Any Kitchen Will Do

Give me a kitchen and I will cook.

Archive for the category “flaxseed”

Strawberry Lemon Cake

strawberry lemon cake

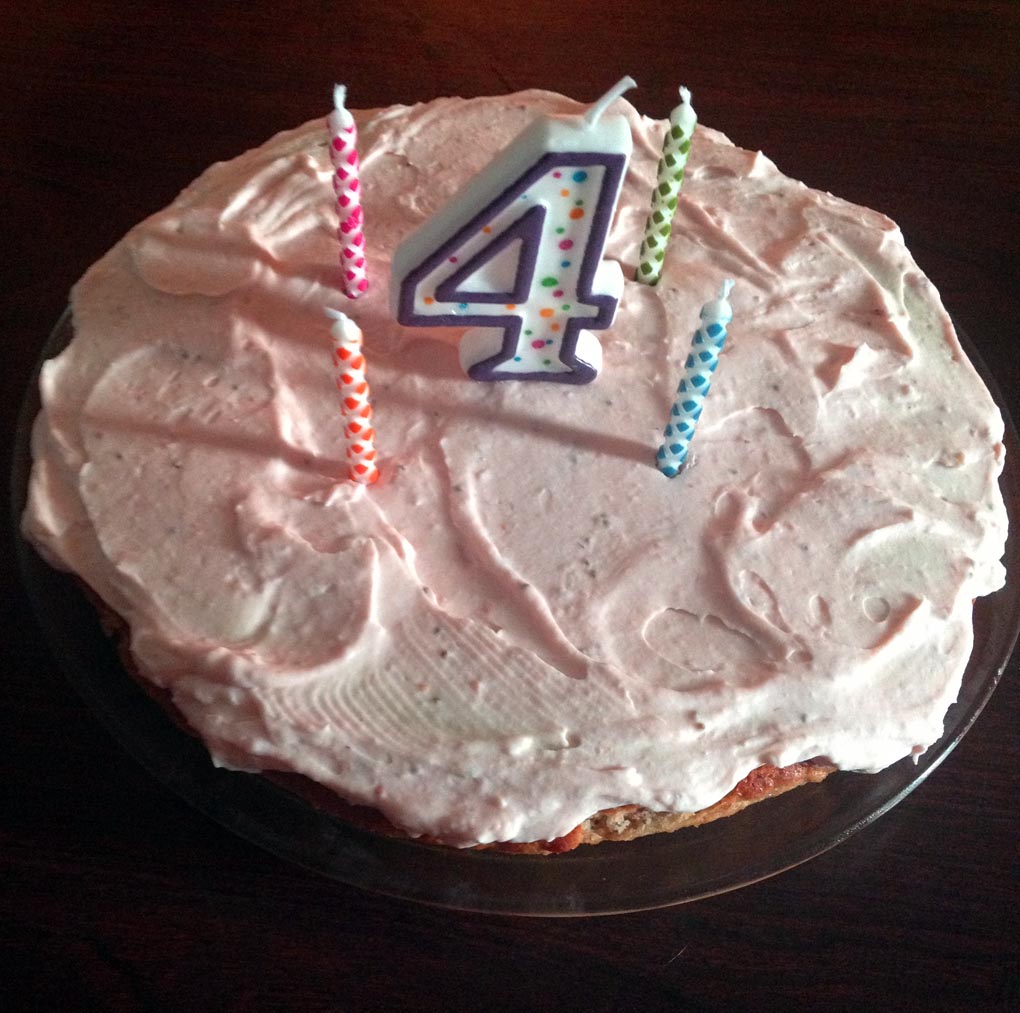
Little B turned four and is taking it very seriously! There are a number of things she won’t do now that she is older than three. It is fun and serious to watch her work it all out. A couple of years ago we started a tradition of doing a family out of town trip to a beach for her birthday. We continued it this past weekend by dipping our toes in the Atlantic Ocean. A challenge for these trips is having a sugar free, wheat free cake ready and waiting for her on THE day. Last year we succumbed to a wheaty, chocolaty concoction from a store near the beach. We got a sugar buzz, while also feeling guilty about not following our diet rules. Rules are made to be broken, yes, but with consequences. She pinged and ponged, then crashed. Not fair to a body, but we did it anyway. I solved it this year by making this strawberry lemon cake and waiting to put it together the day of, thanks to a fridge in the hotel room. It traveled well and thankfully I packed a knife for spreading of the frosting and cutting of the pieces.  Worked like a dream and the whole thing was inhaled by us all. We kept to our food rules, had fun, and no sugar/wheat crash. Besides the princess paraphernalia (ugh) and first bicycle (yay), the cake was a favorite. She wanted a strawberry cake with strawberry frosting. Instead of repeating the cupcakes we made a while back I decided to try a cake with almond meal. I thought the almond and lemon would go wonderfully with the strawberries. The result had a much different texture compared to the coconut flour concoction we came up with before – good, but in a different way. The cake came out dense, very strawberry, very moist and nice and sweet, just like the birthday girl!

Strawberry Lemon Cake

Cake
4 Tbsp butter
3 eggs
4 medium strawberries, cored and chopped
1 tsp vanilla
1 lemon, juiced with meat
1 cup almond flour
½ cup golden flaxseed meal
¼ tsp salt
½ tsp baking soda
2 cups granulated erythritol
1/8 tsp pure stevia powder
½ cup small quartered strawberries

Frosting
1 package cream cheese, room temperature
1/2 cup butter, room temperature
1 cup granulated erythritol
1/2 cup pureed strawberries

In medium pan over medium heat melt the butter. Continue cooking it until the butter is brown and fragrant. Remove from heat and set aside. Preheat oven to 350 degrees. In a blender add eggs, cored and chopped strawberries, vanilla and lemon juice with meat. Blend until combined and strawberries are pureed. Add almond flour, flaxseed meal, salt, baking soda, erythritol, stevia. Blend some more until you have a smooth batter. Stir in butter until well combined. Line the bottom of a 9-inch round baking dish with parchment paper. Pour batter into pan, then drop strawberries into the batter, distributing them evenly. Bake in preheated oven for 25 – 30 minutes. The time may vary based on the juiciness of the strawberries. Remove from oven and let cool in the pan. When cool gently flip cake out of pan and place on serving dish. Frost as desired – I used the strawberry cream cheese version above – combine all ingredients together and whip until smooth. It may need to be chilled for a few minutes to firm up before spreading on the cake. Keep cake refrigerated if room temperature is over 75 degrees. Enjoy!

Adapted from here.

Salmon Patties

salmon patties
I got nostalgic on this one, in many respects. I was craving salmon and began remembering the patties my mom used to make with the canned stuff when I was little. I liked them, but always got a little shiver when I came across one of the soft, yet still crunchy pieces of bone from the canned salmon. I still recall not being able to decide whether the shiver was fun or not. The soft bone was easily chewable but always a surprise in the otherwise non-chewy dish. Another nostalgia point was from my time living in Juneau, Alaska. In late summer and early fall the salmon pile up on each other in an effort to swim upstream and practically jump out of the water into your arms. You have to make sure they are not aiming for bear arms, but after the all clear on the bear front, you can just grab the slippery suckers. Needless to say, even if you don’t fish there is a bounty of salmon, from ‘dogs’, also known as chum salmon, to the sweet, naturally bright red meat of the sockeye salmon. Living in Juneau you are surrounded by fisherpeople who get their maximum catch as often as they can and they share share share. It can be smoked, steamed, grilled, marinated, chopped, dried, jarred, canned….which brings me to this recipe. For this recipe I used canned pink salmon, which in this case is wild caught from Alaska. Not ideal, compared to the taste of the stuff that was swimming in the creek this morning, but effective in my effort to combine the nostalgie, and the fact that the only fresh salmon found in Maryland is Atlantic. Sigh. And as Big D said, these were the first salmon patties he ever had that were not dry and Little B enjoyed them, too. Score!

Salmon Cakes

1 can pink salmon, drained with spine and other bones removed
1/3 cup plain Greek yogurt
3 eggs
1 lemon, juiced with meat included
½ – 2/3 cup golden flaxseed meal
½ tsp sea salt
½ tsp dried dill
1 tsp dried thyme leaves
1 tsp dried parsley leaves
1 clove garlic, crushed
½ cup coconut oil

In medium bowl add salmon and break it up into small flakes. Make a pool in the middle of the salmon and drop in yogurt, eggs, salt, thyme, parsley, garlic and dill. Whisk together egg, lemon juice and yogurt mixture with a fork until eggs are broken up. Toss egg mixture with salmon until combined. Add ½ cup of the meal and stir. Let sit for a minute or two. While you wait add the coconut oil to a medium skillet and heat to medium high. If the salmon mixture is not thick enough to drop into the oil and hold shape as patties (thicker than pancake batter, thinner than, say, tuna salad) add some more meal and stir it in until thicker. Drop a large spoonful of mixture into the skillet and gently flatten so it is of even thickness and about two inches in diameter. Cook until the patties set and begin to brown on the edges, about 2 minutes. Gently flip the patties and cook for another minute or two. Repeat process until all the patties are cooked. Serve with zucchini wedges or other veggies.

Double Chocolate Cupcakes

dbl choco cupcakesThese cupcakes came from the mouth of my babe, Little B. As with our strawberry concoction from a while back, she got a baking hankering and we followed it through. Little chocolate cupcakes with chocolate frosting that don’t have any wheat or sugar. She is adamant about those two points, which meant we got to create a new recipe “with only really good tasting ingredients Mommy. Don’t forget they have to be really good” she tells me. Well, they are really good, and buttery and rich. Also a chance to crack eggs and spread frosting, which are always good things. Really good things.

Double Chocolate Cupcakes

Cakes
6 eggs
½ cup butter, room temperature
1 tsp vanilla
¼ cup coconut flour
½ cup golden flaxseed meal
¼ cup cocoa powder
1 tsp pure stevia powder
1 tsp baking soda
½ tsp sea salt
1 tsp ground cinnamon

Frosting
1 8 ounce block cream cheese, room temperature
½ cup butter, room temperature
½ tsp vanilla
¼ cup cocoa powder
½ cup granulated erythritol

Preheat oven to 350 degrees. Combine eggs, butter and vanilla in a medium bowl. Whisk together until combined. In a separate bowl combine flour, meal, cocoa powder, salt, baking soda, cinnamon and stevia. Add dry ingredients to egg mixture and stir until well combined. Divide batter among a lined 12 regular sized or 24 mini muffin pan. Bake for 15 – 18 minutes until tops are firm. Remove from oven and let cool completely. For the frosting add the cheese, vanilla and butter in a medium bowl. Whisk until combined. Add cocoa and erythritol and continue whisking until combined. Chill a few minutes if it comes out thin. Spread frosting over cupcakes. Store cupcakes in the refrigerator until serving – mostly to keep the frosting firm, otherwise they can sit at room temperature.

Strawberry Cupcakes with Strawberry Frosting

strawberry cupcakes frosted small

These little cakes came out beautifully imperfect. And Little B frosted every single one of them. We were long overdue making a batch of cupcakes, so I started by asking her what flavor she wanted. Strawberry. Then, I asked her what kind of frosting she wanted. Strawberry. I followed up by asking what she wanted to put on top. Strawberries. I saw a theme. So, guess what we got at the store? You guessed it! Strawberries. She loves pushing buttons on the blender and watching all the ingredients swirl and twirl around. The frosting is very similar to what I put on the birthday cake I made a while back, but without the icky whipped topping. Fortunately, after her taste testing between the frosting of each cupcake, there was still enough to finish the job. We got so involved with making sure there was strawberry in the cupcakes we forgot to keep some for on top! Oh well. And Tall P really liked them too! This is actually a big deal, because he claims to not like sweets. Yep. The guy who drinks sweet tea and eats box after box of fresh strawberries coated in sugar. He does not like sweet stuff. I don’t quite understand where his line between sweet and not are actually drawn. I think he has taste bud issues. Regardless, he ate up these little guys! Score one for me and Little B! They definitely taste like strawberry. Just a little nudge of sweetener made them sweet treats and the berry flavor really shines. They taste like summer.

Strawberry Cupcakes with Strawberry Frosting

Cakes

1 pound strawberries, cored

1 Tbsp lime juice

1 tsp pure stevia powder

6 eggs

1 Tbsp vanilla

¾ cup coconut flour

¼ cup golden flax seed meal

1 Tbsp baking powder

½ tsp sea salt

Strawberry Cream Cheese Frosting

8 ounces cream cheese, room temperature

½ cup salted butter, room temperature

½ cup granulated Splenda

2 Tbsp sugar free strawberry syrup

Preheat oven to 350 degrees. In a blender or food processor add the strawberries and lime juice. Blend until there are no large strawberries remaining. Add the Stevia powder and eggs. Blend again until combined. In a separate bowl combine the coconut flour, meal, baking powder and salt. Add the dry ingredients to the wet ingredients and blend some more until combined. Let the batter sit for a few minutes – you will notice it thicken a bit. Pour batter into 24 lined regular sized muffin tins (or 12 regular muffin tins and 24 mini muffin tins). Bake for 20-25 minutes until set and browning. While the cupcakes are baking prepare the frosting. In a medium bowl combine the the cream cheese, butter and Splenda. In a small bowl combine the arrowroot powder and strawberry syrup. Mix until smooth and thick. Stir the syrup mixture with the cream cheese mixture until the color is evenly distributed. When cupcakes are cooled frost them. Store in the refrigerator.

King Cakelettes

king cakelettes_edited-1

Laissez les bon temp rouler! Let the good times roll! Mardi Gras is near and as always we are celebrating. We closely followed up defrocking the house of Yule and Christmas decorations with putting up green, gold and purple for Mardi Gras. After living in New Orleans a few years back I cannot help but get in the spirit of Mardi Gras. There is never a lull down there after Christmas – the frivolity of New Years quickly turns to the Mardi Gras celebrations. Parades begin in mid-January so there is no time to waste. Last year I did a king cake marathon, making sure everyone in the house had some for celebrating. I made a regular, yeasty, cinnamon-y king cake, including sharing of details about king cake history, followed by a gluten free version of the cake. They were both delectable and fun to make. This year Mardi Gras arrives during a time when we are highly sensitive to sugar, wheat and carbohydrates. What is a girl to do? Well, adapt. That is what she does. I used my experimenting with low carb muffins over the past year and incorporated my love of king cakes into these little treats. Although not the traditional ring with colored sugar, the result definitely has the right flavors and textures in play. I usually avoid making king cakes most of the year, but this time I may not. These things are stupendous and I doubt they will last us through Fat Tuesday. I really need them to, if for no other reason but to balance the green potency of chartreuse. Enjoy!

Low Carb King Cakelettes

6 eggs
4 Tbsp heavy cream or half and half
1 tsp vanilla

3 drops liquid stevia
½ tsp sea salt
2/3 cup coconut flour
¼ cup golden flaxseed meal
½ cup splenda
½ tsp baking powder
1 cup pecans, shelled

For the Filling
6 Tbsp butter, melted
¼ cup splenda
1 tsp cinnamon
½ cup pecans

For the Icing
1 Tbsp water
1 tsp lime or lemon juice
½ cup splenda
Green, yellow, red and blue (2 drops blue, 3 drops red for purple) food coloring (optional, if coloring icing instead of using colored sugar)

For Decorating
Purple, green and gold/yellow colored sugar or Splenda (or add color to the icing)

Preheat oven to 400 degrees. On a baking pan spread out pecans in one layer. Bake in oven for about 5 minutes until they begin to brown. Prepare muffin pan with liners. In blender add wet ingredients and nuts together. Blend on low until nuts are broken up in small pieces. In separate bowl combine dry ingredients. Add wet ingredients to dry ingredients and stir just until combined. Divide batter among the 12 muffin cups. For the filling mix together butter, ¼ cup Splenda and cinnamon in a bowl. Grind into a powder the ½ cup pecans and combine with other filling ingredients. With a teaspoon drop some filling into the middle of each muffin. It will sink a bit and be covered by the muffin batter during the baking time. Bake for about 15 minutes until tops begin to brown. While the muffins are baking combine the water, juice and Splenda until smooth (make three different batches if coloring it instead of using colored sugar. A soon as the muffins come out of the oven drizzle the icing on top (drizzle all three colors on every muffin if using colored icing). Let cool for about ten minutes. If using colored sugar, sprinkle by alternating green, purple and yellow/gold*. Use all three colors on every muffin. Serve at room temperature or freeze and gently defrost in the microwave before serving.

*I planned on using colored Splenda for sprinkling, and got good information about coloring it here. My color to sweetener ratio did not turn out as well as it did for Millie, I think it was because I did not have enough coloring gel. It was definitely on its way, but I did not have time to go get more with an eager and waiting Little B, so I improvised. I added water and lemon juice to the colored sweetener and colored the icing and drizzled instead of sprinkled. Even though it did not work out this time, I am going to follow Millie’s coloring process in the future, for springtime is coming and more sprinkling opportunities are on the horizon!

Acorn Squash Bread

squash bread

I bought a big, beautiful acorn squash a week or two ago. We have leftovers from the holidays filling the refrigerator and freezer, so in the process of figuring out what to do with the squash, I realized we were running low on goodies for Little B. Additionally, she was to begin a new preschool soon and we needed to stock up on portable wheat free snacks for her. And on top of THAT, I got an awesome new mini loaf plan as a gift and was itching to break it in. To make a bread that has some sweet and savory I included nuts and spices. Of course, relying on coconut flour and eggs to beef up the protein was a must. Little B likes this stuff a lot, and this particular squash was sweet, so the squash/snack/loaf pan goals were met with one recipe. Three birds, one stone. Big D bit into it and groaned – in a good way – it reminded him of his grandmother’s banana bread, and it had no bananas. Now THAT is a compliment!

Acorn Squash Bread

1 cup cooked, mashed acorn squash
½ cup walnuts
6 eggs
½ cup olive oil
1 Tbsp vanilla extract
½ cup coconut flour
¼ cup golden flaxseed meal
1 cup granular erythritol
1 tsp sea salt
1 tsp baking soda
½ tsp baking powder
1 tsp ground cinnamon
¼ tsp nutmeg

Preheat oven to 350 degrees. In blender combine squash, walnuts, eggs, oil and vanilla. Blend until smooth and nuts are broken up to around the size of little peas. In mixing bowl combine flour, meal, erythritol, salt, baking soda, baking powder, cinnamon and nutmeg. Add blended ingredients to dry ingredients and stir until well mixed. Pour batter into greased bread pan or mini loaf pan(s). Bake for 40 – 50 minutes if making one large loaf, or 25 – 30 minutes for mini loaves. The bread is done when the loaves look set (no longer liquid) and the edges begin to brown. Let cool in the pan before removing. Breads made with coconut flour need to cool before they are set enough to remove from pans, but making sure the pans are greased well make the removal process easier.

White Pizza on a Wheatless Crust

Things are pretty exciting around here right now. Not only is Grandma Jo in town for a visit, but Big D’s newly published book is selling like crazy! Every time I read it I have to make sure I allow enough time to sit and keep reading. It is hard to find a place in the story to stop, set the book down and not wonder what is going to happen next, even when I am trying to concentrate on something else. The book is called Shiver on the Sky, and is available as an e-book on Amazon. We are enjoying the good reviews and watching the sales numbers rise. Take a few minutes to check it out – there is a short, discount promotional period right now, so check it out and let us know what you think! To celebrate the successful launch of the book we had a pizza feast the other night. We don’t do delivery – nobody I know of delivers wheat free pizza – we do our own thing. Even before we started avoiding wheat we did not do delivery much, but you can read about one of those adventures here and yet another, gluten free adventure here. The pizza we make is always loaded with a lot of garlic and a whole pile of toppings. The important part is the awesome crust, which I originally found here, from This Chick Cooks, but have since tweaked. It holds the toppings without getting soggy, and there is no doughy crust getting in the way of the garlic. Did I mention we use a lot of garlic? Oh, and we use a bunch of garlic, which is not mandatory, but we like a lot of garlic on our pizza. Garlic in the crust, garlic cooked with the mushrooms and garlic sprinkled between the layers of topping. And a last sprinkle of garlic on the top layer of cheese. Any topping combination you like will work on top of the crust, especially garlic.

White Pizza on a Wheatless Crust

2 cups shredded mozzarella cheese
2 Tbsp coconut flour
2 Tbsp flaxseed meal
¼ tsp baking soda
2 tsp dried parsley
1 tsp dried basil
1 tsp garlic powder
½ tsp onion powder
½ tsp sea salt
2 eggs, beaten

Toppings:
½ cup ranch dressing
1 Tbsp extra virgin olive oil
½ pound ground Italian sausage
1 cup thin sliced pepperoni
1 cup sliced mushrooms
4 cloves garlic, sliced
½ cup chopped black olives
2 cups shredded mozzarella cheese
1 cup shredded sharp cheddar cheese
½ cup grated Parmesan cheese

In a medium saute pan over medium heat add the olive oil. When the oil is hot add the garlic and cook until it softens. Add the sausage, breaking it up into bite sized pieces. When the sausage is half cooked add the mushrooms and toss the whole mess around until the sausage is done and the mushrooms are at least heated through. Preheat oven to 425F, then prepare the crust. In a medium bowl combine the dry ingredients with the cheese. Add the eggs and stir until combined. It will be a bit sticky and not look at all like pizza dough. That is okay. Cover a large cookie sheet with parchment paper. Spread the dough on the paper, making a very thin layer. The best way to spread it is to press down on it with your fingers – it helps to have a little bit of oil on your fingers to reduce the stickiness. It won’t spread out to all the edges, but it will cover most of the pan. The layer should be no more than 1/8 inch thick. Place pan in oven and cook just until it puffs up and the edges and top begin to brown, about seven minutes. Reduce the oven temperature to 400F. Remove the crust from the oven and begin piling on the toppings. We usually start with a thin layer of ranch dressing, followed by some cheddar cheese, sausage/mushroom/garlic, mozzarella cheese, then pepperoni and olives, followed by a mix of cheddar, mozzarella and last but not least Parmesan. If you like your pizza herby, then do what we do and sprinkle some parsley, basil and garlic between the layers of toppings. Bake the pizza for 10-15 minutes, until the cheese is melted and starting to turn brown on the edges. Remove from the oven and let cool for at least five minutes before cutting.

Chocolate Chia Pudding

This stuff is quick, sugar free, dairy free and wheat free, but sooo chocolaty and satisfying! We tried a few different combinations of spices and flavors, but this is our favorite. It is kind of the texture of tapioca, and makes for a satisfying, light dessert, taking care of any sweet tooth or chocolate cravings. And go ahead – sing the commercial song while you make it – ch ch ch chia! I always imagine the chia plants you can buy that are grown in different shaped planters – chia plants! The seeds are actually from the same kind of plant. Whip it up in the blender before dinner, stick it in the fridge, then it is cold and ready to eat after the meal. It is just enough for three servings, so double or triple accordingly.

Chocolate Chia Pudding

1 cup coconut milk
4 Tbsp chia seeds
1 Tbsp flaxseeds
3 Tbsp erythritol/stevia (Truvia) powder
4 Tbsp cocoa powder
1 Tbsp vanilla
1 tsp ground cinnamon
Fresh berries (optional)

Combine all ingredients in a blender and pulse until everything is combined – you may need to scrape down the sides to make sure the cocoa is fully incorporated. Let sit for a minute, then blend for about five more seconds. You will see it thicken as it blends. Let chill for about 20 minutes before serving – top with fresh berries if you like. If there are leftovers and you chill them overnight you may need to add more coconut milk and stir it up to thin out before partaking.

Scotch Eggs

The nostalgia is dripping from my entries lately. Never fear, it continues here. Starting in high school my friends and I would go to the Texas Renaissance Festival every autumn. It ran October through November on weekends. The trip was a big deal for us because it did not include parents. Since we could not get permission (or collect the funds) for an overnight trip, our adventure was a freakishly long marathon. A one way trip from San Antonio to the festival north of Houston was at least four hours. The round trip, plus time at the festival (and staying up late the night before leaving) equaled a twenty hour day. It was a lot of fun and a lot of gas station stops. We returned home tired and smelly and happy, with bags smelling of incense and full of Christmas presents. Our first stop in the festival grounds was always along the right edge of the outer ring, to eat our first of many treats – Scotch eggs. They were great sources of protein after the doughnuts we grabbed in Flatonia and the empty calories of candy and chips. Here is a low carb version that reminds me of the festival snack. We will be going to the Maryland Renaissance Festival in August, and I am curious to see if they have them. On this fine Sunday morning while the summer sun shone brightly through the kitchen window I made a batch that tasted so very good, and introduced Little B to the dish – she inhaled her egg and ate some of Big D’s and mine. After the feast was over we lamented the fact we did not include some theme music. Consumption of the next batch will definitely include the tunes of Tartanic! I took guidance for this recipe from here. Have a happy day, and always return to happy thoughts and places whenever you can.

Scotch Eggs

1 pound hot breakfast sausage (we typically use Jimmy Dean All Natural or Spicy style)
8 medium boiled eggs, peeled
2 raw eggs
1 cup golden flaxseed meal
1 teaspoon sea salt

Preheat the oven to 350 degrees. Line a baking sheet with aluminum foil. Combine the flaxseed meal and salt together in a bowl. In another bowl whisk together the two raw eggs.

Divide the sausage into eight piles. Using your hands, press the sausage into a patty in the palm of your hand. Place a hard boiled egg in the middle of the patty and and mold the sausage around it until it is completely and evenly covered.

Roll each sausage covered egg in the raw egg, then each in the flaxseed meal to coat it. Repeat with the remaining eggs, then roll them all once more in the meal until it is gone.

Place the eggs on the foil-lined baking sheet, at least two inches apart. Bake the eggs until the outside is browned and the sausage is cooked through, about 25 to 30 minutes.

Remove from the oven and let the eggs rest for 5 minutes. Slice in half and serve with mustard.

Cauliflower Fritters

When I make it a point to avoid processed grains and starchy carbohydrates in my diet I seem to have more energy and lose weight. I also start to crave vegetables. Of course a loaded baked potato or breaded mushrooms don’t really fit the balance I want. Ideally I would crave steamed veggies with some lime juice and herbs, but the reality is I want substance and texture and flavor. These fritters help me balance the need for hearty high fiber veggie variety and a low carb energy source. I was inspired by the recipe here, but tweaked it to make chunkier fritters held together by flaxseed. Low carb and hearty. Yum!

Cauliflower Fritters

½ large head cauliflower
2 whole eggs
¼ cup flaxseed meal
¼ cup fresh parsley, finely chopped
1 tsp lime juice
½ tsp salt
¼ tsp black pepper
1 tsp fresh thyme
½ tsp ground cinnamon
¼ tsp chili powder
½ tsp cumin
½ tsp tumeric
pinch cayenne pepper
½ cup olive oil or fat of your liking

Cut cauliflower into little florets and add to the bowl of your food processor. Process on pulse until cauliflower has texture of large grains of cracked wheat*. In a large mixing bowl add the rest of the ingredients and mix until well combined. Add the cauliflower and combine until well coated. Heat a splash of olive oil in a frying pan and add about ¼ cup of the mixture for each fritter. Using a large spoon droop a mound about the size of a baseball into the oil. Cook three or four fritters at a time for 2 – 3 minutes on each side, until golden brown, then keep warm while you cook the remaining fritters.

*I just chopped them up a bunch, resulting in big and little chunks instead of cracked wheat chunks. They were yummy all the same

Post Navigation