Any Kitchen Will Do

Give me a kitchen and I will cook.

Archive for the category “garlic”

Yellaflower

2015-10-12 11.31.41

Turmeric is an entertaining ingredient to use. It turns everything it touches a brilliant shade of orange-yellow, so it is sometimes hard to keep the kitchen un-yellow. Be it my hands, the counter, spatula or the food itself, there is no doubt when it was used.

Combining turmeric with the sometimes drab color of cauliflower, it cannot help but brighten up any plate. Big D loves turmeric, and we both take it as a daily anti-inflammatory supplement, so I pulled out our big container of the powder and added some to our lunch’s steamed and seared cauliflower side dish the other day.

Little B came through and asked what was for lunch. When I mentioned steamed cauliflower she excitedly asked if it was going to be mashed….why not?! It was mushed instead of left whole. Our traditional mashed cauli is great, but this yellaflower is quite flavorful and gave wonderful balance to the tomato sauce and cheesy meatballs I served on top of it.

During the gradually darker days of winter I hope this dish gives you some summer sun and joy.

Yellaflower

3 Tbsp butter
1 large head cauliflower
1 Tbsp ground turmeric
1 tsp sea salt
1 tsp ground ginger
2 tsp garlic powder
1 tsp onion powder
1/4 cup heavy whipping cream

Cut cauliflower into bite sized florets – although it will be mashed later, cooking smaller pieces will let the flavors spread faster. In a medium stock pot over medium heat melt the butter. Add the cauliflower. Stir occasionally until the florets begin to release liquid, about five minutes. Sprinkle with turmeric, salt, ginger, garlic and onion, tossing until the spices coat the florets. Lower temperature and cover, cooking until cauliflower is soft, about five more minutes.

Puree the cauliflower and whipping cream either in the pot with an immersion blender, or by placing the cauliflower and cream in a food processor. The end product should be thick, smooth and bright yellow. Serve immediately in place of rice, polenta or pasta, or as a side dish.

Autumn Apple Chicken Soup

applechickensoupAlthough it is still in the mid-80s and humid here in Texas, my time on the back porch on cool mornings has given me a hankering for chicken soup. After consulting Little B on the contents she desired, specifically apples, I was inspired to tweak a previous snappy and successful chicken soup recipe to honor autumn with apples and some root vegetables. It was a great way to use the meat and juices from half a spatchcocked chicken. The apple, corn and carrot gave the soup a pleasant sweetness while warming and filling our bellies.

This soup can also be made with a traditionally roasted chicken and juices, or some cooked up especially for the soup, along with chicken stock.

You may notice that the the picture has nothing whatsoever to do with soup. That is because I never got a picture of the soup before Little B ate it up. Big D and I each got at least a bowl before Little B at three bowls per meal before it was gone. I substituted soup pictures with a picture Little B took of her lovies (and the leather strip our cat loves killing) after having three bowls of soup for dinner. Enjoy!

Autumn Apple Chicken Soup

2 Tbsp extra virgin olive oil
2 carrots, chopped
1 medium yellow onion, chopped
1 turnip, chopped
2 celery stalks (plus heart and leaves if available)
5 cloves garlic, chopped
1 Fuji apple with skin, chopped
Corn stripped from two cobs (or 1 can unsalted corn)
1/3 head cauliflower, chopped
8-10 fresh basil leaves
1/2 cup fresh lemon thyme leaves
1/3 cup fresh oregano leaves
1/2 bunch fresh parsley leaves
1 Tbsp sea salt
1 14.5 ounce can diced tomatoes
1 pound chicken meat, dark and white mixed (from about half a roasted chicken)
4 cups chicken stock, or juices from the roasted chicken plus 3 cups water

In a 3 quart stock pot over medium high heat add oil. When oil is hot (in about 30 seconds) add garlic, onion, celery and carrot. Cook, stirring every few minutes until onions become transparent. Add cauliflower, turnip, apple and corn. Stir and continue to cook for about five minutes.

Add diced tomatoes with juices, chicken and chicken stock (or chicken juices plus water). Stir in basil, thyme, oregano, parsley and salt. Bring soup to a boil.

Reduce heat to low. Cover and let simmer for at least one hour. Taste and add salt and pepper to desired level. Serve immediately or let cool, then store in an air tight container.

300th Sausage Herb Frittata

2015-10-09 11.23.23

One or two days a week I do Grain Free Haven baking and roasting marathons to prepare special order and market products. Markets and special orders usually need delivery or pick up on weekend days, so the marathons tend to land on Thursday or Friday. These are also days when the week’s groceries are dwindling, with bits and pieces littering the refrigerator shelves and drawers. On marathon days I like to have family cooking done early for the whole day. Busy baking days and using bits and pieces make dishes like soups and frittatas so appealing. Meats and vegetables go together so well in so many combinations, it is easy to combine them and bind with eggs or broth. They are honorable, filling dishes that help me significantly reduce possible food waste, the thought of which makes me very sad.

In the past I have made versions with salmon and a meaty version. This week Big D made some spicy breakfast sausage that had lovely flavors, but was a skidge salty. We also had some standards in the pantry, like eggs, onions and turnips, so here is what I came up with. It filled up the family all day, both hot right out of the oven in the morning and cold right out of the fridge later in the day. The skillet was empty and bellies were full. Just the way I like it.

I also just realized that this is my 300th post to this blog! It has taken me over 3 1/2 years to get here. I look back in wonder on where I started and where I am now – personally, professionally, nutritionally and emotionally it has been quite a ride. It started out as a way to record recipes so that friends, family and I could find them easily, and also record the antics of my little family. It became a journey about nutrition and food sensitivities, and helped launch a cottage food business that is helping me support said little family. I may not post as frequently now as I did when I started, but I plan on continuing to create and share our journey. Thanks for joining me and thanks to all the people that lent me their kitchens!

300th Sausage Herb Frittata

1 Tbsp extra virgin olive oil
1/2 pound spicy breakfast sausage
1/2 medium yellow onion, chopped
2 garlic cloves, minced
1/2 large turnip, chopped
1 tsp sea salt (you may need more, depending on saltiness of sausage)
1/2 tsp ground black pepper
1 Tbsp dried parsley flakes
1 Tbsp dried basil leaves
1 Tbsp dried oregano leaves
6 large or 7 medium eggs
2 Tbsp heavy whipping cream
1 cup shredded co-jack cheese

Preheat oven to 300 degrees. In a 10″ iron skillet* heat the oil over medium high heat. Add onion, garlic and turnip. Sauté about four minutes until onions are translucent and garlic is browning. Add sausage, stir and cook for about five minutes until sausage is heated through. While sausage is heating up break eggs into a medium bowl, along with salt, pepper, parsley, basil, oregano and cream. Whisk together until egg whites and yolks are well mixed.

Remove skillet from heat.

Pour egg mixture over contents of skillet and stir until egg mixture and sausage/vegetable mixture are well combined. Sprinkle cheese on top of the egg, sprinkling a little more parsley, basil and oregano if you like (I do).

Place skillet on the middle rack of the oven. Bake for 20 minutes. Move skillet to top rack and bake for ten more minutes. Remove from oven. The center of the frittata should be a little puffy. Let sit for about five minutes before serving – the puffiness will settle while it cools. Serve immediately.

*This frittata can be made in a oven proof baking dish if you don’t have the noted iron skillet size, just make sure it is no larger than 10″x10″ to ensure the mixture is thick enough to prevent drying out when it is baked thoroughly enough. If an iron skillet is not used, additional baking time may be needed (about 5-8 minutes), since iron skillets speed up cooking time.

Deconstructed Cabbage Rolls

2015-10-06 11.27.52

Although the ingredients are not seasonally limited, I always consider cabbage rolls to be an autumn dish. They are a baked, one dish meal that freezes and reheats well. The other day I had a craving for thema, as the outside temperatures are gradually dropping, but I did not have as much time as needed to do them up right – blanching the cabbage leaves enough to roll them was more demanding on time than I had, so I embraced the concept of deconstructing them.

Yes, I have recently watched a few episodes of Chopped on the Food Network. I don’t watch many food shows or competition shows, but that one intrigues me. I don’t now if it is the frantic desperation of some contestants, or the odd combination of ingredients that have to use, but I get a kick out of it. If you have ever seen the show you will be familiar with the requirement that specific, typically unrelated ingredients have to be used to create an appetizer, entrée or dessert in a limited amount of time. “Deconstructed” versions of dishes are often presented on the show typically because of time restraints. It was very fitting for my brain to wander to the show concept when a rather rigid time limit was presented to me.

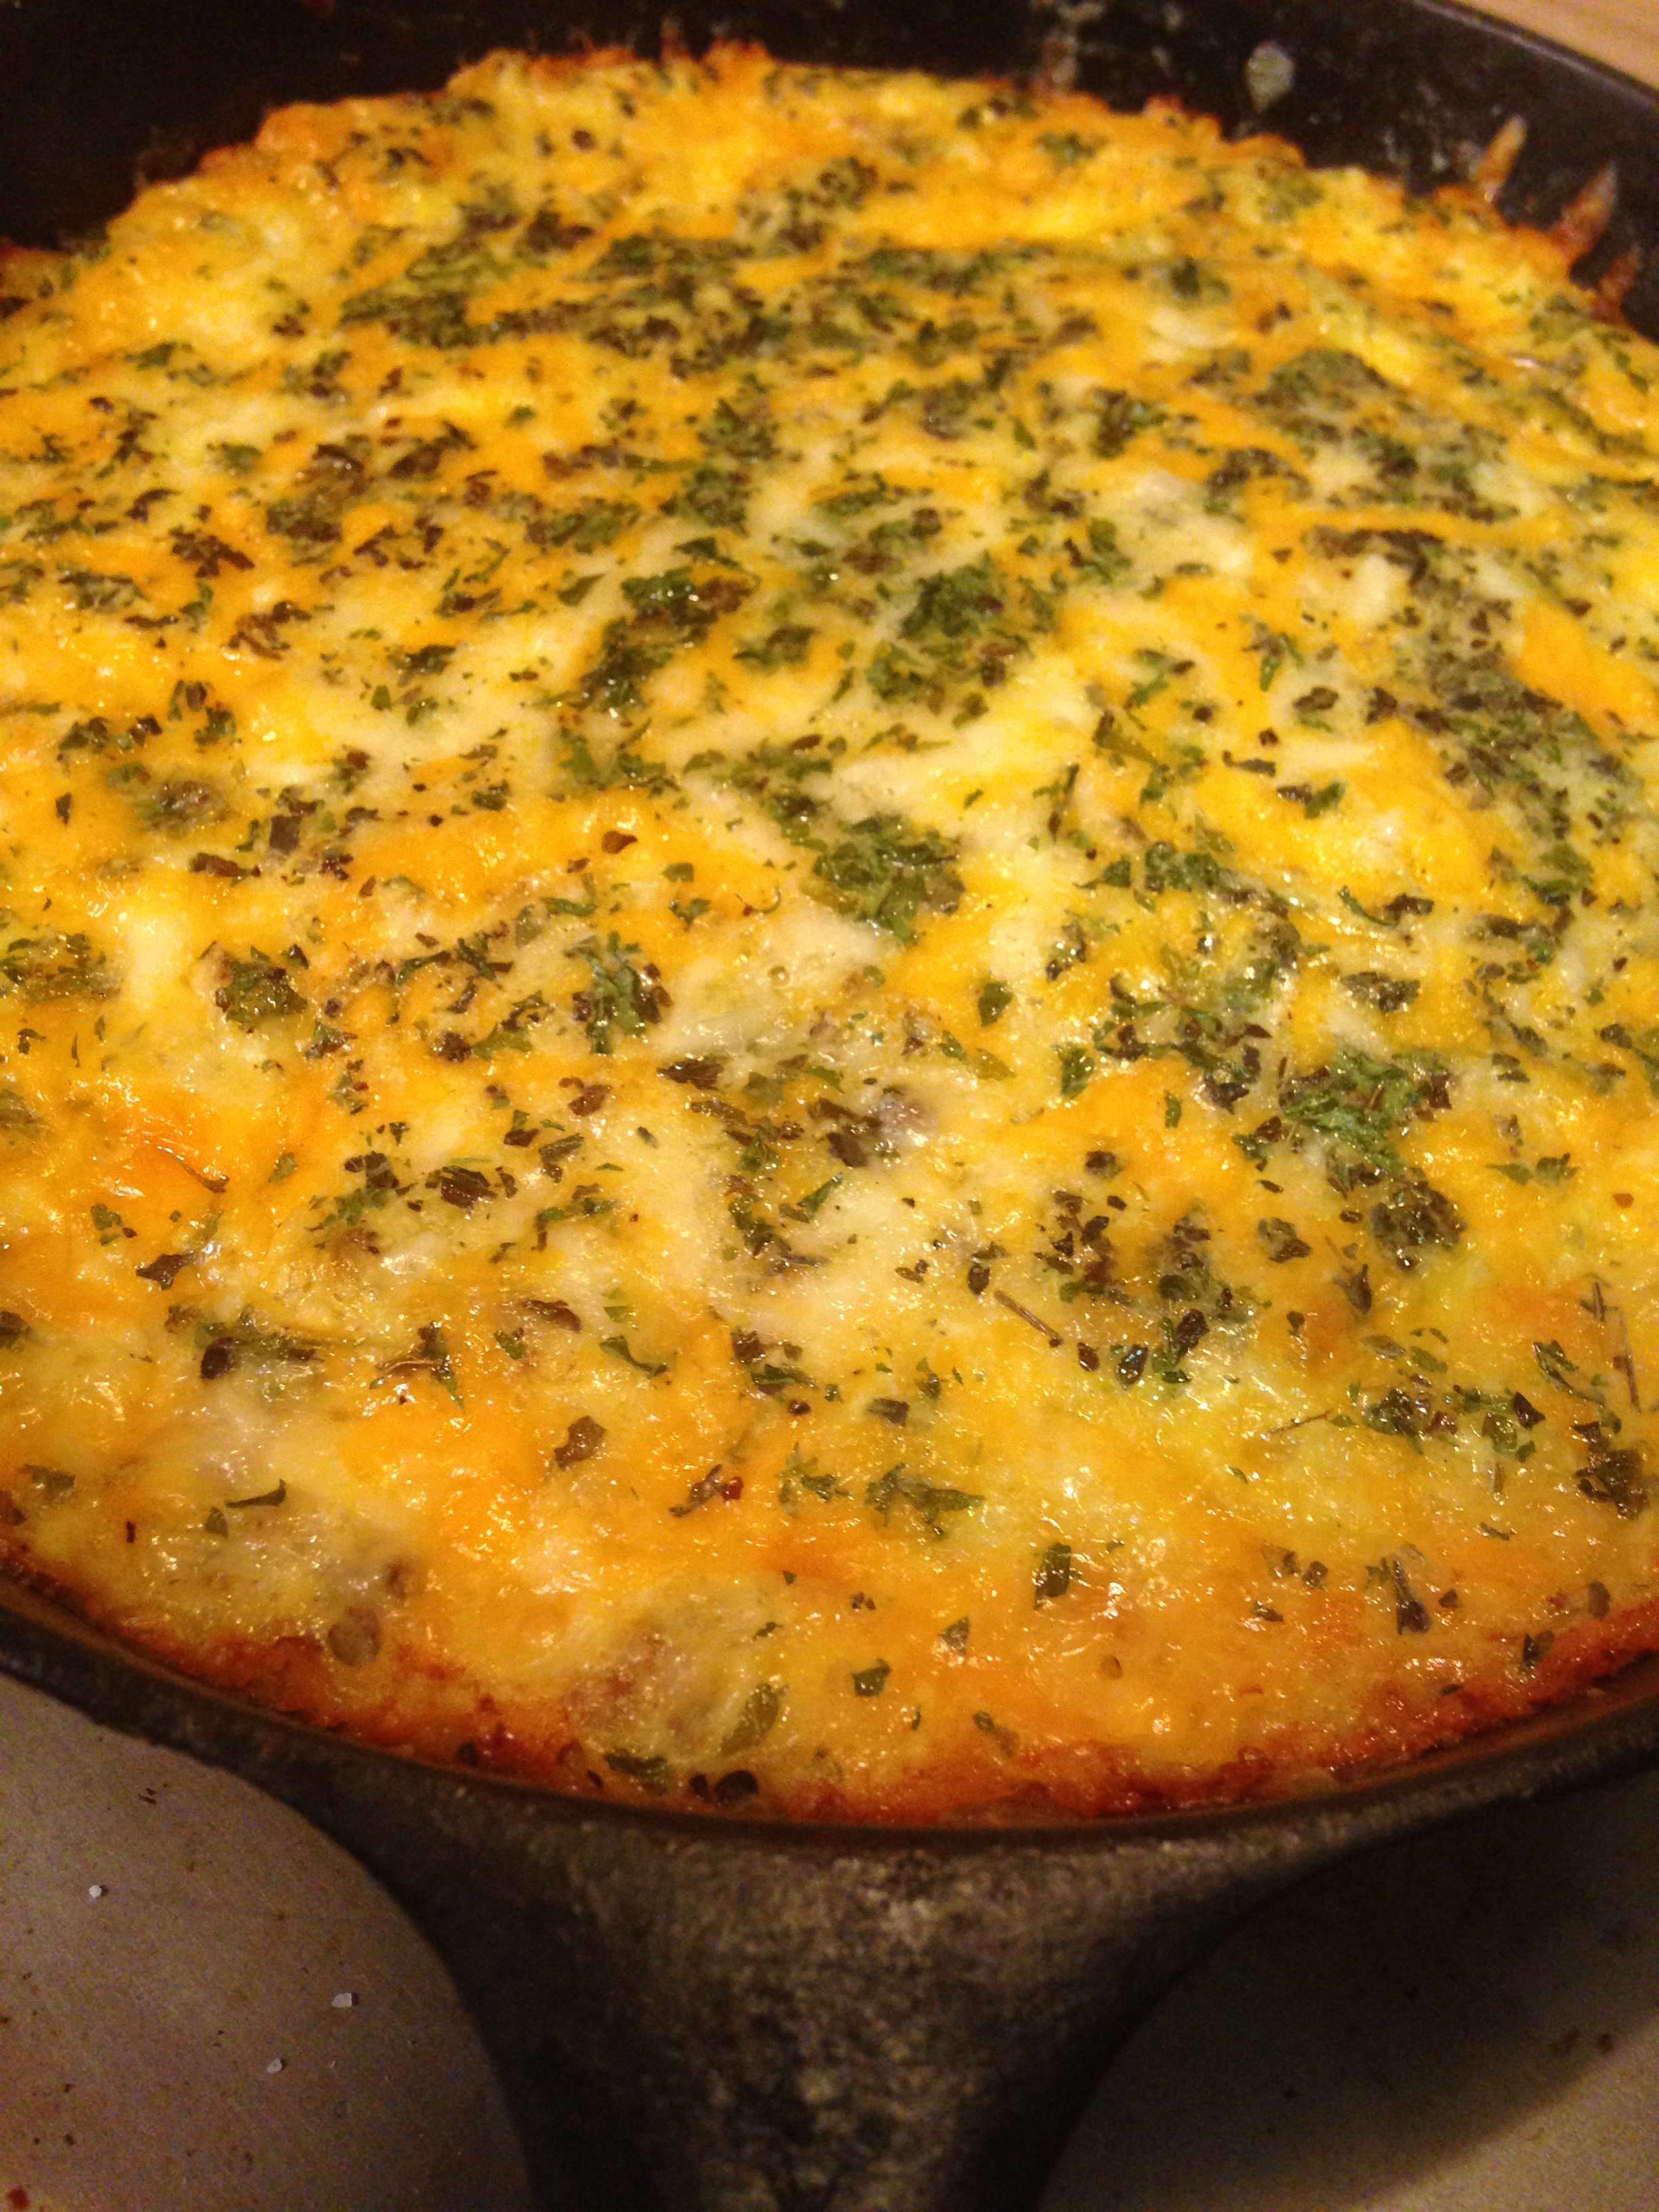
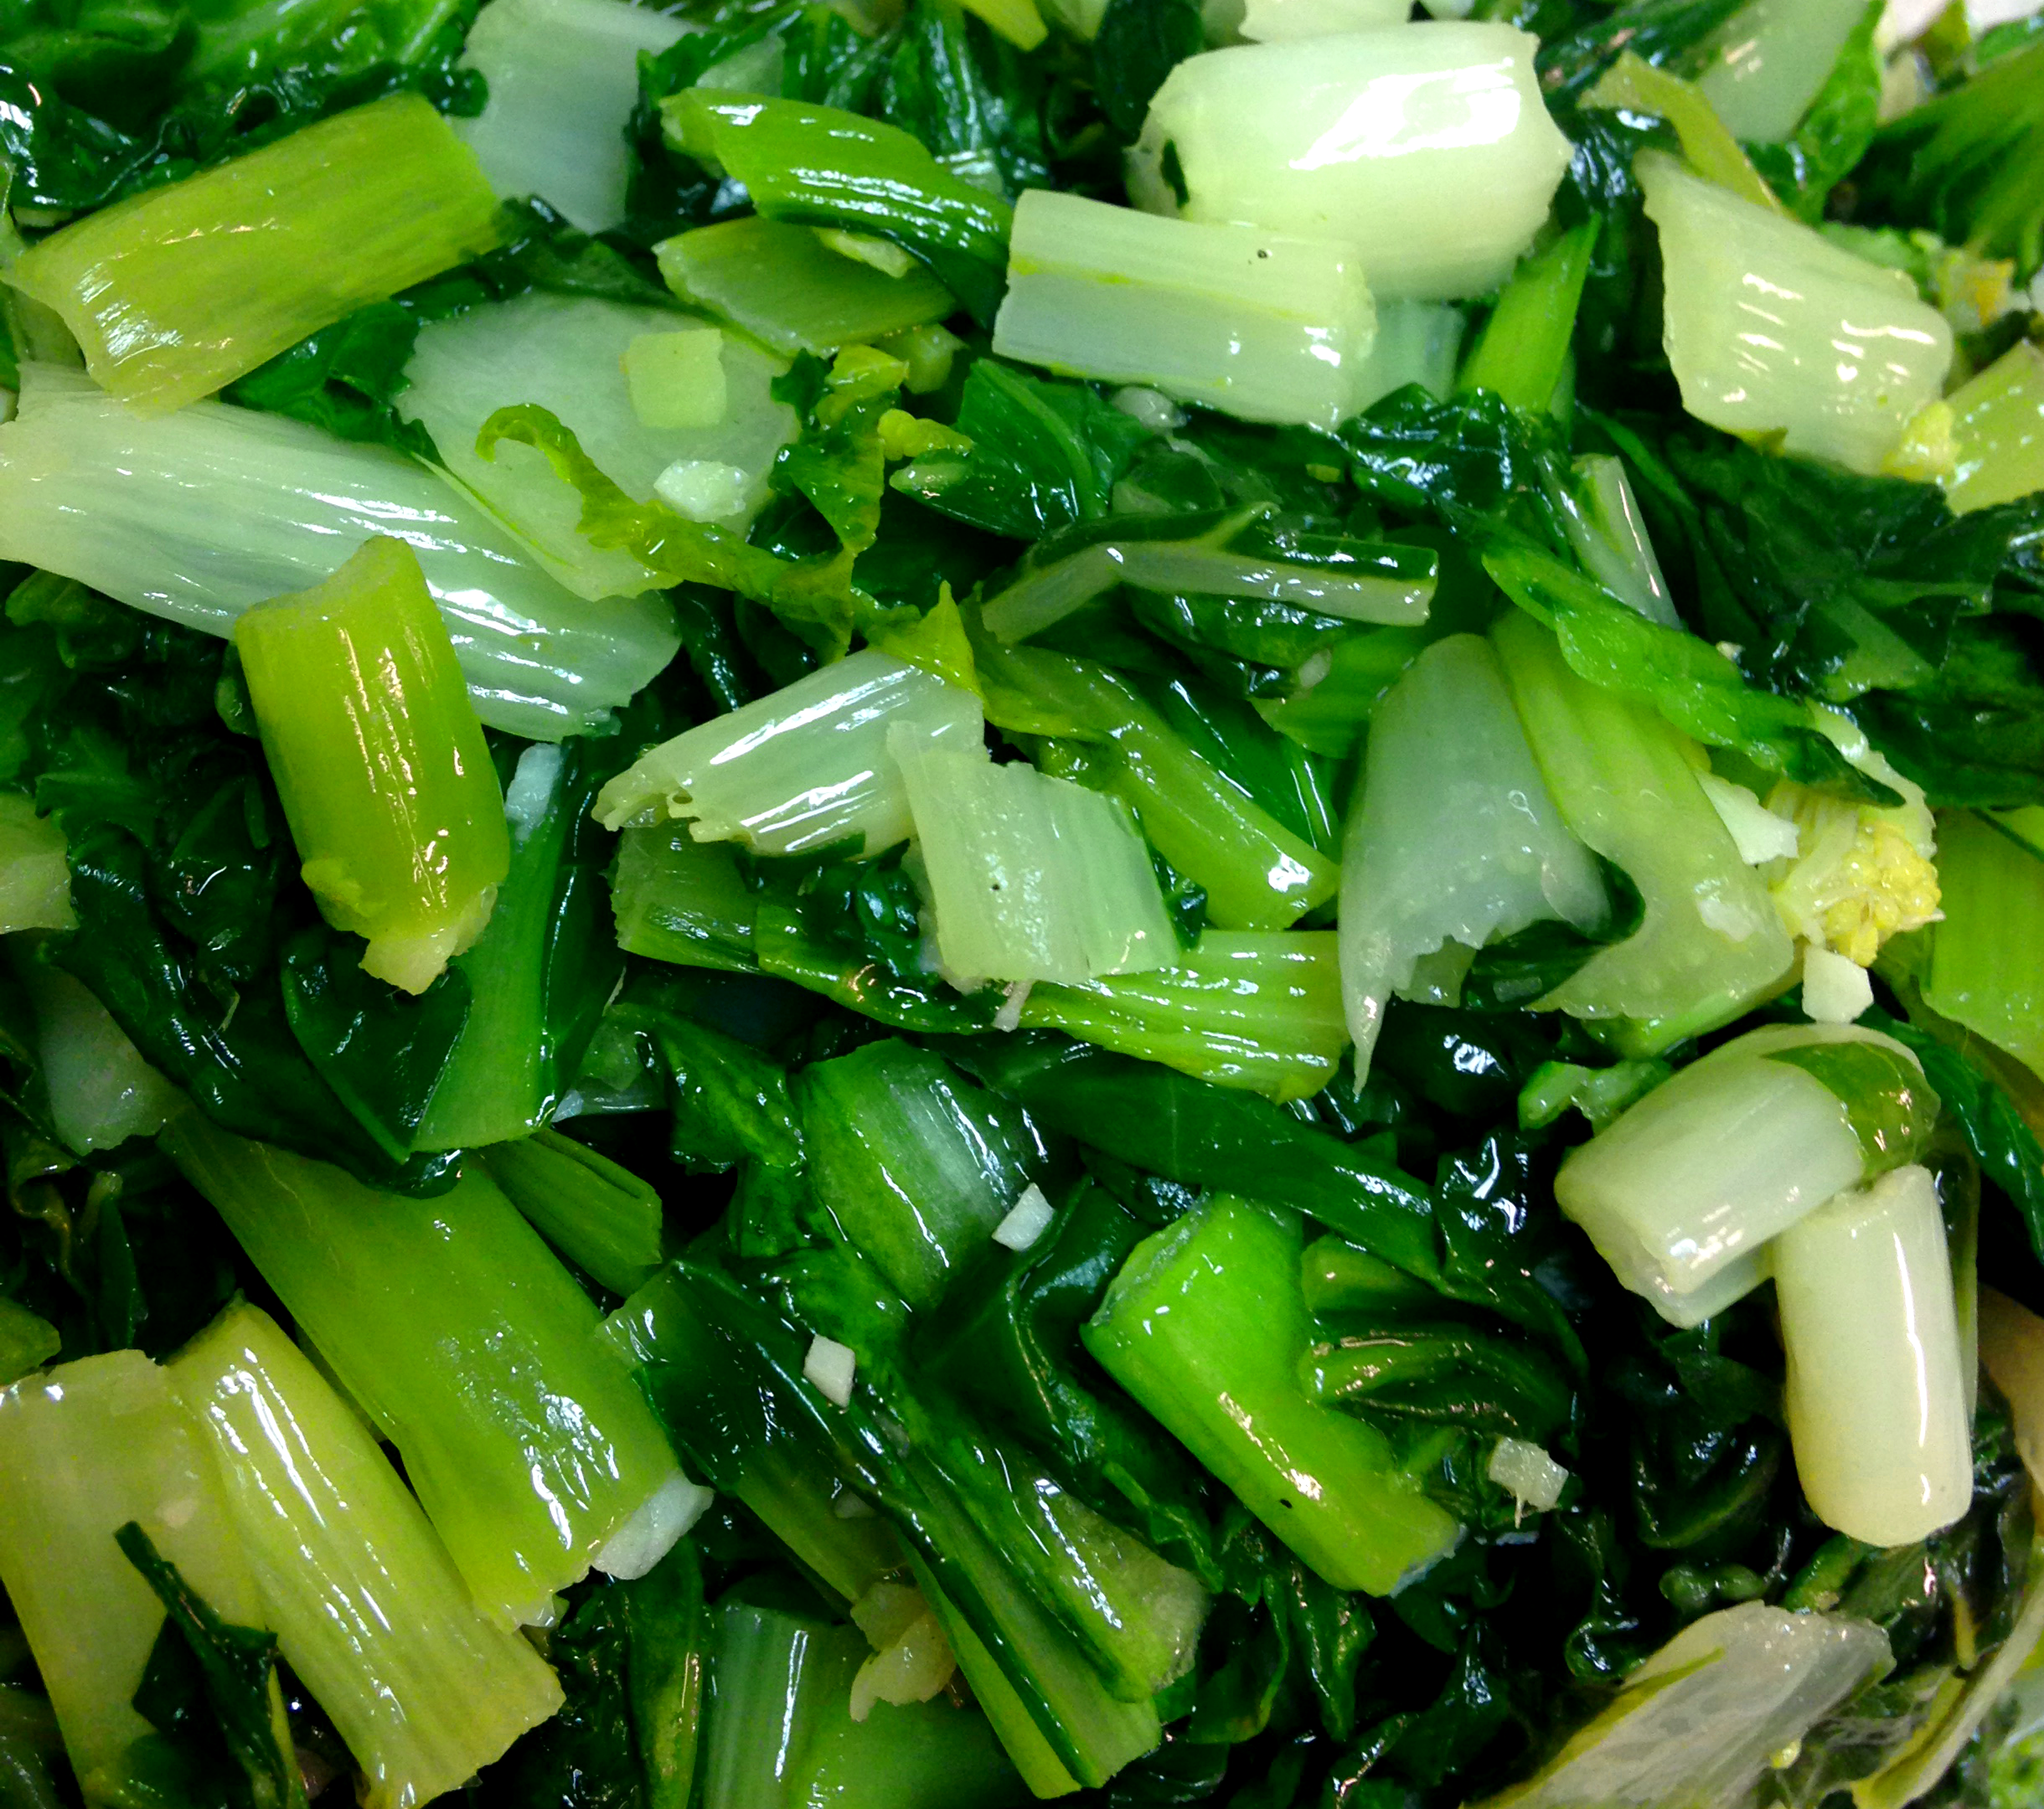
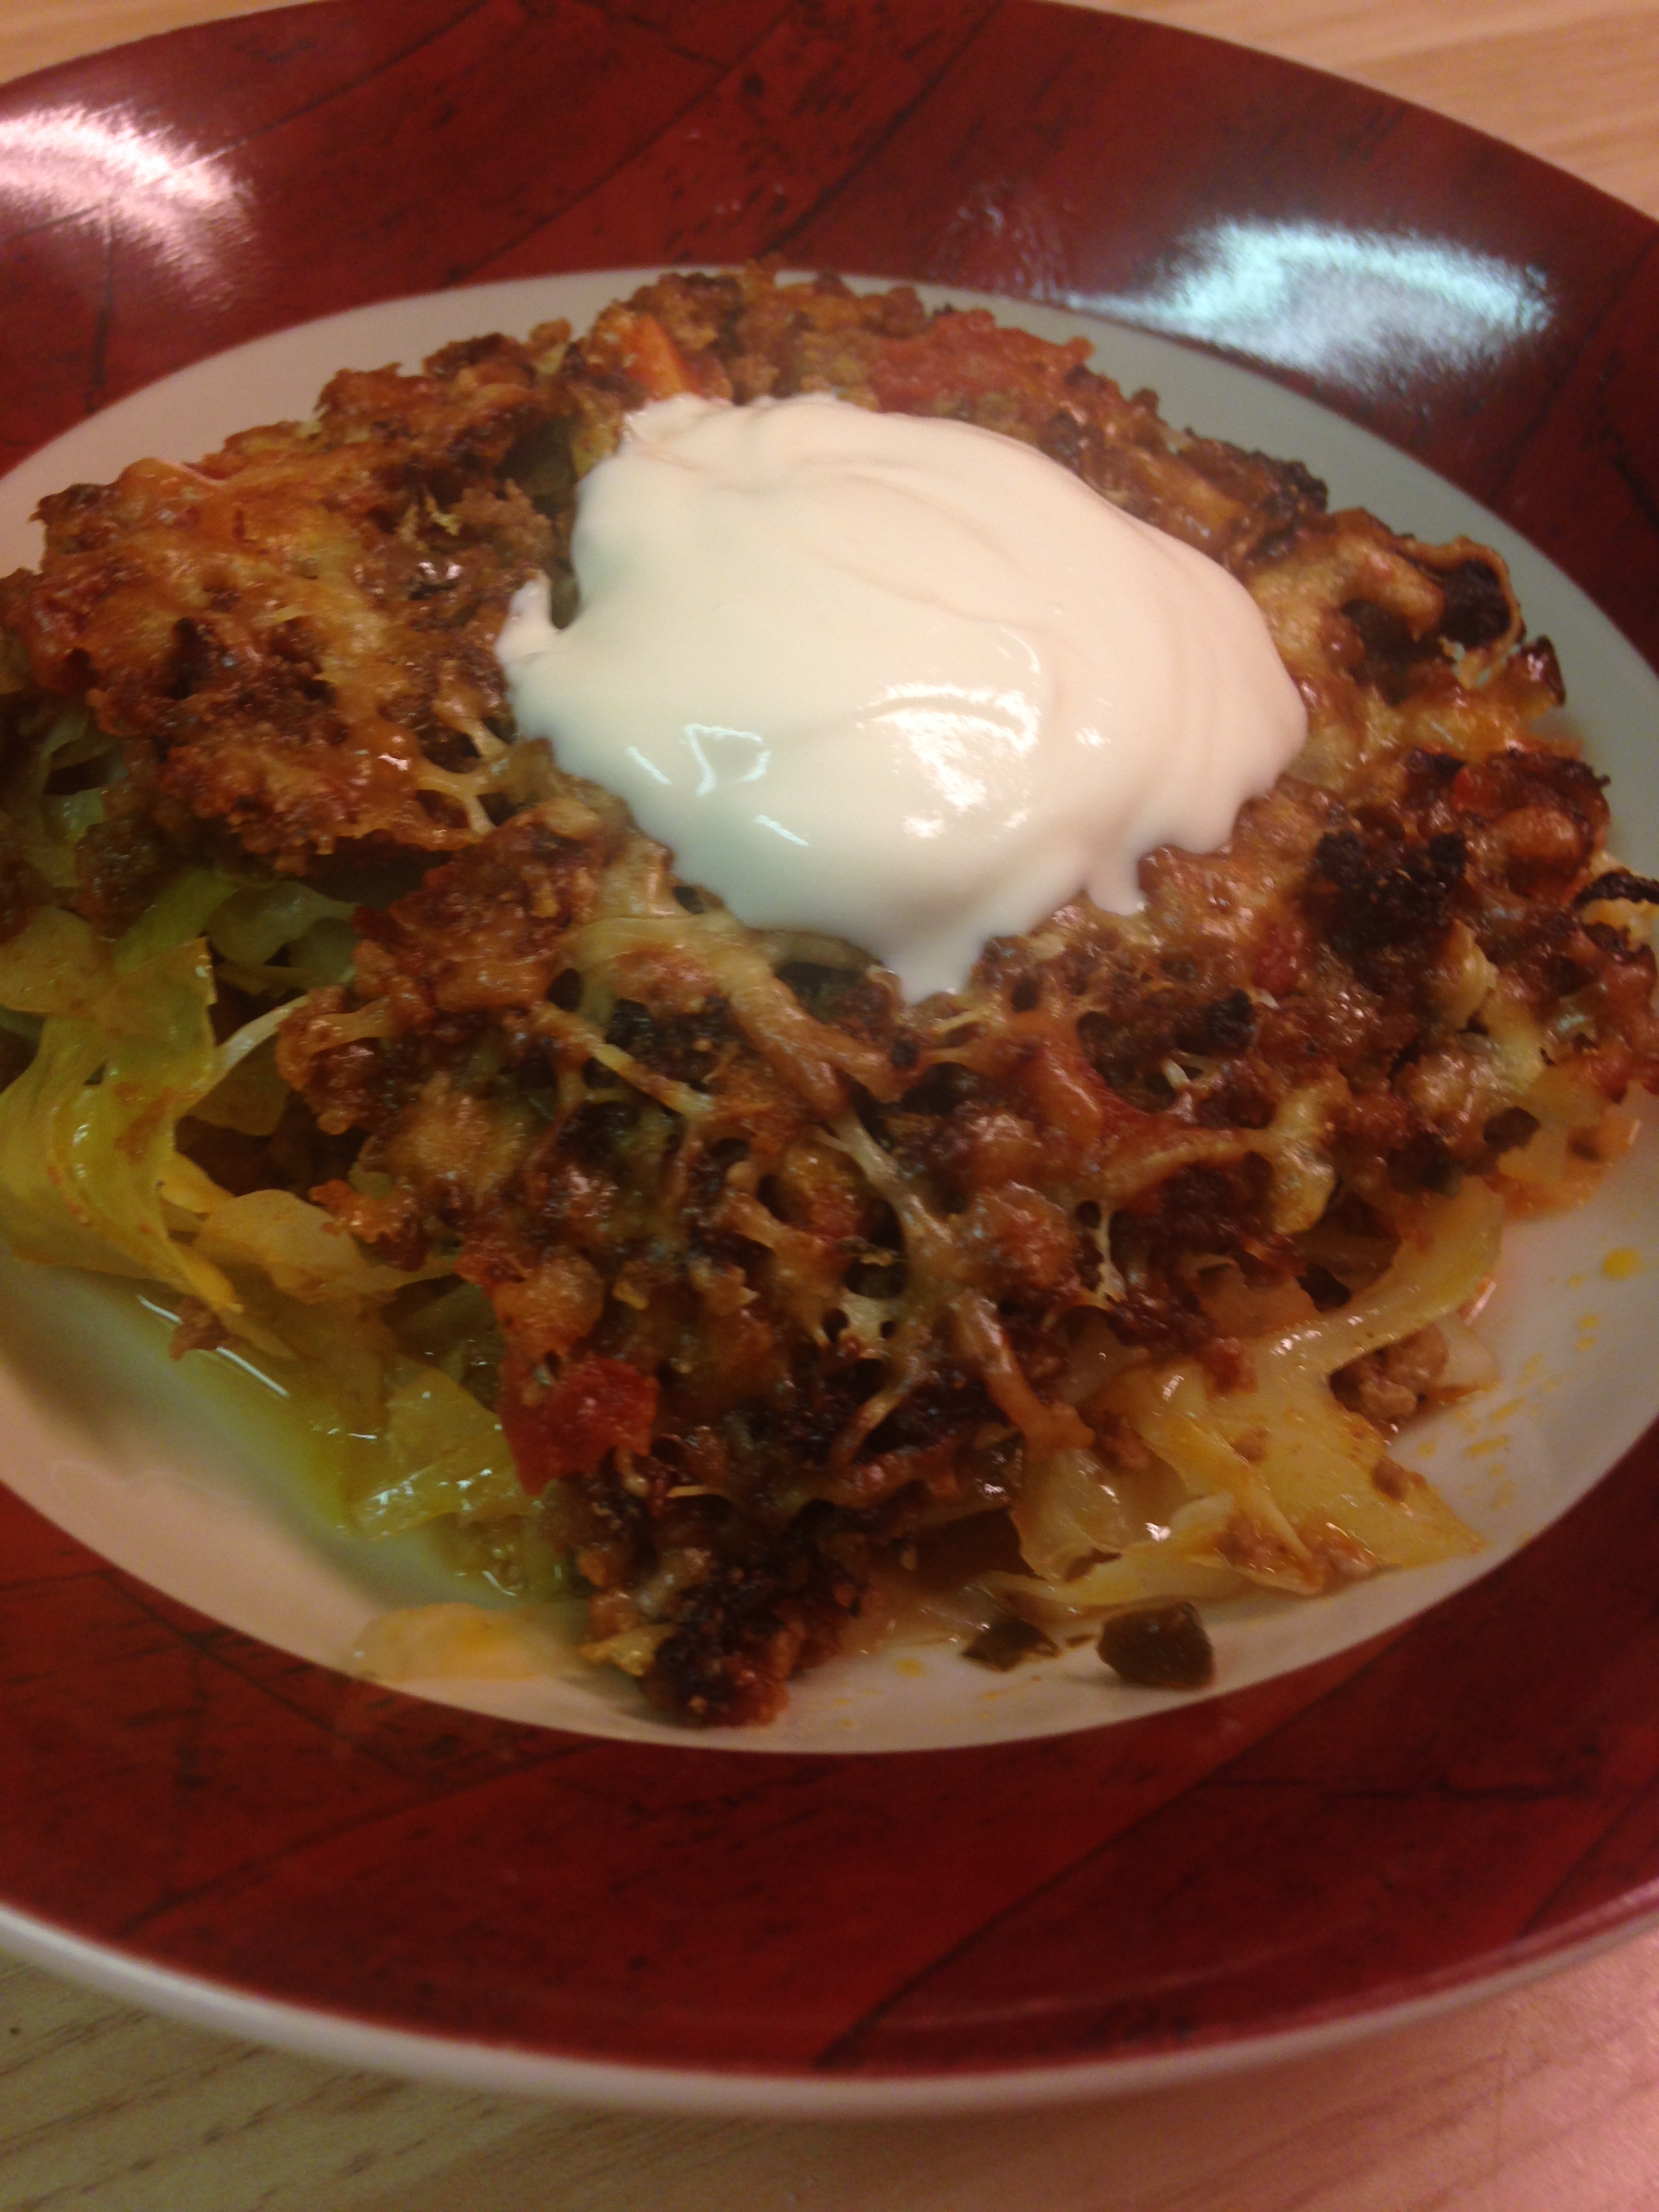
I think the key to this dish is the well shredded cabbage. It cooked faster than larger pieces or fully rolled cabbage rolls. Also, the small cabbage pieces helped soak up all the wonderful flavor of the fresh garden herbs I harvested before they went to seed, as well as the joyful combination of beef and tomatoes in the alternating layers. I ate too much because it was so good, Big D already asked when it will be made again, and Little B’s plate was empty when she asked for more. I hope you enjoy it too!

Deconstructed Cabbage Rolls

1 small head cabbage, shredded
1 medium carrot
1 small yellow onion
5 cloves garlic
3 Tbsp extra virgin olive oil
20 fresh basil leaves
1/3 cup fresh oregano leaves
1/2 cup fresh thyme leaves
1 cup fresh parsley sprigs
2 pounds ground beef
1 14.5 ounce can diced tomatoes
1 8 ounce can tomato sauce
Sea salt and ground black pepper to taste
1 tsp ground nutmeg
1 cup grated parmesan/asiago/romano cheese
Sour cream (optional for serving)

Chop onion, carrot and garlic into small pieces. Roll the basil, oregano, thyme and parsley leaves into a small roll. With a sharp knife slice the herb roll. Cross chop the herbs again until the oils are released. In a large iron skillet over medium high heat add the olive oil. When the oil is hot add the carrot, onion and garlic. Cook for about two minutes, until the onions begin to turn transparent and brown. Add the chopped herbs and stir, cooking for another two to three minutes.

Clear the vegetable mixture from the center of the skillet. Add the ground beef and break it up, folding in the vegetables as the beef pieces get smaller. When the meat is broken up into small pieces and beginning to brown add the diced tomatoes and tomato sauce. Stir and turn temperature under the skillet to high. Let bubble and cook, stirring every few minutes, until the liquid reduces by half, about five to eight minutes. Turn heat down to medium and simmer for another five minutes. Salt and pepper generously to taste.

Preheat oven to 350 degrees.

In a 9×13 baking dish place half of the shredded cabbage into an even layer. Sprinkle with salt, pepper and 1/2 tsp of ground nutmeg. Add a layer of the meat mixture, making sure half of it is left for another layer. Add a second and final layer of cabbage, again sprinkling with salt, pepper and the rest of the nutmeg. Add the second and final layer of meet, covering all the cabbage.

Sprinkle the cheese mixture on top of the meat layer. Place in preheated oven on the top shelf. Bake for 30 minutes. Check the top of the casserole, making sure it is not browning too quickly – if it is, place it on the middle or lower shelf. If is is barely brown or not at all, leave it on the top shelf.

Bake for 30 more minutes. Remove from oven and let sit for 10 minutes before serving.

Apple Herb Pork Loin

applestuffedporkloin I made this roast for my mom’s birthday. She is on the verge of a milestone birthday and generously came to us instead of us travelling to her, since I am so busy on weekends with Grain Free Haven. I knew she loved apples with her pork, but wanted to do something other than apple sauce to serve with it. The garden is still bursting with herbs so I poked around in it for inspiration. The finished roast ended up being a beautiful, seasonally stuffed centerpiece to a celebratory dinner, surrounded by steamed veggies, hollandaise sauce and wine, of course.

As you can see from the picture my rolled roast did not stay fully rolled – a trimmed roast may have stayed in place better, but I love how moist pork is when fat is still attached. The unrolling of the roll did not seem to detract from the ability of the flavors to spread through the pork and the stuffing complimenting it in a wonderful way. The final product may have ended up even better with the stuffing having spilled out, mixing with the roast juices. We just used a spoon to drizzle the stuffing and juices over the top of each served slice. Of course, when I make this again the stuffing will stay put and dribble out the ends. I will let you know!
Apple Herb Stuffed Pork Loin
1  4 1/2 – 5 pound pork loin, fat on
1 Tbsp butter
3 small Granny Smith apples
1/2 large carrot
1 celery heart with leaves (or 2 stalks)
1 medium white onion
4 ounces goat cheese
1/2 cup chopped fresh basil leaves
1/4 cup chopped fresh oregano leaves
1/4 cup chopped fresh parsley leaves
3 garlic cloves, finely minced
Seasoning salt or salt and pepper to taste
Roughly chop apples, carrot, celery and onion. In medium sauce pan over medium high heat melt the butter. Add garlic, onion, celery and carrot. Cook, stirring occasionally for about five minutes. Add apples, basil, oregano and parsley, cooking for three more minutes. Drop in goat cheese and stir until melted. Let mixture simmer until bubbly. Remove from heat.
Preheat oven to 400 degrees. With a fillet knife gently cut into the loin about 1/2 inch below the fat layer, curving around to continue the 1/2 inch thickness until the loin lies flat. Generously sprinkle all sides of the loin with seasoning salt or salt and pepper. Place the loin with fat face down. Using kitchen twine place a length under the loin every inch, making sure there is sufficient length to tie knots.
Place the apple mixture on the end opposite the face down fat. Carefully roll the loin over the filling, ending with the fat side facing up. Tie each length of twine to secure the roll. Place in shallow 9×13 baking dish.
Bake in 400 degree oven for 20 minutes. Reduce temperature to 300 degrees and bake for an additional 40 minutes. Remove from oven and let rest for about ten minutes before serving.


Garden Chicken

2015-08-29 17.59.51Since I began my new business, Grain Free Haven, I have spent a ton of time in the kitchen, but not so much on new stuff. I have been making large quantities of the reliable recipes we love, to share with all my new customers. In my continued effort to contribute to the healthy eating of my family, I share with you now ANOTHER chicken recipe. I swear it is different enough from this chicken recipe, and this one and this one and this one to warrant sharing…. Even with all the bulk baking for the business I still want to spend time in the kitchen making new stuff, so I am making a concerted effort to still come up with new stuff.

Much of what you need for it comes from your garden, or your neighbor’s garden, or even your local farmers’ market vendor gardens…in my case it came from my brother’s garden. The dish is full of summer and the sauce, which can be made in advance of baking the chicken, is addictive. I warned you.

Garden Chicken

2 pounds fresh tomatoes (or 2-14 1/2 ounce cans diced tomatoes)
3 garlic cloves, crushed
1/2 medium yellow or white onion, chopped
1 cup fresh basil leaves
1/4 cup fresh oregano leaves
1 cup fresh parsley leaves
4  cups fresh, raw spinach
2 tsp sea salt
1 tsp ground black pepper
1/3 cup heavy whipping cream
8 – 10 chicken thighs, bone in and skin on
Salt and pepper, to season chicken
1 cup finely grated Parmesean cheese
2 cups grated mozzarella cheese
1/4 cup finely chopped mixed fresh herbs (optional)

Roughly chop tomatoes and place in large sauce pan uncovered over medium high heat. Add onion, garlic, basil, oregano and parsley. When mixture is bubbly reduce heat to medium and continue cooking uncovered for 30 – 45 minutes, until liquid from tomatoes is released and reduced by about half. Add the spinach, salt and pepper, stirring until the spinach wilts and mixes with the tomatoes. Let simmer for ten more minutes. Remove pan from heat. With an immersion blender (or carefully pour the hot stuff into a stand blender) purée the sauce until tomatoes, spinach and herbs are blended into a smooth sauce. Simmer for five more minutes to reheat sauce, then thoroughly stir in heavy whipping cream. Remove from heat.

Preheat oven to 350 degrees. Season chicken on both sides with salt and pepper, then place them in large baking dish. Sprinkle half the Parmesean cheese over the chicken thighs. Pour tomato sauce over chicken, making sure it is covered and there is a layer on the bottom of the dish. Sprinkle mozzarella cheese and optional chopped herbs over chicken, followed by the rest of the Parmesean cheese. Place in oven for 30  minutes. Cheeses should begin to brown. Cover dish loosely with aluminum foil (to prevent cheese from getting too brown) and bake for 15 more minutes.

Remove from oven and let sit for 10 minutes before serving. When serving gently lift the chicken out of the dish, trying not to disturb the sauce and cheese that has moulded on top of each thigh – as the dish cooked the tomato solids settled on top of the chicken with the cheeses and the juices ran down, so serving with the ‘topping’ intact makes for a pretty presentation.


Bright Bok Choy

bokchoysauteWhen we made lobster recently I wanted to serve something bright next to it, but not something that would overpower the sweet crustacean meat. I landed on bok choy, for it is easy to make and met the requirement for bright contrast. I was also influenced by the fact it was in the produce department of the store where we bought the lobster. They were small, very green and very fresh looking. I love wokking (is that a word?) bok choy. I love wokking greens in general – dropping some into the well to sear, then tossing them on the edges to rest, then dropping them right back into the well.

The bok choy keeps with the trend in our house of often eating green, leafy vegetables as often as possible. I like mustard greens and turnip greens and collard greens and spinach, but some variety is always welcome in my world. I have never served bok choy with lobster, but I probably will again, especially with an extra drizzle of lemon, to connect it with the lobster butter. Also, it is fun to say – bok choy, bok choy, bok choy, bok choy….

Bright Bok Choy

2 – 4 bunches bok choy, well rinsed (to equal to approximately 8 cups raw chopped)
1 Tbsp coconut oil
1 Tbsp ginger, peeled and finely minced
2 cloves garlic, finely minced
1 tsp sea salt
1/2 tsp ground black pepper

Thoroughly rinse sand and soil from bok choy. Chop green leaves off from white stems. Loosely chop green tops. Chop white stems to bite-sized pieces. Add oil to wok or large frying pan over medium high heat. When oil is hot add ginger and garlic. Cook until it begins to brown. Add chopped white stems. Cook stems for about five minutes, tossing regularly. Add green tops and sprinkle with salt and pepper. Toss mixture until greens are wilted, 3-5 minutes. Season with additional salt to taste. Remove to serving bowl and serve immediately.

Herby Dressing

herbydressing

I make a lot of salad dressing. My goal is typically to find vegetables that will bring the dressing to my mouth. I like vegetables, but it is hard to keep them interesting and add variety to ensure they make up a majority of my diet. I have been surrounded by herbs and summer lately, so decided to try and capture it all in a jar. I trundled through the jungle of herbs in my brother’s back yard and grabbed handfuls of garlic, cilantro and parsley. I rush back into the kitchen, to reduce my exposure to the triple digit temperatures. I filled the food processor with other basics of a dressing and come up with a bright, crisp, green concoction. We have used it so far to flavor salad, cauliflower fried ‘rice’, cottage cheese and dip. The word dressing may be deceiving, for it is not just for salad. It can brighten up all kinds of foods, so go for it!

Herby Dressing

1 cup chopped fresh cilantro leaves
1/4 cup fresh parsley leaves
2/3 cup apple cider vinegar
1 lime, juiced
1/2 cup extra virgin olive oil
2 garlic cloves, crushed
1 tsp sea salt
1/4 ground black pepper
Place all ingredients except for olive oil into a food processor. Pulse the ingredients until herbs are of a uniform size. Continue processing steadily while incorporating oil with a continuous, steady stream into the processor. Store dressing in an airtight container, drizzling it with abandon on raw veggies or incorporating it into vegetable dishes.

Tex Mex Dip

2015-07-03 18.34.43Dip is a sure fire thing to always have around. Having last minute dinner guests? Pull out the dip with crudite. Feeling nibbly? Pull out the dip with some chips. Faced with raw chicken that needs to be dinner? Pull out the dip and slather the fowl with it before tossing it in the oven. Headed over to someone’s place for drinks? Pull out the dip. It can come in all shapes and sizes and colors and quantities. It can be hot, or cold or both. People can eat it, or not. Dips can be made to taste like just about any dish.

We like queso. When we don’t want to break out the crock pot, processed cheese and can of tomatoes we don’t have to miss out on the flavors. We just pull out the can of tomatoes and veer in another direction. Here is a dip I came up with that gives us the flavor and tang of Tex Mex without the logistics. When I say queso I don’t mean the Spanish word for cheese. I mean chile con queso, the warm cheese dip with tomatoes, onions and chiles often served with a Tex Mex meal. I like queso, but it needs melting and oversight so it does not burn and reheating when it cools off, then if the crock pot cord does not reach to the nearest plug there is need for an extension and the possibility of tripping on it…not that I ever trip on anything. 🙂 None of these logistical elements are insurmountable barriers, but are way beyond what is needed for this dip. Nothing can replace chile con queso in my book, or plate, but this is a nice, cool variation.

Tex Mex Dip

2 cups sour cream
1 Tbsp lime juice
1 Tbsp ground cumin
1 tsp garlic powder
1 tsp sea salt
1/2 tsp ground black pepper
1 can tomato and chiles, well drained
1/4 cup finely chopped onion

In a medium bowl combine sour cream, lime juice, cumin, garlic powder, sea salt and pepper. Whisk until combined. Add onion, tomatoes and chiles. Stir until well combined. Chill at least two hours or overnight before serving.

Sauteed Squash Strips

2015-06-28 13.53.16

With all our moving around and packing and unpacking and living in compact spaces, I have lost the desire to accumulate kitchen gadgets. If something cannot be used for three or more different purposes I am hard pressed to acquire or keep it. If I do succumb, such things often don’t make ‘the cut’ when we are packing and downsizing. Things like avocado slicers, cherry pitters, cheese slicers and the like are not found in our kitchen drawers. On the other hand, our eleven year old Wusthof knife set goes with us everywhere. One thing I have not been able to  do consistently without a gadget is vegetable ‘noodles’. I can use a vegetable peeler to make strips of veggies (yes, the peeler always makes the cut), but not so much the rounder noodles I want as a base.

I caved and finally bought one of those twisty vegetable noodle makers. It works well and is compact (I bought the smaller, non-deluxe version). I have used the noodles under sauces in place of pasta, used them as a side dish, and even as part of tacos and enchiladas, which I must say went especially well. Using the gadget reminds me of peeling oranges as a child – I always tried to peel them in one long strip. This gadget can literally make one long noodle out of a zucchini. The problem with a three foot long noodle is dividing it among diners, so ponder some trimming either before or after cooking.

The nice thing about all these uses (and trimming opportunities) is the preparation is the same, and simple. I use them as a conduit to compliment other foods, like many use rice or pasta, so keeping the preparation simple makes so much sense. One way to use them that I have not yet tried is in soup – imagine pho or udon with veggie noodles. Sounds good, but for me, July is not the time for hot soup, so that experimentation will have to wait for fall.

Sauteed Squash Strips

1 Tbsp extra virgin olive oil
1/2 yellow onion, julienned
2 garlic cloves, chopped
1 yellow squash
1 zucchini
Sea salt and ground black pepper to taste

Twist zucchini and yellow squash through thick setting of a vegetable noodle gadget, placing ‘noodles’ into a bowl. With a sharp knife cut an X through the noodles, allowing for randomly shorter, bite-sized strips. In a medium skillet over medium high heat add oil. When oil is hot add garlic and onion. Cook until onion begins to brown on edges. Lower heat to medium. Add squash strips to pan and season with salt and pepper. Toss squash with onion and garlic until heated through, but stop before squash begins to go limp and release liquid, about two minutes. Remove from pan and serve immediately, either as a side dish, taco filler or ‘pasta’ under sauce.

Post Navigation