Any Kitchen Will Do

Give me a kitchen and I will cook.

Archive for the category “wheat free”

Foccacia

Foccacia

Over the holidays I had a slew of opportunities to feed grain eaters and prove to them that grains are not necessary to enjoy celebratory meals. A couple of guest left after their visit, happy with the discovery that they not only enjoyed their eating experiences, but they in fact lost instead of gained weight during their visit. Win!

One way we were able to accomplish such a feat was adapting some of our recipes to meet celebratory needs. One need was to have a flatbread that easily soaked up sauces and juices, allowing guests to enjoy the tradition of dipping and revelling in soupy leftovers.

Foccaciawhole
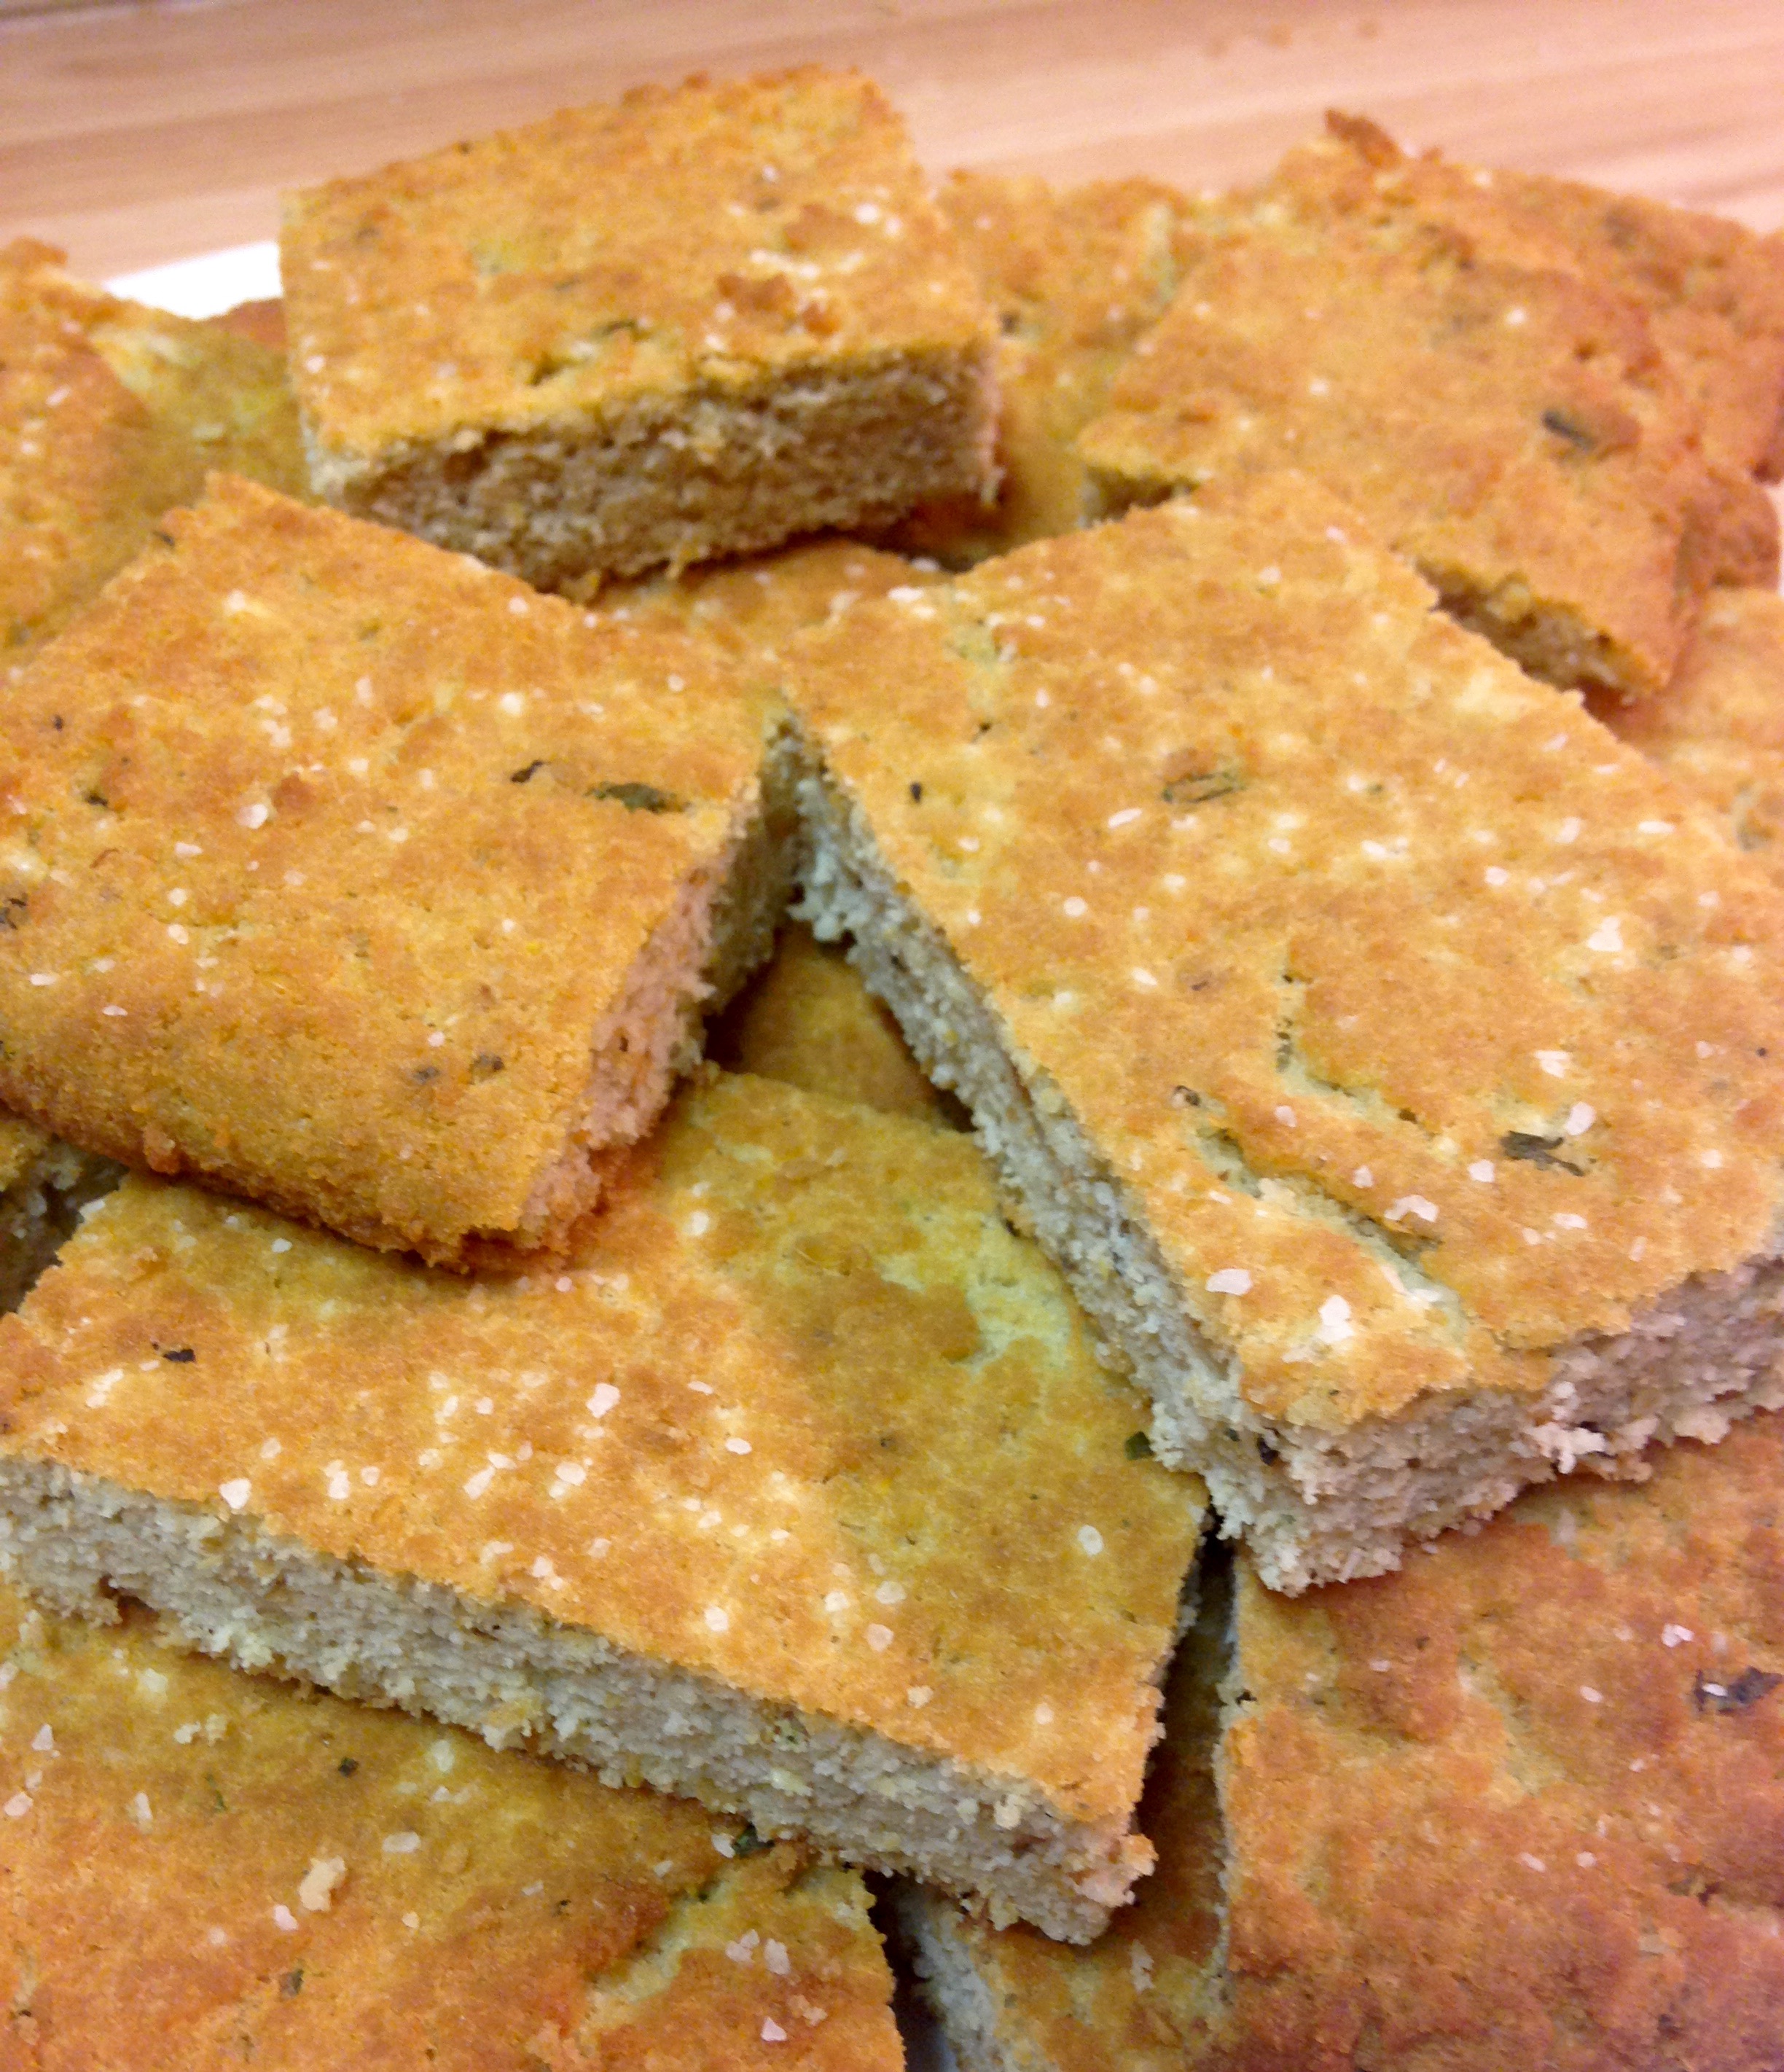
This foccacia was an easy transition from our traditional Power Bread and fun to make! Instead of ensuring the dough was properly packed in a loaf pan I was able to mold it without edges and create exactly what we needed for our celebration. I am still enjoying the new memories made over the holidays and hope you can make some of your own with some of our grain free creations.

Foccacia

1 cup coconut flour
1/4 cup golden flaxseed meal
½ tsp sea salt
1 tsp baking soda
9 eggs, room temperature
¼ cup apple cider vinegar
1 cup melted lard, butter or extra virgin olive oil
2 garlic cloves, crushed
1/4 cup freshly chopped parsley
1/4 cup freshly chopped basil
1/4 cup freshly chopped oregano
1 Tablespoon extra virgin olive oil
Sea salt to taste

Preheat oven to 350 degrees. Prepare shallow baking pan by lining with aluminum foil.

In a large mixing bowl combine coconut flour, golden flaxseed meal, salt, baking soda, garlic, parsley, basil and oregano, then stir until well blended.

In a separate bowl combine eggs and apple cider vinegar. Whisk together until egg whites and yolks are well combined. Add lard/butter to eggs and continue whisking. Add immediately to bowl of dry ingredients.

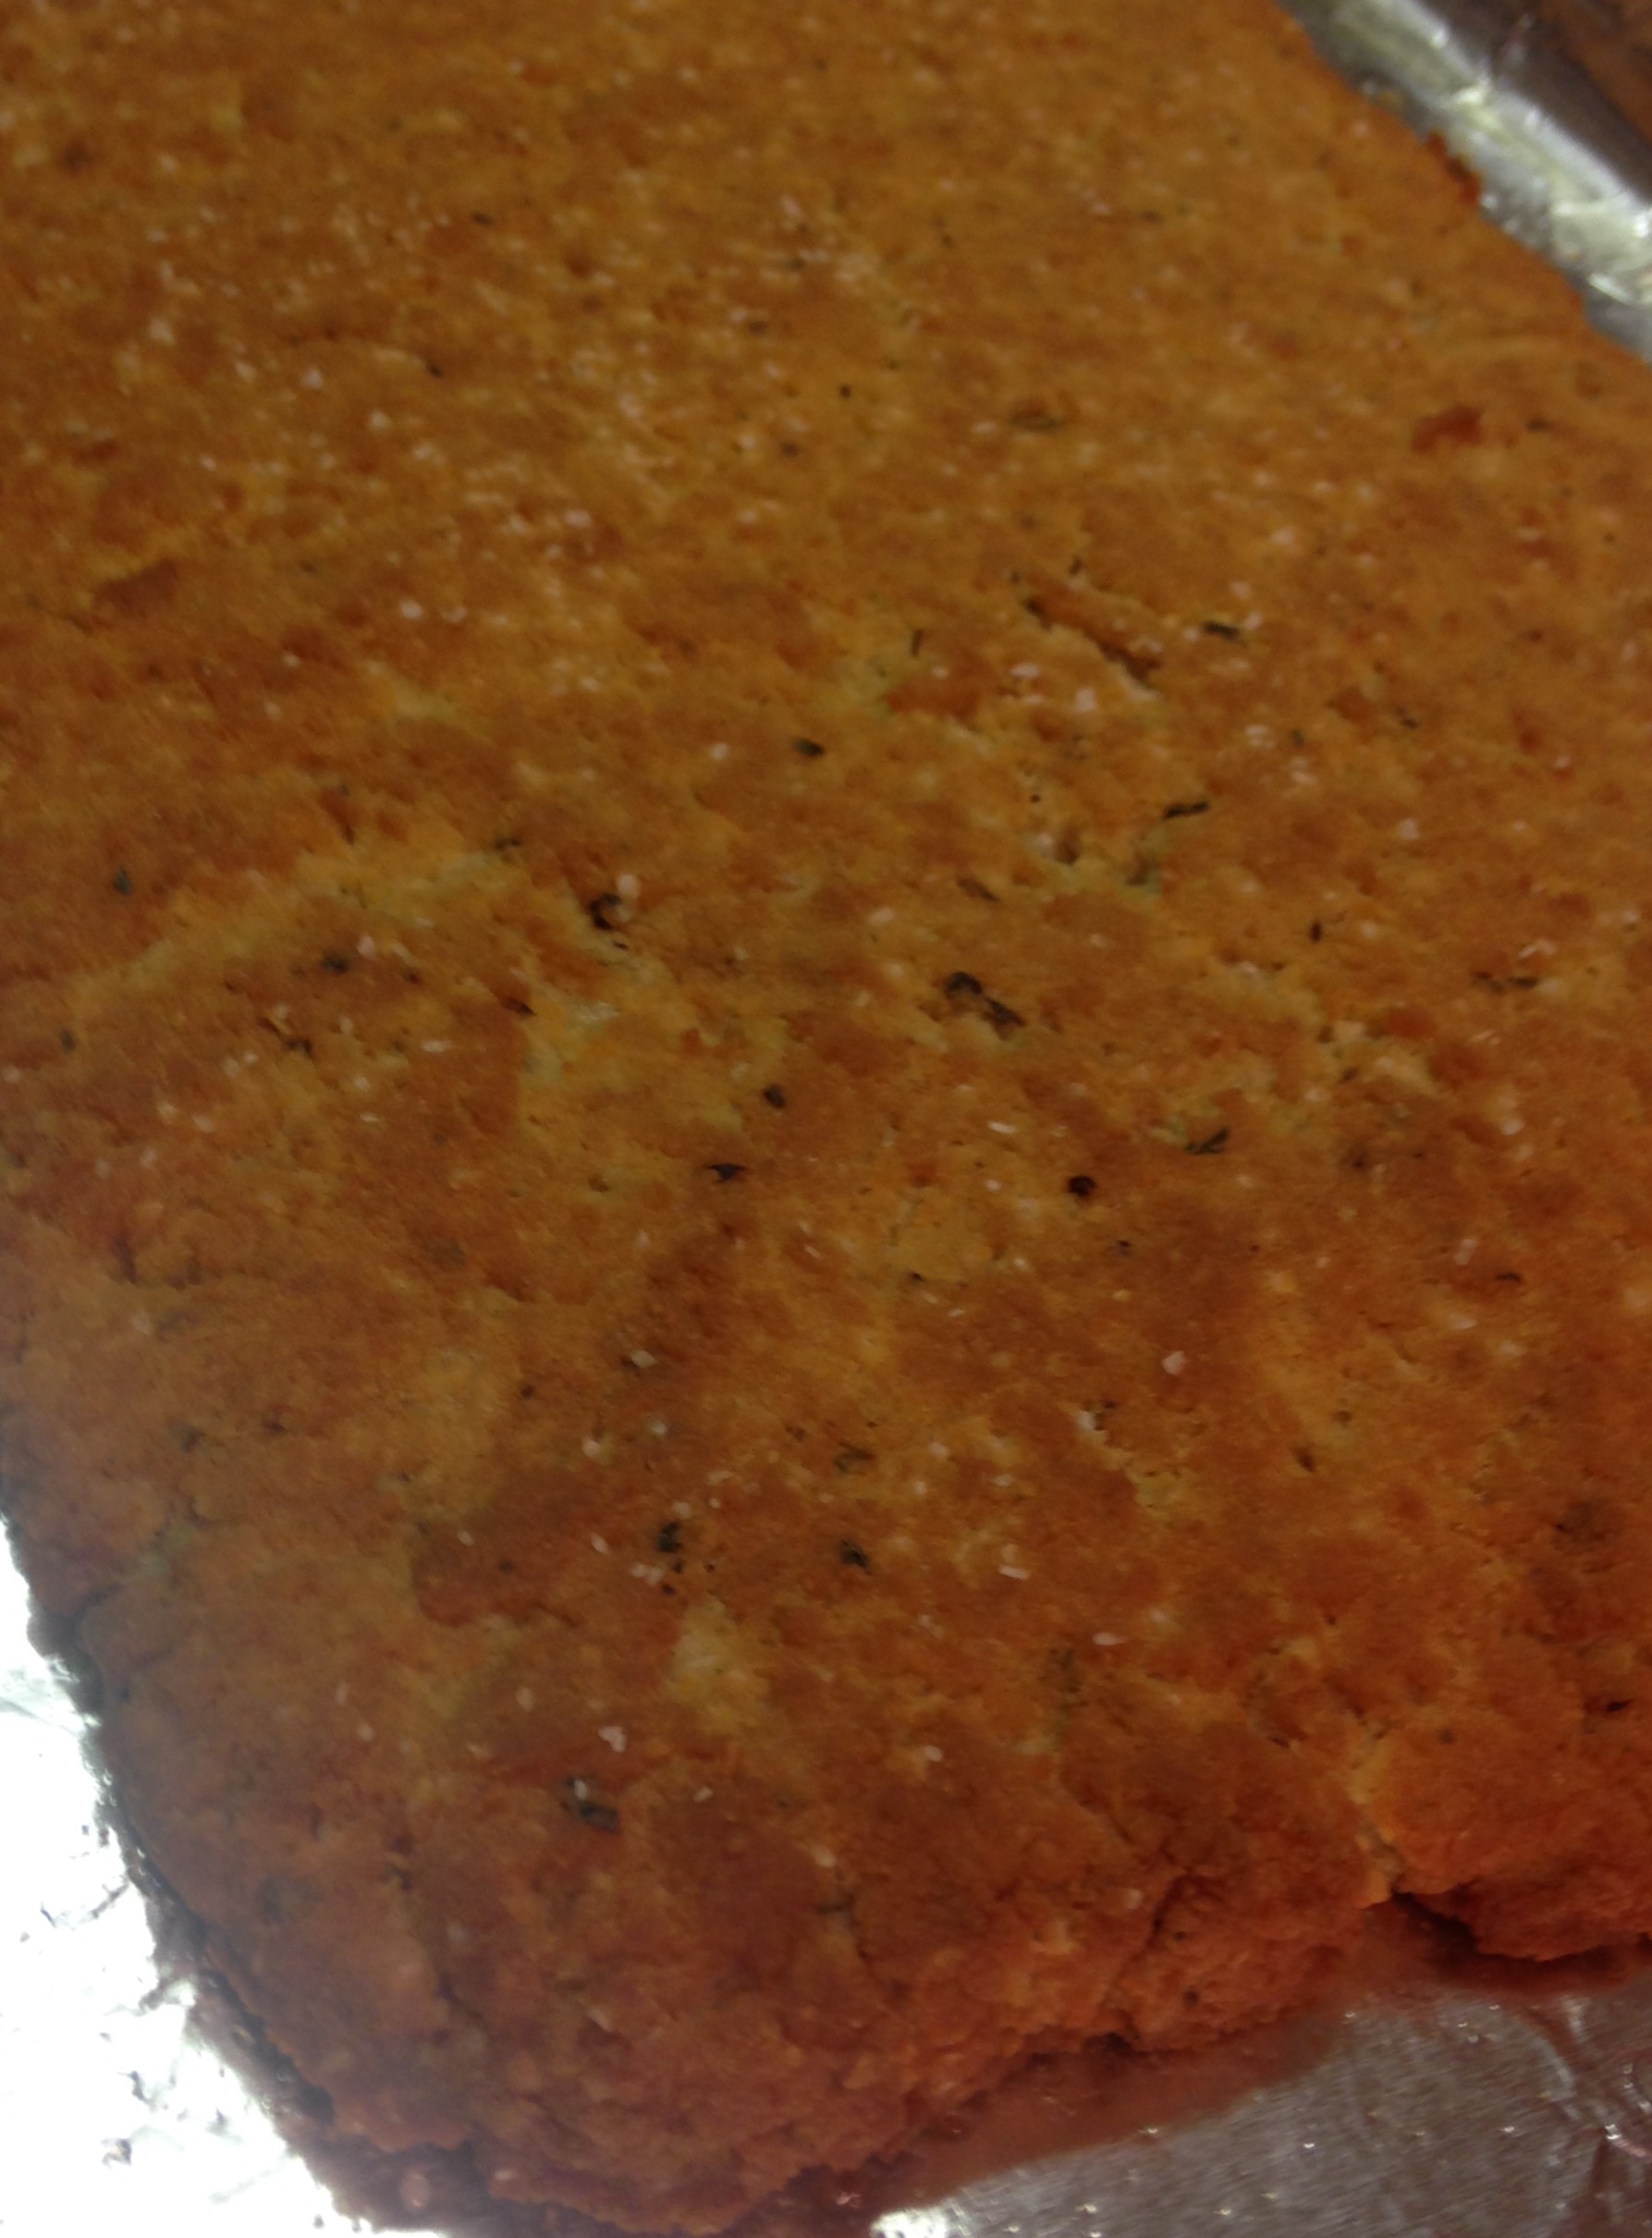
Place dough in the middle of prepared baking pan. Gently spread dough towards the edges of the pan, making a rectangular shape that is 1/2 inch or less in thickness. Press edges towards the middle, ensuring that they are firmly shaped.

Using your hands gently spread the olive oil over the top and edges of the shaped dough. Sprinkle generously with sea salt. Place in preheated oven on the middle shelf. Bake for approximately 25 minutes, until middle is cooked and top of bread is evenly brown.

Remove from oven and let sit for at least 15 minutes. Slice bread into approximately 12-15 squares. Serve immediately or reheat before serving later. Store chilled in airtight container.

Spicy Stuffed Tomatoes

spicystuffedtomatoes

There must have been a bumper crop of tomatoes somewhere nearby, because there were tons of big, beautiful ‘maters in the local produce section at the store this week! We often have fresh tomatoes in our kitchen and chop them up raw as a quick side dish, but I decided this time to stuff them and bake them. The cooler weather leads me towards warm food. You can never have too many variations on vegetable dishes, can you?

I used to make these with oatmeal as filler, but since using it would conflict with our current habit of eating grain free, I replace it by adding more veggies and sausage. Worked out great!

As the new calendar year begins and the holiday activity wanes I ponder what is to come during the next twelve months. Last year Big D and I both shifted the work we do to bring in money, and shifted where we live. Prospects look bright for our efforts to follow our passions, with starting a new business and writing new books. This year is starting on very bright notes, we are working hard and loving it, while also finding opportunities to spend more time with family and friends. I hope you all start the year with positive outlooks, for the perspective you take will most definitely influence where you go in life. Why not do it positively. You will be amazed where you will go with it!

Spicy Stuffed Tomatoes

8 ripe tomatoes
1/2 medium onion
1/2 green bell pepper
4 ounces white button mushrooms
2 links hot Italian sausage, cooked and roughly chopped
4 cloves garlic
2 tablespoons extra virgin olive oil
1/2 teaspoon cayenne pepper powder
1/2 teaspoons sea salt
1/4 teaspoons ground black pepper
2 teaspoons hot sauce (suggest Tabasco Smoked Chipotle Sauce)
1 cup mozzarella cheese
1/4 cup grated parmesan cheese
Sea salt and ground black pepper to taste

Cut off top portion of each tomato, making a flat top. Scrape out seeds and meat core from inside of tomato. Turn tomatoes cut side down on a towel to allow extra juice to run out. Finely chop mushrooms, onion, bell pepper and garlic. Heat oil in a medium sauté pan over medium high heat. Add garlic and onion into pan and cook about three minutes, until onions begin to sweat. Add bell pepper and mushrooms, cooking another five minutes until onions begin to brown and mushrooms release their liquid. Add cayenne pepper powder, salt, black pepper and hot sauce. Stir and simmer on low for five more minutes. Remove from heat and let cool slightly.

Preheat oven to 350 degrees.

Flip over tomatoes so cut side is up. Sprinkle the inside of each with sea salt and ground black pepper to taste. Drop sausage into the bottom of each tomato, dividing it evenly among the eight tomatoes. Spoon sautéed mixture into each tomato, dividing it equally among the eight tomatoes as well.

Place stuffed tomatoes in a baking dish that allows them to fit snugly, so as to support each other while cooking. Dish size can vary due to size of tomatoes, but 9×9 inch should work. Spoon 1/8 cup mozzarella cheese on the top of each tomato, pressing it down firmly so it stays on top of each. Sprinkle parmesan cheese on top of each tomato. Bake for 30-35 minutes, until cheese browns and tomato skin wrinkles and begins to crack. Remove from oven and serve immediately.

Cinnamon Whiskey

cinnamonwhiskey

I get a kick out of flavored liquors. Not so much cloyingly sweet liqueurs, but things like vodka and whiskey with some flavor added. Big D makes fun of me and is above such things, preferring the peaty taste of Laphroaig or the smokiness of Bushmills. I like them too, but the cinnamon whiskey is nostalgic for me, taking me back to days in college when we took shots of Goldschlager or experienced the horridness of cheap cinnamon schnapps. I would like to think my tastes have matured since then, and I now enjoy more subtle cinnamon now. My recent discovery of Fireball took me back to those crazy, boot scooting and ranch party Saturday nights of yore.

The problem with Fireball and other flavored liquors is the mystery surrounding the content of the added flavoring. Do they have grains? Exactly how much sugar do they use? What other chemicals are in that bottle of golden goodness? Such beverages do not have ingredient lists on the bottles or the websites of companies, so a lot of digging goes into actually figuring out what is in them.

One of my favorite flavored liquors is cinnamon whiskey. I can tell from just one sip that, among other things, sugar is definitely added. My attempts at creating my own cinnamon whiskey, so I know what was in it, resulted in two versions. They both have sweeteners, because, honestly, some sweet is why I like it.

The first approach is ideal because it is sweetened with stevia and satisfies my cinnamon hankering. The second approach, using sugar free candies with the sweetener of your choice (or sugary candy if you like) makes the end result very closely match the candy sweetness inherent in commercial cinnamon whiskeys.

Regardless of the approach you use the end result is a pretty, festive red whiskey with a lovely, spicy bite to it!

Cinnamon Whiskey

Approach One
1.75 liter bottle whiskey
5 cinnamon sticks
1 teaspoon cayenne pepper powder
1/2 teaspoon pure stevia powder

Approach Two
1.75 liter bottle whiskey
2 cinnamon sticks
1/4 teaspoon cayenne pepper powder
12-15 sugar free cinnamon candies

Remove 1/4 cup whiskey from the bottle. Add cinnamon, pepper and candies or stevia to bottle. Replace top on bottle. Let whiskey sit for at least two days, shaking it two to three times a day. Shake before each use. Serve neat, on the rocks or with mixers as usual.

The last cup of the whiskey in the bottle will have more sediment and be slightly bitter, so I recommend using it for mixed drinks instead of neat or on the rocks.


Swedish Meatballs

swedishmeatballs

Beyond my version of a Swedish smorgastarta I made a while back, I have not done much with Swedish cuisine, traditional or otherwise. When I think of Swedish cuisine I imagine pastries, fish and meatballs. My hankering to make meatballs led me to the well known Swedish meatballs. Research into the Swedish version revealed they posses a subtle, yet well-rounded flavor. The key flavors, along with the variety of ground meats, are onion, allspice and white pepper. My other meatball versions, whether cheesy or ghoulish, have much less subtle flavors added. I was very curious about making the traditional Swedish dish.

Never partaking of the meatballs on Swedish soil, I relied on my previous experiences eating them here in America. The experiences revealed they are smaller and more delicate than those huge suckers you find in an American sandwich or spaghetti. Served on a bed of zucchini noodles and a side of acorn squash, the meatballs made for a warm, comforting winter meal. The gravy was rich and addictive, and the use of almond meal instead of breadcrumbs worked well to hold the balls together. The bit of gravy left over when the meatballs were gone became two spoonfuls of savory dessert for me!

Swedish Meatballs

Balls
3 tablespoons butter
3 tablespoons finely grated onion
1/3 pound ground beef*
1/3 pound ground pork*
1/3 pound ground veal*
1 teaspoon allspice
1 teaspoon sea salt
1/4 teaspoon finely ground white pepper
2 tablespoons almond meal
1 egg

Gravy
Pan juices
1 cup cream
Sea salt to taste
Finely ground white pepper to taste

Melt 1 tablespoon of butter in an iron skillet over medium heat. Sauté onions in the butter until golden brown. Remove from heat and let cool until comfortable to handle when mixing with meats.

Place ground meats in medium bowl. Add allspice, salt and white pepper, almond meal, onions and egg. Using your hands combine the ingredients until well combined. Form mix into approximately 18 meatballs, each about the size of a  a golf ball. Chill meatballs for at least an hour – this will help them hold their shape when cooking.

Melt the remaining 2 tablespoons in the iron skillet over medium high heat. Add the meatballs, making sure there is some space in the pan around each ball. Shake the pan as you fry the balls, to brown them evenly and prevent flat sides. Continue to cook for 10-12 minutes, until they are evenly browned on all sides.

When all of the meatballs are done cooking transfer them to a plate and place on the stove top to keep them warm.

To make the gravy, lower heat under the pan to medium. Scrape the bottom of the pan to loosen the drippings. Add the heavy cream, salt and pepper to taste. Gently stir to incorporate the cream. Simmer for about three minutes.

Pour gravy over the warm meatballs and serve immediately. Since there is no thickener in the gravy it may separate a bit if overcooked or after it sits away from the heat. If separation occurs just stir right before spooning over meatballs.

Pumpkin Custard

pumpkincustardStill looking for a way to use up the last of the pumpkin from your holiday cooking? From my big jar of pumpkin I have so far made a pie, muffins and pumpkin spice syrup, then finished off the supply with this simple custard. It was a reeeaaalllly big jar!

Speaking of jarred pumpkin…no, I don’t make my own. I used to, but it was much more labor intensive than I wanted to deal with. By the time I bake it and smooth out all the stringiness I am tired of dealing with the stuff. I am hooked on using already smooth and prepared pumpkin (which often is not purely pumpkin, but includes other types of squash that are less stringy). I use very few prepared ingredients when I cook, but some I do rely on consistently. Besides pumpkin, I rely on prepared tomatoes and tomato sauces, as well as artichoke hearts. I will leave the time and effort needed to prepare them to other people. That way I can focus on making other stuff and doing funner things.

Although often for dessert, a custard like this is high in protein and goes great as breakfast too!

I was also feeling a bit nostalgic when making this. Four years ago today my dad died. He loved pumpkin pie. He had big slices whenever it was available. A few weeks before he died we brought family and friends together at his rehabilitation center for a pie party. He was stuck in the center for the holidays, so we brought a celebration to him! We filled up the dining room with people and pies he loved. It was probably the last time he had pumpkin pie. I think of him every time I make this, or pie in general. Bittersweet and comforting at the same time. I love and miss you dad!

Pumpkin Custard

1 cup pumpkin purée
1/2 cup heavy whipping cream
3 large eggs
1 Tbsp ground cinnamon
1 tsp ground ginger
1/2 tsp sea salt
1/4 tsp ground clove
2 Tbsp Stevita
Whipping cream to serve (optional)

Preheat oven to 325 degrees.

In a medium bowl whisk together the eggs and whipping cream. Add pumpkin purée, cinnamon, ginger, salt, clove and Stevita, whisking well to incorporate all the ingredients. Divide the custard evenly between three 1-cup ramekins.

Place ramekins, evenly spaced, in a 9×13 baking dish. Fill dish with water so ramekins are submerged half way up. Place dish in preheated oven on the middle rack. Bake for 30-35 minutes, until center of all custards is firm. Serve, topped with whipped cream, immediately or chill and serve cold.

This recipe can easily be doubled or tripled to make more individual servings.

Yummy Pork Chops

yummyporkchopsThe name of these chops is not my fault. I asked Big D what he would call them and he came up with Yummy Pork Chops. Yes, he is a writer, I swear. Go figure. Anyway, they were easy, very yummy and I will be making them again. I came up with this recipe as a result of thinking about some spicy chipotle chops I made a while back, and spontaneous grocery shopping.

I go to the store once a week, with the hope that additional trips will be unnecessary. I do pretty good on that score most weeks. I also go with a pretty flexible list. I know there will be replacement of standard condiments we have run out of, as well staples like fruits, vegetables, protein and cheese. Beyond that I rely on prices for the most part. Is chicken or pork on sale? Is the deli sliced ham or beef cheaper this week? Is the cabbage or cauliflower cheaper? You get the idea. Sometimes I do have specific dishes in mind, but usually it is a matter of having a stocked fridge and freezer. This week the pork chops won the price battle, so here is the lovely result of living not so large at the store!

Yummy Pork Chops

4 – 6 thin pork chops
1 cup mayonnaise
2 Tbsp horseradish mustard (or 1 Tbsp yellow mustard and 1 Tbsp prepared horseradish)
1 tsp sea salt
2 Tbsp garlic powder
3 Tbsp dehydrated onion
3 Tbsp lemon juice
Sea salt and pepper to taste

Preheat oven to 400 degrees.

In medium bowl combine the mayonnaise, mustard, garlic, salt, onion and lemon juice. Whisk together until blended.

Generously season chops with salt and pepper. Arrange chops on shallow baking sheet. Spread mayonnaise mixture over the top of all the chops. Bake on the middle rack of the oven for 30 minutes, until top of chops has browned. Serve immediately.

Mushroom Goat Cheese Soup

mushroomgoatchzsoup

Today I want to talk about fungus. Something I use a lot for so many different reasons it is just silly.

Mushrooms range from having very little flavor of their own, like white button mushrooms, to some that are earthy or taste downright meaty, like Portobello or Shiitake.  I like stuffing big ones with what could otherwise go in a sandwich or pizza, like my Portobello Pizza, or use them to fill out the volume of dish, like my Chicken Faux Fried Rice.

One thing that comes up sometimes is how to clean mushrooms. I never come home with them and drop them in water to get the dirt off, but I do rinse them with water right before I use them. Some people think that rinsing with water is mushroom blasphemy and do nothing more than wipe them with a towel or lightly brush them. You see, mushrooms are like sponges. Whether it is plain water or broth or tomato sauce, they soak up liquid that gets in contact with them. If you soak them or rinse them in water too far in advance of using them in a dish they can absorb the water and dilute instead of enhance. I only rinse them right before using them, so never had a problem with waterlogged ‘shrooms.

They are also powerful vehicles for other flavors. Just like they absorb water, other liquids are soaked up by them as well. I often use milder white button mushrooms when I want them to take on other flavors, like in soup or tomato sauces. If I want them to stand more on their own I will go for the earthier, meatier types of mushrooms.

This particular batch of soup had some texture, since I puréed instead of strained the base. I also wanted to let the flavors of the non-mushroom vegetables and the goat cheese shine, so I used the white button mushrooms. Little B liked it until she found a piece of mushroom slice, then, in her words, it was suddenly “not my favorite.” That’s okay. More for me and Big D!

Mushroom Goat Cheese Soup

1 pound white button mushrooms
2 Tbsp butter
1 medium carrot, finely chopped
1 small bunch green onions, finely chopped
1/2 small yellow onion, finely chopped
3 garlic cloves, crushed
1/2 bunch fresh parsley, stems removed
2 tsp sea salt
1 tsp ground black pepper
3 cups chicken broth
4 ounces goat cheese
1 cup sour cream
Additional salt to taste

Immediately before making the soup, rinse dirt off mushrooms with cold water and leave them out to dry. Remove stems from all the mushrooms. Slice mushroom caps and set aside. Roughly chop up stems. Melt butter in medium sauce pot over medium high heat. When butter is bubbling add green onions, yellow onion, garlic, carrots and parsley. Cook until onions begin to brown. Add the chopped mushroom stems, salt and pepper. Stir occasionally and continue cooking until mushrooms shrink and release their liquid, about five minutes. Add broth, turn heat to low, cover and let simmer for ten minutes.

For smooth soup, pour the cooked mixture through a sieve and discard vegetable chunks. For chunkier soup, purée vegetables with immersion blender, food processor or stand blender. Return liquid to sauce pot over medium low heat. Add goat cheese and sour cream, stirring occasionally until cream and cheese is melted and incorporated while the soup heats up again. Add sliced mushroom caps to pot, stir and then cover. Reduce heat to low, reducing heat further if necessary to make sure the soup does not boil. Continue simmering for 20 minutes.

Turn off heat and let sit for a few minutes until it soup is cool enough to eat, adding more salt to taste if needed.


Stuffed Sweet Peppers

stuffedsweetpeppersWe had a house full of people this past week. Two waves of them and it was great to visit and spend time with everybody. Considering we are pretty casual people there was no intention of having multiple formal sit down meals, except for one, so I wanted to have the fridge full of ready to eat snacks and sides the accommodate all the diet limitations, preferences and cravings. I also have to talk about these peppers. I love the colors and flavors of sweet peppers.

Some may disagree, but each sweet pepper color does have a different flavor. I have stuffed them before with milder cheese filling, but the gang we had visiting likes a bit of a bite to their food, so the addition of wasabi paste was perfect to go with the smooth cheeses and crispy peppers. After being chilled they only lasted two days as people nibbled through the holiday week, but they seemed to make people happy as they crunched away.

If you are trying to fill your fridge with quick snacks or appetizers, here are a few others you can try, besides these pepper bites with bite: cucumber goat cheese bites, Greek salad on a stick, smoked salmon spread crudite, crunchy cinnamon chickpeas and the ever popular junky nuts. I hope you try some of these recipes and have fun doing it, and don’t forget to leave the kitchen occasionally and enjoy your people this holiday season!

Stuffed Sweet Peppers

24 raw small sweet peppers

8 ounces cream cheese, room temperature

6 ounce goat cheese, room temperature

1 Tbsp wasabi paste or horseradish

2 Tbsp lemon juice

1/2 cup chopped black olives

4 green onions, chopped

2 garlic cloves, finely diced

1 tsp sea salt

In a medium bowl combine the cheeses and wasabi. Fold in the olives, onions, garlic, lemon juice and sea salt. Remove the stem from all the peppers, scraping out the membrane and seeds with a small spoon. Using a spoon or fancy piping bag with round tip fill each pepper with the cheese mixture. Chill until ready to serve.

Susan’s Stuffed Chicken Breasts

susansstuffedchickenbreastsWhenever my friends have news, good or bad, I want to cook for them. For good news it is a celebration! For bad news, it is my version of giving comfort. It is born from a habit started long ago when my family. We always celebrated or mourned surrounded by our people over a table full of food. One of my oldest and dearest friends Susan came over with news recently and cooking was definitely a necessity.

She loved it when I made rolled chicken before, so I followed their fowl lead and came up with another rolled beauty. These chicken breasts came out much less dainty and heartily filled us up. Definitely appropriate for the occasion, since Susan has some ass kicking to do in the near future.

As the holiday season draws near there is a lot of feasting and fasting and celebrating. Embrace the time you have with family and friends. Embrace the time hanging out in the kitchen. Embrace the kids playing chase in the house (and the resulting broken vase). Embrace the chill while sipping coffee in the morning. Embrace the hectic days and the slow, lazy days. Embrace each other and yourself. Time passes swiftly so embrace what you have in real time. Embrace. Embrace stuffed chicken breasts because they are most awesome.

Susan’s Stuffed Chicken Breasts

2 14.5-ounce cans diced tomatoes
1 8-ounce can tomato paste
3 garlic cloves, chopped
1 small bunch fresh parsley, stems removed
3 sprigs fresh oregano, stems removed
8-10 fresh basil leaves
1 tsp ground cumin
1/2 tsp ground black pepper
1 tsp sea salt
4 cups fresh spinach
2 cups (or 2 14-ounce cans) marinated artichoke hearts, drained
1/2 medium yellow onion, finely diced
1 Tbsp lemon juice
6 boneless skinless chicken breasts
12 slices thin deli ham
4 cups grated cheddar cheese
Salt and pepper to taste

In a medium sauce pot over medium heat add the diced tomatoes, tomato sauce and garlic. Roughly chop the parskley, oregano and basil leaves. Add all the herbs except about 2 tablespoons to the sauce. Set aside the extra herbs for the top of the dish. When the sauce begins to steam, lower heat let simmer for about 30 minutes then remove from heat.

While sauce is simmering prepare the chicken and stuffing. Finely chop the spinach and artichoke hearts. In a medium bowl combine the artichoke hearts, spinach, onion and lemon juice. Toss until combined. Add salt and pepper to taste. Set aside.

Spread a piece of wax or parchment paper on the counter, at least twice the size of a single chicken breast. Place a breast in the middle of the paper. Cover the breast with a second piece of paper. With the flat side of a tenderizer mallet (or a regular mallet covered in cling wrap), gently pound the breast, starting from the center and moving towards the edges, until it is 1/4 inch to 1/3 inch thick. Repeat with all the breasts, changing out the paper as needed. Generously season each breast on both sides with salt and pepper.

Preheat oven to 350 degrees.

To stuff the chicken clear a work surface. Position nearby a 9×13 inch baking dish. Spread a thin layer of tomato sauce on the bottom of the dish. Place a single breast in front of you on your work surface lengthwise. Use two pieces of ham to cover the surface of the breast as much as possible. Sprinkle 1/3 cup of grated cheese on top of the ham. Spoon 1/6 of the spinach artichoke mixture in a row from top to bottom on one side of the breast. Starting on the side nearest the mixture begin rolling the breast,  making sure the left and right ends overlap at least once at the end of the roll. Place the roll seam down in the baking dish. Repeat with the remaining breasts.

Pour tomato sauce over chicken rolls, leaving 1/4 inch from the top clear of sauce so there is room for it to bubble up to the dish edges. You may have leftover sauce, depending on the size of the chicken breasts. Sprinkle remaining grated cheese and chopped herbs on top of the sauce. Bake for 45 minutes until chicken is thoroughly cooked. Remove from oven and let sit for ten minutes before serving.


Spinach Artichoke Dip

spinartdippMy moms are awesome. One gave birth to me and is crazy supportive. The other I have known since I was seven, fed and housed me numerous times, then eventually became the bestest mother in law ever. They both love cooking and sometimes generously open up their kitchens to me when I visit. Sometimes I come in with a plan and bags full of groceries. Other times I dig around and see what they have for making a meal. In the past I have made pecan crusted chicken and stuffed mushrooms in my mother in law’s kitchen. Today I took over my mom’s kitchen to become dippy. Again.

Tonight we had a meatless Monday meal. It was accidental, but yummy. We usually figure out a protein and work vegetables and other stuff around it. This time we went the other direction. I made some guacamole with some gorgeous avocados and also made this lovely, cheesy spinach artichoke dip. As is often the case, I opened mom’s well stocked fridge and checked out what was in there to get inspired for dinner. I have made such a dip before, and it was lovely to see the perfect ingredients just sitting there waiting to be made into a dip – spinach, marinated artichokes, cream cheese, sour cream….It is much more mild than my jalapeño popper dip but still cheesy.

The cool thing about this dip is that it freezes easily, so the huge volume will not go to waste – after we head home my mom can store it in the freezer, then pull out leftovers and bake it up for a quick appetizer when her church or book club group comes over. This is a big recipe! It can easily be halved for a smaller dose, but I like making it for parties and pot lucks, so I share below the big version.

Spinach Artichoke Dip

4 cups fresh spinach, roughly chopped
28 ounces (2 cans) marinated artichoke hearts, chopped
1/2 small yellow onion, finely chopped
32 ounces cream cheese, room temperature
1 cup sour cream
1/2 cup heavy cream
1/4 cup Worcestershire sauce
4 garlic cloves, minced
1/2 bunch fresh parsley, finely chopped
2 Tbsp lemon juice
2 tsp sea salt
1 tsp ground black pepper
3 Tbsp grated Parmesean cheese

Preheat oven to 350 degrees. In a mixer bowl add all ingredients. Mix on medium speed for two minutes until all ingredients are thoroughly combined. Pour mixture into 9×9 or larger baking dish and spread top layer evenly. Sprinkle Parmesean cheese on top. Bake for 45 minutes until hot and bubbly. If top has not browned turn on the broiler and let broil until highest points turn brown. Remove from oven and let rest for about ten minutes. Serve with vegetables or other dippable bits.

Post Navigation