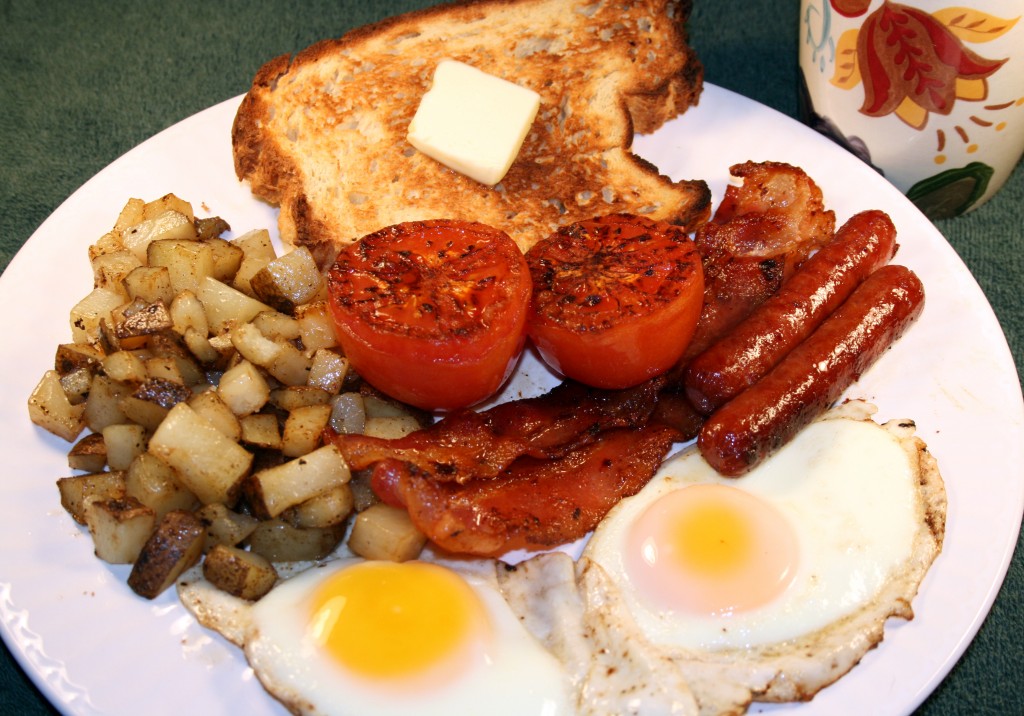
I almost did not post this recipe. Not because it is broken, but because my picture does not quite tell the whole story. I thought this to be a good reason not to post when I took it, then the next day I thought the reason silly. I love cooking and photography. One reason I began this blog was to combine these two loves. Other reasons include telling stories and sharing discoveries about food. Combine all this and it led me to an executive blogging decision. A picture is worth a thousand words, so who cares if I need to add a few more to complete the story? If I expected perfection every time I shared recipes and pictures with you I would never post anything. So here is my post about the traditional Irish Breakfast, Americanized and wheat free. I will explain.
Big D and I agree that we have found two places in the US where we can get a traditional Irish Breakfast like we had in Ireland. One is in Alexandria, Virginia, and the other is in Las Vegas, Nevada. Yep. Vegas baby! I am sure there are other places, but these are the two we have found in our travels. A bunch of places say they serve a traditional breakfast, but just don’t cut it. Like anyone else, the Irish break their fast after a night of sleep by eating a meal. For the hard working majority and tourists (like me) who relied on B&B vouchers during my trip, a hearty breakfast quickly prepared in one pan is ideal for getting on with the day and not having a growling stomach an hour later. In fact, the breakfast often held us until dinner without a problem. We did indulge in soft serve frozen cream soft serve wherever we encountered it (omigosh I can still taste it. Yum!), but that doesn’t really count, does it? If you are in pursuit of a completely traditional meal as I describe below you can get quality versions of all the hard to find ingredients from Tommy Maloney’s, but as you’ll see it will cost you.
Traditional Irish Breakfast for Two
3 Tbsp butter
2 rashers bacon
4 bangers
2 slices each black and white pudding
1 tomato, quartered
4 eggs
1 small potatoes, cut in bite-sized pieces or thin slices
1 cup baked beans, heated
2 slices Irish brown bread
2 bags Irish Breakfast Tea
2-3 cups boiling water
Preheat oven to 350F, then turn off the heat. Place two serving plates in the oven – as parts of the breakfast are cooked you will split them between the two plates. Heat beans in a small pot on low while the rest of the breakfast is prepared. Melt 2 Tbsp of the butter in large skillet and cook puddings, rashers and bangers until browned but not crisp. Remove from skillet and place on the plates in oven. Fry up potatoes in bacon/banger/butter grease. When potatoes are half done add tomatoes, cut side down, to the middle of the pan. Remove potatoes, when tender but not browned, to warm in the oven. Remove tomatoes to warm plates when done, which means they are soft and the skin begins to wrinkle. Begin bread toasting and tea brewing. Add the last Tbsp of butter into the pan and melt. Add eggs and fry to desired doneness, ideally sunny side up. I usually lower the heat after breaking the eggs into the pan and cover it, which encourages the eggs to cook evenly without needing to flip. Add bread and beans to plates and eat hot!
—————————————
Can you have a traditional Irish Breakfast without the black and white puddings? Yes, because that is what we had yesterday, but it was not quite the same without it. Like breakfast anywhere, individual preferences and what is locally available forms what goes on a plate. What the heck are rashers and bangers and pudding? Well, two are more easily explained than the third. Rashers are basically ham/bacon pieces cut from the back of the pig instead of the belly like American bacon, which makes for a hearty piece of meat. Bangers are thicker pork sausages – larger than the typical American sausage link, but smaller than, say smoked sausage. Now the pudding does not really have an American parallel. Irish pudding is a mixture of oatmeal, spices and sometimes meat set up in casings like sausage. The white pudding is primarily the oatmeal and spices, while black pudding has the addition of blood, usually pig’s blood, and prepared like other sausage. The black and white puddings have a particular taste and texture which sometimes turn people off. I appreciate them in small quantities. Big D on the other hand could eat plate fulls with a big grin on his face (along with haggis, but that is another story).
In our small Texas town we could not find the pudding, and Big D could not even find anyone who would sell him pig or cow blood to make his own pudding with his sausage making contraption. It is completely missing from our meal. Also, no rashers were available so we substituted thick cut bacon. Bangers were unavailable so we substituted beef breakfast sausages. The canned baked beans available around here are sweetened overwhelmingly, unlike Irish baked beans, so we just left them out. On top of all these changes, we also had gluten-free bread instead of Irish brown bread to address Big D’s wheat sensitivities.
As with traditional American breakfasts, some things on a traditional Irish breakfast plate vary depending on preference – some cannot bear to be without their baked beans, while others want their eggs scrambled or drink coffee instead of tea. As I mentioned earlier, the picture represents an incomplete Irish breakfast, but the recipe takes you through the traditional version to which I was introduced while traveling Éire. Regardless of my qualms about this post, the breakfast was delicious. After eating it we leaned back, smiling, full and happy.


