Any Kitchen Will Do

Give me a kitchen and I will cook.

Archive for the category “Silver Spring Kitchen”

Veggie Meatloaf


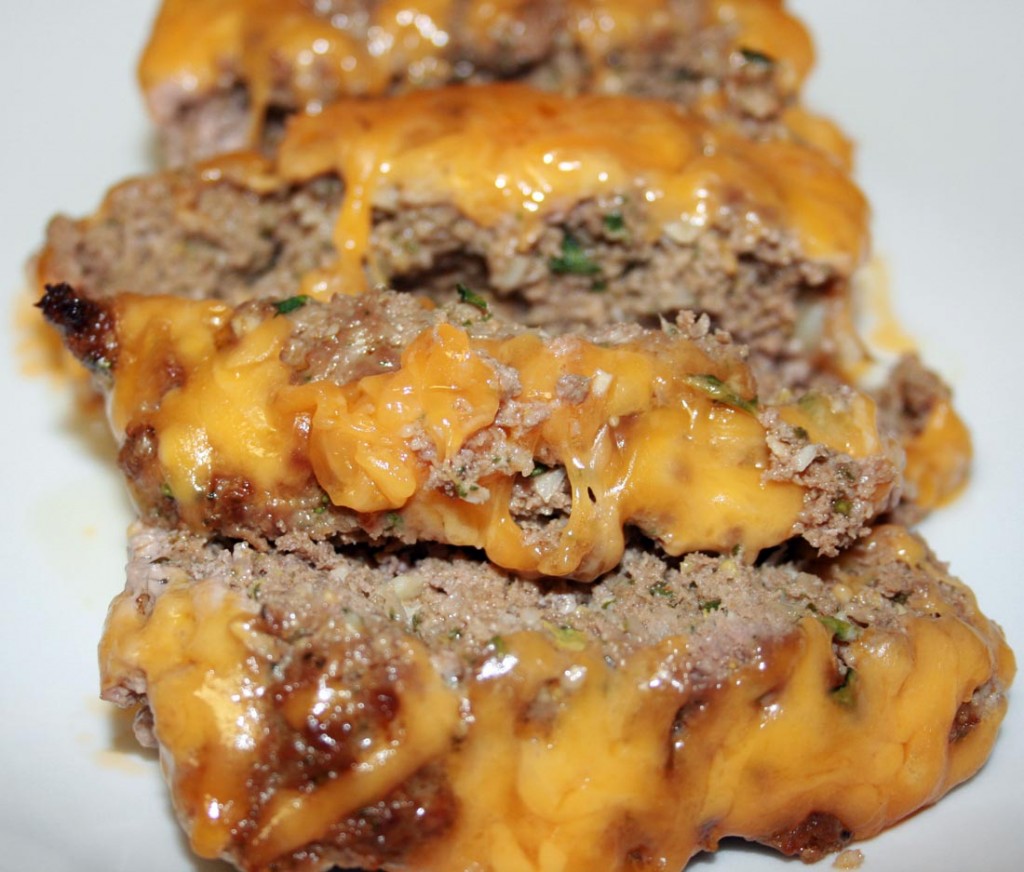
veggie meatloaf

For the most part I don’t have to hide veggies in food to get Little B to eat them. She goes after most of them with a vengeance or by way of an earnest request. Like her all time favorite snack, frozen broccoli “trees”. Yep. Straight out of the freezer. They started out as something to gnaw on when she was teething, but survived as a favorite long after. We try to offer her vegetables every chance we get, even in restaurants, in spite of the restaurants efforts to fill her otherwise. The kid menus at most places include breaded chicken tenders, pasta, sad little mini burgers or a hot dog. Besides being loaded with carbs and often deep fried, such offerings have little nutritional value or variety to expand little palates. More often than not we end up ordering soup or a side of vegetables for her from the non-kid menu. She dives right in. A few times I have tried to order the kid food, but she finds the food as unappealing as I do. It is refreshing to go to a restaurant and actually see smaller versions of the food offered on the rest of the menu, like 1/4 rack of ribs at a barbeque joint, or a kid size version of seafood at a seafood joint. What a concept! I rant because our travels recently have taken us to new restaurants in new places, and I am reminded that sometimes it is not easy to keep Little B eating our version of healthy away from home. This recipe actually stemmed from my desire to use up the vegetable odds and ends in the fridge. It worked very well, held together like meatloaf tends to not want to do. On top of it all Little B ate it up in spite of not being one of her favorite veggies – frozen broccoli, green beans or squash.

Veggie Meatloaf

1 ½ pounds ground beef
2 Tbsp tomato paste
2 stalks celery
1 carrot (or 1 ½ cups mini carrots)
1 small yellow onion
2 cups fresh spinach
4 cloves garlic
3 eggs
½ cup fresh parsley
1 Tbsp dried thyme leaves
1 tsp ground cumin
1 tsp sea salt
½ tsp ground black pepper
1 tsp paprika
1 cup sharp cheddar cheese, grated

In a blender or food processor add tomato paste, celery, carrot, onion, spinach, garlic, eggs, thyme, cumin, salt, pepper and paprika. Pulse until vegetables are very small pieces and herbs are combined. In large bowl combine beef and vegetable mixture. With your bare hands mix meat and vegetables until all the meat is coated and the vegetables are combined with the meat. Press mixture into rectangular bread pan. Bake at 350 for 45 – 55 minutes, until cooked through. Sprinkle top of loaf with cheese and place in hot oven with heat off for five to ten minutes, until cheese is melted. Remove from oven and let rest for about five minutes. Slice in pan, arrange on serving tray and serve.
Caprese Salad

caprese

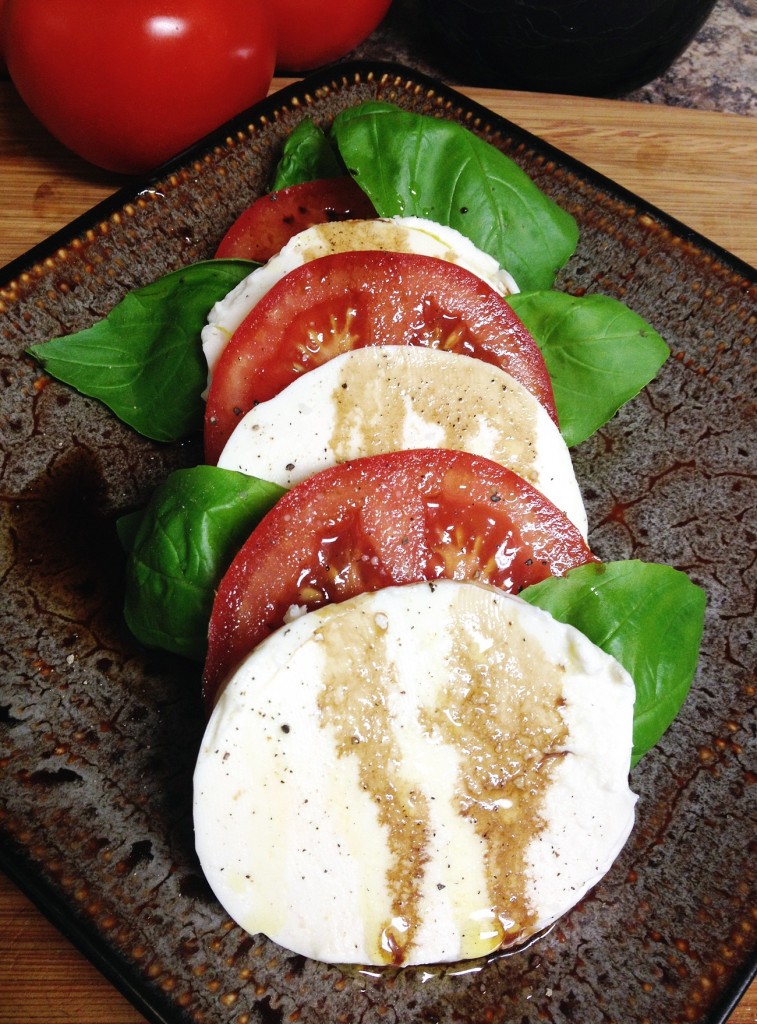
Basil always reminds me of Italy. In 2004 Big D and I explored Rome and Tuscany with another couple. There were, as always, some ups and downs during the trip. Big D’s luggage was not found until halfway through the trip, the pool at our villa was too darned cold for midnight skinny dipping, and cheap grappa is nasty when imbibed warm and straight. The luggage was finally found and took forever because the villa was not easy to find and the local washer/dryer machine was not really a dryer. No solution about the pool, except for some teeth chattering. The grappa was resolved with ice and mixing it with Coke Light (Italy’s version of Diet Coke). Very potent. The reminder basil gives me relates to the week we spent at the little villa. It had three bedrooms upstairs, a dining area and living area downstairs. There was also a lovely, large kitchen. Right outside the kitchen was an herb garden. Even being early summer, it overflowed with rosemary, oregano, thyme, parsley and of course basil. Most nights Big D and I would walk to the co-op in the nearby village, pick out fresh beef and vegetables, walk home, pick a collection of herbs and cook cook cook! The couple we traveled with often went out to eat at one restaurant or another, so we had the place to ourselves for the night. It was a wonderful, quiet time of day after exploring Siena, Pisa, Florence, Rome…. When I smell basil I think of the quiet evenings, fresh steaks and veal, and another, funny and memorable element – frogs croaking in the pond below our bedroom window all night. Believe it or not it was like an elixer, lulling us to sleep. On to the salad. I almost called it insalata caprese, but decided not to because of the – dum dum dum – basalmic vinegar. I loved salad when made with fresh ingredients and high quality olive oil, but never recall seeing the basalmic vinegar offered in Italy, only in the US. My research was consistent. Insalata caprese is typically seasoned with salt, pepper and olive oil.

Caprese Salad

1 large red tomato
1 ball fresh mozzarella
1 large stem fresh basil
Extra Virgin Olive Oil
Aged Basalmic Vinegar
Salt and Pepper to taste

Slice tomato and mozzarella into slices of equal thickness. Sprinkle slices with salt and pepper. Layer slices with leaves of basil. Sprinkle salad with olive oil and basalmic vinegar. Serve immediately.


Double Chocolate Cupcakes

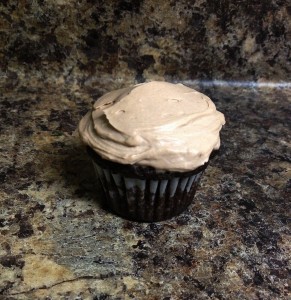
dbl choco cupcakesThese cupcakes came from the mouth of my babe, Little B. As with our strawberry concoction from a while back, she got a baking hankering and we followed it through. Little chocolate cupcakes with chocolate frosting that don’t have any wheat or sugar. She is adamant about those two points, which meant we got to create a new recipe “with only really good tasting ingredients Mommy. Don’t forget they have to be really good” she tells me. Well, they are really good, and buttery and rich. Also a chance to crack eggs and spread frosting, which are always good things. Really good things.

Double Chocolate Cupcakes

Cakes
6 eggs
½ cup butter, room temperature
1 tsp vanilla
¼ cup coconut flour
½ cup golden flaxseed meal
¼ cup cocoa powder
1 tsp pure stevia powder
1 tsp baking soda
½ tsp sea salt
1 tsp ground cinnamon

Frosting
1 8 ounce block cream cheese, room temperature
½ cup butter, room temperature
½ tsp vanilla
¼ cup cocoa powder
½ cup granulated erythritol

Preheat oven to 350 degrees. Combine eggs, butter and vanilla in a medium bowl. Whisk together until combined. In a separate bowl combine flour, meal, cocoa powder, salt, baking soda, cinnamon and stevia. Add dry ingredients to egg mixture and stir until well combined. Divide batter among a lined 12 regular sized or 24 mini muffin pan. Bake for 15 – 18 minutes until tops are firm. Remove from oven and let cool completely. For the frosting add the cheese, vanilla and butter in a medium bowl. Whisk until combined. Add cocoa and erythritol and continue whisking until combined. Chill a few minutes if it comes out thin. Spread frosting over cupcakes. Store cupcakes in the refrigerator until serving – mostly to keep the frosting firm, otherwise they can sit at room temperature.

Stuffed Flank Steak

stuffed flank steak

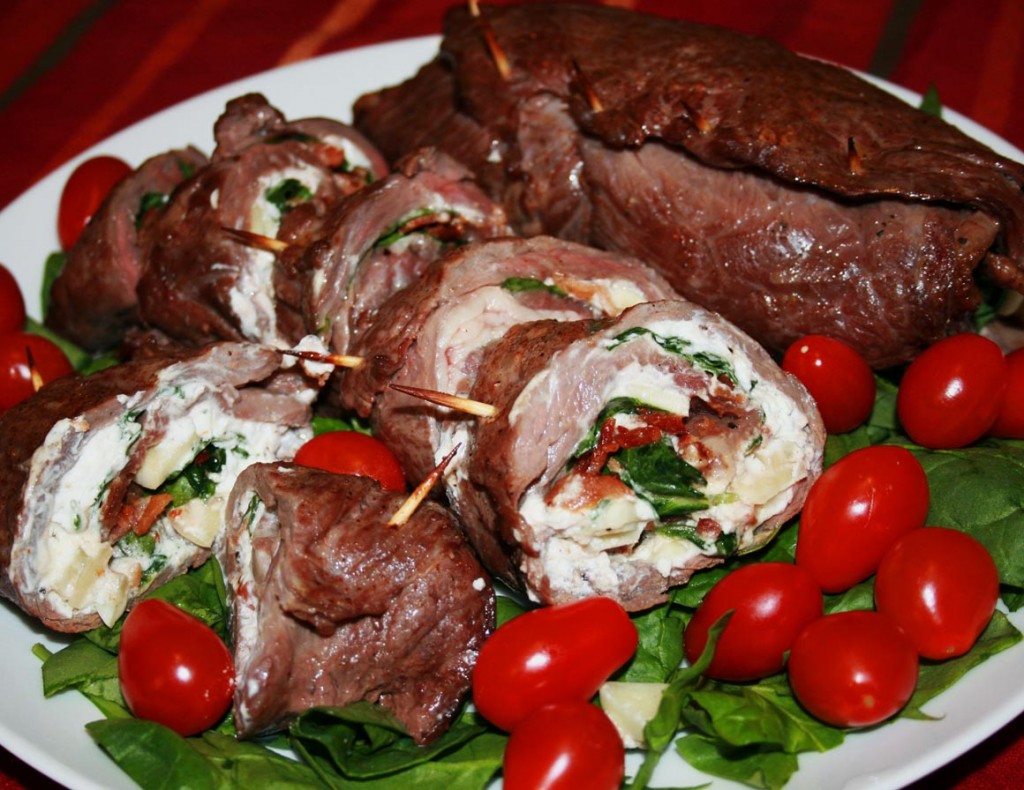
Flank steak, also known as skirt steak, used to be cheap. It was a slightly tougher cut of meat that could be marinated and grilled or broiled, cut up and served south Texas style as fajitas. It still can, but the cheapness is gone. I don’t know what happened. Maybe, like buffalo wings, it got popular and so the price hiked. Did price hike because of demand, or the mere fact the price was higher, and so demand increased? I guess I could go back to my college business textbooks and try to dig deeper, but not gonna do it. The point here is I have turned the once cheap fajita meat into a fancy looking main dish that went POW! Of course, anything with goat cheese tickles my fancy, but the cheese combined with the steak resulted in a tangy, juicy roll. I made a couple and ended up freezing one, and I discovered it froze well, too! Double POW! You can still make old, reliable fajitas with flank steak, but if you want to get a little fancier, you definitely can!

Stuffed Flank Steak

1 – 2 large flank steak (1 ½ – 2 pounds total)
8 ounces bacon
½ cup red onion, finely chopped
4 garlic cloves, sliced
4 – 5 ounces goat cheese
1 Tbsp fresh oregano leaves, coarsely chopped
8 ounces baby spinach leaves
8 – 12 wooden toothpicks

Preheat oven to 400 degrees. Slice bacon into ¼ inch strips. In a medium skillet over medium heat  cook bacon until it begins to release fat. Add onion and garlic and continuing to cook until garlic slices begin to brown. Transfer bacon, onion and garlic to paper towel to soak up extra grease. Lightly salt and pepper the steak. Place steak between two layers of cling wrap. With a tenderizing mallet or side of a regular hammer flatten steak until about ¼ inch thick. Remove the top layer of wrap. Spread the goat cheese on the steak, leaving about ½ inch border around the edges. Make a layer of spinach leaves on top of the cheese. Sprinkle the bacon, garlic and oregano on top of the spinach. Add another layer of spinach. Sprinkle spinach with a little more salt. To roll the steak, begin by lifting the wrap edge on the long side of the steak, pull the steak off the wrap and begin curling it over the spinach. Continue rolling it, squeezing slightly to keep the roll an even size along the length. When completely rolled, place the seam facing up. Impale the roll every inch along the seam with toothpicks. If it is thin enough on the ends, weave a toothpick across them to seal it – like you would a straight pen through cloth. Place the roll in a shallow baking dish or baking sheet covered with foil. Bake for 20 minutes. Turn oven temperature down to 350 degrees and cook for 20 – 30 minutes longer, depending on thickness of steak and desired doneness. I like it more rare, so the shorter cooking time appeals to me.

Steak in Tomato Spinach Sauce

sauteed beef with tomato and spinach sauce

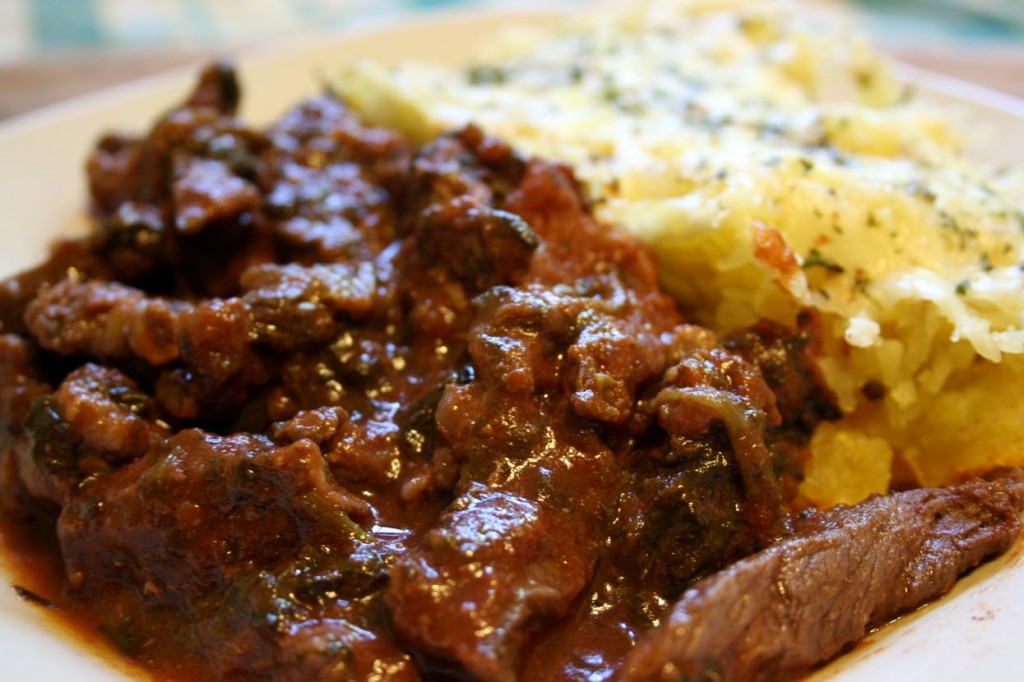
We are moving soon. Again. Not a big move for now, just a short term local move before a bigger move. We don’t know when or where the bigger move will occur, but want to be ready, which means not signing a long term lease or making a real estate purchase. A move translates into me trying to clear out the fridge, freezer and pantry. The less I have to move that is perishable or heavy, the better. This recipe used the last big can of tomatoes from the pantry and some stray steak from the freezer. I like never-been-frozen steak straight off the grill, but if it has been frozen I don’t mind baking or broiling or smothering it in sauce. I like how the tomato and spinach made the sauce nice and rich. Serve it next to or on top of some baked spaghetti squash. I ate too much. Roll me on over to the couch!

Sauteed Steak with Tomato and Spinach

1 Tbsp extra virgin olive oil
½ medium yellow onion, roughly chopped
3 cloves garlic, roughly chopped
2 cups fresh spinach
12 – 14 ounces tomato puree
½ cup dry red wine
2 tsp dried oregano
2 tsp dried parsley
1 tsp ground thyme
1 tsp sugar or sweetener equivalent
1 ½ Tbsp butter
1 pounds thin steak
Salt and pepper to taste

Slice steak against the grain into bite-sized pieces, then season generously with salt and pepper. Set aside. Roughly chop spinach into 1-inch pieces. In medium pot over medium-high heat add olive oil. When oil is hot add onion and garlic. Cook until onion and garlic begins to brown, about two minutes. Add spinach and toss with onion and garlic until most of it wilts, about three minutes. Add oregano, parsley, thyme, tomato, sugar/sweetener and wine, then stir. Lower heat to simmer, and cook uncovered for about ten minutes until it begins to thicken. Cover sauce and cook for 20 – 30 more minutes. Set aside. Right before the simmer time is over heat a shallow saute pan over high heat. Add the butter. Just before it begins to brown add the meat and toss until coated with butter. Continue tossing until steak is cooked to desired doneness (for me about 3 minutes for medium rare). Remove from heat. Add the meat to the sauce, stir and continue simmering for about five minute. Salt to taste. Serve immediately over spaghetti squash, pasta or rice.

Baked Spaghetti Squash with Cheese and Herbs

baked spaghetti squash with cheese and herbs

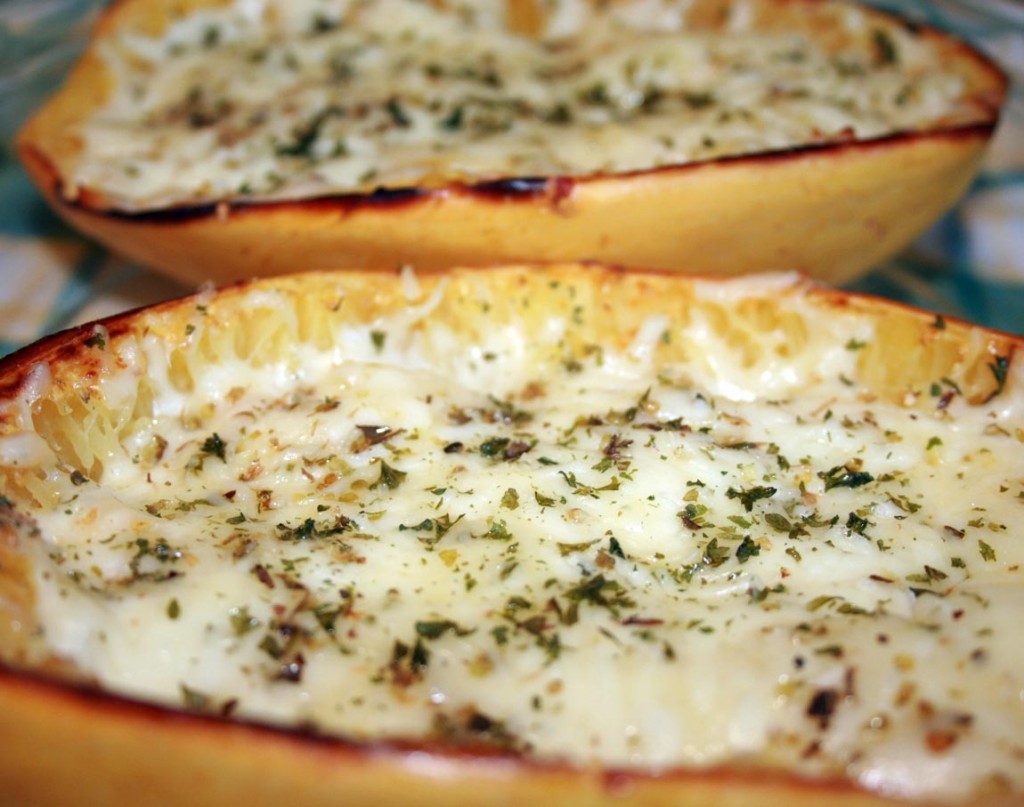
This stuff is just plain cute. Besides being yummy, serving it in the squash skin makes it fun to eat! I remember when I first had spaghetti squash. My mom served it under spaghetti sauce and said it was just like pasta. That caused the problem – unintended, but problematic. I expected some slight mushiness that started to soak up the sauce. What I got was slightly crunchy strings that mixed with the sauce, but did not absorb. I did not find it appealing after the first encounter. Flash forward a few years.  I tried spaghetti squash again, with the expectation of squash, not pasta. It tasted lovely, absorbing the garlic and herbs tossed with it, instead of futilely attempting to soak up marinara. Now that I think back at the two experiences it reminds me to be realistic with Little B when she is trying something new. We often introduce new foods to Little B that may look like other stuff she has had, but will feel and taste different. For example, when you eat regular or instant pudding, then are given chocolate chia pudding, you will have different experiences. They both taste good, but the texture is very different, not to mention the expansive difference in nutritional value. Honestly, I sometimes generalize and refer to most meats as ‘roast’, because she likes roast and it is easier. When it is truly something new I try to describe it for her so she is more willing to not spit it out. When she likes something new she really likes it, but as she gets older she is actually less inclined the try something new. I think it is because of her natural desire right now to display her independence more than not wanting to try something new. I hope it is temporary because she likes spaghetti squash and it is so much better for her than pasta. My ultimate goal is to have new experiences be positive for her. Not always fun or ideal, but result in some learning experience that will move her forward, for the world is full of new experiences. There will be many more new food experiences in her life and I want her to jump into them feet, or mouth first with passion. I know it has made a world of difference for me!

Baked Spaghetti Squash with Cheese and Herbs

1 spaghetti squash
1 Tbsp extra virgin olive oil
Salt to taste
1 tsp garlic powder
½ – 1 cup mozzarella cheese, grated
¼ – ½ cup Parmesan cheese, grated
1 tsp dried oregano
2 tsp dried parsley

Preheat oven to 375 degrees. Cut squash in half lengthwise and remove seeds. Drizzle olive oil on the halves and use your hands to spread it all over the exposed meat of the squash. Place halves face down on baking sheet. Bake for 30 – 45 minutes until inside of squash is soft, but not mushy. Reduce oven temperature to 350 degrees. Flip over squash halves, carefully hold the hot squash with a mitt or towel. Using a fork, scrape the squash meat off the skin, but leave it in the shell. Sprinkle the squash with salt and garlic powder, then gently toss the meat within the skin. Sprinkle with a little more salt. Divide mozzarella on each half, followed by the oregano and parsley. Finish with sprinkling the Parmesan cheese on top. Return squash to oven on baking sheet, cheese side up. Bake for 15 – 20 minutes, until cheese is melted and beginning to brown. Remove from oven and serve immediately – small squash can result in an entire half being a side dish, while larger squash may need to be cut into quarters for serving.

Mojito

mojitoThe first true mojito I had was made by a neighbor many years ago. She prepared a big pitcher as cocktails at the beginning of a dinner party. When poured over ice and muddled mint, it was a welcome refreshment on a warm Virginia evening. Now, many years later in Maryland, watching the tops of the trees sway their new heads filled with leaves, I sip a mojito. The weather is again dropping in temperature from 70 to 50 degrees as rain clouds blow in. Little B plays hopscotch while Big D lounges just inside on the couch reading a book. Yep. Life sucks and I would not trade it for the world.

Mojito

½ lime, divided into thirds
2 – 3 sprigs fresh mint
1 packet sugar or sweetener (about ½ – 1 teaspoon)
1 part rum
5 parts club soda
Ice

In a tall glass add lime pieces, squeezed, and half the mint leaves, gently torn or muddled. Add sweetener and rum. Stir mixture with teaspoon until sweetener is dissolved. Add soda and then ice to fill the glass. Imbibe. Relax.

Wiggly Gelatine Rectangles

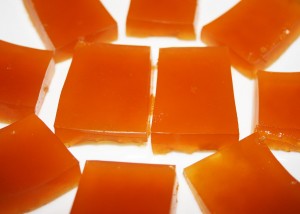
wiggly gelatin rectanglesRooibos tea is a beautiful thing. It tastes good when simply brewed, or in the special way Big D spices it up as iced tea with cinnamon, nutmeg, cloves and citrus when he brews it. Actually, a combination of red rooibos and green rooibos produced the best batch of iced tea I ever had. When Big D first discovered it we could not find it plain in stores, just with other flavors or sweetened up. I found the quick dissolve versions of the tea with peach flavoring to be okay, but not really tasting like tea. We ended up ordering red and green rooibos it in bulk online out of necessity – it was not to be found in any store anywhere near us. The special thing about rooibos tea is the fact it is naturally caffeine free – not processed to be decaffeinated or manipulated to be some arrogant, snooty herbal tea combination. Rooibos is really flavorful tea without pretense. From what I can tell, it is a common beverage in South Africa grown in a specific regions there, and not something you typically find at your local cafe in America. It is a sad thing for America, because it is a lovely tea, if you had not noticed my opinion from the above tea meanderings. Try it if you get a chance. On to the wiggly squares. I found that the flavored gelatine selection at the store includes two bad choices: sweetened either with sugar, or aspartame. Both options are very unappealing. I turned to the top left section of the shelf and saw my solution. Good old plan unflavored gelatin. It can be manipulated in so many ways. Here is a fun, slightly sweet treat that lasted two days, because Little B was very much on a wiggly streak.

Wiggly Gelatin Squares

½ cup lemon or lime juice (you can use orange juice if fresh squeezed)
2 – ¼ ounce packs unflavored gelatine
1 ½ cups brewed rooibos tea, reheated to boiling
1 ½ tsp equivalent of pure stevia

OR

½ cup lemon or lime juice (you can use orange juice if fresh squeezed)
2 – ¼ ounce packs unflavored gelatine
1 pack 4C Totally Light Tea2Go Iced Tea Mix Red Tea Antioxidant Peach Flavor
1 ½ cups boiling water

OR

½ cup lemon or lime juice
2 – ¼ ounce packs unflavored gelatine
1 cup boiling water
5 drops red food coloring
½ cup seltzer water

In a medium bowl add juice and gelatine. Let sit for about one minute, until it the gelatine soaks up all the liquid. Add the tea and stevia (or the tea pack dissolved in the boiling water), then stir until gelatine powder is dissolved. If using ½ cup seltzer add it now and stir a bit. Pour liquid in small baking dish or baking sheet, so it is about ½ inch deep. Chill until set, about three hours. Cut in squares or rectangles and gently lift out with spatula. Play with your wiggly treats then eat! If you have any leftovers store with cling wrap between layers in an airtight container.

I Love You Cake

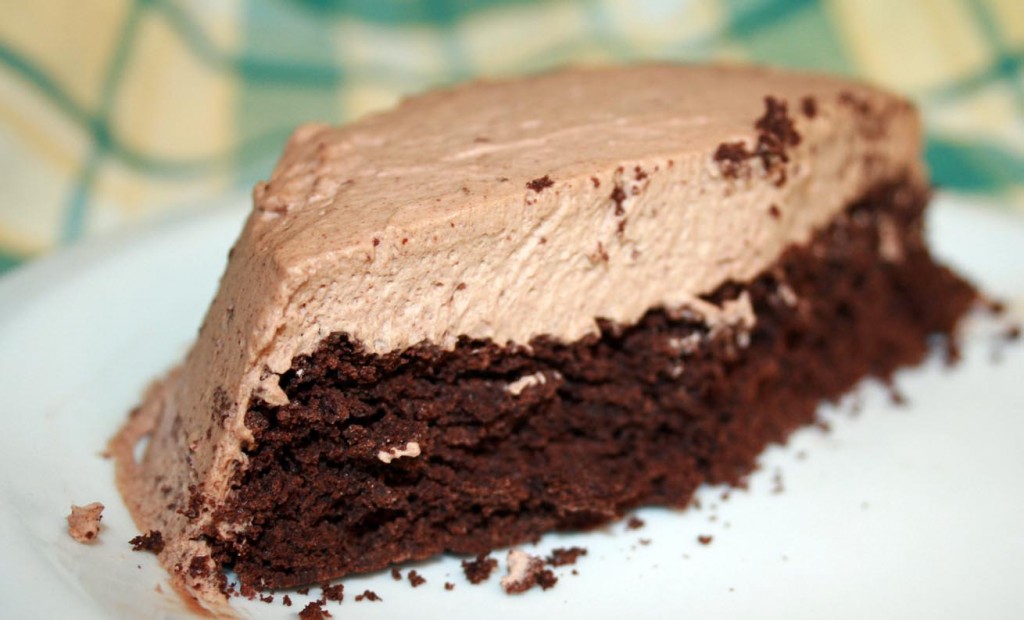
flourless chocolate cake with chocolate cream

Little B loves parties, especially birthday parties. We never have enough reasons to have a cake or open presents. Pretty much every day one toy or person gets a ‘birthday party’, usually involving an intricately constructed tower out of blocks, wrapped in a bath towel and proudly presented. When an already made muffin or cookie will not suffice as the birthday cake, we will make what Little B calls an I Love You Cake. She calls it that because it is made with love and shared with people we love. If we don’t love someone they cannot have any. Her description. I would not necessarily deprive a person of cake if I felt no love for them, but the size of this cake makes it a non-issue most of the time. There is more to making the cake than just having a good dessert. I have learned over time that Little B often wants to do things over and over to practice new skills, and to do so the process does not have to be big or intricate. This cake is perfect – no wheat, no sugar, just the right size to not have leftovers and it gets cooked in the microwave. For today’s cake Little B enjoyed mixing the ingredients with her whisk ‘until it all looked the same’ and concentrated fully on covering with frosting ‘so the whole cake is a secret underneath’. She has really been on a kick to do more frosting practice, as you may remember from the strawberry cupcakes made a while back. I adapted this recipe from Ally over at This Equals Everything. The cake was a lovely, light dessert after feasting on some white pizza we also made together, and she even let Big D help!

I Love You Cake

Cake
1 large egg
1/2 teaspoon vanilla
1 tablespoon heavy cream
1 tablespoon butter, softened
2 tablespoons cocoa
2 tablespoons granular erythritol (I used Truvia)
10 drops liquid stevia
1 teaspoon baking powder

Chocolate Whipped Frosting
½ cup heavy whipping cream
2 tsp granular erythritol
1 Tbsp cocoa powder

Spray a 2-cup measuring cup or small bowl with cooking spray. Add the egg and beat it with a fork. Add the remaining ingredients and whisk until a smooth batter forms. Microwave on HIGH 45-75  seconds or until it puffs up and no longer looks wet in the center. Let it sit for a few minutes, then pop it into the freezer for about five minutes – when you take it out gently coax the cake from the container, which should come out smoothly. While the cake cools make the frosting. For the frosting put the cream, Truvia and cocoa in a tall sided bowl or container. Whip for about 20 seconds with a hand mixer or stick blender until stiff peaks form. Spread the cake with chocolate whipped frosting to cover the whole thing, or simply a dollop of whipped cream, if desired.

Real Taco Meat

real taco meat

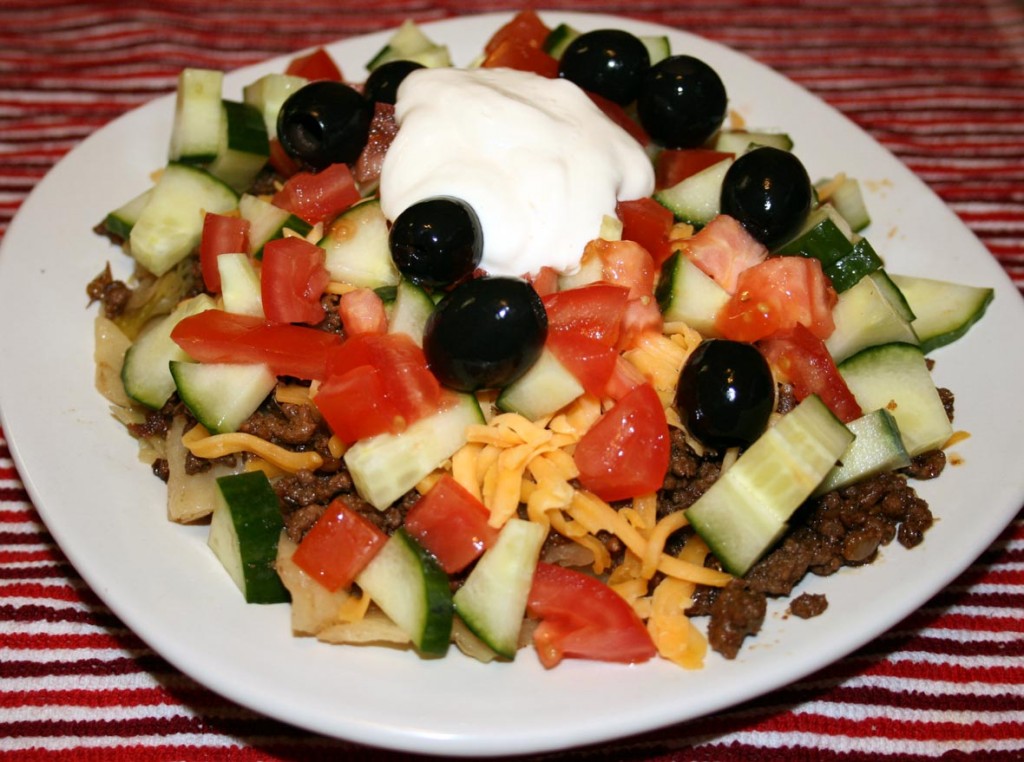
I give up. My nagging of Big D to write a guest post here in my space and talk about some of the awesome meals he makes our family is over. I would love him to update here after he sees it and make fun of all the ‘mistakes’ I make in the ingredients and process. This is the best way I know of to goad him into talking food here. If he does, you will get a taste of his instinctive method of cooking. If he doesn’t take the bait, you still get a recipe from me that reflects a basic version of what we create, eat a lot of and enjoy. I spicing varies with every batch, but it is so easy to make a big pan of it and have it around for quick meals. You can never go wrong using a package of ground beef with this recipe. It reminds me of Texas and the two week party in San Antonio called Fiesta! It happens every April, and seeing the pictures coming out of San Antone recently, along with the memories of partying it up myself when I lived down there, gave me a serious hankering for some good taco meat. Not what you get out of a prepackaged mix, or find in a school cafeteria, but the real taco meat I grew up with, as did Big D. We like it really spicy around here, and achieve an acceptable level of spice with the wonderful smokiness of chipotle peppers in adobo sauce. They are optional, of course, but add a level of flavor Big D and I  have not found elsewhere. Big D often eats it simply as a pile of meat and cheese, occasionally with some vegetables underneath. You can see from the picture I often surround mine with sauteed veggies underneath (this time with cabbage) and top it with tomatoes, cucumber, olives and sour cream. If you look closely, you will actually see meat! The meat can of course also be served with tortillas, but we don’t keep such things around the house anymore. Take a siesta and enjoy!

Real Taco Meat

3 – 4 Tbsp bacon grease or other high heat fat
3 Tbsp cumin seeds
4 garlic cloves, crushed
1 Tbsp red pepper flakes
1 Tbsp Chili powder
1 tsp red cayenne powder
1 Tbsp cumin powder
2 chipotle peppers with 1 Tbsp adobo sauce (optional)
1 medium onion, chopped
1 ½ – 2 pounds ground beef
6 – 8 ounces amber or dark beer
1 tsp sea salt

In a large skillet over high heat add grease. When it is hot add the cumin seeds, red pepper flakes and optional chipotle peppers. Stir frequently until they begin to darken. After a few minutes add the garlic, chili powder, cayenne pepper, cumin powder and optional adobo sauce. Stir for about a minute until it too darkens. Add the onion and cook until the onions begin to sweat and brown. Add the ground beef, breaking it up into small pieces while also combining it with the onion and spice mixture. Add ½ tsp salt and continue stirring. When about half the liquid has reduced, about five to eight minutes, add the beer. Sip on the rest of the beer in the bottle. Continue cooking over high heat until the liquid reduces again. When most of the liquid is cooked off turn down to medium heat and continue cooking until most of the liquid is gone. The meat should begin searing. Drink some more beer. After searing the meat for about a minute turn down the heat to low and simmer. Taste and add more salt to preferred saltiness. Let sit with the heat off for about ten minutes before serving.

Post Navigation