Any Kitchen Will Do

Give me a kitchen and I will cook.

Archive for the category “side dish”

Crispy Baked Chips

You want fries with that? Of course, but I shouldn’t…

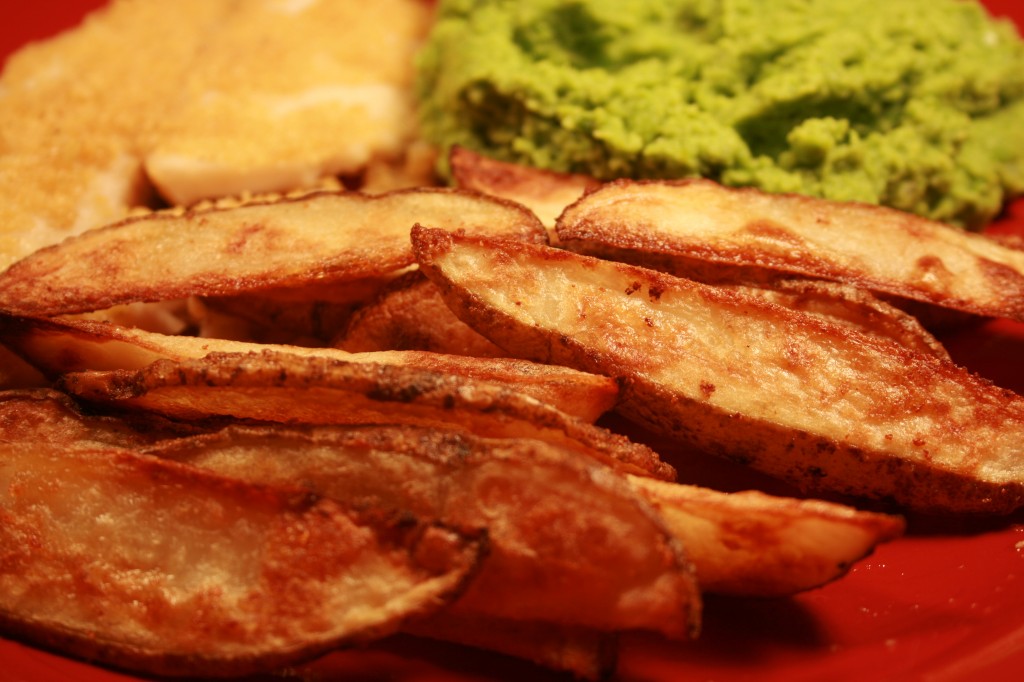
Although I like a lot of foods that are good for me, I also crave some of those foods that are quite lacking in nutritional value. You know, oreos, macaroni and cheese, loaded baked potato and of course the fries. Yum! Usually made with processed potatoes and deep fried, they go well with burgers and ribs and under a pile of chili and cheese. An occasional small serving is no problem, but when they come so easily almost everywhere we eat out – and we eat out quite frequently – it gets harder and harder to resist. One way that helps me is to make some at home, which are just as good or loads better than those found in a restaurant. They cook up so crispy, and the seasoning begs not to be dipped in ketsup, but if absolutely necessary, I guess it could be done. These are chips, as in fish ‘n chips! These little guys taste like they could have been deep fried, but they are baked, much lower fat than their deep-fried counterparts, crispy and addictive! I served them up with mushed peas and some tilapia cooked in a skidge of oil and lime juice.

Crispy Baked Chips

4 small or 3 medium russet potatoes
2 Tbsp canola or olive oil
1 tsp salt
1 tsp garlic powder
Dash of pepper

Wash and slice potatoes into thin wedges lengthwise, approximately 12 per potato. Soak slices in a bowl of cold water for 10 minutes. Preheat oven to 425F. Lay out wedges on a towel to dry, pressing down from above using another towel to get as much water off as possible. Place wedges in a bowl and sprinkle with oil, salt, pepper and garlic, tossing until completely coated. Spread wedges out in one layer on large cookie sheet. Bake in oven for about 20 minutes. Flip wedges over, rotate pan 180 degrees to ensure even baking and return to oven for 10-20 minutes. The second baking time varies so much because the size of the wedges may vary. By the time the first bake time is over the potatoes will be cooked – the second time is to ensure complete and utter crispiness. Serve immediately. The recipe can be easily doubled, just make sure you have sufficient cookie sheet space. If doubling the recipe and cooking on two cookie sheets, which probably means using two levels of the stove, you will need to cook them twenty minutes, then switch levels for the additional time to allow for even browning.
 

Deviled Eggs

Devil may care, but I do not. Eat eggs. Sometimes the healthy eating powers-that-be say they are bad for you, then they change their minds and say they are good for you. Some say the chicken came first while others insist the egg was first in line. They are a great source of cheap protein, make for a great breakfast that will actually hold me until lunch, and, by golly, I like them. Eggs can make sauces better tasting or baked goods light and airy. As Easter approaches there is always a need for ways to use up those colored boiled eggs. Besides egg salad there is at least one other way! Make them deviled!

I like making deviled eggs, and an actual deviled egg dish is one of the few specialty serving plates I have on hand at the moment. There is nothing worse than arriving at a party with a plate of deviled eggs, only to find that the sharp right turn you took in the car resulted in the slippery little things smushing up on one side of the plate and the decorated tops all ending up on their sides. Growing up we made them often, only to scarf them down as soon as the whites were filled. Personally I despise the use of sweet pickles or relish in deviled eggs. It is a contradiction I will most likely spit out such abominations if they ever cross my lips. Now dill pickles are another story. They emphasize the already savory nature of the boiled eggs and always taste good with a little mustard mixed in. I am not sure why I started on a pickle tangent because I don’t even use any for this recipe…

From what I can tell, deviled eggs got their name from being spicy, as in full of flavor, and almost evil in their ability to tempt. Even the ancient Romans were known to partake of them. Some people more devout than myself are wont to call them angel eggs, but there is nothing angelic about these babies. What food with horseradish could possibly be considered angelic, of course the seraphim may be the closest. Seraphim eggs? Um. No.

Deviled Eggs

12 large eggs
½ tsp horseradish
1 tsp yellow or stone ground mustard
½ tsp curry powder
1-2 Tbsp mayonnaise or plain yogurt
2 Tbsp green onion, finely chopped

Fill a large pot with about 3” of water. Place over high heat on stove top and bring to a boil. With a slotted spoon gently place eggs, one at a time, into the boiling water. Lower heat to maintain a simmer and cook eggs for 12-15 minutes until hard boiled. Remove pan from heat and tip to let hot water run out while cold water runs into the pot, gradually replacing hot water with cold. Let set for about five minutes then shake pan around to crack shells and loosen them from the cooked whites. Peels should easily come off the eggs at this point. After peeling let the eggs cool completely. When cold, slice eggs in half lengthwise and carefully remove yolks, placing them in a small bowl, while avoiding any damage to the whites. Sometimes the egg whites may tear along the middle of the egg, which may ruin the egg white for using to devil. Just cut them in half along the tear – if you rely on a deviled egg serving dish the whites will sit in the divets of the plate and hold the yolk mixture whether they are cut lengthwise or width-wise. Arrange egg whites on serving dish.

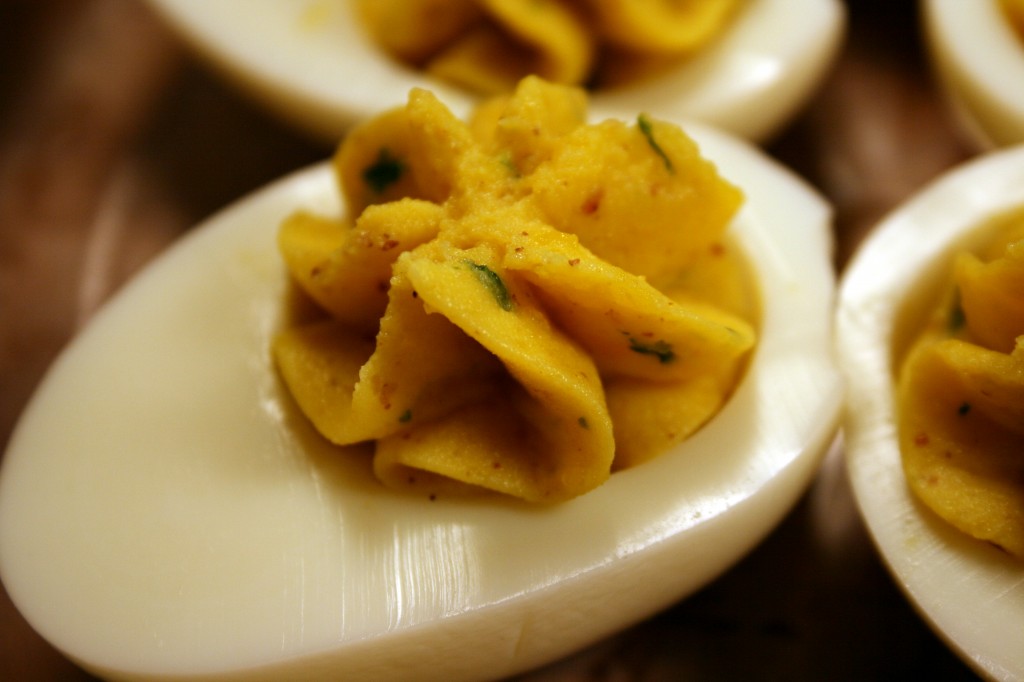
Add all remaining ingredients to egg yolks and combine well. Take care to only use as much mayonnaise or yogurt as needed to thin out the mixture, but stop short of making the mixture runny. It should be thick enough to hold shape, similar to decorating frosting. Place egg yolk mixture into cake decorating bag with a large decorating tip*. Fill egg whites with yolk mixture, using any kind of swirl or twist motion to make them pretty. Chill until time to serve.

*Instead of cake decorating equipment you can use a strong plastic bag (like Ziploc®). Fill bag with yolk mixture and pack it down into one corner. Snip the corner of the bag with scissors, making about a 1/8” to ¼” opening. Squeeze mixture through opening into egg white halves.

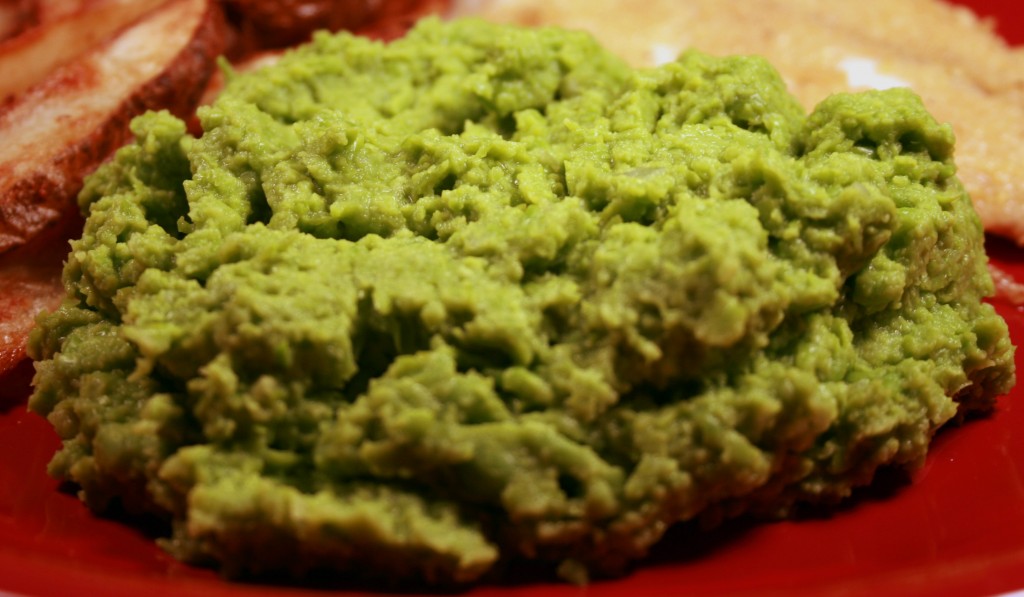
Mushed Peas

On the first day of my first trip to Ireland I stayed up for 36 hours straight. The original plan was to sleep on the flight over the Atlantic, but a merry band of fine looking Italian men decided to have a party about five rows away, so any thoughts of peace and quiet went out the window. There are worse reasons for not sleeping. We landed in Shannon, went through customs, found our B&B and took off in our little car to explore. Bumping along a narrow road on the way to the Cliffs of Moher we came across a little cottage converted into a small cafe. Our rumbling stomachs could be heard over the car engine, so we stopped for a bite. It may have been the beautiful, lush green surroundings, but the fish and chips with mushed peas we ate for lunch tasted magical. Our table of two made up half the customers in the place for the entirety of our meal. It was quiet, we could see through windows in three directions, and were slightly punchy from being awake in our 30th hour. It was a blissful break from the rushed feeling inherent in travel. A decade later I still recall the cup of bright peas, the subtle mint mixed in, and how amazed I was that I never thought of mushing them before. Some people call them mashed, other mushy, but I call them mushed because that is what they were called during my first encounter. Oh, and the Cliffs of Moher are really tall and otherwise left me speechless.

Mushed Peas

2 pounds frozen peas
½ small onion, finely diced
2 Tbsp butter
1 Tbsp fresh mint, minced leaves only
2 Tbsp whole milk
Salt and Pepper to taste

Melt butter in a pot. Add peas and onion and cook covered on low until peas and onion are tender. Add mint. Mash with a potato masher, food processor, hand blender or other macerating device you may have handy. Add milk and stir. Season to taste with salt and pepper – take care with the salt and pepper because a little goes a long way with mushed peas. Serve warm.

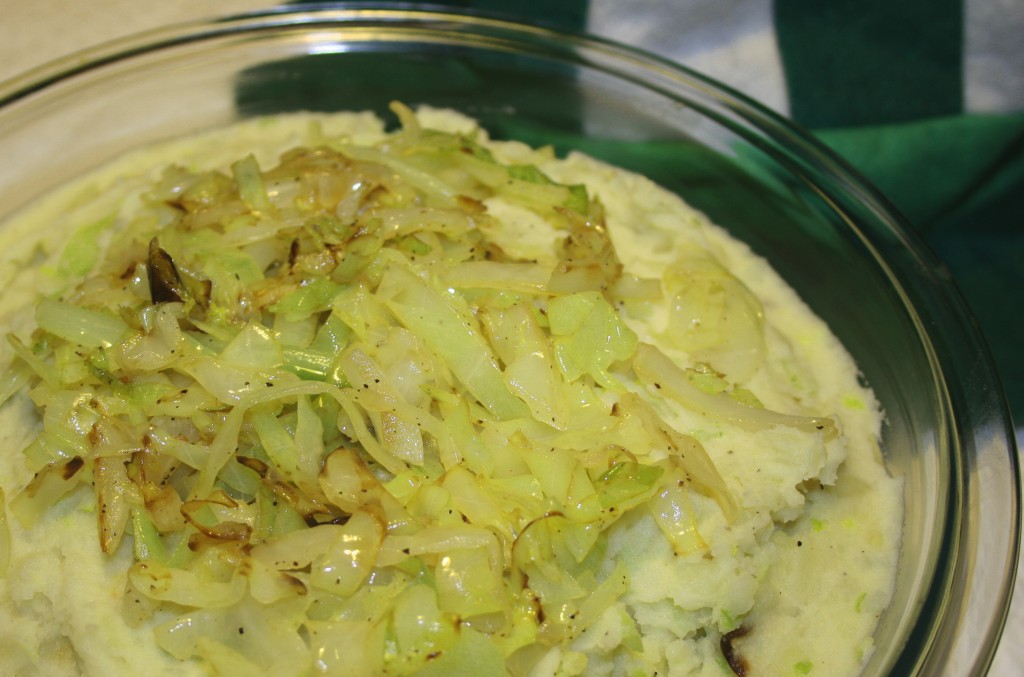
Colcannon

It is March! March means two things to me – the world changes from brown to green and the 17th of the month is one of my favorite days of the year. As St. Patrick’s Day nears I ponder more and more the Irish dishes I consider comfort food. Frankly, when I think of Ireland and food my thoughts do not often float beyond seafood and potato dishes. My ancestors survived on such things, so it is no wonder I enjoy exploring them. Traditional Irish-American foods that start popping up around St. Patrick’s Day usually include corned beef, but pork is more often the protein in Irish dishes. Over the next few posts leading up to St. Patty’s Day I am going to cover some of my favorite Irish dishes, prepared in ways my family enjoys them. Let’s see where this journey takes us! I am starting with colcannon, which goes well with pork. Go figure.

One of my favorite pubs is The Lion and Rose British Restaurant and Pub, of which there are a few locations down in San Antonio and Austin, Texas. The first one opened in a little shopping center in Alamo Heights, an old neighborhood in San Antonio near my alma mater. So far they have retained the deliciousness of their food, and hopefully continue to do so as the number of locations grows. I mention the pub because they serve a dish I love, but for some reason rarely make – colcannon. Uh, technically their menu item is bubble and squeak (an English stove top version of colcannon), but the flavor is much the same and so easy to make myself. When I eat mashed potatoes there are usually vegetables along side and I always end up mixing them together. Mashed potatoes and corn? Mix. Mashed potatoes and peas? Mix. Mashed potatoes and green beans? Mix. Mashed potatoes and cabbage. Yep, mix.

The traditional versions of colcannon I have come across include boiling. A lot of boiling. I can boil everything and mix it together as was done in the past, but I am partial to sauteed cabbage. The searing of cabbage that is barely crispy and just becoming tender makes me melt. I guess you can say I make a hybrid of colcannon and bubble and squeak. I am okay with that statement. If you are like me and serve colcannon with meat, at the last minute you suddenly worry that you forgot to make a vegetable for dinner. Never fear. The cabbage IN the colcannon is actually the vegetable! Big D got a laugh out of my omigosh-I-forgot-the-veggies moment.

Colcannon

3 pounds potatoes, peeled
1 small (or ½ medium) head cabbage
1 medium leek (green sections removed), thinly sliced
1 cup milk
½ cup butter
Salt and pepper to taste

Chop potatoes into equal sized pieces (about 4-6 pieces per potato). Drop potatoes into boiling salt water and cook until tender, about 20 minutes. Drain and set aside. While potatoes are cooking, core and thinly slice the cabbage. In a large skillet melt 1 Tbsp of the butter over medium high heat. Add cabbage and toss to distribute the butter. Turn down the heat to medium, add salt and pepper to taste and cover, cooking until cabbage is tender. Occasionally toss the cabbage, allowing some browning to occur. While the cabbage is cooking add the remaining butter to a small sauce pan and melt. Add leek to butter and cook until transparent. Add milk and simmer until heated through, using salt and pepper to taste. Mash the potatoes until smooth (they may look dry). Add the onion mixture (the potatoes won’t look dry anymore). Add the cabbage, setting aside about one cup for garnish. Stir until all is combined. Top with the set aside cabbage. Serve hot.

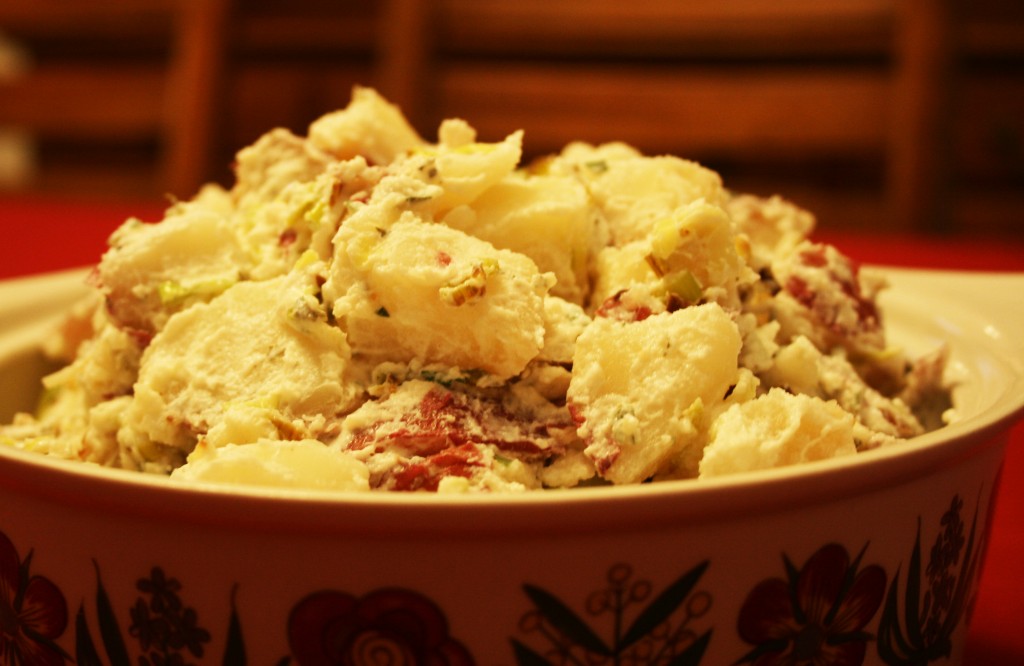
Potato Leek Salad

I am on a quest to eat food I love while reducing the fat and calories of said food. It is difficult because I love bread and butter and beef and pasta and cheese. Oh the cheese! I understand the concept of moderation, and practice it as much as possible, but when food is good it is so easy to be bad. Where potato salad is concerned I like the kind dressed with mayonnaise and mustard, complimenting a pile of smoked brisket or ribs. The other night I could not sleep and craved the not-so-good-for-me potato salad my dad made in big batches for years. He would smoke meats for hours and hours. When the meat was a few hours from being done he would make the potato salad so it could chill and allow the flavors to meet each other. I say he made the salad, but it was actually a group effort. My mom and I would boil the potatoes and eggs, chop the onions, bell pepper, celery and herbs. Dad would inspect our work and let us know if the chop size and quantities were just right, or we needed to work on them a little more. He would pull out the huge green glass bowl from the cabinet and put all the ingredients together, taste testing to see if it needed a little more of this, a little more of that. When he was done with his part it was again time for mom and I to swoop in and decorate the top with bell pepper and egg slices, finishing with sprinkle of paprika. I loved my dad’s potato salad, but it was far from healthy. In my desire to eat healthier and not fade away from complications of diabetes, which took his life last year, I offer the following dish. It appeases my potato salad craving without as much in the way of fat and calories. Enjoy!

Potato Leek Salad

5 lbs red potatoes*
2 leeks
2 Tbsp olive oil
Salt and pepper to taste
14 oz nonfat Greek yogurt
¼ cup parsley, chopped
1 lime, juiced
2 cloves garlic, crushed
8 ounces mushrooms, diced
2 tsp dried tarragon

Cook red potatoes in gently boiling salted water until tender, about 15 minutes, depending on their size. Drain out the water, letting the potatoes cool and dry out (in the refrigerator for faster results). Separate white and green portions of the leeks, discarding the tough outer and upper dark green potions. Thinly slice white/light green sections to form rings. Heat large sauté pan to medium high. Add oil. When oil is hot add leeks. Stir regularly to prevent burning, but not so much that the leeks are prevented from browning. Sprinkle with salt and pepper to your liking. After about 10 minutes add the mushrooms and cook for 5 – 10 more minutes. Set aside to cool. Cut potatoes into bite sized pieces. In a large bowl combine yogurt, juice, garlic, tarragon, parsley and a dash of salt. If the dressing tastes a little salty do not worry – it will be spread among the potatoes which will absorb it. Add leeks and mushrooms to the dressing. Toss potatoes with dressing until coated. Refrigerate until chilled through before serving, at least two hours.

*I prefer to leave the skin on red potatoes for this recipe, but of course if you prefer they can be peeled without significantly affecting the final product. Go ahead – reject the most nutritious part of our root friends. I’m sure they won’t mind…


Mexican Rice

I used to think of Mexican rice as the bland, tomato-y part of my school lunch I did not eat. Then, it was the sticky stuff that always came with a Mexican meal, but I always left it for last in case I filled up on other stuff, and I always did. I don’t have anything against rice, but it is a starchy filler that is often my last priority after protein, fruits and vegetables. If I don’t like how it tastes I am not going to eat it. I am a big girl and sometimes choose to leave food on my plate.

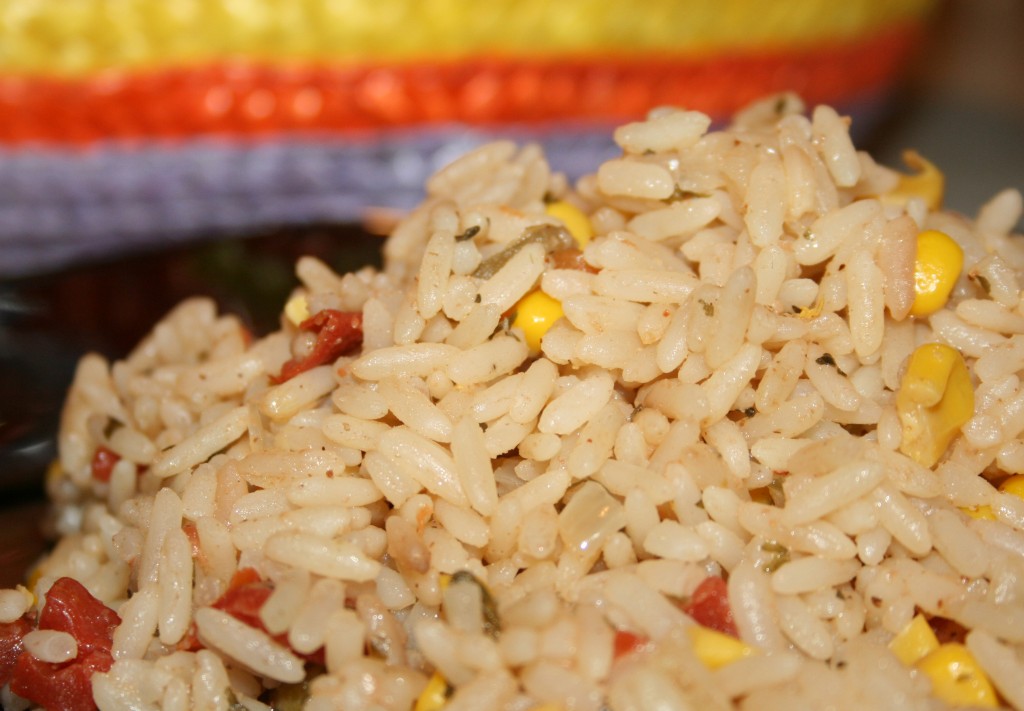
Now I make my own Mexican Rice, which is not very red, not very sticky, not very bland and has just the right amount of vegetables in it. You may think using both green chiles and jalapenos is an overdose on heat, but it really isn’t. The jalapenos make it smoky and the chiles make it tangy, and both flavors are soaked up by the rice and spread throughout the dish. Just try it.

Mexican Rice

2 cups uncooked parboiled rice

1 Tbsp butter

2 cups water

2 cups chicken broth

1 tsp salt

½ tsp chili powder

1 tsp ground cumin

1 Tbsp fresh cilantro, chopped

1 Tbsp fresh parsley, chopped

1 small onion, diced

1 small tomato, diced

4 ounces green chiles, diced

1 cup corn, removed from cob

½ jalapeno, diced (optional)

Melt butter over high heat in medium pot. Add onion, jalapeno (if being used) and corn, cooking until the corn browns and the onion begins to sweat. Add rice, salt, cilantro, parsley and chili powder and stir until rice begins to brown. Add tomato, chiles* and corn, stirring until blended. Add water and chicken broth*, bringing the mixture to a boil. Lower heat to a simmer and cook until liquid is absorbed, about 20 minutes. Let set for about five minutes before serving.

*Sometimes if I am lacking for fresh chiles and tomatoes I will use a can of Rotel tomatoes and chiles instead. I drain the can and retain the juice for use as part of the water and broth liquid (within the four cups needed) to cook the rice.

Post Navigation