Any Kitchen Will Do

Give me a kitchen and I will cook.

Archive for the category “vegetables”

Pecan Green Beans

pecangreenbeans

One of my favorite low carbohydrate vegetable dishes is green beans. I especially love them with crunchy bits of nuts in them and a pleasant coating of butter.

Whenever I make these I am reminded of the green beans my grandmother used to make. She started with fresh green beans and a little fat like I do, but her cooking approach was very different. She would boil those suckers all afternoon until they were mush at dinner time. They tasted great, but there was no need for teeth to eat them! The great thing about them was flavors from the pork belly she used for the fat element. The pork flavor permeated the beans, so every bite was delicious!

I don’t make mine the same way, partially because I don’t have all day to monitor the bubbling pot, but also because I like my cooked green beans with a little snap to them. The cooking time in this recipe softens the beans a bit, but they can still hold their own as individual, non-mushy beans, and you will need teeth to eat them.

Pecan Green Beans

1/4 cup bacon grease or butter
8 cups trimmed, bite-sized fresh green beans
1 1/2 cups roughly chopped pecans
1 teaspoon garlic powder
1 teaspoon onion powder
Sea salt and ground black pepper to taste

In a large skillet over medium-high heat melt the grease or butter. Add the pecans and let cook for about three minutes.

Add the green beans, garlic powder and onion powder. Toss until beans are coated and nuts distributed among them.

Lower heat to medium, cover and let cook for about five minutes, until beans begin to soften. Toss beans and cover again, cooking for five more minutes.

Season with salt and pepper, toss beans. Beans can be served immediately or cooked longer to make them the desired softness.


Tomato Broccoli Chicken

italianchickenThe other day I was craving lasagna. In the past I have made it grain free by substituting zucchini or cabbage for the noodle layers. I wanted the same flavors a little easier and faster than prepping and constructing a casserole. The cheese and tomato sauce and chicken really hit the spot. The leftovers were even better!

Tomato Broccoli Chicken

8 chicken thighs, bone in (skin optional)
2 cups tomato sauce
4 cups diced tomatoes with juices
2 tablespoons dried parsley
1 tablespoon dried basil leaves
2 teaspoons dried oregano leaves
2 garlic cloves, finely minced
1/4 cup finely minced white onion
1 teaspoon sea salt
4 cups broccoli florets
1/2 cup finely grated Parmesan cheese
2 cups grated colby jack cheese
Sea salt and and ground black pepper to taste

In a medium pot over medium heat combine the tomato sauce, diced tomatoes, parsley, basil, oregano, garlic and salt. When sauce begins to boil turn temperature down to low. Cover and let simmer for 15 minutes, then remove from heat.

Preheat oven to 350 degrees.

In a 9×13 inch baking dish pour a thin layer of sauce. Generously salt and pepper all sides of the chicken and place, skin side up, in the pan. Arrange the broccoli florets in between the chicken thighs. Sprinkle the Parmesan cheese on top of the chicken and broccoli.

Pour the rest of the sauce over the chicken and broccoli, leaving some room at the top of the pan for cheese and bubbling. Sprinkle the colby jack cheese evenly on top of the sauce. Place on middle rack of the oven and bake for 45 minutes, until chicken is cooked through (at least 165 degrees).

Remove from oven, let rest for ten minutes before serving.


Cucumber Salad

cucumbersaladAs spring springs around here I move away from warm, gooey comfort foods and head straight towards colder foods. My morning coffee is no longer a steaming hot cup from the French press, but cold brew poured over ice after chilling for a day. As I walk around in cropped pants instead of jeans and sweaters I love opening the fridge and grabbing a bowl of chilled salad for lunch, like this one!

In past years I have done themed posts leading up to St. Patrick’s Day, either by culture or color. This year all I can muster is the green from these cucumbers. This is not a bad thing, just with so much going on leading up to our move my priorities have been elsewhere, like making products for Grain Free Haven, ensuring the 40 year old Christmas ornaments are safely wrapped and packed, and the DVDs we barely ever watch anymore (but still keep the movies we love since Netflix and Amazon Prime are fickle).

If you want to explore traditional and not so traditional Irish dishes, here are a few like Colcannon, Corned Beef, Shepherd’s Pie     Dublin Coddle or a Traditional Irish Breakfast. Some green themed items can be found too, like Salsa Verde, Mushed Peas or Buttered Leeks. May the luck of the Irish be with you this week, and the wearing of the green reduce the number of pinches you get! Slainte!

Cucumber Salad

2 medium cucumbers (or one large English cucumber)
1/2 medium white or yellow onion
1/2 cup sour cream
2 teaspoons distilled white vinegar
2 teaspoons dried dill leaves
1/2 teaspoon sea salt
1/4 teaspoon ground black pepper

In a small bowl whisk together all ingredients except for the cucumber and onion.

Slice cucumbers into thin discs, either by hand or with a mandolin. Place slices in a large bowl. Thinly julienne slice the onion and add to the bowl with cucumber slices.

Pour dressing over vegetables and toss until well coated. Cover and chill for at least one hour and toss again right before serving.


Roasted Carrots

roastedcarrots

For the past few weeks I have spent a lot of time at the Dallas Farmers 
Market supporting my business Grain Free Haven.  Between customers 
I found myself regularly staring at the goodies sold by the produce vendor 
across from my booth. They have a lot of greens and citrus right now, but 
I especially have been coveting the carrots. Long, slender and bright orange 
with springy green tops. 

I don't eat a lot of root vegetables like carrots, potatoes or turnips. They 
are not entirely evil, but have a higher level of starches and sugars 
than I usually consume. The higher number of carbohydrates in a food, 
the more cravings I get after eating them. Ironically, after focusing on 
eating steamed veggies like broccoli, cauliflower and celery of late 
(about 1-2 net carbohydrates per serving) I got a craving for the lovely 
carrots (about 4 net carbohydrates per serving). I actually blame the 
tomatoes and cucumber (2-5 net carbohydrates per serving depending 
on size) I have been piling on my salads. I'm thinking that if the worst 
craving I have is for roasted carrots I am doing pretty well in the 
craving department!

Yesterday I finally gave in and bought some of the carrots. I will be 
using the tops later for some veggie or chicken broth, but for now I 
roasted and enjoyed the lovely carrots. Here is the simple way I 
prepared them. 

I loved every bite, but will definitely be going back to the green 
roughage tomorrow!
Roasted Carrots

10-12 medium carrots, tops removed and rinsed 
8 whole garlic cloves 
1/3 cup extra virgin olive oil 
1 teaspoon onion powder 
1 teaspoon sea salt 
1/2 teaspoon ground black pepper 
1 tablespoon dried parsley leaves 

Preheat oven to 400 degrees. 

In a small bowl combine the oil, onion powder, salt, pepper and parsley. 
Using your hands or a basting brush cover all the carrots with the 
mixture and place them on a shallow baking sheet. 

Spread the garlic cloves randomly among the carrots. 

Bake for 20 minutes, then remove from oven. Carrots should be slightly 
softened but not mushy. If you prefer them softer, shake the pan so the 
side of the carrots touching the pan changes, then cook for 5-10 more 
minutes. Serve immediately.

Spicy Stuffed Tomatoes

spicystuffedtomatoes

There must have been a bumper crop of tomatoes somewhere nearby, because there were tons of big, beautiful ‘maters in the local produce section at the store this week! We often have fresh tomatoes in our kitchen and chop them up raw as a quick side dish, but I decided this time to stuff them and bake them. The cooler weather leads me towards warm food. You can never have too many variations on vegetable dishes, can you?

I used to make these with oatmeal as filler, but since using it would conflict with our current habit of eating grain free, I replace it by adding more veggies and sausage. Worked out great!

As the new calendar year begins and the holiday activity wanes I ponder what is to come during the next twelve months. Last year Big D and I both shifted the work we do to bring in money, and shifted where we live. Prospects look bright for our efforts to follow our passions, with starting a new business and writing new books. This year is starting on very bright notes, we are working hard and loving it, while also finding opportunities to spend more time with family and friends. I hope you all start the year with positive outlooks, for the perspective you take will most definitely influence where you go in life. Why not do it positively. You will be amazed where you will go with it!

Spicy Stuffed Tomatoes

8 ripe tomatoes
1/2 medium onion
1/2 green bell pepper
4 ounces white button mushrooms
2 links hot Italian sausage, cooked and roughly chopped
4 cloves garlic
2 tablespoons extra virgin olive oil
1/2 teaspoon cayenne pepper powder
1/2 teaspoons sea salt
1/4 teaspoons ground black pepper
2 teaspoons hot sauce (suggest Tabasco Smoked Chipotle Sauce)
1 cup mozzarella cheese
1/4 cup grated parmesan cheese
Sea salt and ground black pepper to taste

Cut off top portion of each tomato, making a flat top. Scrape out seeds and meat core from inside of tomato. Turn tomatoes cut side down on a towel to allow extra juice to run out. Finely chop mushrooms, onion, bell pepper and garlic. Heat oil in a medium sauté pan over medium high heat. Add garlic and onion into pan and cook about three minutes, until onions begin to sweat. Add bell pepper and mushrooms, cooking another five minutes until onions begin to brown and mushrooms release their liquid. Add cayenne pepper powder, salt, black pepper and hot sauce. Stir and simmer on low for five more minutes. Remove from heat and let cool slightly.

Preheat oven to 350 degrees.

Flip over tomatoes so cut side is up. Sprinkle the inside of each with sea salt and ground black pepper to taste. Drop sausage into the bottom of each tomato, dividing it evenly among the eight tomatoes. Spoon sautéed mixture into each tomato, dividing it equally among the eight tomatoes as well.

Place stuffed tomatoes in a baking dish that allows them to fit snugly, so as to support each other while cooking. Dish size can vary due to size of tomatoes, but 9×9 inch should work. Spoon 1/8 cup mozzarella cheese on the top of each tomato, pressing it down firmly so it stays on top of each. Sprinkle parmesan cheese on top of each tomato. Bake for 30-35 minutes, until cheese browns and tomato skin wrinkles and begins to crack. Remove from oven and serve immediately.

Mushroom Goat Cheese Soup

mushroomgoatchzsoup

Today I want to talk about fungus. Something I use a lot for so many different reasons it is just silly.

Mushrooms range from having very little flavor of their own, like white button mushrooms, to some that are earthy or taste downright meaty, like Portobello or Shiitake.  I like stuffing big ones with what could otherwise go in a sandwich or pizza, like my Portobello Pizza, or use them to fill out the volume of dish, like my Chicken Faux Fried Rice.

One thing that comes up sometimes is how to clean mushrooms. I never come home with them and drop them in water to get the dirt off, but I do rinse them with water right before I use them. Some people think that rinsing with water is mushroom blasphemy and do nothing more than wipe them with a towel or lightly brush them. You see, mushrooms are like sponges. Whether it is plain water or broth or tomato sauce, they soak up liquid that gets in contact with them. If you soak them or rinse them in water too far in advance of using them in a dish they can absorb the water and dilute instead of enhance. I only rinse them right before using them, so never had a problem with waterlogged ‘shrooms.

They are also powerful vehicles for other flavors. Just like they absorb water, other liquids are soaked up by them as well. I often use milder white button mushrooms when I want them to take on other flavors, like in soup or tomato sauces. If I want them to stand more on their own I will go for the earthier, meatier types of mushrooms.

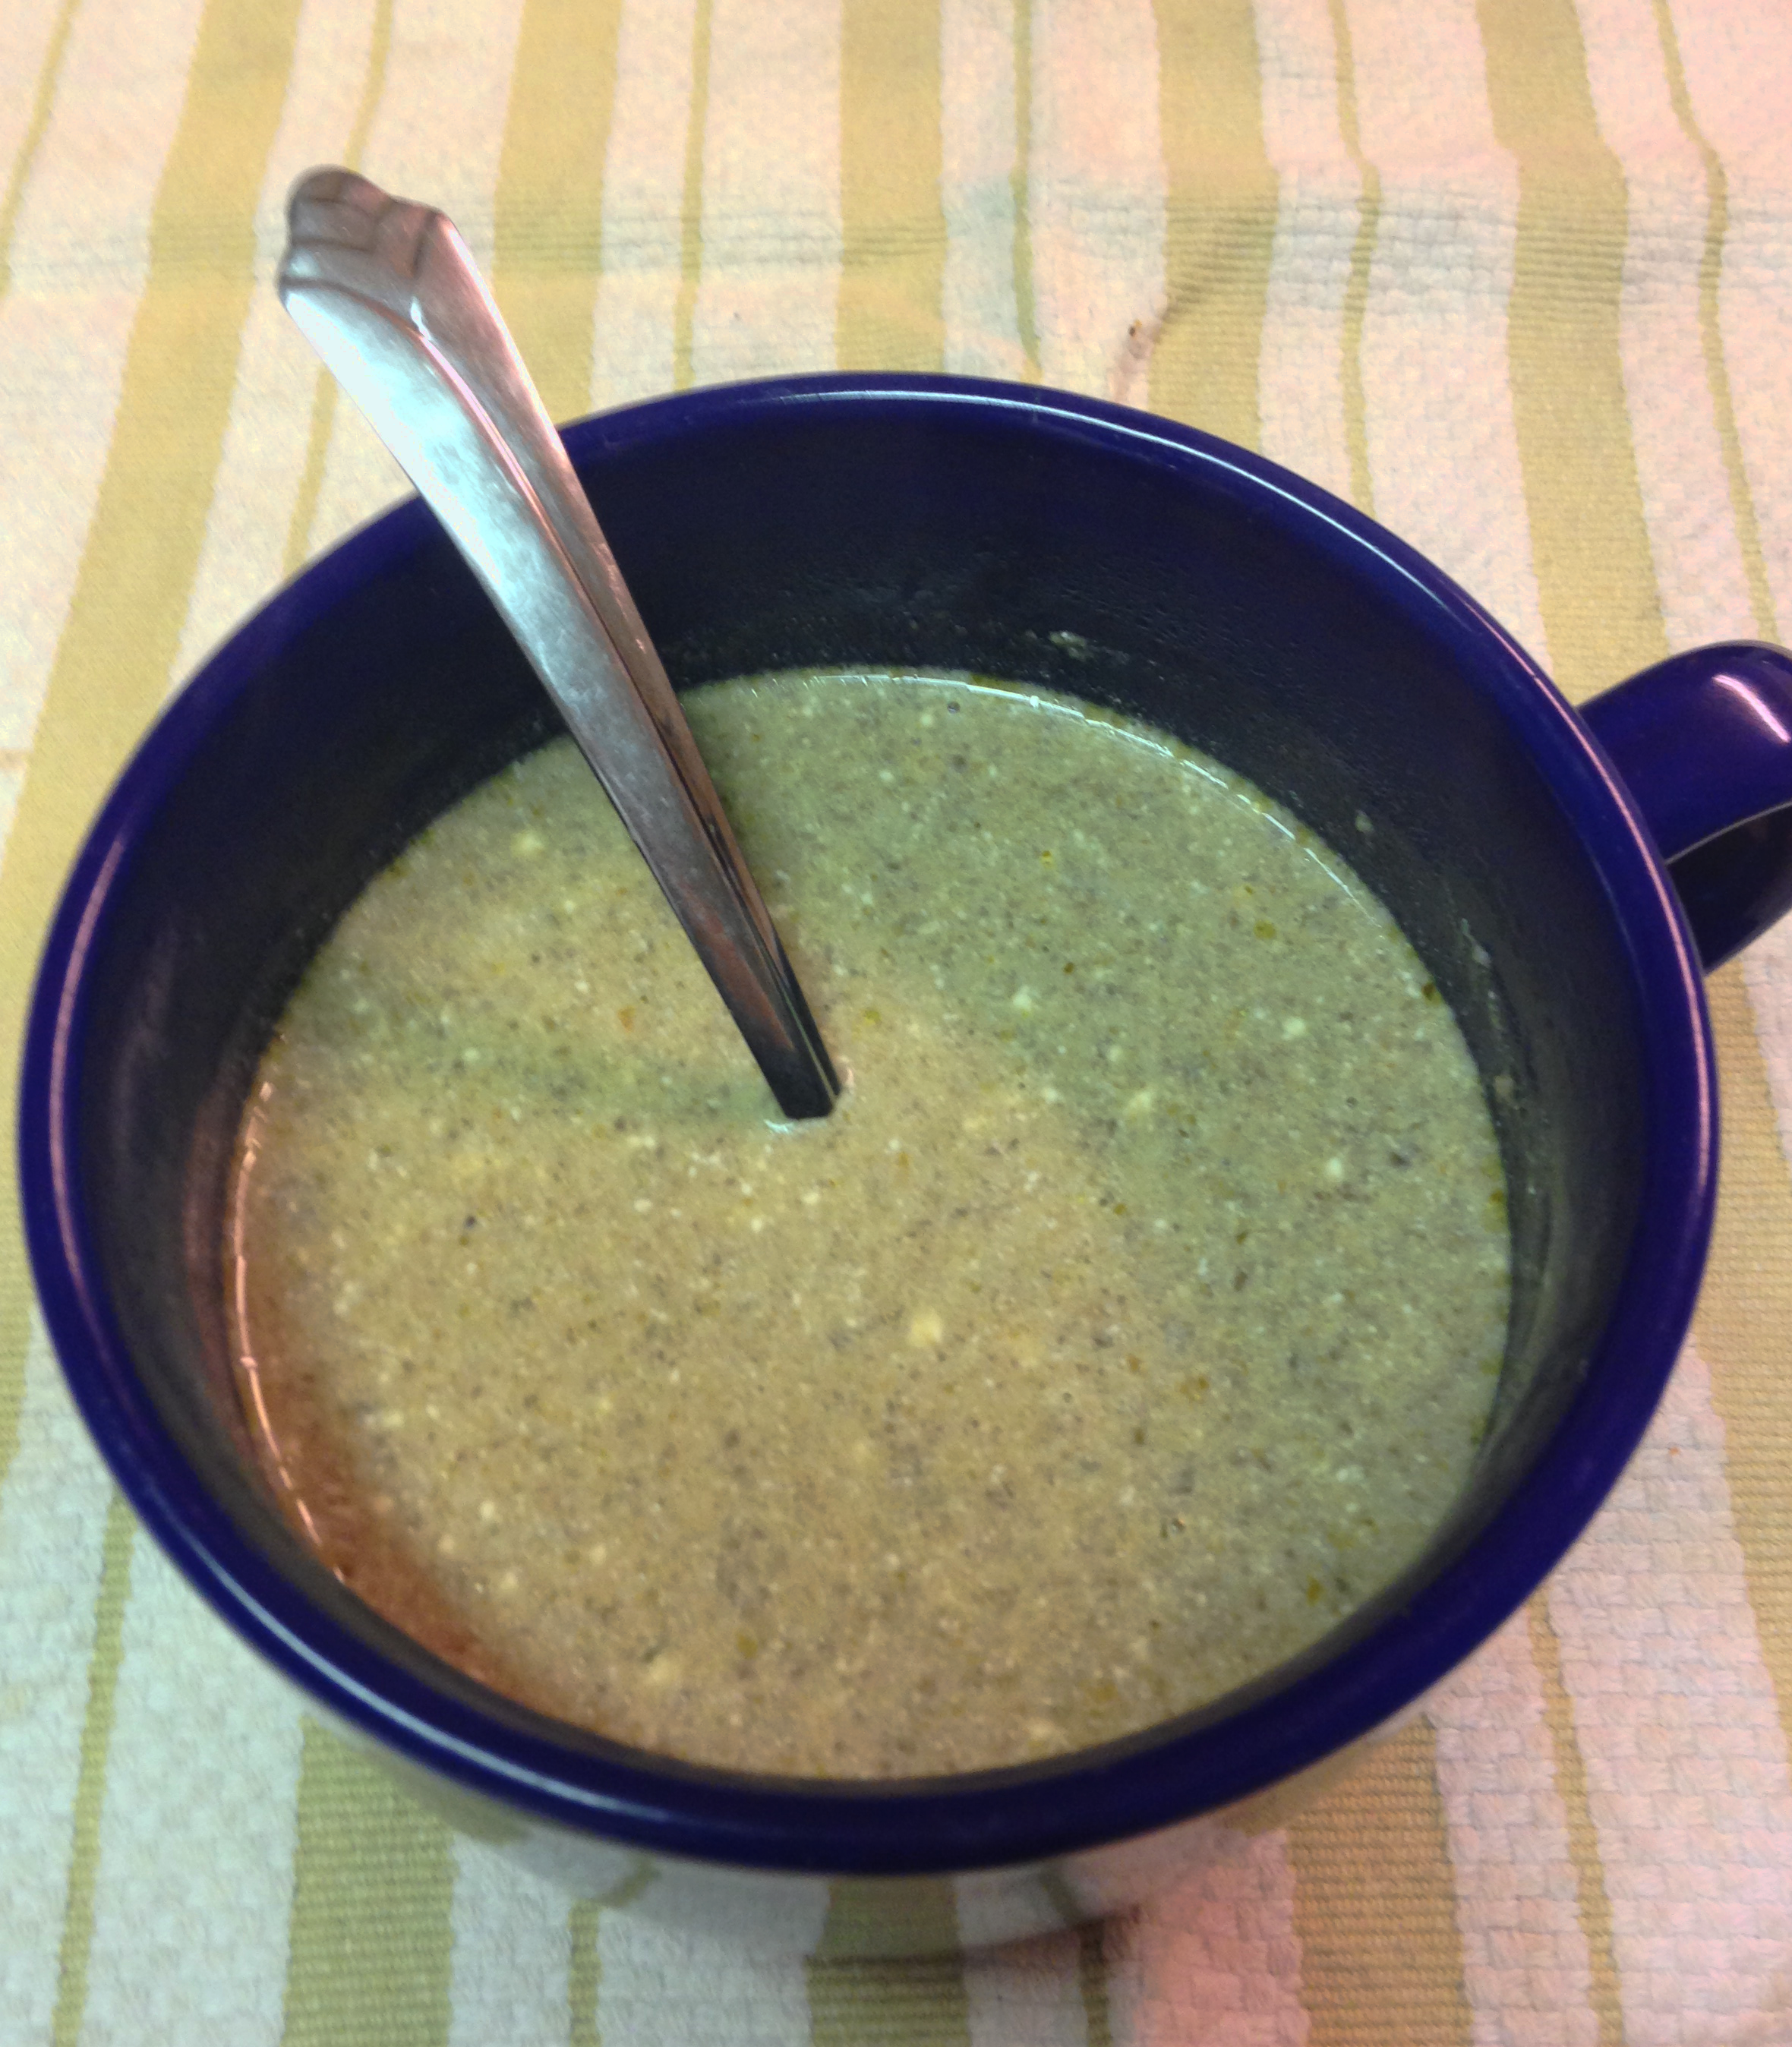
This particular batch of soup had some texture, since I puréed instead of strained the base. I also wanted to let the flavors of the non-mushroom vegetables and the goat cheese shine, so I used the white button mushrooms. Little B liked it until she found a piece of mushroom slice, then, in her words, it was suddenly “not my favorite.” That’s okay. More for me and Big D!

Mushroom Goat Cheese Soup

1 pound white button mushrooms
2 Tbsp butter
1 medium carrot, finely chopped
1 small bunch green onions, finely chopped
1/2 small yellow onion, finely chopped
3 garlic cloves, crushed
1/2 bunch fresh parsley, stems removed
2 tsp sea salt
1 tsp ground black pepper
3 cups chicken broth
4 ounces goat cheese
1 cup sour cream
Additional salt to taste

Immediately before making the soup, rinse dirt off mushrooms with cold water and leave them out to dry. Remove stems from all the mushrooms. Slice mushroom caps and set aside. Roughly chop up stems. Melt butter in medium sauce pot over medium high heat. When butter is bubbling add green onions, yellow onion, garlic, carrots and parsley. Cook until onions begin to brown. Add the chopped mushroom stems, salt and pepper. Stir occasionally and continue cooking until mushrooms shrink and release their liquid, about five minutes. Add broth, turn heat to low, cover and let simmer for ten minutes.

For smooth soup, pour the cooked mixture through a sieve and discard vegetable chunks. For chunkier soup, purée vegetables with immersion blender, food processor or stand blender. Return liquid to sauce pot over medium low heat. Add goat cheese and sour cream, stirring occasionally until cream and cheese is melted and incorporated while the soup heats up again. Add sliced mushroom caps to pot, stir and then cover. Reduce heat to low, reducing heat further if necessary to make sure the soup does not boil. Continue simmering for 20 minutes.

Turn off heat and let sit for a few minutes until it soup is cool enough to eat, adding more salt to taste if needed.


Stuffed Sweet Peppers

stuffedsweetpeppersWe had a house full of people this past week. Two waves of them and it was great to visit and spend time with everybody. Considering we are pretty casual people there was no intention of having multiple formal sit down meals, except for one, so I wanted to have the fridge full of ready to eat snacks and sides the accommodate all the diet limitations, preferences and cravings. I also have to talk about these peppers. I love the colors and flavors of sweet peppers.

Some may disagree, but each sweet pepper color does have a different flavor. I have stuffed them before with milder cheese filling, but the gang we had visiting likes a bit of a bite to their food, so the addition of wasabi paste was perfect to go with the smooth cheeses and crispy peppers. After being chilled they only lasted two days as people nibbled through the holiday week, but they seemed to make people happy as they crunched away.

If you are trying to fill your fridge with quick snacks or appetizers, here are a few others you can try, besides these pepper bites with bite: cucumber goat cheese bites, Greek salad on a stick, smoked salmon spread crudite, crunchy cinnamon chickpeas and the ever popular junky nuts. I hope you try some of these recipes and have fun doing it, and don’t forget to leave the kitchen occasionally and enjoy your people this holiday season!

Stuffed Sweet Peppers

24 raw small sweet peppers

8 ounces cream cheese, room temperature

6 ounce goat cheese, room temperature

1 Tbsp wasabi paste or horseradish

2 Tbsp lemon juice

1/2 cup chopped black olives

4 green onions, chopped

2 garlic cloves, finely diced

1 tsp sea salt

In a medium bowl combine the cheeses and wasabi. Fold in the olives, onions, garlic, lemon juice and sea salt. Remove the stem from all the peppers, scraping out the membrane and seeds with a small spoon. Using a spoon or fancy piping bag with round tip fill each pepper with the cheese mixture. Chill until ready to serve.

Susan’s Stuffed Chicken Breasts

susansstuffedchickenbreastsWhenever my friends have news, good or bad, I want to cook for them. For good news it is a celebration! For bad news, it is my version of giving comfort. It is born from a habit started long ago when my family. We always celebrated or mourned surrounded by our people over a table full of food. One of my oldest and dearest friends Susan came over with news recently and cooking was definitely a necessity.

She loved it when I made rolled chicken before, so I followed their fowl lead and came up with another rolled beauty. These chicken breasts came out much less dainty and heartily filled us up. Definitely appropriate for the occasion, since Susan has some ass kicking to do in the near future.

As the holiday season draws near there is a lot of feasting and fasting and celebrating. Embrace the time you have with family and friends. Embrace the time hanging out in the kitchen. Embrace the kids playing chase in the house (and the resulting broken vase). Embrace the chill while sipping coffee in the morning. Embrace the hectic days and the slow, lazy days. Embrace each other and yourself. Time passes swiftly so embrace what you have in real time. Embrace. Embrace stuffed chicken breasts because they are most awesome.

Susan’s Stuffed Chicken Breasts

2 14.5-ounce cans diced tomatoes
1 8-ounce can tomato paste
3 garlic cloves, chopped
1 small bunch fresh parsley, stems removed
3 sprigs fresh oregano, stems removed
8-10 fresh basil leaves
1 tsp ground cumin
1/2 tsp ground black pepper
1 tsp sea salt
4 cups fresh spinach
2 cups (or 2 14-ounce cans) marinated artichoke hearts, drained
1/2 medium yellow onion, finely diced
1 Tbsp lemon juice
6 boneless skinless chicken breasts
12 slices thin deli ham
4 cups grated cheddar cheese
Salt and pepper to taste

In a medium sauce pot over medium heat add the diced tomatoes, tomato sauce and garlic. Roughly chop the parskley, oregano and basil leaves. Add all the herbs except about 2 tablespoons to the sauce. Set aside the extra herbs for the top of the dish. When the sauce begins to steam, lower heat let simmer for about 30 minutes then remove from heat.

While sauce is simmering prepare the chicken and stuffing. Finely chop the spinach and artichoke hearts. In a medium bowl combine the artichoke hearts, spinach, onion and lemon juice. Toss until combined. Add salt and pepper to taste. Set aside.

Spread a piece of wax or parchment paper on the counter, at least twice the size of a single chicken breast. Place a breast in the middle of the paper. Cover the breast with a second piece of paper. With the flat side of a tenderizer mallet (or a regular mallet covered in cling wrap), gently pound the breast, starting from the center and moving towards the edges, until it is 1/4 inch to 1/3 inch thick. Repeat with all the breasts, changing out the paper as needed. Generously season each breast on both sides with salt and pepper.

Preheat oven to 350 degrees.

To stuff the chicken clear a work surface. Position nearby a 9×13 inch baking dish. Spread a thin layer of tomato sauce on the bottom of the dish. Place a single breast in front of you on your work surface lengthwise. Use two pieces of ham to cover the surface of the breast as much as possible. Sprinkle 1/3 cup of grated cheese on top of the ham. Spoon 1/6 of the spinach artichoke mixture in a row from top to bottom on one side of the breast. Starting on the side nearest the mixture begin rolling the breast,  making sure the left and right ends overlap at least once at the end of the roll. Place the roll seam down in the baking dish. Repeat with the remaining breasts.

Pour tomato sauce over chicken rolls, leaving 1/4 inch from the top clear of sauce so there is room for it to bubble up to the dish edges. You may have leftover sauce, depending on the size of the chicken breasts. Sprinkle remaining grated cheese and chopped herbs on top of the sauce. Bake for 45 minutes until chicken is thoroughly cooked. Remove from oven and let sit for ten minutes before serving.


Spinach Artichoke Dip

spinartdippMy moms are awesome. One gave birth to me and is crazy supportive. The other I have known since I was seven, fed and housed me numerous times, then eventually became the bestest mother in law ever. They both love cooking and sometimes generously open up their kitchens to me when I visit. Sometimes I come in with a plan and bags full of groceries. Other times I dig around and see what they have for making a meal. In the past I have made pecan crusted chicken and stuffed mushrooms in my mother in law’s kitchen. Today I took over my mom’s kitchen to become dippy. Again.

Tonight we had a meatless Monday meal. It was accidental, but yummy. We usually figure out a protein and work vegetables and other stuff around it. This time we went the other direction. I made some guacamole with some gorgeous avocados and also made this lovely, cheesy spinach artichoke dip. As is often the case, I opened mom’s well stocked fridge and checked out what was in there to get inspired for dinner. I have made such a dip before, and it was lovely to see the perfect ingredients just sitting there waiting to be made into a dip – spinach, marinated artichokes, cream cheese, sour cream….It is much more mild than my jalapeño popper dip but still cheesy.

The cool thing about this dip is that it freezes easily, so the huge volume will not go to waste – after we head home my mom can store it in the freezer, then pull out leftovers and bake it up for a quick appetizer when her church or book club group comes over. This is a big recipe! It can easily be halved for a smaller dose, but I like making it for parties and pot lucks, so I share below the big version.

Spinach Artichoke Dip

4 cups fresh spinach, roughly chopped
28 ounces (2 cans) marinated artichoke hearts, chopped
1/2 small yellow onion, finely chopped
32 ounces cream cheese, room temperature
1 cup sour cream
1/2 cup heavy cream
1/4 cup Worcestershire sauce
4 garlic cloves, minced
1/2 bunch fresh parsley, finely chopped
2 Tbsp lemon juice
2 tsp sea salt
1 tsp ground black pepper
3 Tbsp grated Parmesean cheese

Preheat oven to 350 degrees. In a mixer bowl add all ingredients. Mix on medium speed for two minutes until all ingredients are thoroughly combined. Pour mixture into 9×9 or larger baking dish and spread top layer evenly. Sprinkle Parmesean cheese on top. Bake for 45 minutes until hot and bubbly. If top has not browned turn on the broiler and let broil until highest points turn brown. Remove from oven and let rest for about ten minutes. Serve with vegetables or other dippable bits.

Yellaflower

2015-10-12 11.31.41

Turmeric is an entertaining ingredient to use. It turns everything it touches a brilliant shade of orange-yellow, so it is sometimes hard to keep the kitchen un-yellow. Be it my hands, the counter, spatula or the food itself, there is no doubt when it was used.

Combining turmeric with the sometimes drab color of cauliflower, it cannot help but brighten up any plate. Big D loves turmeric, and we both take it as a daily anti-inflammatory supplement, so I pulled out our big container of the powder and added some to our lunch’s steamed and seared cauliflower side dish the other day.

Little B came through and asked what was for lunch. When I mentioned steamed cauliflower she excitedly asked if it was going to be mashed….why not?! It was mushed instead of left whole. Our traditional mashed cauli is great, but this yellaflower is quite flavorful and gave wonderful balance to the tomato sauce and cheesy meatballs I served on top of it.

During the gradually darker days of winter I hope this dish gives you some summer sun and joy.

Yellaflower

3 Tbsp butter
1 large head cauliflower
1 Tbsp ground turmeric
1 tsp sea salt
1 tsp ground ginger
2 tsp garlic powder
1 tsp onion powder
1/4 cup heavy whipping cream

Cut cauliflower into bite sized florets – although it will be mashed later, cooking smaller pieces will let the flavors spread faster. In a medium stock pot over medium heat melt the butter. Add the cauliflower. Stir occasionally until the florets begin to release liquid, about five minutes. Sprinkle with turmeric, salt, ginger, garlic and onion, tossing until the spices coat the florets. Lower temperature and cover, cooking until cauliflower is soft, about five more minutes.

Puree the cauliflower and whipping cream either in the pot with an immersion blender, or by placing the cauliflower and cream in a food processor. The end product should be thick, smooth and bright yellow. Serve immediately in place of rice, polenta or pasta, or as a side dish.

Post Navigation