Any Kitchen Will Do

Give me a kitchen and I will cook.

Archive for the category “dip”

Veggie Kinda Hummus

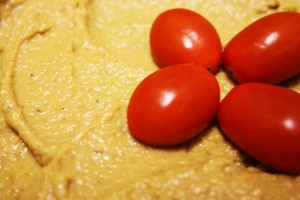
Hummus tastes good in so many ways. And by ways I mean it can be used as a dip, or spread, or side dish or a nice base for presenting other foods. My favorite use is spreading it on pita and filling with Greek salad. These days I try to not eat much pita, and frankly hummus made from chickpeas can put me over the top carb-wise on a day if I am not careful. I still like the idea of using hummus as a fiber filled  base for anything from salad to grilled meats or seafood. To reduce the carb count I came up with a way to make kinda hummus, using veggies. I can use it where I would otherwise put hummus, with fewer carbs while keeping the fiber content high. The other day Big D made a killer batch of taco meat. I slathered a layer of kinda hummus on the plate under the meat and cheese and tomatoes. Yum! The vegetable proportions can vary depending on what you have in the fridge, but keeping the cauliflower  at about half the bulk will helps obtain the hummus consistency. Be sure to let the veggies cool before pureeing, cuz they can certainly become a hot mess!

Veggie Kinda Hummus

2 cups chicken broth
1 medium head cauliflower
2 cups broccoli, chopped
1 small onion
2 celery stalks, chopped
1 carrot, chopped
2 cloves garlic
Salt and pepper to taste

Combine broth, garlic and vegetables in a large pot. Cook over medium high heat until boiling. Reduce heat and simmer for 30-45 minutes until all the vegetables are soft. Let cool until safe to transfer to use a hand blender, counter top blender  or food processor. Using a strainer or
slotted spoon separate the veggies from the liquid. Purée the vegetables until smooth, all at once or in batches. Add some of the cooking liquid only if it is too thick to purée. The vegetables will be pretty wet, so you probably won’t need the liquid. Serve warm or cold as a spread, dip or plating base for meats and other vegetables, as you would hummus.

Greek Burgers

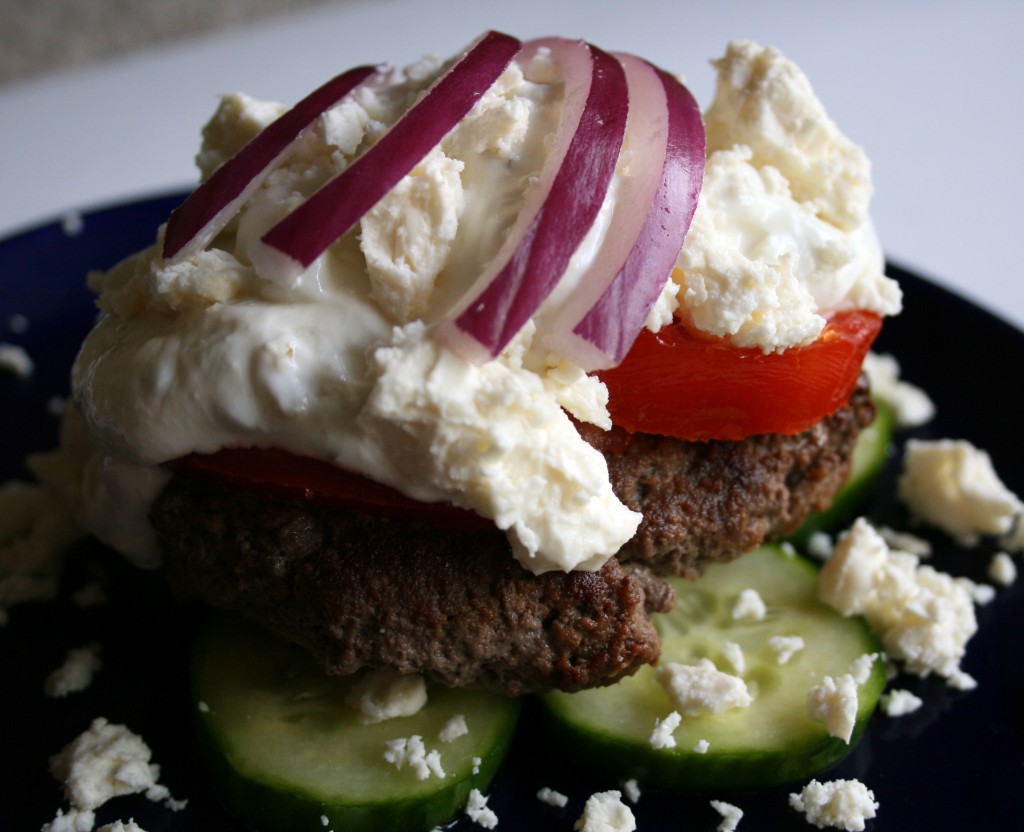
I must confess. I am a Fed. I work in a tall building in a big complex with uber security at the door and a locked work area with a bunch of cubicles around me. I am a little cog in a huge rolling maze of cogs, but I enjoy the work. Don’t get me wrong, I would prefer cooking all day, but for now I am content with my work, which is challenging and never boring. This time of year is pretty busy for me, reflected by the fact it is longer than usual between posts. I have not cooked for days, but no suffering occurred during the drought. Big D made some wonderful stuff in the evenings and there was enough for me to very much look forward to leftovers at lunch. It will be another couple of months before things slow down, so I make no promises, but I have some yummy ideas – don’t give up on me. I will persevere and post post post! Cooking relaxes me and I cannot stay away from it for long, no matter what. Take these burgers, for example. I had a burger like this at a hole in the wall restaurant somewhere in Alaska. I can’t remember where, but I was surprised how much I enjoyed it – I had expected a hockey puck with sour cream on top, but it was fresh and wonderful. With no lamb in sight my version is a tangy, filling meal that reminds me of my beloved gyros (pronounced ‘yee-rohs’ in my opinion). I had to negotiate with Little B to use the last of our Greek yogurt for tzatziki. She loves it with a little stevia, cinnamon and vanilla for dessert, but I finagled enough from her for the recipe.

Greek Burgers

Patties
½ cup parsley, finely chopped
2 Tbsp oregano, roughly chopped
½ cup mint, roughly chopped
3 cloves garlic, finely chopped
1 tsp black pepper
2 tsp sea salt
1 egg
1 Tbsp lime juice (or 2 packets True Lime) http://www.truelemonstore.com/products/true_lime
2 pounds ground beef
2 Tbsp olive oil
1 cup feta, crumbled
2 cups fresh spinach leaves, stems removed
1 English cucumber, sliced in ¼” coins
1 tomato, sliced
½ red onion, thin julienne

Tzatziki
1 cup cucumber, peeled and finely chopped
1 ½ cups Greek yogurt
1 clove garlic, crushed
2 tsp parsley, finely chopped
2 tsp mint, finely chopped
2-3 tsp lime juice
1 Tbsp olive oil
½ tsp sea salt
¼ tsp black pepper, finely ground

First make the tzatziki – doing it right before the meal works, but doing it the day before is better. Combine all ingredients together. Chill until time to serve. For patties whisk together the first eight ingredients. Pour mixture over ground beef in large bowl. Remove your rings, bracelets and watches, then get your hands dirty making sure the egg mixture is well combined with the beef. Squish it and squeeze it until all the herby bits are distributed. Form meat into patties about 4” wide and 1” deep. In large frying pan heat the oil over medium high heat. Add patties and cook until seared, about five minutes. Flip patties and sear the other side. Cover and cook to desired doneness. On a bed of spinach and a layer of cucumber coins (either on a bun or directly on a plate) place a patty. Layer toppings – tomato slices, a glop of tzatziki, feta crumbles and onion. Dig in!

Jalapeno Popper Dip

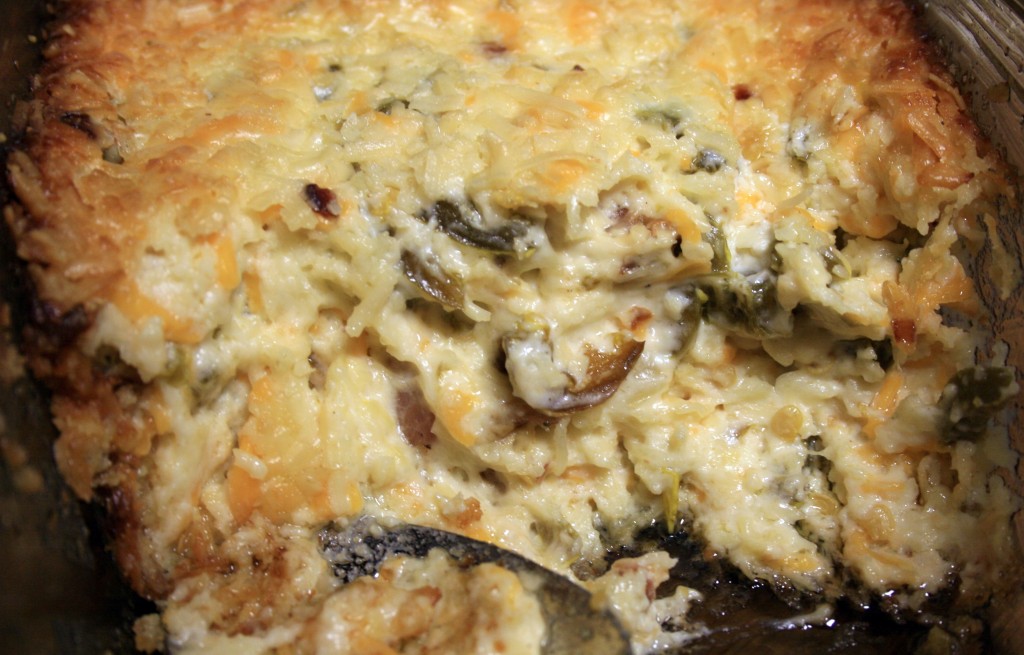
I have really been craving stuffed jalapeno poppers. Especially from Snoopy’s in Corpus Christi TX or Los Amigos in Bonham TX. Big D really loves them too, but it is almost impossible to find them without a crunchy, wheaty layer of breading all over them. Since Big D is not a wheat fan (well, he likes wheat, his body doesn’t) I feel a bit of guilt inhaling a plate full right in front of him. To appease us both I came up with the following recipe. From the urging of Big D I added double the jalapenos listed in the recipe for this batch – our sinuses are definitely cleared out now. I don’t recommend it for the faint of heart, but if the crowd you are feeding includes a lot of pepper lovers the go for it. The other ingredient quantities don’t need adjustment. As always, the leftovers a day or two later had a much more rounded taste from sitting around and hanging out together, so mixing it all up and waiting to bake it a day or so would be stellar.

Jalapeno Popper Dip

8 ounces cream cheese, room temperature
8 ounces mayonnaise
8 ounces Monterrey jack cheese, shredded
4 ounces cheddar cheese, shredded
2 cloves garlic, crushed
2 slices bacon, cooked crisp and crumbled
1 cup pickled jalapenos, roughly chopped
2 ounces Parmesan cheese

Preheat oven to 350 Fahrenheit. In a mixing bowl thoroughly combine the garlic and mayonnaise with all the cheeses except Parmesan. Stir in the bacon and jalapenos. Pour mixture into 9×9 glass baking dish, or glass bread pan or 9 inch glass pie pan – the idea is to use glass to get a crispy pretty finish all around, so the more crispy you like your dip the wider the dish you should use. Sprinkle the Parmesan cheese over the top* and pop in the oven for 30-35 minutes until brown and bubbly. A deeper bread pan or casserole dish may need 45-50 minutes to get completely bubbly. Let sit for about five minutes before serving.

*If you want the bready effect of stuffed jalapenos combine about ½ cup of bread crumbs with the Parmesan cheese before sprinkling over the top.

Ketchup

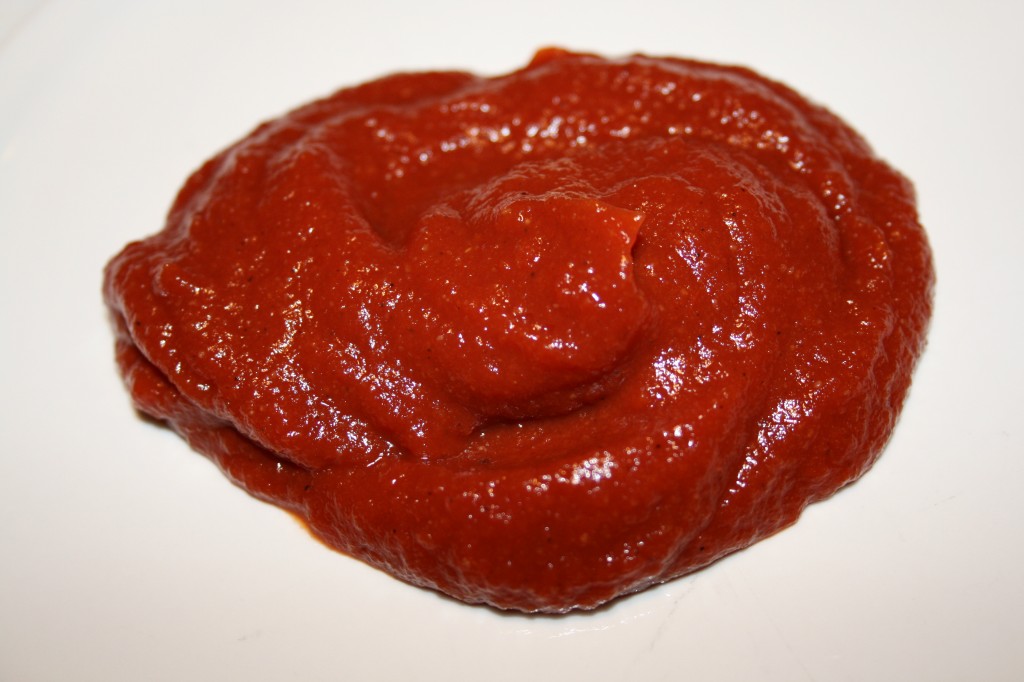
Is it Catsup or Ketchup? I don’t know the difference, but I do know that both of them are red, slightly tangy dipping sauces that are mostly tomato. A while back we had a house full of young people over and fed them burgers, hot dogs and home fries. Our household rarely uses ketchup, so we don’t usually have any around. Ack! No red stuff in the fridge! We got some wide-eyed looks when we declared the absence of the condiment. Instead of running to the store and leaving Big D to host our guests while simultaneously grilling meat, I dove into our pantry and attempted to make a batch of ketchup. With tomato paste as a base it was easy to combine some spices and vinegar to come up with a pretty darned good version. It seemed to do the trick and the party continued without a hitch. I will definitely make this again, and even eat some! Read the preparation instructions carefully. It is easy to get lost in all the steps…

Quick Ketchup

6 ounces tomato paste
¼ cup white vinegar
1 Tbsp garlic powder
1 Tbsp onion powder
Dash allspice
1 tsp salt
1 tsp honey
½ cup water

Combine all ingredients together very thoroughly. Serve.

Red Tomato Salsa

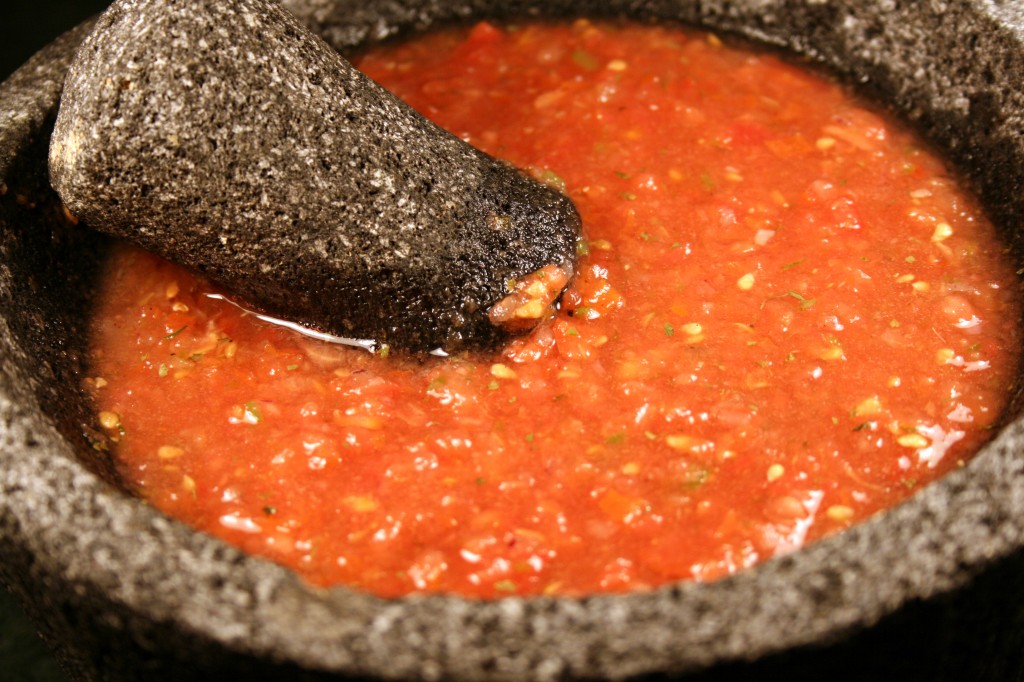
Salsa! It is low fat, low calorie, low sugar and can spice up pretty much anything. I don’t think it can be beat on top of eggs, inside tacos or all around a tortilla chip. I have made it cold, warm, roasted, raw, green, brown (it was actually good) and of course, red. The raw red version is the one that most reminds me of the tex-mex restaurants I like the most down in Texas where I grew up. Each batch is a little different, depending on the quality of the tomatoes and the bite of the jalapenos. This version of salsa comes straight out of the fridge. It is raw, red and tangy. I made the recipe mild, but it could of course be spiced up with more jalapenos.

Tomato Salsa

4 large rip tomatoes, quartered
½ small red onion, roughly chopped
1 large or 2 small jalapenos
1 lime, juiced with meat included
3 cloves garlic
1 small bunch cilantro
½ teaspoon ground sea salt

If you have a big food processor, combine one tomato with the remaining ingredients and pulse until finely pureed. Add remaining tomatoes and pulse until roughly chopped. Refrigerate overnight and serve cold.

If you are going to use a molcajete combine the onion, jalapeno, lime meat, garlic and cilantro in bowl. Grind until all the ingredients are combined. Add tomatoes and continue grinding until combined and the tomatoes are of preferred mushiness. Refrigerate overnight and serve cold.

If you have a small food processor add ½ a tomato and all the other non-tomato ingredients. Pulse until finely pureed. Empty puree into medium bowl. Add tomato to processor and pulse until roughly chopped. Empty into medium bowl. Add tomato to processor and pulse until roughly chopped. Empty into medium bowl. All the tomatoes done? Now stir everything up in the bowl and refrigerate overnight. Serve cold.


Greek Layer Dip

We are moving! Actually, we are in the process of moving, literally. I am sitting on a bed in a hotel room, somewhere between Texas and Maryland. We should arrive in Maryland tomorrow, but in the meantime I am without a kitchen. Until I am again armed with a kitchen I will share with you some recipes I collected over the past few months but did not post.

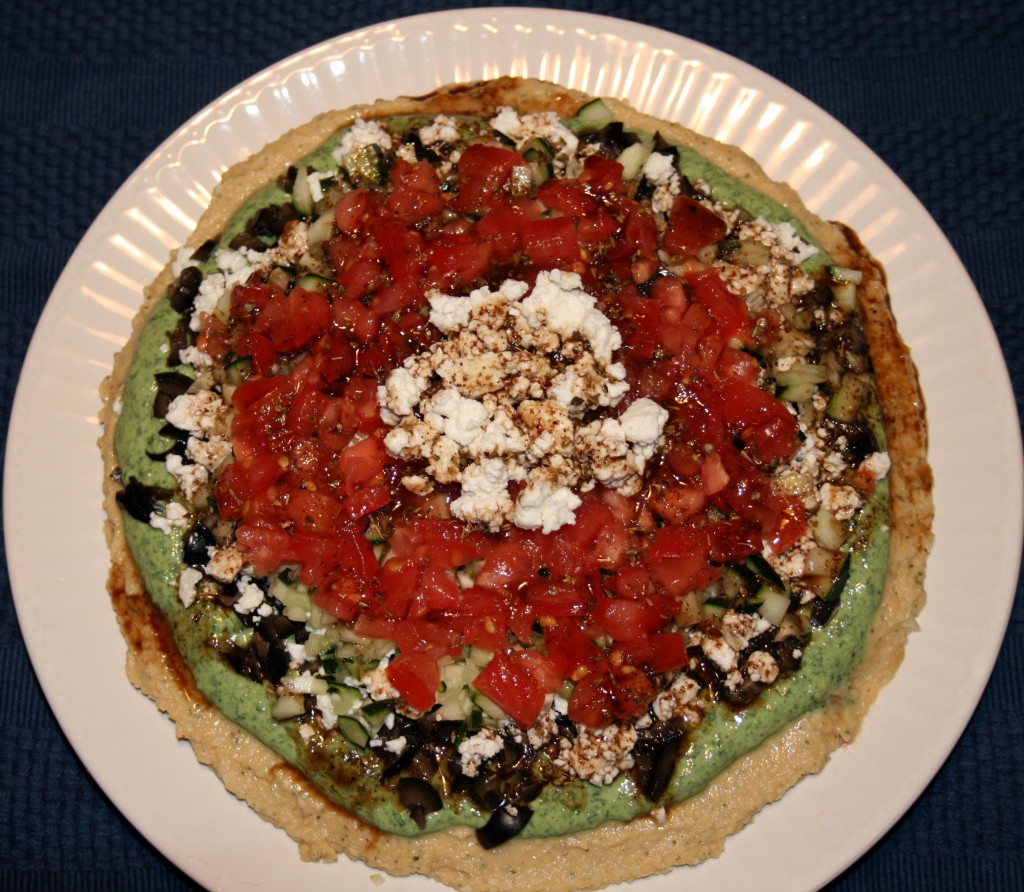
The first one is a dip. Sometimes when a big gaggle of people are coming over I like making available a variety of appetizers so they can nibble as they trickle in to the house. One of my favorites lately, to go along with the ever reliable ranch or peanut dip, is a layer dip. It is high in fiber and very colorful. It can also substitute for a green salad if you have enough Greek lovers. What I like most about it is that if you work hard enough you can get every layer into one bite, but if you don’t, you still get a mouthful of robust flavors that will make you want to seek out another scoop full. With everyone’s vegetable gardens starting to grow (except mine, of course, since I have no idea where we will be living), the dip is a great way to use up some of the bumper crops later this year.

Greek Layer Dip

2 cups hummus
1 cup plain Greek yogurt (optional)
2-3 cups raw spinach
1 cup feta cheese, crumbled
1 cup cucumber, chopped
1 large tomato, chopped
1 cup kalamata olives, chopped
1 Tbsp olive oil
2 Tbsp balsamic vinegar
2 tsp chopped oregano
2 tsp lemon juice
Salt and Pepper to taste

Combine in small bowl the oil, vinegar, oregano, salt, pepper and lemon juice. Set aside. Spread hummus on a serving tray in an even layer, about ¼ to ½ inch deep. Chop spinach into small pieces (and if you are using yogurt now is the time to combine the yogurt with spinach until well blended)*. Spread/sprinkle the spinach on top of the hummus, leaving a visible edge of hummus. Sprinkle olives on top of spinach mixture, followed by cucumber and tomato. Drizzle dressing on top of dip and add some more feta for garnish if you like, then serve. It can be prepared in advance and chilled until serving.

*If you are making the dip in advance I would recommend the yogurt not be used. Depending on the brand of yogurt, it can be a runny layer and will spread if put on the day before. It should be fine if made within an hour or two of serving. I have made it both with the yogurt and without – just sprinkling a layer of spinach makes it look a lot different, but still beautiful and you will still have a moist, dippable dip.

Steamed Artichoke

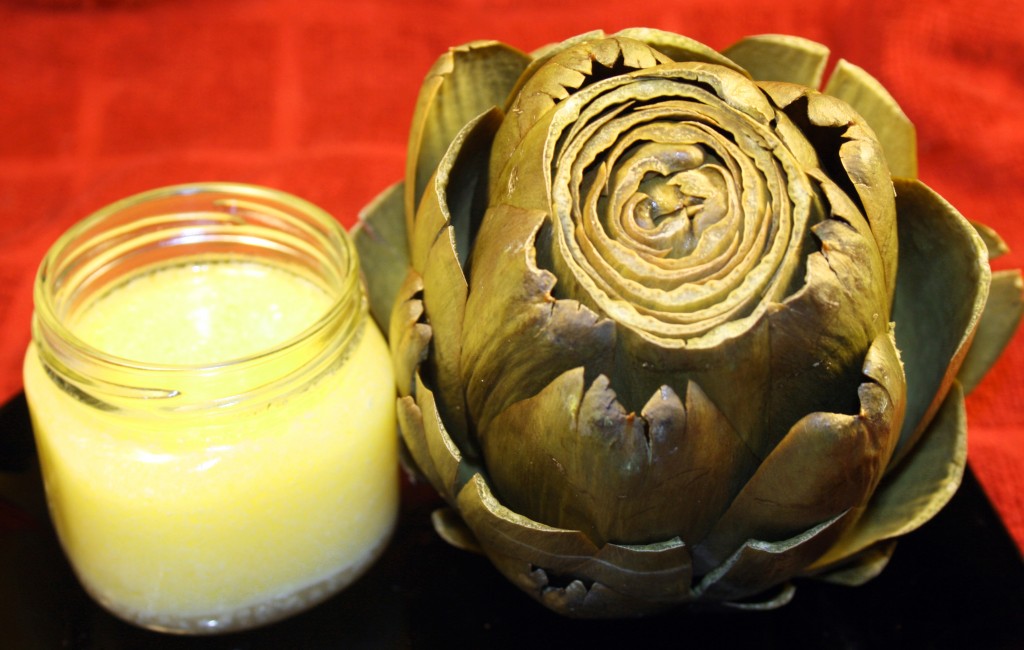
I was about eight when I first remember eating an artichoke. My parents steamed a few. They set them up on plates with small bowls of mayonnaise and melted butter for dipping. Here I was at the kitchen counter looking at this beautiful, yet also ugly green thing with little spikes on the ends of the leaves. I was supposed to eat it? Mom and dad had a rule about food. You had to try everything. You don’t have to like it – liver, creamed turkey, coconut – but you gotta try it. They showed me and my brother how to hold the prickly end and use our lower front teeth to scrape the meat off the tender end. I fell in love for the very first time. The meat had a gentle flavor, almost overwhelmed by the the dipping options of mayo and butter. The closer to the heart we got the more tender and sweet the meat. Dad then showed us how to carefully scrape off the bristly choke to reveal succulent mouthfuls of the heart. The meat was not very filling and it took a bit of effort to get every bite, but what a treat!

Time warp forward about 12 years. My brother and I are sitting at his kitchen table in Austin. He had cooked about a half dozen artichokes in the back yard smoker. The leaf tips were brown and wrinkled, but the meat inside each leaf was soft, having been tickled with flavor from the smoking process. We spent what must have been hours catching up with each others lives and scraping the meat off every single artichoke leaf. The result was a lovely afternoon, an impressive pile of meat and hearts, and plans to make soup. The soup was simple – with all our efforts of the afternoon, all we had left to do was add garlic, cream and butter, then simmer for a bit. We continued talking while relishing every spoonful of soup. The cream of artichoke soup became yet another fond memory of mine closely tied to food.

Here is a simple method for preparing an artichoke on the stove top and enjoying it with some pleasant conversation. Each bite of artichoke never takes up so much room that you cannot talk with your mouth full!

Steamed Artichoke

1 large or 2 small artichokes
4 – 6 cups water
3 Tbsp plus 1 tsp lemon juice
1 Tbsp plus ½ tsp salt
1 tsp black pepper
4 Tbsp butter
1 clove garlic, crushed
3 Tbsp mayonnaise

Cut off stem of artichoke just below the leaves until it sits level. Chop off the pointed tip of the artichoke and use kitchen scissors to clip off the tips of the larger, lower, tougher leaves that have pulled away from the artichoke. In a deep pot with steamer basket add the water (it should come right to the bottom of where the steamer basket will sit), 2 Tbsp of the lemon juice, 1 Tbsp of the salt and all the black pepper. Bring water to a boil and add steamer basket, placing artichokes stem down in the basket, and cover. If artichokes cannot stand upright there are two alternatives: 1) they can be steamed laying on the side, but should be flipped half way through cooking, or 2) place the artichoke stem down, but use foil to cover and seal in the steam instead of the pot top. Turn down heat to medium-low, but make sure the water continues to gently boil. Steam for 30 – 45 minutes. You will need less time if the artichokes are smaller. The artichoke is ready when the center of the stem gives easily to a knife.

In a small pot add butter, 1 Tbsp lemon, garlic and 1/2 tsp salt. Melt over medium-low heat until butter is melted and bubbly. In a small bowl stir together 1 tsp lemon juice with the mayonnaise. Serve artichokes along with the two dipping sauces.

To eat the artichokes peel off leaves, dip them in your sauce of choice, and use your lower front teeth to scrape meat off then inside of each leaf. It helps to have an empty bowl nearby to collect the leaves when you finish with them. As you get closer to the heart the leaves will become smaller and more tender. You will be able to eat most of the leaf, carefully avoiding the prickly tips. When you finally get to the bristly choke, take a spoon and scrape off the bristles, revealing the heart. Scoop the heart out of the base and cut it into bite-size pieces. Dip and enjoy!

Fondue Feast

Is it French or Swiss in origin? I don’t know. The evolution in America of fondue is such a different animal compared to the simple cheese fondue I found to be served in Europe. Way back in the ’80s my family would join forces with other families and have fondue parties. At the time it was a throwback to the 1960s, when my parents stocked up on fondue sets. Regardless of when it peaked in popularity or where it first happened, it is still a fun time with abundant and delicious food.

I learned a number of things from those fondue parties when I was growing up. The first was you must commit to any dip you take with your loaded fondue forks, for double dipping in a pot of cheese or chocolate is frowned on in the fondue world. If you do such a thing there may be nothing said, but the vibes of the fondue tribe may change toward you. Those fondue forks can be lethal when stabbed into a hand guilty of double dipping! The second thing I learned was there is never enough room on the little divided plates for all the sauces. With divided fondue plates you need to commit to, like, four of the ten or so available sauces. Another option is to do a lot of dollop dropping on individual pieces you cook. The third thing was that it took a while to get full from fondue, and since the process took a while to cook and eat and reload and cook and eat…there was plenty of time to talk and sip wine and laugh and, especially, try and sneak other people’s forks when they are not looking so you get to double up on your pile of cooked bites. The trick to sneaking forks is to not have any of your own on your plate. Have your own forks cooking away before stealthily stealing your neighbor’s fork while they are gesturing dramatically during the telling of a story. Don’t forget to reload their fork with the same stuff. A bonus is their quizzical look when they check their fork and wonder why the chicken is still raw after their story about Uncle Festus at the family reunion.

Although it may take a while to fill up on fondue that full stomach will sneak up on you. Before the chocolate fondue is served you wonder if you have any room left in your belly. But it is just fruit, right? There is always room for fruit! Maybe not fruit covered with chocolate, but it is very much worth trying. And it will fit!

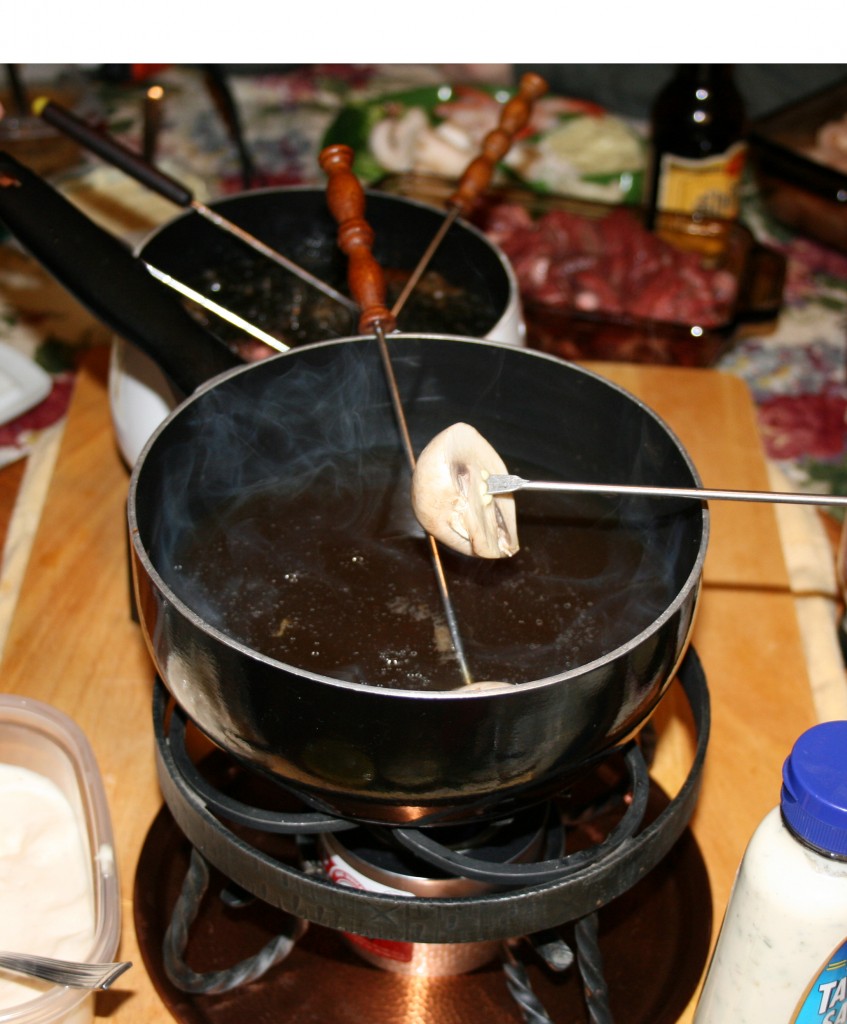
For our fondue feast we did a sample of four different fondues – cheese, oil, broth and chocolate. In the future I will probably limit myself to one fondue for a meal, surrounding it with non-fondue dishes. This particular meal was a chaotic mess of food and fun, and a great way to sample the different fondue types. Everyone had a blast.

The following recipes account for feeding seven people, since our fondue party included as many guests. After digging through the closets mom found four – count ’em – four fondue pots. We chose not to use the small one from France meant for chocolate fondue, but only because the sheer number of people, all that dipping would have overwhelmed the little thing. The meal called for a lot of preparation, but it can be spaced out in small chunks, mostly as early as the day before, and makes for quick set up when it is actually time to eat. I pulled everything out of the refrigerator (yes, even the meats) about 45 minutes to an hour before serving so things were cool but not chilly.

Everyone should scour their parents’ pantry, estate sales and thrift stores for fondue sets and be ready to pull them out for some fun eats. If you are short of cash the fondue feast can be turned into a pot luck where everyone brings a little bit but eats a lot. Have fun with it and be sure to make a mess!

I served the cheese fondue when people were first arriving and standing around in the kitchen, then served the oil and broth fondues at the table with all the sauces. In addition to the sauces I made, shown in the recipes below, I provided tartar sauce, BBQ sauce and creamy horseradish, all served simply in their pre-made states in bottles from the grocery. I did not even start preparing and melting the chocolate fondue until the table was cleared of the oil and broth. It was quick to do and a fun dessert. I remembered a lot of the recipes from when I was younger, but found a lot of helpful reminders here.

FONDUES

Cheese Fondue

2 garlic cloves, cut in half

1 cup dry white wine
8 ounces Gruyere cheese, shredded
8 ounces Havarti cheese, shredded
2 ounces Dubliner cheese, shredded
1 Tbsp lemon juice
1 Tbsp cornstarch
1 Tbsp Kirsch or brandy
½ tsp nutmeg
½ tsp paprika
Black Pepper (optional)

Handful of Cubed bread per person
Vegetables also used with Broth Fondue

The measurements for wine and cheese should be enough, but you may want to have a little more on hand to adjust the consistency if needed. Add more cheese if it’s too liquid, add more wine if it’s too thick. I have found that if you mix the cheese fondue on the stove top or electric fondue pot about an hour before serving, then turn it off, but then start to reheat about ½ hour before serving it makes for quick set up when guests first arrive. To begin preparation, rub the garlic inside the fondue pot then discard. Pour the white wine and lemon juice into the pot and turn on the burner. Let the wine and lemon juice warm up without boiling. Reduce heat and add the shredded cheese. With a wooden spoon, mix well and stir regularly. Dilute the cornstarch in the Kirsch or brandy, and add remaining ingredients to the pot. Add pepper to taste. Adjust consistency with additional wine or cheese. Dip bite size pieces of bread or vegetables. Let the freshly dipped pieces cool off for a few seconds before enjoying. You may have to twirl the cheesy bits on your fondue fork until it cools and stops drizzling long strings of cheese before you eat them. Also, extra liquid may be needed after the fondue is half gone because it thickens as time passes.

Hot Oil Fondue

2 – 4 cups peanut or canola oil
4 ounces beef per person, cut in bite-sized cubes
2 – 4 ounces chicken breast per person, cut into thin strips
2 ounces per person medium size shrimp (cooked or uncooked), tails intact

Heat oil to 325 – 350F, either in the fondue pot if electric, which is best for oil, or on the stove top for flame pots. If using a flame pot carefully transfer the hot oil to the fondue pot. Do not fill the pot more than 2/3 full, to reduce splashing over the rim of the pot while cooking. Pierce the raw meat or seafood with fondue forks and submerge in hot oil for about a minute. Remove and let cool briefly before dipping.

Broth Fondue

4 – 6 cups chicken stock
2 Tbsp dry white wine
1 garlic clove, thinly sliced
1 Tbsp fresh ginger, grated
3 Tbsp Worcestershire or soy sauce
Salt and Pepper to taste

2 – 4 mushrooms per person, whole or halved, depending on size
4 – 6 broccoli crowns per person, blanched
2 – 4 cauliflower crowns per person, blanched
4 – 6 snow peas per person, blanched
2 – 3 mini carrots per person, blanched

Combine all ingredients (salt and pepper optional) into electric fondue pot or on a stove top pot if using flame pot. Bring liquid to a simmer (liquid is moving and steam coming off surface) and begin dipping. For flame pots bring liquid to a boil on the stove then carefully transfer to the flame fondue pot. Dip vegetables into broth until cooked to your liking, warm but still crisp, or soft and mushy. If you really want the vegetables cooked quickly, I recommend blanching all the vegetables (drop them for 2 – 5 minutes in boiling water, then stop the cooking process by dropping them in cold water, then drain) before cooking them in the broth. The blanching can be done in advance and then refrigerated until serving time.

Chocolate Fondue

½ pound semi-sweet chocolate
1/2 cup Light Cream
1/8 cup brown Sugar
2 Tbsp Butter
2 tsp Vanilla Extract

Combine all ingredients in pot on stove top or in a microwave-proof glass bowl. Melt on low heat until liquid and well combined. If using the microwave heat for 30 seconds and stir until mostly melted, then stir until all lumps are gone. Whether prepared on the stove top or in the microwave, transfer to fondue pot for serving and dip dip dip (but don’t double dip!).

SAUCES

Lemon Teriyaki Sauce

1/2 cup Soy Sauce
1/2 tsp Ground Ginger
1/4 cup Sugar
2 tbs Lemon Juice

Add all ingredients to a pot on the stove top. Heat until ingredients come to a boil. Let cool.

Hollandaise Sauce

4 oz Butter
2 Egg Yolks
1 tbs Lemon Juice
1 tbs Water
1/4 tsp salt

Melt butter and let cool briefly. While butter is cooling mix the rest of ingredients in a blender but do not blend them yet. When butter has cooled a bit spoon out the foamy, bubbly top from butter, leaving the clear, yellow clarified portion. Begin blending the mixed ingredients and gradually and steadily add the butter. Let blend for about a minute. Leave at room temperature until served.

Spicy Oriental Sauce

2 Tbsp soy sauce
1 ½ Tbsp lemon juice
1 4.5 ounce can mild green chiles
1 clove garlic, crushed
2 tsp Sesame Oil

Combine all ingredients in tall bowl. With hand blender combine ingredients to a uniform, slightly thick texture. Serve chilled or at room temperature.

Garlic Lemon Dip

1 ½ cups mayonnaise
1 ½ Tbsp lemon juice
1 Tbsp garlic, crushed
½ tsp hot sauce
Salt and Pepper to taste

Mix all the ingredients until well blended. Keep refrigerated until served.

Curry Sauce

1 cup plain yogurt
2 tsp ground curry
1 ½ tsp lime juice
Salt and Pepper to taste

Mix all ingredients until well combined. Refrigerate until served.

Dill Dip

1 ½ cup low fat sour cream
½ shallot, finely chopped
2 Tbsp dill, finely chopped
1 Tbsp lemon juice
Salt and Pepper to taste

Combine all ingredients well. Refrigerate until served.

Guacamole Dip

1 rip avocado, mashed
1 Tbsp lemon juice
½ cup plain low fat yogurt
½ cup low fat sour cream
¼ cup finely chopped pine nuts, walnuts or pecans
1 leek, white and light green part finely chopped
½ tsp hot sauce
Salt and Pepper to taste

Mix the avocado flesh with the lemon juice. Mix avocado mixture with the rest of the ingredients. Add salt and pepper to taste. If prepared ahead of time of serving, keep refrigerated.

Salsa Verde with Tomatillos

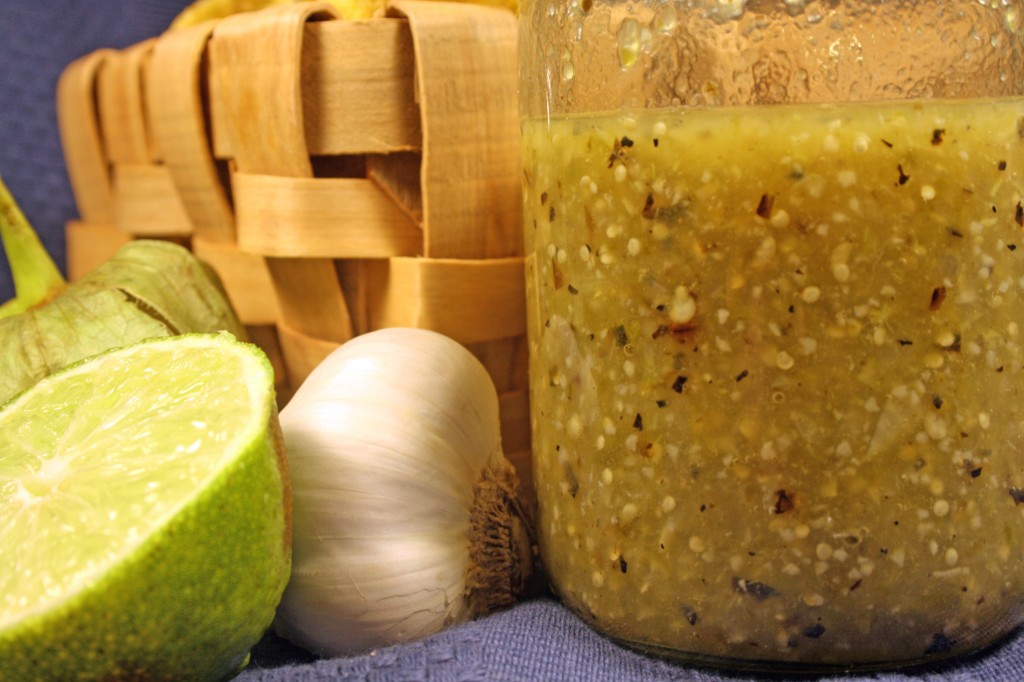
I have found the point where my intention of exploring Irish food takes a turn. And you are here to share it with me! Okay, so salsa verde is not an authentic Irish dish, but it is green, right? It will be fun! After boiling and sauteing Irish foods lately I felt the need to have something spicy on crunchy tortilla chips. The tomatillos at the store were looking good, so they led to a logical conclusion – green sauce! I did not really get much salsa verde until I started traveling to New Mexico about ten years ago. Each restaurant served the sauce with varying levels of heat, from mild and sweet and almost dessert-like to an addictive spiciness that leads to consuming many a chip and drinking margaritas much too fast. Out there it is usually heavier on the peppers than my version, but I dug into my tex-mex roots for this recipe and used only one jalapeno. The tomatillos were nice and tangy and the onion a bit sweet so this batch needed no sugar or salt at all. Yummy! I could not find my written recipe, so found this one, which most closely matched what I have done in the past…

Salsa Verde with Tomatillos

1 pound fresh tomatillos
1 small yellow onion
1 jalapeno
1 garlic clove, crushed
1 lime, juiced with meat
¼ cup chopped cilantro
Pinches of Sugar and Salt to taste

Remove husks from tomatillos, wash well and cut in half. Remove dry layers from onion and cut it in half. Cut jalapeno in half. Remove seeds and discard if you want a milder salsa, but I leave them in. Set oven to high broil. Place tomatillos, jalapeno and onion on foil covered broiling pan, skin side up. The onion and jalapeno pieces should be on the outer edges, with the tomatillos in the center. Place under broiler and roast until tomatillo skins begin to blacken, at least 5 minutes and possibly up to 10, depending on the power of your broiler. Rotate the pan and broil longer if needed to maximize blackening*. Let vegetables cool. Combine all ingredients in food processor and pulse to desired texture, or use a molcajete and break it up the old fashioned way. Refrigerate for at least an hour, but ideally overnight. Add additional salt to taste if needed before serving.

*Recently my mother in law was making a tomatillo sauce with avocados and I encouraged her to roast the tomatillos and peppers. She did, but…just…could…not let them get really black. The result was delicious, but we will never know how truly blackened tomatillos would have changed the flavor. I know the urge will be strong to take the pan out before the skins are truly black and smoking, but it really expands the flavor of the results if you control yourself and let them go black.

hummus

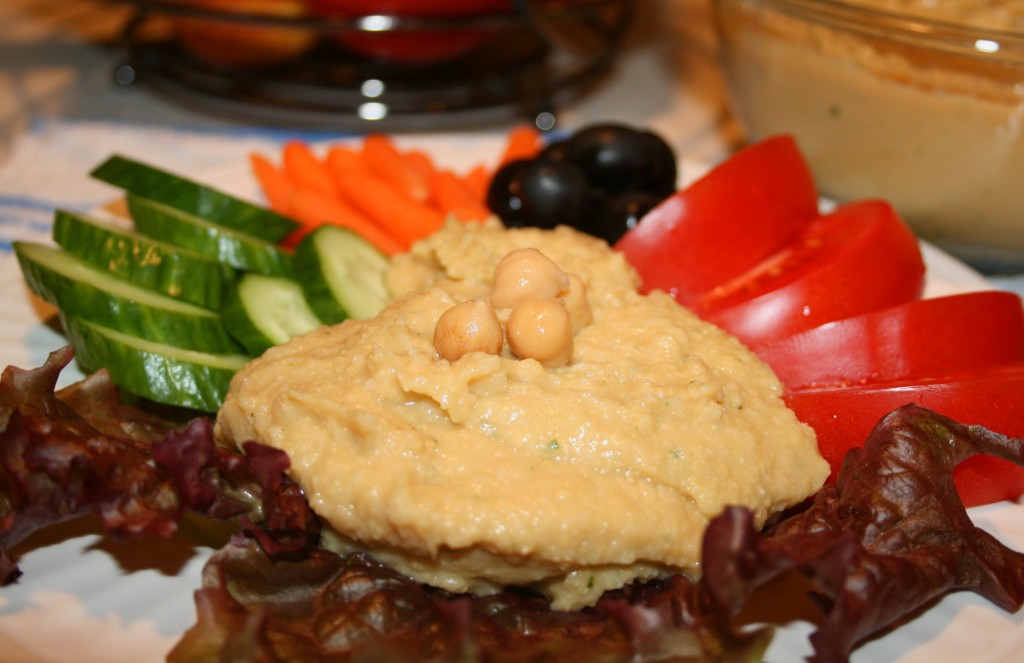
If there ever was a food that doubled as good for me AND a comfort food, it would be hummus. My favorite dipping implement – beyond the most perfect of breads, freshly made naan – would be cucumber. Especially the English cucumbers, which seem to hang on to their smaller seeds so much better than their seedier American cousins. My sister in law makes flavorful batches of hummus, sprinkled with freckles of olives, red peppers and tons of garlic. I adore the versions she makes, but I lean towards making a more conservative, basic hummus….well, except for the cilantro. After a day or so the lemon juice really latches on to the chickpeas and yum! I use hummus to substitute for all kinds of spreads and abominations, such as mayonnaise, ketchup, and secret sauces. Just try it – a ham and cheese sandwich with a layer of hummus on the bread. You will never go back to mayo and mustard. Well, you might, but when you do you will remember the hummus.

Hummus

2 16-ounce cans chickpeas

1/4 cup lime juice

3 cloves garlic, crushed

3 Tbsp tahini

1 tsp salt

¼ cup fresh cilantro leaves

1 Tbsp olive oil

Drain chickpeas but retain the liquid. Set aside about a dozen chickpeas for use later as garnish. Place chickpeas and all other ingredients except olive oil into a food processor. Start the processor and slowly add liquid from the chickpeas to the mixture – you should add just enough at the beginning to help move the ingredients around for blending. When the ingredients are smooth add more liquid until the desired texture is achieved; typically something like peanut butter, but some like it thinner. It usually does not take more than ½ the reserved liquid. Serve chilled or at room temperature – prior to serving sprinkle with the reserved whole chickpeas and drizzle the olive oil on top. Compliment the hummus with pita chips, olives, tomatoes and cucumber. Definitely scoop it up with fresh naan if you have a source for it.

Post Navigation