Any Kitchen Will Do

Give me a kitchen and I will cook.

Archive for the category “dip”

Chive Goat Cheese Dip

chivegoatcheesedipI love cheese. Occasionally I get a craving for a particular kind and have to do something about it. This time it was goat cheese. A couple of days after the craving began I was sitting on the porch enjoying the morning breeze. Near me was a big pot of tall, bright green chives. With guests coming over for dinner there was a need to have an appetizer, so this dip was born!

Previous goat cheese cravings resulted in appetizers like these cucumber bites, also these stuffed sweet peppers or this mushroom goat cheese soup, or cheese balls, which I often make during the holidays. My favorite use of goat cheese is in these stuffed flank steaks.

The combination of the goat cheese, sour cream and mayonnaise made for a very creamy dip base, and the chives, garlic and onion bits added complimentary flavors that traveled well as part of crudités!

Chive Goat Cheese Dip

1 cup goat cheese
1 cup sour cream
1/2 cup mayonnaise
1 tablespoon lemon juice
1 handful fresh chives (about 1 cup chopped)
1/4 cup finely chopped white onion
2 cloves finely chopped garlic
1 teaspoon sea salt

In a medium bowl combine goat cheese, sour cream and mayonnaise. Whisk until smooth.

Add lemon juice, chives, onion, garlic and salt. Whisk more until everything is combined.

Chill for at least an hour before serving.

Spinach Artichoke Dip

spinartdippMy moms are awesome. One gave birth to me and is crazy supportive. The other I have known since I was seven, fed and housed me numerous times, then eventually became the bestest mother in law ever. They both love cooking and sometimes generously open up their kitchens to me when I visit. Sometimes I come in with a plan and bags full of groceries. Other times I dig around and see what they have for making a meal. In the past I have made pecan crusted chicken and stuffed mushrooms in my mother in law’s kitchen. Today I took over my mom’s kitchen to become dippy. Again.

Tonight we had a meatless Monday meal. It was accidental, but yummy. We usually figure out a protein and work vegetables and other stuff around it. This time we went the other direction. I made some guacamole with some gorgeous avocados and also made this lovely, cheesy spinach artichoke dip. As is often the case, I opened mom’s well stocked fridge and checked out what was in there to get inspired for dinner. I have made such a dip before, and it was lovely to see the perfect ingredients just sitting there waiting to be made into a dip – spinach, marinated artichokes, cream cheese, sour cream….It is much more mild than my jalapeño popper dip but still cheesy.

The cool thing about this dip is that it freezes easily, so the huge volume will not go to waste – after we head home my mom can store it in the freezer, then pull out leftovers and bake it up for a quick appetizer when her church or book club group comes over. This is a big recipe! It can easily be halved for a smaller dose, but I like making it for parties and pot lucks, so I share below the big version.

Spinach Artichoke Dip

4 cups fresh spinach, roughly chopped
28 ounces (2 cans) marinated artichoke hearts, chopped
1/2 small yellow onion, finely chopped
32 ounces cream cheese, room temperature
1 cup sour cream
1/2 cup heavy cream
1/4 cup Worcestershire sauce
4 garlic cloves, minced
1/2 bunch fresh parsley, finely chopped
2 Tbsp lemon juice
2 tsp sea salt
1 tsp ground black pepper
3 Tbsp grated Parmesean cheese

Preheat oven to 350 degrees. In a mixer bowl add all ingredients. Mix on medium speed for two minutes until all ingredients are thoroughly combined. Pour mixture into 9×9 or larger baking dish and spread top layer evenly. Sprinkle Parmesean cheese on top. Bake for 45 minutes until hot and bubbly. If top has not browned turn on the broiler and let broil until highest points turn brown. Remove from oven and let rest for about ten minutes. Serve with vegetables or other dippable bits.

Tex Mex Dip

2015-07-03 18.34.43Dip is a sure fire thing to always have around. Having last minute dinner guests? Pull out the dip with crudite. Feeling nibbly? Pull out the dip with some chips. Faced with raw chicken that needs to be dinner? Pull out the dip and slather the fowl with it before tossing it in the oven. Headed over to someone’s place for drinks? Pull out the dip. It can come in all shapes and sizes and colors and quantities. It can be hot, or cold or both. People can eat it, or not. Dips can be made to taste like just about any dish.

We like queso. When we don’t want to break out the crock pot, processed cheese and can of tomatoes we don’t have to miss out on the flavors. We just pull out the can of tomatoes and veer in another direction. Here is a dip I came up with that gives us the flavor and tang of Tex Mex without the logistics. When I say queso I don’t mean the Spanish word for cheese. I mean chile con queso, the warm cheese dip with tomatoes, onions and chiles often served with a Tex Mex meal. I like queso, but it needs melting and oversight so it does not burn and reheating when it cools off, then if the crock pot cord does not reach to the nearest plug there is need for an extension and the possibility of tripping on it…not that I ever trip on anything. 🙂 None of these logistical elements are insurmountable barriers, but are way beyond what is needed for this dip. Nothing can replace chile con queso in my book, or plate, but this is a nice, cool variation.

Tex Mex Dip

2 cups sour cream
1 Tbsp lime juice
1 Tbsp ground cumin
1 tsp garlic powder
1 tsp sea salt
1/2 tsp ground black pepper
1 can tomato and chiles, well drained
1/4 cup finely chopped onion

In a medium bowl combine sour cream, lime juice, cumin, garlic powder, sea salt and pepper. Whisk until combined. Add onion, tomatoes and chiles. Stir until well combined. Chill at least two hours or overnight before serving.

French Onion Dip

french onion dip

My favorite dip EVER is French onion dip. Onion soup has been around since recorded ancient times, but French onion soup was the inspiration for the dip which became popular in the United States about 60 years ago. I have not asked any of them lately, but I bet the French would happily disown the dip version of their lovely soup. Growing up we always had packets of French onion soup mix in the pantry. I was in my 30s before I actually used the mix to make soup. Until then I had only used the packets for making dip or seasoning meats. Not bad tasting as a soup, but fresh, from scratch versions tastes better in pretty much every case.

Of late, I have been looking closely at ingredients of everything I buy, especially anything processed or convenient. This led to me being unimpressed with some of the packet ingredients – sugar, corn syrup, monosodium glutamate….I am pretty sure the Romans did not use much of those in their onion soup, and I am not keen on consuming them. It is easy to make packet-free French onion dip, and it is fun too! It takes a bit longer, but if you are in the kitchen doing other things anyway, you probably won’t notice.

Have you ever caramelized onions? It is a kitchen task I always enjoy if I have the time. Onion, water and a little salt makes for an impressive result. The biggest challenge is carefully watching while they cook (but not burn) and avoiding the temptation to stir. A while back I made some onion paste, which can also be used to make French onion dip, but I am going to elaborate a bit here on making chunky, caramelized onions that lead to the dip’s main ingredient.

French Onion Dip

1 large onion (Vidalia works great, but any yellow or white type will do)
2 cups water
1 cup sour cream or plain Greek yogurt
1 cup mayonnaise
2 cloves garlic, minced
2 Tbsp dijon mustard
Salt and pepper to taste

Roughly chop the onion, making sure all the pieces are broken up. Heat a medium saute pan to medium high. When the pan is hot add the onion to the dry pan. Let cook for about five minutes without stirring, allowing the onion to release moisture and begin to brown. Toss onion and let cook undisturbed for another three minutes. Add 1/2 cup water and stir, making sure to scrape the brown bits from the bottom of the pan. Let cook undisturbed for 3 – 5 minutes, allowing the liquid to reduce. When liquid is almost gone and onions begin to brown and caramelize again, stir and add another 1/2 cup of water. Repeat the liquid reduction and stirring two more times, until all the water is incorporated. Sprinkle onions with 1/4 tsp salt. Stir and set aside to cool. In a medium bowl combine the sour cream, mayonnaise, garlic, mustard, pepper and more salt to taste. Add the cooled onions and stir until combined. Refrigerate at least two hours or overnight before serving. Serve with vegetables, chips and crackers.

Three Year Tapenade

tapenade

Happy Blogiversary to me!!! Rarely do I pursue things for long periods of time…consecutively. I do something, then I stop, then I do it again, then I begin something new…you get the idea. It is not that I leave things incomplete, but I will find a stopping point and then go in another direction. My longest recorded continuous successes are people related – being a daughter, a brother a friend, being hitched to Big D over ten years and being mommy to Little B for over five years. Other stuff, like jobs and hobbies are more in the realm of come-and-go. I think I can definitely say that this blog is getting some longevity – a few days ago I started my fourth year, so I have passed my third blogiversary! When I started three years ago it was intended to be a place to put recipes so I could get to them easily. My cookbooks did not always make the cut when we moved and consolidated, so my creations would sometimes be lost. Tracking it on a blog let me combine the availability I wanted, my desire to do some writing and my continued joy in taking pictures. It has become more than just a place to record my food journey, but that of my little family as well. It is a place where others can come and experience it with us. The blog has given me the opportunity to share stories of my childhood, my family, friends and our geographic journeys. The name of it came from the fact that I cook in whatever kitchen I come across.  If the kitchen is not mine the owners so far have generously shared their space with me. Thanks goes out to them and to you for checking in on occasion!

I celebrated the end of the first year with cheese stuffed jalapeno halves. Yum! The second year I did it with low carb cinnamon rolls. Double yum! This year I am taking a different slant, with a New Orleans theme.  I am taking a more savory slant this year with some tapenade. It is very easy and very flavorful. If you ever have a bunch of partially full jars of olives, like we often do, it is a great way to use them.

muffalettaThis is not the first time I have mentioned my family’s love for New Orleans. The New Orleans connection is the lovely sandwiches that first introduced me to tapenade when I was a kid. Muffuletta sandwiches are about as common in New Orleans as po’boy sandwiches and gumbo. They originated in the Central Grocery right there on Decatur Street in the French Quarter. When I first had one I could not get enough of the olive ‘salad’ in the sandwich. Between the olives and the meats and cheeses it was a very satisfying meal. To do a version of the sandwich that fits our eating habits I made up some one minute buns in the microwave, whipped up a batch of tapenade in the food processor and opened up a few packages of deli meats and cheeses. The picture to the left does not do it justice, but there is a thick layer of tapenade on the bread that is practically the same color. A blob of the tapenade sits next to it as proof! The tapenade leftovers will not go to waste – I have used it as a dip, a stuffing for chicken, pork and mushrooms. It has an addictive saltiness that, believe it or not, sates my salty snacking craving I used to appease by eating chips. Just a straight spoonful can do the trick! Please make a batch and toast me with a cracker or sandwich full!

Three Year Tapenade

2 cups mixed black and green olives, pitted
3 cloves garlic
1/4 cup small capers
1/4 cup extra virgin olive oil
1 tsp dried oregano leaves
1 tsp dried basil leaves
1 tsp dried parsley leaves
1 anchovy fillet (optional)

Place all ingredients except the olive oil into a food processor. Slowly add the olive oil in a stream while the mixture is blending on low speed, until mixture is an evenly sized paste. Serve as condiment for sandwiches, or with crackers as a dip. Store refrigerated in an air tight container.

To make a Muffuletta Sandwich: the traditional sandwich layers Italian meats (mortadella, salami, ham) and cheeses (mozzarella, provolone) in an alternating pattern, so there is a thick pile of it in the sandwich. The traditional bread is a large round focaccia-type loaf about 10″ in diameter, which can actually make about four sandwiches. On one side of your bread (or low carb individual muffins in our case) spread a thick layer of the tapenade. Layer your meats and cheeses until there is a healthy pile. Add the other half of the bread. Cut into portions and eat!

Ranch Dressing

ranch dressing

Summer means salad, especially a salad with nice, tender, young collard green leaves that you see above. They have a nice peppery taste that is less bitter than older collard greens. These particular greens came straight from our little container garden on our balcony, which made them taste even better! It also means raw veggies straight from the fridge as side dishes. Most vegetables better for you raw, and they also contribute to reducing the heat in the kitchen on a warm June day, even in Alaska. Since making our own stellar homemade mayonnaise we are confidently surging forward in using it for sauce bases, which includes this lovely dressing. I have always preferred homemade ranch dressing over the bottled stuff, and have usually relied on dressing mixes. When I started reading labels more closely I discovered some mixes have untoward ingredients, like monosodium glutamate. That stuff puffs me up like a balloon. Others have ‘modified food starch’. If you look up such an ingredient you may find it can sometimes include wheat. Not fun, especially for Big D. There goes the mix permanently off the grocery list. Geez…. Of course, if other people can make homemade versions, then why can’t I? We certainly have a spice cabinet stocked sufficiently to do so. I feel silly not having tried it before. Now I feel happy having it continuously available in my fridge, whether it is summer or not. You will see it here often!

Ranch Dressing 

1 cup mayonnaise
1/2 cup heavy cream
2 Tbsp lemon juice
1 1/2 tsp apple cider vinegar
1 Tbsp dried onion flakes
2 Tbsp fresh parsley, finely chopped
1 tsp dried basil leaves, crushed
1/2 tsp black pepper, ground
1/2 tsp garlic powder
2-4 Tbsp water (optional)
1/4 – 1/2 tsp sea salt, to taste

In a medium bowl combine all ingredients except salt, whisk together until well combined. Add some water if dressing is too thick. Add salt to taste. Chill overnight to allow flavors to blend. Store in the refrigerator.

Cheese Ball(s)

cheese ball

To continue with my appetizer trend, after a longer than expected pause, I offer you a cheese ball! If you look closely at the various balls available at the market, there is a curiously large amount of products that have added sugar and/or wheat. As frequent cheese consumers I found it logical to make our own. This one is simple and can be molded in all kinds of ways. The instructions below tell you how to make an actual ball, but the picture shows the result of using a silicone snowflake mold. I used the mold to make individual servings for a holiday meal, pressing nuts into the bottom, then chilling and turning them out. I served them with nuts face down, along with a smoked beef roast and cabbage saute. We have been eating wonderful meats lately, after our recent acquisition of an electric smoker. Our living situation necessitates the absence of charcoal-related activities on our balcony, so electric it is. The results are stupendous, and our refrigerator is full of delectable, smoked protein. The individual cheese servings were a perfect accompaniment to the meat and vegetables. You can probably tell, but the cheese mixture is extremely versatile and delicious! I recommend it in all forms and fashions to decorate and compliment as an appetizer or side dish. The snowflakes are not necessarily clearly defined, but the plate arrangement certainly gave a hint to the theme. I hope your holiday season is pleasant and not too cold, for the warmth of family and friends always makes the season cozy.

Cheese Ball

2 1/2 cups sharp cheddar cheese, grated and at room temperature
8 ounces cream cheese, room temperature
4 ounces goat cheese, room temperature
1/2 tsp red chili flakes
1 tsp ground cumin
1 cup toasted pecans, chopped (optional)
Whisk together cream cheese, goat cheese, chili flakes and cumin. Add cheddar cheese and stir together. The mixture may be a bit stiff if you don’t have a strong mixer, so mixing it together with your hands (like I often do) works great. Drop cheese mixture onto a piece of cling wrap that is twice the size of the mixture. Using the cling wrap mold the cheese into the desired shape – sphere, log, oval, etc. you can also use a gelatin mold or other shape to form the cheese. If desired, roll shaped cheese in pecans and gently press them into the cheese. Chill at least an hour before serving with vegetables or crackers.

Smoked Salmon Spread Crudite

sss crudite celery smallsss crudite tomato smallsss crudite cheese small

With the holiday season upon us, I find there are three versions of being a guest. The first is the kind where you just show up with a host(ess) gift and enjoy the evening, offering to help, but getting the expected, “oh no, I got it, you just relax”. Sometimes I just relax, and other times I relax by helping. The second is when you are expected to arrive with a side dish or appetizer. There is always the wondering about who can and cannot eat the ingredients you use, much less whether or not it will come out right. You cannot even taste the results of say, a pie, because the pretty presentation would be ruined! Yes, you might have made two, but what if you didn’t? How dare you even think of cutting into the puffy, browned top of sweet potato casserole or lattice topped cherry pie! I have been pretty lucky in the past, but I have also been known to accidentally mix up salt and sugar – yowza! The third version is the grand American tradition of potluck. If it is laid back and you can bring anything, go crazy! Make what you want, cut it into portions and taste a bit to make sure it is perfect; bring it hot, bring it cold, whatever! I like all three versions because they all involve two things I love – cooking and enjoying the company of people I care about. This year has been busy with our family being in limbo, then moving, then having complications with moving, then a new job. Through it all we had a wonderful little girl who hung in there with us through all the changes. For all these reasons we are keeping our holidays simple this year, focusing on enjoying the company of our little family and of our new friends. We are planning cooking marathons, as usual, for the holidays, but they will be a little smaller, including simple appetizers. This simple recipe for crudité can be adjusted to accommodate all types of diets and give variety to a meal, either before or during – even make them a meal on their own. They can fit any version of being a guest, or as a host(ess). Change up the vegetables and cheeses – pretty much anything you can cut in half and fill or top (carrots, cucumbers, olives, pickles). Of course, crisped bread or crackers would work too! I hope you enjoy the holidays and spend more time with your loved ones than you do in the stores, because when it is all said and done, the people are what give you purpose.

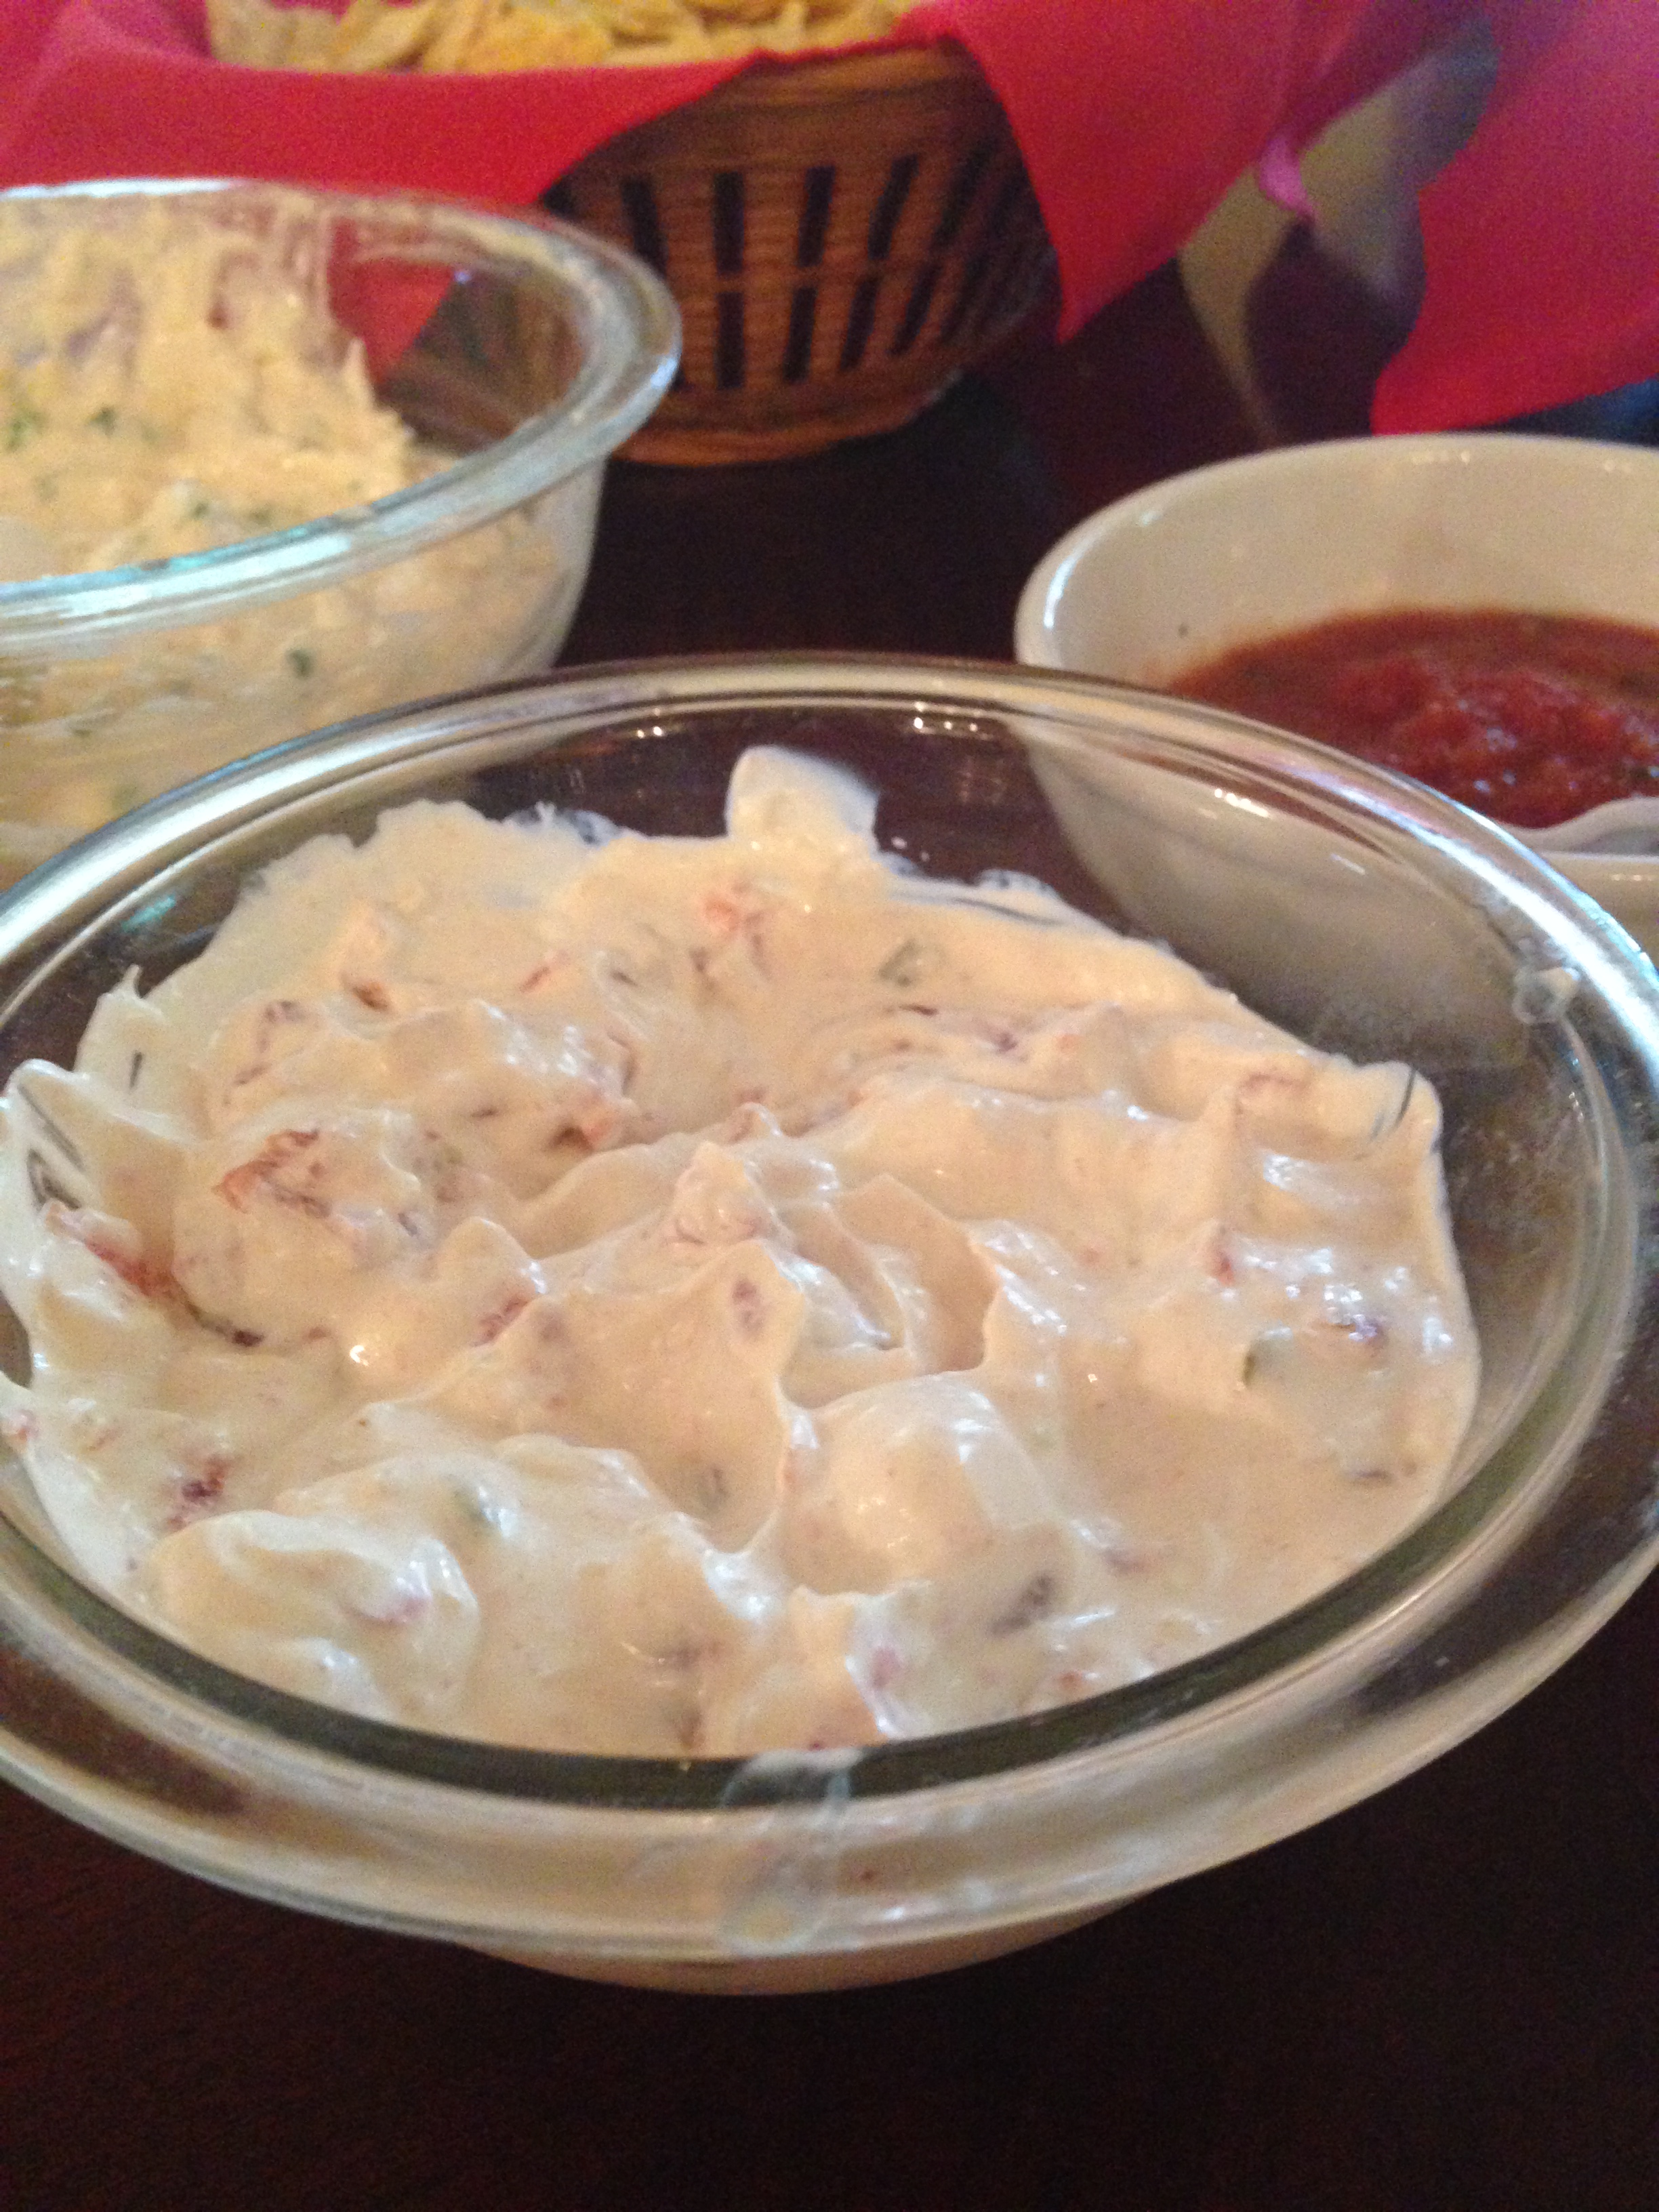
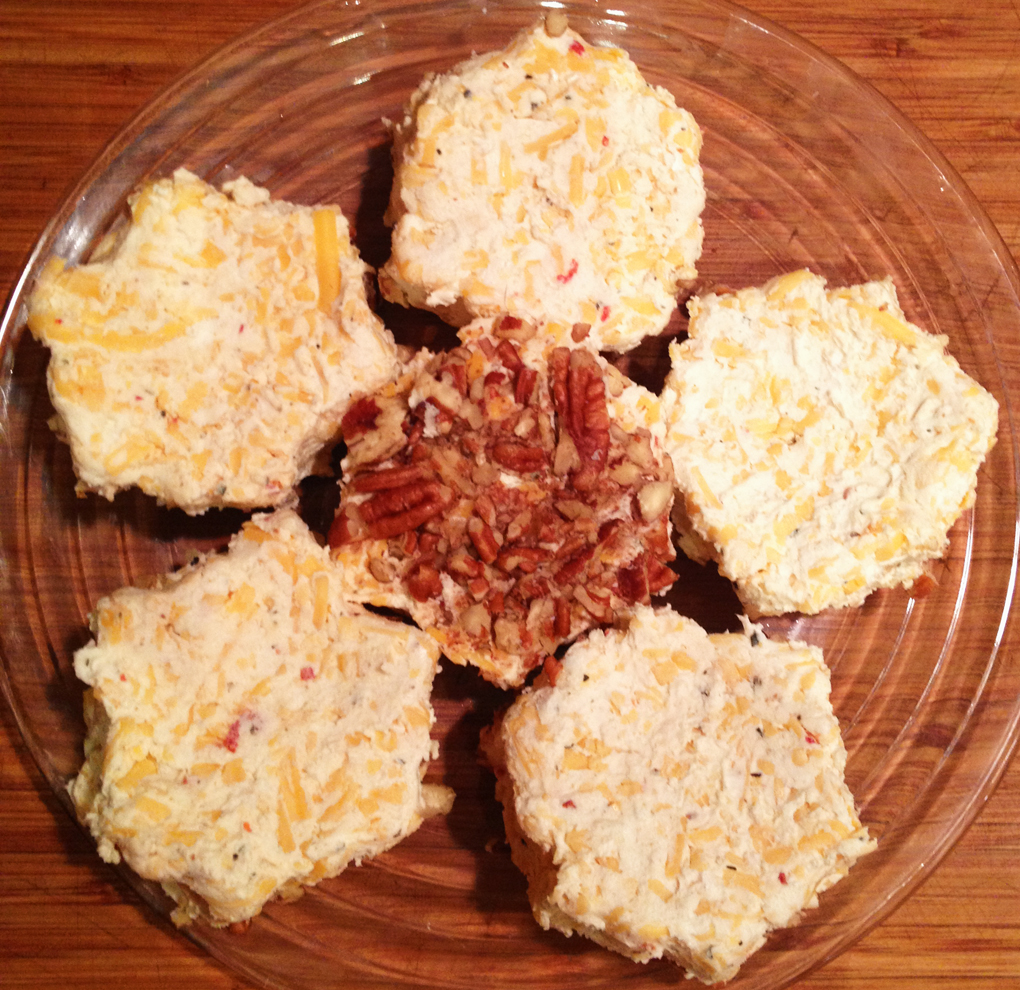
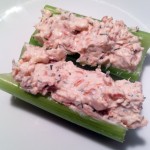
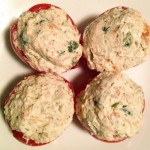
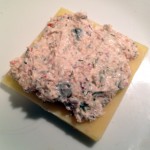
Smoked Salmon Spread Crudité

1 cup cream cheese, room temperature
½ cup sour cream
4 ounces smoked salmon, roughly chopped
1 garlic clove, crushed
1 tsp fresh dill, chopped (and a bit more for optional garnish)
2 celery stalks
5 large cherry tomatoes
5 – 10 slices sharp white cheddar cheese

Whisk together cream cheese and sour cream. Add salmon and garlic, folding it into the cheese mixture until well combined. Chill for about an hour. While it chills prepare the serving bases. Clean celery stalks, peel off tough strings and cut into 1 – 2 inch sticks. Clean tomatoes and slice in half lengthwise, scoop out the seeds and meat and pat dry. Slice cheese into 1 – 2 inch squares, making them thick enough to pick up and take a few bites out of, but thin enough not to over cheese the bites – a bit thicker than sandwich slices. Spread the spread (heh) on all the bases, taking time to form it to compliment the shape of the base – round like a tomato, within the crevice of the celery, and a bit random to soften the edges of the cheese slices. Top with dill if you please. Serve immediately or chill until time to serve/leave for the party.
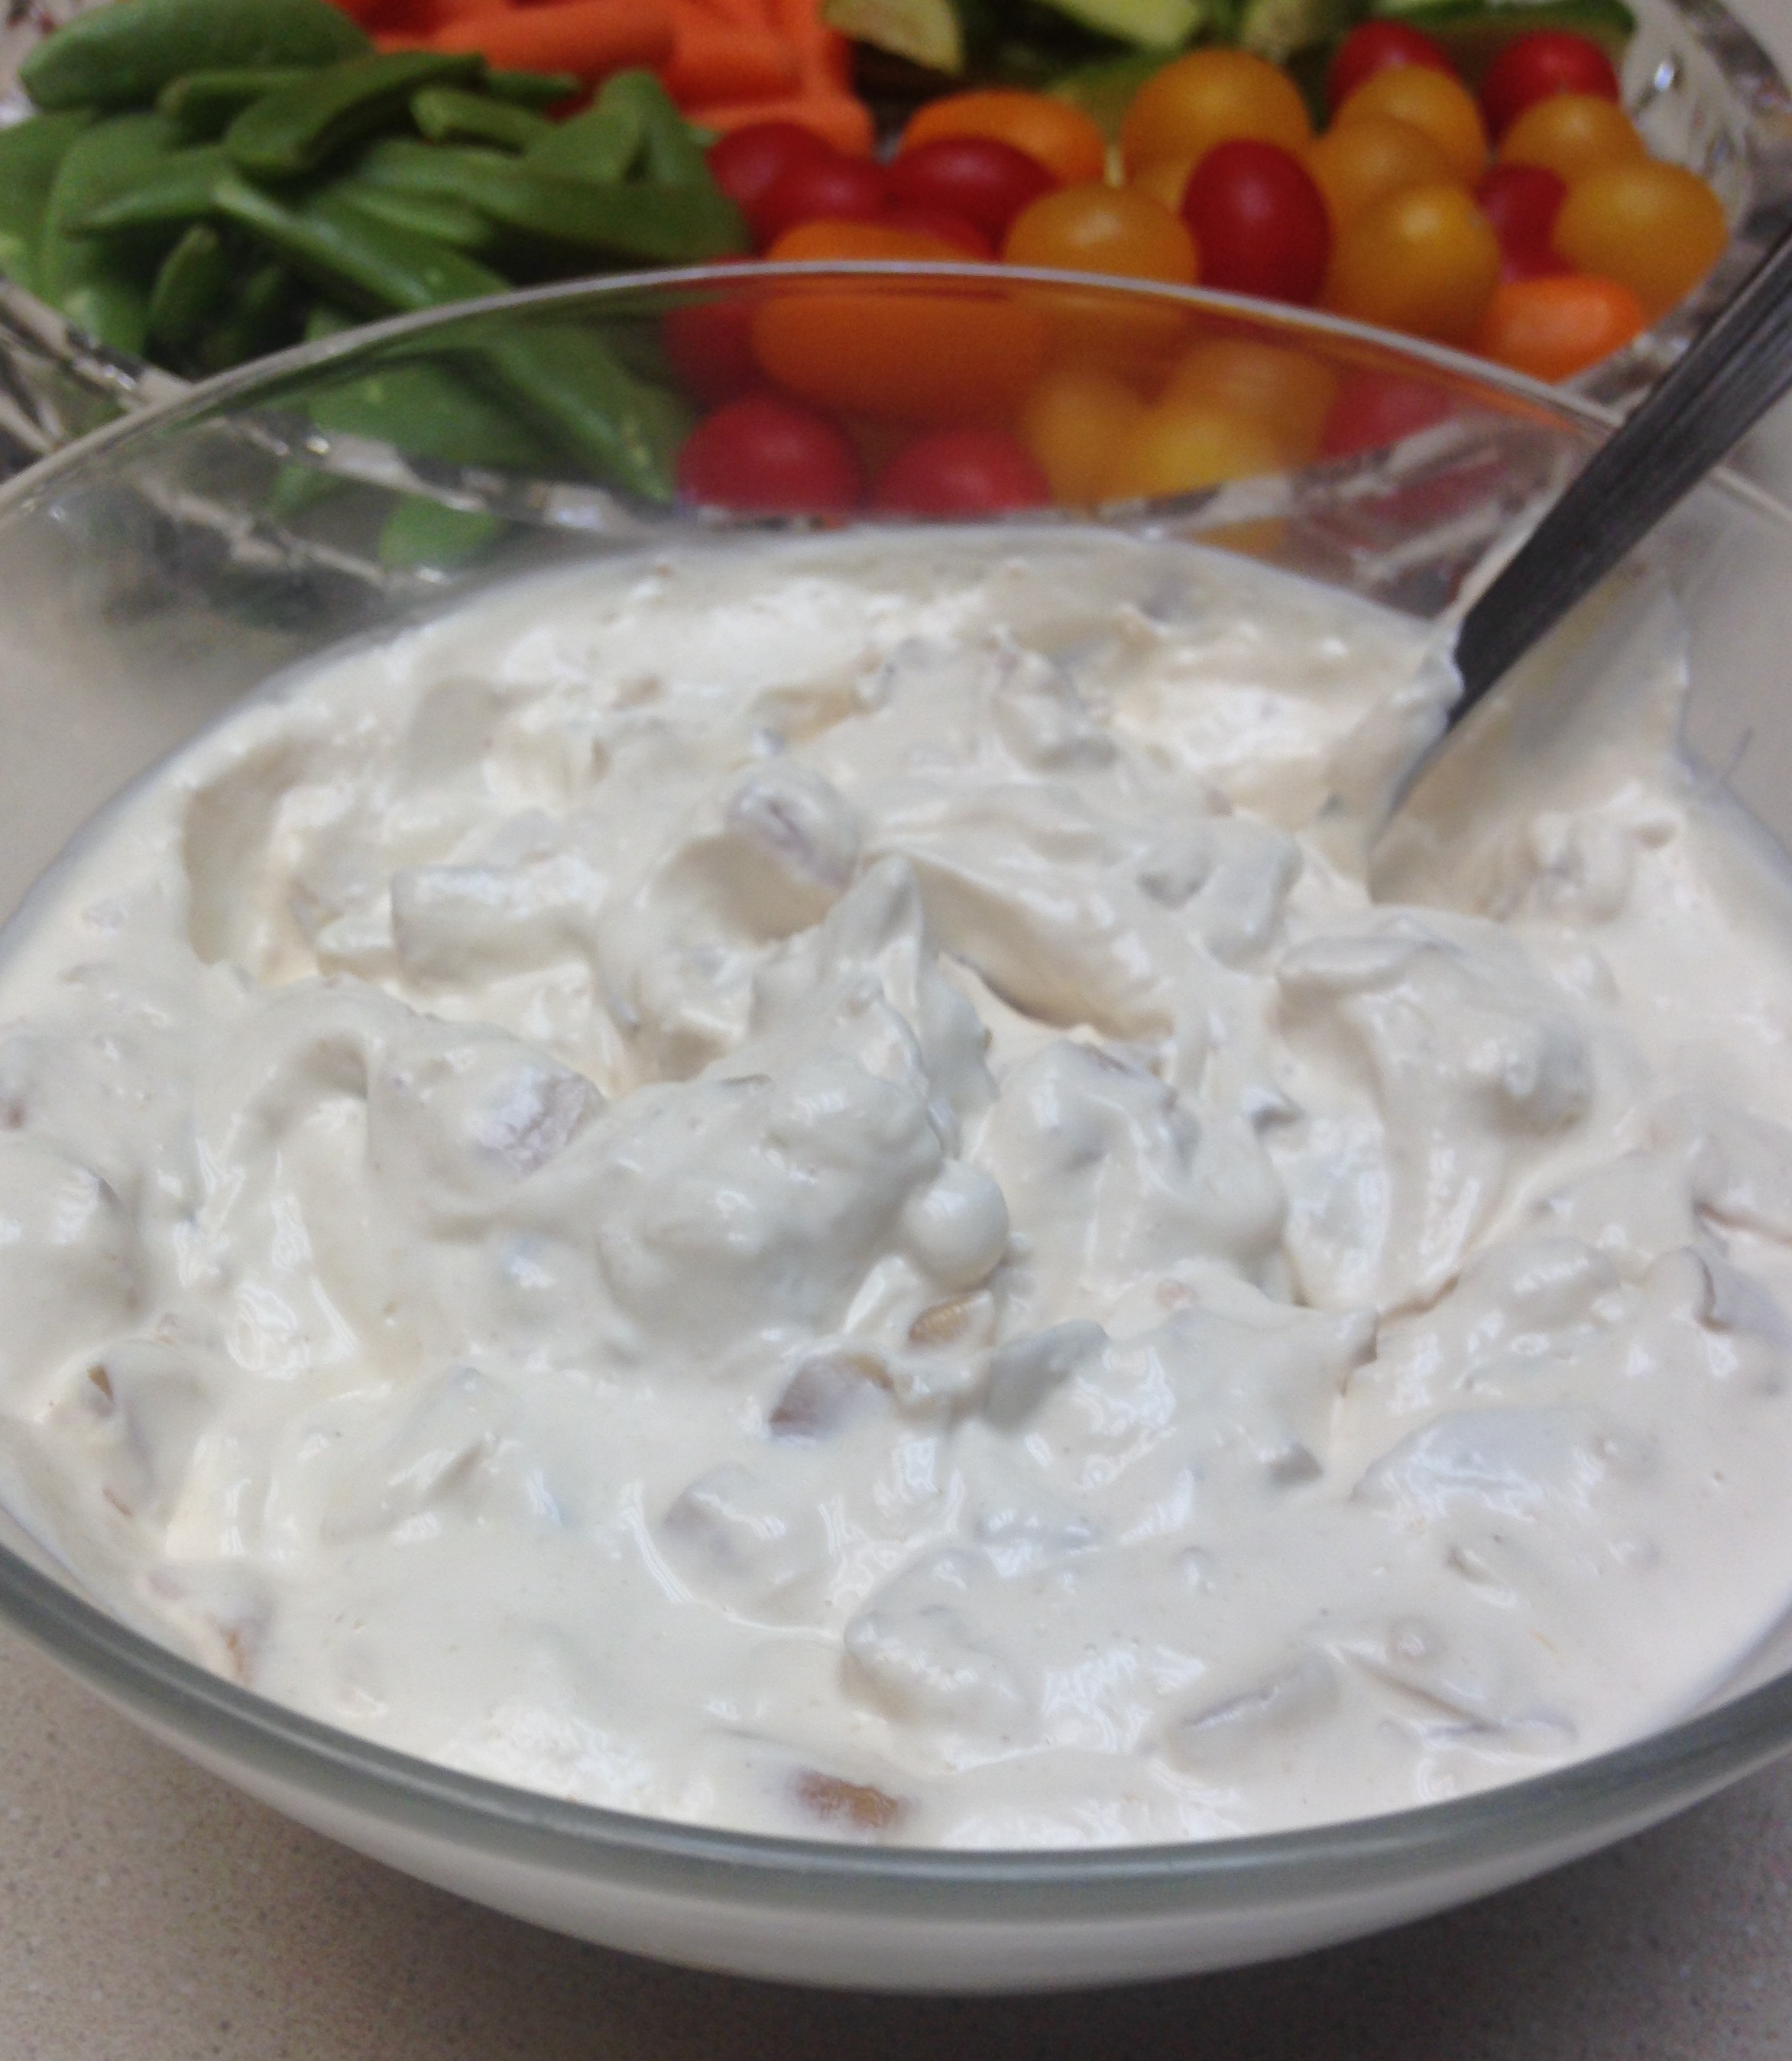
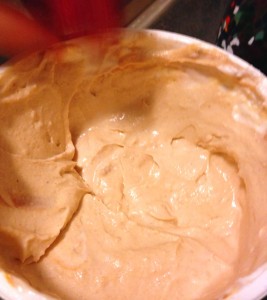
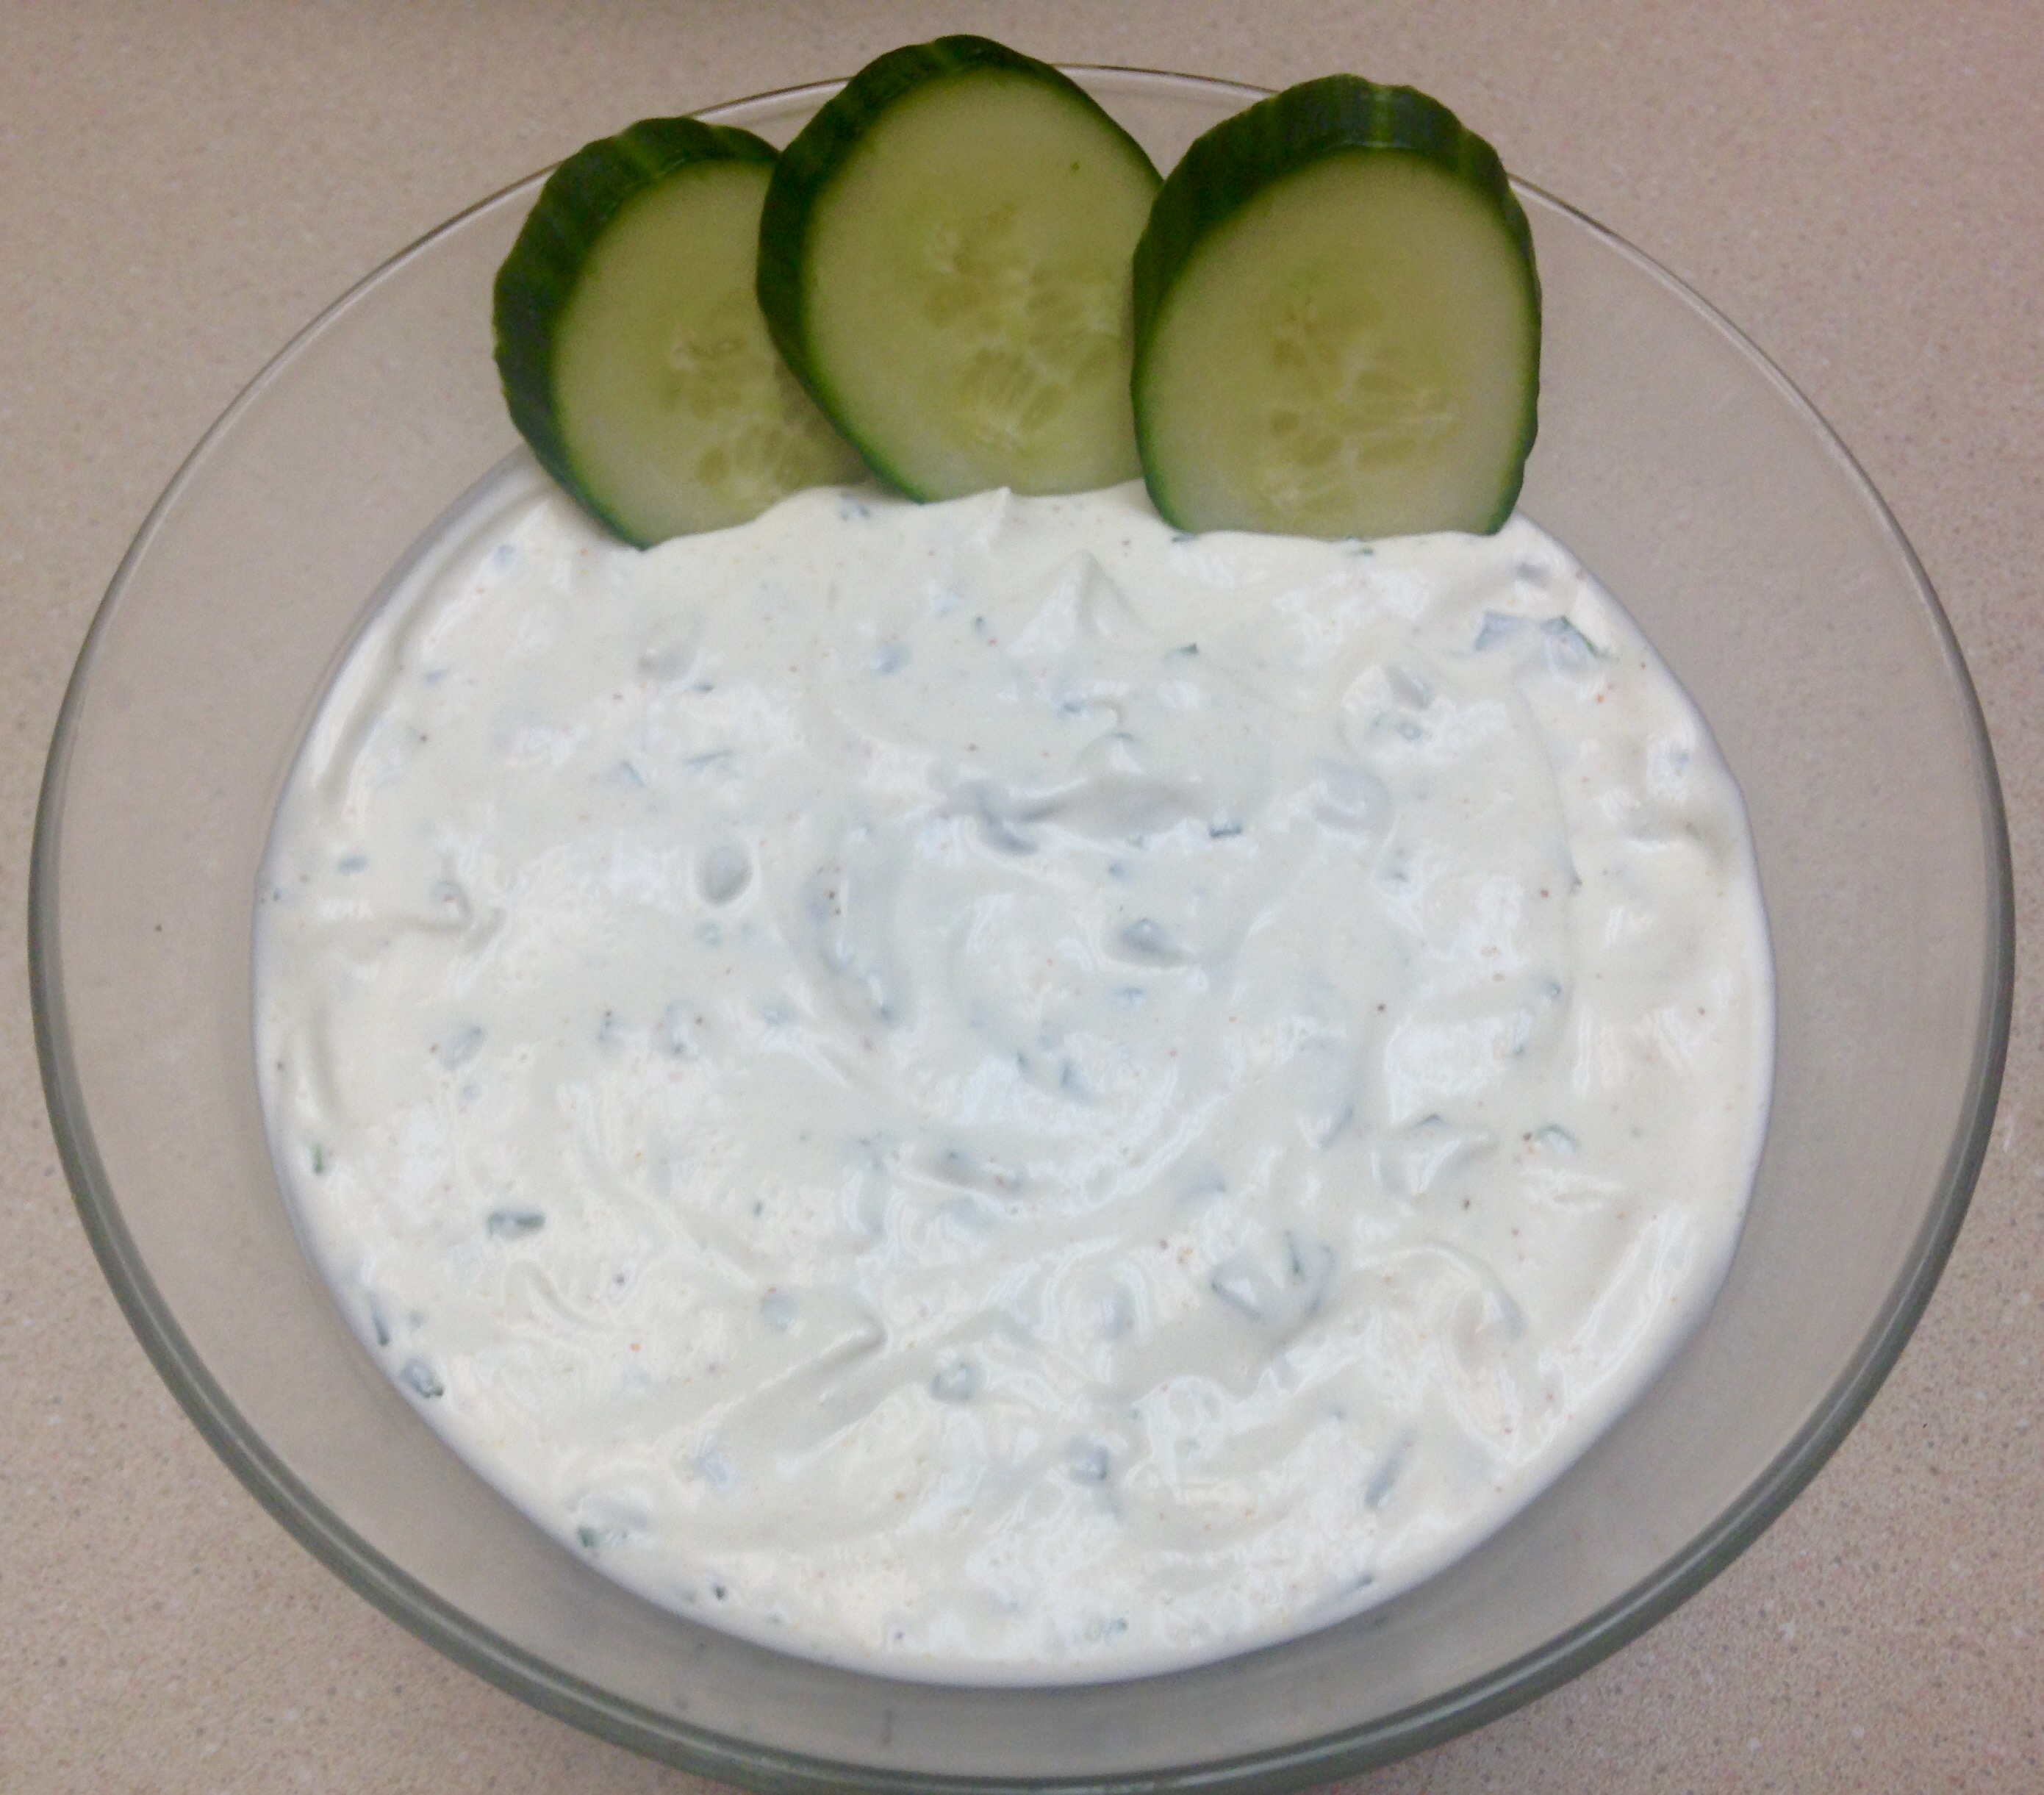
Peanut Butter Yogurt Dip

peanut butter yogurt dip

Double duty yogurt stuff! This works as an awesome dip for fruit as well as a spoonable non-dip snack for Little B. Talk about protein and protein and some subtle sweetness from the apple sauce. The recipe is quick and dirty (but clean) so I will leave the intro the same. Make it and enjoy, even adding some extra cinnamon to make it spicier, if the apple sauce is not already enough. Yum yum! You can see Little B’s hand dipping a blurry strawberry in her eagerness – could not wait until the pics were taken….

Peanut Butter Yogurt Dip

1 cup creamy peanut butter
2 cups whole milk Greek yogurt
1/2 cup apple sauce

In medium bowl combine peanut butter, yogurt and apple sauce. Stir until completely combined. Store in covered dish and chill overnight. Serve with celery, apple slices, mango slices or other fruit. Also works plain as a snack for peanut butter lovers.

Tzatziki

tzatziki_edited-1

I could just eat this stuff straight from a bowl, with a big spoon, as in “would you like some lamb with your tzatziki”? Forget daintily dipping or drizzling it on food. Sometimes I get a Greek salad just to be able to mix tzatziki in with it. I used to love dipping pita bread into tzatziki and hummus – oh, what a bite exploding with flavor! These days, since I don’t eat pita anymore, I rely on roasted meats and veggies as my tzatziki conduits. Beyond the lovely, tangy creaminess of the sauce, I just like saying the word – tzatziki, tzatziki, tzatziki. I eat salsa with Mexican food, I eat wasabi with sushi, I slather steaks with chimichurri, I put mustard on hotdogs and I top Greek food with tzatziki. So there.

Tzatziki

2 cups plain Greek yogurt, or half sour cream and half yogurt
1 medium cucumber
2 large garlic clove, crushed
1 Tbsp finely chopped fresh mint
2 Tbsp finely chopped fresh dill
1 Tbsp olive oil
2 Tbsp fresh lemon juice
Salt, to taste

Peel, halve and remove seeds from the cucumber, then finely dice. Sprinkle salt on the diced cucumber and let sit for about five minutes. Place diced cucumber it between two towels and press gently to remove any excess water. You may need to repeat with more dry towels to get all the water. In a medium bowl combine yogurt/sour cream, garlic, mint, dill, olive oil and lemon juice. Stir until combined. Fold in cucumber and mix until it is evenly distributed. Add salt to taste. Chill overnight before serving.

Post Navigation