Any Kitchen Will Do

Give me a kitchen and I will cook.

Archive for the category “eggs”

Baked Zucchini Wedges

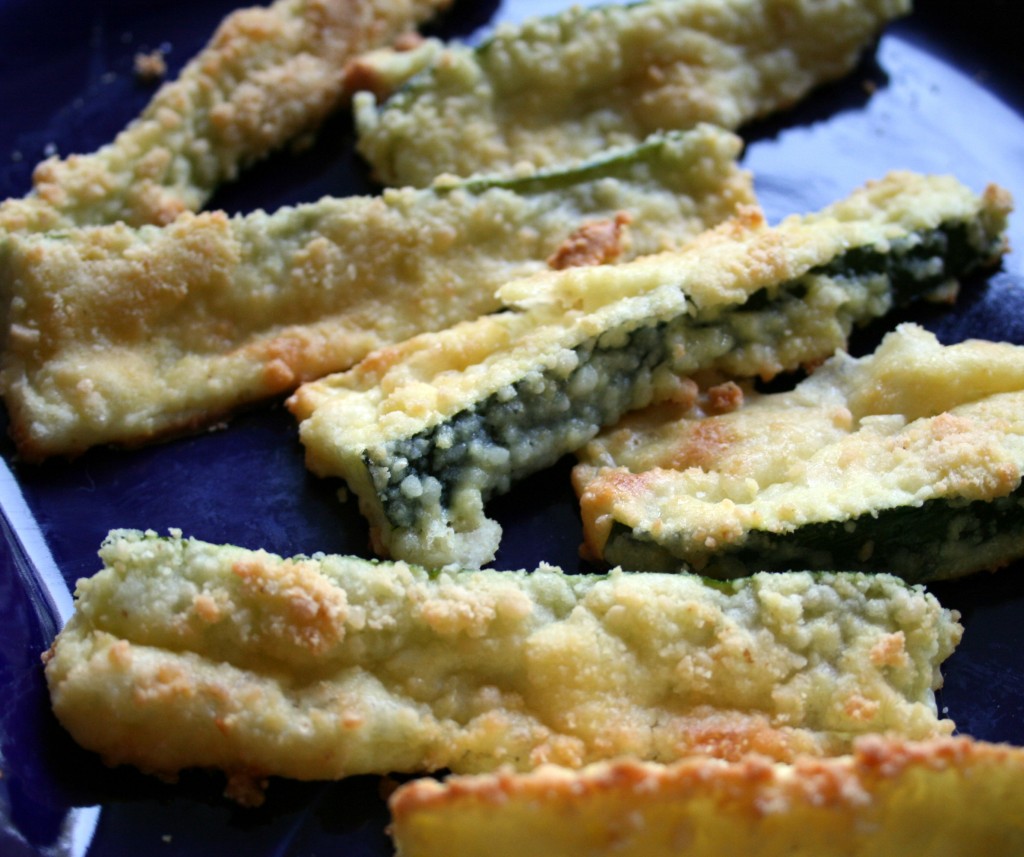
I did it! I finally did it! I made a zucchini dish that Big D declared as the best he has ever had. This is a BIG deal. I love zucchini, but Big D does not. As usual, if I cover something with garlic and cheese there is a high possibility of culinary success around here. Besides being absolutely delicious (hot or cold, we discovered) they were a great balance for the spicy meat Big D cooked up to go along with the zucchini – he has promised to guest blog about it soon (nudge nudge). I don’t know if this bread crumb-less version will work with anything other than the powdery Parmesan cheese typically found in shaker-type containers, but I do know the powdery stuff did a great job of sticking, with the help of some egg.

Baked Zucchini Wedges

2 large zucchini
2 cups finely grated Parmesan cheese
2 tsp garlic powder
1 tsp salt
2 eggs
2 Tbsp water

Preheat oven to 350 Fahrenheit. Slice zucchini in half, then lengthwise into narrow wedges – at least 20 slices per squash. Make available a large non-stick cookie sheet to receive the prepared slices. Mix together eggs and water, making sure they are well combined. Pour into a shallow bowl or deep plate. In another bowl/plate combine cheese, garlic and salt. Dip each slice into the egg mixture, followed by dipping in the cheese mixture. If they will stand on their skin edge, then set them on the sheet skin side down. If they only stand on a wide, white edge, they will be fine, but will cook brown on the side touching the pan. Bake for about 30 minutes until coating on top starts browning. Serve immediately.

Tuna Salad Sautee

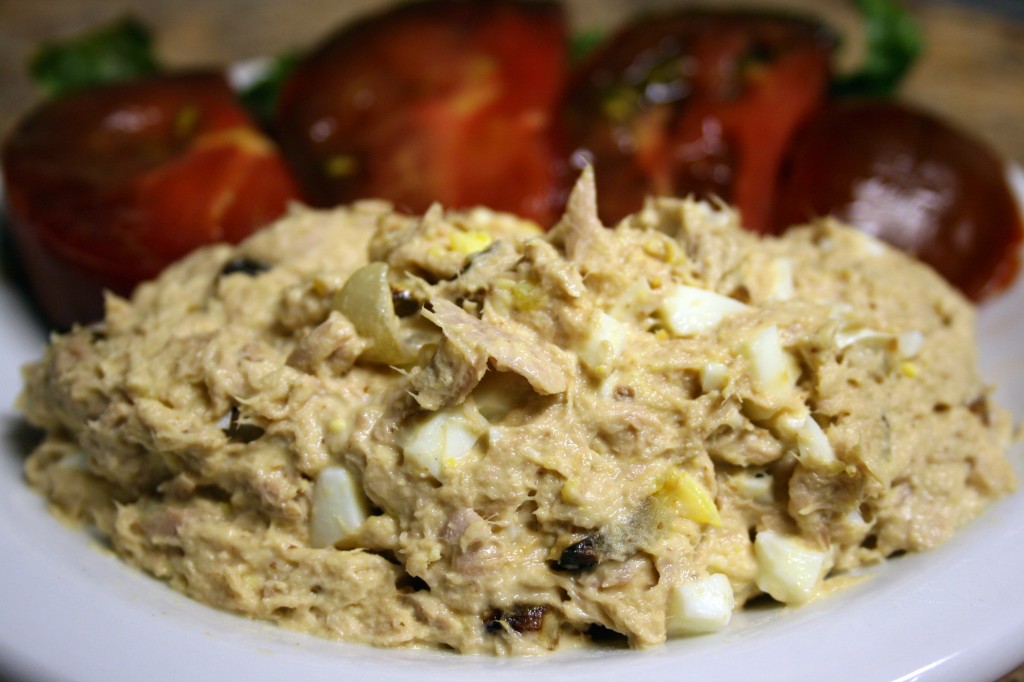
To me summer means eating cool salads. Whether they are cobb, chef, walnut, chicken or tuna, the cool salad always makes me feel happy as the temperatures rise. The word sautee to me sounds like a hot dish, but after the sautee portion of this salad cools off and is chilled, you won’t think of sautee the same again. The sweet of the onion and garlic works really well with the tuna and egg. The bite added by the mustard makes you want to alternate salad bites with those of some chocolate zebra heirloom tomatoes you picked up at the farmers’ market. Oh, that is me. But if you come across some, grab them! They are dark red and purple and green and smell marvelous. The market in Silver Spring was exploding with vegetables, and we could not pass up these tomatoes, which actually taste like a soft red wine to me…kind of a pinot noir or shiraz. They were delish, and went well with my tuna salad sautee creation. Happy summer!!!

Tuna Salad Sautee

4 small cans tuna in water
4 boiled eggs
1 tsp olive oil
½ small sweet onion, finely chopped
4 garlic cloves, finely chopped
½ cup mayonnaise
2 Tbsp horseradish mustard
Salt and Pepper to taste

Heat oil in small pan over medium heat. Add onion and garlic. Sautee until browned and beginning to caramelize. Set aside to cool while the rest of the salad is prepared. Drain water from tuna into small bowl. Place tuna in mixing bowl and serve tuna liquid to eager cats. Roughly chop eggs and add them to the tuna. Add mayonnaise, mustard, salt and pepper to tuna. Stir ingredients until mixed. Add onion and garlic and stir some more until all the dark pieces are pretty evenly distributed. Chill for at least an hour before serving.


Smoky Meat Pucks

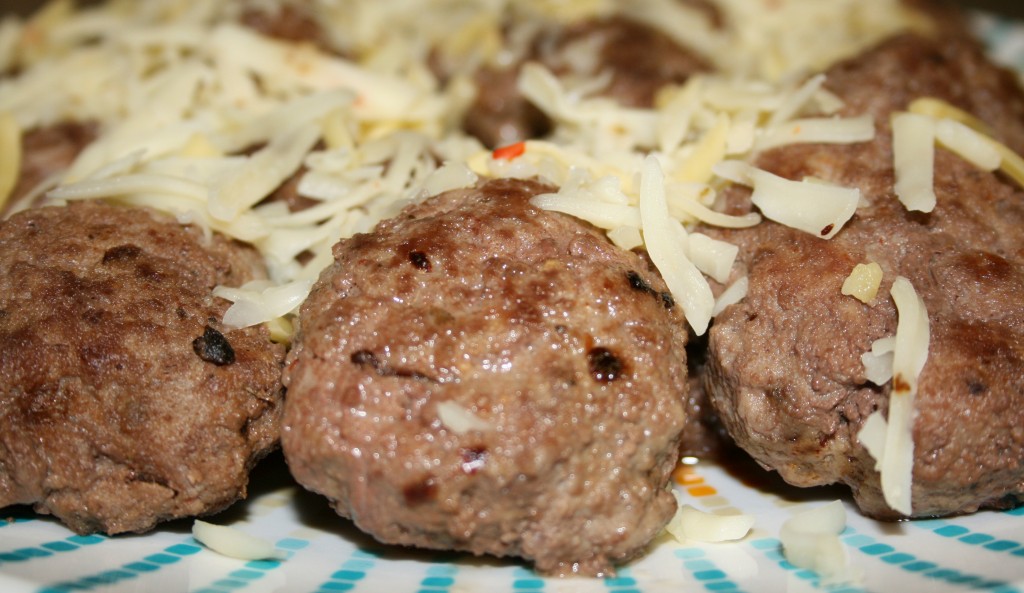
I was originally inspired to make meatballs, but when kids are involved who were asking for hamburgers on buns, I compromised and made pucks – either small burgers or smushed meatballs – however you want to think of them. Since the meatball craving included a desire for smoky flavors I automatically turned to paprika and cheese with a bit of a bite. It felt wonderful to fill our new apartment with the smell of onion and garlic and spices. I also had a blast exploring our local Trader Joe’s to find ingredients. I have not lived near one for years, and cherish the fact there is one on my route home from work. This morning as I write about making the pucks I cannot detect a hint of dinner’s aromas in the apartment, but am glad there are a couple of pucks left to heat up and eat along with the morning eggs. I am eager to further break in our new-to-us kitchen with more smells today! Stay tuned! I’m baaaack!

Smokey Meat Pucks

2 pounds 80/20 ground beef
½ small onion, diced
4 garlic cloves, diced
1 egg
2 Tbsp butter
2 tsp dried paprika flakes
2 tsp dried basil
1 tsp sea salt
1 cup pepper jack cheese

In a medium frying pan melt 1 Tbsp of butter over medium high heat. Add onion and garlic. Cook until it is all a dark caramelized color. Set aside. In a bowl place the ground beef, egg and spices*. Add the onions and garlic. Roll up your sleeves and use your hands to blend together all the ingredients. Form meat into thick, small 2-3” patties. Melt the remaining butter in a frying pan over medium high heat. Cook the patties to desired doneness – about five minutes, including flipping, for medium. Plate and sprinkle with cheese before serving.

*This time I actually used Trader Joe’s South African Smoke Seasoning Blend, which gave it the same flavor as the spice combination I used in the list of ingredients.

Dilly Egg Salad

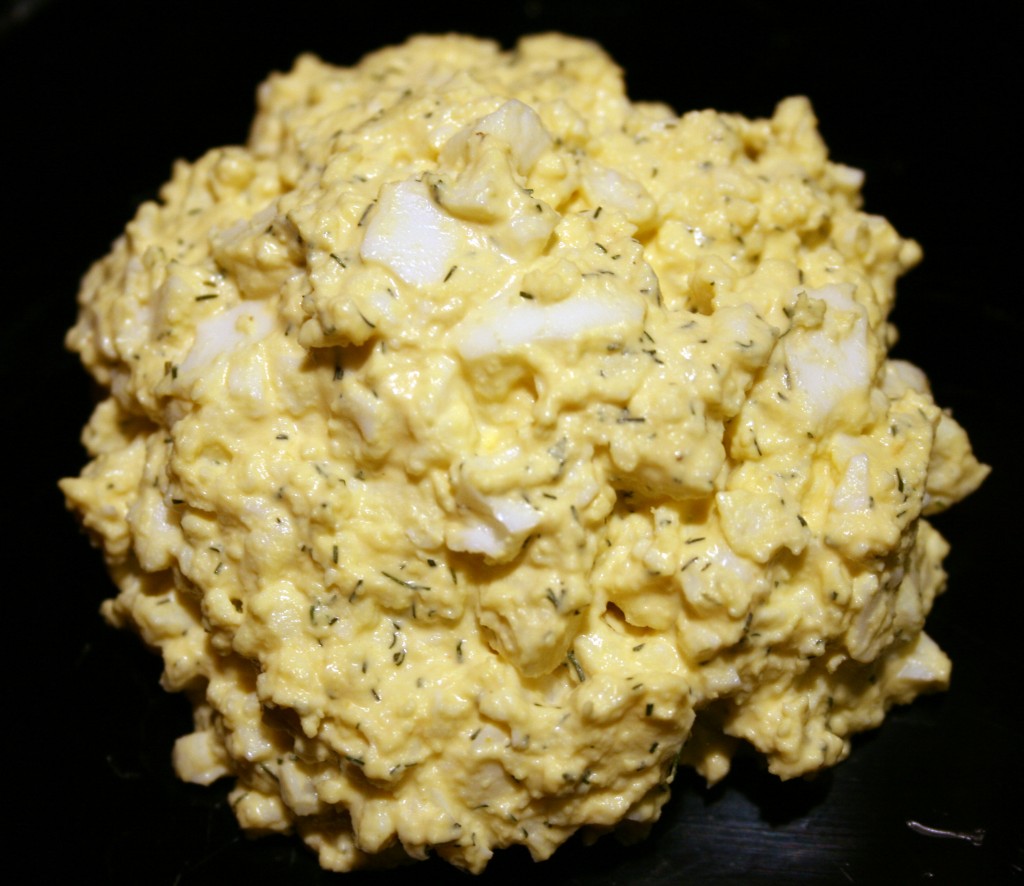
Yes. Another rather unoriginal use for all those Easter eggs that were dyed, hid and hunted (we won’t talk about what happens to the ones that stay hidden, forever. Yech!) After you send everyone home with as many eggs as you can talk them into, there will undoubtedly be some left. Make egg salad! I know this is a very simple recipe that almost everyone can do without direction, but it is still nice to write it down, put together and enjoy the results. I couldn’t help myself after making deviled eggs last week. I even measured everything, because usually I just toss in this and that. It is pretty good, but I just have to remember to brush my teeth before going anywhere. Those garlic and onion powders are really potent! Happy Easter to you and your families!

Dilly Egg Salad

12 eggs, hard boiled and peeled
½ cup mayonnaise
2 Tbsp yellow mustard
1 Tbsp dried dill weed
½ tsp salt
1 tsp garlic powder
½ tsp onion powder

Mash eggs with a pastry blender or potato masher. Make them chunky or finely mashed as you like. Add remaining ingredients and stir until well combined. Refrigerate at least an hour before serving.

Deviled Eggs

Devil may care, but I do not. Eat eggs. Sometimes the healthy eating powers-that-be say they are bad for you, then they change their minds and say they are good for you. Some say the chicken came first while others insist the egg was first in line. They are a great source of cheap protein, make for a great breakfast that will actually hold me until lunch, and, by golly, I like them. Eggs can make sauces better tasting or baked goods light and airy. As Easter approaches there is always a need for ways to use up those colored boiled eggs. Besides egg salad there is at least one other way! Make them deviled!

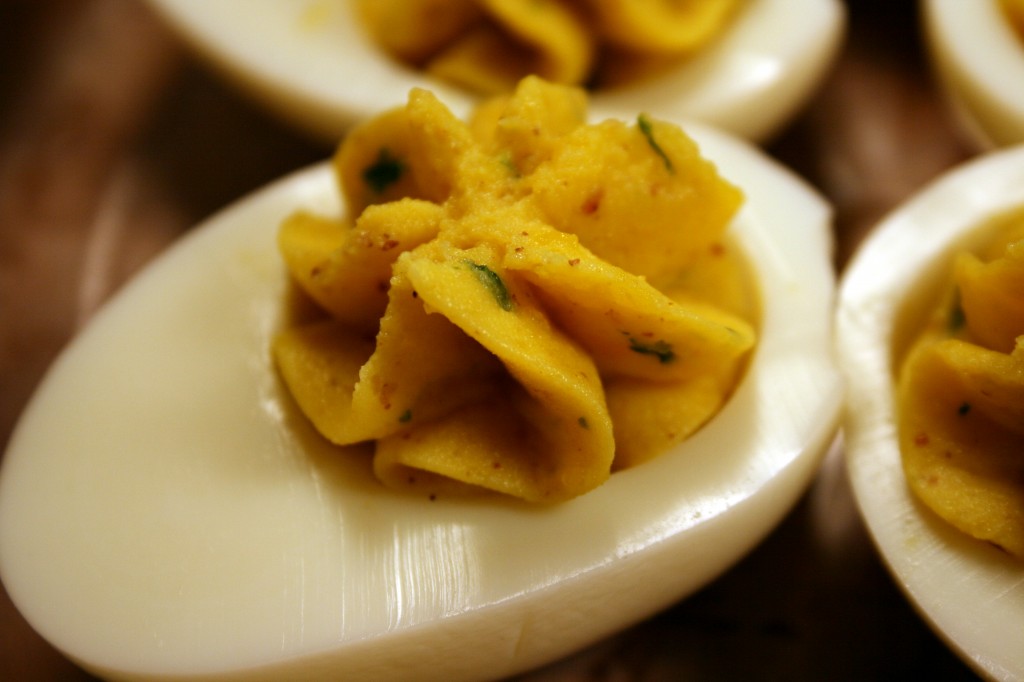
I like making deviled eggs, and an actual deviled egg dish is one of the few specialty serving plates I have on hand at the moment. There is nothing worse than arriving at a party with a plate of deviled eggs, only to find that the sharp right turn you took in the car resulted in the slippery little things smushing up on one side of the plate and the decorated tops all ending up on their sides. Growing up we made them often, only to scarf them down as soon as the whites were filled. Personally I despise the use of sweet pickles or relish in deviled eggs. It is a contradiction I will most likely spit out such abominations if they ever cross my lips. Now dill pickles are another story. They emphasize the already savory nature of the boiled eggs and always taste good with a little mustard mixed in. I am not sure why I started on a pickle tangent because I don’t even use any for this recipe…

From what I can tell, deviled eggs got their name from being spicy, as in full of flavor, and almost evil in their ability to tempt. Even the ancient Romans were known to partake of them. Some people more devout than myself are wont to call them angel eggs, but there is nothing angelic about these babies. What food with horseradish could possibly be considered angelic, of course the seraphim may be the closest. Seraphim eggs? Um. No.

Deviled Eggs

12 large eggs
½ tsp horseradish
1 tsp yellow or stone ground mustard
½ tsp curry powder
1-2 Tbsp mayonnaise or plain yogurt
2 Tbsp green onion, finely chopped

Fill a large pot with about 3” of water. Place over high heat on stove top and bring to a boil. With a slotted spoon gently place eggs, one at a time, into the boiling water. Lower heat to maintain a simmer and cook eggs for 12-15 minutes until hard boiled. Remove pan from heat and tip to let hot water run out while cold water runs into the pot, gradually replacing hot water with cold. Let set for about five minutes then shake pan around to crack shells and loosen them from the cooked whites. Peels should easily come off the eggs at this point. After peeling let the eggs cool completely. When cold, slice eggs in half lengthwise and carefully remove yolks, placing them in a small bowl, while avoiding any damage to the whites. Sometimes the egg whites may tear along the middle of the egg, which may ruin the egg white for using to devil. Just cut them in half along the tear – if you rely on a deviled egg serving dish the whites will sit in the divets of the plate and hold the yolk mixture whether they are cut lengthwise or width-wise. Arrange egg whites on serving dish.

Add all remaining ingredients to egg yolks and combine well. Take care to only use as much mayonnaise or yogurt as needed to thin out the mixture, but stop short of making the mixture runny. It should be thick enough to hold shape, similar to decorating frosting. Place egg yolk mixture into cake decorating bag with a large decorating tip*. Fill egg whites with yolk mixture, using any kind of swirl or twist motion to make them pretty. Chill until time to serve.

*Instead of cake decorating equipment you can use a strong plastic bag (like Ziploc®). Fill bag with yolk mixture and pack it down into one corner. Snip the corner of the bag with scissors, making about a 1/8” to ¼” opening. Squeeze mixture through opening into egg white halves.

Flourless Double Chocolate Cookies

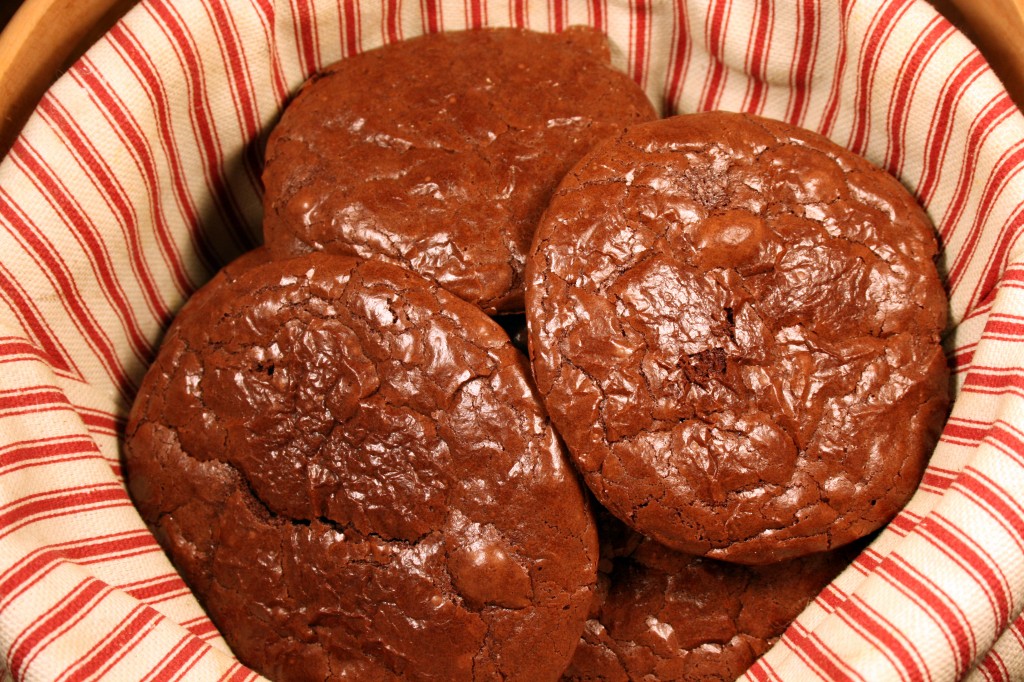
You will want to eat more than one, but you may not be able to! These cookies are rich rich rich. Have some milk handy to help wash them down. I came across the recipe for these flourless cookies here. The batter was almost that of a cake batter instead of doughy and sticky like it says in the recipe. The results I got are also less cake-y than those I saw on the blog, and they came out with almost a brownie-type shininess to them. I don’t know if it was just some random altitude thing, the fact that one of the egg whites was cold, or slightly less cocoa ended up in the batter than was prescribed in the recipe, but I don’t actually care. The results were wonderful.

While we were adding ingredients Little B carefully cracked the third room temperature egg, missed the bowl and proceeded to drop it on the floor between the counter and her learning tower, which meant I added a third egg white cold, straight from the fridge. It may also have been the fact that Little B was helping me start and stop the Kitchen Aid mixer, and at one point turned it on high when we had just added the cocoa – a cloud of chocolate dust rose from the blender and gently settled on the mixer, me, Little B and everything else within 18 inches of the bowl. Next time she started the mixer Little B covered her nose and mouth, waiting for another explosion, which did not happen. Adventures when practicing fine motor skills! I will definitely try the recipe again, and will eagerly await the results. I bet next time they will again be deliciously rich, delicate and powerful treats.

Flourless Double Chocolate Cookies

3 egg whites, at room temperature
1½ cups powdered sugar
¾ cups cocoa powder
¼ tsp salt
1 tsp vanilla extract
½ cup semi-sweet chocolate chips, melted

Preheat oven to 350˚. In a kitchen stand mixer, beat egg whites until soft peaks form (about 5 minutes). Beat in ½ cup of powdered sugar until mixture is well blended. Add the rest of the ingredients, including the remaining sugar, and beat until well blended. Dough will be stiff and sticky. Using a greased spoon or hands, drop balls of dough onto a baking sheet lined with parchment paper. Bake for 10-12 minutes; cool on a cooling rack.

Traditional Irish Breakfast

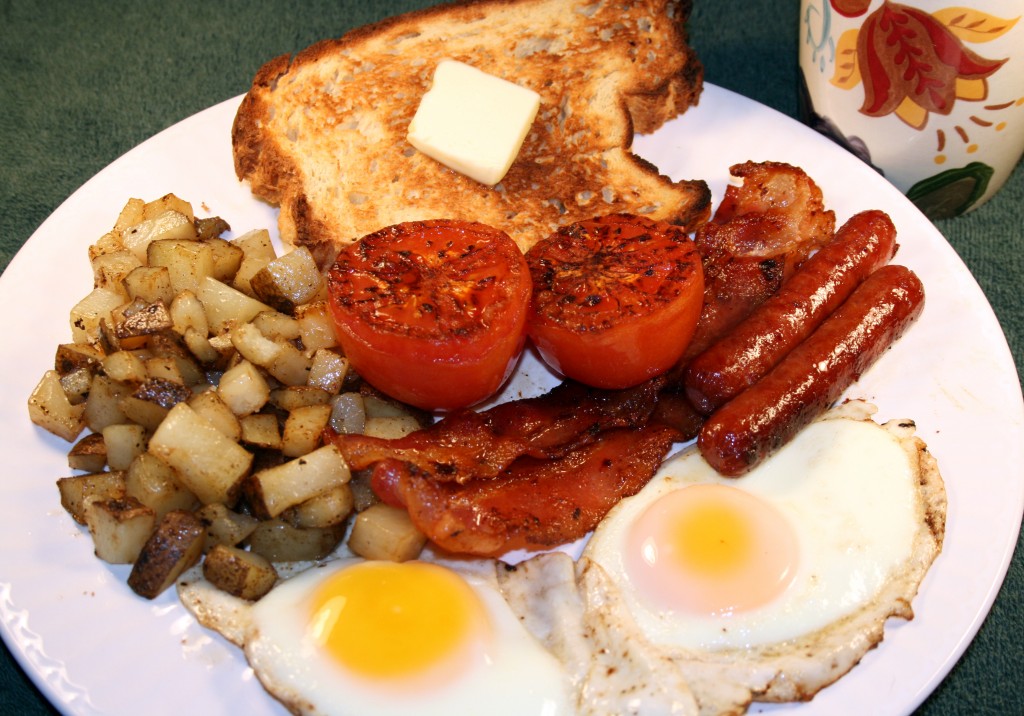
I almost did not post this recipe. Not because it is broken, but because my picture does not quite tell the whole story. I thought this to be a good reason not to post when I took it, then the next day I thought the reason silly. I love cooking and photography. One reason I began this blog was to combine these two loves. Other reasons include telling stories and sharing discoveries about food. Combine all this and it led me to an executive blogging decision. A picture is worth a thousand words, so who cares if I need to add a few more to complete the story? If I expected perfection every time I shared recipes and pictures with you I would never post anything. So here is my post about the traditional Irish Breakfast, Americanized and wheat free. I will explain.

Big D and I agree that we have found two places in the US where we can get a traditional Irish Breakfast like we had in Ireland. One is in Alexandria, Virginia, and the other is in Las Vegas, Nevada. Yep. Vegas baby! I am sure there are other places, but these are the two we have found in our travels. A bunch of places say they serve a traditional breakfast, but just don’t cut it. Like anyone else, the Irish break their fast after a night of sleep by eating a meal. For the hard working majority and tourists (like me) who relied on B&B vouchers during my trip, a hearty breakfast quickly prepared in one pan is ideal for getting on with the day and not having a growling stomach an hour later. In fact, the breakfast often held us until dinner without a problem. We did indulge in soft serve frozen cream soft serve wherever we encountered it (omigosh I can still taste it. Yum!), but that doesn’t really count, does it? If you are in pursuit of a completely traditional meal as I describe below you can get quality versions of all the hard to find ingredients from Tommy Maloney’s, but as you’ll see it will cost you.

Traditional Irish Breakfast for Two

3 Tbsp butter
2 rashers bacon
4 bangers
2 slices each black and white pudding
1 tomato, quartered
4 eggs
1 small potatoes, cut in bite-sized pieces or thin slices
1 cup baked beans, heated
2 slices Irish brown bread
2 bags Irish Breakfast Tea
2-3 cups boiling water

Preheat oven to 350F, then turn off the heat. Place two serving plates in the oven – as parts of the breakfast are cooked you will split them between the two plates. Heat beans in a small pot on low while the rest of the breakfast is prepared. Melt 2 Tbsp of the butter in large skillet and cook puddings, rashers and bangers until browned but not crisp. Remove from skillet and place on the plates in oven. Fry up potatoes in bacon/banger/butter grease. When potatoes are half done add tomatoes, cut side down, to the middle of the pan. Remove potatoes, when tender but not browned, to warm in the oven. Remove tomatoes to warm plates when done, which means they are soft and the skin begins to wrinkle. Begin bread toasting and tea brewing. Add the last Tbsp of butter into the pan and melt. Add eggs and fry to desired doneness, ideally sunny side up. I usually lower the heat after breaking the eggs into the pan and cover it, which encourages the eggs to cook evenly without needing to flip. Add bread and beans to plates and eat hot!

—————————————

Can you have a traditional Irish Breakfast without the black and white puddings? Yes, because that is what we had yesterday, but it was not quite the same without it. Like breakfast anywhere, individual preferences and what is locally available forms what goes on a plate. What the heck are rashers and bangers and pudding? Well, two are more easily explained than the third. Rashers are basically ham/bacon pieces cut from the back of the pig instead of the belly like American bacon, which makes for a hearty piece of meat. Bangers are thicker pork sausages – larger than the typical American sausage link, but smaller than, say smoked sausage. Now the pudding does not really have an American parallel. Irish pudding is a mixture of oatmeal, spices and sometimes meat set up in casings like sausage. The white pudding is primarily the oatmeal and spices, while black pudding has the addition of blood, usually pig’s blood, and prepared like other sausage. The black and white puddings have a particular taste and texture which sometimes turn people off. I appreciate them in small quantities. Big D on the other hand could eat plate fulls with a big grin on his face (along with haggis, but that is another story).

In our small Texas town we could not find the pudding, and Big D could not even find anyone who would sell him pig or cow blood to make his own pudding with his sausage making contraption. It is completely missing from our meal. Also, no rashers were available so we substituted thick cut bacon. Bangers were unavailable so we substituted beef breakfast sausages. The canned baked beans available around here are sweetened overwhelmingly, unlike Irish baked beans, so we just left them out. On top of all these changes, we also had gluten-free bread instead of Irish brown bread to address Big D’s wheat sensitivities.

As with traditional American breakfasts, some things on a traditional Irish breakfast plate vary depending on preference – some cannot bear to be without their baked beans, while others want their eggs scrambled or drink coffee instead of tea. As I mentioned earlier, the picture represents an incomplete Irish breakfast, but the recipe takes you through the traditional version to which I was introduced while traveling Éire. Regardless of my qualms about this post, the breakfast was delicious. After eating it we leaned back, smiling, full and happy.
 

Eggy Breakfast Muffins

Eggs are quite quick and easy to cook. I love eating them in all ways and forms of preparation. My favorite of all time is Eggs Florentine with classically poached eggs, barely wilted spinach and crisp home fries on the side. When I was growing up our family Sunday brunch usually fell near one of two extremes. The first was a champagne brunch at the club, where I was summarily denied anything more than a sip of champagne or a soaked strawberry until I was ‘of age’. The second was a feast at home after we returned from church and changed into our play clothes. My mom and dad often split the cooking. Me and my brother set the table and stayed out of the way. The kitchen was square and they did a little dance moving between the sink, stove and fridge. While mom made fruit cups dad would whip up waffle batter and crank out a pile of them a foot high. The waffle iron made huge waffles with little divots. I much prefer them to the big divoted belgian waffle irons. Other times he made SOS (mildly put, creamed beef on toast) or mom made drop biscuits while dad cooked up the most perfect fried eggs. He would gently fry them in oil. He never flipped them, but splashed oil from the pan over the top to cook the upper half. We also often set the table with boiled egg cups – the eggs were boiled just enough to cook the whites and leave most of the yolk runny. The pointy end went in the cup and we snipped the top off, using little spoons that just fit into the egg to scoop out buttery bites.

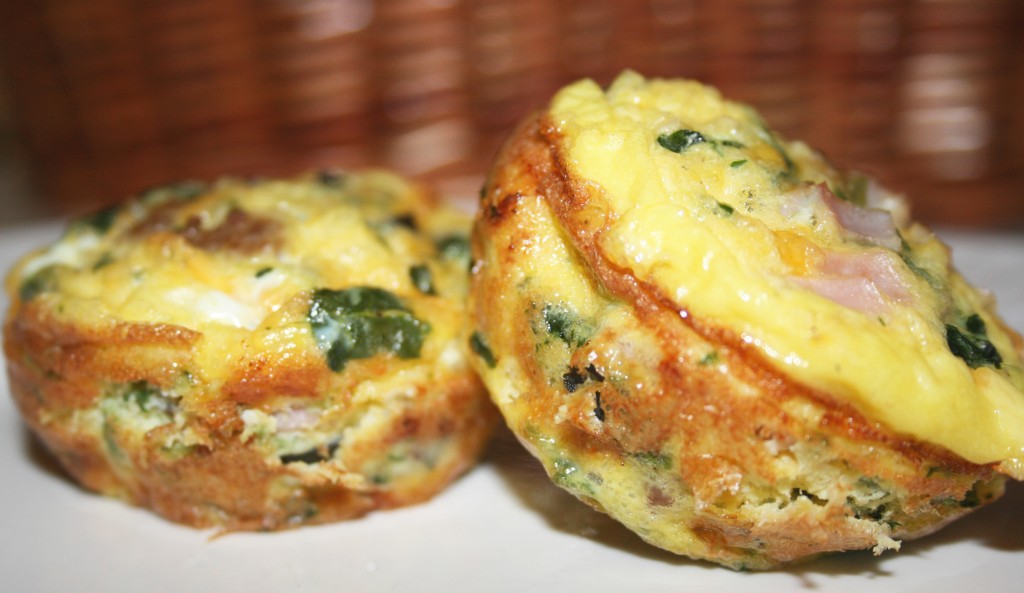
Growing up Catholic we observed the tradition of fasting before Mass. Even though we went to the first service at 8:30, it still meant the earliest we would eat at home was about 10:00. I was always famished by then, since the rest of the week my stomach received breakfast by 7:30. When my stomach is grumbling first thing in the morning it is almost torture waiting for the yummy bits to cook that accompany eggs – the bacon or potatoes to crisp, the sausage patties to sear, the making of Hollandaise sauce or the baking of biscuits. One solution to my desire for instant gratification is to resort to carbohydrate loaded, oily fast food breakfast sandwiches. Another is to buy those frozen things that heat up fast, but are rubbery on the outside and cold on the inside. My third and favorite solution is baking little quiche-like ‘muffins’ – they can be eaten immediately, or pulled from the fridge or freezer and microwaved while retaining their moist and savory goodness. The content of each batch of muffins I make varies and is directly impacted by the content of my kitchen. They always have eggs and cheese, but the meat and veggies change constantly – leftover roast chicken and broccoli are popular additions, as are grilled pork chops and potatoes. Muffins with salmon, dill and asparagus are wonderful. On top of everything else, Little B adores cracking eggs, whisking them into oblivion and stirring them up with the filling. I rarely deny her an egg experience.

Eggy Breakfast Muffins

9 eggs
6 ounces frozen spinach
1 cup cheese, grated
4 ounces ham or cooked sausage, small dice
1/4 cup black olives, chopped
Salt and pepper to taste
2 tsp dried parsley
1/2 tsp garlic powder
1/4 tsp onion powder

Heat oven to 375F. Grease a 12-hole muffin pan. In the microwave cook the spinach for about two minutes in a covered dish. When it cools squeeze as much liquid out of the spinach a possible. Chop finely. In a medium sized bowl add the cheese, meats, spinach and olives. Stir together. Crack all eggs into a separate bowl. Add salt, pepper, garlic, onion powder and parsley. Whisk the eggs until whites and yolks are well blended. Pour egg mixture over the cheese, meats and vegetables. Stir everything together until all is coated with egg. Spoon mixture into muffin pan until it is evenly distributed – they holes should be 2/3 to 3/4 full, depending on pan size. Bake in preheated oven for 15-20 minutes until they start to brown on top. Remove from oven and let muffins cool in pan for about five minutes. Run a knife around the edge of each round to separate them from the pan, then gently lift them out onto a serving dish. Serve immediately. They also do well heated up in the microwave after being refrigerated or frozen.

Egg Bake

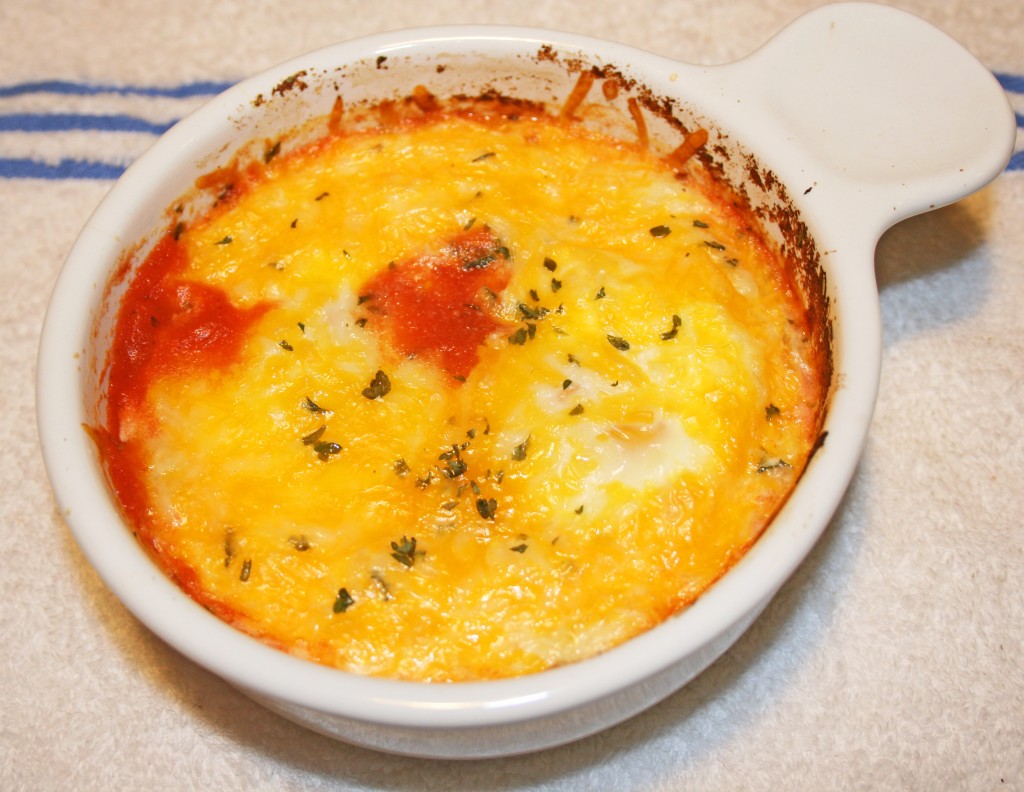
When I was a single working girl I loved making these eggs for breakfast. They would warm me up on winter mornings when I was not feeling it for oatmeal. I would set it up and start it baking right when I woke up. By the time I was ready for work my breakfast was ready too! If I wasn’t running late I would sit and enjoy every bite before leaving home. If I was running late I would snap a top on it and take it with me, enjoying it at my desk while my slower-than-molasses computer booted up.

My married version of this dish is a little different – I triple the recipe, which works wonderfully, and bake it in a small casserole dish. Big D may or may not be interested – he is not a big breakfast eater – or even be awake to decide. It also may be a morning when Little B decides she does not want any other food touching her eggs. After I eat my share eventually – following the preparation of eggs ‘without all that red stuff on them’ – the leftovers will go in the fridge. Microwaving the eggs to reheat may make an explosive mess. It tastes okay cold, but is just not the same. I end up not making it much anymore.

When I made it today I was by myself in the house. I curled up on the couch and loved every bite. I was not hurrying to leave for work, but it still warmed me up on a cold day. It tasted as good as it always did.

Egg Bake

1 14.5-ounce can diced tomatoes
4 eggs
1/2 cup grated cheese
1 tsp dried oregano
1 tsp dried parsley
Pinch garlic powder
Pinch onion powder
Salt and pepper to taste

Preheat oven to 350F. Open the can of tomatoes, but don’t pour them out. Add oregano, parsley, garlic and onion powders, as well as salt and pepper. With a spoon mix up the spices with tomatoes in the can. Divide tomato mixture between two 12 ounce oven-proof ramekins. Break two eggs into each ramekin*. Top with cheese. Bake for 20-25 minutes until eggs are cooked to desired doneness.

*Since I was usually cooking for one I placed the second ramekin with tomatoes (before adding eggs and cheese) in the fridge. The next day I could quickly add the eggs and cheese and continue preparation.

Post Navigation