Any Kitchen Will Do

Give me a kitchen and I will cook.

Archive for the category “vegetables”

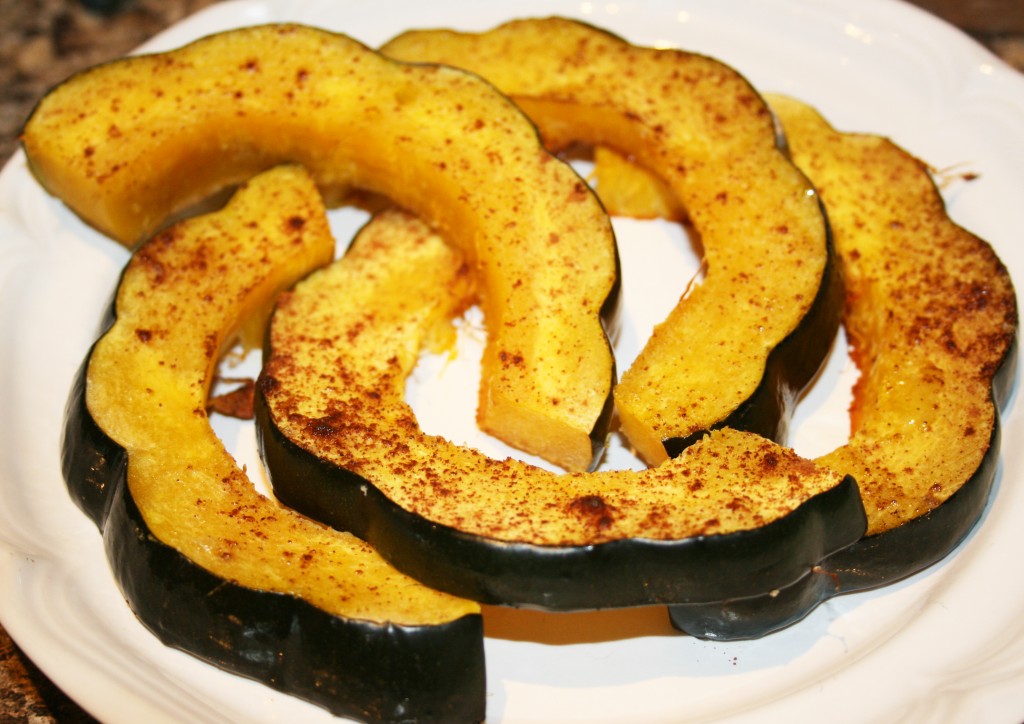
Roasted Acorn Squash

I know it is not peak season for acorn squash, but I wanted to add some variety to our dinner vegetables. I often just cut the squash in half and bake with some butter and brown sugar in the middle, but I am trying to cut down on added sugar while increasing nutrients. This roasted version has three advantages: 1) it makes the squash almost finger food, which gets more inside of Little B, 2) the skin is soft enough to eat along with the flesh, and adds more nutritional value to the dish, and 3) it adds a bit of sweetness naturally to an otherwise savory meal. I made this batch of squash at what used to be a house at a lake near where we currently live. The old house has since been replaced and is now owned by other family members. Although Big D’s grandparents have both passed, some of their well used equipment continues to be used on a regular basis where the family lake house once stood. I used some wonderfully blackened cookie sheets that are older than me – they belonged to Big D’s grandmother. They did a beautiful job of evenly cooking the squash. I know Grandma Seals enjoyed watching me use them.

Roasted Acorn Squash

2 acorn squash
3 Tbsp olive oil
1 tsp cinnamon
1 tsp salt

Preheat oven to 400F. Cut squash in half lengthwise, remove stringy membrane and seeds, then horizontally make slices about 1/2 inch wide to create “C” shaped pieces. Grease a large cookie sheet with 1 Tbsp of the olive oil. Place squash pieces on sheet in one layer. Sprinkle remaining oil on slices. The best way to evenly distribute the oil is to get messy – pour it on your hands and wipe the top of each piece with your oiled fingers. Sprinkle slices with cinnamon and salt. Bake in oven for about 25 minutes, until squash is tender (a fork slides easily into the thicker pieces) and just starting to turn golden brown. Do not be deceived – it may not look done, but it really will be. Serve immediately.

Vegetable Curry Bake

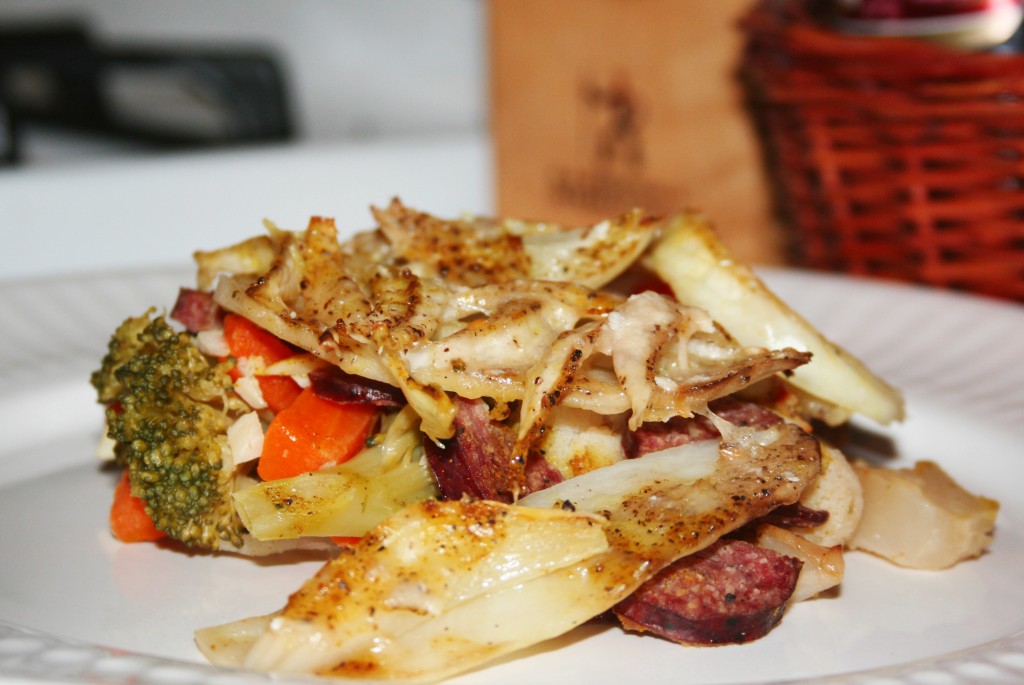
I originally planned to make a chicken curry soup in the crock pot yesterday. Unfortunately it rained. When it rains Little B and I usually go outside and splash around in puddles and follow the path the water takes from the ditches to the creek. Don’t worry grandmothers. We don’t go cavorting when there is lightning or thunder, and we watch the flowing water from above. Our rainy adventure took much longer than originally planned, so there was not enough time before dinner to cook the soup slowly the way I like it. I will do it another day. There was time to layer up a casserole and get it baked, and my hankering for curry was humming away, so I checked out the fridge and pantry. I am working on improving my ratio of vegetables to meat, in that I want to eat mostly vegetables and a moderate amount of meat. I love meat, but it is loaded with calories. I don’t ever expect to completely remove meat from my diet, but eating less of it could not hurt. The following is an attempt at improving the veggie/meat ratio without leaving me hungry an hour later.

Vegetable Curry Bake

3 medium potatoes, sliced thin
1 1/2 cups broccoli, roughly chopped
1 1/2 cups cauliflower, roughly chopped
1 cup baby carrots, roughly chopped
4 cloves garlic, roughly chopped
2 – 3 8” smoked sausage links, sliced lengthwise and then into bite-size pieces
1 large yellow onion, sliced to a medium julienne
3 Tbsp extra virgin olive oil
1 Tbsp curry powder
1/2 cup broth (beef, chicken or vegetable)
3/4 cup Parmesan cheese, grated
Salt and Pepper to taste

Preheat oven to 325F. Grease a 9”x13” baking dish. Use half the potato slices to make a layer on the bottom of the dish, completely covering it by overlapping the slices. Lightly salt and pepper the potatoes. Add a mixed layer of the cauliflower, broccoli and baby carrots, topping with the chopped garlic. Sprinkle half the curry powder over the vegetables. Sprinkle the sausage slices on top of the vegetables. Add another layer of potato with the remaining slices. Finish with a layer of onions. Pour the broth over the onions, making sure it gets evenly distributed. Drizzle the olive oil over the top, along with some salt, pepper and the rest of the curry powder. Cook covered for one hour. Uncover and sprinkle with cheese. Cook an additional 30 minutes until brown on top. Let rest for about 10 minutes before serving.

Eggy Breakfast Muffins

Eggs are quite quick and easy to cook. I love eating them in all ways and forms of preparation. My favorite of all time is Eggs Florentine with classically poached eggs, barely wilted spinach and crisp home fries on the side. When I was growing up our family Sunday brunch usually fell near one of two extremes. The first was a champagne brunch at the club, where I was summarily denied anything more than a sip of champagne or a soaked strawberry until I was ‘of age’. The second was a feast at home after we returned from church and changed into our play clothes. My mom and dad often split the cooking. Me and my brother set the table and stayed out of the way. The kitchen was square and they did a little dance moving between the sink, stove and fridge. While mom made fruit cups dad would whip up waffle batter and crank out a pile of them a foot high. The waffle iron made huge waffles with little divots. I much prefer them to the big divoted belgian waffle irons. Other times he made SOS (mildly put, creamed beef on toast) or mom made drop biscuits while dad cooked up the most perfect fried eggs. He would gently fry them in oil. He never flipped them, but splashed oil from the pan over the top to cook the upper half. We also often set the table with boiled egg cups – the eggs were boiled just enough to cook the whites and leave most of the yolk runny. The pointy end went in the cup and we snipped the top off, using little spoons that just fit into the egg to scoop out buttery bites.

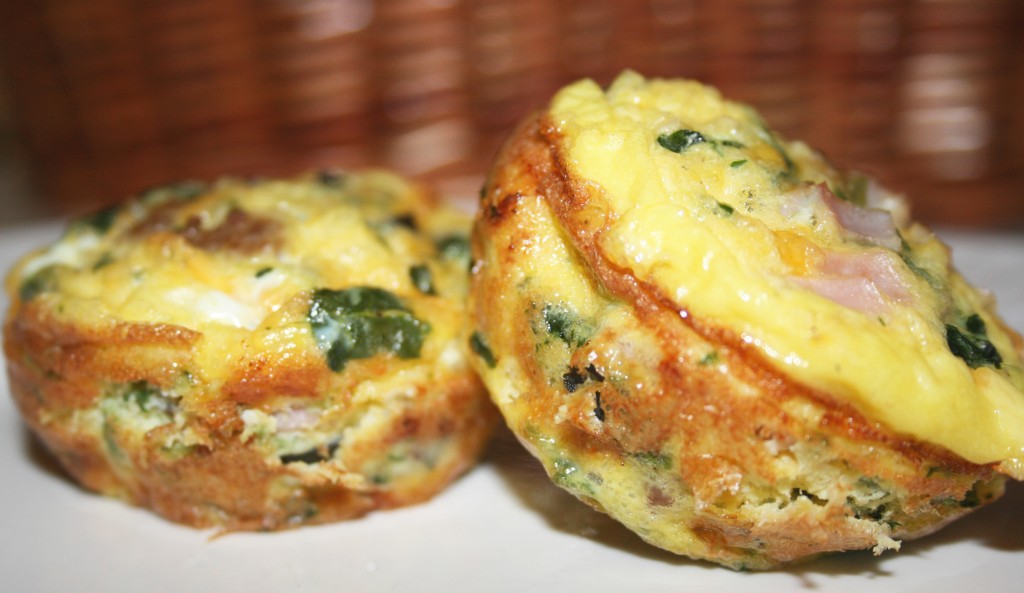
Growing up Catholic we observed the tradition of fasting before Mass. Even though we went to the first service at 8:30, it still meant the earliest we would eat at home was about 10:00. I was always famished by then, since the rest of the week my stomach received breakfast by 7:30. When my stomach is grumbling first thing in the morning it is almost torture waiting for the yummy bits to cook that accompany eggs – the bacon or potatoes to crisp, the sausage patties to sear, the making of Hollandaise sauce or the baking of biscuits. One solution to my desire for instant gratification is to resort to carbohydrate loaded, oily fast food breakfast sandwiches. Another is to buy those frozen things that heat up fast, but are rubbery on the outside and cold on the inside. My third and favorite solution is baking little quiche-like ‘muffins’ – they can be eaten immediately, or pulled from the fridge or freezer and microwaved while retaining their moist and savory goodness. The content of each batch of muffins I make varies and is directly impacted by the content of my kitchen. They always have eggs and cheese, but the meat and veggies change constantly – leftover roast chicken and broccoli are popular additions, as are grilled pork chops and potatoes. Muffins with salmon, dill and asparagus are wonderful. On top of everything else, Little B adores cracking eggs, whisking them into oblivion and stirring them up with the filling. I rarely deny her an egg experience.

Eggy Breakfast Muffins

9 eggs
6 ounces frozen spinach
1 cup cheese, grated
4 ounces ham or cooked sausage, small dice
1/4 cup black olives, chopped
Salt and pepper to taste
2 tsp dried parsley
1/2 tsp garlic powder
1/4 tsp onion powder

Heat oven to 375F. Grease a 12-hole muffin pan. In the microwave cook the spinach for about two minutes in a covered dish. When it cools squeeze as much liquid out of the spinach a possible. Chop finely. In a medium sized bowl add the cheese, meats, spinach and olives. Stir together. Crack all eggs into a separate bowl. Add salt, pepper, garlic, onion powder and parsley. Whisk the eggs until whites and yolks are well blended. Pour egg mixture over the cheese, meats and vegetables. Stir everything together until all is coated with egg. Spoon mixture into muffin pan until it is evenly distributed – they holes should be 2/3 to 3/4 full, depending on pan size. Bake in preheated oven for 15-20 minutes until they start to brown on top. Remove from oven and let muffins cool in pan for about five minutes. Run a knife around the edge of each round to separate them from the pan, then gently lift them out onto a serving dish. Serve immediately. They also do well heated up in the microwave after being refrigerated or frozen.

Pizza Pizza Pizza!

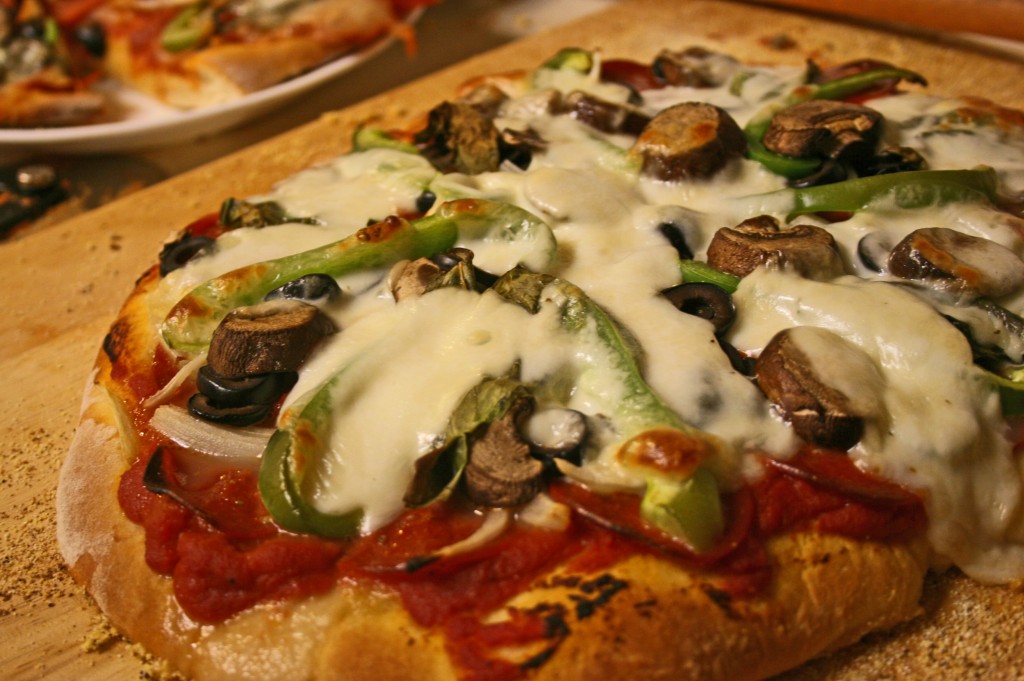
I returned home yesterday after visiting my in-laws and my mom. My brother was there too! What a treat! To commemorate our last evening together we made a total mess of the kitchen making pizza. One obstacle regarding the pizza crust was a lack of a recipe. The one I have relied on for years was at home (what I get for having not yet scanned all my old recipes), and the one my brother usually used was not at mom’s place either, so my brother dug around online and found this one, which worked great. Mom’s pizza stone got a good workout making FIVE pizzas and Grandma Heflin’s 80 year old cedar rolling pin did a darned good job on rolling out the dough. When the dough was ready and the toppings prepared we stuck Little B on a stool and had her help us with topping the pizzas. She loved throwing, er, placing the vegetables and pepperoni all over the place, especially in big piles. We had to make a couple of adjustments before they went in the oven, like reducing the pile of five cheese slices, but we all had blast. My brother was the work horse for the evening, watching the baking times, transferring the pizzas from the stone, and making sure everyone got what they wanted, or didn’t want, on the pizzas. Here is what we did. These things are fun and fun is good, to quote Dr. Seuss.

Pizza Pizza

2 batches pizza dough (makes about five 12-inch pizzas)

1 large can diced tomatoes

1 small can tomato paste

2 Tbsp plus ½ cup olive oil

1 clove garlic, crushed

Salt and Pepper to taste

2 bell peppers, cut into strips

10 baby portabello mushrooms, sliced about ½ cm thick

1 bunch basil, washed with stems removed

1 large can black olives, sliced into rings

½ large white onion, sliced thin julienne

5 ounces turkey pepperoni (or the fatty kind if you are not trying as hard as I am to justify eating pizza)

2 pounds buffalo mozzarella, sliced about ½ cm thick

1 cup corn meal

1 cup flour

Place pizza stone in cold oven. Turn oven on to 450-475F, depending on your oven. In a bowl mix together diced tomatoes, tomato paste, garlic, olive oil, and salt and pepper to taste. Smush some of the tomatoes, but leave some chunky. Roll out on floured surface 1/5 the dough into a 12 inch round. Transfer the round to a pizza peel (or the back of a cookie sheet) that has been sprinkled with corn meal. Spread a thin layer of olive oil (about 2 Tbsp) on the crust. Add about 1/5 of the tomato sauce*. Layer other toppings (mushrooms, pepperoni, olives, onions, basil) as desired, topping with 1/5 of the cheese. When oven and stone are hot, sprinkle the stone with corn meal then slide the pizza on to stone and cook for 14-16 minutes. If the first pizza does not brown on top you may need to raise the oven temperature.

While the first pizza is cooking, make sure you have transition stations set up (this is where the dishes and clean up time increased exponentially) – one platter for setting on the table, one surface for receiving a pizza just out of the oven, and one for a prepared pizza ready to go in the oven. If you have a pizza peel the pizza transfer from oven to cutting board is a breeze. If you don’t have a peel (like us), make sure you have the thickest oven mitts you can find, or check your grilling/fire pit supplies to see if you have at least one high temperature glove to help handle the stone. We had to remove it from the oven to slide it onto the cutting surface. It is really hot! If you don’t have a pizza stone the whole cooking time and transfer issue is completely different than what is described here, and I have faith you can figure it out. Good luck!

This baking method and timing melts the cheese, browns the surface a bit and cooks the crust, but it does not completely cook the vegetables until limp. We like ours a bit crispy. If you want your vegetables cooked a little more it may help to blanch or saute them before you start making the pizzas.

*On one of the pizzas we used a wonderful pesto instead of the tomato sauce. It was from Humble House Foods who sell at the Pearl Farmers Market. Amazing pizza results and the most delicious pesto ever!
Greek Salad On A Stick

I will start by saying these toothpick-mounted wonders are the closest I got to making football shaped food this year. I actually watched quite a bit of the Super Bowl today. Good game, considering I did not feel strongly about one team or the other winning. I don’t watch much professional American Football these days; mostly because I don’t have a TV at home, but even more because any attempt I make to do something for hours at a time is frequently interrupted by a lively 2 1/2 year old daughter. When I weigh time with Little B against watching football, Little B always wins.

Greek salads are things I can just eat and eat, especially with some hot grilled kebabs on top. My favorite of all time is at Papouli’s in San Antonio – they have a killer dressing. The tanginess of the dressing, olives and feta just pull me in, and are much less bad for me health-wise than my other salad love, blue cheese dressing. Yes, I know blue cheese dressing is not a salad – I need the lettuce and tomato and cucumber to hold the dressing – but the calorie and fat load of blue cheese dressing can wreak havoc on almost any diet.

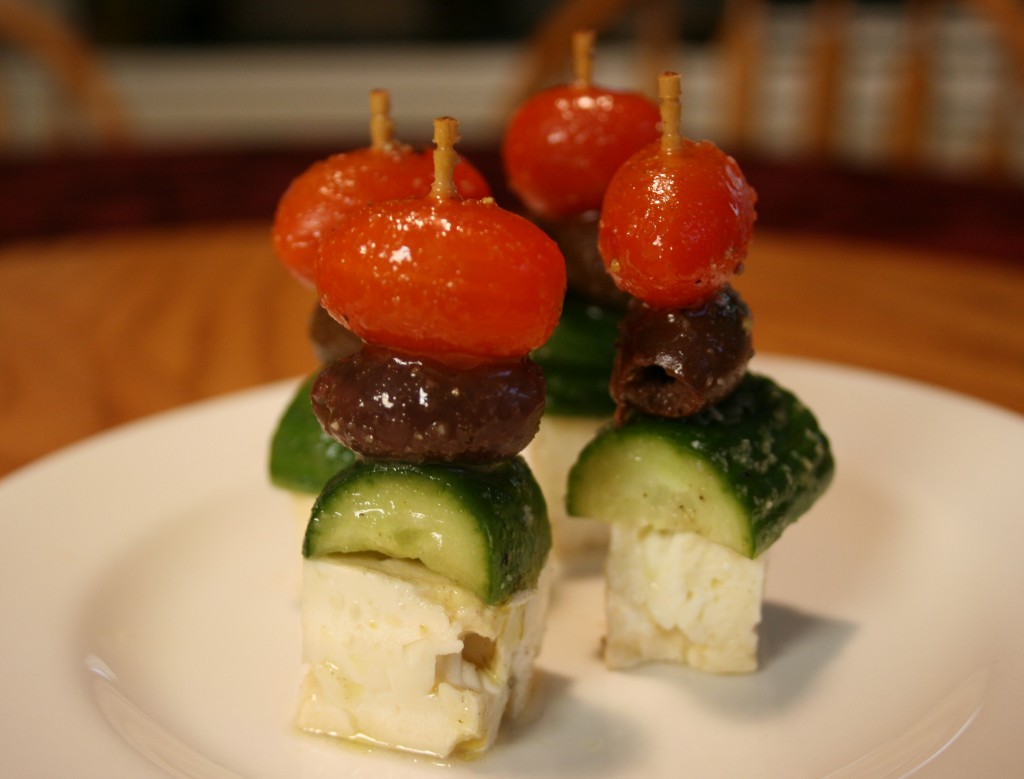
I saw this idea somewhere last year but for the life of me cannot remember where. I think it was here, but it was a while back. I tried to give credit where it is due, so I get kudos for trying, right? I have made these wonderful little appetizers a number of times and love the juiciness with the dressing added. The whole stick of salad can fit in one bite. Whoa! Heaven! I sometimes include onion, but usually not because some of my nearest and dearest have a hard time with raw onion, so I present the recipe without. I most recently served these along with my smorgastarta and they were a great compliment.

Greek Salad On A Stick

24 toothpicks

1 block feta cheese, cut into 24 cubes

24 grape tomatoes

24 kalamata olives, pitted

1 English cucumber or 3 mini cucumbers

¼ cup olive oil

1/8 cup red wine or balsamic vinegar

1 tsp lemon juice

½ tsp salt

¼ tsp pepper

1 tsp dried oregano

Whisk together the last six ingredients. Set aside. Slice cucumbers into thick slices, about ½ inch in length, then again in half or quarters, depending on cucumber size. I have found that all four elements fitting on the toothpicks is directly related to the size of the cucumber pieces (or the squishiness of the olives, but that can only go so far), so do a test ‘pick before cutting up all the cucumber. Start with putting on toothpicks the tomato, followed by an olive and cucumber, ending with the feta. Place all the filled toothpicks in a deep plate or bowl that will just hold the completed ‘picks. Drizzle dressing over the ‘picks. Refrigerate for at least an hour. Before serving move the ‘picks to a serving dish and again drizzle the dressing over the ‘picks. If you use fancy decorated ‘picks, the top of which won’t look good slimed with dressing, you may need to spoon the dressing over them with a spoon.

Guacamole

Once again my food preparation decision is strongly influenced by what was on sale at the store. I live in a small town in Texas. There are two options for groceries – Walmart (yuck) and a a regional chain. I gave in and got a discount card for the local place, especially since they let me do so without giving a bunch of personal information, and they have REALLY good deals that I would otherwise have to drive 30 miles to get. This week avocados influenced me. Not only were they on sale, but they were grown in Texas. YeeHaw! I bought ten of the suckers, knowing that I can freeze some if I overdose on the green stuff.

When I first started making guacamole at a teenager I would throw everything in a blender, add sour cream and make it a smooth, creamy dip. I don’t recall why I started making it smooth, because I was surrounded by people who preferred creating chunky versions. Maybe it was my way of being a rebel – I toilet papered a few houses and made smooth guacamole. Scary.

Now that I am a big girl I make it chunky. Besides the fact I do not currently own a blender, I really like not knowing if I am going to bite into a piece of tomato, onion, jalapeño or avocado. It is a comfort food for me and I will be eating a lot of it because, well, avocados don’t freeze well unless you mush them all up with some lime juice. I guess if I end up freezing avocado I can just thaw it out later make a batch of smooth guacamole…anyone got a blender?

Guacamole

4 large ripe avocados

2 small tomatoes, diced with seeds removed

½ small white or red onion, diced

1 medium jalapeño, diced with seeds removed

1 lime, juiced and meat included

¼ cup fresh cilantro, roughly chopped

1 clove garlic, diced

½ tsp ground cumin

Salt and pepper to taste

Cut avocados in half lengthwise. Carefully remove the pit (I usually strike it with my knife blade and twist). In each half cut the avocado meat in a crisscross pattern. With a spoon scoop all the meat out of the skins into a medium bowl. Add the remaining ingredients, keeping the lime juice for last to pour over the top. Stir it all together with a fork, adding salt and pepper to taste and smashing some of the avocado. To prevent the top from turning brown during storage, cover with cling wrap and press it down against the guacamole until all the air is pushed out. Chill for at least an hour, then let it warm to room temperature before serving.


Orange Chicken Redux

Adaptability. The need for it comes in small and large ways. With two aging oranges in the fruit bowl the chicken in the freezer was calling to be joined with them. My original idea was to make a stir fry, with the sauce caramelizing around the meat and veggies, trickling down into the rice and filling every bite with a sweet spiciness. In the end, the dish was delicious, but only after a bit of adapting. I pulled the chicken out of the fridge when it came time to make dinner. Arghh! Still frozen! Since I hate defrosting meats in the microwave – it always partially cooks it and encourages rubberiness – my options were to wait way too long to start dinner, make something else, or switch up the recipe. I decided to (sigh) bake the chicken instead of stir fry. Not the end of the world, but not exactly the plan.  I jumped in and went with the flow. I am including directions for what I did (redux) and what I meant to do (original). In the end it turned out yummy with a slow heat from the sauce.

Orange Chicken

4 chicken thighs, skinned and deboned (redux version used chicken with skin and bone intact)

Salt to taste

3 Tbsp canola oil

2 oranges, juiced with meat

1 tsp red chili flakes

2 Tbsp chili sauce

1 Tbsp teriyaki sauce

1 garlic clove, diced

½ medium onion, julienned

4 cups stir fry vegetables (snow peas, carrots, cauliflower, watercress, etc)

Original Directions

Mix chili flakes, chili sauce, teriyaki sauce and orange juice. Set aside. Cut chicken into bite sized pieces, sprinkling it with salt to taste.  Heat oil in wok at medium high heat. Add garlic to oil until browning begins. Add chicken and cook until half cooked. Add onions until they begin sweating. Add remaining vegetables and until almost done, covering if needed to speed up cooking. Turn up heat, add sauce and continue cooking and tossing until chicken is cooked and veggies are desired crispness. Serve over rice or noodles.

Redux Directions

Heat oven to 350F. In a small bowl combine ½ the oil, all the chili flakes, chili sauce, teriyaki sauce, orange juice and garlic. Set aside. Arrange onions in the bottom of a 9×9 baking dish. Season chicken with salt and arrange on top of the onions.  Pour sauce over chicken, making sure it runs over all the meat. Bake in oven for 45 minutes until juices run clear. Heat remaining oil in wok over medium high heat and toss until vegetables begin sweating. Turn heat to high. Draw about one cup of juices from the chicken dish and add to the vegetables. Toss the vegetables and sauce until they are done and the sauce thickens. Serve chicken, vegetables and sauce over a bed of rice or noodles.


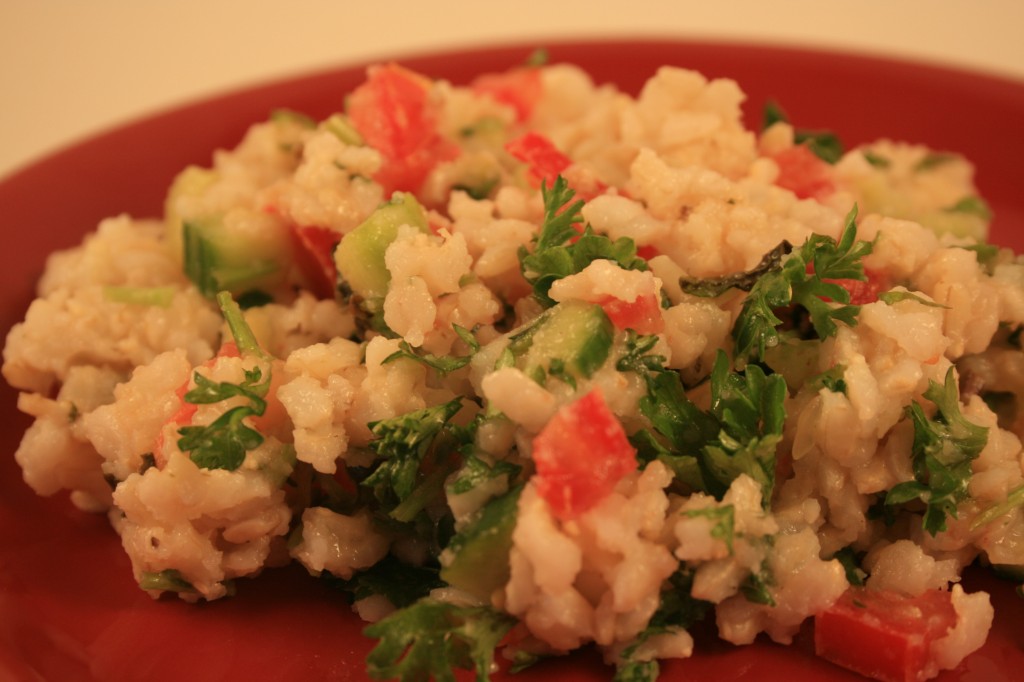
Impure Tabbouleh Salad

I love tabbouleh. It is tangy and filling, emphasizing the simple nuttiness of bulgur wheat. Big D hates what wheat does to his digestive system. How oh how can the two meet in a pleasant, yummy way? Rice! Brown rice. I call it impure tabbouleh. As a dish made in many different regions of the world and often consisting of local products, tabbouleh by its very nature varies from kitchen to kitchen. I decided to embrace the nature of the dish and make it ricey. A happy hubby tummy is a good thing, and I like it, too! I make a big batch and we eat on it for a week. Even our little girl digs into it when she is in the mood. The later in the week it gets the limey-er the salad gets.

Impure Tabbouleh Salad

4 cloves garlic, diced

2 medium limes, juiced with meat

¼ cup extra virgin olive oil

1 tsp sea salt

1 english cucumber, diced

4 roma tomatoes, seeds removed and diced

5 spring onions, diced

1 bunch parsley, chopped (about 2 loose cups when prepared)

¼ cup mint, chopped

7 ½ cups cooked brown rice (about 3 cups uncooked)

Black olives (optional as garnish)

Combine garlic, lime juice, olive oil and salt. Set aside. Mix together all other ingredients except for rice. Pour dressing over mixture until veggies are covered. Add mixture to rice, making sure dressing and veggies are well combined with the rice. Although the salad is immediately ready to eat, letting it sit for a few hours in the refrigerator allows the flavors to blend. Serve as a meal itself or as a side dish with grilled or roasted meats.


Chicken A Go Go


What do you do when chicken is on sale for 79 cents a pound? I don’t know about you, but two things happen to me. Number one, I let all pure thoughts of free range and grain fed go out the window. Number two, I buy it. A lot of it. Until the freezer is full of thighs and legs. Then I cook some.

I am starting my chicken marathon with something simple, reminiscent of a dish my mother-in-law makes that my husband (aka Big D) adores. I simply chop up tomatoes, artichoke hearts, onions and broccoli. I then drizzle them with lime juice, olive oil and some chopped garlic, with salt to taste. On top of the veggies I place chicken thighs that were sprinkled with salt, pepper, chili powder and cumin. A little pat of butter is then perched precariously atop each piece of chicken. Ideally it will all fit in a 9″x13″ baking dish, but if you are like me such a dish is still in the fridge with leftovers, so in this case I used a 9″x9″ and a glass pie dish. They worked great.

After cooking it all for about 45 minutes at 350 degrees it is done, the skin is crispy and itching to be eaten. I serve it over some brown rice cooked in ½ chicken broth ½ water and voila! Dinner! And leftovers for lunch! And maybe another dinner…

Post Navigation