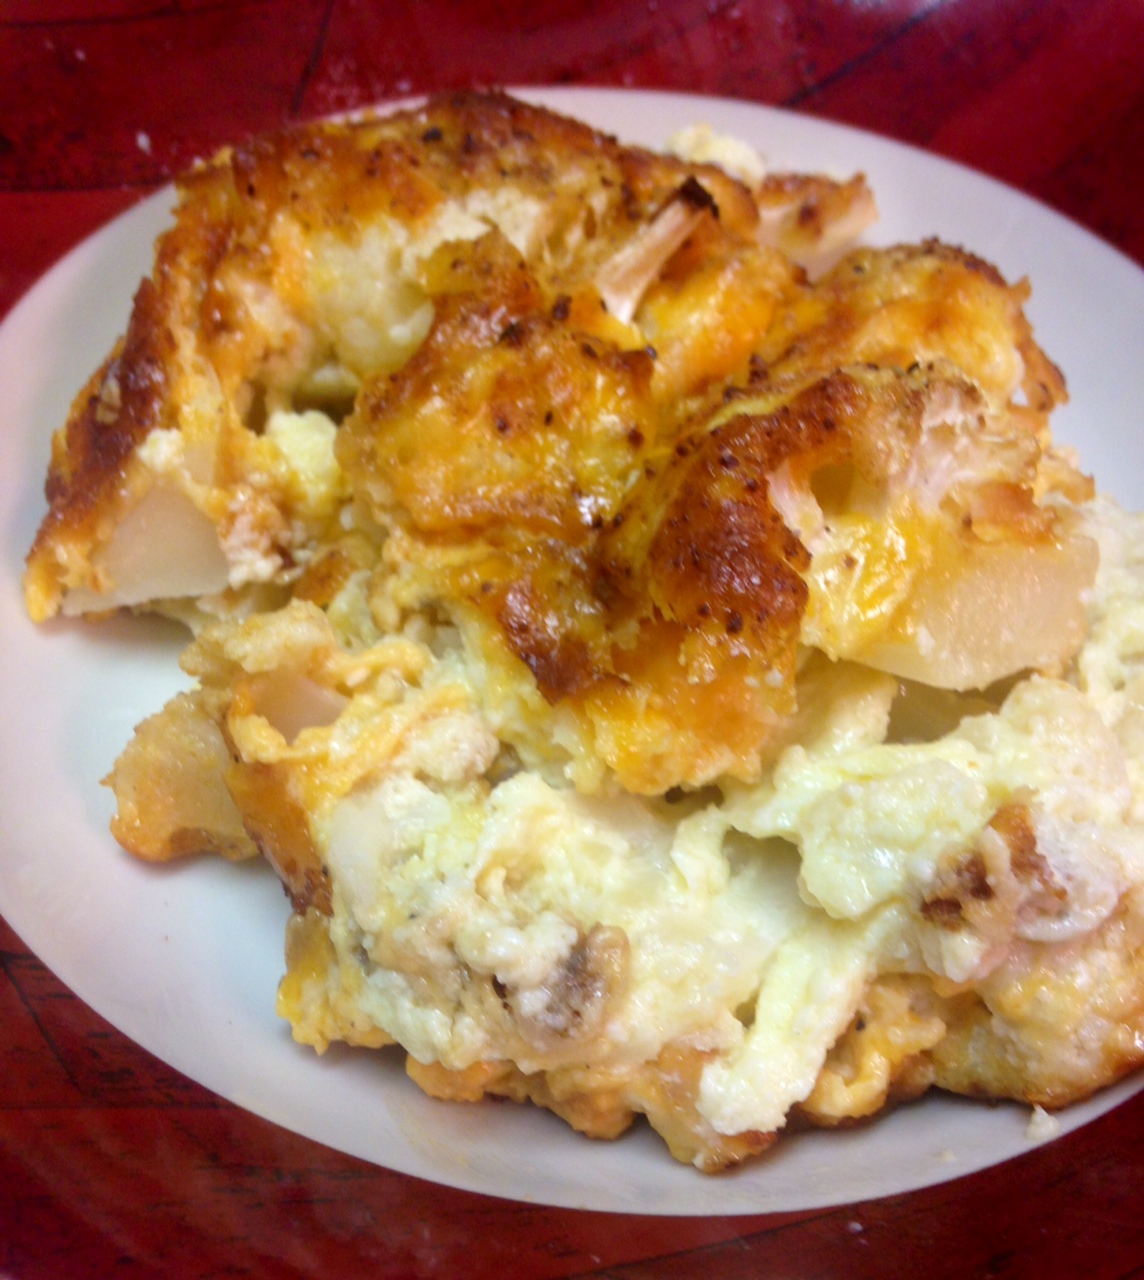
Any Kitchen Will Do

Give me a kitchen and I will cook.

Author Archive

Cauli n Cheese

cauli n chz

I have made this before but did not have the just right combination for creamy and cheesy, so did not share it. Other cheesy things with cauliflower, like the Cauliflower Mac Bake is cheesy but not so creamy, and the Cheesy White and Green Bake is good, but the fibrous broccoli does not quite bring to mind a replacement for mac n cheese. I think the combination of cheeses and cream really worked this time. The cheese merged with the cauliflower and cream instead of becoming stretchy. This time was different. This time it worked just right. There was a chewiness, cheesiness and creaminess that worked like a comfort food for me. THIS time I was reminded of the nights as a child when mom and dad did not have time to make dinner and grabbed a box of pasta and cheese pouch, threw it in a pot and cooked it up. Sometimes ham or hot dogs were chopped up with it and made it even more salty. The taste of this meal also reminded me of meatless Fridays that were part of the religious aspects of my upbringing. I never actually missed the meat as I dug into the creamy cheesiness. After a few mouthfuls Little B asked if I would make this every night because it was ‘soooooo good!’. I don’t know if I can accomplish that, but it certainly is not hard to do if there is a kitchen nearby and barely took more time than fixing mac n cheese from a box! It would be so cool if she craved cauliflower instead of pasta in 20 years…

Cauli n Cheese

1 head cauliflower
2 eggs
1 cup heavy whipping cream
1 Tbsp sea salt, plus more for top
1 tsp ground black pepper, plus more for top
1 tsp onion powder, plus more for top
1 tsp garlic powder, plus more for top
2 cups grated sharp cheddar cheese
1 1/2 cups grated parmigiano reggiano cheese

Preheat oven to 350 degrees. Remove leaves and stem from cauliflower. Cut cauliflower head into bite-sized pieces, keeping as much of the florets attached to the base as possible – avoid the crumbling of the florets. In a medium bowl whisk the eggs and cream, then add the salt, pepper, onion powder and garlic powder. Whisk in the seasoning. Add the cheese and stir in with the cream mixture. Arrange the cauliflower evenly in a 9″x13″ baking dish. Sprinkle some salt on cauliflower. Pour creamy cheese mixture over cauliflower, spreading cheese to cover the top entirely. Sprinkle a bit more salt, pepper, onion powder and garlic powder on top. Place uncovered in preheated oven for 40-45 minutes, until top is browned and bubbly. Remove from oven and let sit for ten minutes before serving.

Pecan Crusted Chicken

pecan crusted tenders

A few years ago we stopped eating wheat for a number of reasons. We have not been perfect about it, but try really hard. It is amazingly difficult to avoid wheat in convenience foods at stores and restaurants in America. Take a quick look at kid menus in quick serve and sit-down service restaurants – you are most likely to see choices like burgers,  grilled cheese sandwiches, corn dogs, macaroni and cheese, and some sort of breaded chicken. Most often included are the lovely and mysterious chicken nuggets and tenders – lovely because they are often crispy and mysterious because it not always clear what parts of the chicken are tendered or nuggetted. Little B and I like having such things on occasion, and am glad I have found a few versions that are not only wheat free but completely grain free. I like using the baked crispy chicken recipe for tenders and nuggets too, but wanted something with a little more crunch and bulk. The pecans sure fit the bill in this new recipe! The nuts chop up into various sizes, adding a nice texture which mixes well with the chicken. Little B eats them plain, but I like dipping in spicy dressing or mustard. They are filling too – instead of feeling hungry soon after eating like with wheat, the nut coating fills me up fast and keeps me full for a while. My in laws generously let me take over their kitchen during a recent visit and really liked them. Little B inhaled this stuff too – another score!

Pecan Crusted Chicken

3 pounds boneless skinless chicken pieces (tenders and thighs recommended)
2 pounds raw pecans
1 tsp sea salt
1 tsp garlic powder
3 egg whites
2 Tbsp dijon mustard
Sea salt and ground black pepper to taste

Preheat oven to 400 degrees. In a food processor pulse pecans, salt and garlic powder until nuts are finely chopped. In a medium bowl whisk together egg whites and mustard until well combined, but stop short of the whites becoming stiff. Line one to two shallow baking sheets with aluminum foil. Spread the nuts on a third sheet or large plate. Generously season chicken with salt and pepper. Dip the chicken in the egg wash, letting the excess run off. Roll chicken in the nuts, gently pressing them into the meat. Place chicken on the foil lined baking sheets with about an inch between pieces. Bake for 35-45 minutes, until juices run clear (whole chicken breasts or bone-in chicken may take longer). Serve immediately, plain or with desired dipping sauces.

Savory Watermelon Salad

IMG_9048As kids my brother and I spent summer afternoons outside a lot. We were able to cavort around our neighborhood bicycling, rollerskating, swimming, playing soccer and other things kids did in the 80’s ‘on the streets’. One of the snacks we ate was messy, juicy, sweet watermelon. Mom would cut it up and bring a bowl out to the back yard. We would take a break from gardening or playing in the sprinkler to feast on it, sprinkling each wedge with a bit of salt and letting the juices run down our chins. After we were done we often had seed spitting contents. The watermelons we  had were always riddled with slippery black seeds. We would save them up as we ate, then would have the contest. There were occasional arguments about whether seed bounces counted in spitting distance, or whether one of us stepped over the spitting line when getting a running start on a spit. To this day I am surprised there weren’t more watermelon plants growing rogue in the yard. This may be the oddest sounding salad I have ever made, but it was curiously satisfying. On a warm summer day in Texas I was looking for something other than a green side salad at dinner. We don’t eat much watermelon, considering the higher carbohydrate count for the fruit, but I am glad I plunged in with this salad. Very refreshing, and quite a different slant compared to the spiked Whiskey Watermelon I made a few years ago…different type of satisfying…

Savory Watermelon Salad

1 small seedless watermelon
1 cup crumbled feta
1 cup kalamata olives, pitted and sliced
1/2 cup finely diced sweet yellow onion
1/3 cup extra virgin olive oil
1 lemon, juiced with meat retained
1 tsp sea salt (plus more to taste)
1 tsp ground black pepper
1/4 tsp red chili flakes
1/2 cup chopped fresh mint leaves

Prepare about 8 cups of watermelon in bite-sized pieces by cutting it into 1-inch cubes or using a melon baller. In a medium bowl combine the olive oil, lemon juice, salt, pepper and chili flakes. Whisk until combined. Add the feta, olives and onion. Stir to coat with the dressing. Add mixture to watermelon and gently toss, trying not to crush the watermelon pieces.  Sprinkle mint and more salt to taste on top. Serve immediately or chill until served.

Note: as you can see from the picture the watermelon juices will mix with the dressing build up as the salad sits. It is recommended that a slotted spoon is used to serve, to reduce the soupiness of the salad when plated.

Tangy Wings

tangy wings

We eat wings often, but mostly when Big D is not around for the meal. It is not a sneaky thing, for it is based on historical fact. He is not a big fan of high maintenance food, even if it tastes good – lobster, crab, quail, cornish game hens…and even chicken wings. In spite of all this I still make them sometimes when he will be home for dinner. I usually just toss wings in a bit of oil and some spices, then toss them on a tray for the oven, like I did with these mustard parmesean wings. I would like to think I can evolve, so I attempted to do so. These wings take a little longer to prepare than the others I posted, but I think the time is well spent. I got the idea from my brother’s efforts to brine some chicken before smoking it. Doing the soaked portion of this recipe is not a pure brine, but I think it had a similar effect of adding flavor to the chicken without doing much else, which is how his wonderful smoked chicken works. I love the result I got with these wings. The acids and bases in the ‘brine’ worked well to make the wings tangy and juicy. Since it was a meal when Big D would be home I added some larger,  lower maintenance chicken legs to the mix. The legs got done cooking about the time the smaller wings were perfectly browned and crispy, so all was well. People kept eating and eating, so there were no leftovers. I think I will make these again, regardless of who is noshing on them.

Tangy Wings

24 – 36 chicken wing drumettes
12 chicken legs
1/2 cup extra virgin olive oil
1 cup apple cider vinegar
2 Tbsp lime juice
2 Tbsp Montreal Steak Seasoning (or other general seasoning mix)
1 tsp onion powder
1 tsp garlic powder
1 tsp yellow mustard powder

In a large bowl combine the oil, vinegar and lime juice. Add all the chicken and toss, making sure all pieces are coated. Marinate for at least 90 minutes to four hours, tossing to coat every 30 minutes. Preheat oven to 400 degrees. Drain liquid from chicken and pat all pieces dry. In large bowl add the seasoning mix, garlic powder, onion powder and mustard powder. Add chicken and toss to coat. Place chicken pieces on shallow baking sheets, leaving some space between each one. Bake for 45 – 60 minutes, switching pans halfway through cooking if multiple pans are used at different levels in the oven. After chicken is cooked and juices run clear, remove from oven and let cool about five minutes before serving.

Beef in Wine

beefwine4

This may make some shudder. I had a craving for beef bourguignon. Knowing I did not have all the ingredients or time to prep before leaving it to cook accurately to the version by the great Julia Child, I decided to wing it. I found out that some things still exist that were true when Little B was, well, smaller. The needs are different but the level of desired attention is the same. Not that I have not been present, but the flurry of a full time job has broken up the timing of focus. Instead of squeezing in project research at lunch, grabbing supplies after work and doing them after dinner when Big D was working, I have all the time in the world to prepare, right? Wrong! The planning and purchasing were much more efficient when doing it solo. This is soooo much a first world problem. I know. Having a dollar store a mile away (instead of a thousand miles) makes more projects tempting. The challenge now is getting in and out of the store without being accosted by my own daughter for random things that make her pile of toys higher. The size of the pile is not troublesome, but the amount of abandonment of said toys after a week is the troublesome part. We did a big purge when we moved recently, and Little B did a lot of work to help with her stuff. I don’t want to create the same pile of stuff for her to deal with, but trying to tell her that when she is starry eyed in front of a wall of cheap toys is not very helpful. We are working on earning and managing her own money, but the more important concept is contributing to our household, not earning money. I don’t want to be in a situation where I am debating with her on one or two dollars to sweep the kitchen or pick up her clothes. It is part of living with people. Needless to say, transition means finding a balance, so dinner was good but not traditional. Even if it is not a traditional version, it came out great, allowed for project preparation, gave me time to give Little B attention, tidy up after the dogs (one of which is still in a chewing stage) and and still feed seven people for dinner. Phew! This domestic thing can be lazy or not. Maybe lazy for now…

Beef in Wine

5 pound beef roast (rump or other)
3 medium turnips
1 large yellow onion
3 large carrots
1 cup dry red wine
2 cups beef or vegetable broth
1/2 cabbage head, roughly chopped
Salt and pepper to taste

Preheat oven to 300 degrees. Heat medium oven-proof stock pot to medium high. Chop turnips, onion and carrots into bite-sized pieces. Season roast generously with salt and pepper. Sear meat on all sides in heated pot until browned. Add vegetables and stir, slightly coating with the browning bits. Arrange meat so fat side is facing up. Pour wine and broth over meat and vegetables. Cover pot and place in oven. Cook for four hours, leaving it covered the whole time. Remove pot from oven and uncover. Add cabbage, stir vegetables, trying not to disturb crusty fat layer on top and replace cover. Return to oven and cook for one more hour. Remove from oven, arrange meat and vegetables on serving tray and serve immediately.

Red Eggs

red poached egg

We had leftover sauce! My aptly named Red Chicken was delish, and left us with some sauce that was taunting us from the fridge the other morning. I was reminded of the simple egg bake I posted about a few years ago. It is also reminiscent of Indian shakshuka or Mexican huevos rancheros, which have a bit more than smooth sauce and eggs, but the concept sounded really good, easy and filling.

We were in the middle of a significant effort to reduce our worldly belongings and using up stuff from our food stores before moving. Such a process is pretty emotionally draining. More so than I ever expected. Not the use of food stores, but the reduction of belongings. I would think that getting rid of sweaters not worn in years would be easy, but remembering wearing them when spending time with family and friends brought a bunch of memories to the forefront,  good and bad. After the sweaters were done I shifted over to sorting other stuff. The same type of memories rise, everywhere from who gifted them to me to remembering all the places I wore them. If I was doing the process over the span of months is one thing, but we were doing this type of sorting day after day for a week. Although most of the time was spent sitting or standing and sorting, we were all exhausted at the end of the day. We were all doing it (me, Big D and Little B) and all felt the energy drain.

red poached egg platedThe cooking during this week of great purging helped us relax and talk about our goal – keep the things that serve us and we cherish, not being tempted by keeping stuff just because we always did before. We successfully got through the grand project and winnowed down our stuff to the amount we agreed to (two pick up trucks worth of bins, etc). We make no promises of avoiding the rut of collecting things again, but I think the experience will make us think twice before nonchalantly filling the cart at the big box stores. Keeping things simple provides clarity and encourages creativity – things we can never have too much of. On another note, we are so very proud of Little B. It would have been easy to send her off to a friend’s house and quietly sort through her stuff in absentia, but since we consider her a little person, we thought it important to take her through the process with us. It was not easy, but we took the time to work with her about what she used, what she had outgrown, what she had not touched in a year, and what she cherished. Of course, she is looking forward to more stuff as her interests change in the future, so she leapt in with both feet and made very thoughtful decisions, way beyond her five years on this earth. We surrounded ourselves with comforting food as we moved forward with the purge, including these eggs. Fortunately I did not step away from the pan at the wrong minute, so the poachiness of the eggs was pretty darned perfect. They helped us move on and gave us a new go to dish.

Red Eggs

2 Tbsp butter
1/2 white onion finely chopped
4 cloves garlic, finely chopped
1/2 cup natural peanut butter
15 ounces tomato sauce
1/2 cup lemon juice
2 Tbsp ground turmeric
2 tsp ground ginger
1 tsp ground cinnamon
1 Tbsp cayenne pepper
1 tsp sea salt
1tsp ground black pepper
8 ounces full fat coconut milk
4 – 6 eggs

In medium saute pan over medium high heat melt butter. Add the onion and garlic, cooking until browning begins. Add remaining ingredients except for coconut milk. Stir until all ingredients are combined, turning down heat to low. Stir in coconut milk and simmer until steam is rising from sauce. With the back of a spoon make a divet along the edge of the sauce in the pan. Drop a raw egg into the divet. Repeat with remaining eggs, evenly distributing them in the sauce. Cover pan and let simmer until eggs are cooked to desired doneness – about five minutes for soft. Serve immediately by scooping egg(s) onto a place and drizzle sauce on top.


Red Chicken

photo 1
A while back my brother lived in an apartment complex. Not one of those little ones with just a few units, but a huge corporate monstrosity with dozens of buildings. It was not the most interesting place he has ever lived – the house on a hill in Austin with a concrete bathroom holds that honor – but it was convenient to his work and reasonably priced. There was not much around it but his office and a few local markets, all of which had a common theme – Indian food. We did not do much Indian cooking when we were younger, but the convenience and variety of ingredients, as well as the opportunity to learn from his neighbors, resulted into a foray of curries, colorful sauces and a little (or a lot of) heat. He has since moved into his own house, but carried with him the Indian food immersion from his apartment days. We are having a long visit with him, and I am looking forward to learning a bit from his experience. I am looking to play around with traditional ingredients and flavors, not necessarily copying specific dishes. Here is my first gander at being inspired by a Northern Indian dish called Butter Chicken. It is far from accurate, so I am not even trying to use butter in the title. It was great. On top of everything else, today is the eleventh wedding anniversary for me and Big D. My ongoing quest to find chicken dishes he likes has spanned the entirety of the eleven years. He is a beefy kind of guy, begrudgingly consuming chicken if absolutely necessary. He gushed with joy and satisfaction upon tasting this dish. I definitely added it to the ‘like’ category for him. Little be was not as impressed with the dish, but still ate her fill, including the green beans I cooked up to go with them. You should see what we do with the leftover sauce!
Red Chicken2 Tbsp butter
6-8 sinless boneless chicken thighs
1/2 white onion finely chopped
4 cloves garlic, finely chopped
1/2 cup natural peanut butter
15 ounces tomato sauce
1/2 cup lemon juice
2 Tbsp ground turmeric
2 tsp ground ginger
1 tsp ground cinnamon
1 Tbsp cayenne pepper
1 tsp sea salt
1tsp ground black pepper
8 ounces full fat coconut milk

In medium saute pan over medium high heat melt butter. Add chicken and partially cook, about five minutes. Remove chicken from pan and set aside. Add to the the chicken juices the onion and garlic, cooking until browning begins. Add remaining ingredients except for coconut milk. Stir until all ingredients are combined, turning down heat to medium low, and simmering for about ten minutes until hot and bubbly. Add coconut milk and stir again until combined. Add chicken and simmer until cooked through, about ten more minutes. Serve immediately.


Secret Muffins

secret muffin
Little B and I have a wonderful opportunity to start spending more time together for a while. I guess that would be an obvious (to me) wonderful consequence of quitting my job. Of course part of the time will definitely be spent doing stuff in the kitchen. In recent months she has randomly thrown together fruit and veggies with cheese and called it soup. While some has been yummy, other batches not so much. Knowing that I often share kitchen experiences on my blog, she insisted this time I don’t share the recipe. It must be kept a secret! I cannot tell you we puréed a banana and berries, using them to substitute for butter, and then doubled the sweetener in some microwave muffins. At least I will stop short of listing all the ingredients or tell you how to cook them. I am a bad person, but they were soooo good!

Cheesy White and Green Bake

image

We have been very busy lately, so you may have noticed more often than not my posts include quick, easy recipes, good as leftovers for days we don’t have time to cook. I am so busy I noticed how much of a run on sentence I just wrote. Everything is moving quickly for us at the moment, but we still enjoy cooking a good meal, and want to make sure there is variety and a healthy dose of vegetables. This bake is filled with staples we always have in our kitchen. I hope you try it. As of the date of this posting, Little B inhaled this side dish the day I made it (along with a hunk of steak) then proceeded to request it three days in a row until the leftovers were all gone. This is noteworthy for two reasons: 1) although Little B is a fruit and vegetable nut, she tends toward raw rather than baked, so interest in this dish was refreshing, and 2) Little B is not a fan of leftovers, which may be rooted in our penchant for constant variety, or just a general tendency of a typical five year old. Regardless, she inhaled it and we happily watched! I may throw in some tuna or chicken next time and make it a full on casserole…

Cheesy White and Green Bake

1 small head cauliflower
1 stalk broccoli
1/2 small onion
2 eggs
1 cup heavy whipping cream
1 tsp sea salt
1 tsp ground black pepper
2 tsp granulated garlic
1/2 tsp ground thyme
2 Tbsp lemon juice
3 cups shredded mozzarella cheese

Preheat oven to 350 degrees. Roughly chop onion, cauliflower and broccoli into bite-sized pieces. Toss together then spread vegetables evenly in a 9×13 inch baking dish. In medium bowl combine eggs, cream, salt, pepper, garlic, thyme and lemon juice. Whisk together until eggs are combined with other ingredients. Pour sauce over vegetables, gently tossing vegetables until they are coated. Sprinkle cheese on top of vegetables. Bake for 30 minutes until edges are browning and middle is bubbly. Remove from oven and let rest for five minutes before serving.

Onion Paste

onion paste

I like adding onion to all kinds of savory stuff. Although it is convenient to add onion powder or dehydrated onion flakes from the pantry, it is different from real onion. Not that cooking onions to varying levels of doneness takes very long, but sometimes it seems like it when every other part of a dish is quicker. I am fickle sometimes and just have to live with it. To overcome what sometimes feels like the huge expanse of time it takes to cook onions, I have come up with this paste. It adds onion flavor quickly from a jar in the fridge, even when you are feeling fickle. Very nice to have around for omelets, quick soups and dips – the flavor gets distributed in a dish much faster, compared to the pantry versions.

Onion Paste

2 large onions
2 Tbsp fat (bacon grease, butter, olive oil)
1 1/2 tsp sea salt

Peel and roughly chop onion. In a medium skillet over medium high heat add fat. When fat is hot add onion and sprinkle with salt. Sauté until onion softens and browns. Remove from pan and let cool until it is safe to handle. Place onions in food processor and pulse until a smooth paste forms. Store in airtight glass or metal container in the refrigerator. Use 1 tablespoon for every 1/4 onion in a recipe.

Post Navigation