Any Kitchen Will Do

Give me a kitchen and I will cook.

Archive for the category “Irving Kitchen”

Cucumber Salad

cucumbersaladAs spring springs around here I move away from warm, gooey comfort foods and head straight towards colder foods. My morning coffee is no longer a steaming hot cup from the French press, but cold brew poured over ice after chilling for a day. As I walk around in cropped pants instead of jeans and sweaters I love opening the fridge and grabbing a bowl of chilled salad for lunch, like this one!

In past years I have done themed posts leading up to St. Patrick’s Day, either by culture or color. This year all I can muster is the green from these cucumbers. This is not a bad thing, just with so much going on leading up to our move my priorities have been elsewhere, like making products for Grain Free Haven, ensuring the 40 year old Christmas ornaments are safely wrapped and packed, and the DVDs we barely ever watch anymore (but still keep the movies we love since Netflix and Amazon Prime are fickle).

If you want to explore traditional and not so traditional Irish dishes, here are a few like Colcannon, Corned Beef, Shepherd’s Pie     Dublin Coddle or a Traditional Irish Breakfast. Some green themed items can be found too, like Salsa Verde, Mushed Peas or Buttered Leeks. May the luck of the Irish be with you this week, and the wearing of the green reduce the number of pinches you get! Slainte!

Cucumber Salad

2 medium cucumbers (or one large English cucumber)
1/2 medium white or yellow onion
1/2 cup sour cream
2 teaspoons distilled white vinegar
2 teaspoons dried dill leaves
1/2 teaspoon sea salt
1/4 teaspoon ground black pepper

In a small bowl whisk together all ingredients except for the cucumber and onion.

Slice cucumbers into thin discs, either by hand or with a mandolin. Place slices in a large bowl. Thinly julienne slice the onion and add to the bowl with cucumber slices.

Pour dressing over vegetables and toss until well coated. Cover and chill for at least one hour and toss again right before serving.


Ham and Cheese Meatloaf

hamnchzmeatloaf

I was recently longing for the Cheesy Burger Bombs I made a while back. Since we were missing the necessary cheese snack wheels, and I did not want to run to the store, I decided to create a new thematic dish. A ham and cheese sandwich wrapped up in a meatloaf! The ham and cheese sandwich elements I prefer include, of course, ham and cheese, but also mustard and onion. I also like cold, crisp pickles, but excluded them from this dish, for I am not a fan of warm pickles. Yuck!

It was fun to make this meatloaf, especially since Little B helped stack the layers! Forming the bottom of the loaf to make a little nest for the filling, then stacking it all in the middle, then closing it up and hiding the surprise in the middle. She did not agree with the inclusion of the mustard layer, but after it cooked and we sliced it up the lovely condiment blended well with the warm onion, ham and cheese and she devoured it!

The final result reminded me more of a cheeseburger than a ham sandwich; you know, the kind where they basically put breakfast on a burger, with ham or bacon and cheese and a fried egg? When I had some of this loaf as leftovers I actually topped it with a fried egg. I highly recommend the addition!

Ham and Cheese Meatloaf

1 1/2 pounds ground beef
3 cloves garlic, crushed
2 Tablespoons dried basil leaves
2 teaspoons sea salt
1 teaspoon ground black pepper
1 teaspoon ground cumin
3 eggs
3 Tablespoons Worcestershire sauce
8 slices deli ham
12 ounces shredded colby/monterey jack cheese
1 medium yellow onion, sliced into thin discs
1/4 cup yellow mustard

In a large bowl combine beef, garlic, basil, salt, pepper, cumin, eggs and Worcestershire sauce. Mix ingredients well with hands or mixer.

Press half of the beef mixture into the bottom of a large loaf pan, bringing it up slightly on the sides.

Place a layer of onion in the middle, followed by a layer of half the ham slices. Sprinkle 8 ounces of the cheese on top of the ham, followed by another layer of ham. Spread the mustard on top of the ham. Place a final layer of onions on the mustard.

Press the remainder of the beef on top of the inside layers and press it along the edges to join the top beef with the bottom beef. Sprinkle the remaining cheese on top.

Bake at 350 degrees for 45 minutes, until the top is browned and beef cooked through. Remove from oven and let cool for about ten minutes. Depending on the fat content of the beef there may be an excess of grease and juices surrounding the meatloaf. Remove as much as possible before removing loaf from pan. Tip loaf pan so the meatloaf slides onto its side on a serving platter. Turn the loaf upright so the browned cheese side is on top.

Garnish with dark green lettuce leaves or fresh herbs and serve in thick slices to show the layers.

Tuna Avocado Cups

tunaavocadocups

We will be moving (again) soon. Not far and not dramatically, just to a different town. As always, there is a process prior to our moves that involve a cleansing. Cleansing of stuff of all kinds, including the contents of the pantry, freezer and fridge. This cleansing project has resulted in eating leftovers and staples with which I have not been very creative. The process is neither bad nor good, but the lack of creativity resulted in a lack of posts lately.

In my attempt to reconcile the posting situation I realized I was hungry for lunch and had two hankerings – tuna and avocado. I stocked up on some avocados a few days ago and they were finally, wonderfully ripe. Here is what I did with my hankerings and had a filling, satisfying lunch that did not take long at all to make.

Of course you can use any of many cold salads to fill avocado halves, like my Mustard Chicken Salad, Don’t Have To Choose Salad, Walnut Chicken Salad, Dilly Egg Salad, or even the exotic and vegetarian Japanese Eggplant Tomato Salad.  I used my old, reliable tuna salad this time, which I just realized I never posted about. Well, then, I am multitasking and did not know it!

Tuna Avocado Cups

2 ripe avocados
10-12 ounces wild caught tuna in water
1 medium dill pickle, finely chopped
1/2 cup mayonnaise
2 teaspoons lemon juice
1 Tablespoon finely chopped onion or 1/8 teaspoon onion powder
1 clove garlic, finely minced or 1/8 teaspoon garlic powder
1 teaspoon dried dill leaves
1/2 teaspoon sea salt
Dash ground black pepper

In a medium bowl whisk together mayonnaise, lemon juice, onion, garlic, salt and pepper. Add tuna and stir with a fork until tuna is broken up and coated with mayonnaise mixture.

Slice avocados in half lengthwise and remove seeds. Lightly sprinkle halves with salt. Spoon tuna salad into halves, molding it into a pretty mound. Serve immediately with some cheese and raw vegetables.

Roasted Carrots

roastedcarrots

For the past few weeks I have spent a lot of time at the Dallas Farmers 
Market supporting my business Grain Free Haven.  Between customers 
I found myself regularly staring at the goodies sold by the produce vendor 
across from my booth. They have a lot of greens and citrus right now, but 
I especially have been coveting the carrots. Long, slender and bright orange 
with springy green tops. 

I don't eat a lot of root vegetables like carrots, potatoes or turnips. They 
are not entirely evil, but have a higher level of starches and sugars 
than I usually consume. The higher number of carbohydrates in a food, 
the more cravings I get after eating them. Ironically, after focusing on 
eating steamed veggies like broccoli, cauliflower and celery of late 
(about 1-2 net carbohydrates per serving) I got a craving for the lovely 
carrots (about 4 net carbohydrates per serving). I actually blame the 
tomatoes and cucumber (2-5 net carbohydrates per serving depending 
on size) I have been piling on my salads. I'm thinking that if the worst 
craving I have is for roasted carrots I am doing pretty well in the 
craving department!

Yesterday I finally gave in and bought some of the carrots. I will be 
using the tops later for some veggie or chicken broth, but for now I 
roasted and enjoyed the lovely carrots. Here is the simple way I 
prepared them. 

I loved every bite, but will definitely be going back to the green 
roughage tomorrow!
Roasted Carrots

10-12 medium carrots, tops removed and rinsed 
8 whole garlic cloves 
1/3 cup extra virgin olive oil 
1 teaspoon onion powder 
1 teaspoon sea salt 
1/2 teaspoon ground black pepper 
1 tablespoon dried parsley leaves 

Preheat oven to 400 degrees. 

In a small bowl combine the oil, onion powder, salt, pepper and parsley. 
Using your hands or a basting brush cover all the carrots with the 
mixture and place them on a shallow baking sheet. 

Spread the garlic cloves randomly among the carrots. 

Bake for 20 minutes, then remove from oven. Carrots should be slightly 
softened but not mushy. If you prefer them softer, shake the pan so the 
side of the carrots touching the pan changes, then cook for 5-10 more 
minutes. Serve immediately.

Peanut Butter Chicken

peanutbutterchicken

Chicken chicken and more chicken! It seems to be the dish of choice lately, what with all the business in the house of late. I am probably not the only one that has noticed my posts are full of quick proteins and vegetables and mixes. I don’t think it is a bad thing, but is far from earlier posts of more time consuming dishes, like king cheesecake, tortillas, posole, cinnamon rolls or fondue.

This dish came from a combination of pre-gymnastics pending meal time and a bit of exhaustion from a day of baking for Grain Free Haven. If I ever worry about my family being interested in eating something all I have to do is slather it with peanut butter. The idea inspired me and this is what I came up with.

If it is not spread on top of a piece of bread it may just be a spoonful scooped out of the jar. If all else fails there are cookies, whether sugar free or just grain free. It is hard to find a jar with simple ingredients. I tried to make my own a few times but burned out food processors, grinders and blenders. Seeking out basic peanut butter (leaving out chemicals and preservatives) that will hold together is not easy. Natural butters are an easy choice, but, frankly, don’t have the stability of butters with sugars. Honestly, we lean towards the butters with simple sugars alternating with sugarless ones. Everybody has a vice, right? This chicken recipe relied on peanut butter with some simple sugars – usually labeled ‘natural’ on the side of the jar. I hope you enjoy the chicken, for what does not go well with peanut butter?

Peanut Butter Chicken

1 cup creamy peanut butter
1/2 cup Worcestershire sauce
1/4 cup water
1 teaspoon granulated garlic
1/2 teaspoon onion powder
1/2 teaspoon sea salt
6 – 8 chicken thighs and legs, bone in and skin on
Sea salt and ground black pepper to taste

Preheat oven to 375 degrees. In a medium bowl whisk together peanut butter, Worcestershire sauce, water, garlic, onion and sea salt.

Generously season all sides of each piece of chicken and place, skin side up, on a shallow baking sheet.

With a knife or back of a spoon spread the peanut sauce on the skin top of each piece of chicken. Place baking sheet on top level of oven. Bake for 35 – 40 minutes, until chicken is cooked through and sauce is beginning to brown.

Remove from oven and let sit for about five minutes before serving.

Italian Sheet Bake

italiansheetbake
I love one dish wonders. Throw some yummy ingredients on a pan, slide it 
in the oven and viola! Dinner! 

We recently had chicken leg quarters and some hot Italian sausage in the 
fridge, which brought on this Italian feast. It was inspired by my 
mother in law. She regularly makes a delicious dish with chicken, sausage 
and a lovely tomato sauce with fresh herbs, served on top of pasta or 
spaghetti squash, or the spiffy new veggie noodles that are popular these 
days. I did not have the fresh herbs, but definitely had the other elements. 
I decided to pull out a sheet pan and fill it up with our future dinner.

Next time I will probably double the amount of cabbage, but the organic 
head I got this week was tiny, so maybe not. 

The star of this dish, surprisingly, was the tomato sauce. The low and slow 
cooking temperature roasted the tomatoes, so they had a rich, powerful 
flavor that perfectly complimented the chicken and sausage. The cabbage 
absorbed the flavors of the juices and it evolved into a great side dish. 

The recipe is flexible as well--the chicken and sausage ratio could vary 
significantly depending on your supplies, just make sure the tomato sauce 
is on top and the cabbage is below.

Italian Sheet Bake

2 cups jarred or canned diced tomatoes (about 16 ounces)
1 Tablespoon dried basil leaves
2 teaspoons dried oregano Leaves
1 tablespoon dried parsley leaves
2 garlic cloves, crushed
1 teaspoon sea salt
1/2 cabbage head, medium chop
5-6 hot Italian sausage links
4 chicken leg quarters
1/2 cup finely grated Parmesan cheese
Sea salt and black pepper to taste

Place oven rack on the second level from the top. Preheat oven to 325 
degrees. 

In a medium bowl (if using a stick blender) or food processor add the 
tomatoes, basil, oregano, parsley, garlic and salt. Purée tomatoes 
and herbs into a sauce. Set aside.

On a shallow baking sheet evenly spread the chopped cabbage. Make 
a slit in one side of each sausage, arranging the links around the edge 
of the pan, slit side up. 

Generously season all sides of the chicken quarters with salt and 
pepper. Arrange chicken in the middle of the bed of cabbage, skin side 
up. Drizzle tomato sauce on chicken and sausage, spreading it to 
cover the surface of all the pieces. 

Sprinkle the cheese over the sauce. Place sheet in oven and bake for 
one hour and 15 minutes, until sausage and chicken is fully cooked, 
at least 165 degrees Fahrenheit. 

Remove sheet from oven and let sit for five minutes before serving.

Blue Plate Chops

blueplatechops

I know this recipe looks suspiciously like a chop recipe I shared in December, but it is definitely different. It has bite and goodness that the other does not. They do share a crisp brown on top, but can anyone get enough of crisp brown on sauce topped meats? Not me!

I call it a blue plate special because it is comforting, easy and filling. The traditional blue plate special is thought to first be offered during the Great Depression of the 1920s and 1930s, consisting of a meat and three sides on a blue colored divided plate. Another thing about the blue plate special–you take what you get and don’t get upset. There were not any choices with the original blue plate special – to keep the price low the meal elements were made in bulk quantities and included in every serving. Don’t like the peas offered? Then pay more and order something else.

On this plate I prepared the inexpensively cut bone in pork steak and combined three veggies in one side – onion, zucchini and yellow squash, for which the recipe can be found here. The main point is that an inexpensive protein can be made to taste absolutely delicious without much effort. Make your oven do the hard work!

Since our squash needs eating while still presentable, it was an unconditional veggie side for the night. I don’t have a traditional divided blue plate, but maybe a blue rimmed plate will work in this century? Everybody ate without complaint. Maybe it was because it was a busy day of working and play group meeting frenzy and light lunching, but I think it may have been because we were all hungry. Regardless, it was yummy and it was gone. No need to package leftovers….

Blue Plate Special Chops

4 large bone in pork steaks (approx 2 1/2–3 pounds)
1/2 cup tomatillo or Verde salsa
1 cup shredded cheddar or co-jack cheese
1/2 cup finely grated Parmesan cheese
2 teaspoons granulated Garlic
Salt And pepper to taste

Preheat oven to 350 Degrees.

Line shallow baking sheet with foil Generously season both sides of all chops with salt and pepper. Place on sheet evenly spaced out. Divide the salsa among the four chops, spreading it evenly on the top facing side.

Sprinkle Parmesan cheese on each cup, followed by grated cheese. Sprinkle granulated garlic and a little bit more salt. Place sheet on top level if oven. Bake for 30 Minutes. Cheese layer should be brown and crisp.

Remove from oven and serve immediately.


Fourth Blogiversary Escargot

escargot
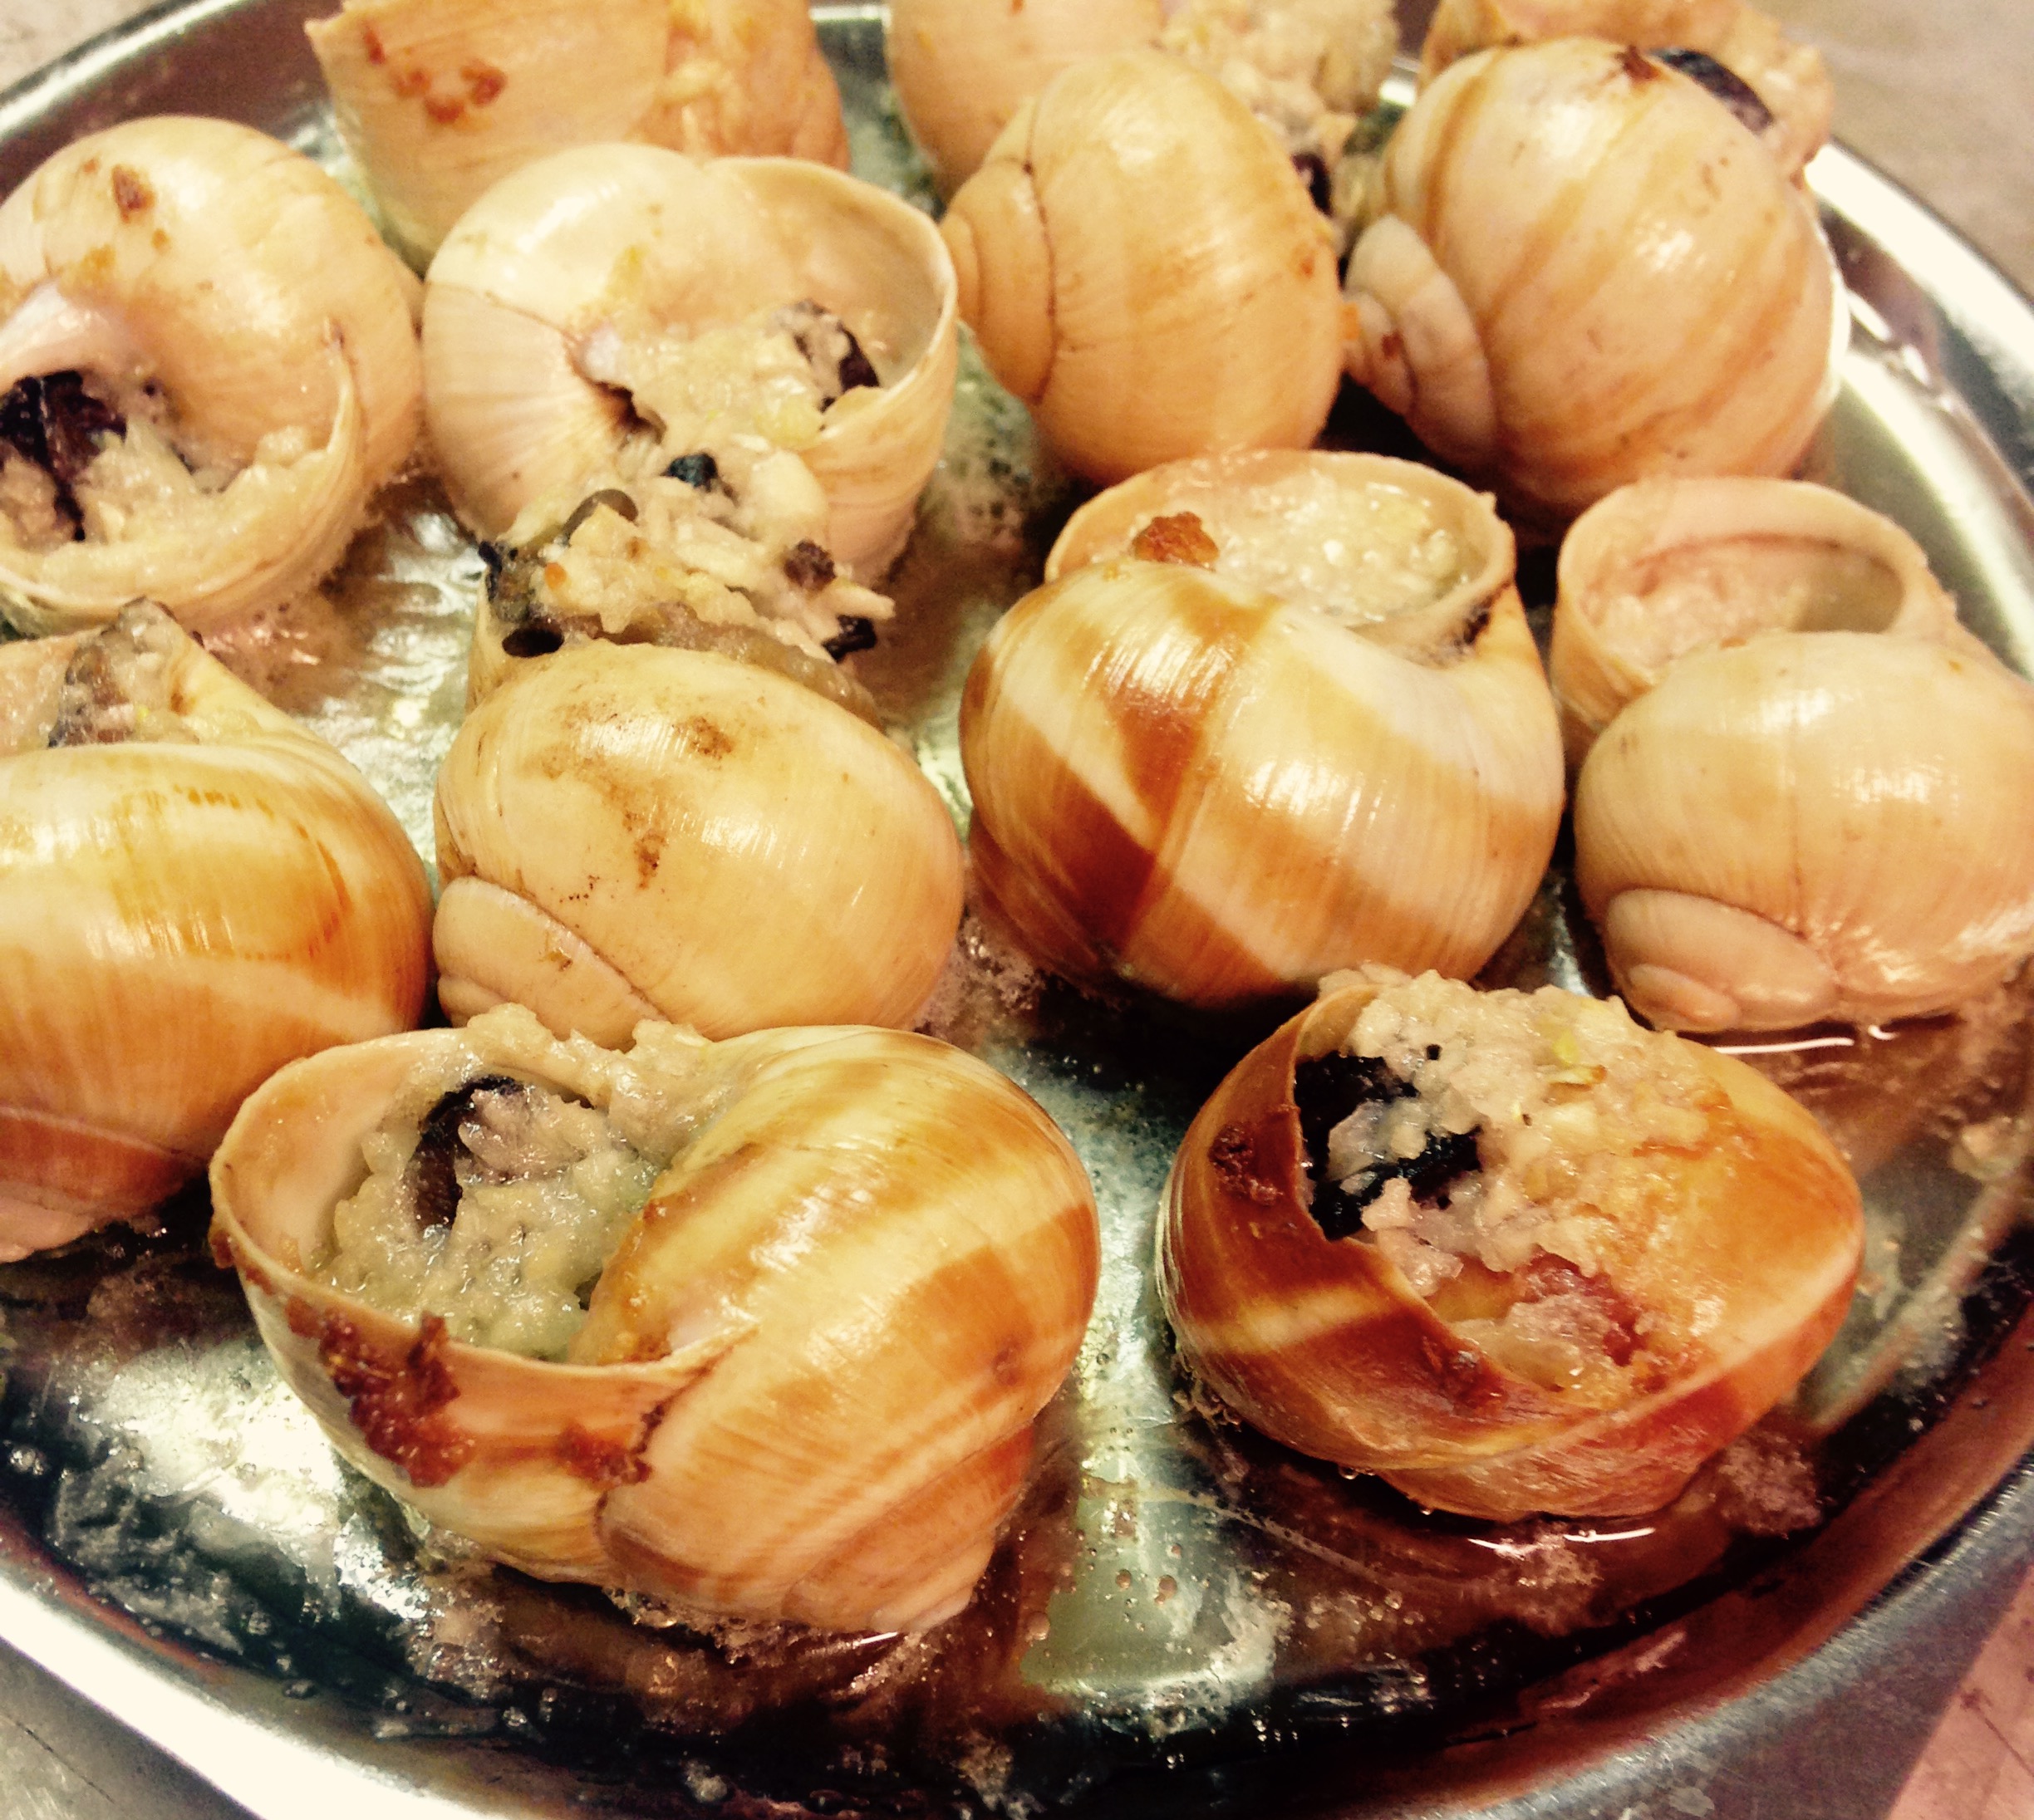
Escargot. A name for slimy little things thought to be elite delicacies since ancient times. I am not necessarily a judge of elite delicacies, but I do know about what I consider nostalgic foods that may also be considered elite and delicate. The first time I learned of the existence of escargot was an anniversary dinner held by my parents when I was a kid. What I remember from back them was pretty little sea shells bubbling with butter. I soon found out there were also snails, garlic and salt in the shells. Using some funky tongs and little forks, the snails slid out, then mom and dad dropped them in their mouths and they smiled. I know that part of that smile was remembering doing the same thing in France many years prior, but they were also enjoying the here and now–the simple flavors of butter and garlic covering a common gastropoda.

It is almost hard for me to call this a recipe, but one thing I like to do on this blog is to include some basic recipes that help appreciate the common and slightly less common. Along with the plethora of quick and easy chicken and pork chop recipes I like sharing other more delicate items, like lobster, scallops and fondue.

Escargot is fun and delicious. My family downed six dozen snails over the holidays while we laughed, cried and told stories. They brought back memories because they were shared before. Little B tried one, but honestly could not down it. I think it was because it was too similar to a mushroom, which is currently a hated element. Maybe it was too garlicy or salty. Maybe we were too excited about her trying it. I don’t know and probably never will. It does not matter. What matters is that next time she is presented with escargot I hope that she smiles, remembering the first time she tried it, regardless of whether or not she sticks another snail in her mouth. Memories count. A lot.

This is the fourth anniversary of this blog. There have been an amazing number of things that have happened, both personally and professionally during the past four years. What I can say, at this point in time, is that I am excited and emboldened by where I am in my life right now.

It is scary to start a business, especially for me. As a lifelong introvert it is impossible for me to explain to you what I feel when stepping forward with my love and passion to total strangers and the general public. It is a strange and wonderful experience as time passes and the reactions of other people are experienced and evolve.

It all started with this blog in a small Texas town and is now a business with a passionate family behind it. Thank you to family and friends who have been there the whole time, and to the new friends who are becoming a lovely reality in the now. Life could not be better.

Fourth Blogiversary Escargot

Six dozen snails, canned
Three to six dozen snail shells, boiled and drained
1 pound salted sweet cream butter, room temperature
8 finely chopped garlic cloves
3 Tablespoons finely chopped shallots
1 Tablespoon brandy
Sea salt to taste

Combine butter, garlic, shallots, brandy and some salt. Stir until well combined. Let rest at least one hour before cooking snails, leaving it at room temperature.

Preheat oven to 400 degrees.

For each shell drop approximately one teaspoon of butter mixture into a shell, press the snail in, small side down, until resistance is felt. Add more butter on top. Place filled shell on baking dish so large opening is facing up. If an escargot plate is not used, then rely on a medium iron skillet, making sure shells sit in skillet snugly so they cannot roll over during baking process. Repeat until all shells are filled. Place dish in oven for 10–15 minutes, until butter is bubbly while garlic and shallot bits begin to brown.

Remove dish from oven and serve immediately. Fully utilize butter sauce by dipping with power bread, foccacia or other absorbent, wonderfully consumable element.
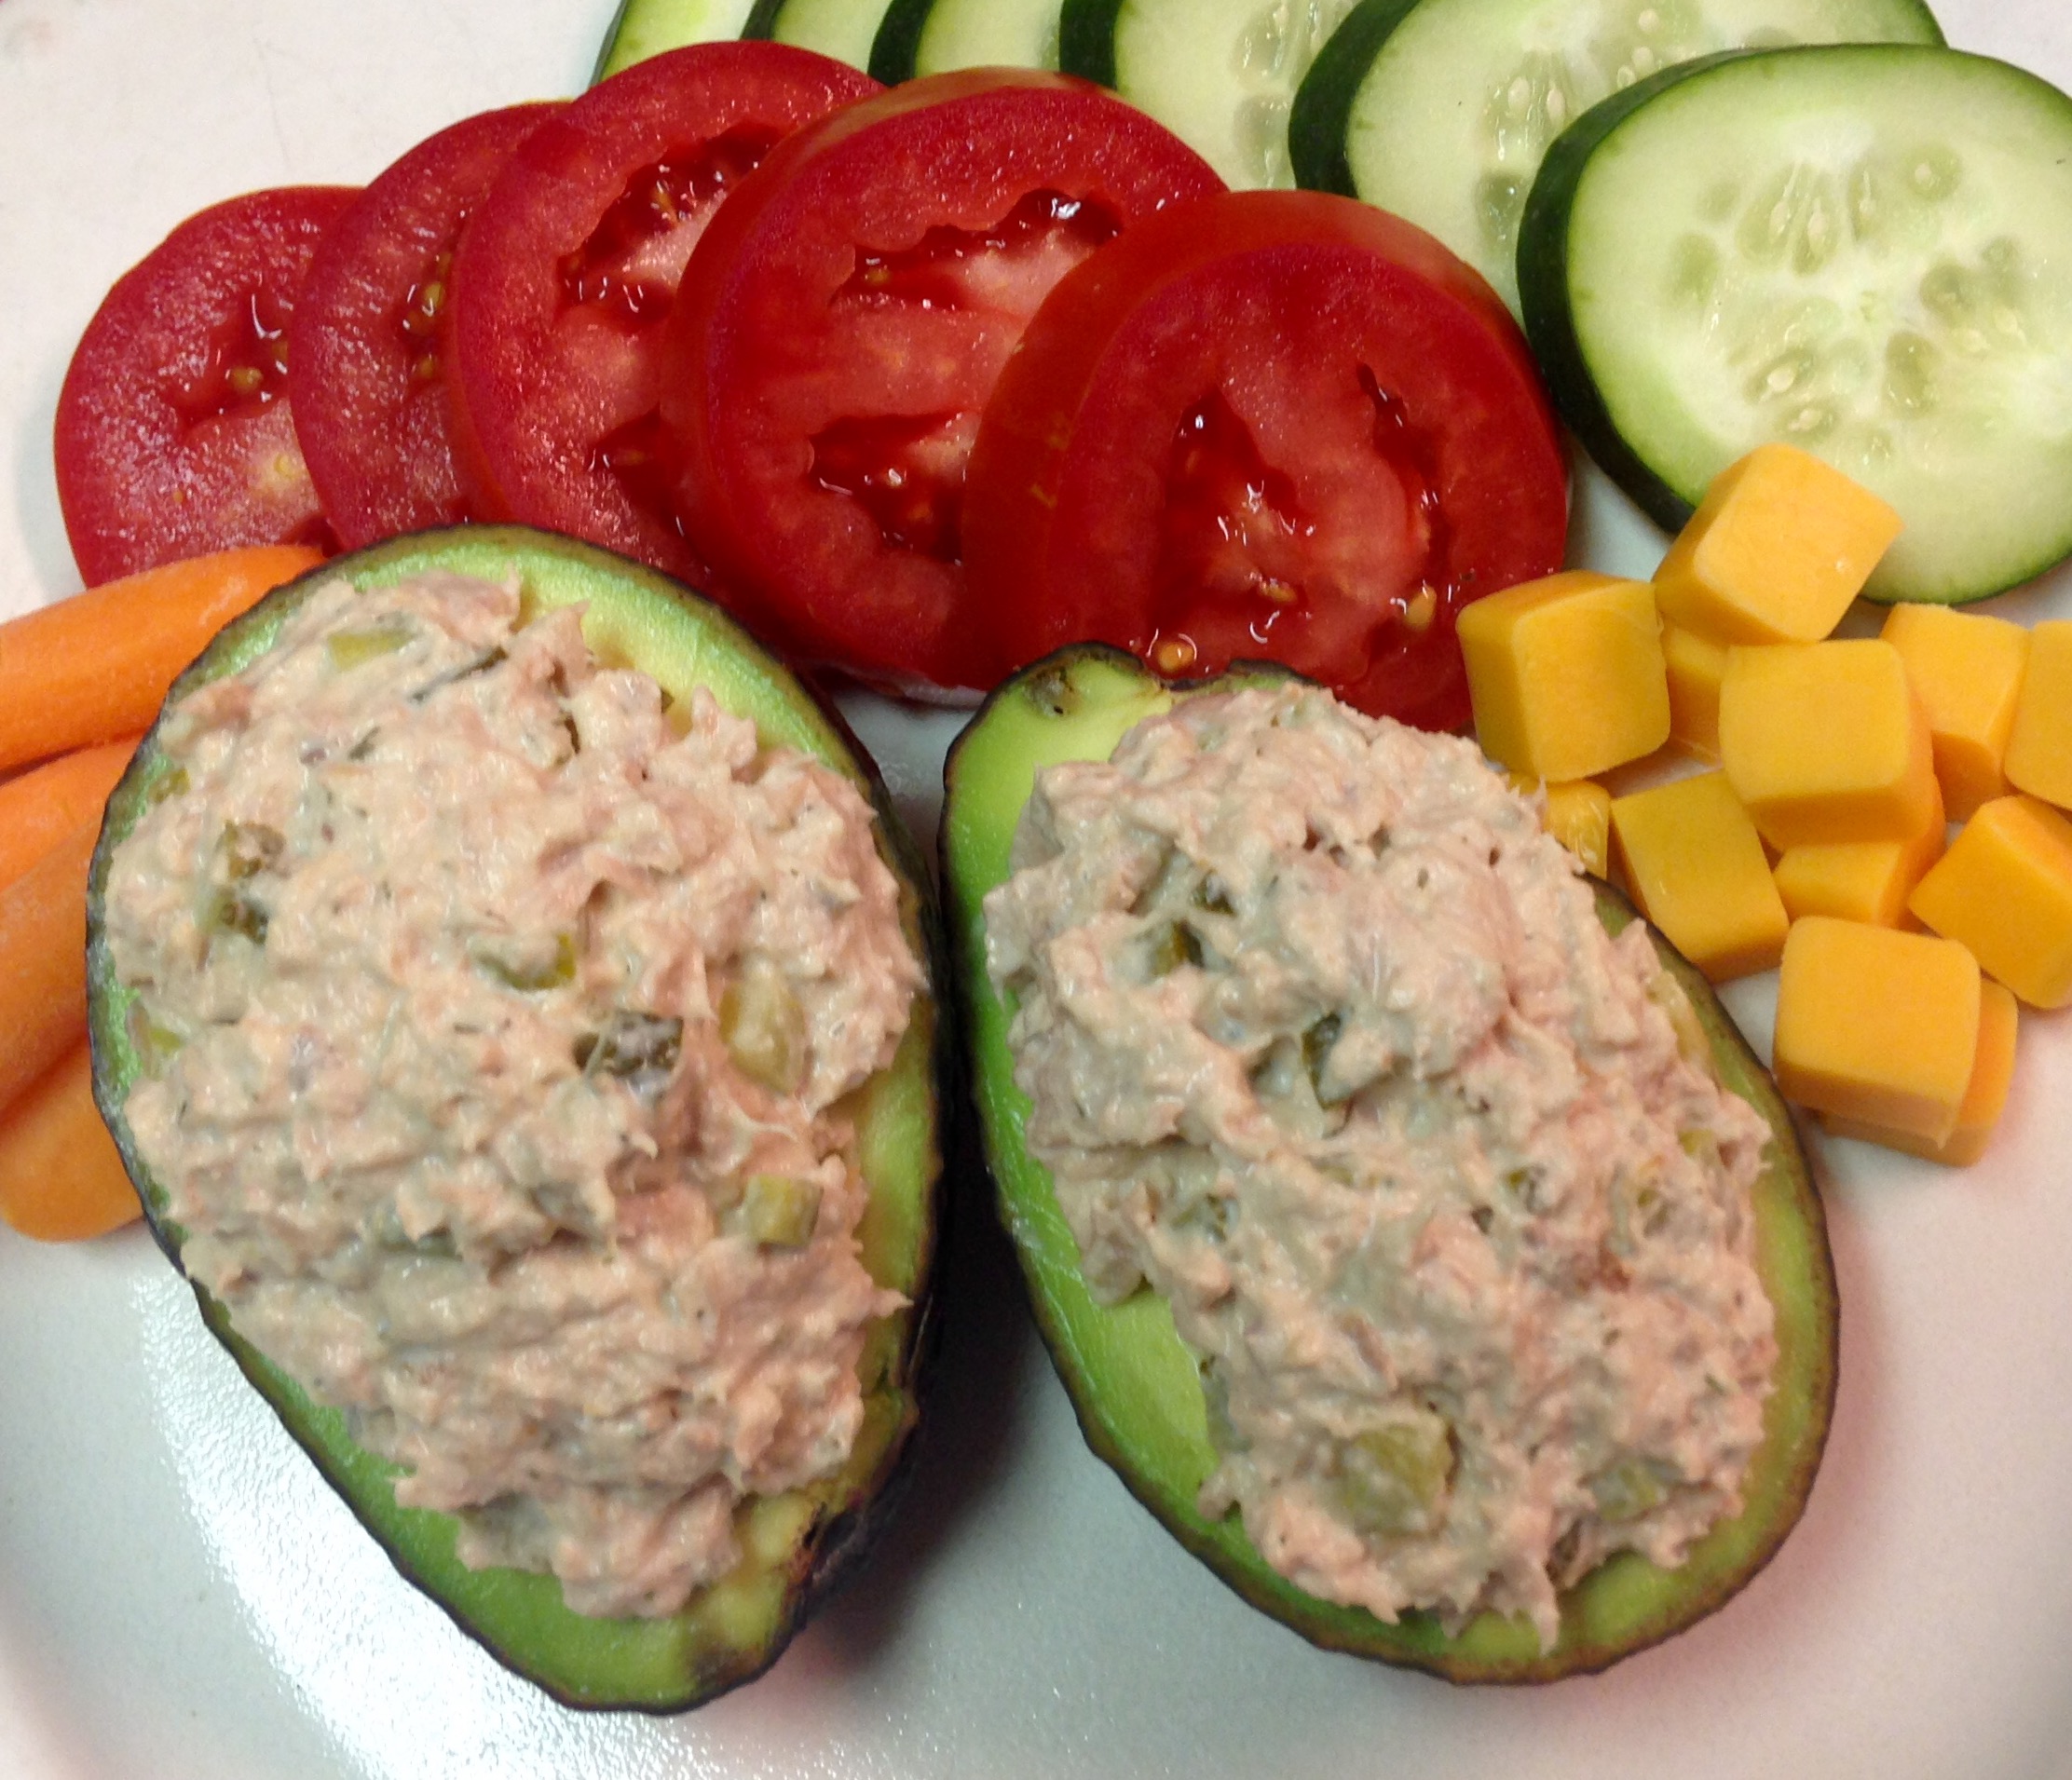
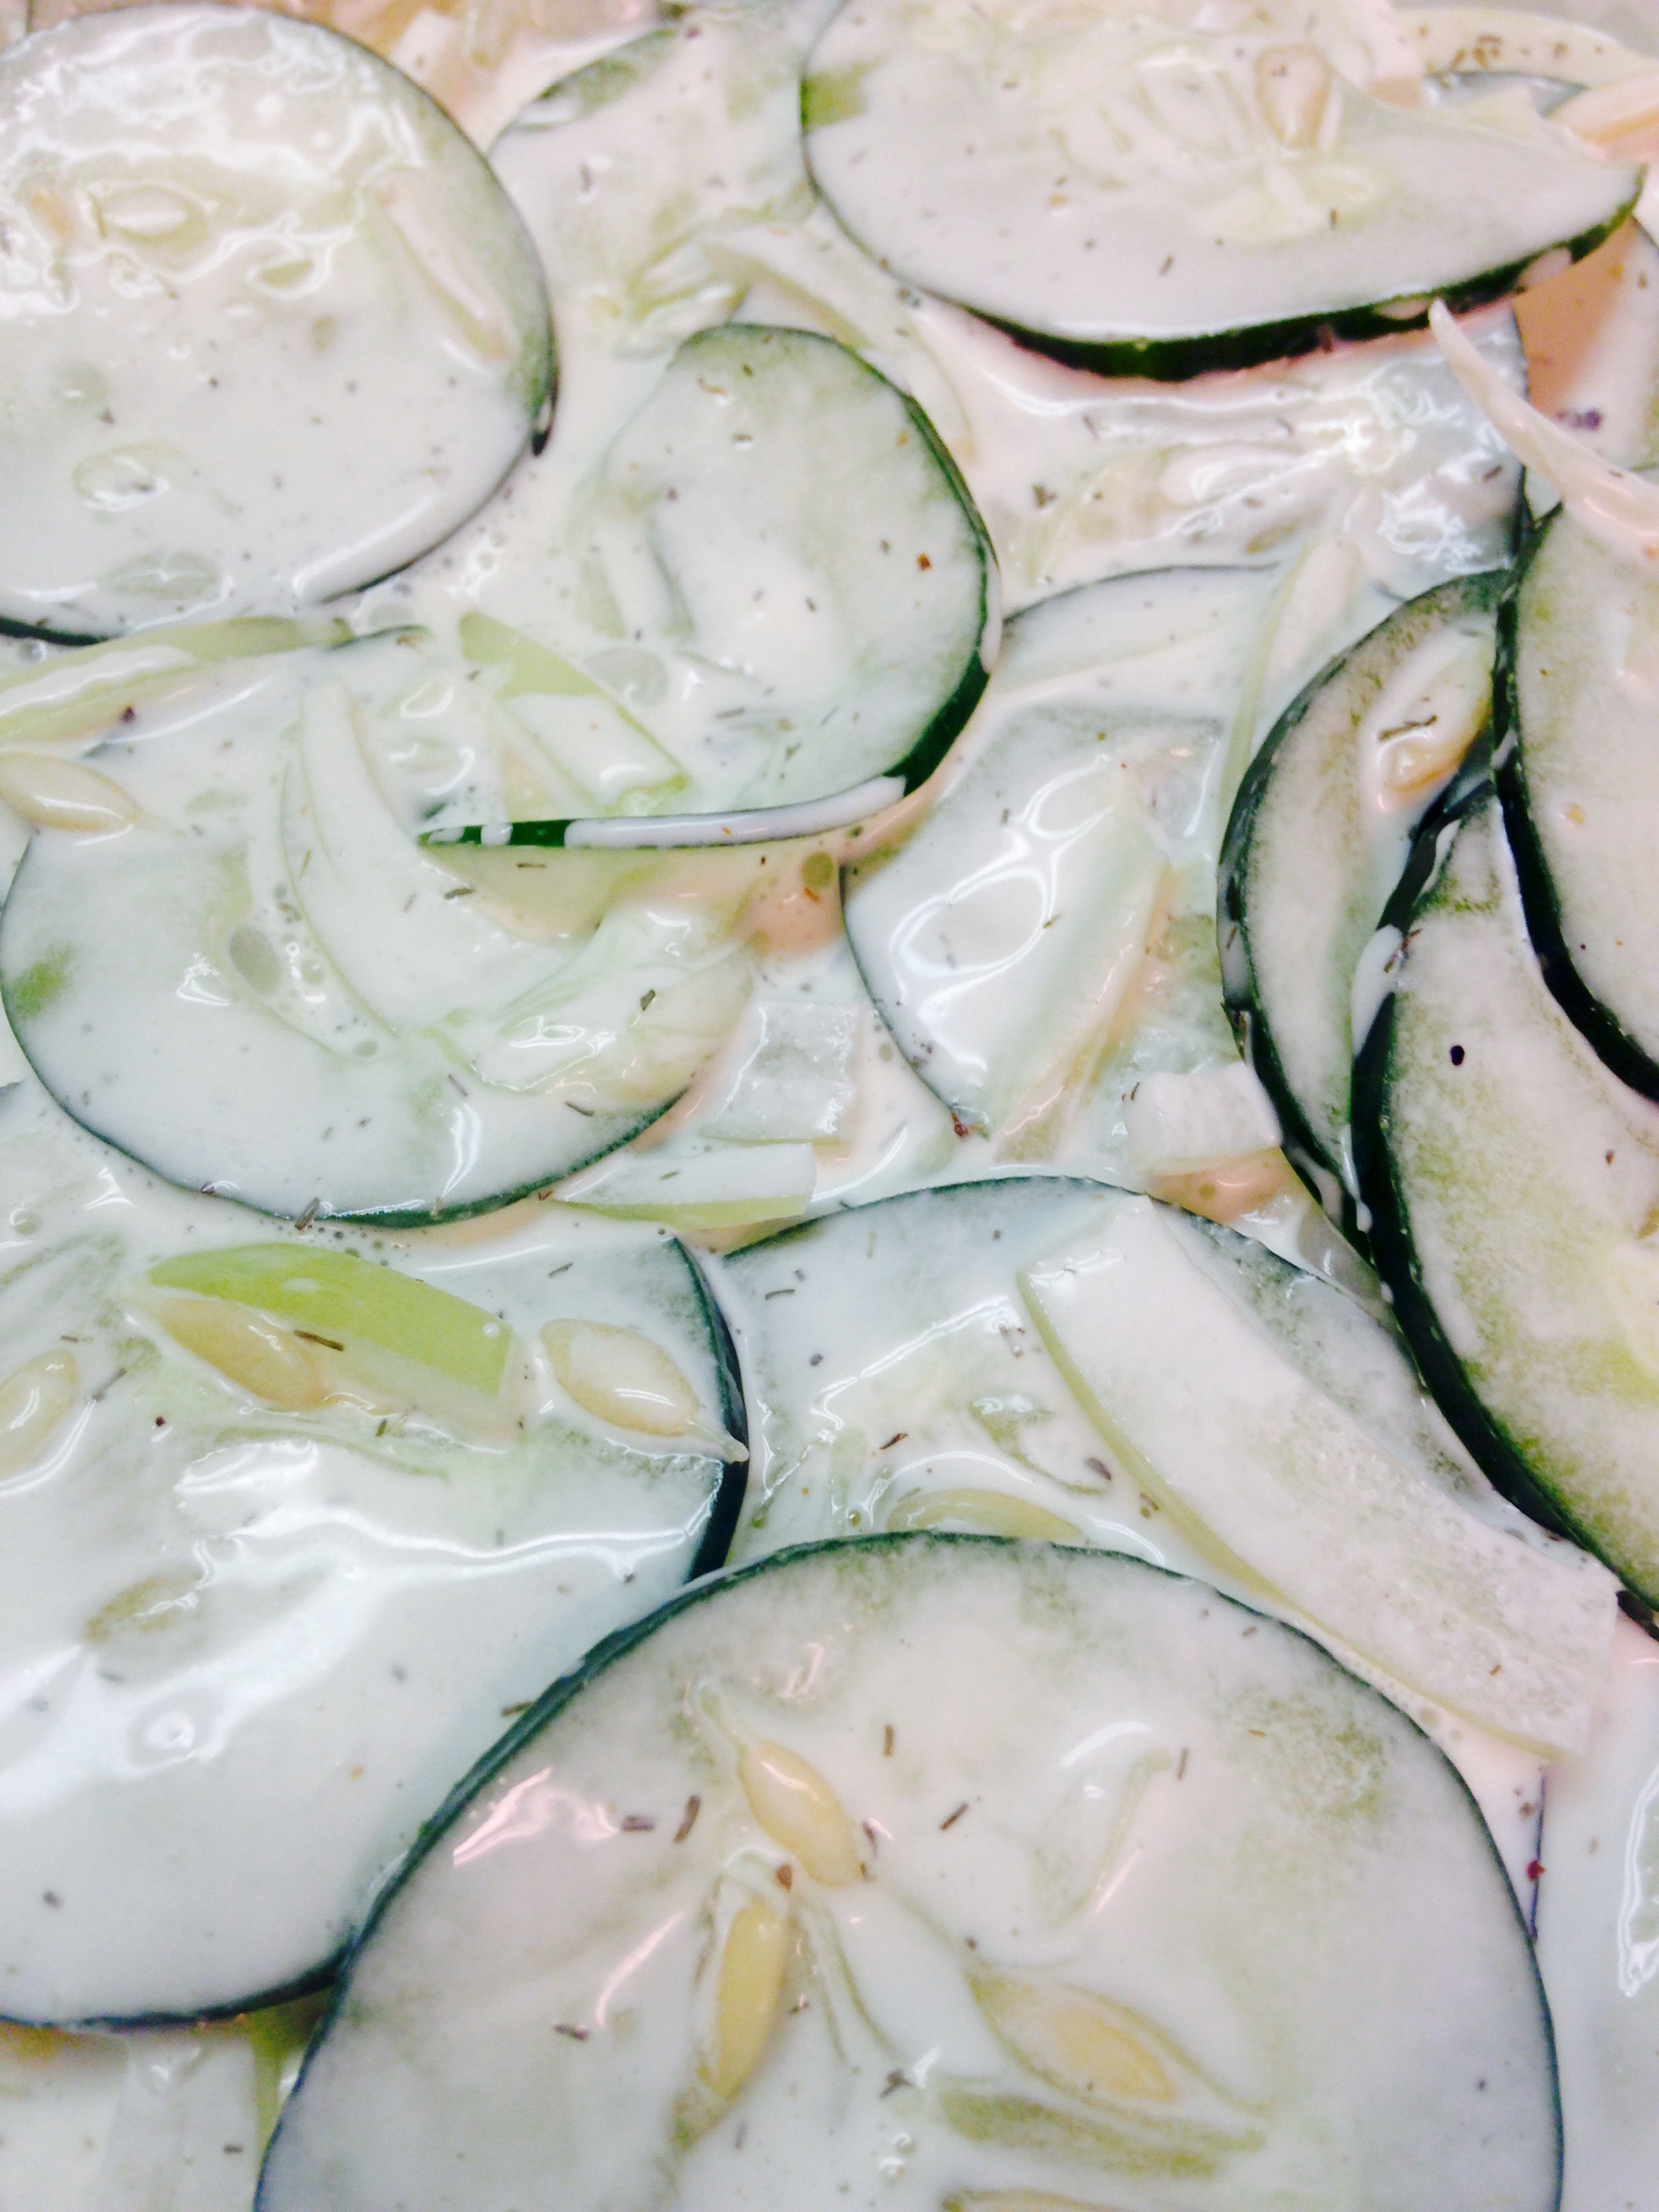
Foccacia

Foccacia

Over the holidays I had a slew of opportunities to feed grain eaters and prove to them that grains are not necessary to enjoy celebratory meals. A couple of guest left after their visit, happy with the discovery that they not only enjoyed their eating experiences, but they in fact lost instead of gained weight during their visit. Win!

One way we were able to accomplish such a feat was adapting some of our recipes to meet celebratory needs. One need was to have a flatbread that easily soaked up sauces and juices, allowing guests to enjoy the tradition of dipping and revelling in soupy leftovers.

FoccaciawholeThis foccacia was an easy transition from our traditional Power Bread and fun to make! Instead of ensuring the dough was properly packed in a loaf pan I was able to mold it without edges and create exactly what we needed for our celebration. I am still enjoying the new memories made over the holidays and hope you can make some of your own with some of our grain free creations.

Foccacia

1 cup coconut flour
1/4 cup golden flaxseed meal
½ tsp sea salt
1 tsp baking soda
9 eggs, room temperature
¼ cup apple cider vinegar
1 cup melted lard, butter or extra virgin olive oil
2 garlic cloves, crushed
1/4 cup freshly chopped parsley
1/4 cup freshly chopped basil
1/4 cup freshly chopped oregano
1 Tablespoon extra virgin olive oil
Sea salt to taste

Preheat oven to 350 degrees. Prepare shallow baking pan by lining with aluminum foil.

In a large mixing bowl combine coconut flour, golden flaxseed meal, salt, baking soda, garlic, parsley, basil and oregano, then stir until well blended.

In a separate bowl combine eggs and apple cider vinegar. Whisk together until egg whites and yolks are well combined. Add lard/butter to eggs and continue whisking. Add immediately to bowl of dry ingredients.

Place dough in the middle of prepared baking pan. Gently spread dough towards the edges of the pan, making a rectangular shape that is 1/2 inch or less in thickness. Press edges towards the middle, ensuring that they are firmly shaped.

Using your hands gently spread the olive oil over the top and edges of the shaped dough. Sprinkle generously with sea salt. Place in preheated oven on the middle shelf. Bake for approximately 25 minutes, until middle is cooked and top of bread is evenly brown.

Remove from oven and let sit for at least 15 minutes. Slice bread into approximately 12-15 squares. Serve immediately or reheat before serving later. Store chilled in airtight container.

Spicy Stuffed Tomatoes

spicystuffedtomatoes

There must have been a bumper crop of tomatoes somewhere nearby, because there were tons of big, beautiful ‘maters in the local produce section at the store this week! We often have fresh tomatoes in our kitchen and chop them up raw as a quick side dish, but I decided this time to stuff them and bake them. The cooler weather leads me towards warm food. You can never have too many variations on vegetable dishes, can you?

I used to make these with oatmeal as filler, but since using it would conflict with our current habit of eating grain free, I replace it by adding more veggies and sausage. Worked out great!

As the new calendar year begins and the holiday activity wanes I ponder what is to come during the next twelve months. Last year Big D and I both shifted the work we do to bring in money, and shifted where we live. Prospects look bright for our efforts to follow our passions, with starting a new business and writing new books. This year is starting on very bright notes, we are working hard and loving it, while also finding opportunities to spend more time with family and friends. I hope you all start the year with positive outlooks, for the perspective you take will most definitely influence where you go in life. Why not do it positively. You will be amazed where you will go with it!

Spicy Stuffed Tomatoes

8 ripe tomatoes
1/2 medium onion
1/2 green bell pepper
4 ounces white button mushrooms
2 links hot Italian sausage, cooked and roughly chopped
4 cloves garlic
2 tablespoons extra virgin olive oil
1/2 teaspoon cayenne pepper powder
1/2 teaspoons sea salt
1/4 teaspoons ground black pepper
2 teaspoons hot sauce (suggest Tabasco Smoked Chipotle Sauce)
1 cup mozzarella cheese
1/4 cup grated parmesan cheese
Sea salt and ground black pepper to taste

Cut off top portion of each tomato, making a flat top. Scrape out seeds and meat core from inside of tomato. Turn tomatoes cut side down on a towel to allow extra juice to run out. Finely chop mushrooms, onion, bell pepper and garlic. Heat oil in a medium sauté pan over medium high heat. Add garlic and onion into pan and cook about three minutes, until onions begin to sweat. Add bell pepper and mushrooms, cooking another five minutes until onions begin to brown and mushrooms release their liquid. Add cayenne pepper powder, salt, black pepper and hot sauce. Stir and simmer on low for five more minutes. Remove from heat and let cool slightly.

Preheat oven to 350 degrees.

Flip over tomatoes so cut side is up. Sprinkle the inside of each with sea salt and ground black pepper to taste. Drop sausage into the bottom of each tomato, dividing it evenly among the eight tomatoes. Spoon sautéed mixture into each tomato, dividing it equally among the eight tomatoes as well.

Place stuffed tomatoes in a baking dish that allows them to fit snugly, so as to support each other while cooking. Dish size can vary due to size of tomatoes, but 9×9 inch should work. Spoon 1/8 cup mozzarella cheese on the top of each tomato, pressing it down firmly so it stays on top of each. Sprinkle parmesan cheese on top of each tomato. Bake for 30-35 minutes, until cheese browns and tomato skin wrinkles and begins to crack. Remove from oven and serve immediately.

Post Navigation