Any Kitchen Will Do

Give me a kitchen and I will cook.

Archive for the category “chicken”

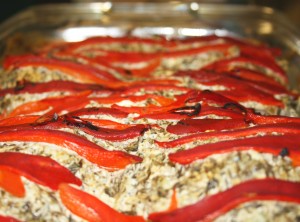
Baked Chicken with Cheese and Spinach

chickenspinachcheese1

I noticed that it’s been a while since I posted a chicken recipe. I can’t go too long without doing chicken. We eat it often and I try to vary the preparation. It is always easy to roast a bird, but a nice sauce on top of baked pieces is comfort food extraordinaire. I did a slightly similar recipe a while back, but this dish is much more rich and thick, with a completely different result. This stuff is pretty rich, and I spooned up every bit of the sauce when the chicken was long gone. Our young charge Lanky P, who is living with us now, is not a vegetable eater, which makes for a lot of scrambled eggs in his belly. I was nice and did a few thighs without the sauce for him. I think he seriously missed out, but whenever someone dislikes vegetables I respect it, but think it is a little sad. There are so many wonderful flavors you can get from vegetables. Maybe I will do some recipes and sneak in veggies – I did it the other day with spaghetti sauce and he cleaned his plate. I never have to sneak with Little B – she eats frozen broccoli florets straight from the freezer as a snack, for goodness sake – so I can hone my veggie sneaking skills with Lanky P. Heh. Heh. Heh. That is an evil laugh if you don’t recognize it.

Baked Chicken with Cheese and Spinach

6 – 8 chicken thighs, skin on but edges trimmed
3 cups fresh spinach, roughly chopped (or 13.5 ounce can spinach, with liquid squeezed out)
1 Tbsp extra virgin olive oil (if using fresh spinach)
6 cloves garlic, crushed
8 ounces cream cheese
4 ounces goat cheese
6 ounces sour cream
½ tsp sea salt
2 Tbsp lime juice
3 roasted red peppers, jarred or fresh roasted with skin removed
Salt and pepper to taste

Preheat oven to 375 degrees. Lightly salt and pepper chicken thighs after trimming off excess fat and skin – leave enough skin on to cover the top of the chicken thigh meat. Place one layer of chicken in 9×13 baking dish. Slice red peppers into thin strips, no more than ¼ inch width and set aside. In a medium pot over medium high heat add garlic and spinach (if using fresh, add oil first until heated, then garlic and spinach). When spinach is hot add cream cheese, goat cheese, sour cream, salt and juice. Stir until cheeses are melted and combined with spinach and garlic. Spread cheese and spinach mixture over chicken. Lay slices of red pepper over cheese mixture so they are evenly distributed. Cover pan with aluminum foil. Bake for 20 minutes. Remove foil and cook for 20 – 25 more minutes until peppers are dried out a bit, cheese is bubbly and chicken is cooked through. Let sit for about five minutes before serving.


Mustard Baked Chicken

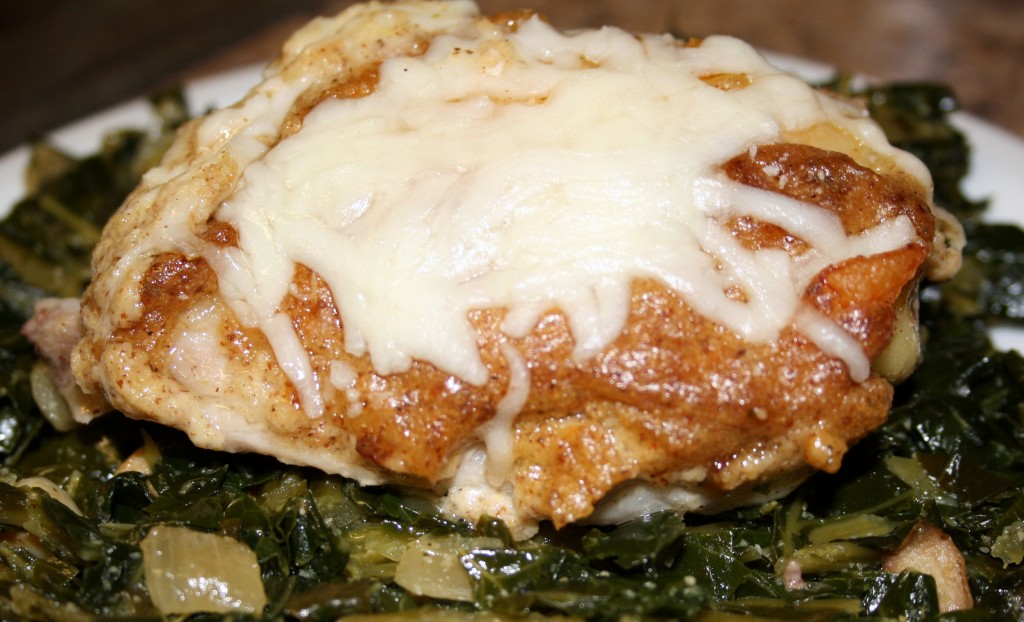
I know it is not very exciting, but there are not many dishes simpler than baked chicken parts for a weekday dinner. We always have chicken pieces of some sort in the freezer. Instead of pretending we eat exotic meals every day of the week I will continue to share variations of staples we rely on for dinners and very often lunches the next day. We continue to find that cooking our own food on a regular basis  helps us stay on a diet that makes us feel great, thus the reliance on back stock of protein in the freezer. This recipe is a result of opening the fridge on a Wednesday evening and having the thawed chicken thighs telling me “I know we are common, but make us special. Very special.” A few things from our well stocked fridge resulted in special yumminess. Saute some greens for a bed, and the special chicken is scrumptious! Wonderful wolfing down of dinner on a Wednesday!

Mustard Baked Chicken

2-3 pounds chicken pieces, skin on
1/2 cup spicy brown or horseradish mustard
1 cup olive oil mayonnaise
1 tsp garlic powder
2 Tbsp fresh lime juice
Salt and Pepper
1 cup grated mozzarella cheese

Preheat oven to 350F. Rinse and pat dry chicken pieces. Season all over with salt and pepper. Place chicken, skin side up, in a large baking dish. In a small bowl stir together mustard, mayonnaise, garlic powder and lime juice. Spread sauce over the top of all the chicken. Bake in preheated oven for about 45 minutes, until juices run clear and edges of chicken begin to brown. Turn off oven, sprinkle cheese over chicken and leave in oven for about 10 minutes, until cheese is melted. Serve immediately.

Thyme and Lime Chicken Soup

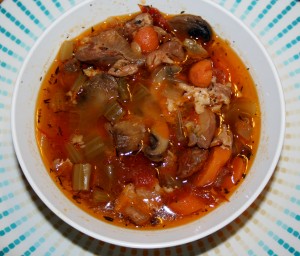
You are walking along enjoying the crisp fall breeze, when you suddenly have an urge for a bowl of hot chicken soup. You run by the store and into the soup aisle, only to discover that all their offerings include noodles, rice, tons of salt, preservatives and fillers. Where, oh where, is the veggie and chicken filled bowl of goodness you were craving? And what about that extra twist you want to be surprised with as the first spoonful slides down your throat? Well, here are all the things you’re looking for! The surprise is how wonderfully the beer mixes with the lime juice and thyme to give the soup a nip not usually found in chicken soup. Don’t worry. After hours of exposure to heat the alcohol cooks away, but the more subtle flavors of the beer stays in the soup. Little B inhaled two bowls in one sitting. Enjoy!

Thyme and Lime Chicken Soup

½ pound thick sliced mushrooms
3 Tbsp dried thyme
1 tsp sea salt
2 Tbsp extra virgin olive oil
3 limes, juiced with meat included
2 pounds cooked chicken, chopped or shredded
2 cups miniature carrots, chopped into coins
3 stalks celery, chopped
1 medium Onion, chopped
4 cloves garlic, crushed
4 small or roma tomatoes, roughly chopped
1 cup water
12 ounces beer (pick a strong flavored one – pale ale or IPA – goes well with the lime)
Salt to taste

Preheat oven to 350F. In a medium bowl combine the juice and pulp from one lime, olive oil, thyme and salt. Add the mushrooms and toss until coated. On a medium cookie sheet spread out the mushrooms slices flat with a little space between each. Drizzle any sauce over the mushrooms. Bake for 20-25 minutes, until they begin to brown. Remove from oven and set aside to cool. In crock pot add water and remaining lime juice with pulp, then turn pot to high. Add chicken, carrots, celery, onion, garlic and tomatoes. Stir and let soup heat up, about an hour. When the soup is hot add mushrooms (along with any juices left on the baking sheet) and the beer to the soup. Continue to cook on high for three more hours. Turn temperature to low and cook for 3 – 4 more hours. All the ingredients can be added to the crock pot at the same time and cooked on low for 8 – 10 hours, but the results are tangier if the vegetables are allowed to heat up in the water/lime liquid before adding the beer. Either method bears good results. If using the stove top, bring the soup to a boil before adding the mushrooms and beer, then simmer on low for 5 or 6 hours. Season with salt to taste before serving.

Chicken Tomatillo

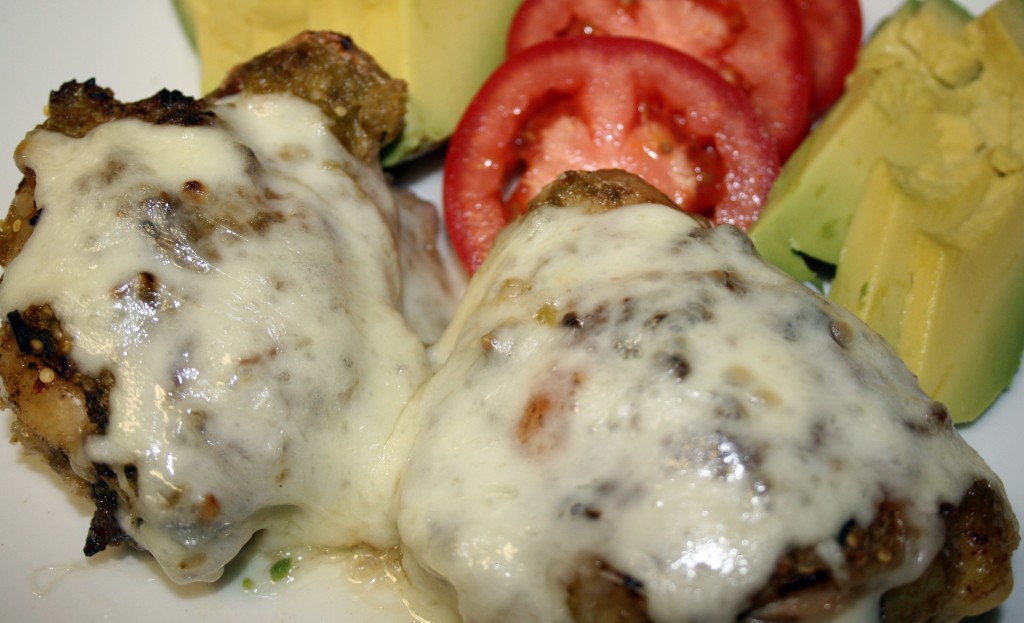
What the heck do you do when you have chicken and some leftovers in the fridge? Come up with something for dinner using them! Duh! After a long day at work I really needed to cook something so I could relax and totally enjoy my family. Cooking, Little B and Big D are what I rely on to balance out the chaos at work. It is a necessity for me to focus on those three things when I get home. It definitely works. I don’t think about work again until the next morning when they are sleeping and I am on the way out the door on the way to the office. I love that it works so well for me. There is nothing better than being able to escape at home. One of my constant challenges is to do something creative and simple with chicken. We are dark meat people, which means packages of legs and/or thighs cooked up for dinner. Recently we had a package of thighs, so I poked around in the fridge and came up with something luscious and amazing for dinner and a couple of lunches at work, which, of course, reminded me of home and let me escape for a bit in the middle of the work day. Yay!

Tomatillo Chicken

3 – 4 pound package chicken thighs, with bone and skin

1 tsp chili powder

1 tsp ground cumin

1 tsp sea salt

½ tsp ground black pepper

2 cups salsa verde with tomatillos sauce

2 cups mozzarella cheese

Preheat oven to 350F. Combine chili powder, cumin, salt and pepper. Get your hands dirty and cover chicken with combined spices. Place chicken in 9×13 glass baking dish. Pour tomatillo sauce over chicken, then top with cheese. Bake uncovered for 45 minutes to 1 hour, until chicken is cooked through and juices run clear. Let sit for about ten minutes before serving.

Walnut Chicken Salad

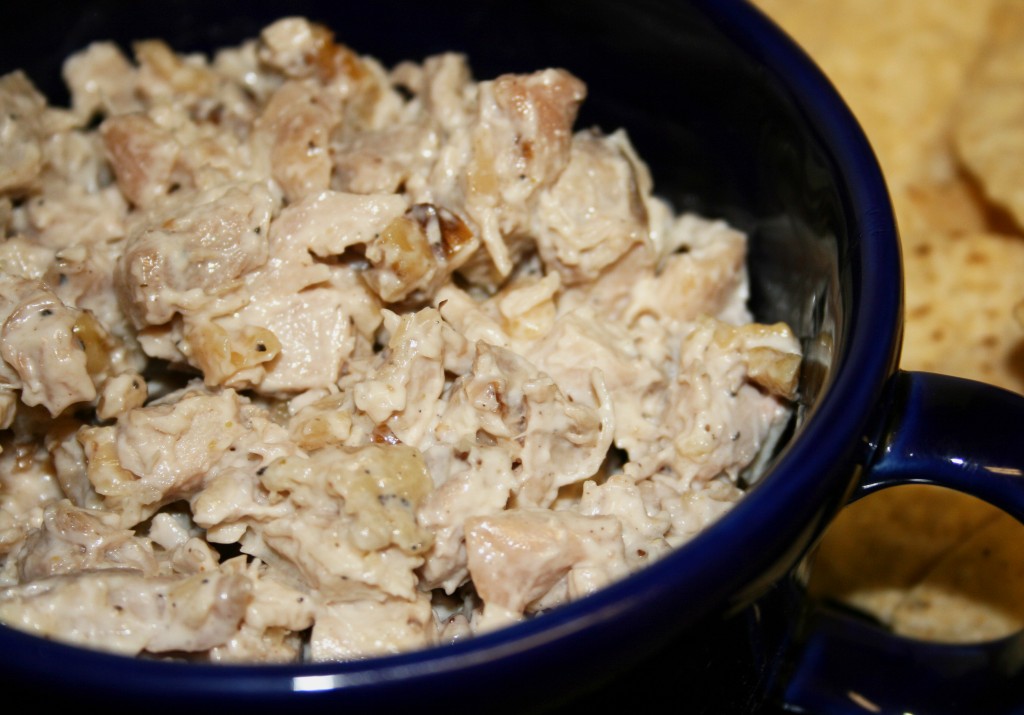
If you have ever been to Washington DC for work you probably noticed in almost every government and office building there is a little cafe on the bottom floor. These little cafes can be addicting. They usually have delicious breakfast and lunch bars that are sold by the pound, and are extremely convenient. Before going upstairs to do your business you get your little to go container and pick bits and pieces from the display of food. A little pasta salad, a bit of roast chicken, a spoonful of sauteed green beans, a pile of fruit and a couple pieces of sushi. What usually happens for me is my eyes are bigger than my stomach and I end up eating my selections for lunch over two days. Since there are little food bars in so many places they have to compete with each other, so keeping the selections flavorful and offering daily specials make you want to come back for more. This week I have meetings away from my office and for lunch I scooped up some chicken salad at one of the cafes. I expected it to be pleasant, like most food bar choices tend to be, but boy was I surprised. The light brown bits mixed with the chicken weren’t pieces of fruit like I expected, but walnuts! The sweet fruity taste I expected ended up being a nutty, savory flavor that blended wonderfully with the dressing and chicken. I don’t know what was actually in the salad, but I ate the rest of it slowly, savoring each bite and trying to figure out what else was in with the chicken. I think I figured out a pretty good replica of my lunchtime discovery, which is a good thing, because starting next week I will be back in my regular section of the metro area partaking from a completely different food bar. I may never have a chance to experience the surprising salad ever again. That is, unless I keep making it for myself.

Walnut Chicken Salad

4 – 6 cups chicken, cooked and diced
1 – 2 Tbsp broth retained from cooking the chicken*
¾ – 1 cup mayonnaise
1 tsp cumin powder
1 cup raw walnuts, chopped
Salt to taste

In mixing bowl combine mayonnaise, cumin and walnuts. Add some of the broth to thin out the mixture to the consistency of thick salad dressing. Add chicken and toss with dressing. Chill overnight before serving.

*If you use the express route and dice up a quick grocery store roasted chicken, just scoop up some juice from the container, as long as it is watery and will help thin out the dressing.

Creamy Spinach Chicken

So today I enlisted a canned good that is very comforting to me. I was one of those kids that loved spinach, and most of the time got it out of the can. When my brother and I started pre-school my mom told me that we came home and would not eat our spinach, but looked at it longingly. Apparently we told her we were not supposed to like it, so we did not eat it. Of course she explained to us that the kids who told us such things just had different opinions about spinach and that we could like it if we wanted to. I don’t succumb to peer pressure quite as easily anymore, and am really glad I chose to like it again. Later in life I learned to love raw spinach and the barely blanched but still bright green spinach. They are delicious, but do not replace memories of the canned stuff I ate as a kid. I still sometimes just open a can and eat it all up, at room temperature, with the sharp lid still attached. Thrill seeker, am I! In my quest to always find a new way to prepare chicken I came up with this lovely, rich dish that incorporates my treat in a can.

Creamy Spinach Chicken

8 – 10 bone-in chicken thighs, skin attached
1 Tbsp butter
1 cup heavy cream
1 small can chopped spinach, drained
½ small white onion, chopped
3 garlic cloves, diced
¾ cup shredded Parmesan cheese
Salt and pepper to taste

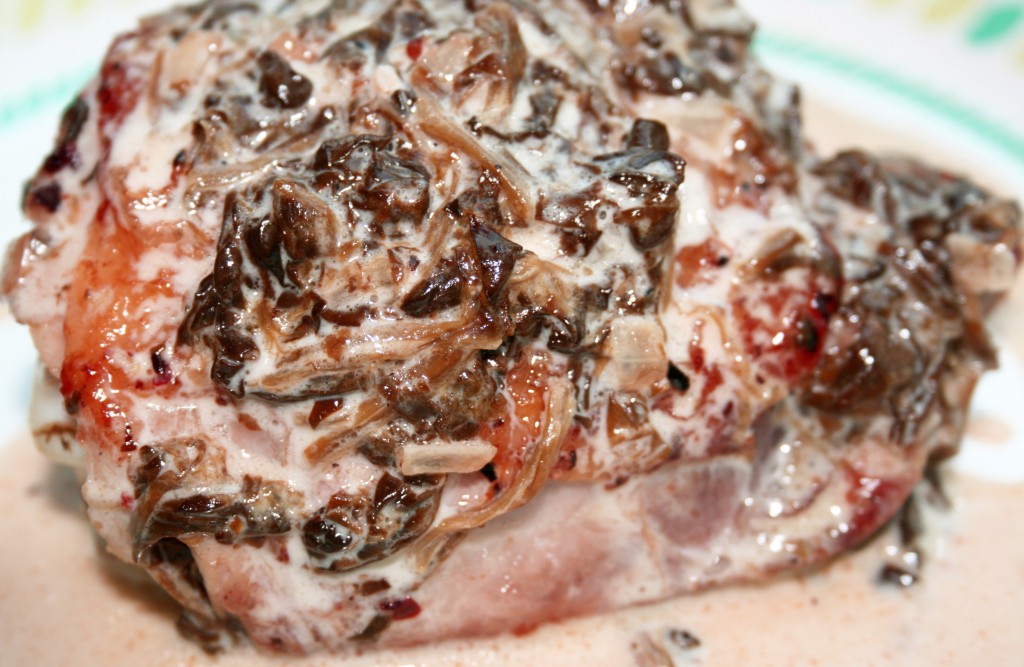
On medium high heat sear chicken thighs on both sides, making sure the skin gets crispy, about 10 minutes. While the chicken cooks melt butter over medium heat in a sauce pan. Add onion and garlic and cook until translucent. Add spinach and stir until heated through. Add cream and turn down heat, but bring sauce to a simmer and let cook for about five minutes. Add cheese and stir until melted and combined. When chicken is done cooking remove from pan and discard juices. Return chicken to pan and pour sauce over chicken. Simmer covered over low heat until chicken is cooked through, about five more minutes. Serve immediately and make sure you drizzle sauce over every piece.

Spatchcocked Chicken

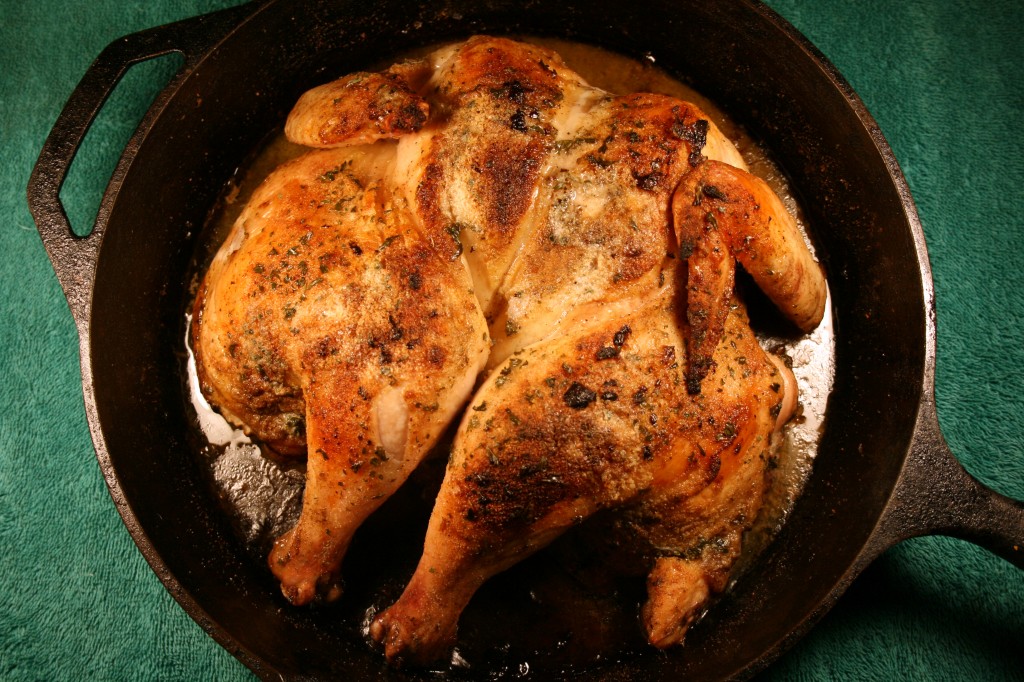
To all those who have trouble cooking a roast chicken please continue reading, for I have a solution for you. To everyone who thinks they have made a good roast chicken you should also keep reading, because you may be wrong. Being able to roast a chicken is a good skill to have, but when you find a big one at the store there is always the challenge of getting the meat evenly cooked, considering the meat is not evenly distributed around the cavity. One solution is sticking it on a full, open soda can and letting the soda keep it moist while standing on end and cooking. The can method works, but to me the meat gets an odd flavor. It might have been the fact I don’t much like Dr Pepper, but it just tasted odd. Splitting a chicken in half and cooking it in an iron skillet results in an amazingly moist, flavorful chicken. Since the bird is laid down almost flat the meat cooks evenly so the dark meat gets cooked instead of running red, and the white meat does not overcook for the sake of the dark meat. It also maximizes exposure of the skin for crispiness. The first time I used the spatchcocked method I did not expect much of a result different from when I roasted with the bird whole. When we started eating it, not only were the herbs and spices more evenly distributed in the meat, but taking the bird apart and carving it up was easier, because it was flat and easier to manipulate. If you try it you will like it, and it is also great for helping to season an iron skillet! Enjoy!

Spatchcocked Chicken

1 whole chicken, 4-5 pounds
2 Tbsp butter, room temperature
1 large lime
1 tsp salt
1 tsp pepper
2 tsp chopped garlic
1 tsp ground cumin
1 tsp onion powder
1 Tbsp chopped parsley
½ tsp ground sage
1 tsp ground thyme

Preheat oven to 375F. Place chicken on a cutting surface breast side down. Using a knife cut skin and meat down to the bone, following the spine. With a sturdy pair of scissors cut right along both sides of the spine to remove it. Turn chicken over and press down in the middle between the wings until the wishbone breaks and the chicken lays down almost flat. Take care not to push it completely flat to the point the ribs break – that is too far. Squeeze lime juice onto both sides of the chicken. Also gently pull skin away from the meat in a few places and drop some of the juice between the skin and meat. If you have fresh herbs you can slide a sprig or two of parsley, sage or thyme under the skin to add some extra flavor. Sprinkle salt and pepper on the bottom (formerly the cavity) of the chicken. Place chicken in large iron skillet skin side up. Get your hands dirty by spreading the butter all over the skin side of the chicken, including crevasses, until it is all gone. Sprinkle salt, pepper and herbs all over butter. Cover with foil and put chicken in oven and cook for about an hour, removing the foil after about 30 minutes. The chicken is done when a thermometer reads 160 degrees and juices run clear. Remove from oven and let rest for about ten minutes.

Spicy Honey Chicken

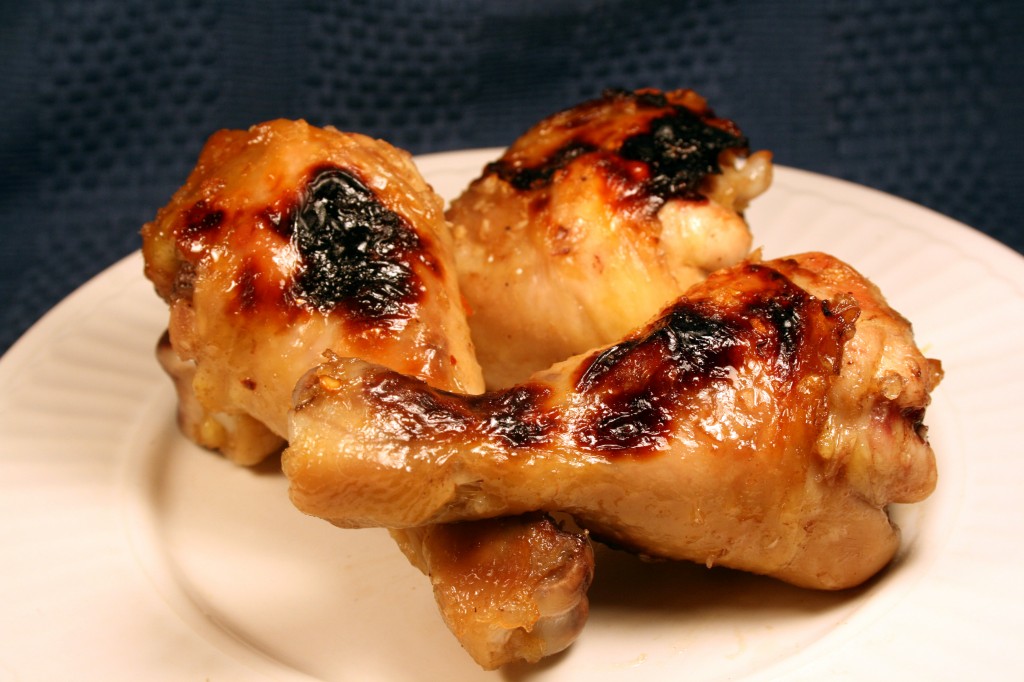
In my family there is always a fight over drumsticks. We like dark chicken meat and negotiate who gets what dark parts. I know they would look funny, but if anyone ever came up with a four or five-legged chicken I would so be in front of the line to buy some fryers, genetic distortions notwithstanding. Legs are good hot or cold, with beans or salad or slaw, and are mobile while being much easier to hold than those clumsy breasts. In recent years I have noticed more and more that packages filled with about ten legs are sold in the stores. They fit great in a crock pot or a baking dish and whenever I make them they are scarfed down. These days the bulk chicken leg packages are cheaper than the ‘buffalo wings’ that are getting more and more expensive. Quite a deal at fifty cents each at restaurants – really? Really? Not.

Chicken drumsticks always make me feel like a kid. I have been at fancy parties and felt obligated to eat them with a fork and knife, but when in more casual company I pick them up with my fingers and dig in, ready with a napkin nearby. Little B really likes them and I hope she ties many a childhood memory to hanging on to a leg while enjoying fun company.

This recipe was inspired by what I already had on hand in the kitchen, so next time I make it the recipe will probably look and taste different. I wanted sticky and sweet and a bit hot. It worked out pretty well, but I am really looking forward to having an even cooking broiler at our next place. I just can’t get this one to work the way I want. Serve them with some tangy coleslaw and dig in!

Spicy Honey Chicken

½ cup honey
2 Tbsp balsamic vinegar
2 tsp red chili flakes
1 tsp ground cumin
1 tsp black pepper
1 tsp salt
2 cloves garlic, chopped
½ small onion, finely diced

Preheat oven to 400. In a bowl mix together all ingredients except chicken. Dip each leg into the sauce, making sure each leg is covered. Place end to end in 9×13 baking dish. Pour no more than ½ cup of remaining sauce over legs, making sure the small ends get covered too (not a worry if you got yourself a little sticky while initially dipping the legs in the sauce). Bake in oven for about 25 minutes. The glaze may smoke a bit, but should not burn. If the glaze does not brown you can turn on the broiler for a bit to finish them off. A little caramelizing is wonderful.


Fondue Feast

Is it French or Swiss in origin? I don’t know. The evolution in America of fondue is such a different animal compared to the simple cheese fondue I found to be served in Europe. Way back in the ’80s my family would join forces with other families and have fondue parties. At the time it was a throwback to the 1960s, when my parents stocked up on fondue sets. Regardless of when it peaked in popularity or where it first happened, it is still a fun time with abundant and delicious food.

I learned a number of things from those fondue parties when I was growing up. The first was you must commit to any dip you take with your loaded fondue forks, for double dipping in a pot of cheese or chocolate is frowned on in the fondue world. If you do such a thing there may be nothing said, but the vibes of the fondue tribe may change toward you. Those fondue forks can be lethal when stabbed into a hand guilty of double dipping! The second thing I learned was there is never enough room on the little divided plates for all the sauces. With divided fondue plates you need to commit to, like, four of the ten or so available sauces. Another option is to do a lot of dollop dropping on individual pieces you cook. The third thing was that it took a while to get full from fondue, and since the process took a while to cook and eat and reload and cook and eat…there was plenty of time to talk and sip wine and laugh and, especially, try and sneak other people’s forks when they are not looking so you get to double up on your pile of cooked bites. The trick to sneaking forks is to not have any of your own on your plate. Have your own forks cooking away before stealthily stealing your neighbor’s fork while they are gesturing dramatically during the telling of a story. Don’t forget to reload their fork with the same stuff. A bonus is their quizzical look when they check their fork and wonder why the chicken is still raw after their story about Uncle Festus at the family reunion.

Although it may take a while to fill up on fondue that full stomach will sneak up on you. Before the chocolate fondue is served you wonder if you have any room left in your belly. But it is just fruit, right? There is always room for fruit! Maybe not fruit covered with chocolate, but it is very much worth trying. And it will fit!

For our fondue feast we did a sample of four different fondues – cheese, oil, broth and chocolate. In the future I will probably limit myself to one fondue for a meal, surrounding it with non-fondue dishes. This particular meal was a chaotic mess of food and fun, and a great way to sample the different fondue types. Everyone had a blast.

The following recipes account for feeding seven people, since our fondue party included as many guests. After digging through the closets mom found four – count ’em – four fondue pots. We chose not to use the small one from France meant for chocolate fondue, but only because the sheer number of people, all that dipping would have overwhelmed the little thing. The meal called for a lot of preparation, but it can be spaced out in small chunks, mostly as early as the day before, and makes for quick set up when it is actually time to eat. I pulled everything out of the refrigerator (yes, even the meats) about 45 minutes to an hour before serving so things were cool but not chilly.

Everyone should scour their parents’ pantry, estate sales and thrift stores for fondue sets and be ready to pull them out for some fun eats. If you are short of cash the fondue feast can be turned into a pot luck where everyone brings a little bit but eats a lot. Have fun with it and be sure to make a mess!

I served the cheese fondue when people were first arriving and standing around in the kitchen, then served the oil and broth fondues at the table with all the sauces. In addition to the sauces I made, shown in the recipes below, I provided tartar sauce, BBQ sauce and creamy horseradish, all served simply in their pre-made states in bottles from the grocery. I did not even start preparing and melting the chocolate fondue until the table was cleared of the oil and broth. It was quick to do and a fun dessert. I remembered a lot of the recipes from when I was younger, but found a lot of helpful reminders here.

FONDUES
Cheese Fondue

2 garlic cloves, cut in half

1 cup dry white wine
8 ounces Gruyere cheese, shredded
8 ounces Havarti cheese, shredded
2 ounces Dubliner cheese, shredded
1 Tbsp lemon juice
1 Tbsp cornstarch
1 Tbsp Kirsch or brandy
½ tsp nutmeg
½ tsp paprika
Black Pepper (optional)

Handful of Cubed bread per person
Vegetables also used with Broth Fondue

The measurements for wine and cheese should be enough, but you may want to have a little more on hand to adjust the consistency if needed. Add more cheese if it’s too liquid, add more wine if it’s too thick. I have found that if you mix the cheese fondue on the stove top or electric fondue pot about an hour before serving, then turn it off, but then start to reheat about ½ hour before serving it makes for quick set up when guests first arrive. To begin preparation, rub the garlic inside the fondue pot then discard. Pour the white wine and lemon juice into the pot and turn on the burner. Let the wine and lemon juice warm up without boiling. Reduce heat and add the shredded cheese. With a wooden spoon, mix well and stir regularly. Dilute the cornstarch in the Kirsch or brandy, and add remaining ingredients to the pot. Add pepper to taste. Adjust consistency with additional wine or cheese. Dip bite size pieces of bread or vegetables. Let the freshly dipped pieces cool off for a few seconds before enjoying. You may have to twirl the cheesy bits on your fondue fork until it cools and stops drizzling long strings of cheese before you eat them. Also, extra liquid may be needed after the fondue is half gone because it thickens as time passes.

Hot Oil Fondue

2 – 4 cups peanut or canola oil
4 ounces beef per person, cut in bite-sized cubes
2 – 4 ounces chicken breast per person, cut into thin strips
2 ounces per person medium size shrimp (cooked or uncooked), tails intact

Heat oil to 325 – 350F, either in the fondue pot if electric, which is best for oil, or on the stove top for flame pots. If using a flame pot carefully transfer the hot oil to the fondue pot. Do not fill the pot more than 2/3 full, to reduce splashing over the rim of the pot while cooking. Pierce the raw meat or seafood with fondue forks and submerge in hot oil for about a minute. Remove and let cool briefly before dipping.

Broth Fondue

4 – 6 cups chicken stock
2 Tbsp dry white wine
1 garlic clove, thinly sliced
1 Tbsp fresh ginger, grated
3 Tbsp Worcestershire or soy sauce
Salt and Pepper to taste

2 – 4 mushrooms per person, whole or halved, depending on size
4 – 6 broccoli crowns per person, blanched
2 – 4 cauliflower crowns per person, blanched
4 – 6 snow peas per person, blanched
2 – 3 mini carrots per person, blanched

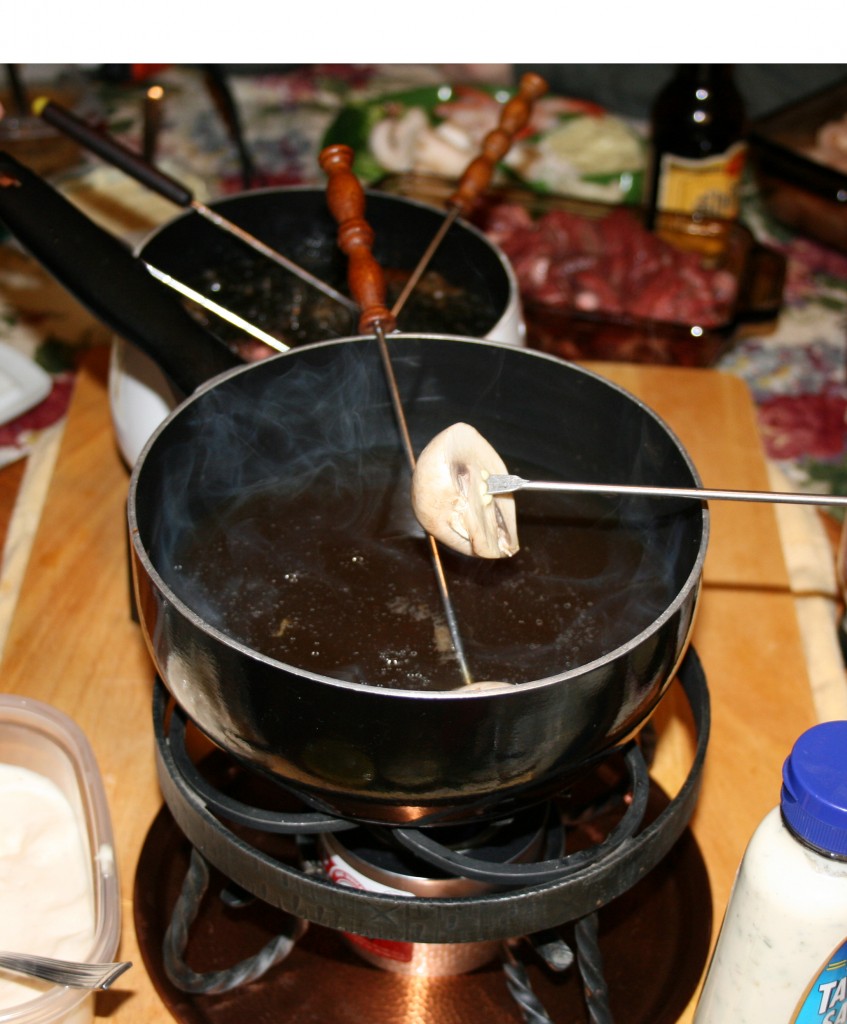
Combine all ingredients (salt and pepper optional) into electric fondue pot or on a stove top pot if using flame pot. Bring liquid to a simmer (liquid is moving and steam coming off surface) and begin dipping. For flame pots bring liquid to a boil on the stove then carefully transfer to the flame fondue pot. Dip vegetables into broth until cooked to your liking, warm but still crisp, or soft and mushy. If you really want the vegetables cooked quickly, I recommend blanching all the vegetables (drop them for 2 – 5 minutes in boiling water, then stop the cooking process by dropping them in cold water, then drain) before cooking them in the broth. The blanching can be done in advance and then refrigerated until serving time.
Chocolate Fondue

½ pound semi-sweet chocolate
1/2 cup Light Cream
1/8 cup brown Sugar
2 Tbsp Butter
2 tsp Vanilla Extract

Combine all ingredients in pot on stove top or in a microwave-proof glass bowl. Melt on low heat until liquid and well combined. If using the microwave heat for 30 seconds and stir until mostly melted, then stir until all lumps are gone. Whether prepared on the stove top or in the microwave, transfer to fondue pot for serving and dip dip dip (but don’t double dip!).

SAUCES

Lemon Teriyaki Sauce

1/2 cup Soy Sauce
1/2 tsp Ground Ginger
1/4 cup Sugar
2 tbs Lemon Juice

Add all ingredients to a pot on the stove top. Heat until ingredients come to a boil. Let cool.

Hollandaise Sauce

4 oz Butter
2 Egg Yolks
1 tbs Lemon Juice
1 tbs Water
1/4 tsp salt

Melt butter and let cool briefly. While butter is cooling mix the rest of ingredients in a blender but do not blend them yet. When butter has cooled a bit spoon out the foamy, bubbly top from butter, leaving the clear, yellow clarified portion. Begin blending the mixed ingredients and gradually and steadily add the butter. Let blend for about a minute. Leave at room temperature until served.

Spicy Oriental Sauce

2 Tbsp soy sauce
1 ½ Tbsp lemon juice
1 4.5 ounce can mild green chiles
1 clove garlic, crushed
2 tsp Sesame Oil

Combine all ingredients in tall bowl. With hand blender combine ingredients to a uniform, slightly thick texture. Serve chilled or at room temperature.

Garlic Lemon Dip

1 ½ cups mayonnaise
1 ½ Tbsp lemon juice
1 Tbsp garlic, crushed
½ tsp hot sauce
Salt and Pepper to taste

Mix all the ingredients until well blended. Keep refrigerated until served.

Curry Sauce

1 cup plain yogurt
2 tsp ground curry
1 ½ tsp lime juice
Salt and Pepper to taste

Mix all ingredients until well combined. Refrigerate until served.

Dill Dip

1 ½ cup low fat sour cream
½ shallot, finely chopped
2 Tbsp dill, finely chopped
1 Tbsp lemon juice
Salt and Pepper to taste

Combine all ingredients well. Refrigerate until served.

Guacamole Dip

1 rip avocado, mashed
1 Tbsp lemon juice
½ cup plain low fat yogurt
½ cup low fat sour cream
¼ cup finely chopped pine nuts, walnuts or pecans
1 leek, white and light green part finely chopped
½ tsp hot sauce
Salt and Pepper to taste

Mix the avocado flesh with the lemon juice. Mix avocado mixture with the rest of the ingredients. Add salt and pepper to taste. If prepared ahead of time of serving, keep refrigerated.

Two Day Chicken Vegetable Soup

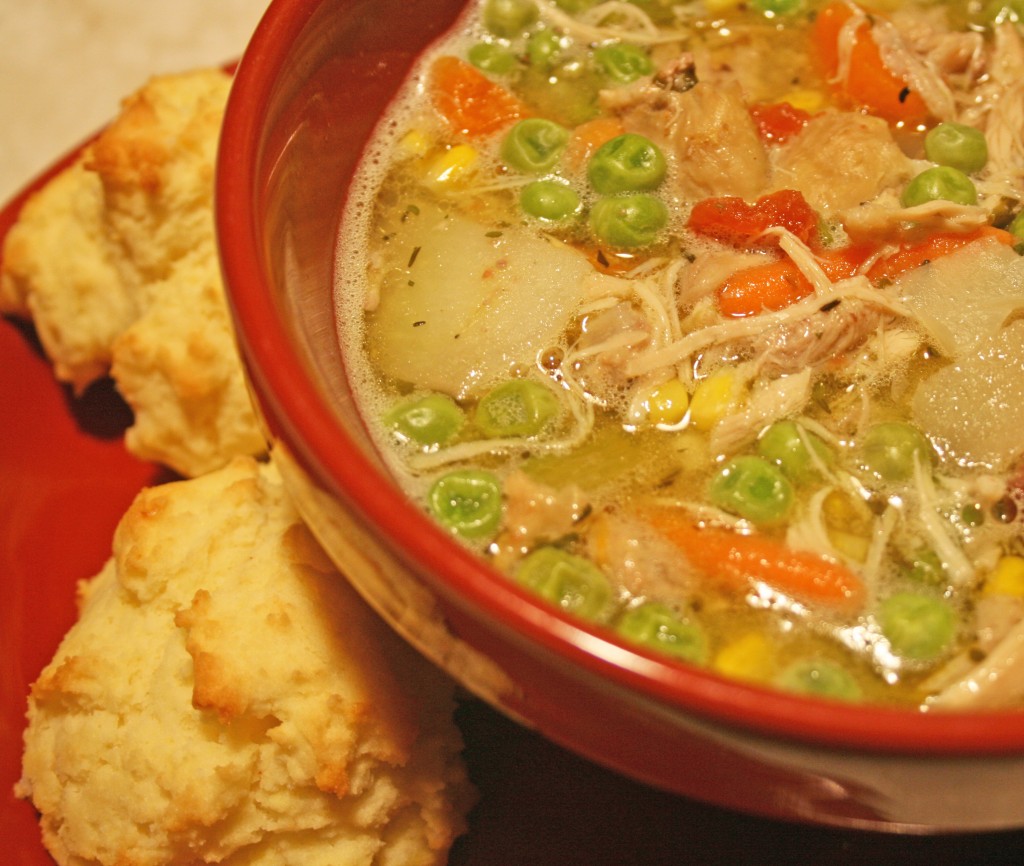
When it comes to soup I prefer mine chunky. I also make creamy and pureed soup, but rely on them mostly for appetizers or snacks. Otherwise, I feel like I am having a meal of baby food, though much more flavorful (believe me, I made baby food for Little B – TMI warning: if it was not bland the results on the other end were disturbing). A main course soup needs to be chunky in my world. My chicken soup comes with yet another dimension – slow cooked chicken. I have tried to sear the chicken right before adding it to the soup, or steaming it just enough to avoid adding raw meat to the soup, but it just does not work for me. I like chicken in my soup that has the flavor of slow cooked meat. My chicken soup is a two day process, so don’t think you can just throw things in a crock pot one morning and return that evening with dinner ready. No no no. You can return two nights later for dinner. It is a double crock pot meal, and not because you might happen to own two crock pots. It is a consecutive process, not concurrent. I slow cook the meat one day, prep it, let it rest, then slow cook the soup the next day. It really does taste better. Really.

Two Day Chicken Vegetable Soup

Day 1
6 – 8 chicken thighs
5 cloves garlic
1 Tbsp cumin
1 can Rotel® tomatoes and green chiles*
Salt and pepper to taste

Season chicken thoroughly by sprinkling it with cumin, salt and pepper. Pour half the can of Rotel in a 5-quart crock pot. Arrange chicken on top of the Rotel®. Chop garlic and sprinkle on top of chicken, then add the rest of the Rotel®. Cover and cook on high for first two hours, then lower temperature and cook for four more hours. If you are gone for the day it can be cooked on low for eight hours with similar results. When cooled debone and remove skin from the thighs. Shred meat into bite-size pieces. Retain liquid, including any pieces remaining of the tomatoes and chiles. Store meat and liquid separately overnight in the refrigerator.

*If no Rotel® is available it can be substituted with a 14.5 ounce can diced tomatoes and a small 4.5 ounce can of green chiles.

Day 2
Chicken meat and liquid from Day 1
5-6 cups water
20 mini carrots, quartered
2 potatoes peeled, halved and sliced thin
2 cups peas
2 cups corn
1 bunch celery hearts with leaves, chopped
2 cups mixed cauliflower and broccoli, chopped
1 small onion, chopped
1 Tbsp dried thyme
1 Tbsp dried parsley
1 tsp ground sage
Salt to taste

Remove chicken meat and liquid from fridge. Skim fat off top of liquid and discard. Pour liquid (which will include some flavorful gelatinous/fatty substance) in the bottom of the crock pot. Add vegetables and herbs, topping with chicken meat. Stir together all ingredients. Add water until meat and vegetables are just covered with liquid and stir again. Cover and cook six hours on high. Turn off heat and taste, adding salt and pepper if desired. Let soup sit for about an hour before serving. Serve with fresh bread or biscuits.

Post Navigation