Any Kitchen Will Do

Give me a kitchen and I will cook.

Archive for the category “Seals’ Kitchen”

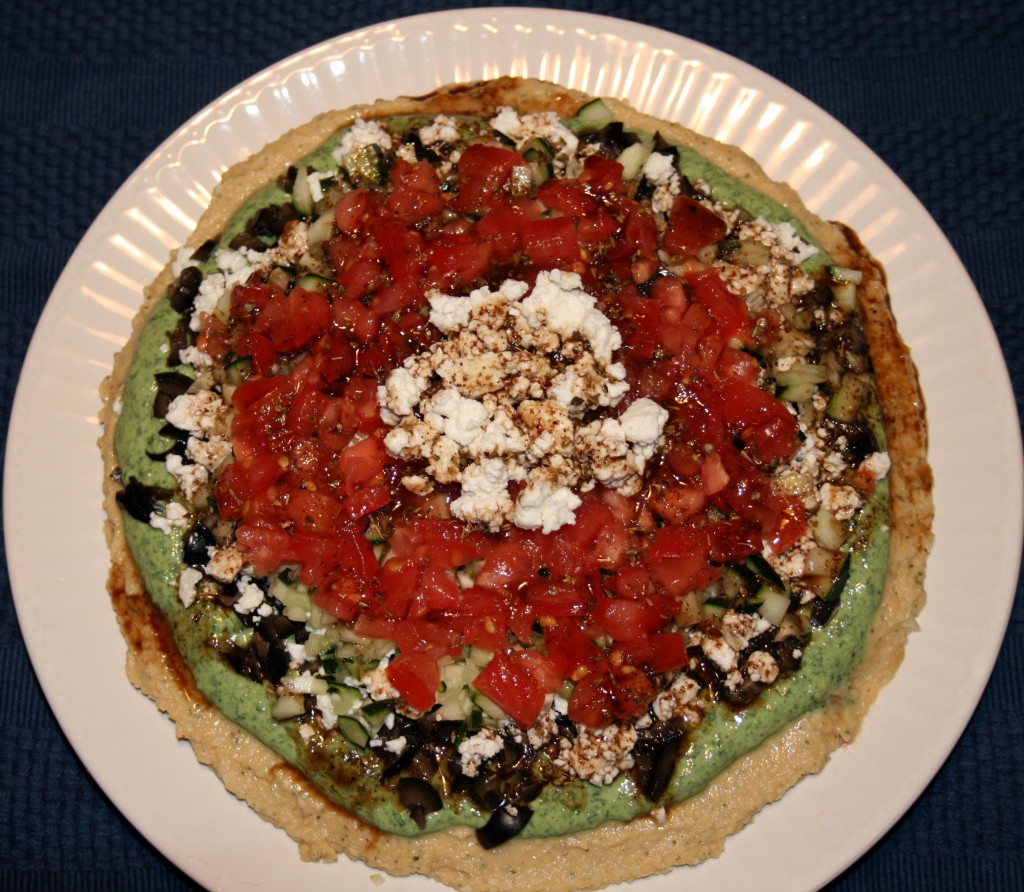
Greek Layer Dip

We are moving! Actually, we are in the process of moving, literally. I am sitting on a bed in a hotel room, somewhere between Texas and Maryland. We should arrive in Maryland tomorrow, but in the meantime I am without a kitchen. Until I am again armed with a kitchen I will share with you some recipes I collected over the past few months but did not post.

The first one is a dip. Sometimes when a big gaggle of people are coming over I like making available a variety of appetizers so they can nibble as they trickle in to the house. One of my favorites lately, to go along with the ever reliable ranch or peanut dip, is a layer dip. It is high in fiber and very colorful. It can also substitute for a green salad if you have enough Greek lovers. What I like most about it is that if you work hard enough you can get every layer into one bite, but if you don’t, you still get a mouthful of robust flavors that will make you want to seek out another scoop full. With everyone’s vegetable gardens starting to grow (except mine, of course, since I have no idea where we will be living), the dip is a great way to use up some of the bumper crops later this year.

Greek Layer Dip

2 cups hummus
1 cup plain Greek yogurt (optional)
2-3 cups raw spinach
1 cup feta cheese, crumbled
1 cup cucumber, chopped
1 large tomato, chopped
1 cup kalamata olives, chopped
1 Tbsp olive oil
2 Tbsp balsamic vinegar
2 tsp chopped oregano
2 tsp lemon juice
Salt and Pepper to taste

Combine in small bowl the oil, vinegar, oregano, salt, pepper and lemon juice. Set aside. Spread hummus on a serving tray in an even layer, about ¼ to ½ inch deep. Chop spinach into small pieces (and if you are using yogurt now is the time to combine the yogurt with spinach until well blended)*. Spread/sprinkle the spinach on top of the hummus, leaving a visible edge of hummus. Sprinkle olives on top of spinach mixture, followed by cucumber and tomato. Drizzle dressing on top of dip and add some more feta for garnish if you like, then serve. It can be prepared in advance and chilled until serving.

*If you are making the dip in advance I would recommend the yogurt not be used. Depending on the brand of yogurt, it can be a runny layer and will spread if put on the day before. It should be fine if made within an hour or two of serving. I have made it both with the yogurt and without – just sprinkling a layer of spinach makes it look a lot different, but still beautiful and you will still have a moist, dippable dip.
Tomato Artichoke Soup

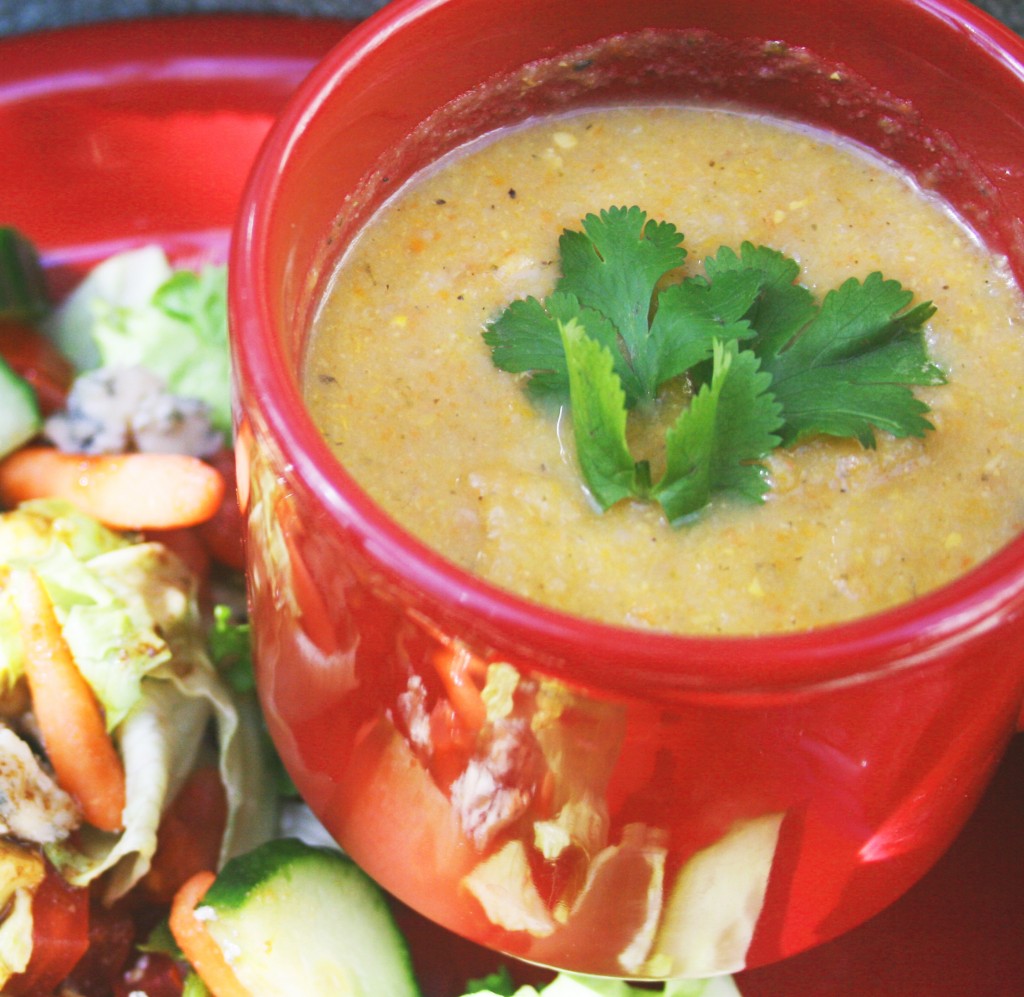
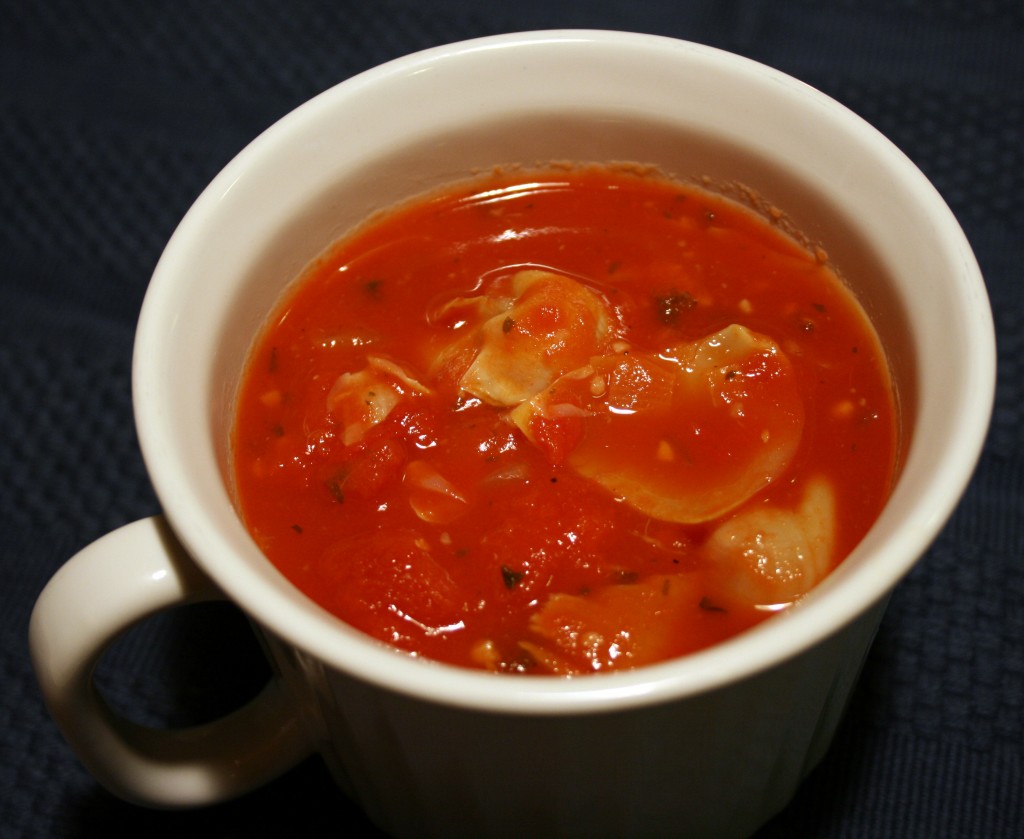
What do you make for a last minute dinner party when you are two days away from moving? Not that this would ever happen to me, but if it did I would open my pantry wide and see what I could find that needs to be used. Oooh! Canned tomatoes! And there is a can of artichoke hearts! There is still some garlic cloves left over? Where did those come from? Chicken broth! Yay! Served along with grilled cheese and egg salad sandwiches we had a wonderful spring dinner with very few leftovers. I did not use cream this time to smooth out the soup’s texture, but if you add ½ to ¾ cup during the last half of the cooking process the soup can only get better. Enjoy! I have to get back to sorting toys before Little B returns home. I found it is a really bad task to try and accomplish with her ‘help’.

Tomato Artichoke Soup

2 14.5-ounce cans diced tomatoes
1 29-ounce can tomato sauce
1 14.5 ounce can whole medium artichoke hearts
1 cup chicken broth
½ medium onion, diced
1 Tbsp finely chopped basil
2 cloves garlic
1 pinch red pepper flakes
1 tsp sugar
1 Tbsp Worcestershire sauce
Salt and Pepper to taste

Combine all ingredients except salt into a medium pot over medium high heat. Bring to a boil. Lower temperature and cover, simmering for about an hour. Break up artichoke hearts (I scooped them out one by one with a ladle and gently pushed on them with a soup spoon – they easily separated). Adjust flavor with salt as desired. Serve immediately or chill and reheat on low before serving.

Deviled Eggs

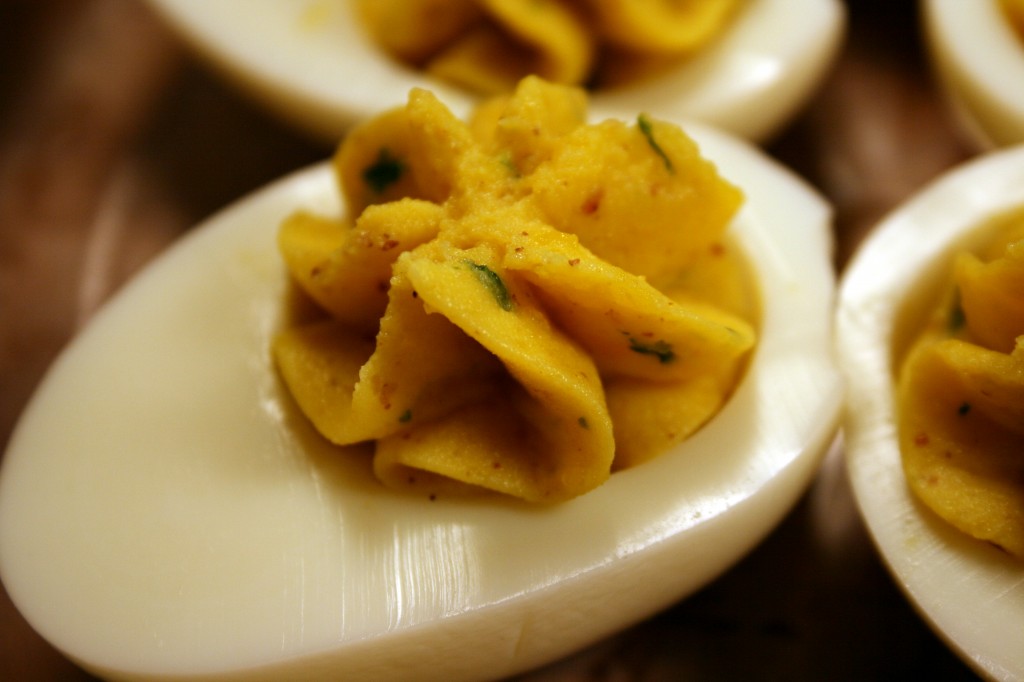
Devil may care, but I do not. Eat eggs. Sometimes the healthy eating powers-that-be say they are bad for you, then they change their minds and say they are good for you. Some say the chicken came first while others insist the egg was first in line. They are a great source of cheap protein, make for a great breakfast that will actually hold me until lunch, and, by golly, I like them. Eggs can make sauces better tasting or baked goods light and airy. As Easter approaches there is always a need for ways to use up those colored boiled eggs. Besides egg salad there is at least one other way! Make them deviled!

I like making deviled eggs, and an actual deviled egg dish is one of the few specialty serving plates I have on hand at the moment. There is nothing worse than arriving at a party with a plate of deviled eggs, only to find that the sharp right turn you took in the car resulted in the slippery little things smushing up on one side of the plate and the decorated tops all ending up on their sides. Growing up we made them often, only to scarf them down as soon as the whites were filled. Personally I despise the use of sweet pickles or relish in deviled eggs. It is a contradiction I will most likely spit out such abominations if they ever cross my lips. Now dill pickles are another story. They emphasize the already savory nature of the boiled eggs and always taste good with a little mustard mixed in. I am not sure why I started on a pickle tangent because I don’t even use any for this recipe…

From what I can tell, deviled eggs got their name from being spicy, as in full of flavor, and almost evil in their ability to tempt. Even the ancient Romans were known to partake of them. Some people more devout than myself are wont to call them angel eggs, but there is nothing angelic about these babies. What food with horseradish could possibly be considered angelic, of course the seraphim may be the closest. Seraphim eggs? Um. No.

Deviled Eggs

12 large eggs
½ tsp horseradish
1 tsp yellow or stone ground mustard
½ tsp curry powder
1-2 Tbsp mayonnaise or plain yogurt
2 Tbsp green onion, finely chopped

Fill a large pot with about 3” of water. Place over high heat on stove top and bring to a boil. With a slotted spoon gently place eggs, one at a time, into the boiling water. Lower heat to maintain a simmer and cook eggs for 12-15 minutes until hard boiled. Remove pan from heat and tip to let hot water run out while cold water runs into the pot, gradually replacing hot water with cold. Let set for about five minutes then shake pan around to crack shells and loosen them from the cooked whites. Peels should easily come off the eggs at this point. After peeling let the eggs cool completely. When cold, slice eggs in half lengthwise and carefully remove yolks, placing them in a small bowl, while avoiding any damage to the whites. Sometimes the egg whites may tear along the middle of the egg, which may ruin the egg white for using to devil. Just cut them in half along the tear – if you rely on a deviled egg serving dish the whites will sit in the divets of the plate and hold the yolk mixture whether they are cut lengthwise or width-wise. Arrange egg whites on serving dish.

Add all remaining ingredients to egg yolks and combine well. Take care to only use as much mayonnaise or yogurt as needed to thin out the mixture, but stop short of making the mixture runny. It should be thick enough to hold shape, similar to decorating frosting. Place egg yolk mixture into cake decorating bag with a large decorating tip*. Fill egg whites with yolk mixture, using any kind of swirl or twist motion to make them pretty. Chill until time to serve.

*Instead of cake decorating equipment you can use a strong plastic bag (like Ziploc®). Fill bag with yolk mixture and pack it down into one corner. Snip the corner of the bag with scissors, making about a 1/8” to ¼” opening. Squeeze mixture through opening into egg white halves.

Cinnamon Roll Cake

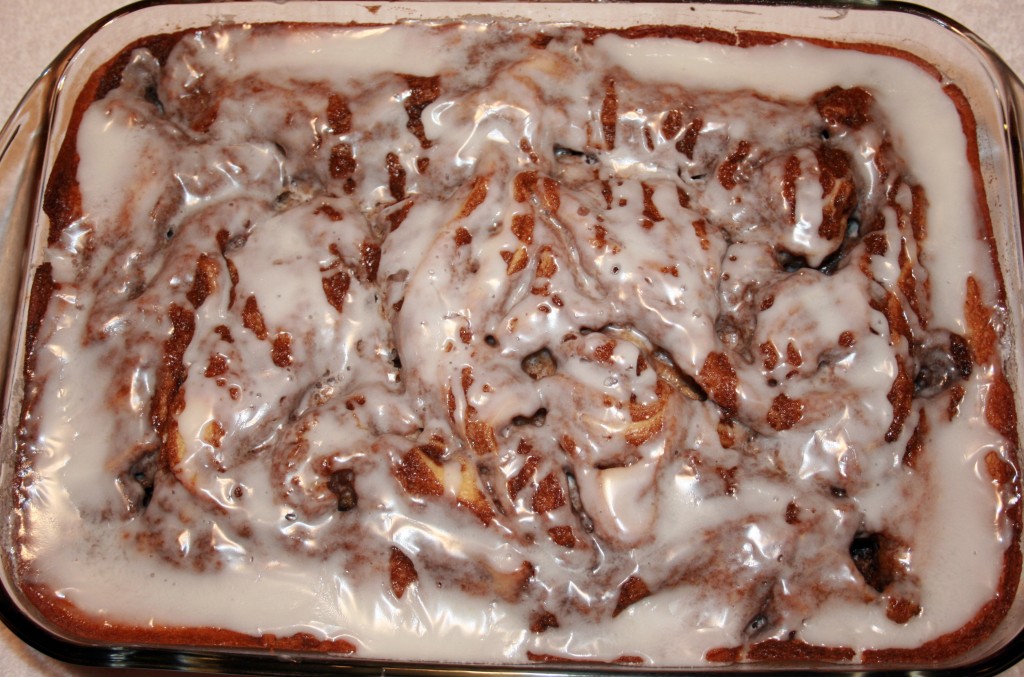
Have you ever seen a 9 x 13 cinnamon roll? Yes you have! It is right there ↑! I like sweet stuff for breakfast, but only when it is going to be a lazy day. The crash from the sugar rush is best experienced while hanging out on the couch reading a book or building a block tower with Little B. An occasional breakfast with pancakes or waffles is good (although not necessarily good for you), but I tend to be the producer of such delights, and it is much more onerous to make them compared to a plate magically appearing piled high and presented by someone else for eating.

With a gaggle of girls using my house for slumber party last weekend I could not imagine making enough fresh baked pancakes, waffles or cinnamon rolls to appease them and also have breakfast ready at a decent hour. There were bodies curled up in blankets over the majority of the living room floor. It would be hard to quietly measure and mix and roll breakfast in the kitchen, a mere four feet away from the slumbering sweethearts. This cake was quick, made the day before and did not have to go in the fridge, which was already full of other party foods. As it cooked, the sugary topping formed crevasses where cinnamon gathered, making lovely sweet nips in almost every bite. All the girls could have a little piece or a big one without committing to a whole roll. Of course I also provided healthy, savory eggy muffins for breakfast as well, but the cake is what disappeared the fastest.

I have seen cinnamon roll cakes all over the internet, but this recipe made the most sense to me, so I relied on it. I changed the order of preparation a bit, but it worked out great.

Cinnamon Roll Cake

Cake
3 cups Flour
1/4 teaspoon Salt
1 cup Sugar
4 teaspoons Baking Powder
1 1/2 cups Milk
2 Eggs
2 teaspoons Vanilla
1/2 cup ( 1 stick) Butter, melted

Topping
1 cup ( 2 sticks) Butter, softened
1 cup Brown Sugar
2 Tablespoons Flour
1 Tablespoon Cinnamon

Glaze
2 cups Powdered Sugar
5 Tablespoons Milk
1 teaspoon Vanilla

Preheat oven to 350 degrees. Spray a 9×13 glass baking pan with cooking spray. Set aside. To make the topping mix in a medium bowl the 2 sticks of butter, brown sugar, flour and cinnamon together until well combined and creamy. Set aside. In an electric or stand mixer add the flour, salt, sugar, baking powder, milk, eggs, and vanilla. Once combined well, slowly stir in the melted butter. Pour into the prepared 9×13 baking pan.

Drop the topping mixture evenly over the cake batter by the tablespoonfuls and use a knife to marble/swirl through the cake. Bake at 350 for 35-40 minutes or when a toothpick inserted near the center comes out nearly clean.

In a medium bowl, mix the powdered sugar, milk and vanilla together with a whisk. Drizzle evenly over the warm cake. Serve warm or at room temperature.


Dancing Vegetable Soup

For me, spontaneous homemade soup is hard pressed to satisfy ultimately. It is usually good right away, but always tastes better the second or third day. Where is the spontaneity in that? Regardless, you have to make the soup before the flavors can hang out together and can get better. When I make soup it is usually pretty good, but I look forward to tasting it the next day!

I called this dish dancing vegetable soup because it made me dance when I made it. I was in a rush and pureed the soup while it was still over the heat. I have done this before and did not think twice about doing it this time, but I failed to turn the heat down. Having the heat on is fine, but having it too high is downright dangerous. Oops! When the soup was half pureed some bubbles rose from the bottom (trying to get away from all that heat underneath it). The evil bubbles splashed steaming hot soup onto my left thumb where I was holding the pot and also the bottom of the wrist of my right hand that was holding the stick blender. I popped back away from the stove and did a twisty spin while flailing my arms about as I headed to the sink. The soup was thick and clung to my skin. It really hurt. As I ran cold water on my hand and wrist I did a kind of jogging side step, then lunged for the freezer to get a cold pack. As the cold pack cooled off my hot skin Little B woke up from her nap, crying from a bad dream, so on the way to the bedroom to soothe her I was balancing the pack between my left hand and the bottom of my right wrist. It was slippery. After I got Little B calmed down she asked me what the cold pack was for. I told her I burned myself and showed here where it happened. She kissed my burn spots and they felt a lot better.

This soup is high in fiber, low fat and is good hot or cold. I usually only eat about a cup along with a sandwich or salad because it is pretty filling.

Dancing Vegetable Soup

1 cup broccoli, chopped
2 cups cauliflower, chopped
3 large carrots, chopped
½ onion, chopped
2 medium potatoes, peeled and chopped
1 apple, peeled and chopped
1 medium tomato, chopped
2 cloves garlic, chopped
5 cups chicken broth
2 tsp dried thyme leaves
1 tsp ground sage
2 tsp dried parsley leaves
2 tsp salt
1 dash cayenne pepper
1 Tbsp olive oil

Heat oil at medium high in a large pot. Add onion and garlic, cooking them until they sweat and sear a bit. Add remaining vegetables and stir to spread onions and garlic throughout. Add broth, salt and spices. Cover and simmer until vegetables are cooked soft, about 45 minutes. Remove from heat. Puree soup with a stick blender until smooth. Return to heat and simmer for 10 more minutes. Serve hot or cold.

Cheesy Garlic Pull Apart Bread

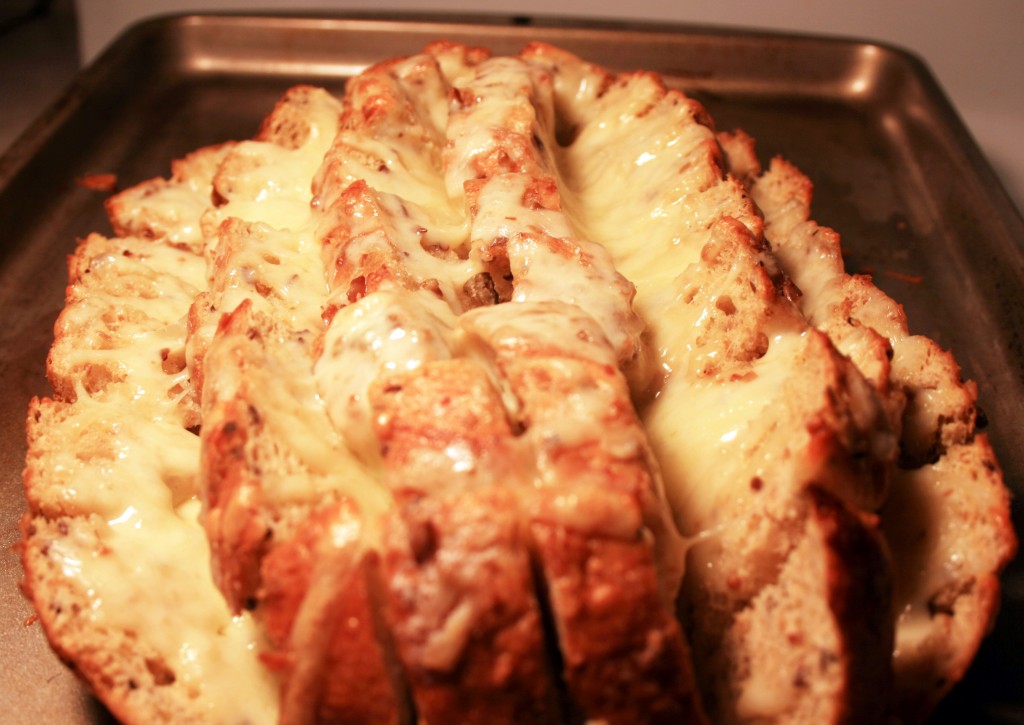
I have seen this method of preparing cheesy bread all over the place online, but had not tried it myself. We had a dinner party the other night and I thought it a perfect time to make some. It is an ooey gooey alternative to plain sliced bread. Besides making the whole house smell heavenly it was a hit with our guests. I cannot tell you anything about how leftovers keep because there were none.

Cheesy Garlic Pull Apart Bread

1 unsliced loaf whole grain bread
1 cup muenster cheese, grated
4 Tbsp butter, room temperature
3 cloves garlic, chopped

Slice the bread loaf lengthwise then crosswise, but leave the bottom crust intact, creating 1 inch squares. Using your hands (a messy method, but the best way I have found to keep the bread from tearing off of the bottom crust) spread butter between bread squares. Drop garlic between squares. Sprinkle cheese over top of bread, encouraging some to drop down in between some of the squares. Bake for approximately 15 minutes until cheese is melted and bubbly. Serve immediately.

Spicy Honey Chicken

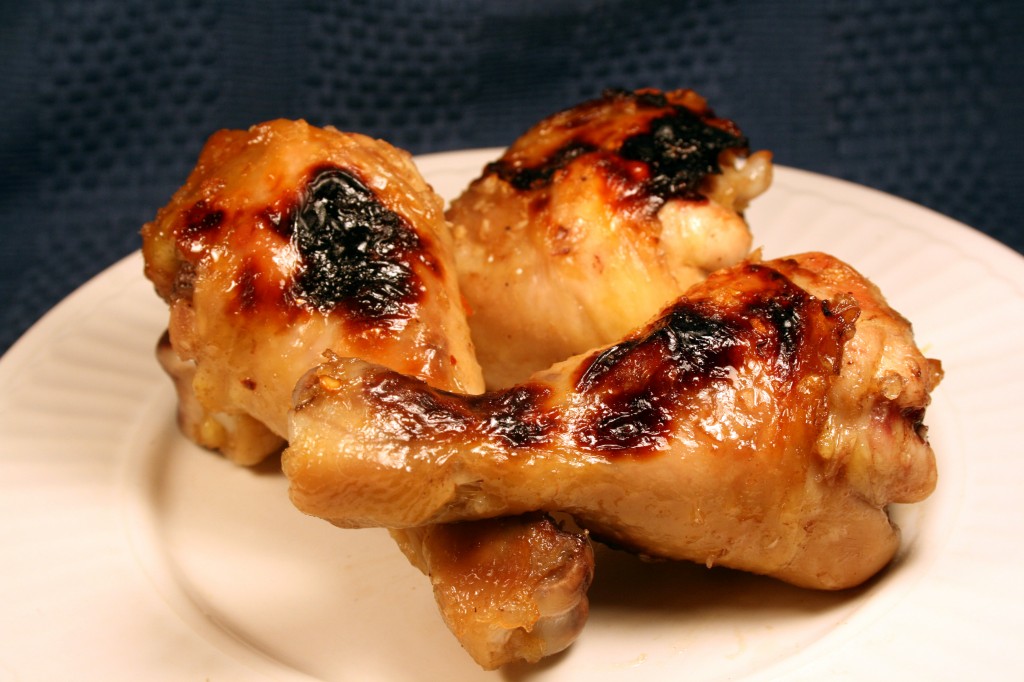
In my family there is always a fight over drumsticks. We like dark chicken meat and negotiate who gets what dark parts. I know they would look funny, but if anyone ever came up with a four or five-legged chicken I would so be in front of the line to buy some fryers, genetic distortions notwithstanding. Legs are good hot or cold, with beans or salad or slaw, and are mobile while being much easier to hold than those clumsy breasts. In recent years I have noticed more and more that packages filled with about ten legs are sold in the stores. They fit great in a crock pot or a baking dish and whenever I make them they are scarfed down. These days the bulk chicken leg packages are cheaper than the ‘buffalo wings’ that are getting more and more expensive. Quite a deal at fifty cents each at restaurants – really? Really? Not.

Chicken drumsticks always make me feel like a kid. I have been at fancy parties and felt obligated to eat them with a fork and knife, but when in more casual company I pick them up with my fingers and dig in, ready with a napkin nearby. Little B really likes them and I hope she ties many a childhood memory to hanging on to a leg while enjoying fun company.

This recipe was inspired by what I already had on hand in the kitchen, so next time I make it the recipe will probably look and taste different. I wanted sticky and sweet and a bit hot. It worked out pretty well, but I am really looking forward to having an even cooking broiler at our next place. I just can’t get this one to work the way I want. Serve them with some tangy coleslaw and dig in!

Spicy Honey Chicken

½ cup honey
2 Tbsp balsamic vinegar
2 tsp red chili flakes
1 tsp ground cumin
1 tsp black pepper
1 tsp salt
2 cloves garlic, chopped
½ small onion, finely diced

Preheat oven to 400. In a bowl mix together all ingredients except chicken. Dip each leg into the sauce, making sure each leg is covered. Place end to end in 9×13 baking dish. Pour no more than ½ cup of remaining sauce over legs, making sure the small ends get covered too (not a worry if you got yourself a little sticky while initially dipping the legs in the sauce). Bake in oven for about 25 minutes. The glaze may smoke a bit, but should not burn. If the glaze does not brown you can turn on the broiler for a bit to finish them off. A little caramelizing is wonderful.


Flourless Double Chocolate Cookies

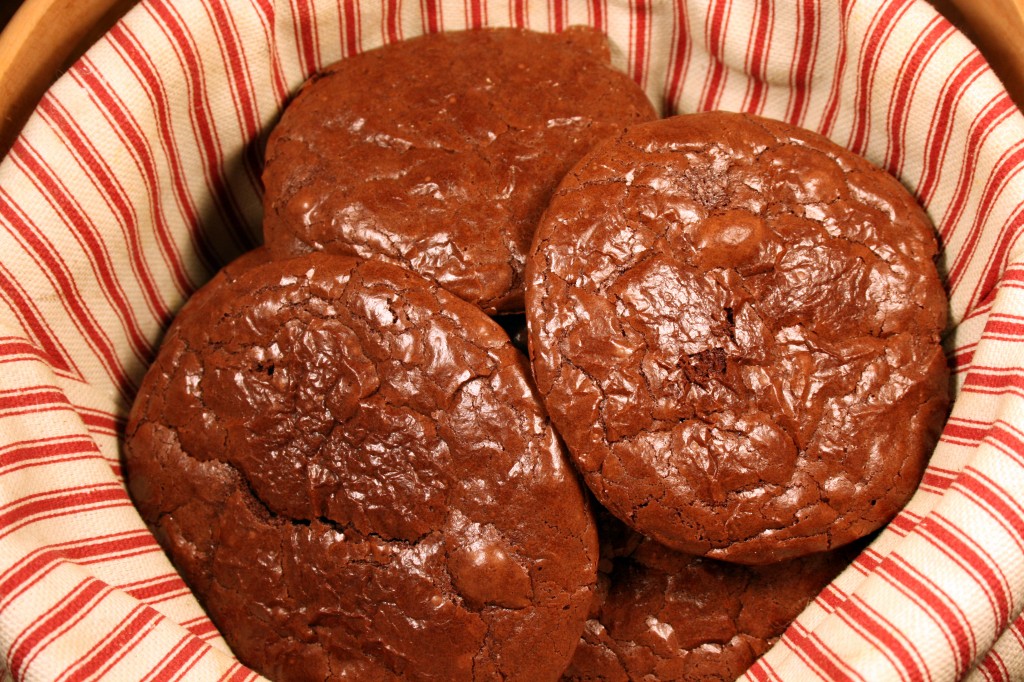
You will want to eat more than one, but you may not be able to! These cookies are rich rich rich. Have some milk handy to help wash them down. I came across the recipe for these flourless cookies here. The batter was almost that of a cake batter instead of doughy and sticky like it says in the recipe. The results I got are also less cake-y than those I saw on the blog, and they came out with almost a brownie-type shininess to them. I don’t know if it was just some random altitude thing, the fact that one of the egg whites was cold, or slightly less cocoa ended up in the batter than was prescribed in the recipe, but I don’t actually care. The results were wonderful.

While we were adding ingredients Little B carefully cracked the third room temperature egg, missed the bowl and proceeded to drop it on the floor between the counter and her learning tower, which meant I added a third egg white cold, straight from the fridge. It may also have been the fact that Little B was helping me start and stop the Kitchen Aid mixer, and at one point turned it on high when we had just added the cocoa – a cloud of chocolate dust rose from the blender and gently settled on the mixer, me, Little B and everything else within 18 inches of the bowl. Next time she started the mixer Little B covered her nose and mouth, waiting for another explosion, which did not happen. Adventures when practicing fine motor skills! I will definitely try the recipe again, and will eagerly await the results. I bet next time they will again be deliciously rich, delicate and powerful treats.

Flourless Double Chocolate Cookies

3 egg whites, at room temperature
1½ cups powdered sugar
¾ cups cocoa powder
¼ tsp salt
1 tsp vanilla extract
½ cup semi-sweet chocolate chips, melted

Preheat oven to 350˚. In a kitchen stand mixer, beat egg whites until soft peaks form (about 5 minutes). Beat in ½ cup of powdered sugar until mixture is well blended. Add the rest of the ingredients, including the remaining sugar, and beat until well blended. Dough will be stiff and sticky. Using a greased spoon or hands, drop balls of dough onto a baking sheet lined with parchment paper. Bake for 10-12 minutes; cool on a cooling rack.

Steamed Artichoke

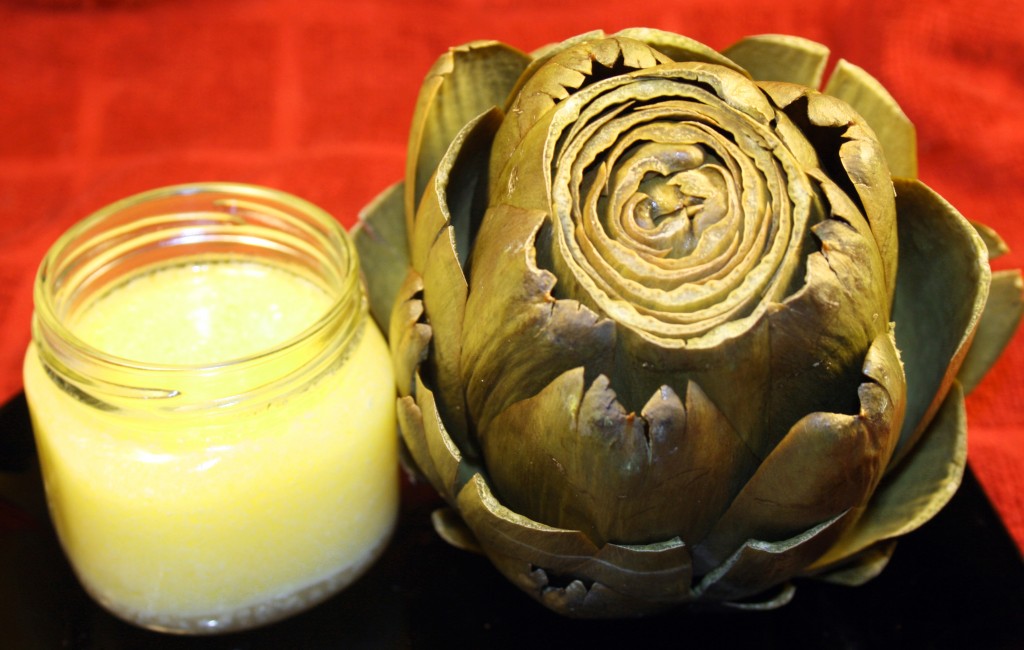
I was about eight when I first remember eating an artichoke. My parents steamed a few. They set them up on plates with small bowls of mayonnaise and melted butter for dipping. Here I was at the kitchen counter looking at this beautiful, yet also ugly green thing with little spikes on the ends of the leaves. I was supposed to eat it? Mom and dad had a rule about food. You had to try everything. You don’t have to like it – liver, creamed turkey, coconut – but you gotta try it. They showed me and my brother how to hold the prickly end and use our lower front teeth to scrape the meat off the tender end. I fell in love for the very first time. The meat had a gentle flavor, almost overwhelmed by the the dipping options of mayo and butter. The closer to the heart we got the more tender and sweet the meat. Dad then showed us how to carefully scrape off the bristly choke to reveal succulent mouthfuls of the heart. The meat was not very filling and it took a bit of effort to get every bite, but what a treat!

Time warp forward about 12 years. My brother and I are sitting at his kitchen table in Austin. He had cooked about a half dozen artichokes in the back yard smoker. The leaf tips were brown and wrinkled, but the meat inside each leaf was soft, having been tickled with flavor from the smoking process. We spent what must have been hours catching up with each others lives and scraping the meat off every single artichoke leaf. The result was a lovely afternoon, an impressive pile of meat and hearts, and plans to make soup. The soup was simple – with all our efforts of the afternoon, all we had left to do was add garlic, cream and butter, then simmer for a bit. We continued talking while relishing every spoonful of soup. The cream of artichoke soup became yet another fond memory of mine closely tied to food.

Here is a simple method for preparing an artichoke on the stove top and enjoying it with some pleasant conversation. Each bite of artichoke never takes up so much room that you cannot talk with your mouth full!

Steamed Artichoke

1 large or 2 small artichokes
4 – 6 cups water
3 Tbsp plus 1 tsp lemon juice
1 Tbsp plus ½ tsp salt
1 tsp black pepper
4 Tbsp butter
1 clove garlic, crushed
3 Tbsp mayonnaise

Cut off stem of artichoke just below the leaves until it sits level. Chop off the pointed tip of the artichoke and use kitchen scissors to clip off the tips of the larger, lower, tougher leaves that have pulled away from the artichoke. In a deep pot with steamer basket add the water (it should come right to the bottom of where the steamer basket will sit), 2 Tbsp of the lemon juice, 1 Tbsp of the salt and all the black pepper. Bring water to a boil and add steamer basket, placing artichokes stem down in the basket, and cover. If artichokes cannot stand upright there are two alternatives: 1) they can be steamed laying on the side, but should be flipped half way through cooking, or 2) place the artichoke stem down, but use foil to cover and seal in the steam instead of the pot top. Turn down heat to medium-low, but make sure the water continues to gently boil. Steam for 30 – 45 minutes. You will need less time if the artichokes are smaller. The artichoke is ready when the center of the stem gives easily to a knife.

In a small pot add butter, 1 Tbsp lemon, garlic and 1/2 tsp salt. Melt over medium-low heat until butter is melted and bubbly. In a small bowl stir together 1 tsp lemon juice with the mayonnaise. Serve artichokes along with the two dipping sauces.

To eat the artichokes peel off leaves, dip them in your sauce of choice, and use your lower front teeth to scrape meat off then inside of each leaf. It helps to have an empty bowl nearby to collect the leaves when you finish with them. As you get closer to the heart the leaves will become smaller and more tender. You will be able to eat most of the leaf, carefully avoiding the prickly tips. When you finally get to the bristly choke, take a spoon and scrape off the bristles, revealing the heart. Scoop the heart out of the base and cut it into bite-size pieces. Dip and enjoy!

Beef Curry

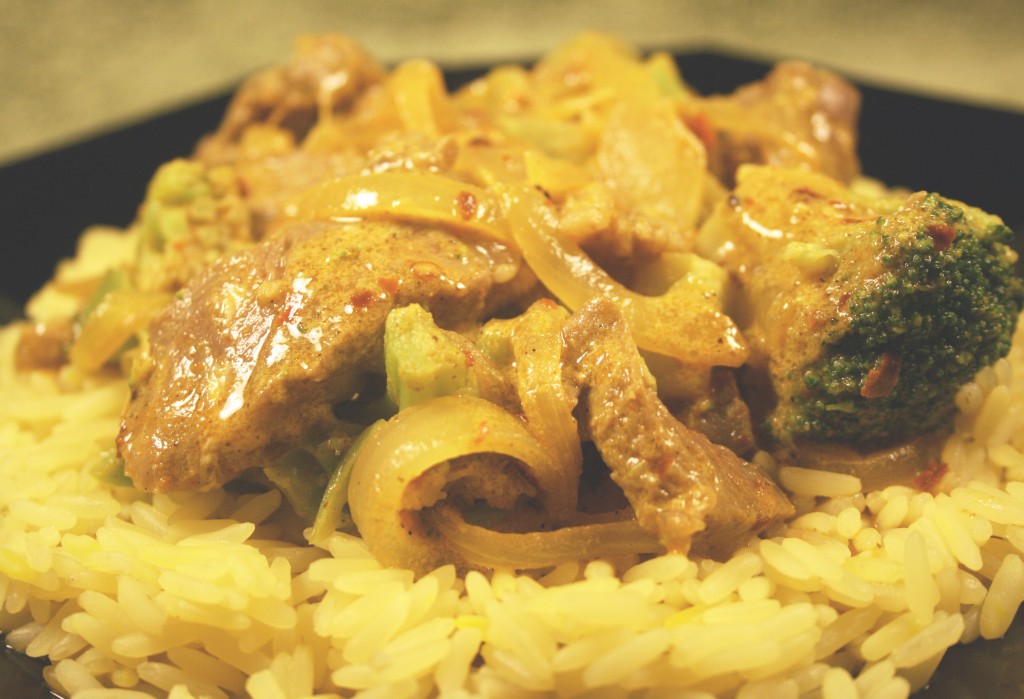
As promised to Big D weeks and weeks ago, I am trying out a spicy curry dish. He is usually the one that cooks dishes with curry sauces, but I am going to take a stab at it. His favorite is a chicken spinach concoction with curry sauce he first discovered in Anchorage, Alaska, at a little Indian restaurant. I am not going to try and copy it, since he does such a good job doing it himself, so I will aim for beefy. Trying new things is good, right? I also think my concoction went very well over saffron rice, which I was craving lately. My in-laws took a trip to Greece last summer and brought back some wonderfully strong saffron for me. Saffron is a flavor that does not go with just anything, and can actually make some foods almost sour, but I think it will be very complimentary to the beef and curry, while softening the bite of the chili. When Big D took his first bite I was sitting across the table from him – he smiled and his eyes got big as he quickly reached for his beer. I think I got it spicy enough for him!

Beef Curry

10-12 ounces tender cut beef steak, sliced into bite size strips
3 Tbsp vegetable or canola oil
½ yellow onion, cut julienne
1 pound broccoli, chopped
2 cloves garlic, crushed
1 Tbsp dried chili flakes
2 Tbsp curry powder
1 tsp ground ginger
1 cup whole milk
2 Tbsp lemon juice
1 cup long grain parboiled rice
2 ¼ cups chicken broth
1 ½ tsp salt
10-15 strands saffron

Combine broth, 1 tsp salt and saffron in a medium pot over high heat on the stove. Bring it to a boil and add rice. Cook for 20 minutes until liquid is absorbed. Let sit for about ten minutes before serving. While rice is cooking you can prepare the meat and vegetables. Add oil to electric or stove top wok on medium high heat. When oil is hot add chili flakes and garlic. As garlic begins to brown add onions and sauté until they are transparent. Add lemon juice, curry, ginger and ½ tsp salt. The spices will soak up all the oil and juice pretty quickly. Cook until the color of the mixture changes to a dark brown. If you are convinced the dish will not be hot enough for you, do what I did and stir in a squirt (about 1 Tbsp) of Sriracha hot chile sauce. Move onions to the outer edges of the wok. Add beef into the well and toss just until it begins to brown. Toss onion mixture with meat. Add milk and stir until combined. Add broccoli and cover, lower the heat and let mixture simmer for about 5 minutes. It is ready when the sauce is hot and the broccoli just tender but still bright green. Serve on top of the saffron rice.

Post Navigation