Any Kitchen Will Do

Give me a kitchen and I will cook.

Salsa Verde with Tomatillos

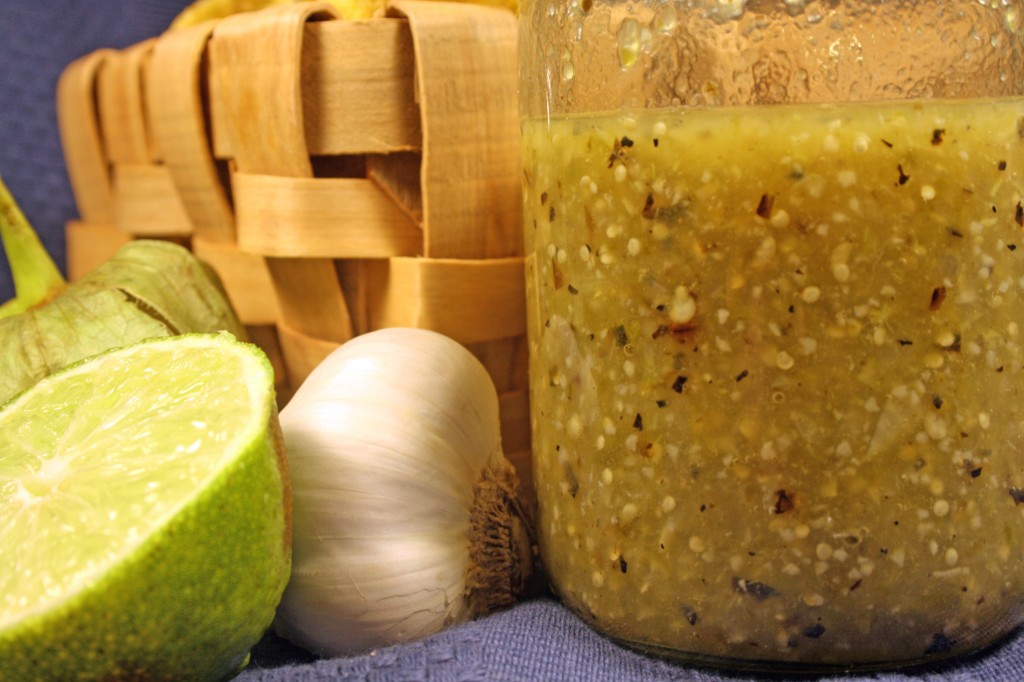
I have found the point where my intention of exploring Irish food takes a turn. And you are here to share it with me! Okay, so salsa verde is not an authentic Irish dish, but it is green, right? It will be fun! After boiling and sauteing Irish foods lately I felt the need to have something spicy on crunchy tortilla chips. The tomatillos at the store were looking good, so they led to a logical conclusion – green sauce! I did not really get much salsa verde until I started traveling to New Mexico about ten years ago. Each restaurant served the sauce with varying levels of heat, from mild and sweet and almost dessert-like to an addictive spiciness that leads to consuming many a chip and drinking margaritas much too fast. Out there it is usually heavier on the peppers than my version, but I dug into my tex-mex roots for this recipe and used only one jalapeno. The tomatillos were nice and tangy and the onion a bit sweet so this batch needed no sugar or salt at all. Yummy! I could not find my written recipe, so found this one, which most closely matched what I have done in the past…

Salsa Verde with Tomatillos

1 pound fresh tomatillos
1 small yellow onion
1 jalapeno
1 garlic clove, crushed
1 lime, juiced with meat
¼ cup chopped cilantro
Pinches of Sugar and Salt to taste

Remove husks from tomatillos, wash well and cut in half. Remove dry layers from onion and cut it in half. Cut jalapeno in half. Remove seeds and discard if you want a milder salsa, but I leave them in. Set oven to high broil. Place tomatillos, jalapeno and onion on foil covered broiling pan, skin side up. The onion and jalapeno pieces should be on the outer edges, with the tomatillos in the center. Place under broiler and roast until tomatillo skins begin to blacken, at least 5 minutes and possibly up to 10, depending on the power of your broiler. Rotate the pan and broil longer if needed to maximize blackening*. Let vegetables cool. Combine all ingredients in food processor and pulse to desired texture, or use a molcajete and break it up the old fashioned way. Refrigerate for at least an hour, but ideally overnight. Add additional salt to taste if needed before serving.

*Recently my mother in law was making a tomatillo sauce with avocados and I encouraged her to roast the tomatillos and peppers. She did, but…just…could…not let them get really black. The result was delicious, but we will never know how truly blackened tomatillos would have changed the flavor. I know the urge will be strong to take the pan out before the skins are truly black and smoking, but it really expands the flavor of the results if you control yourself and let them go black.

White Chocolate Frito Popcorn

I enjoy the addictive nature of salty and sweet. Is there a better combination than popcorn and candy coated chocolate? Not. A lovely boyfriend in my past introduced me to mixing popcorn and peanut M&Ms as a snack. It works in a movie theater, at home or on a hiking trail. The flavors bring back so many diverse memories I can get overwhelmed, so I actually avoid it. The plus is not getting overwhelmed by memories and also not accumulating fat and calories that damage any nutritious benefit of popcorn.

When I was collecting ingredients I discovered something. In my quest to make a St. Patty’s Day treat I purchased a standard bag of candy coated chocolate, intending to pull out the green factions. There were not as many as I expected, and would make the recipe lacking in the sweet category, so I pondered what other color would accentuate the March holiday. Tossing popcorn, corn chips and white chocolate together is pleasant as is, but there is a whole world of colors, depending on the holiday, that can be added. With the looming March celebrations I pondered. I decided to be retrospective. I used orange along with the green.

If there are thoughts of Ireland connected with St. Patrick’s Day they may wander, very logically, to the conflict between Protestants and Catholics, Irish and English. Ireland and Northern Ireland are still distinct countries with distinct preferences religiously. Without going deeply into the religious, political and dynamic contrasts of the two sides there can be a general agreement of how they are traditionally represented, as on the Irish flag – with green for the Catholic/Irish and orange for Protestant/English, relying on white to keep them neutral. At least that is generally – and with no intention for animosity – what I understand as the reason the flag of Ireland is set up as it is. Although I understand that Protestants do no celebrate saints to the extent Catholics do, I still feel obligated to recognize the whole of the island. I know it is a simple sweet treat, but colors are often not something to laugh at but to recognize.

My guinea pigs (a.k.a. Big D and friends) decided that the results were salty, sweet and addictive, this recipe definitely needs more corn chips. Like, twice as many corn chips. I will consider doing so in the next batch. I relied on the recipe (and hilarious lead in) here.

White Chocolate Frito Popcorn

8 cups popped popcorn
16 ounces white chocolate or almond bark
2 cups corn chips, crushed
1 cup M&M’s

Pop corn according to package directions. Put popped corn and crushed corn chips into a large bowl. Make sure to get all of the unpopped kernels (“grannies”) out or someone will break their tooth. Melt chocolate in a microwave safe bowl in 30 second increments, stirring in between, until melted. Pour melted chocolate over popcorn mixture and stir to coat completely. Pour onto a wax paper or parchment paper lined cookie sheet and sprinkle with M&Ms. Allow to cool and dry.

Traditional Irish Breakfast

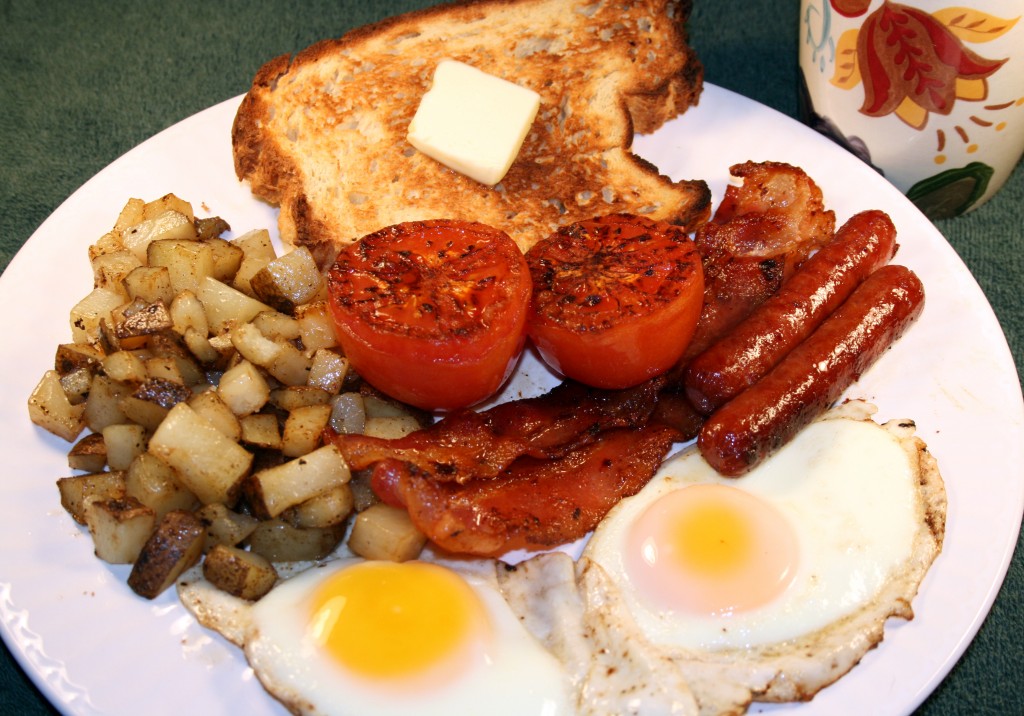
I almost did not post this recipe. Not because it is broken, but because my picture does not quite tell the whole story. I thought this to be a good reason not to post when I took it, then the next day I thought the reason silly. I love cooking and photography. One reason I began this blog was to combine these two loves. Other reasons include telling stories and sharing discoveries about food. Combine all this and it led me to an executive blogging decision. A picture is worth a thousand words, so who cares if I need to add a few more to complete the story? If I expected perfection every time I shared recipes and pictures with you I would never post anything. So here is my post about the traditional Irish Breakfast, Americanized and wheat free. I will explain.

Big D and I agree that we have found two places in the US where we can get a traditional Irish Breakfast like we had in Ireland. One is in Alexandria, Virginia, and the other is in Las Vegas, Nevada. Yep. Vegas baby! I am sure there are other places, but these are the two we have found in our travels. A bunch of places say they serve a traditional breakfast, but just don’t cut it. Like anyone else, the Irish break their fast after a night of sleep by eating a meal. For the hard working majority and tourists (like me) who relied on B&B vouchers during my trip, a hearty breakfast quickly prepared in one pan is ideal for getting on with the day and not having a growling stomach an hour later. In fact, the breakfast often held us until dinner without a problem. We did indulge in soft serve frozen cream soft serve wherever we encountered it (omigosh I can still taste it. Yum!), but that doesn’t really count, does it? If you are in pursuit of a completely traditional meal as I describe below you can get quality versions of all the hard to find ingredients from Tommy Maloney’s, but as you’ll see it will cost you.

Traditional Irish Breakfast for Two

3 Tbsp butter
2 rashers bacon
4 bangers
2 slices each black and white pudding
1 tomato, quartered
4 eggs
1 small potatoes, cut in bite-sized pieces or thin slices
1 cup baked beans, heated
2 slices Irish brown bread
2 bags Irish Breakfast Tea
2-3 cups boiling water

Preheat oven to 350F, then turn off the heat. Place two serving plates in the oven – as parts of the breakfast are cooked you will split them between the two plates. Heat beans in a small pot on low while the rest of the breakfast is prepared. Melt 2 Tbsp of the butter in large skillet and cook puddings, rashers and bangers until browned but not crisp. Remove from skillet and place on the plates in oven. Fry up potatoes in bacon/banger/butter grease. When potatoes are half done add tomatoes, cut side down, to the middle of the pan. Remove potatoes, when tender but not browned, to warm in the oven. Remove tomatoes to warm plates when done, which means they are soft and the skin begins to wrinkle. Begin bread toasting and tea brewing. Add the last Tbsp of butter into the pan and melt. Add eggs and fry to desired doneness, ideally sunny side up. I usually lower the heat after breaking the eggs into the pan and cover it, which encourages the eggs to cook evenly without needing to flip. Add bread and beans to plates and eat hot!

—————————————

Can you have a traditional Irish Breakfast without the black and white puddings? Yes, because that is what we had yesterday, but it was not quite the same without it. Like breakfast anywhere, individual preferences and what is locally available forms what goes on a plate. What the heck are rashers and bangers and pudding? Well, two are more easily explained than the third. Rashers are basically ham/bacon pieces cut from the back of the pig instead of the belly like American bacon, which makes for a hearty piece of meat. Bangers are thicker pork sausages – larger than the typical American sausage link, but smaller than, say smoked sausage. Now the pudding does not really have an American parallel. Irish pudding is a mixture of oatmeal, spices and sometimes meat set up in casings like sausage. The white pudding is primarily the oatmeal and spices, while black pudding has the addition of blood, usually pig’s blood, and prepared like other sausage. The black and white puddings have a particular taste and texture which sometimes turn people off. I appreciate them in small quantities. Big D on the other hand could eat plate fulls with a big grin on his face (along with haggis, but that is another story).

In our small Texas town we could not find the pudding, and Big D could not even find anyone who would sell him pig or cow blood to make his own pudding with his sausage making contraption. It is completely missing from our meal. Also, no rashers were available so we substituted thick cut bacon. Bangers were unavailable so we substituted beef breakfast sausages. The canned baked beans available around here are sweetened overwhelmingly, unlike Irish baked beans, so we just left them out. On top of all these changes, we also had gluten-free bread instead of Irish brown bread to address Big D’s wheat sensitivities.

As with traditional American breakfasts, some things on a traditional Irish breakfast plate vary depending on preference – some cannot bear to be without their baked beans, while others want their eggs scrambled or drink coffee instead of tea. As I mentioned earlier, the picture represents an incomplete Irish breakfast, but the recipe takes you through the traditional version to which I was introduced while traveling Éire. Regardless of my qualms about this post, the breakfast was delicious. After eating it we leaned back, smiling, full and happy.
 

Mushed Peas

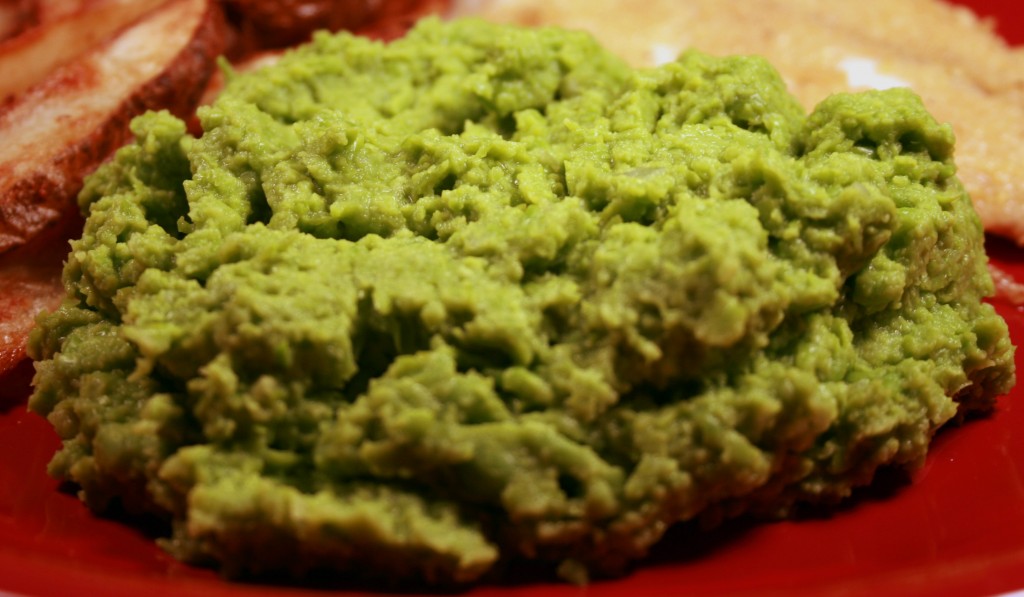
On the first day of my first trip to Ireland I stayed up for 36 hours straight. The original plan was to sleep on the flight over the Atlantic, but a merry band of fine looking Italian men decided to have a party about five rows away, so any thoughts of peace and quiet went out the window. There are worse reasons for not sleeping. We landed in Shannon, went through customs, found our B&B and took off in our little car to explore. Bumping along a narrow road on the way to the Cliffs of Moher we came across a little cottage converted into a small cafe. Our rumbling stomachs could be heard over the car engine, so we stopped for a bite. It may have been the beautiful, lush green surroundings, but the fish and chips with mushed peas we ate for lunch tasted magical. Our table of two made up half the customers in the place for the entirety of our meal. It was quiet, we could see through windows in three directions, and were slightly punchy from being awake in our 30th hour. It was a blissful break from the rushed feeling inherent in travel. A decade later I still recall the cup of bright peas, the subtle mint mixed in, and how amazed I was that I never thought of mushing them before. Some people call them mashed, other mushy, but I call them mushed because that is what they were called during my first encounter. Oh, and the Cliffs of Moher are really tall and otherwise left me speechless.

Mushed Peas

2 pounds frozen peas
½ small onion, finely diced
2 Tbsp butter
1 Tbsp fresh mint, minced leaves only
2 Tbsp whole milk
Salt and Pepper to taste

Melt butter in a pot. Add peas and onion and cook covered on low until peas and onion are tender. Add mint. Mash with a potato masher, food processor, hand blender or other macerating device you may have handy. Add milk and stir. Season to taste with salt and pepper – take care with the salt and pepper because a little goes a long way with mushed peas. Serve warm.

Oxtail Soup

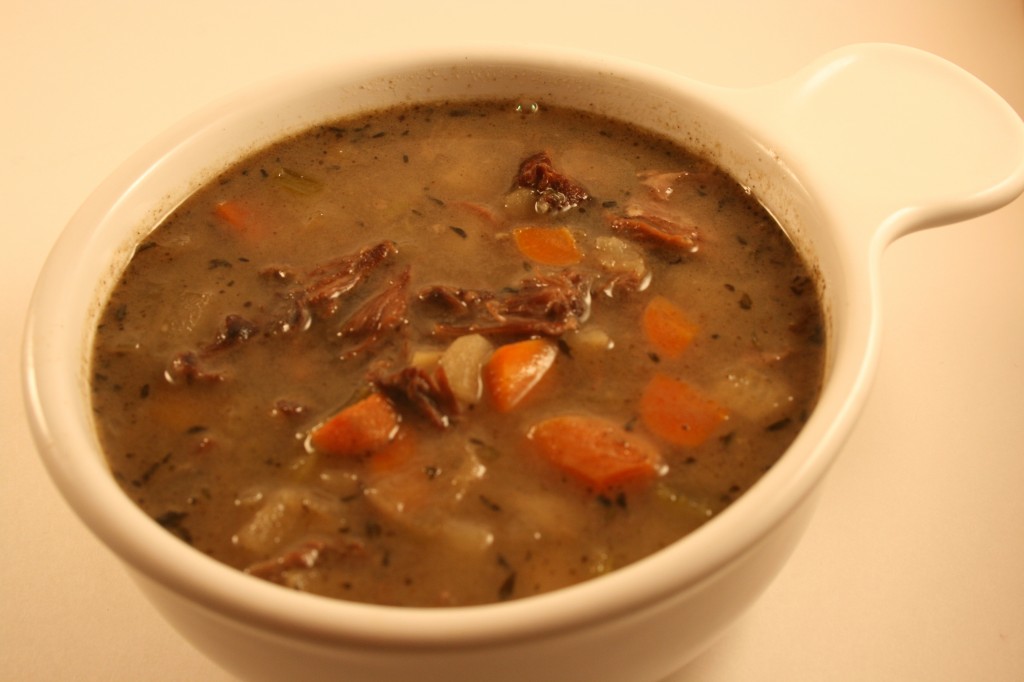
Yet again, I am making soup. And yet again it is something my dad used to make, but I am putting my own spin on it. Hang in there with me – I promise that soup on my menu will decrease significantly as the temperature outside rises. I don’t do well with warm liquids in warm weather. Just doesn’t seem right. Now, on with the soup…

My dad learned how to make oxtail soup in Germany where, as in most places of the world, every bit and piece of slaughtered animals was used. It has a rich sauce and the vegetables melt in your mouth. He would leave the meat on the bones and we would each get one in our bowl. As a kid it was fun trying to get all the meat out of the little crevasses. The dog was always hanging around, trying to wait patiently for the bones.

Oxen have meaty tails, and the meat is pretty tender. Of course, most meat is tender after being boiled for three hours. The oxtail is traditionally considered one of the more lowly cuts of meat. I mean, you don’t typically find oxtails on the menu of fine dining establishments, but in many places of the world soup made with them is very popular. The marrow adds extra depth of flavor to the broth. The meat and simple vegetables in the soup are relied on to warm bellies on cold winter nights.

Since Ireland is one of the countries traditionally relying on it as a staple dish, and it is still soup season (aka winter) in some parts of the U.S., I give you as one of my Irish dishes – the lovely and rich oxtail soup. I actually decided to take pieces of recipes from my dad, my own recipe collection, as well as those from China, Korea, Jamaica, Hawaii, Germany, the US and of course Ireland…you get the idea. I guess it is more of an International soup made with an American ox.

Oxtail Soup

1 pound oxtail, cut into 2-inch thick slices
3 Tbsp oil
¾ cup red wine
3 garlic cloves, cut in half
8 cups water
1 tsp salt
1 tsp ground ginger
2 large carrots, diced
1 medium turnip, diced
1 large or 2 small onion, diced
3 stalks celery, diced
2 small potatoes, diced
2 tsp chopped thyme
1 tsp chopped parsley
Additional salt and pepper to taste
3 Tbsp flour (optional)*

The day before making the soup the oxtail pieces need to be cooked. In a deep pan on the stove top (I used a dutch oven) heat the oil, add the oxtail pieces and sear on all sides. Add the salt, garlic, water and wine, bring it to a boil then lower heat, cover and let simmer for about three hours. When cooking is complete the meat should fall off the bones. Let cool until the meat can be handled and separate broth from the bones and meat. Store the meat and broth separately in the fridge overnight and give the bones to the dogs. The next day skim off/remove as much fat and garlic as you can from the broth and discard. The broth will mostly be in a gelatinous form, but will liquify when heated. If there is fat you can remove from the meat, then do so. Return broth and meat to the stove top pot (or a crock pot), add all the vegetables, meat and herbs. If the liquid is not covering all the vegetables you may need to add a cup or so of water or beef broth, but wait until it is warm because it might not be necessary. Simmer on low for about three hours until the vegetables are tender (or six hours in a crock pot). Add salt and pepper to taste. Serve hot.

*A final, optional step can be to add some thickener to the soup. I do not take this step because I want the soup to be wheat free. To thicken, draw out about ½ cup of liquid from the soup. Add 3 Tablespoons of flour and whisk together until all lumps are gone. Add the thickener to the soup, combine with the rest of the soup and let cook for the last ten minutes.

Oatmeal Apple Muffins

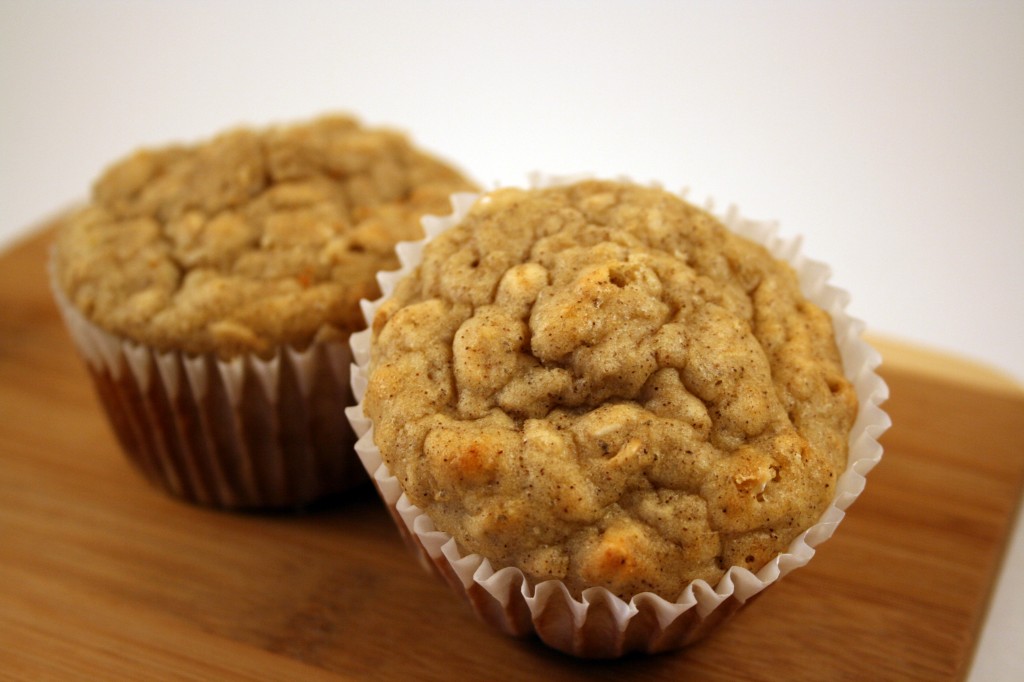
Ireland and potatoes are always associated with each other, but there is more to the agricultural history of the isle than spuds. In fact, potatoes are a very small percentage of crops grown there these days. Most of the large production farmland is dedicated to grains, but there are also smaller specialty crops, like apples and tubers. I want to highlight apples and oats to make some robust muffins. Particular types of apples thrive in the rich soil, and the climate is ideal for the slow ripening of oat grains. In spite of the sugar laden flavored oatmeal packets available in US stores, oatmeal is actually a low fat, high fiber food that keeps me full long after finishing a bowl.

I am always trying to sneak extra fiber into Little B’s diet. Some days all she wants to eat is ham and peanut butter, which are not horrible choices, but do not help much in the way of keeping her system running, er, smoothly. When I cannot pique her interest in oatmeal or an apple I like having something on hand that she perceives as a treat. These muffins work great for getting extra fiber into her, although I sometimes resort to smearing a little honey and Greek yogurt on top when she says “that’s not a cupcake that’s a muffin”. It is amazing what a glop on top can do. These muffins are also wheat free so Big D doesn’t give me that sad puppy dog look I get when I bake something he can’t eat. Double bonus!

Oatmeal Apple Muffins

1 1/2 cups uncooked oatmeal
1 1/2 cups cornmeal
2 tablespoons baking powder
1 tsp cinnamon
1 teaspoon salt
3 eggs
1 1/2 cups milk
1 cup banana/applesauce mush
1/3 cup sugar

Preheat oven to 400F. In a food processor pulse until powder ¾ cup of the oatmeal. Mix together oatmeal, cornmeal, baking powder, cinnamon, and salt. In another bowl, beat the eggs then add the milk and fruit mush (mash up one banana and fill the rest of the cup with applesauce) and stir. Add the sugar to the wet ingredients and mix well. Pour the egg mixture into the oat mixture and stir until just combine. Pour into a well greased 12-hole muffin tin and bake for around 20 minutes. Let cool for about five minutes and remove from tin.

Mustard Cider Pork Chops

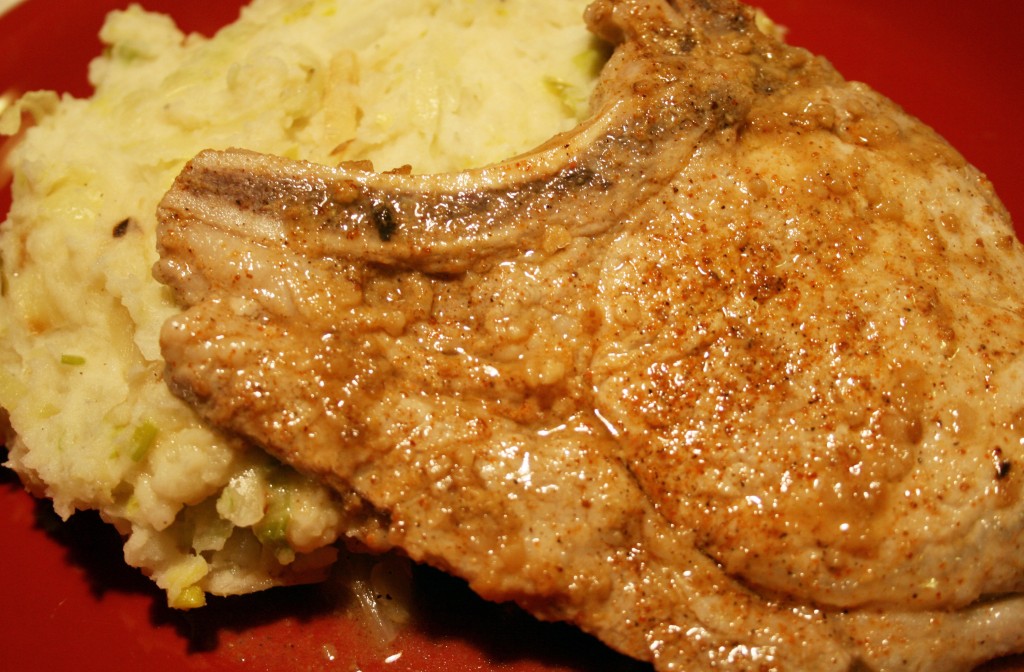
One thing about traditional Irish foods and methods of preparation is they are often simple and/or quick. I enjoy making simply prepared dishes just as much as complicated ones. Many more modern Irish dishes combine sweet and savory to compliment meats, which is what I did here. Although the older method of preparing chops (pork or mutton) involves boiling them in broth (Irish food boiled? No! Never heard of that concept before!), but I just could not do it. I had to sear them a bit before letting them simmer in the sauce. So sue me, I broke from tradition. I am sure the Irish food cops will not be knocking on my door anytime soon. These chops go great with colcannon I shared with you earlier this week. I was inspired by the recipe here, but may have made so many changes you might not be able to tell. Have a great weekend and look for more Irish inspired dishes soon!

Mustard Cider Pork Chops

4 thin cut bone-in pork chops
3 Tbsp olive oil
1 Tbsp stone ground mustard
2 Tbsp lime juice
2 Tbsp cider
2 cloves garlic, chopped
Salt and Pepper to taste

Make two slits in the meat of each pork chop, 2-3 inches apart cutting towards the bone. Season chops with salt and pepper. Heat large skillet over medium-high heat. Add oil. When hot add garlic and cook until it begins to brown. Add mustard, honey and lime juice. Stir until combined and hot. Place pork chops in the pan, press down a bit, then flip, allowing both sides of the chops to be covered with sauce. Cook on each side for about 3 minutes until seared. Decrease heat to medium-low and cover pan, cooking until pork is cooked through. Serve immediately.

Colcannon

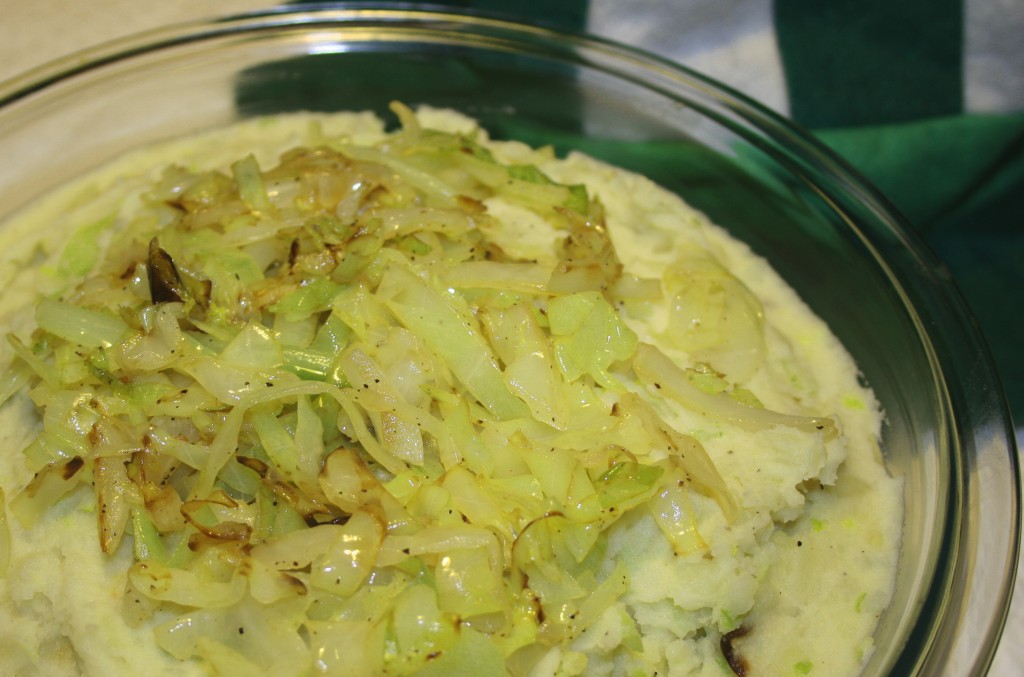
It is March! March means two things to me – the world changes from brown to green and the 17th of the month is one of my favorite days of the year. As St. Patrick’s Day nears I ponder more and more the Irish dishes I consider comfort food. Frankly, when I think of Ireland and food my thoughts do not often float beyond seafood and potato dishes. My ancestors survived on such things, so it is no wonder I enjoy exploring them. Traditional Irish-American foods that start popping up around St. Patrick’s Day usually include corned beef, but pork is more often the protein in Irish dishes. Over the next few posts leading up to St. Patty’s Day I am going to cover some of my favorite Irish dishes, prepared in ways my family enjoys them. Let’s see where this journey takes us! I am starting with colcannon, which goes well with pork. Go figure.

One of my favorite pubs is The Lion and Rose British Restaurant and Pub, of which there are a few locations down in San Antonio and Austin, Texas. The first one opened in a little shopping center in Alamo Heights, an old neighborhood in San Antonio near my alma mater. So far they have retained the deliciousness of their food, and hopefully continue to do so as the number of locations grows. I mention the pub because they serve a dish I love, but for some reason rarely make – colcannon. Uh, technically their menu item is bubble and squeak (an English stove top version of colcannon), but the flavor is much the same and so easy to make myself. When I eat mashed potatoes there are usually vegetables along side and I always end up mixing them together. Mashed potatoes and corn? Mix. Mashed potatoes and peas? Mix. Mashed potatoes and green beans? Mix. Mashed potatoes and cabbage. Yep, mix.

The traditional versions of colcannon I have come across include boiling. A lot of boiling. I can boil everything and mix it together as was done in the past, but I am partial to sauteed cabbage. The searing of cabbage that is barely crispy and just becoming tender makes me melt. I guess you can say I make a hybrid of colcannon and bubble and squeak. I am okay with that statement. If you are like me and serve colcannon with meat, at the last minute you suddenly worry that you forgot to make a vegetable for dinner. Never fear. The cabbage IN the colcannon is actually the vegetable! Big D got a laugh out of my omigosh-I-forgot-the-veggies moment.

Colcannon

3 pounds potatoes, peeled
1 small (or ½ medium) head cabbage
1 medium leek (green sections removed), thinly sliced
1 cup milk
½ cup butter
Salt and pepper to taste

Chop potatoes into equal sized pieces (about 4-6 pieces per potato). Drop potatoes into boiling salt water and cook until tender, about 20 minutes. Drain and set aside. While potatoes are cooking, core and thinly slice the cabbage. In a large skillet melt 1 Tbsp of the butter over medium high heat. Add cabbage and toss to distribute the butter. Turn down the heat to medium, add salt and pepper to taste and cover, cooking until cabbage is tender. Occasionally toss the cabbage, allowing some browning to occur. While the cabbage is cooking add the remaining butter to a small sauce pan and melt. Add leek to butter and cook until transparent. Add milk and simmer until heated through, using salt and pepper to taste. Mash the potatoes until smooth (they may look dry). Add the onion mixture (the potatoes won’t look dry anymore). Add the cabbage, setting aside about one cup for garnish. Stir until all is combined. Top with the set aside cabbage. Serve hot.

Flourless Peanut Butter Chocolate Chip Cookies

About thirty years ago (when I was an infant…well, really a bit older than that) my mom brought home a cookie cookbook for me. She got it at one of those traveling book fairs visiting the school where she taught kindergarten. We always baked sweets together and I was so proud of having my own cookbook! The book is now all beat up and stored away, nestled safely in the loft of our cabin in Alaska. Almost every page has a spot of vanilla or a place where batter dripped on it and I attempted to wipe it off. One recipe from the book I made a lot and know by heart – it is for a peanut butter chocolate chip cookie. They were actually named “The Greatest Cookie in the World”. I don’t necessarily disagree. Although I got pretty tired of eating them after a few years I still enjoy seeing people bite into them, surprised at how good they are, roll their eyes and look down at the cookie, wondering where it had been all their lives. I have taken batches of them to bake sales, given them as gifts, relied on them for potlucks, given them as ‘I’m sorry’ presents, added pounds to the waists of many a boyfriend and to this day make batches for my godfather. He freezes them and carefully rations his supply, taking one out every evening before dinner. By the time he is done eating the cookie is thawed and provides him with a daily treat. I am not as good as I used to be in keeping him stocked, but I try to make a batch for him when I visit.

After all this build up I am actually not going to share the recipe with you. One, because I want to make sure I give credit to the original source, which I have not yet found, and two, I have a recipe just about as great, but gluten free!

I have made these cookies a few times over the past year and they come out wonderfully every time. The salty, peanutty chocolaty explosion in your mouth may try convince you they are full of processed all purpose flour, but they are not. Using white cane sugar makes a big difference in the result, which is what you see above. I have also made them with Stevia in the Raw instead of white cane sugar. The Stevia version ends up a little dryer and powdery, but I make them small, about two bites, so it is not overwhelming – the peanut buttery chocolate magic still shines through. I was introduced to the recipe here by the guys at The Bitten Word, and as they say, they got it from Southern Living. Enjoy!

Flourless Peanut Butter Chocolate Chip Cookies

1 cup creamy peanut butter
¾ cup sugar
1 large egg
½ tsp baking soda
¼ tsp salt
1 cup semisweet chocolate morsels
Parchment paper

Preheat oven to 350°F. Stir together peanut butter and next 4 ingredients in a medium bowl until well blended. Stir in chocolate morsels. Drop dough by rounded tablespoonfuls 2 inches apart onto parchment paper-lined baking sheets. Bake at 350°F for 12 to 14 minutes or until puffed and lightly browned. Cool on baking sheets on a wire rack 5 minutes. Transfer to wire rack, and let cool 15 minutes.


UPDATE 01/26/2013

Little B and I made a lower carbohydrate version of these cookies tonight and they came out scrumptious! They taste a little less sweet, but using a less bitter chocolate may take care of that issue, although I like the less sweet version. Here are the revised ingredients and instructions.

1 cup natural smooth peanut butter
2 large eggs
1 tsp vanilla
1 cup powdered splenda
1/3 cup vanilla whey protein powder
1/2 tsp baking soda
1/2 tsp sea salt
1/2 ounce block unsweetened chocolate, roughly chopped

Preheat oven to 350°F. Stir together peanut butter, eggs and vanilla until well blended. In a separate bowl combine splenda, protein powder, baking soda and salt. Add dry ingredients to peanut butter mixture and mix until well blended. Stir in chocolate. Drop dough by rounded tablespoonfuls 2 inches apart onto parchment paper-lined baking sheets. Bake at 350°F for 10-12 minutes or until puffed and lightly browned. Cool on baking sheets on a wire rack 5 minutes. Transfer to wire rack, and let cool 15 minutes. They will get crispier as they cool.

Jambalaya

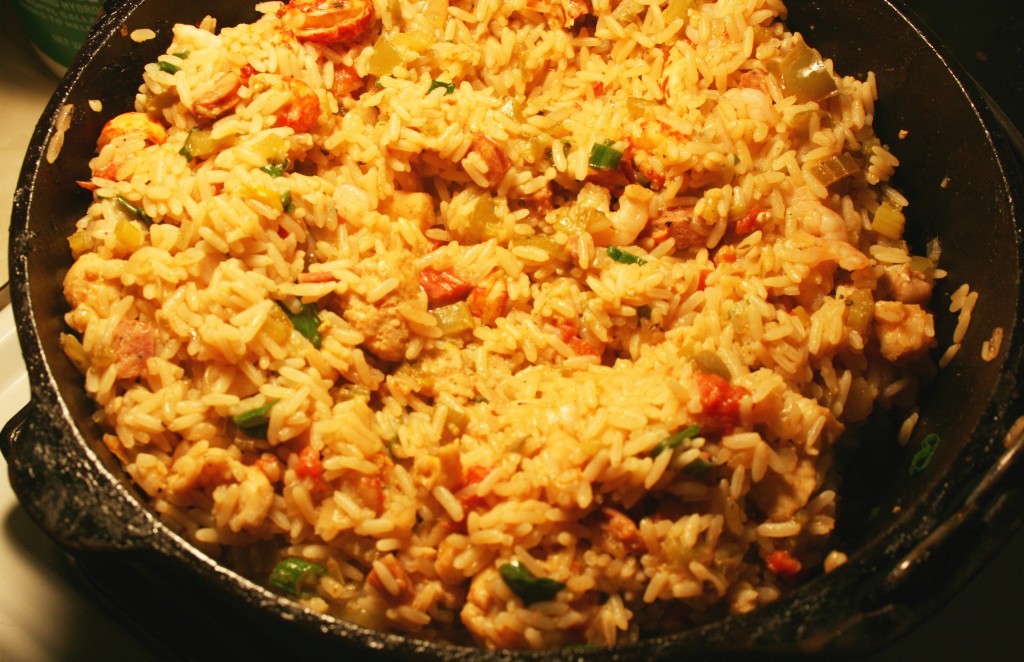
When I was in 6th grade my dad had a business trip to New Orleans. It coincided with spring break so my mom, brother and I went along. The trip was exhilarating in a number of ways. 1) the old, European feel of the narrow streets and old buildings was a new experience for me, 2) even as a ‘tween’ I immediately recognized the potential for fun and folly inherent on Bourbon Street, which was apparent to me in spite of the fact I only saw it in daylight, and 3) the Mississippi was mighty. My brother and I got a brief chance to walk the streets together without the parents, got caught in a rainstorm and were mistaken for a young couple in love (it was a REALLY crowded elevator so we were scrunched together, we were freakishly tall for our age and we were sopping wet). Another discovery was the food in New Orleans. It is sometimes subtle and sometimes spicy, but always has roots in simplicity. Jambalaya is a popular dish found in New Orleans. It is consistent with an international tendency to create a one-pot conglomeration of ingredients that is delicious, filling and representive of local ingredients. Jambalaya is similar to risotto in Italy, paella in Spain, pilaf in Greece/Turkey and fried rice in Asia. Although the ingredients may seem exotic in some regions of the U.S., the following recipe is typical for the Creole tradition of cooking, and close to Cajun methods, even though Cajuns tended not to use tomatoes.

Upon our return to Texas from that first trip to New Orleans there was a flurry of Cajun dishes made in our house. I am not kidding – my dad purchased cookbooks, multiple iron skillets and a propane burner for use outside to make things like blackened redfish. I spent a lot of time chopping up the holy trinity – equal parts green bell pepper, celery and onion. We grew up eating many servings of jambalaya, gumbo, and occasionally etouffee. He sprinkled many a dish with Paul Prudhomme’s magic seasoning blends. Dad was a master meat griller and among his secrets for preparing meat (which he shared with me but I will not divulge here) he relied on the seasoning blends to give the right spiciness and flavor to meats. Such influences still linger with me today, and were part of the reason I was inclined to spend three additional vacations in New Orleans, and spend six months living there. I really want to return again and further experience the magic of one of the oldest and most culturally diverse cities in our country. It may be because I miss my dad, but it may also be that the charm of the city is undeniable and cannot be understood unless you walk the streets and open your heart to the experience.

Jambalaya

1/4 cup vegetable oil
1 large onion, chopped
1 green bell pepper, chopped
3 stalks celery with leaves, chopped
6 cloves garlic, chopped
2 tsp oregano
1 Tbsp cayenne pepper (or less if you want to curb spiciness)
2 tsp salt
1 pound alligator meat, cubed
1 pound andouille sausage, quartered and sliced
2 cups long grain parboiled rice
2 cups chicken stock
2 cups water
1 14.5 ounce can diced tomatoes
3 bay leaves
1 pound cooked crawfish tail meat
1 pound uncooked small shrimp, peeled and de-veined
2 green onions, chopped

In a large Dutch oven heat oil over medium heat on stove top. Add onion, bell pepper, celery, garlic, oregano, cayenne and salt. Cook for about 10 minutes, stirring regularly and scraping bottom until vegetables are wilted and mixture is becoming a caramel color. Push vegetables to the edges of the pot to create a well on the bottom. Add sausage and alligator; cook until it begins to sear, about five minutes, then combine with vegetables. Scrape the bottom of the pan regularly while the meat sears. Add rice, tossing it until thoroughly coated. Add chicken stock, water, tomatoes with their liquid and bay leaves. Stir thoroughly. Cover and simmer over medium low heat for 25 minutes. Do not remove lid during cooking time. Rice should be almost cooked but some liquid not absorbed. Add shrimp and crawfish tails. Cook on low another 10 minutes, until shrimp is cooked, crawfish heated through and liquid absorbed*. Remove from heat and stir in green onions. Let sit for 10 minutes. Taste before serving and add salt as needed to enhance flavors. Before serving remove bay leaves, or at least warn your guests to look out for them.

*To make the jambalaya without seafood use 6 chicken thighs (skinned and diced into large cubes) instead of the alligator. Add the chicken instead of alligator along with the sausage and skip the step later when the shrimp and crawfish are added.

Post Navigation