Any Kitchen Will Do

Give me a kitchen and I will cook.

Archive for the category “snack”

Fifth Blogiversary Protein Bombs

proteinbomb

You may notice it has been almost six months since I posted here. SIX MONTHS!!!!! For those of you first visiting, that is a long time. Way long. When I first started this blog I had a lot of momentum, posting every other day. As life trundled along, the frequency varied more, sometimes every third day, sometime once a week. Once during a move across the country, when we lived in a kitchenless hotel, it was a month.

I want to explain why I have not posted in a while, and share a new recipe while I am at it!

About six months ago (hmmm….maybe a pattern here?) Big D, Little B and I started welcoming foster children into our home. We are licensed to welcome up to five at a time. For the most part, our capacity has been full for six months. That is a lot of mouths to feed. Not only feed, but make available food they will actually eat. Each child has had their own eating idiosyncrasies – some healthy, some not so much. Everything from a vegetarian to a voracious carnivore to some who don’t like speckles (a.k.a. herbs) in their food.

To develop and support consistent eating habits for the kids, I have had to focus on many foods with which they are familiar, in addition to introducing foods new to them. This means I needed to deviate from my grain free cooking some of the time. A lot of the food the kids are used to eating include many types of ‘junk’ food, canned and boxed foods. We don’t do ramen or canned ravioli here,. Yuck flavor wise and nutrition wise. Although I have cooked some grains for them, mostly including rice and corn, I still do plenty of grain free dishes.

As a result of almost tripling the size of hour household, my creative juices committed to cooking have dropped significantly. It has been sucked up focusing on feeding the masses, and trying to keep up with the demands of my business, Grain Free Haven. I continue to make many of the dishes I posted in the past, while making new stuff with some grain ingredients. I have made some really good tasting dishes, but hesitated to post them, since they are inconsistent with how I wish they would eat. I sneak in grain free versions of ingredients when I can, but the kids are sharp cookies, and cannot always be ‘tricked’. Other people try to sneak vegetables into food for kids. I try to sneak out grains and sugar!

I mean, I own a business that promotes grain free eating. How absurd is it to continue a food blog that promotes eating grains? I refuse to frustrate the foster children by not providing them foods they like just because they include grains, but I also refuse to have a kitchen that makes Big D sick, since he is extremely sensitive to wheat and other grains that include gluten. I firmly believe that avoiding grains and sugar have helped me, Big D and Little B avoid illness, internal inflammation, gastrointestinal irritation and diabetes. I am not at all interested in abandoning those tenets. It takes a little more effort to provide meals with grain free foods alongside those with grains, but it is very much worth it.

As the sixth year of this blog begins, I have decided to resolve my cooking and blog posting conundrum. I intend to continue fulfilling my love of cooking and creating new dishes, using this blog as my conduit. I look forward to posting  what I cook, whether it is grain free or not. I also intend to share substitutions I would use if making the grainy dish grain free. I will also include what I serve to sate the appetites of those eating grain free.

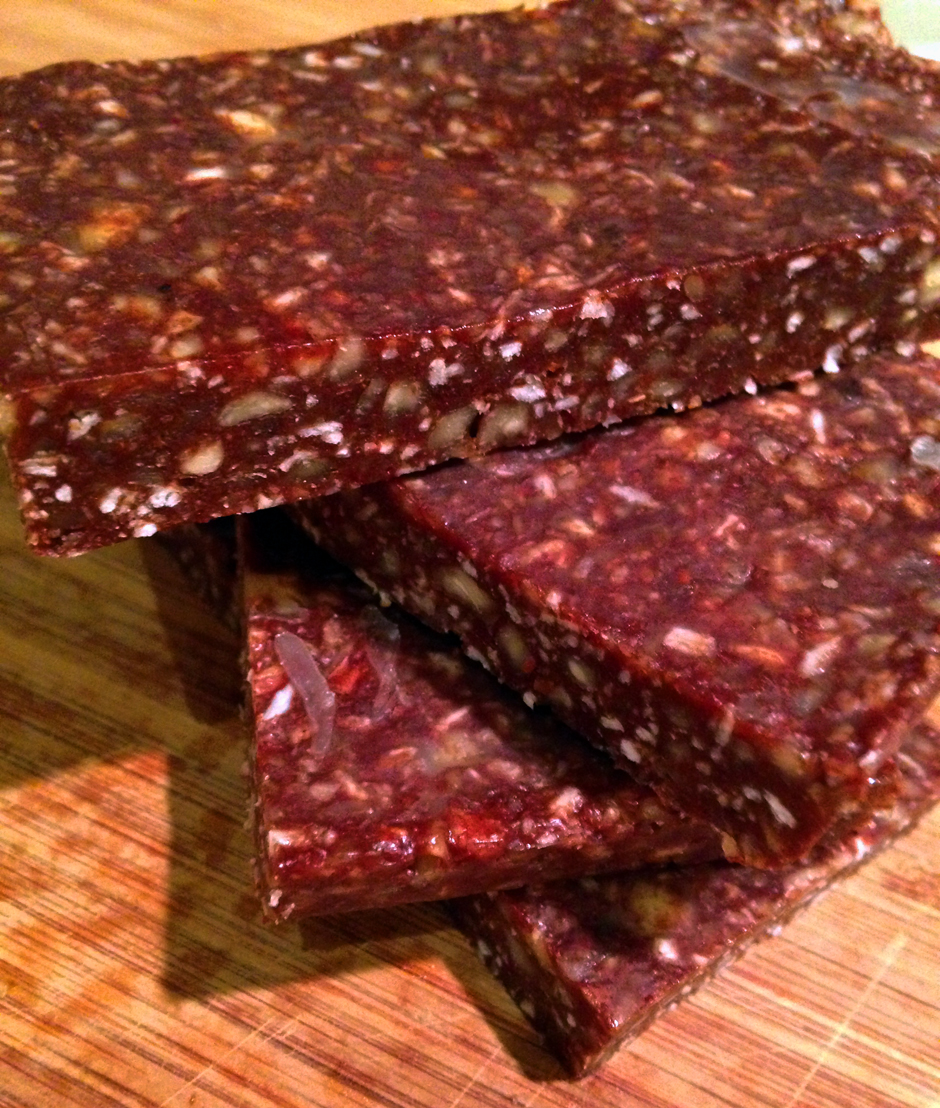
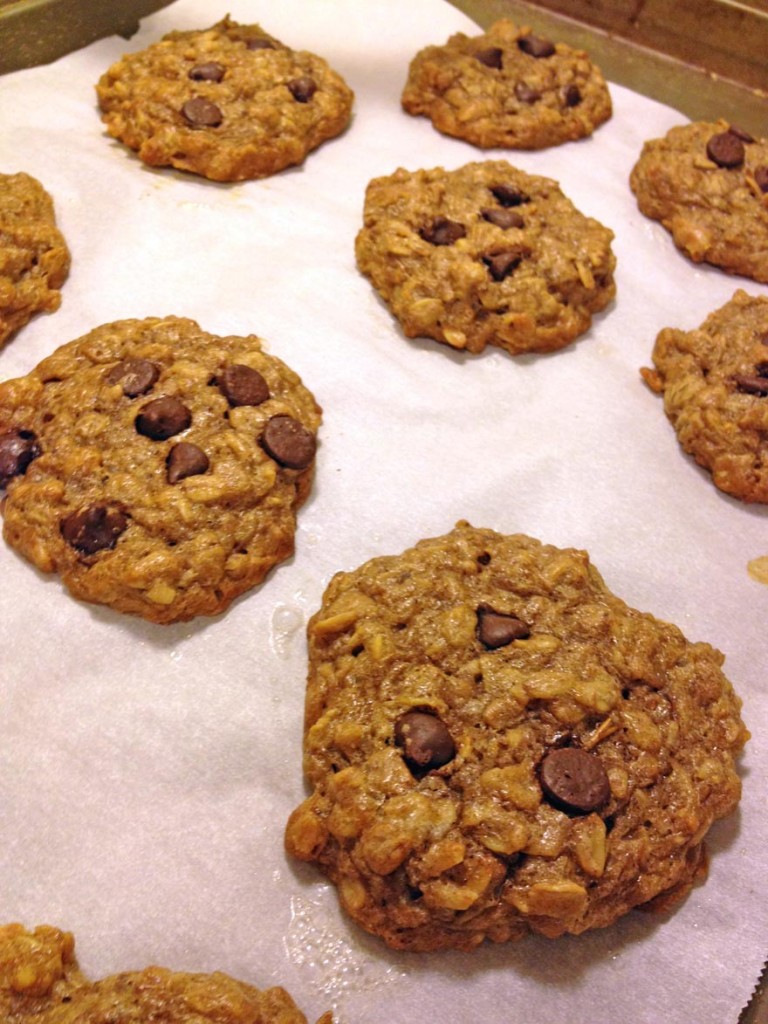
To begin this new approach, I share with you some protein bombs. I like making these for the kids to appease their sweet tooth without added sugar, and fill them up between the school day ending and dinner beginning. The kids are growing like weeds and I need to get as much protein in them as I can. It is based on a no-bake cookie my mom has made for decades. For a grain free alternative you can make my Chocolate Coconut No Bake Goodies.

Fifth Blogiversary Protein Bombs

1 cup peanut butter (use natural to make the result sugar free)
1/2 cup butter (use your oil of choice to make dairy free)
1 teaspoon vanilla
3/4 teaspoon pure stevia powder (equivalent to 1/2 cup pure cane sugar)
1/3 cup cocoa powder
2 1/2 cups gluten free oatmeal, uncooked

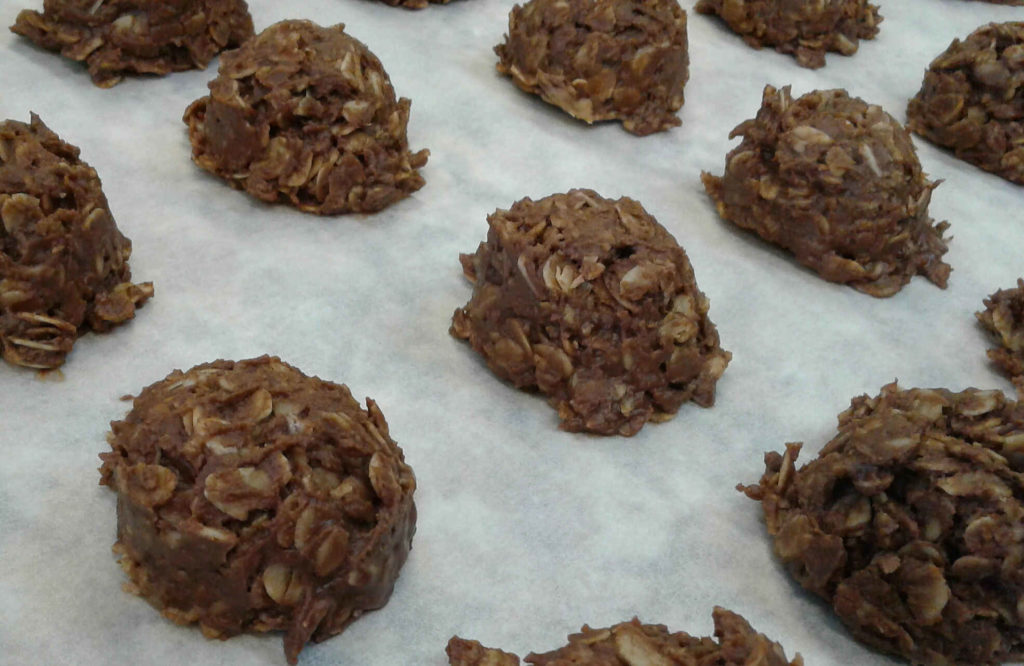
In a medium pot over medium heat add the butter, peanut butter, vanilla and stevia. Stir until butter is melted and ingredients well combined.

Add the cocoa powder and stir, then fold in the oatmeal. Stir until all the oatmeal is coated.

With a small ice cream scoop or tablespoon drop portions onto parchment paper. The bombs can be made whatever size suits your needs. Let cool to room temperature and serve. Store in the refrigerator or at room temperature. Makes 18-20 bombs.


Tex Mex Dip

2015-07-03 18.34.43Dip is a sure fire thing to always have around. Having last minute dinner guests? Pull out the dip with crudite. Feeling nibbly? Pull out the dip with some chips. Faced with raw chicken that needs to be dinner? Pull out the dip and slather the fowl with it before tossing it in the oven. Headed over to someone’s place for drinks? Pull out the dip. It can come in all shapes and sizes and colors and quantities. It can be hot, or cold or both. People can eat it, or not. Dips can be made to taste like just about any dish.

We like queso. When we don’t want to break out the crock pot, processed cheese and can of tomatoes we don’t have to miss out on the flavors. We just pull out the can of tomatoes and veer in another direction. Here is a dip I came up with that gives us the flavor and tang of Tex Mex without the logistics. When I say queso I don’t mean the Spanish word for cheese. I mean chile con queso, the warm cheese dip with tomatoes, onions and chiles often served with a Tex Mex meal. I like queso, but it needs melting and oversight so it does not burn and reheating when it cools off, then if the crock pot cord does not reach to the nearest plug there is need for an extension and the possibility of tripping on it…not that I ever trip on anything. 🙂 None of these logistical elements are insurmountable barriers, but are way beyond what is needed for this dip. Nothing can replace chile con queso in my book, or plate, but this is a nice, cool variation.

Tex Mex Dip

2 cups sour cream
1 Tbsp lime juice
1 Tbsp ground cumin
1 tsp garlic powder
1 tsp sea salt
1/2 tsp ground black pepper
1 can tomato and chiles, well drained
1/4 cup finely chopped onion

In a medium bowl combine sour cream, lime juice, cumin, garlic powder, sea salt and pepper. Whisk until combined. Add onion, tomatoes and chiles. Stir until well combined. Chill at least two hours or overnight before serving.

Dessert Cashews

dessert cashews

In preparation for our recent visit my mom bought some cashews, for Little B loves them. Specifically, she likes roasted, salted cashews. The generous container of purchased cashews was very much not salted. I had to come to the rescue for all our sakes!

The need to ‘fix’ the cashews reminded me of festival nuts. They are often our diet downfall. As we walk through a festival all day it is easy to walk by the funnel cakes, cobbler, ice cream, pastries, battered pig on a stick…you know, sugary and wheaty stuff. There are two or three danger zones, and they are all roasted nut stands. They typically roast the nuts and coat them with cinnamon and sugar. You can smell them about 100 yards away, so when you finally come up to the booth the brain has gone through the battle of yes, no, yes, no, oh well hell why not. We usually rationalize the purchase by assuring ourselves that splitting a bag among six people is not the worst thing in the world, and it is not. What usually happens is everyone has a few, then one or two people absentmindedly nibble on the entire bottom half of the bag and they are suddenly gone. Oops! I blame the ambiance and my nose – if I could not smell I bet I would care less about those darned nuts.

I noticed the festival nut seasoning combination worked well on pecans and almonds, but not so well on the cashews. They seemed to not capture the flavors as well and were just sad. It was not the fault of the nuts – they are more gentle and softer flavor-wise than their almond and pecan kin. The cashews needed something more than cinnamon and sugar. My first inclination was to add some bite, maybe cayenne, but Little B is not a fan. Pondering mom’s pantry and keeping Little B in mind, my eyes fell upon a can of cocoa powder. Of course! I relied on the general process I figured out for savory nuts and came up with these lovely chocolate cashews. They are sweet and rich and satisfying – a handful makes for a great dessert or snack when the chocolate craving bug comes around. I love nipping a few now and then. My mom had some mixed with popcorn for dinner the other day. Oh yeah, Little B liked them too!

Dessert Cashews

1/2 cup butter
2 Tbsp vanilla extract
1 Tbsp ground cinnamon
2 tsp cocoa powder
2 tsp Stevita granular sweetener
1 tsp sea salt (discard if using salted nuts)
8 cups roasted, unsalted cashews

Preheat oven to 350 degrees. Line two medium sized shallow baking sheets with foil. In a large bowl melt the butter in a microwave. Add vanilla extract, cinnamon, cocoa, stevita and salt. Stir until combined. Add the nuts and toss until well coated. With a large slotted spoon drop nuts onto baking sheets and spread evenly into a single layer – additional liquid on the pan may result in a burning smell before the nuts are done baking, so reduce the ‘drizzle’ as much as possible. Place sheets into oven on different shelves. Bake for 5 minutes. Remove nuts from oven. Toss nuts and again spread evenly into single layer. Return to oven, making sure the sheets are switched from the first baking period. Bake for 5 – 8 more minutes, until nuts are sizzling a bit and barely beginning to brown. Note that the point of being brown and being burned are very close together, so stay nearby during the second baking period. Remove from oven and let cool completely. Store at room temperature in air tight container.


Junky Nuts

junkynuts

No, this is not a promotion for a porn movie. It is much less provocative. This recipe is actually based on some family traditions from both my and Big D’s relations. It reminds both of us of holidays we have always celebrated in November and December. Why am I writing about it in March, you ask? Because this is when I start missing some of the holiday food traditions, like snacks and eggnog. Our little family actually keep ‘holidays’ going from November 1st through March 17th. It stretches so far because things like Samhain, birthdays, Mardi Gras, Candlemas (Imbolc) and the Vernal Equinox (Ostara). We officially take a holiday break between St. Patrick’s Day and Easter before the build up for May Day (Beltane). It is a pretty short break this year (less than three weeks), but it is long enough to develop a hankering for holiday smells and flavors. Specifically, an ubiquitous snack mixture. Big D’s family called it Trash, mine called it Junk – the savory combination of square cereal pieces, pretzels, nuts and cheese crackers baked in a buttery Worcestershire sauce. This exclusively nut version takes out the wheaty, grainy bits and lets the saucy flavor shine while keeping the crunch. The sauce sticks to the nuts and creates salty black bits that linger in nut wrinkles. We started the habit years ago of keeping some type of flavored nuts around as a quick, ‘good fat’ snack for when hunger strikes. I first made this version a few months ago and now I automatically make a batch every week. I don’t know what this means for next November when the holiday season begins again, if we continue to eat them year round. Maybe we will have to come up with some other holiday snack tradition and keep it special, for I am pretty sure I am un-special-ing this one, but for a good cause. Regardless, I think it will all turn out okay, time will continue to turn and holidays will still come and go. Crunch on everybody!

Junky Nuts

4 cups raw walnuts
3 cups raw pecans
2 cups shelled peanuts (raw or roasted)
1/2 cup butter, melted
1/2 cup Worcestershire sauce
1 Tbsp garlic powder
2 tsp onion powder
1 Tbsp sea salt
1/2 tsp ancho chile powder

Preheat oven to 300 degrees. Add melted butter in a large bowl along with the Worcestershire sauce, garlic powder, onion powder, salt and chile powder. Stir until combined. Add walnuts, pecans and peanuts. Toss nuts until they are all coated. Spread nuts evenly in one layer on shallow baking sheets. Bake for ten minutes. Remove from oven and toss nuts so they are all flipped. Return to oven and bake for ten more minutes. If you are baking multiple sheets at once you should switch their positions in the oven. Remove from oven and let cool completely on the sheets. They will look damp at first, but will dry as they cool. Store in airtight container at room temperature.

Yule Platter

yule platter_edited-1
Every year on winter solstice we have a family party – Merry Yule! Especially during our winter time in Alaska this day is a big turning point – the shortest day of the year is the beginning of longer days and the approximate midpoint of chilly winter weather. Yes, there are still heavy winter storms in late March sometimes, but there is mostly rain after February here in Southeast. Most of our snow this season so far is melted, with temperatures in the high 30s, and a white Christmas is questionable. Regardless of the weather there is definitely a shortage if light. Sunrise is about 8:45am, if you can see it through the clouds, and then sets about 3pm. One way we celebrate Yule each year is to have a simple meal, made up of preserved foods that require little or no cooking. We don’t do much of the preserving ourselves, but work off the labors of others. Big D smokes some jerky, onion, garlic and cheese, while other items like pickled veggies, cured meats and nuts are added to the platter. We snack from the platter while sipping something bubbly – champagne, beer for me and Big D, and root beer for Little B.  It makes for a winter celebration we appreciate before the hustle and bustle of Christmas Eve and Day, which remind us of our childhood traditions. The simple celebration reminds us that the world is hibernating under the bare branches, blustery winds and wet ground. It reminds us of our New Year resolutions from Samhain and look forward to the Candlemas celebration of light in February. A time to ponder during a more sedate time of year when much of the natural world sleeps. Since there is not much recipe involved, here is a list of suggested items for your platter.
Yule Platter
Dry coppa, pastrami or prosciutto
Dry Salami
Beef Jerky
Roasted Chestnuts
Garlic Stuffed Olives
Jalapeno Stuffed Olives
Dry Roasted Mixed Nuts
Specialty Cheeses, sliced
Pickled Asparagus
Pickles
Roasted Mixed Nuts
Arrange ingredients in a pretty way on large platter. Offer and provide bubbly and/or fermented beverages. Eat, drink, be merry. Don’t feel guilty about the ease of this dinner, for more complicated ones are on the horizon.

Peanut Butter Chocolate Chip Protein Cookies

protein pb choco cookies

These cookies look ready for a picnic, don’t they?! First impressions may give the appearance of being just a regular cookie, tempting you to abandon your diet or require an additional 20 minutes on the treadmill. Not so! Look closely and you will see they are full of protein, and only have sugar if you choose for them to. We love our sugar free chocolate bars all chopped up and performing the role of topping. Our cookie treats have evolved from the wheaty, to the sugary but not wheaty, to this finale of non-wheaty and non-sugary. We are pretty impressed with ourselves, especially Big D who has become quite the consummate baker! I even changed the name per his request to put the protein after the peanut butter and chocolate chip – I am so proud! Enjoy these cookies on a Sunday picnic, or a Tuesday night – what a treat!

Peanut Butter Chocolate Chip Protein Cookies

1 cup natural peanut butter
1 1/2 Tbsp apple cider vinegar
1 Tbsp butter
3 eggs
1 cup almond flour
2 Tbsp whey or hemp protein powder
1 1/2 tsp baking soda
3 Tbsp Stevita
ÂĽ tsp sea salt
1 cup chocolate chips (or sugar free chocolate bar, chopped)

Preheat oven to 350 degrees. Combine peanut butter, butter, eggs and vinegar in medium bowl. In a separate bowl combine remaining dry ingredients except chips. Add dry mix to wet ingredients and stir until well blended. The dough will be stiff. Cover two baking sheets with parchment paper – paper is optional if sheets are nonstick. For each cookie take 1 – 2 tablespoons in hand and shape a cookie, about  ÂĽ inch thick and place on cookie sheet. Leave approximately ½ inch between cookies. Gently press three to four chocolate chips into the top of each cookie. Bake for 20-22 minutes, until cookies begin to brown. Remove from oven and cool completely before removing cookies from parchment paper.

Nutty Chocolate Protein Bars

nutty chocolate protein bars

For months Little B took ballet lessons on Saturdays. They are now over, including the flashy, chaotic shows. It was quite an ‘experience’, but is now over. I will reserve my opinion about the experience, but suspect she has more enthusiasm for other activities. I personally am looking forward to getting back to more weekend hikes.  We have standard food we take on hikes and overnight trips – nuts, peanut butter, jerky, cheese, boiled eggs. They are convenient, energy-building and filling, but with all the summer hiking in our future I wanted to add some variety. The idea for these bars sprung from here. The chewiness and nuttiness reminds me of a candy bar you find at the store – rhymes with tickers. After sufficient bar chilling occured Little B tentatively took a small first bite, then proceeded to eat an entire bar and asked for some in her lunch the next day. Score! This is significant, because in her worldly 4 3/4 year old brain anything mommy suggests is immediately suspect. These bars are a tiny bit sticky at room temperature, but what protein bars aren’t? They hold together well when wrapped in foil or plastic wrap, so score again! It is easy to add them to the hiking food mix, and quite a treat when taking a break looking over water and mountains and whales. Yep. The whales are pretty spectacular. And so is everything else. I am going to experiment with less sticky bars, but these easy-to-make snacks are great for dealing with hunger when you want to spend your time focusing on life and love and nature. Even ballet.

Nutty Chocolate Protein Bars

1 ounce bittersweet chocolate
2 tablespoons butter
2 tablespoons heavy cream
2 tablespoons Da Vinci sugar free syrup, any flavor
1 Tbsp Nutiva Stevita
1 cup whey protein powder, vanilla flavor
1 tsp ground cinnamon
1 1/2 cup mixed raw nuts, finely chopped
1/2 cup unsweetened coconut

Line an 8×8″ baking pan with nonstick foil. In a medium microwaveable bowl, melt the chocolate and butter on half power about 1 minute or until melting and softened. Stir until smooth and blended. Add in the cream, syrup, sweetener and protein powder.The mixture will be stiff and sticky when well blended. Stir in the nuts and coconut – you may need to use your hands to get it all mixed in, but then they would already be ready for putting it in the pan. Firmly press the mixture into the bottom of the foil lined pan using the back of a spoon that is lightly coated with oil or butter, or just use your hands. Chill at least two hours or until firm. Cut into eight large bars or 16 snack squares. Store in refrigerator or freeze.

Cookie Cut Ups

cookie cut upsThis is the tale of the cookies that kept cutting up. I found the delicious recipe from Ginny at Ginny’s Low Carb Kitchen. I mostly followed it, but made a tweak or two because of timing – there was nooooo way I was going out in the snow storm to buy xanthan gum, and Little B was gonna die if she could not make cookies soon! I don’t know how different they turned out without it, but we had success! Eventually. Little B and I mixed up the dough, rolled it out and ugh. A bit too soft for manipulating. I suggested to Little B that we form the cookies into shapes with our hands, but she insisted on using the cookie cutters. The cookie cutter use was a disaster. We piled up the dough and stuck it in the refrigerator for an hour. We rolled it out – again – with slightly more success, but still smooshing of the shapes by the spatula, even with a bit of help from arrowroot powder. Ack! Little B still insisted on cookie cutter use, so we again chilled the dough, for about six hours this time, occupying ourselves with movies and art projects and carols. When it was finally time to try again it worked! The cookie cutters did their duty, as long as we made sure to ‘shimmy’ them before pulling them off, separating the shape from the extra dough around it. I then carefully tilted the parchment paper and the shapes, one by one, fell onto my hand. They were delicate, but cooked up nicely and were very buttery and nutty; a wonderful accompaniment to hot chocolate. I will be more adventurous next time figuring out icing, but for now, we were able to experience cut out cookies on a snowy Alaska day, even though they resisted. Kudos to Little B for holding out for use of cookie cutters, and being flexible enough to hand shape those pesky candy canes! Three were set aside especially for Santa. Fingers crossed to have them survive that long!

Cookie Cut Ups

1/2  cup  Stevia in the Raw
1/2  cup  butter
1  large  egg
1  teaspoon  baking powder
1  teaspoon  vanilla
1/2  teaspoon  salt
2 cups  almond flour
In a food processor blend together Stevia, butter, egg and vanilla. In a medium bowl combine the baking powder, salt and flour. Add the butter mixture to the flour mixture and combine into a stiff dough. Refrigerate for 2 – 6 hours. Sprinkle a square piece of parchment paper with arrowroot powder, and have another piece of parchment of the same size nearby. Also prepare a large baking sheet covered with parchment paper and preheat the oven to 350 degrees. Remove dough from refrigerator and work quickly with it. Place dough between parchment paper and roll it out 1/8 to 1/4 inch thick. Carefully peel off top layer of paper and use cookie cutters to make cookies. Two methods can be used to transfer cookies to the baking sheets. Either tilt the paper, letting the cookie fall into your hand, transferring the cookie to the baking sheet, or sprinkle a thin spatula with arrowroot powder and use it to slide under the cookies and remove them from the parchment paper. Bake for 10 – 15 minutes, until the edges start to turn a golden brown. Let cookies cool completely before removing them from the baking sheet. Frost as desired and store in airtight container.
 

Smoked Salmon Spread Crudite

sss crudite celery smallsss crudite tomato smallsss crudite cheese small

With the holiday season upon us, I find there are three versions of being a guest. The first is the kind where you just show up with a host(ess) gift and enjoy the evening, offering to help, but getting the expected, “oh no, I got it, you just relax”. Sometimes I just relax, and other times I relax by helping. The second is when you are expected to arrive with a side dish or appetizer. There is always the wondering about who can and cannot eat the ingredients you use, much less whether or not it will come out right. You cannot even taste the results of say, a pie, because the pretty presentation would be ruined! Yes, you might have made two, but what if you didn’t? How dare you even think of cutting into the puffy, browned top of sweet potato casserole or lattice topped cherry pie! I have been pretty lucky in the past, but I have also been known to accidentally mix up salt and sugar – yowza! The third version is the grand American tradition of potluck. If it is laid back and you can bring anything, go crazy! Make what you want, cut it into portions and taste a bit to make sure it is perfect; bring it hot, bring it cold, whatever! I like all three versions because they all involve two things I love – cooking and enjoying the company of people I care about. This year has been busy with our family being in limbo, then moving, then having complications with moving, then a new job. Through it all we had a wonderful little girl who hung in there with us through all the changes. For all these reasons we are keeping our holidays simple this year, focusing on enjoying the company of our little family and of our new friends. We are planning cooking marathons, as usual, for the holidays, but they will be a little smaller, including simple appetizers. This simple recipe for cruditĂ© can be adjusted to accommodate all types of diets and give variety to a meal, either before or during – even make them a meal on their own. They can fit any version of being a guest, or as a host(ess). Change up the vegetables and cheeses – pretty much anything you can cut in half and fill or top (carrots, cucumbers, olives, pickles). Of course, crisped bread or crackers would work too! I hope you enjoy the holidays and spend more time with your loved ones than you do in the stores, because when it is all said and done, the people are what give you purpose.

Smoked Salmon Spread Crudité

1 cup cream cheese, room temperature
½ cup sour cream
4 ounces smoked salmon, roughly chopped
1 garlic clove, crushed
1 tsp fresh dill, chopped (and a bit more for optional garnish)
2 celery stalks
5 large cherry tomatoes
5 – 10 slices sharp white cheddar cheese

Whisk together cream cheese and sour cream. Add salmon and garlic, folding it into the cheese mixture until well combined. Chill for about an hour. While it chills prepare the serving bases. Clean celery stalks, peel off tough strings and cut into 1 – 2 inch sticks. Clean tomatoes and slice in half lengthwise, scoop out the seeds and meat and pat dry. Slice cheese into 1 – 2 inch squares, making them thick enough to pick up and take a few bites out of, but thin enough not to over cheese the bites – a bit thicker than sandwich slices. Spread the spread (heh) on all the bases, taking time to form it to compliment the shape of the base – round like a tomato, within the crevice of the celery, and a bit random to soften the edges of the cheese slices. Top with dill if you please. Serve immediately or chill until time to serve/leave for the party.

Topped Oatmeal Cookies

oatmeal cookies no wheat

We made these for Santa last year, topped with blueberries. We decided our house was the only one in the whole wide world where he would get blueberry oatmeal cookies. In the morning the cookies and milk were all gone! He must have liked them. I forgot to take pictures then, but recently made a batch with Little B and she wanted to top them with sugar free chocolate chips instead of blueberries. Wheat free and sugar free, these went with Little B to her last day with her daycare group in Maryland before we moved. The group gets so excited just being around each without any stimulation, why the heck would I put wheat or sugar in the treats?! They were soft and chewy and seemed to be a hit. We may make them for Santa again this year, and try again to make them memorable. Involving Little B in deciding the topping and standing back so she can stir stir stir makes for a great opportunity to practice measuring, mixing and creativity. Go crazy with the toppings – she was so proud to share her creations. I got the original idea here, but tweaked to my liking. Thanks Alton!

Toasted Oatmeal Cookies (no wheat)

4 cups old fashioned rolled oats
1 tsp baking powder
½ tsp baking soda
1 tsp cinnamon
½ tsp sea salt
1 tsp unsweetened cocoa powder
1 cup butter, room temperature
1 cup granulated stevia in the raw
3 large eggs
2 tsp vanilla extract
1 cup optional toppers (raisins, blueberries, sugar free chocolate chips, etc)

Heat the oven to 375 degrees F. Spread oats in a single layer on half-sheet pans and bake until lightly toasted, about 20 minutes. Watch carefully to avoid burning. Remove the oats from the oven and let cool for 2 to 3 minutes. Grind half the toasted oats in a food processor until they are the consistency of whole wheat flour. Add the baking powder, baking soda, cinnamon, cocoa, stevia and salt, then pulse to combine. Combine the butter, egg and vanilla in a mixer and mix on medium speed for about a minute. Slowly add the oat mixture and the remaining oats until just combined. Let batter sit and thicken if it is soupy and will not hold shape if scooped. Using a teaspoon, scoop batter and drop onto baking sheets lined with parchment paper. If adding a topping gently push into the middle of each cookie. Bake the cookies for about 12 minutes until they begin to brown around the edges. Remove the pans from the oven and let the cookies cool on the pans for 2 minutes. Transfer the cookies to a cooling rack until cooled completely – they should remain soft and chewy. Store in airtight container.


Post Navigation