Any Kitchen Will Do

Give me a kitchen and I will cook.

Author Archive

Tilapia Tacos

One of my favorite past times is kayaking. Big D and I have sit-on-top kayaks we use in warmer climates, while our sit-inside kayaks and spray skirts are reserved for colder places. Besides allowing us to paddle to shallow nooks and crannies boats often cannot go, the kayaks keep me on top of the water. I never really like that vulnerable feeling when I have my feet dangling down where they cannot touch the bottom, wondering if my wiggling toes are calling large sea mammals to come feast. It is irrational and I do not get to the point where I freeze with fear, but my imagination sure runs wild. Yes, I may be able to blame images from Jaws or Deep Blue Sea for giving me trepidations, and (mom, don’t read this) I have in fact landed in the ocean with feet dangling over the abyss, hanging on the edge of my kayak while waves roll me around. Good thing I can swim and can heave ho myself back into my kayak. I can stand here today and say with confidence that I have not yet been eaten by any sea creatures, though I am pretty sure a few have come close and considered a snack. All of this kayak talk is leading me to my solution for using up some beautifully ripe tomatoes and avocados.

I appreciate the taste of fresh fish on fresh corn tortillas, topped with things like the previously mentioned beautifully ripe tomatoes and avocados. Such concoctions are called fish tacos in my world. When I am done kayaking for the day, and famished, I am rarely interested in cooking. I want food. Immediately. Made by someone else. Since it is a must to be near water when kayaking, it is pretty much guaranteed there is someone cooking up seafood at nearby restaurants. I will trudge over to the nearest joint, regardless of my sandy and salty and bedraggled state, drink a ton of water and chow down. When I am not eating shrimp or oysters at said restaurants I like fish tacos – a mix of fresh vegetables and fresh fish all swaddled in corn tortillas. After watching fish swim by and under me all day I can’t help but think about eating them. I have discovered in my travels the preparation of fish tacos varies in the U.S. from coast to coast to coast (yes, there are at least three in the contiguous U.S.). Here is the way I like them.

Tilapia Tacos

2 tilapia fillets
3-4 Tbsp olive oil
1 lime, juiced with meat included
1 tsp chili powder
½ tsp salt
¼ head green or red cabbage
1 Tbsp red wine vinegar
3 Tbsp sour cream
1 tsp Crystal® hot sauce
1 tsp cumin
Salt and pepper to taste
1 large ripe tomato, chopped
1 avocado, diced
¼ cup cilantro leaves
6 corn tortillas

Combine 2 tablespoons olive oil, lime juice, chili powder and salt in a bag that can be sealed. Add fillets and toss gently until the fish is covered by the marinade. Push air out of the bag and seal, marinating for at least an hour, flipping it over about half way through. For the coleslaw chop the cabbage thinly and then across, making short, bite-size pieces. Combine vinegar, sour cream, hot sauce, salt, pepper and cumin. Toss with cabbage. Refrigerate until tacos are served. Preheat oven to 300F. Brush the remaining olive oil on both sides of the corn tortillas, placing them on a large cookie sheet. While cooking the fish pop the tortillas in the oven. They should be ready about the same time as the fish – they just need to be heated up, not browned or crisped. Heat a pan on the stove top to medium high. Cut each fillet into three or four pieces, depending on the size of the fillets. Add the fish to the dry heated pan and cook about three minutes on each side, until cooked through. There should be enough oil on the fish to cook them without adding more oil, but if not, you may need to add a splash more while cooking. Remember: dry fish is gross fish! Before serving break up the fish into even smaller pieces, allowing them to better mix with the other ingredients when added to the tacos. Fill tortillas with fish, coleslaw, tomato, avocado and cilantro. Eat up! I tend to put the slaw on top so the dressing can drip down onto the rest of the taco contents. After a few bites sprinkle on some hot sauce if the tacos are not spicy enough.
Blueberry Muffins Gluten Free!

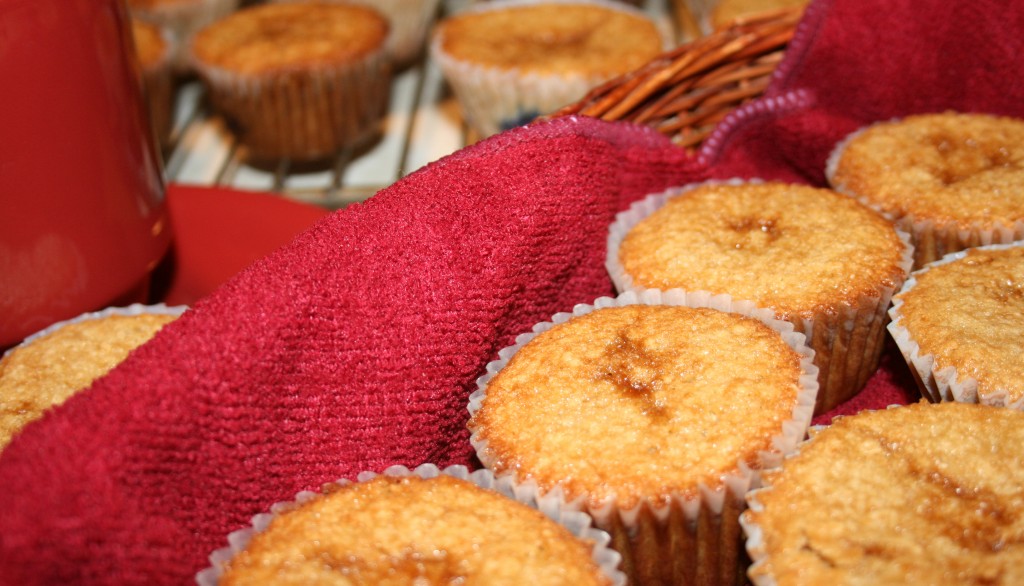
The other day I asked Big D what he wanted me to cook, or if he actually wanted to use the kitchen himself. I never mind getting out of the way to watch him do his thing. I kind of took over the kitchen since starting this blog and had not really ask how my invasion was fitting in with what he wanted to do food-wise. I know him well enough to be confident in his ability to – readily and eloquently – speak up if he feels like doing so. He is a darned good cook himself, but was busy with work recently and had not done much in the kitchen. He was certainly eating my offerings, so I made assumptions based on his words of praise and looks of contentment, along with empty plates and bowls. Fortunately I was correct. He said he was very much enjoying the food and was happy to see me enjoying myself. He did say he was interested in something spicy with curry. Oh, and some blueberry muffins. I concluded he did not want to eat them together, so I am starting with the muffins while developing future plans for the curry and spicy. In seeking guidance for making said muffins (since wheat free is a must), I of course turned to other food bloggers for ideas, since I am very new to wheat free baking. Although I made some tweaks to it, I found the discussion and recipe here very helpful.

One funny thing happened when the muffins first started baking. They sputtered! I started smelling a slight burning smell about eight minutes into the baking time. I flipped on the oven light but kept my eyes shut at first, hoping that what I saw when opening them was not some kind of rare chemical reaction with the flour and oatmeal. I HATE cleaning ovens! I slowly opened my eyes and was instantly relieved. I saw bubbles rising to the surface of the muffins and popping, leaving a layer of little spots of batter glurping onto the pans. The sputters were browning quickly and giving off the smell. No harm done to the muffins, though. The rest of the baking went smoothly and was sputter free…

Gluten Free Blueberry Muffins

¾ cup butter, room temperature
1 cup white sugar
2 large eggs
2 tsp lemon zest
1 tsp vanilla extract
1 cup brown rice flour
2 cups instant oatmeal, uncooked
1 ½ tsp baking soda
½ tsp salt
1 cup Greek yogurt
1 cup unsweetened applesauce
1 cup blueberries, frozen or fresh
2 Tbsp brown sugar

Fill muffin tins with liners*. Set aside. Preheat oven to 350F. Place oatmeal in a food processor and blend until it is a rough powder. Combine flour, oatmeal, baking soda and salt. Set aside. In a mixer bowl using a flat paddle cream together cane sugar and butter just until blended. Add eggs one at a time, making sure one is combined before adding the next. Add a third of the dry ingredients, then a third of the yogurt/applesauce. Continue alternating until all is incorporated. Fold in blueberries. Fill muffin tins about ¾ full. Sprinkle a bit of brown sugar on top of each muffin. Bake for 20-25 minutes, until tops are brown and beginning to harden. Makes 20-24 muffins.

*In my current kitchen I only have one muffin pan that makes 12 muffins. Since the recipe makes more than 12 muffins, I used my back up baking cups on a cookie sheet. They are aluminum muffin cups that have white paper liners inside them. You don’t need a pan for them, so they are great to have around for overflow. The result of the two different baking tools was doneness. The pan muffins cooked a little darker than those in the aluminum cups, but they all came out good and moist.

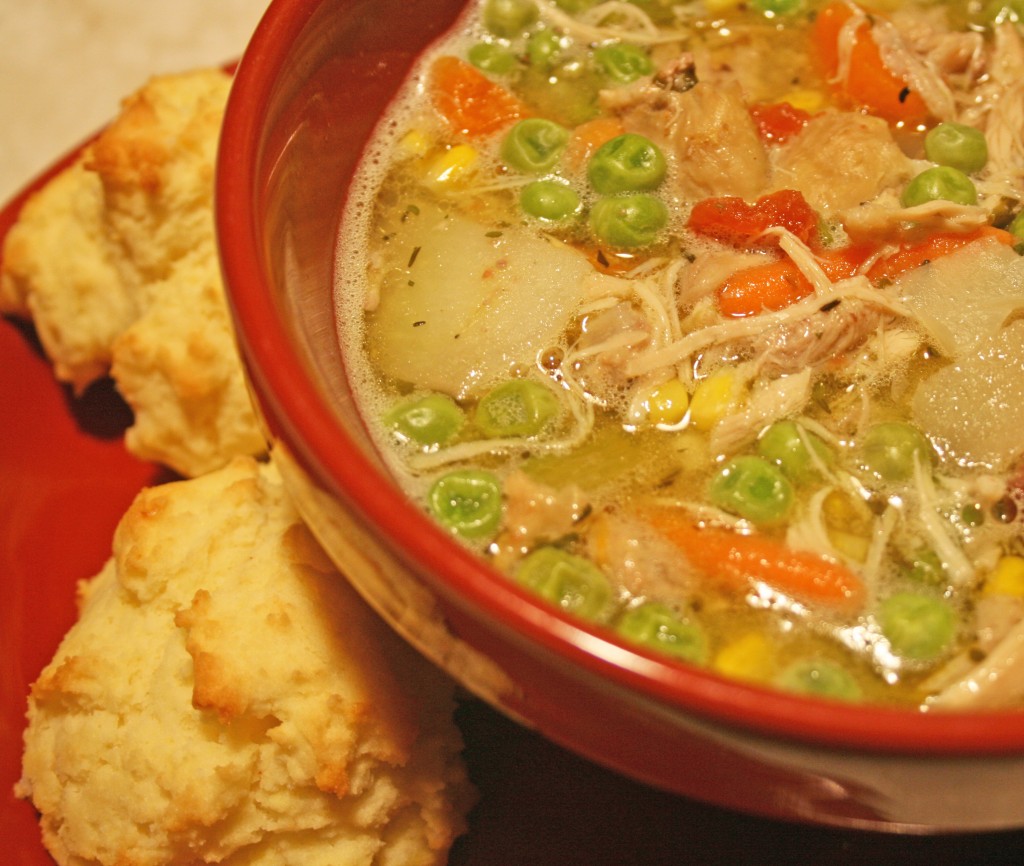
Two Day Chicken Vegetable Soup

When it comes to soup I prefer mine chunky. I also make creamy and pureed soup, but rely on them mostly for appetizers or snacks. Otherwise, I feel like I am having a meal of baby food, though much more flavorful (believe me, I made baby food for Little B – TMI warning: if it was not bland the results on the other end were disturbing). A main course soup needs to be chunky in my world. My chicken soup comes with yet another dimension – slow cooked chicken. I have tried to sear the chicken right before adding it to the soup, or steaming it just enough to avoid adding raw meat to the soup, but it just does not work for me. I like chicken in my soup that has the flavor of slow cooked meat. My chicken soup is a two day process, so don’t think you can just throw things in a crock pot one morning and return that evening with dinner ready. No no no. You can return two nights later for dinner. It is a double crock pot meal, and not because you might happen to own two crock pots. It is a consecutive process, not concurrent. I slow cook the meat one day, prep it, let it rest, then slow cook the soup the next day. It really does taste better. Really.

Two Day Chicken Vegetable Soup

Day 1
6 – 8 chicken thighs
5 cloves garlic
1 Tbsp cumin
1 can Rotel® tomatoes and green chiles*
Salt and pepper to taste

Season chicken thoroughly by sprinkling it with cumin, salt and pepper. Pour half the can of Rotel in a 5-quart crock pot. Arrange chicken on top of the Rotel®. Chop garlic and sprinkle on top of chicken, then add the rest of the Rotel®. Cover and cook on high for first two hours, then lower temperature and cook for four more hours. If you are gone for the day it can be cooked on low for eight hours with similar results. When cooled debone and remove skin from the thighs. Shred meat into bite-size pieces. Retain liquid, including any pieces remaining of the tomatoes and chiles. Store meat and liquid separately overnight in the refrigerator.

*If no Rotel® is available it can be substituted with a 14.5 ounce can diced tomatoes and a small 4.5 ounce can of green chiles.

Day 2
Chicken meat and liquid from Day 1
5-6 cups water
20 mini carrots, quartered
2 potatoes peeled, halved and sliced thin
2 cups peas
2 cups corn
1 bunch celery hearts with leaves, chopped
2 cups mixed cauliflower and broccoli, chopped
1 small onion, chopped
1 Tbsp dried thyme
1 Tbsp dried parsley
1 tsp ground sage
Salt to taste

Remove chicken meat and liquid from fridge. Skim fat off top of liquid and discard. Pour liquid (which will include some flavorful gelatinous/fatty substance) in the bottom of the crock pot. Add vegetables and herbs, topping with chicken meat. Stir together all ingredients. Add water until meat and vegetables are just covered with liquid and stir again. Cover and cook six hours on high. Turn off heat and taste, adding salt and pepper if desired. Let soup sit for about an hour before serving. Serve with fresh bread or biscuits.

hummus

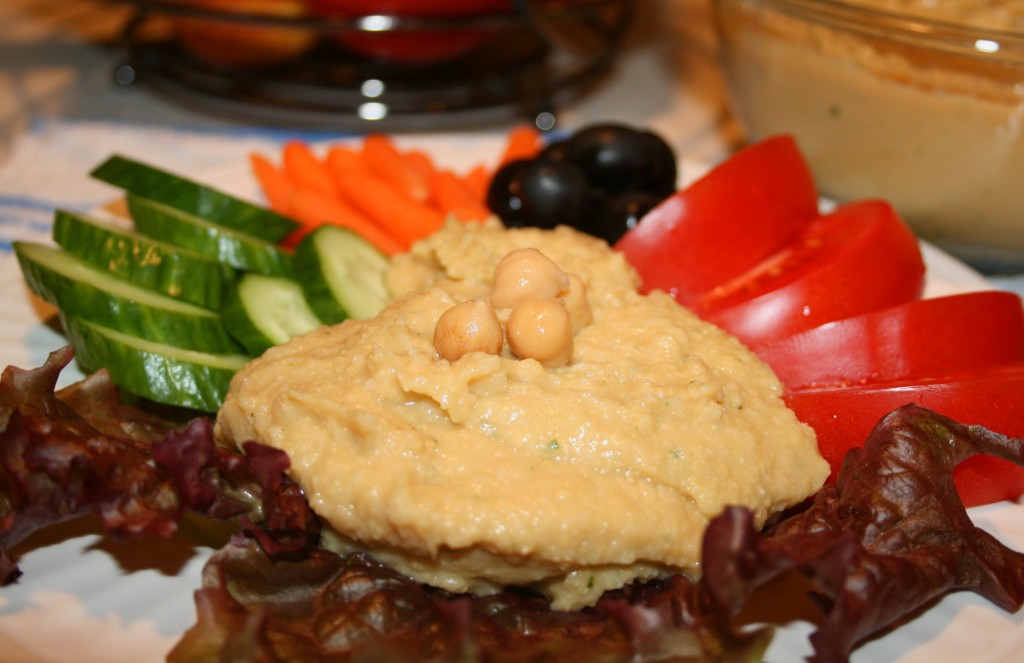
If there ever was a food that doubled as good for me AND a comfort food, it would be hummus. My favorite dipping implement – beyond the most perfect of breads, freshly made naan – would be cucumber. Especially the English cucumbers, which seem to hang on to their smaller seeds so much better than their seedier American cousins. My sister in law makes flavorful batches of hummus, sprinkled with freckles of olives, red peppers and tons of garlic. I adore the versions she makes, but I lean towards making a more conservative, basic hummus….well, except for the cilantro. After a day or so the lemon juice really latches on to the chickpeas and yum! I use hummus to substitute for all kinds of spreads and abominations, such as mayonnaise, ketchup, and secret sauces. Just try it – a ham and cheese sandwich with a layer of hummus on the bread. You will never go back to mayo and mustard. Well, you might, but when you do you will remember the hummus.

Hummus

2 16-ounce cans chickpeas

1/4 cup lime juice

3 cloves garlic, crushed

3 Tbsp tahini

1 tsp salt

¼ cup fresh cilantro leaves

1 Tbsp olive oil

Drain chickpeas but retain the liquid. Set aside about a dozen chickpeas for use later as garnish. Place chickpeas and all other ingredients except olive oil into a food processor. Start the processor and slowly add liquid from the chickpeas to the mixture – you should add just enough at the beginning to help move the ingredients around for blending. When the ingredients are smooth add more liquid until the desired texture is achieved; typically something like peanut butter, but some like it thinner. It usually does not take more than ½ the reserved liquid. Serve chilled or at room temperature – prior to serving sprinkle with the reserved whole chickpeas and drizzle the olive oil on top. Compliment the hummus with pita chips, olives, tomatoes and cucumber. Definitely scoop it up with fresh naan if you have a source for it.

pan pork chops

It is really easy to make dry pork. The first pork loin I ever made was a disaster. I loved the flavors on it – a Jamaican jerk combination of cinnamon, thyme, allspice and nutmeg – the flavor was great, but the meat was almost sandy it was so dry. I wanted to make sure it was thoroughly cooked. I did a really good job at that part. Ugh. I have since improved my technique to cook moist pork and will share the jerk recipe with you soon. Today I am doing a simple one-pan pork chop recipe that always comes out moist and delicious.

Pan Pork Chops

4-5 thin pork chops, with or without bone
1 yellow onion, roughly chopped
3 Tbsp olive oil
1 Tbsp lime juice
Salt and pepper (or seasoning salt) to taste

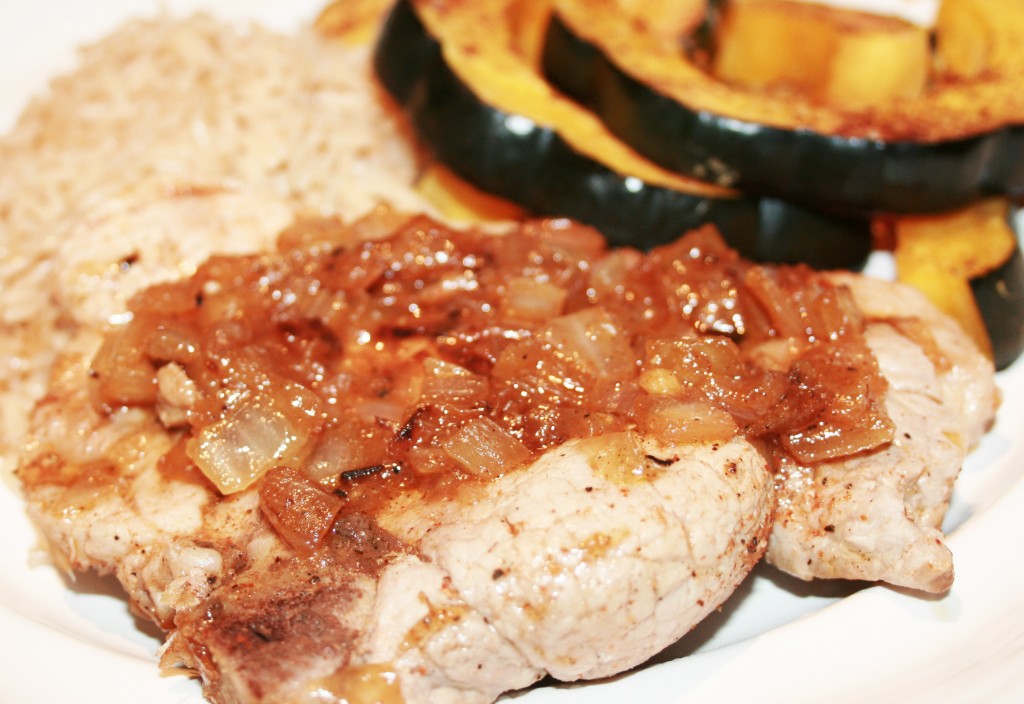
Heat large skillet over medium high flame. Add 1 Tbsp oil. When oil is hot add onions and cook until they begin to brown. Salt and pepper lightly. Make two short cuts on each pork chop – they should run about 1/2 inch from the outer edge towards the center, and be 2-3 inches apart. This will help keep the chops flat in the pan instead of curling up. Season pork chops with salt and pepper. Move onions to the edges and walls of the pan. Add remaining oil to the pan. When it is hot add the chops. Cook on each side about five minutes until browned. Add lime juice by drizzling it over the chops and onions. You may need to move the chops out of the way and stir up the onions to keep them from getting too dark. Cover the pan, turn down the heat and cook slowly to desired doneness, about five more minutes. Remove pork chops to serving plate and increase heat under pan. Cook onions and liquid in pan until liquid is reduced by half, about two minutes. Top pork chops with onions and sauce. Serve immediately, ideally with some parboiled rice cooked with broth and some roasted acorn squash.

Roasted Acorn Squash

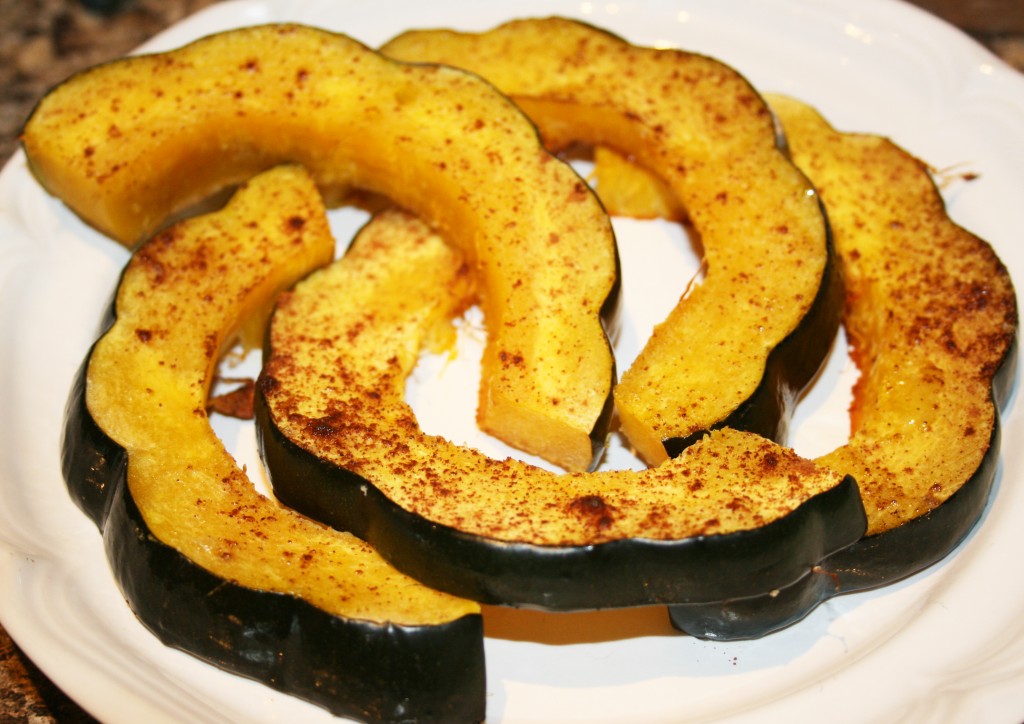
I know it is not peak season for acorn squash, but I wanted to add some variety to our dinner vegetables. I often just cut the squash in half and bake with some butter and brown sugar in the middle, but I am trying to cut down on added sugar while increasing nutrients. This roasted version has three advantages: 1) it makes the squash almost finger food, which gets more inside of Little B, 2) the skin is soft enough to eat along with the flesh, and adds more nutritional value to the dish, and 3) it adds a bit of sweetness naturally to an otherwise savory meal. I made this batch of squash at what used to be a house at a lake near where we currently live. The old house has since been replaced and is now owned by other family members. Although Big D’s grandparents have both passed, some of their well used equipment continues to be used on a regular basis where the family lake house once stood. I used some wonderfully blackened cookie sheets that are older than me – they belonged to Big D’s grandmother. They did a beautiful job of evenly cooking the squash. I know Grandma Seals enjoyed watching me use them.

Roasted Acorn Squash

2 acorn squash
3 Tbsp olive oil
1 tsp cinnamon
1 tsp salt

Preheat oven to 400F. Cut squash in half lengthwise, remove stringy membrane and seeds, then horizontally make slices about 1/2 inch wide to create “C” shaped pieces. Grease a large cookie sheet with 1 Tbsp of the olive oil. Place squash pieces on sheet in one layer. Sprinkle remaining oil on slices. The best way to evenly distribute the oil is to get messy – pour it on your hands and wipe the top of each piece with your oiled fingers. Sprinkle slices with cinnamon and salt. Bake in oven for about 25 minutes, until squash is tender (a fork slides easily into the thicker pieces) and just starting to turn golden brown. Do not be deceived – it may not look done, but it really will be. Serve immediately.

Vegetable Curry Bake

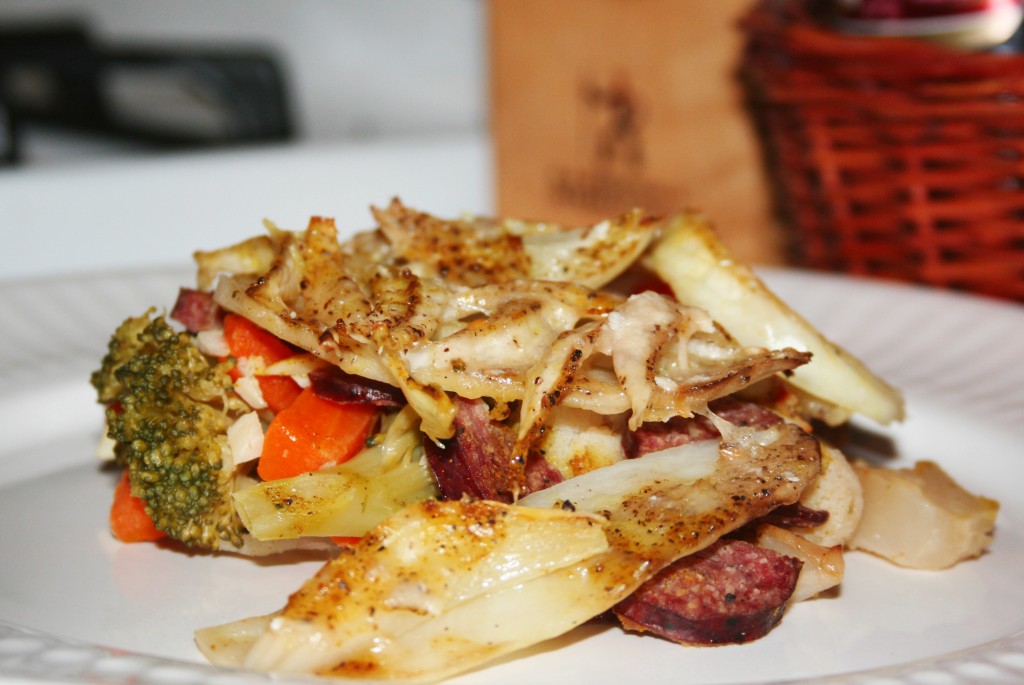
I originally planned to make a chicken curry soup in the crock pot yesterday. Unfortunately it rained. When it rains Little B and I usually go outside and splash around in puddles and follow the path the water takes from the ditches to the creek. Don’t worry grandmothers. We don’t go cavorting when there is lightning or thunder, and we watch the flowing water from above. Our rainy adventure took much longer than originally planned, so there was not enough time before dinner to cook the soup slowly the way I like it. I will do it another day. There was time to layer up a casserole and get it baked, and my hankering for curry was humming away, so I checked out the fridge and pantry. I am working on improving my ratio of vegetables to meat, in that I want to eat mostly vegetables and a moderate amount of meat. I love meat, but it is loaded with calories. I don’t ever expect to completely remove meat from my diet, but eating less of it could not hurt. The following is an attempt at improving the veggie/meat ratio without leaving me hungry an hour later.

Vegetable Curry Bake

3 medium potatoes, sliced thin
1 1/2 cups broccoli, roughly chopped
1 1/2 cups cauliflower, roughly chopped
1 cup baby carrots, roughly chopped
4 cloves garlic, roughly chopped
2 – 3 8” smoked sausage links, sliced lengthwise and then into bite-size pieces
1 large yellow onion, sliced to a medium julienne
3 Tbsp extra virgin olive oil
1 Tbsp curry powder
1/2 cup broth (beef, chicken or vegetable)
3/4 cup Parmesan cheese, grated
Salt and Pepper to taste

Preheat oven to 325F. Grease a 9”x13” baking dish. Use half the potato slices to make a layer on the bottom of the dish, completely covering it by overlapping the slices. Lightly salt and pepper the potatoes. Add a mixed layer of the cauliflower, broccoli and baby carrots, topping with the chopped garlic. Sprinkle half the curry powder over the vegetables. Sprinkle the sausage slices on top of the vegetables. Add another layer of potato with the remaining slices. Finish with a layer of onions. Pour the broth over the onions, making sure it gets evenly distributed. Drizzle the olive oil over the top, along with some salt, pepper and the rest of the curry powder. Cook covered for one hour. Uncover and sprinkle with cheese. Cook an additional 30 minutes until brown on top. Let rest for about 10 minutes before serving.

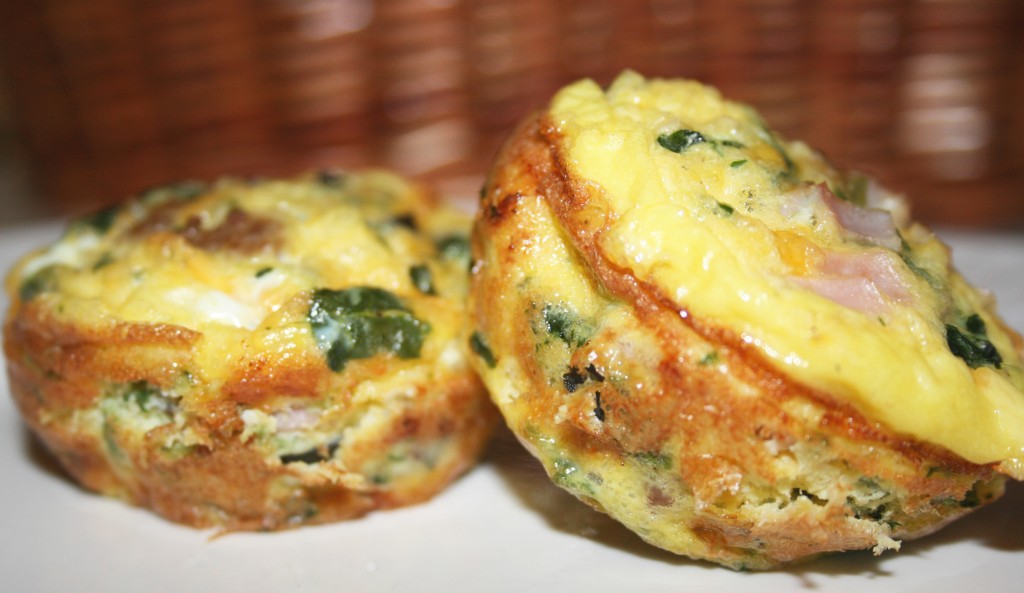
Eggy Breakfast Muffins

Eggs are quite quick and easy to cook. I love eating them in all ways and forms of preparation. My favorite of all time is Eggs Florentine with classically poached eggs, barely wilted spinach and crisp home fries on the side. When I was growing up our family Sunday brunch usually fell near one of two extremes. The first was a champagne brunch at the club, where I was summarily denied anything more than a sip of champagne or a soaked strawberry until I was ‘of age’. The second was a feast at home after we returned from church and changed into our play clothes. My mom and dad often split the cooking. Me and my brother set the table and stayed out of the way. The kitchen was square and they did a little dance moving between the sink, stove and fridge. While mom made fruit cups dad would whip up waffle batter and crank out a pile of them a foot high. The waffle iron made huge waffles with little divots. I much prefer them to the big divoted belgian waffle irons. Other times he made SOS (mildly put, creamed beef on toast) or mom made drop biscuits while dad cooked up the most perfect fried eggs. He would gently fry them in oil. He never flipped them, but splashed oil from the pan over the top to cook the upper half. We also often set the table with boiled egg cups – the eggs were boiled just enough to cook the whites and leave most of the yolk runny. The pointy end went in the cup and we snipped the top off, using little spoons that just fit into the egg to scoop out buttery bites.

Growing up Catholic we observed the tradition of fasting before Mass. Even though we went to the first service at 8:30, it still meant the earliest we would eat at home was about 10:00. I was always famished by then, since the rest of the week my stomach received breakfast by 7:30. When my stomach is grumbling first thing in the morning it is almost torture waiting for the yummy bits to cook that accompany eggs – the bacon or potatoes to crisp, the sausage patties to sear, the making of Hollandaise sauce or the baking of biscuits. One solution to my desire for instant gratification is to resort to carbohydrate loaded, oily fast food breakfast sandwiches. Another is to buy those frozen things that heat up fast, but are rubbery on the outside and cold on the inside. My third and favorite solution is baking little quiche-like ‘muffins’ – they can be eaten immediately, or pulled from the fridge or freezer and microwaved while retaining their moist and savory goodness. The content of each batch of muffins I make varies and is directly impacted by the content of my kitchen. They always have eggs and cheese, but the meat and veggies change constantly – leftover roast chicken and broccoli are popular additions, as are grilled pork chops and potatoes. Muffins with salmon, dill and asparagus are wonderful. On top of everything else, Little B adores cracking eggs, whisking them into oblivion and stirring them up with the filling. I rarely deny her an egg experience.

Eggy Breakfast Muffins

9 eggs
6 ounces frozen spinach
1 cup cheese, grated
4 ounces ham or cooked sausage, small dice
1/4 cup black olives, chopped
Salt and pepper to taste
2 tsp dried parsley
1/2 tsp garlic powder
1/4 tsp onion powder

Heat oven to 375F. Grease a 12-hole muffin pan. In the microwave cook the spinach for about two minutes in a covered dish. When it cools squeeze as much liquid out of the spinach a possible. Chop finely. In a medium sized bowl add the cheese, meats, spinach and olives. Stir together. Crack all eggs into a separate bowl. Add salt, pepper, garlic, onion powder and parsley. Whisk the eggs until whites and yolks are well blended. Pour egg mixture over the cheese, meats and vegetables. Stir everything together until all is coated with egg. Spoon mixture into muffin pan until it is evenly distributed – they holes should be 2/3 to 3/4 full, depending on pan size. Bake in preheated oven for 15-20 minutes until they start to brown on top. Remove from oven and let muffins cool in pan for about five minutes. Run a knife around the edge of each round to separate them from the pan, then gently lift them out onto a serving dish. Serve immediately. They also do well heated up in the microwave after being refrigerated or frozen.

Big D’s Gluten Free King Cake

Do you know how fun it is to eat a huge cinnamon pecan King Cake? How about doing it in front of someone who cannot eat it? Someone who would get sick if he did, but who also adores cinnamon rolls? No fun at all. After making a traditional King Cake the other day I decided to make one Big D could eat without worrying about wheat. Here is what I came up with and I must say, it came out gangbusters good! It is smaller and flatter than the humongous one I made with wheat, but it was plenty for him to be a complete part of the celebration. We had people over this morning for coffee and cake – they preferred this wheat free version to the wheat version. I bet I will be making it again. Let the good times keep rolling!

Big D’s Gluten Free King Cake

Pastry:
1 cup warm water (about 110F)
2 ¼ tsp (1 pkg) active dry yeast
1 ½ cups Bob’s Red Mill Gluten Free All Purpose Baking Flour
1 ½ cups brown rice flour
1 tsp xanthan gum
2 Tbsp white sugar
2 tsp salt
½ tsp vinegar
2 eggs, room temperature
Filling:
½ cup brown sugar
¼ cup white sugar
1 Tbsp brown rice flour
½ cup pecans, finely chopped
1 Tbsp cinnamon
¼ cup butter, melted
Icing:
1 cup confectioner’s sugar
2 Tbsp milk
¼ tsp vanilla
¼ tsp lemon juice
1 Tbsp purple decorating sugar
1 Tbsp green decorating sugar
1 Tbsp yellow decorating sugar

Grease a large cookie sheet with butter. Set aside. Place on the counter a piece of wax or parchment paper. Spray it with oil or cooking spray. In a bowl combine all the dry Filling ingredients together. Add melted butter and stir until crumbles form. Set aside.

Preheat oven to 350F. To make the pastry add yeast to warm water and wait until it proofs. In a stand mixer using a flat paddle, place eggs and vinegar and whip until blended. Add yeast/water mixture and continue mixing. Add baking mix, flour, gum, sugar and salt and stir on low speed until completely combined, scraping down sides as needed. Spread the dough out on the wax/parchment paper in the shape of a rectangle, roughly 22” x 10”. Make sure it is as thin and even as possible. Spread filling on the dough, leaving about 1” around the edges without filling. Using the paper as a a guide gently roll the dough into a tube. Transfer the tube by rolling it off the paper onto the cookie sheet and coax it into a ring, gently connecting the ends together. Place ring in oven and bake for about 45 minutes until browned on top.

While the bread is baking make the icing. Mix together confectioner’s sugar, vanilla, lemon juice and milk. Set aside. While the cake is still warm drizzle the icing along the highest point of the bread, encouraging it to drip down the sides. Before the icing hardens sprinkle colored sugar over the icing, alternating colors in the order of purple, green then gold. Allow the cake to cool and the icing to set. Transfer to a serving dish.

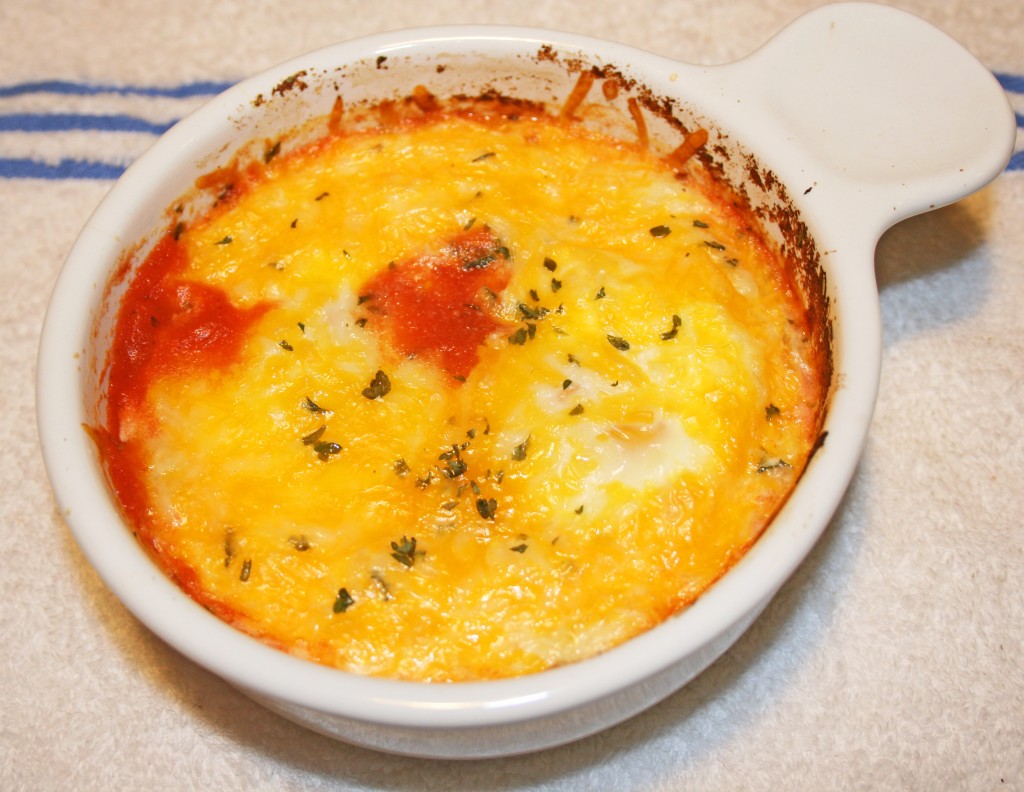
Egg Bake

When I was a single working girl I loved making these eggs for breakfast. They would warm me up on winter mornings when I was not feeling it for oatmeal. I would set it up and start it baking right when I woke up. By the time I was ready for work my breakfast was ready too! If I wasn’t running late I would sit and enjoy every bite before leaving home. If I was running late I would snap a top on it and take it with me, enjoying it at my desk while my slower-than-molasses computer booted up.

My married version of this dish is a little different – I triple the recipe, which works wonderfully, and bake it in a small casserole dish. Big D may or may not be interested – he is not a big breakfast eater – or even be awake to decide. It also may be a morning when Little B decides she does not want any other food touching her eggs. After I eat my share eventually – following the preparation of eggs ‘without all that red stuff on them’ – the leftovers will go in the fridge. Microwaving the eggs to reheat may make an explosive mess. It tastes okay cold, but is just not the same. I end up not making it much anymore.

When I made it today I was by myself in the house. I curled up on the couch and loved every bite. I was not hurrying to leave for work, but it still warmed me up on a cold day. It tasted as good as it always did.

Egg Bake

1 14.5-ounce can diced tomatoes
4 eggs
1/2 cup grated cheese
1 tsp dried oregano
1 tsp dried parsley
Pinch garlic powder
Pinch onion powder
Salt and pepper to taste

Preheat oven to 350F. Open the can of tomatoes, but don’t pour them out. Add oregano, parsley, garlic and onion powders, as well as salt and pepper. With a spoon mix up the spices with tomatoes in the can. Divide tomato mixture between two 12 ounce oven-proof ramekins. Break two eggs into each ramekin*. Top with cheese. Bake for 20-25 minutes until eggs are cooked to desired doneness.

*Since I was usually cooking for one I placed the second ramekin with tomatoes (before adding eggs and cheese) in the fridge. The next day I could quickly add the eggs and cheese and continue preparation.

Post Navigation