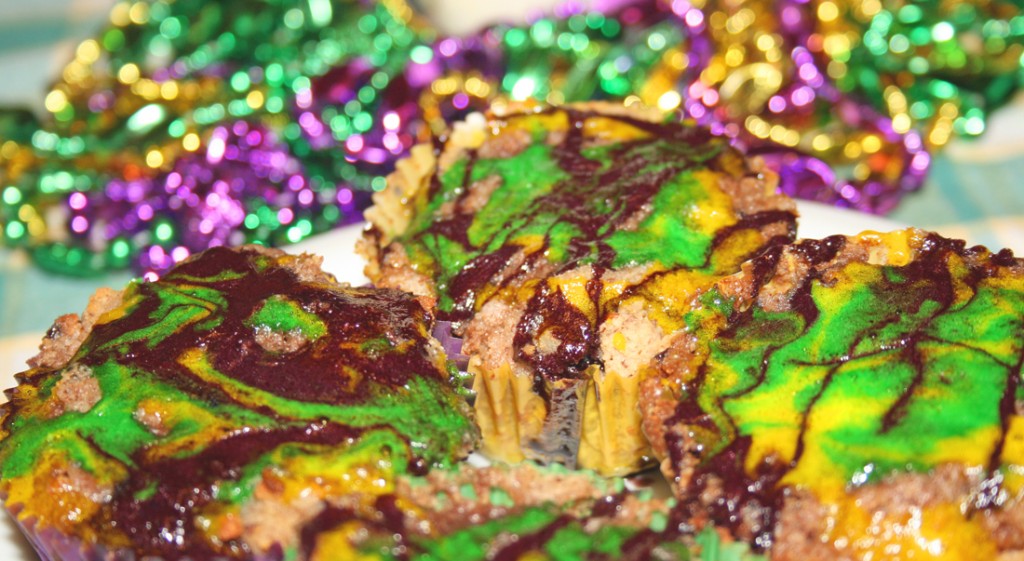
Any Kitchen Will Do

Give me a kitchen and I will cook.

Archive for the category “seasonal”

Unholy King Cake

unholy king cake_edited-1

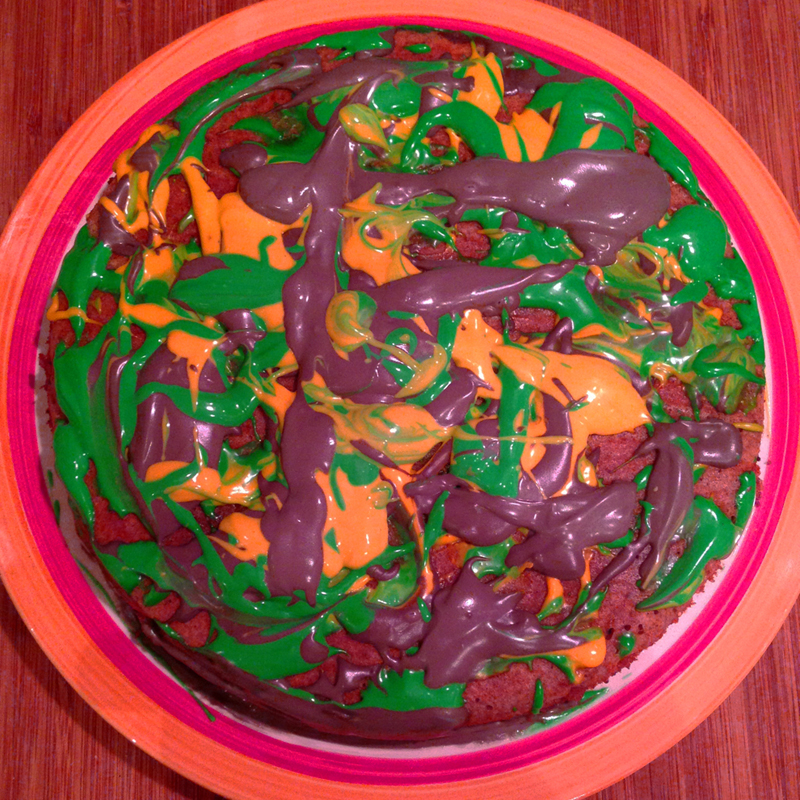
For the past few years, since moving away from N’Awlins, we’ve made our own King Cakes as part of our Mardi Gras and Fat Tuesday celebration. We party on Fat Tuesday wherever we are, regardless of the location. This year I was hard pressed to find acceptable decorations in our Alaska town, having to resort to mail order for beads and masks and shiny purple/gold/green curtains for out doorways. Our little place looks cheery and ready for fun. Again this year I made a King Cake, and again it is a version different from previous years. I seem to experiment with a new recipe each year instead of just going with what I did the previous year. One reason for the annual variation is because I like trying new things, and another is because of our evolving diet – from sugar and wheat and carbs to less or none of all three. The first cake was traditional, made with wheat flour, another was gluten free version but with sugar and not much nutritional value. A third version was a concoction of low carb sugar free cinnamony cakelettes, with a very sticky icing. This year it is an unholy cake, absent the traditional hole in the middle, as well as absent of sugar and wheat. I guess I could have made it holy, but then where would all the frosting go?!  I guess if you want to cut a hole in the middle you could, but I am not as holy as I used to be, so don’t miss the ring-ness of this cake. It looks very different from a traditional rolled cake, but I think it definitely carries the spirit of the original, and we can eat it without worry of allergic reactions or sugar buzzes. It was fun to make and everybody helped splatter the frosting, although the first batch of purple turned too gray to use. Try, try again I say. Now I wonder who will find the baby this year? Laissez les bons temps rouler!

Cake
1 cup finely chopped coconut
1 cup almond meal
6 eggs
1 tsp ground nutmeg
1 Tbsp ground cinnamon
1 Tbsp Stevita
½ tsp sea salt
1 tsp baking powder
2 Tbsp heavy whipping cream
1 Tbsp lime juice
2 tsp vanilla extract

Topping
1 cup raw pecans
1 cup raw walnuts
2 Tbsp ground cinnamon
1 Tbsp Stevita
½ cup butter, melted
¼ tsp sea salt

Frosting
4 ounces cream cheese
3 ounces butter
1 Tbsp Stevita
Food coloring (green, yellow, purple – made with one part blue and three parts red)

Preheat oven to 350 degrees. In a food processor grind the coconut into very small pieces, about the same size as the almond meal. In a medium bowl combine coconut, almond meal, nutmeg, cinnamon, Stevita, salt and baking powder. Add eggs, whipping cream, vanilla and lime juice. When well combined, pour mixture into 9” round cake pan lined with parchment paper. In a food processor combine pecans, walnuts, cinnamon, Stevita, butter and salt. Pulse until combined and nuts are a uniform size. Drop the nut mixture by spoonfuls until mixture is covering most of cake batter in pan. If you want to give the impression of a hole in the middle, drop the spoonfuls so batter in the middle of the cake is not covered with nut mixture. Place in preheated oven and bake for 30 – 40 minutes, until middle is firm and edges are pulling away from pan. When cake is cooled, flip out of baking dish onto cooling rack, removing parchment paper. Flip over again so cinnamon/nut filling is face up. In microwave safe dish warm the cream cheese and butter until softened, but not completely melted. Add sweetener and whisk together until smooth. Divide frosting into three separate bowls. Add yellow food coloring to one, green coloring to another, then 3 parts red and 1 part blue to the third to make purple. Add more coloring as desired so they are bright and a similar tone. With small spoons drop the frosting with a slashing motion until the top of the cake is covered with spatters. Store in the fridge until about an hour before serving, allowing it to soften and come to room temperature.


Cookie Cut Ups

cookie cut upsThis is the tale of the cookies that kept cutting up. I found the delicious recipe from Ginny at Ginny’s Low Carb Kitchen. I mostly followed it, but made a tweak or two because of timing – there was nooooo way I was going out in the snow storm to buy xanthan gum, and Little B was gonna die if she could not make cookies soon! I don’t know how different they turned out without it, but we had success! Eventually. Little B and I mixed up the dough, rolled it out and ugh. A bit too soft for manipulating. I suggested to Little B that we form the cookies into shapes with our hands, but she insisted on using the cookie cutters. The cookie cutter use was a disaster. We piled up the dough and stuck it in the refrigerator for an hour. We rolled it out – again – with slightly more success, but still smooshing of the shapes by the spatula, even with a bit of help from arrowroot powder. Ack! Little B still insisted on cookie cutter use, so we again chilled the dough, for about six hours this time, occupying ourselves with movies and art projects and carols. When it was finally time to try again it worked! The cookie cutters did their duty, as long as we made sure to ‘shimmy’ them before pulling them off, separating the shape from the extra dough around it. I then carefully tilted the parchment paper and the shapes, one by one, fell onto my hand. They were delicate, but cooked up nicely and were very buttery and nutty; a wonderful accompaniment to hot chocolate. I will be more adventurous next time figuring out icing, but for now, we were able to experience cut out cookies on a snowy Alaska day, even though they resisted. Kudos to Little B for holding out for use of cookie cutters, and being flexible enough to hand shape those pesky candy canes! Three were set aside especially for Santa. Fingers crossed to have them survive that long!

Cookie Cut Ups

1/2  cup  Stevia in the Raw
1/2  cup  butter
1  large  egg
1  teaspoon  baking powder
1  teaspoon  vanilla
1/2  teaspoon  salt
2 cups  almond flour
In a food processor blend together Stevia, butter, egg and vanilla. In a medium bowl combine the baking powder, salt and flour. Add the butter mixture to the flour mixture and combine into a stiff dough. Refrigerate for 2 – 6 hours. Sprinkle a square piece of parchment paper with arrowroot powder, and have another piece of parchment of the same size nearby. Also prepare a large baking sheet covered with parchment paper and preheat the oven to 350 degrees. Remove dough from refrigerator and work quickly with it. Place dough between parchment paper and roll it out 1/8 to 1/4 inch thick. Carefully peel off top layer of paper and use cookie cutters to make cookies. Two methods can be used to transfer cookies to the baking sheets. Either tilt the paper, letting the cookie fall into your hand, transferring the cookie to the baking sheet, or sprinkle a thin spatula with arrowroot powder and use it to slide under the cookies and remove them from the parchment paper. Bake for 10 – 15 minutes, until the edges start to turn a golden brown. Let cookies cool completely before removing them from the baking sheet. Frost as desired and store in airtight container.
 

Bacon Wrapped Asparagus

bacon asparagus final

These were fun! Not only were they easy to make, mostly by Little B, but no complication, even minor, of adding seasoning or flavors. Yes, I know. That is the magic of bacon! I was tempted to marinate the asparagus first, but decided to try simpler, and it worked wonderfully. We sat on the porch and rolled them while Big D set up the fire in the grill. Is it gas or charcoal, you ask? I won’t tell Big D yo said that. Of course it is charcoal. Although level and length of heat may vary compared to gas, there is no comparison when it comes to the flavors transferred to food from the charcoal fire. For the pictured batch of asparagus we (more precisely he) grilled it. They were a little dark, because of the high fire heat, but it gave the dish a wonderful crispiness and the asparagus was bright green and just tender enough. Although easy to serve as a side dish daintily cut up alongside a steak, we scarfed them down with our fingers, which made them more of an appetizer. In the future I plan on cooking them up in a pan on the stove or in the oven. I will update you on how it goes. For now, we have a quick side dish for an all-grilled meal. The accompanying steaks were to die for, by the way…

Bacon Wrapped Asparagus

1 pound asparagus spears, tough ends removed
1 pound sliced bacon, room temperature

Combine asparagus spears in multiple bundles so each one does not exceed 1/2 inch diameter (could be one to three spears). Wrap a strip of bacon around each bundle at a diagonal, so most of the asparagus is covered. Cooking approaches: 1) grill bundles over medium to high heat until bacon is crisp. Remove and let cool until warm enough to eat, or 2) heat the broiler to medium and place on broiling pan. When top side is crisp (three to five minutes) turn over to crisp on underside. Remove from broiler and let cool, or 3) heat large skillet to medium high heat. Place rolls in the pan and cook until bacon is crisp, like you would for breakfast. Remove from pan and let cool before serving.

Gazpacho

20130609-080341.jpgLook at me diving into summery goodness! I am not a real big fan of summer heat, which is only kind of funny, considering I grew up in Texas, where hot and humid are the name of the game for half the year. Maryland has its share of hot and humid, but for only a fraction of the Texas time, thank goodness. After a particularly rainy week we landed ourselves in the RV for a mostly warm, sunny weekend. Such a weather change inspired me to make a nice, cold soup to go with our fire seared meaty dinner. I stocked up on some fresh vegetables, threw them in a blender and waited, not turning on an oven or firing up a single burner on the stove. The meat got cooked over the fire pit as the sun set, making for a beautiful summer meal at twilight and grand evening of simple, refreshing food.

Gazpacho

2 pounds ripe tomatoes, coarsely chopped
1 small cucumber, peeled
1/2 red bell pepper, seeded and chopped
3 garlic cloves, crushed
1 cup fresh cilantro, loosely packed
1/2 cup parsley, loosely packed
1/2 sweet Vidalia onion, coarsely chopped
1/2 tsp sea salt
1/8 – 1/4 cup sherry

Combine all ingredients except sherry into a blender or food processor. Pulse until combined and all pieces uniform size. Add 1/8 cup sherry and pulse again to combine. If you like chunkier soup like me don’t pulse further. For smoother soup, continue pulsing to desired texture. Depending on the sweetness of the tomatoes and onion you may need more sherry and/or salt. If you are not sure, chill soup for about an hour and taste before deciding to add more. Chill at least two hours or overnight before serving. Garnish individual servings with any combination of tomato/cucumber/bell pepper/herbs you wish.

King Cakelettes

king cakelettes_edited-1

Laissez les bon temp rouler! Let the good times roll! Mardi Gras is near and as always we are celebrating. We closely followed up defrocking the house of Yule and Christmas decorations with putting up green, gold and purple for Mardi Gras. After living in New Orleans a few years back I cannot help but get in the spirit of Mardi Gras. There is never a lull down there after Christmas – the frivolity of New Years quickly turns to the Mardi Gras celebrations. Parades begin in mid-January so there is no time to waste. Last year I did a king cake marathon, making sure everyone in the house had some for celebrating. I made a regular, yeasty, cinnamon-y king cake, including sharing of details about king cake history, followed by a gluten free version of the cake. They were both delectable and fun to make. This year Mardi Gras arrives during a time when we are highly sensitive to sugar, wheat and carbohydrates. What is a girl to do? Well, adapt. That is what she does. I used my experimenting with low carb muffins over the past year and incorporated my love of king cakes into these little treats. Although not the traditional ring with colored sugar, the result definitely has the right flavors and textures in play. I usually avoid making king cakes most of the year, but this time I may not. These things are stupendous and I doubt they will last us through Fat Tuesday. I really need them to, if for no other reason but to balance the green potency of chartreuse. Enjoy!

Low Carb King Cakelettes

6 eggs
4 Tbsp heavy cream or half and half
1 tsp vanilla

3 drops liquid stevia
½ tsp sea salt
2/3 cup coconut flour
¼ cup golden flaxseed meal
½ cup splenda
½ tsp baking powder
1 cup pecans, shelled

For the Filling
6 Tbsp butter, melted
¼ cup splenda
1 tsp cinnamon
½ cup pecans

For the Icing
1 Tbsp water
1 tsp lime or lemon juice
½ cup splenda
Green, yellow, red and blue (2 drops blue, 3 drops red for purple) food coloring (optional, if coloring icing instead of using colored sugar)

For Decorating
Purple, green and gold/yellow colored sugar or Splenda (or add color to the icing)

Preheat oven to 400 degrees. On a baking pan spread out pecans in one layer. Bake in oven for about 5 minutes until they begin to brown. Prepare muffin pan with liners. In blender add wet ingredients and nuts together. Blend on low until nuts are broken up in small pieces. In separate bowl combine dry ingredients. Add wet ingredients to dry ingredients and stir just until combined. Divide batter among the 12 muffin cups. For the filling mix together butter, ¼ cup Splenda and cinnamon in a bowl. Grind into a powder the ½ cup pecans and combine with other filling ingredients. With a teaspoon drop some filling into the middle of each muffin. It will sink a bit and be covered by the muffin batter during the baking time. Bake for about 15 minutes until tops begin to brown. While the muffins are baking combine the water, juice and Splenda until smooth (make three different batches if coloring it instead of using colored sugar. A soon as the muffins come out of the oven drizzle the icing on top (drizzle all three colors on every muffin if using colored icing). Let cool for about ten minutes. If using colored sugar, sprinkle by alternating green, purple and yellow/gold*. Use all three colors on every muffin. Serve at room temperature or freeze and gently defrost in the microwave before serving.

*I planned on using colored Splenda for sprinkling, and got good information about coloring it here. My color to sweetener ratio did not turn out as well as it did for Millie, I think it was because I did not have enough coloring gel. It was definitely on its way, but I did not have time to go get more with an eager and waiting Little B, so I improvised. I added water and lemon juice to the colored sweetener and colored the icing and drizzled instead of sprinkled. Even though it did not work out this time, I am going to follow Millie’s coloring process in the future, for springtime is coming and more sprinkling opportunities are on the horizon!

Cinnamon Dough Ornaments

cin ornaments

I guess technically you can eat these ornaments, and they get made in the kitchen, so they pass the ‘food blog’ test I arbitrarily created in my head. If you don’t eat them, which I advise, they can make any space they occupy smell WONDERFUL! For days after making these ornaments with Little B the house smelled of cinnamon, then when the ornaments got put on the Christmas/Solstice tree they still smelled wonderful. One of them hanging in my office gets rid of that officy smell, which is not that bad, but nothing compared to cinnamon spice. There is still time before the holidays are over to add some decorations, so dive in and make a batch. Our first roll out was with dough that was too sticky, so the intended shapes got, well, a bit reshaped when transferring them to the pan. They also  cracked a bit when baked. We learned as we went, though, and stiffened the dough up with more cinnamon. The picture shows our mixed results, and you can tell which ones were made with the wet dough compared to the dryer dough. This project appeased my desire to make cut out cookies, didn’t result in sugarbombs sitting around the house begging to be eaten. It was such fun creating glittery ornaments we can enjoy during the holiday season. Stay tuned for a wheat free edible version of cut out cookies, but experiments in that vein continue, and mastery is still pending….

Cinnamon Spice Dough Ornaments

1 ½ – 2 cups ground cinnamon
1 tsp ground clove (optional)
1 cup applesauce
1 Tbsp glitter (optional)

Combine half the ground cinnamon, the ground clove (it will make the dough darker, so decide before adding if you want darker or lighter results), applesauce and glitter. Combine until a dough forms. Add more cinnamon as needed to thicken if it is too sticky. The amount of cinnamon needed varies with altitude and humidity, so keep adding cinnamon until the dough seems crumbly, and you need to knead it for the pieces to stay together. Wet dough will bake brittle and the ornaments will crack, so make sure it is stiff. Roll out the dough and use cookie cutters to shape the ornaments, or cut them out freehand. Use a drinking straw to poke a hole in the ornament, strategically placed, for hanging. Place ornaments on baking sheets covered in parchment paper, or directly on the sheets. Bake ornaments at 200 degrees for two hours, then turn off oven and leave the oven closed until it cools off. Yes, I know you can’t tell if the oven is cooled off unless you open it, but two more hours or overnight should do it. Carefully remove the ornaments from the sheets/paper. Loop string or cord through the hanging holes and decorate something.

Peppermint Bark

I did it again. Had a hankering to make something sweet, delicious and addictive, only to then take it to work and encourage bad habits for my co-workers. There are fancier versions of peppermint bark out there, but I have found this one to be consistent and delish. It can be doubled, tripled, taken to a potluck or divvied among gifts for teachers or neighbors. I warn you to not make it just because you want some. If you are anything like me you will have ‘just a bite or two’ so many times it will suddenly be gone and you are the sole culprit. Either have plans to share it or go ahead and get elastic waist pants. Another warning: don’t confuse peppermint extract and oil – the oil is much more potent than extract, and the results will vary widely, sometimes in a bad way. Yet another suggestion: if you have an energetic young person who wants to help make the bark, hand them the bag of canes and let them whack it on the ground. It will probably do the trick. Happy Holidays!

Peppermint Bark

2 pounds white chocolate chips or roughly chopped white chocolate bark
1 package (about 12) peppermint candy canes
½ tsp peppermint extract or 2-3 drops peppermint oil

Prepare medium sized cookie sheet by lining with parchment or wax paper. Crush candy canes: place unwrapped canes in a resealable bag, then use a rolling pin or tenderizer hammer to break them up, making sure all pieces are less than 1 centimeter long. Set aside candy. Into a medium glass bowl add chocolate. Melt in microwave for one minute. Stir. Continue heating in microwave by using 30-second increments, stirring after each increment. You can also melt the chocolate in a metal bowl over a double boiler with gently simmering water. When the chocolate is warm, smooth and completely melted, add extract or oil and stir well. Pour chocolate onto prepared pan and spread until chocolate is evenly distributed. Sprinkle crushed candy over top and gently press it into the chocolate. Let cool completely at room temperature or in the refrigerator, then break into desired serving sizes – I usually make 2-inch square-ish pieces. Store in air tight container.

Roasted Chestnuts

Chestnuts roasting on an open fire….the opening to one of the most wonderful winter songs ever. So many times in recent years I was actually unable to find fresh chestnuts! This year I found some at the store and snagged a bag. While my wonderful MIL Sherry and forever BFF Kelley were here for a visit we were able to fulfill the cliché.

The coals were still glowing red after Big D seared steaks and we had a red meat feast. We had a blast roasting them, and after they cooled just enough we were able to peel them. We could tell they were done when the shell where they were cut started curling up and away from the nut. It was great evening and the chestnuts made for quite a treat. Sherry and Kelley had never roasted chestnuts. We flitted around the kitchen enjoying the process and savoring the flavors of the nuts. Preparation of the nuts is similar to garlic – the outer shell is removed, then the thin membrane right on the nut itself needs to be removed. As my lovely daughter concluded, they look more like brains, which are food for the zombies. Does it help that they are nested in a nice bed of young greens? Maybe not. I don’t want to know how badly we have distorted her mind, but Shaun of the Dead is a most awesome movie. Roast up some chestnuts this winter, or find a street vendor who did the work for you. It is a flavor that will linger and you will never forget.

Roasted Chestnuts

Roasting pan or grilling grid for fish
Open fire or grill with glowing embers
12 – 24 raw chestnuts

With a sharp knife make a criss-cross cut into one side of the nut shell. Roast over an open fire until the cut sections curl away from the nuts and start hissing. The nuts are a bit like popcorn – as you roast them they can go from roasted to burned in about two seconds, so watch carefully, otherwise they might burn. Remove from fire. Let cool just until they can be handled. Peel off outer shell and remove the brown membrane, until the tan colored nut is exposed. The roasted nut should be about the color of a peanut and the texture of a walnut. Eat immediately or freeze/refrigerate for use with chocolate fondue, in recipes and on salads.

Bacon Wrapped Thanksgiving Turkey

To all fellow bacon lovers – what may be even better than wrapping steak or jalapenos or chicken breasts in bacon? Turkey! The end result may not look like the quintessential golden skinned turkey, but boy is it moist and flavorful! Our traditional method is to use a smoker to do the turkey, along with whatever appetizers we crave, like stuffed mushrooms, and even throw in the occasional bunch of jalapenos, tomatoes and onions, which make a smokin’ salsa. Our current living situation, at the top of an apartment building, is not conducive with smoker use. We didn’t want the landlord following the trail of smoke and nagging us about rule breaking. A quick searing of steaks on the balcony grill is one thing, but eight or so hours of trailing smoke is more than what we thought we could get away with. We went ahead and did an oven version this year. I am curious about how this recipe would work in a smoker, but we will have to find out another time. It was fun to do the bacon wrapping and watch the bacon get dark and crispy. Instead of having the typical crispy skin to eat, we had a blanket of bacon. The skin kind of melted into the meat, becoming part of the bacon. I am not sure how it happened, but the results were very satisfying. I got the idea from here, but made adjustments, since we are particular about fresh herbs for Thanksgiving, even though we often rely on the dried stuff most of year. The bird was stuffed with carrots, celery, onion, garlic and the herb combination that turned out wonderful. There are various versions of this recipe with comments about soft bacon, but I don’t know what they are talking about. As you can see, there is a crispy shell on it and the meat is well cooked and moist and wonderful. If you follow my instructions you should be able to get the same results. Enjoy!

Bacon Wrapped Thanksgiving Turkey

One 15-pound turkey
1 cup fresh parsley leaves
½ cup fresh tarragon leaves
½ cup fresh sage leaves
¼ cup rosemary leaves
10 cloves garlic, peeled and crushed
½ cups olive oil
4 cups vegetables, including carrots, celery, onion and garlic
3 pounds bacon, sliced into thin strips

Wash the turkey inside and out and pat dry. Place in refrigerator for at least an hour uncovered to cool. Preheat the oven to 500 degrees. Mix together the herbs, minced garlic and olive oil to make a paste. Rub the paste in the cavity and underneath the skin of the breasts of the turkey, carefully so you do not tear the skin. Fill the cavity with the vegetable mixture, and place in a roasting pan. Add 1-2 cups of water in the roasting pan, so there is about ¼ inch of water, then roast the turkey in the oven for 30 minutes. Remove from the oven and turn the heat to 350 degrees. Cover the turkey in the bacon slices, in cross-hatch form* or just by overlapping the slices in strips. Insert a meat thermometer in the thickest part of the breast. Put the turkey back in the oven and continue to cook for about 20 minutes per pound (about three hours total, including the high temperature period) until an internal thermometer temperature reaches 160 degrees. 

*To do the cross hatch on top and bottom there can be preparation while the high temperature cooking happens. Take two pieces of wax or parchment paper, about two feet long each. Create the cross hatch by alternating bacon pieces into one foot by one foot sections. After the turkey finishes the first half hour of cooking, move the turkey to a surface where juices can drain. In the baking pan flip one of the cross hatch sections into the dish and spread it out. Place the turkey on top, then flip the second cross hatch on top. Between the wings and legs connect the cross hatch edges as much as reasonably possible. Wrap the wings and legs with bacon strips, making sure to cover all the meat and skin. Add a few more pieces on the top and bottom of the cross hatch pattern to cover all surfaces of the turkey.

Another End of Summer Salad

Okay, so I had a little of this and a little of that in the fridge (some of which was left over from making pizza (add link)) and thought they would make a wonderful end of summer salad. Again. It is a bit different from my other End of Summer Salad (add link), but I am really trying to squeeze in the summer produce, so I decided to post it. I know it was recently, like, right below, but this one has a totally different taste. I have to say right now that I absolutely adore my daughter and love how her fine motor skills are improving exponentially while helping me in the kitchen. Now I must also say that I really enjoyed making this salad all by myself – not having to lean over a footstool, without a helper who is learning to use a knife, or a munchkin putting a little too much parsley in the bowl or an imp who insists on measuring and pouring the olive oil from the huge bottle on her own and spilling about half a cup on the counter. While she watched the last bit of Willy Wonka and the Chocolate Factory (1971 version, thank you very much) I snuck in the kitchen and whipped up the salad. I liked doing it by myself as much as I will like the next time she helps break a dozen eggs for a frittata – its just a different way of cooking. Here she comes!

Another End of Summer Salad

3 Tbsp apple cider vinegar
1 tsp sea salt*
½ tsp ground black pepper
1 Tbsp dried parsley leaves
1 tsp garlic powder
½ tsp onion powder
Dash of dried red pepper flakes
4 Tbsp extra virgin olive oil
2 medium tomatoes, rough chopped
½ large cucumber, rough chopped
1 cup artichoke hearts, rough chopped
½ cup chopped black olives
1 cup shredded Monterrey Jack, Feta or Parmesan cheese

Add first seven ingredients in small bowl. While whisking the vinegar mixture gradually add olive oil until well combined. In medium bowl add tomatoes, cucumber, artichoke hearts, olives and cheese. Drizzle dressing over vegetables and stir until evenly distributed. Chill for at least 20 minutes. Toss again before serving.

*If you use Feta or Parmesan cheese you may need less than 1 tsp of sea salt, since they tend to be stronger flavored cheeses.

Post Navigation