Any Kitchen Will Do

Give me a kitchen and I will cook.

Archive for the category “casserole”

Lemon Parmesan Chicken
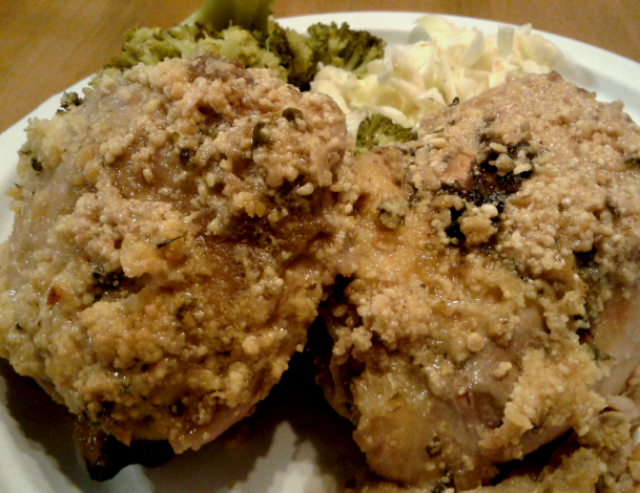
lemonparmesanchknA few months ago my mom gave me a casserole crock pot. As you know, most crock pots are, well, pots. Four to six inches deep, they are great for slow cooking stews, soups and other concoctions you can sink a serving spoon deep into. This one is shallow and wide, just like the glass casserole dishes that sat unused on my shelf for this recipe. I was not sure if I would use the casserole crock when I first got it, but it works wonders to help get many a dinner made around here. When my oven is busy cooking stuff for my business, Grain Free Haven, using the casserole crock I can still have dinner on the table at a reasonable time.

The cool thing about the casserole crock pot is the ability to pop out the casserole dish and serve straight from it, and the kids are less likely to make a big mess serving from it for themselves, compared to a deeper crock pot. Granted, there will still be a mess, for they cannot grasp the concept of moving plate and serving dish near each other to catch dribbles. Trust me, I am still realistic.

Many days I begin thinking about dinner right after breakfast. Not because I plan on preparing it all day, but because a lot of our proteins are in the freezer, and waiting until 5pm to pull them out is just too late. Sometimes I don’t think about dinner until lunch, but I can still pull off the frozen chicken trick. That is what happened the other day, resulting in this lovely dish.

Fortunately, the chicken was in smaller packages, so doing a partial quick thaw in a sink of water was sufficient. While the thighs were still partially frozen I was able to pop them in the casserole crock pot and have dinner on the table at the usual 6pm.

I was wild and crazy with the preparation of the chicken, because it challenged the eyes and minds of our younger kids. One, the coating on the chicken was pale, whereas they prefer something more bold, like tomato sauce. Second, there were speckles (also known as green herbs) dotting the surface of the chicken. After one thinks they have a “bug” in their dinner the others are hard pressed to continue eating and not mistake a piece of parsley for a fly. There were many compliments all around, nobody spotted a “bug”, and my hopes for next day lunch leftovers were dashed as the last thigh was moved from platter to plate. That’s okay. A salad will do just fine.

Along with the chicken I served coleslaw and steamed broccoli. For the starch eaters I baked up some crispy baked chips and rice cooked simply in chicken broth.

Lemon Parmesan Chicken

12 chicken thighs, bone in and skin removed
2 cups finely grated parmigiano-reggiano cheese
1 cup lemon juice
2 teaspoons finely chopped garlic
1 teaspoon onion powder
1 tablespoon dried parsley leaves
2 teaspoons dried oregano leaves
1 teaspoon sea salt

Prepare casserole crock pot*. In a medium bowl combine cheese, lemon juice, garlic, onion powder, parsley, oregano and sea salt. Stir until well combined. Remove chicken from packaging and rinse, patting it dry with paper towels. Using your hands coat all sides of each thigh with the cheese mixture. Place the thighs bone side down in the crock pot. Two or three thighs may need to sit on top of the others, depending on their size.

Cover and cook on high for about three hours, until chicken is cooked through, measuring 165 degrees Fahrenheit. Turn off crock pot and let sit for about 15 minutes before serving.

There are two additional steps you can take to fancy up the dish a bit:

One is reduce the sauce. Pour the sauce from the cooked chicken into a sauce pan over high heat. Let sauce come to a boil and turn the temperature down by half. Let simmer until sauce volume reduces by half, about ten minutes. Serve the sauce to drizzle on the chicken.

Second is to make the chicken coating a little crispy. About ten minutes before serving (ideally while the sauce simmers and reduces), set oven to low broil with a rack on the second highest level. Place the thighs, bone side down on a baking sheet, being careful not to disturb the cheese crust that formed on top. Broil for five to eight minutes until crust is crispy but not burned. If your oven only has a single broil setting, lower the rack further and check often to avoid burning.

*If you don’t have a cool casserole crock pot you can make this dish in a traditional casserole dish in the oven. Arrange the chicken as noted above in the dish, then cook it uncovered at 350 degrees Fahrenheit for about one hour, until juices run clear and chicken measures 165 degrees.
Deconstructed Cabbage Rolls

2015-10-06 11.27.52

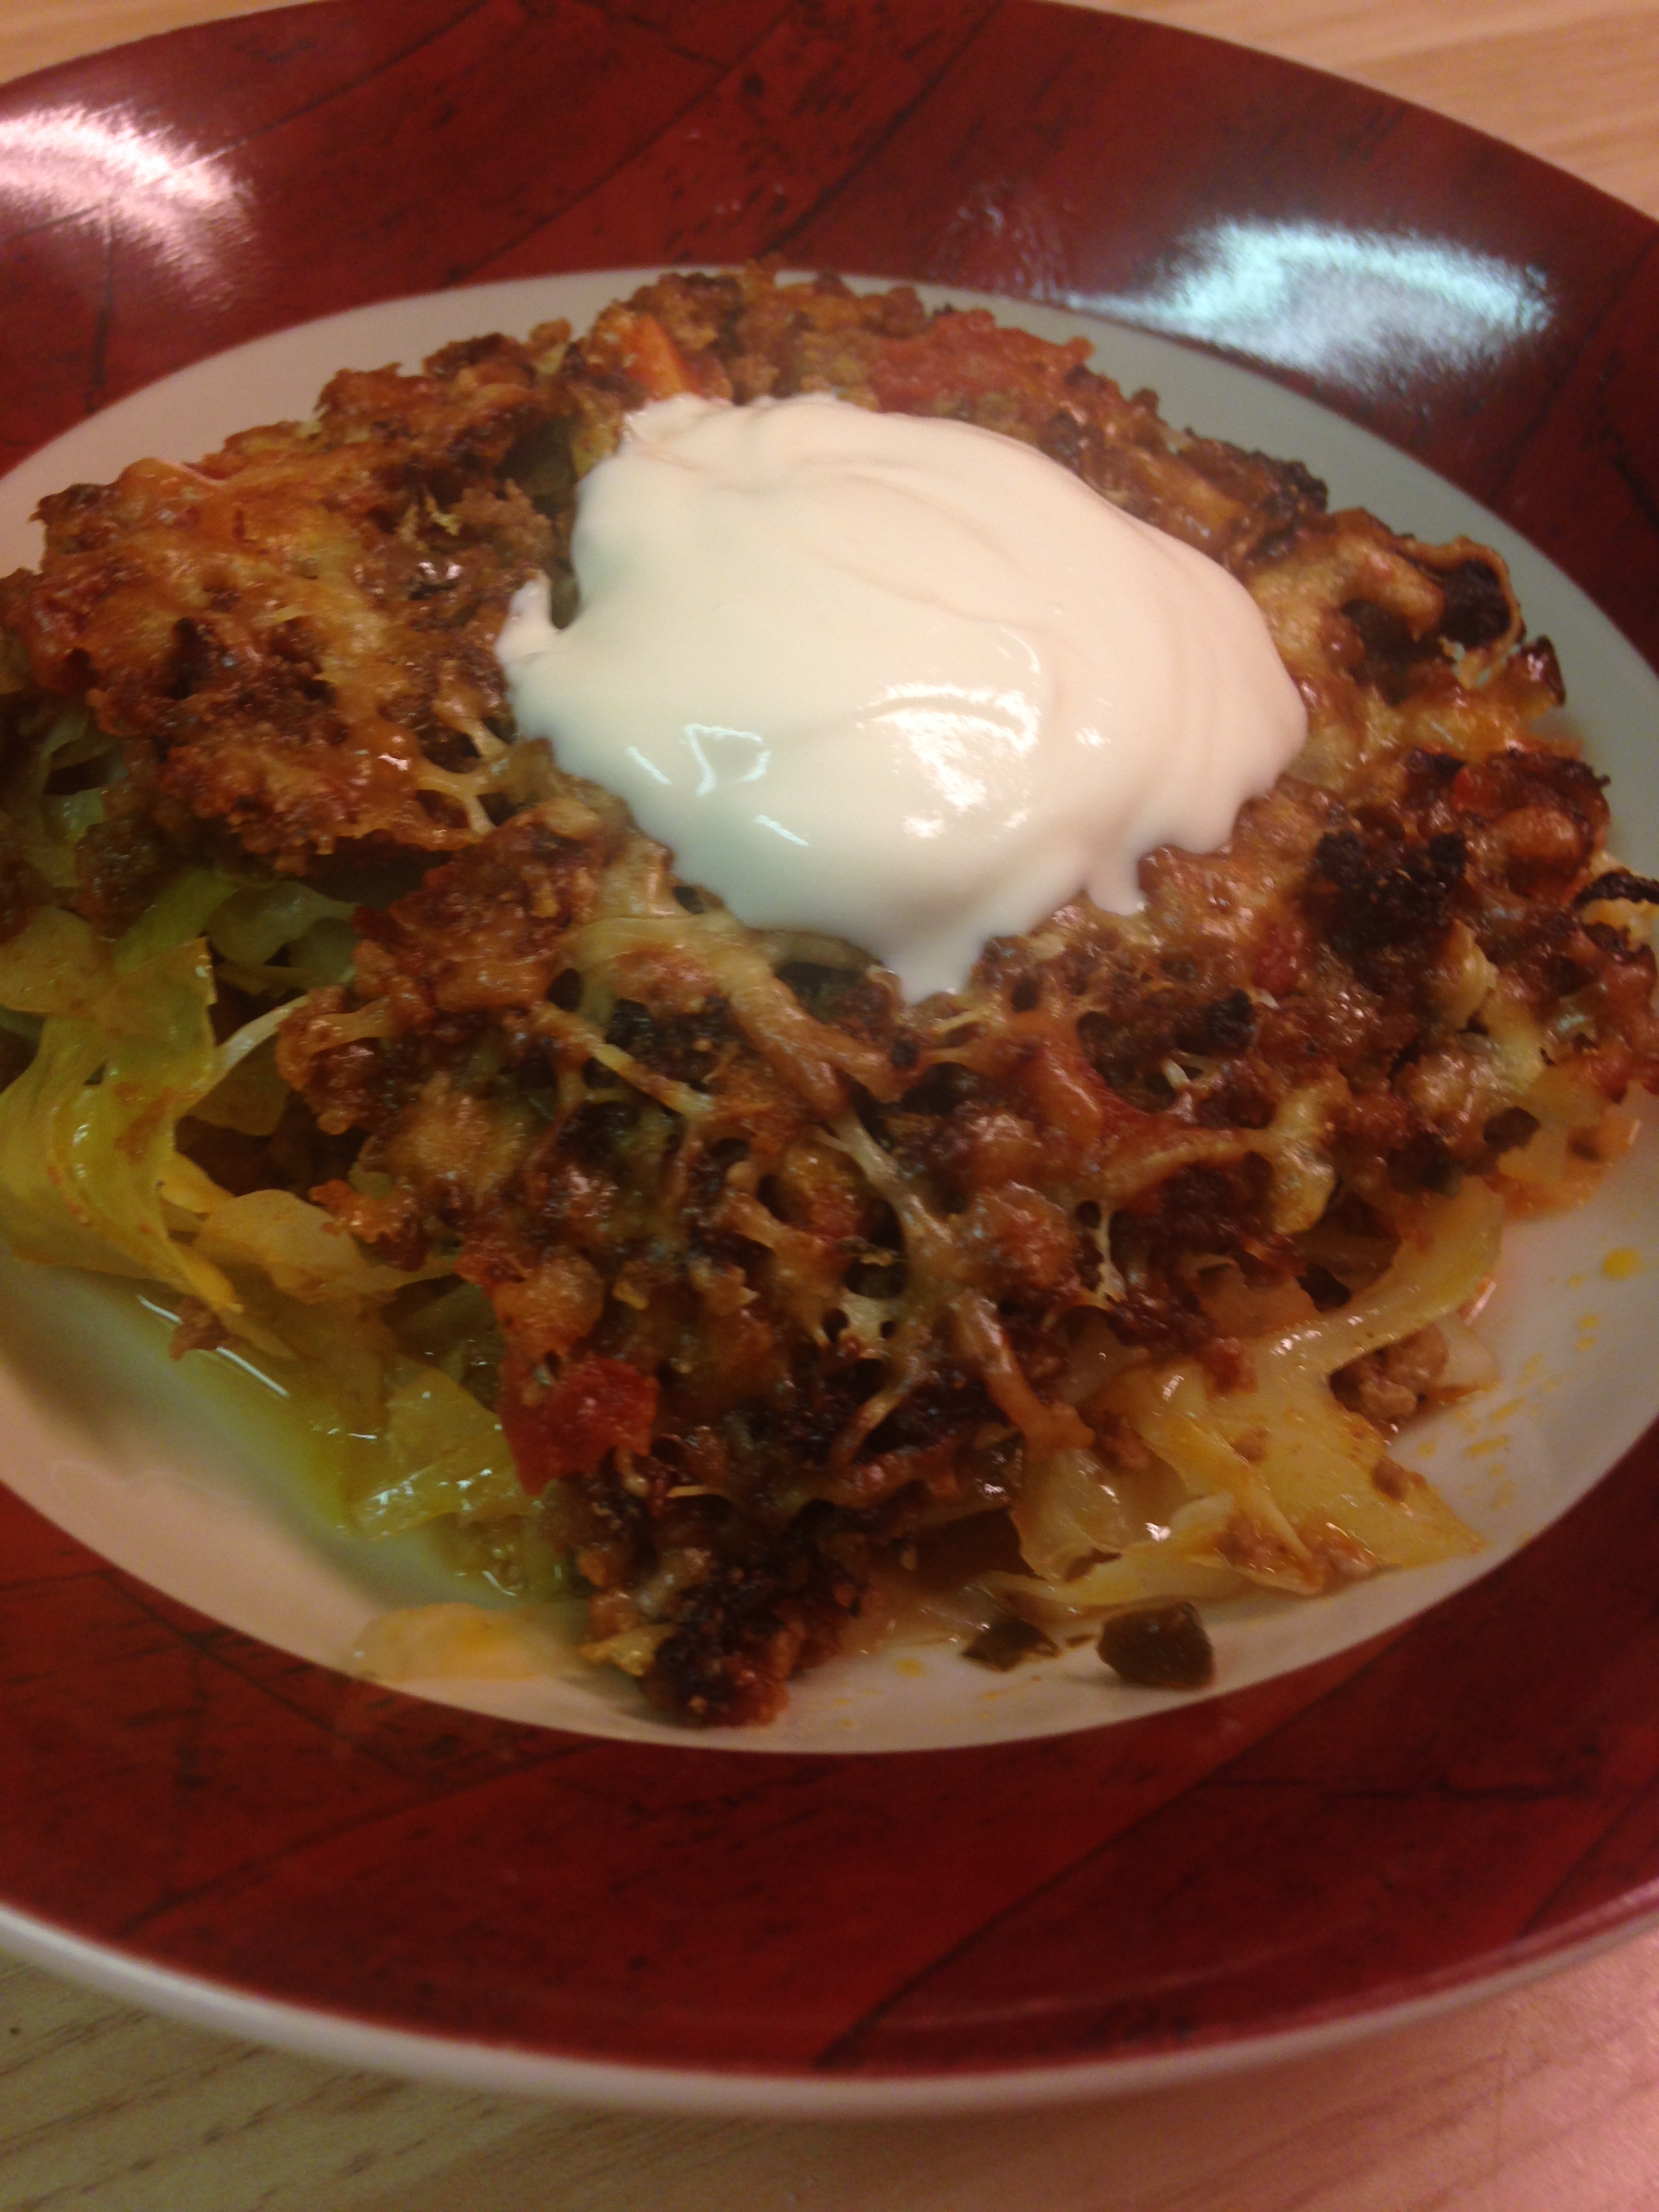
Although the ingredients are not seasonally limited, I always consider cabbage rolls to be an autumn dish. They are a baked, one dish meal that freezes and reheats well. The other day I had a craving for thema, as the outside temperatures are gradually dropping, but I did not have as much time as needed to do them up right – blanching the cabbage leaves enough to roll them was more demanding on time than I had, so I embraced the concept of deconstructing them.

Yes, I have recently watched a few episodes of Chopped on the Food Network. I don’t watch many food shows or competition shows, but that one intrigues me. I don’t now if it is the frantic desperation of some contestants, or the odd combination of ingredients that have to use, but I get a kick out of it. If you have ever seen the show you will be familiar with the requirement that specific, typically unrelated ingredients have to be used to create an appetizer, entrée or dessert in a limited amount of time. “Deconstructed” versions of dishes are often presented on the show typically because of time restraints. It was very fitting for my brain to wander to the show concept when a rather rigid time limit was presented to me.

I think the key to this dish is the well shredded cabbage. It cooked faster than larger pieces or fully rolled cabbage rolls. Also, the small cabbage pieces helped soak up all the wonderful flavor of the fresh garden herbs I harvested before they went to seed, as well as the joyful combination of beef and tomatoes in the alternating layers. I ate too much because it was so good, Big D already asked when it will be made again, and Little B’s plate was empty when she asked for more. I hope you enjoy it too!

Deconstructed Cabbage Rolls

1 small head cabbage, shredded
1 medium carrot
1 small yellow onion
5 cloves garlic
3 Tbsp extra virgin olive oil
20 fresh basil leaves
1/3 cup fresh oregano leaves
1/2 cup fresh thyme leaves
1 cup fresh parsley sprigs
2 pounds ground beef
1 14.5 ounce can diced tomatoes
1 8 ounce can tomato sauce
Sea salt and ground black pepper to taste
1 tsp ground nutmeg
1 cup grated parmesan/asiago/romano cheese
Sour cream (optional for serving)

Chop onion, carrot and garlic into small pieces. Roll the basil, oregano, thyme and parsley leaves into a small roll. With a sharp knife slice the herb roll. Cross chop the herbs again until the oils are released. In a large iron skillet over medium high heat add the olive oil. When the oil is hot add the carrot, onion and garlic. Cook for about two minutes, until the onions begin to turn transparent and brown. Add the chopped herbs and stir, cooking for another two to three minutes.

Clear the vegetable mixture from the center of the skillet. Add the ground beef and break it up, folding in the vegetables as the beef pieces get smaller. When the meat is broken up into small pieces and beginning to brown add the diced tomatoes and tomato sauce. Stir and turn temperature under the skillet to high. Let bubble and cook, stirring every few minutes, until the liquid reduces by half, about five to eight minutes. Turn heat down to medium and simmer for another five minutes. Salt and pepper generously to taste.

Preheat oven to 350 degrees.

In a 9×13 baking dish place half of the shredded cabbage into an even layer. Sprinkle with salt, pepper and 1/2 tsp of ground nutmeg. Add a layer of the meat mixture, making sure half of it is left for another layer. Add a second and final layer of cabbage, again sprinkling with salt, pepper and the rest of the nutmeg. Add the second and final layer of meet, covering all the cabbage.

Sprinkle the cheese mixture on top of the meat layer. Place in preheated oven on the top shelf. Bake for 30 minutes. Check the top of the casserole, making sure it is not browning too quickly – if it is, place it on the middle or lower shelf. If is is barely brown or not at all, leave it on the top shelf.

Bake for 30 more minutes. Remove from oven and let sit for 10 minutes before serving.

Cauli n Cheese

cauli n chz

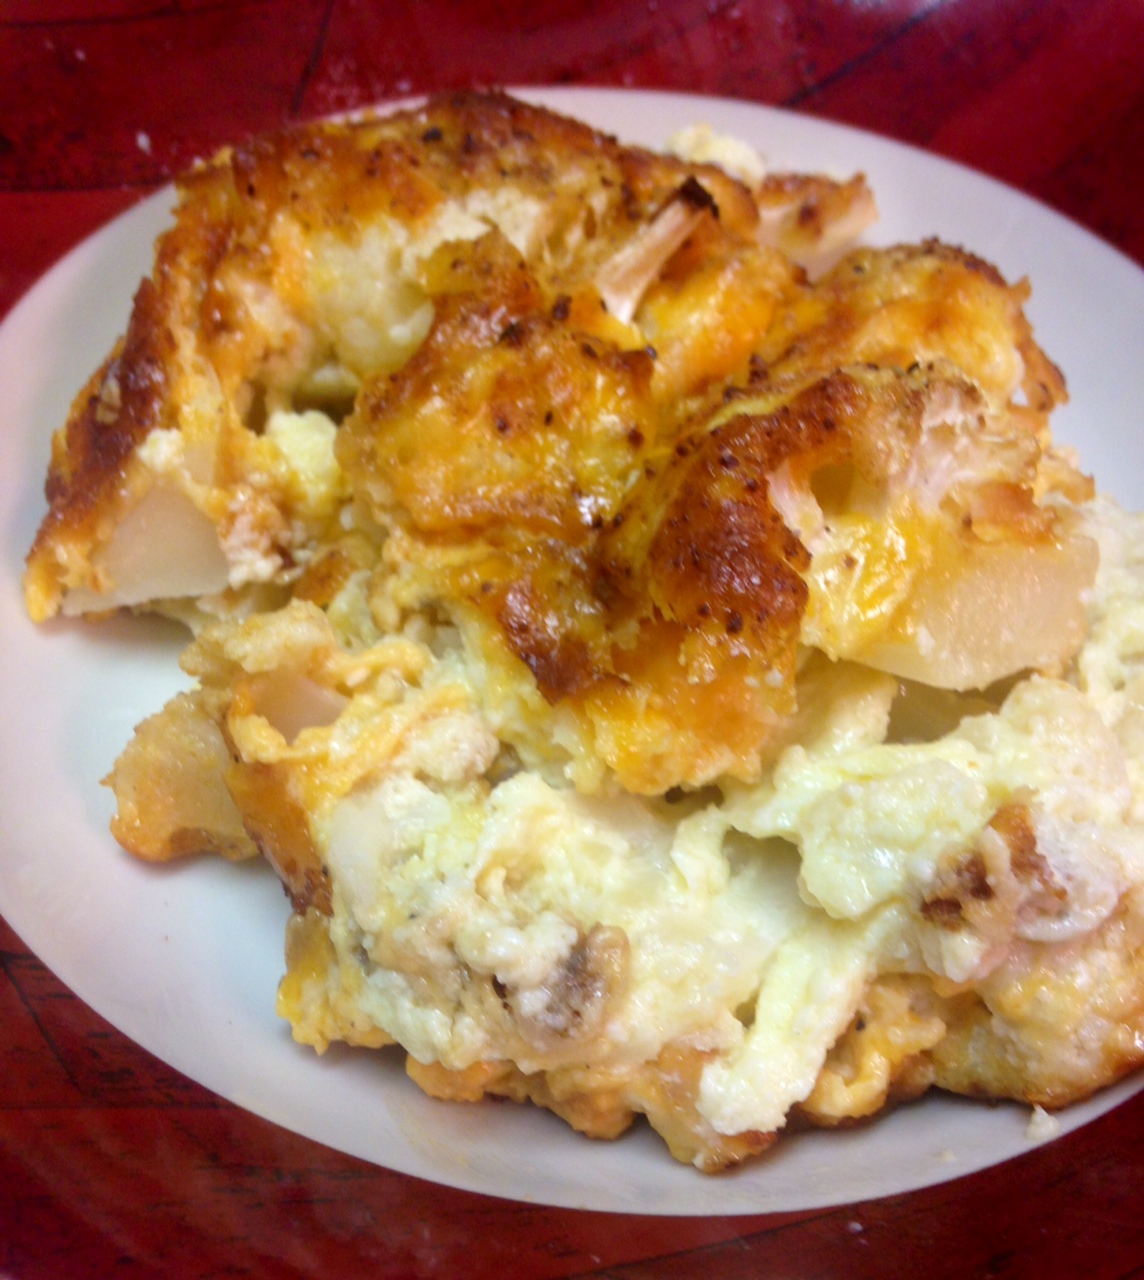
I have made this before but did not have the just right combination for creamy and cheesy, so did not share it. Other cheesy things with cauliflower, like the Cauliflower Mac Bake is cheesy but not so creamy, and the Cheesy White and Green Bake is good, but the fibrous broccoli does not quite bring to mind a replacement for mac n cheese. I think the combination of cheeses and cream really worked this time. The cheese merged with the cauliflower and cream instead of becoming stretchy. This time was different. This time it worked just right. There was a chewiness, cheesiness and creaminess that worked like a comfort food for me. THIS time I was reminded of the nights as a child when mom and dad did not have time to make dinner and grabbed a box of pasta and cheese pouch, threw it in a pot and cooked it up. Sometimes ham or hot dogs were chopped up with it and made it even more salty. The taste of this meal also reminded me of meatless Fridays that were part of the religious aspects of my upbringing. I never actually missed the meat as I dug into the creamy cheesiness. After a few mouthfuls Little B asked if I would make this every night because it was ‘soooooo good!’. I don’t know if I can accomplish that, but it certainly is not hard to do if there is a kitchen nearby and barely took more time than fixing mac n cheese from a box! It would be so cool if she craved cauliflower instead of pasta in 20 years…

Cauli n Cheese

1 head cauliflower
2 eggs
1 cup heavy whipping cream
1 Tbsp sea salt, plus more for top
1 tsp ground black pepper, plus more for top
1 tsp onion powder, plus more for top
1 tsp garlic powder, plus more for top
2 cups grated sharp cheddar cheese
1 1/2 cups grated parmigiano reggiano cheese

Preheat oven to 350 degrees. Remove leaves and stem from cauliflower. Cut cauliflower head into bite-sized pieces, keeping as much of the florets attached to the base as possible – avoid the crumbling of the florets. In a medium bowl whisk the eggs and cream, then add the salt, pepper, onion powder and garlic powder. Whisk in the seasoning. Add the cheese and stir in with the cream mixture. Arrange the cauliflower evenly in a 9″x13″ baking dish. Sprinkle some salt on cauliflower. Pour creamy cheese mixture over cauliflower, spreading cheese to cover the top entirely. Sprinkle a bit more salt, pepper, onion powder and garlic powder on top. Place uncovered in preheated oven for 40-45 minutes, until top is browned and bubbly. Remove from oven and let sit for ten minutes before serving.

Rebellious Ratattouille

image

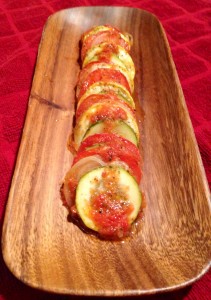
I think this is ratatouille but some people may find it lacking. What I love about it is the combination of flavors I get from the alternating, thinly sliced vegetables in a single bite. I like bell peppers in general, which are usually included in this dish, but I don’t like the taste and texture they add to the other veggies used here, so I left them out. Look at me being a ratattouille rebel. A neat thing about this recipe is it can be doubled and tripled easily by adding more sliced vegetables and a larger pan. It also makes for a lovely presentation in a serving dish or on your plate.
Rebellious Ratattouille
1 medium zucchini
1 medium yellow squash
1 medium onion
3 large Roma tomatoes
1 14.5 ounce can diced tomatoes
2 cloves garlic, crushed
1 Tbsp dried oregano leaves
1 Tbsp dried parsley leaves
1/2 tsp sea salt
1/4 tsp ground black pepper
In a medium pot over medium heat add the canned tomatoes, garlic, oregano, parsley, salt and pepper. Simmer for about ten minutes, until heated through and bubbly. Remove from heat to let cool. Preheat oven to 375 degrees. While sauce simmers prepare the vegetables by slicing them thinly, less than 1/8 inch thick. Sprinkle slices with salt and pepper. Removing seeds from tomatoes is optional. Using a stand or stick blender purée the tomatoes ito a smooth sauce. In a loaf pan pour a thin layer of tomato sauce (you will probably have leftover sauce). Alternate the slices of zucchini, yellow squash, tomatoes and onion, placing them in two long rows in the pan. Bake for 30 minutes, cover pan with foil and bake for an additional 15 minutes. Remove from oven and let sit for 5 minutes before serving.

Meaty Squash Bake

meaty squash bake

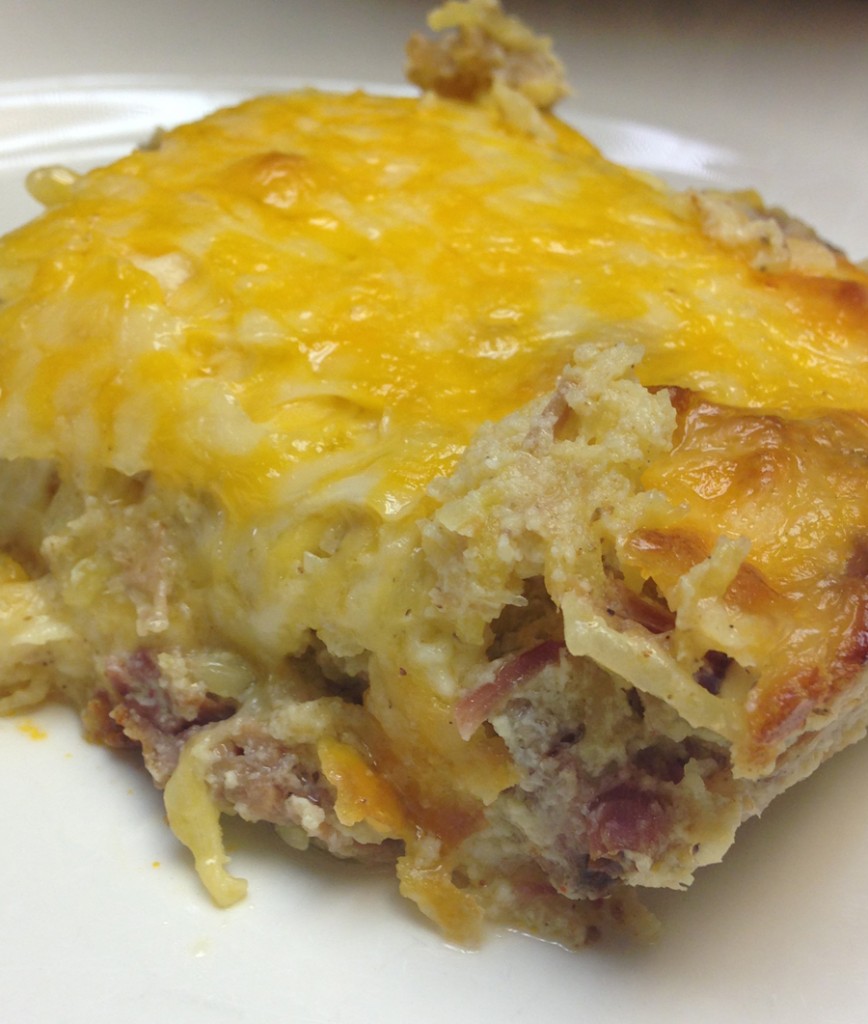
This dish was purely delish and purely a result of leftovers. We had spaghetti squash left over from serving as a side dish with the rolled chicken, and a lovely brisket our friends brought over was still calling to us from the fridge. Knowing we would have leftovers from the leftovers, I wanted to make sure it would be something that would freeze and reheat well. I think we hit the jackpot! I don’t know of many savory leftovers that can’t be combined and topped with cheese, do you? The nice thing about it is you can also cook up some fresh spaghetti squash, and maybe some ground beef for it if you don’t have leftovers to manipulate. It freezes well too! As you see, I made this in my mom’s kitchen, and while I was visiting her I definitely cooked more than we and our visitors could possibly consume, so freezer friendly is a good thing.

Meaty Squash Bake

1 pound chopped meat (leftover brisket, chicken, pork, etc)
2 1/2 cups cooked spaghetti squash
2 tsp garlic powder
1 tsp sea salt
1 cup heavy whipping cream
3 eggs
2 cups Colby jack cheese, shredded

Preheat oven to 350 degrees. In large bowl stir together squash, garlic powder and salt. Add meat and stir again. In small bowl whisk together eggs and cream. Add cream mixture to squash and meat. Fold until everything is coated with cream mixture.  Pour mixture into 9×12 baking dish. Sprinkle top with cheese. Bake for 35 – 45 minutes until outer edge of cheese begins to brown. Remove from oven and let sit for about ten minutes before serving.

Shepherd’s Pie with Cauliflower

shepherds pie whole

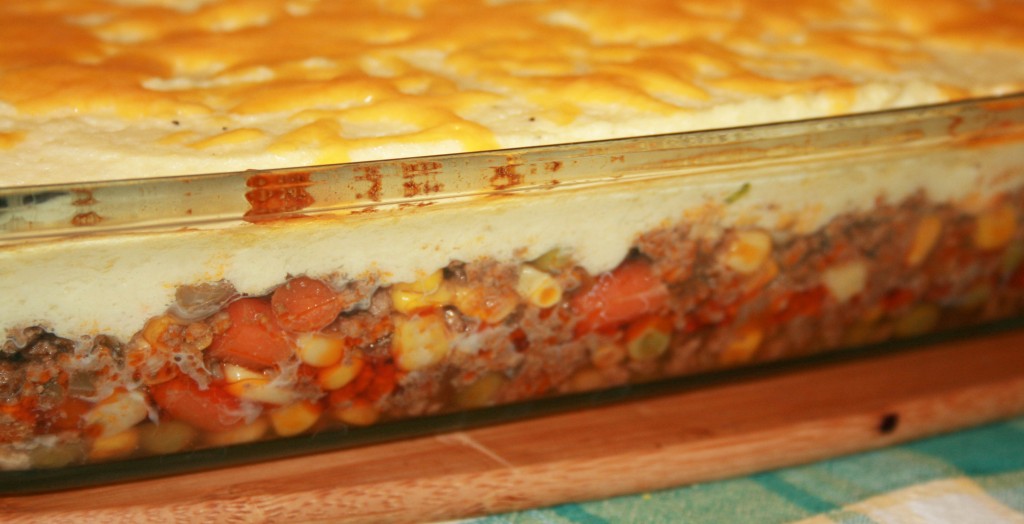
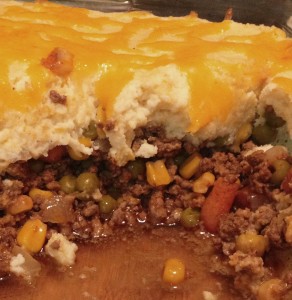
Last year for St. Patrick’s Day I made the traditional American St. Patrick’s Day meal with corned beef. That is all well and good, but not the only Americanized Irish food available. The Shepherd’s Pie is another dish that actually has Irish roots much closer than the corned beef. Here is a version that is very Americanized, or more accurately low carb-ized, for it has not a speck of potato, but as with other manipulations that can be done with cauliflower, you might not miss the ‘taters. This dish is usually called cottage pie when beef is used, and Shepherd’s Pie when lamb is used. I used ground lamb, so I at least kept to some traditional aspects, even if the top is from a cauliflower patch! If I did not tell you, you would never have known. I got the idea for the topping here. I hope for you fun and festivities on this St. Patrick’s Day, and eat cauliflower!shepherds pie piece

Shepherd’s Pie

For the Stew

2 Tbsp butter
1 pound stew beef or lamb, ground or cut into small bite-sized pieces
½ – 1 cup red wine
2 Tbsp tomato paste
2 cloves garlic, crushed
2 Tbsp Worcestershire sauce
1 cup chopped carrots
1 small onion, chopped
1 cup frozen peas
1 cup frozen corn

For the Topping
1 medium head of cauliflower
2 Tbsp heavy cream
2 Tbsp butter
½ cup plus 1 cup shredded sharp cheddar cheese
4 egg whites
Salt & pepper to taste

Clean and trim cauliflower, adding florets to a microwave safe bowl with ¼ cup water. Cover with cling wrap or a vented cover and microwave for 5 – 8 minutes until soft. Drain water. Add the cream and butter to the bowl and toss until butter is melted. Add the cauliflower and ½ cup of cheese to a food processor or use a hand blender to process until the mixture is a smooth consistency. It should look like thick mashed potatoes. Season with salt and pepper. Let cool.

Preheat oven to 375 degrees. In a skillet over medium high heat melt the butter, then add the meat. Saute until browned, about five minutes. If an overwhelming amount of liquid is in the meat, partially drain and continue cooking. Add red wine and cook until sauce bubbles. Add tomato paste, garlic and Worcestershire sauce, stirring until blended. Add onion, corn and peas. Cover and let simmer for 30 minutes over low heat. Turn off heat and set aside while you finish the topping.

Right before putting the cauliflower on top of the meat filling, whip the egg whites to a stiff peak. Fold 1/3 of the egg whites into the cauliflower mixture to lighten it up. Then fold the remaining egg whites into the cauliflower mixture and gently mix until combined. In a 9×13 baking dish add the stew and spread until even. Gently top with cauliflower topping, spreading it evenly and not pressing down too far. Sprinkle the remaining 1 cup of shredded cheese over the top. Bake for 15 – 20 minutes until topping is puffed and cheese is browning slightly. Remove from heat and serve immediately. Sprinkle more Worcestershire Sauce on individual servings if needed.

Texan Macaroni and Cheese

texan mac and cheese_edited-1

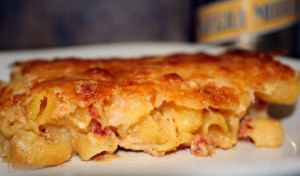
I am evil. Really evil. I had a craving for one of my dishes of yore and just had to make it. I include here the evil and less evil versions of the recipe. A few years ago I had this idea to play around with food and enter cooking contests. The hankering did not last long and I never won anything, but experimenting with one particular dish holds some sweet memories for me. I have always liked macaroni and cheese, but am often disappointed in the lack Of flavor in some versions. I like sharp cheeses and some punch in the flavors soaked up by the pasta. Growing up we would have the Kraft version on Fridays in lent. It did not feel like much of the meatless sacrifice it may have been intended, although it was a variation on the protein rich meals we usually ate. When I decided to join a macaroni and cheese recipe contest I was determined to have it taste the way I loved. At the time my brother and I happened to be visiting my parents. We spent a crazy late night making at least three batches of the stuff, working to make sure the cheese sauce was smooth and the final baked results were not dry, but also not runny. We had a lot of fun, caught up on each others lives and finished off the leftover beer, among other things. I don’t get to spend much time with my brother these days, so it was a treat to share the kitchen with him. It was a marathon cooking and picture fest, which I hope did not keep our mom up too late. She probably enjoyed lying awake laughing at our conversations. I never asked. Here is the original, non-award winning recipe and a lower carbohydrate, wheat free version. They both work, but the non-wheat pasta version results in an extra nutty flavor from the quinoa, I think. Overall, the combined flavors of Mexican beer, cheese and the tomato/chilies remind me of the south Texas foods I grew up with. Totally appeased my comfort food hankerings and brought back great memories.

Texan Macaroni and Cheese

Wheat Version

1 pound elbow pasta
1 can tomatoes and green chilies
1 1/2 lb Sharp or Medium Cheddar Cheese, grated
5 oz goat cheese
12 oz Mexican beer (suggest Negro Modelo)
1 can condensed cream of celery soup
2 tsp ground cumin
½ tsp sea salt
1/2 cup heavy cream
2 large eggs
1 Tbsp butter (for baking dish)
1/2 lb Monterrey Jack Cheese, grated
1 tsp paprika
1/2 cup crushed tortilla chips (optional)

Cook pasta per package instructions for al dente and rinse with cold water. Drain well. Heat medium pot over medium-high heat. Add tomatoes and chilies, beer, goat cheese, cream of celery soup, salt and cumin. Stir until blended and heated through. Turn heat to medium-low. Gradually add Cheddar cheese, stirring occasionally until cheese is melted. Remove pot from heat. Preheat oven to 350 degrees Fahrenheit. Add pasta to cheese mixture and combine until pasta is well coated. In separate bowl mix together cream and eggs until eggs are well beaten. Gradually fold cream/egg mixture into pasta until thoroughly combined. Butter 9 x 13 baking dish. Pour pasta mixture into dish. Bake uncovered for 20 minutes in preheated oven. Remove dish from oven and sprinkle Monterrey Jack cheese over pasta, followed by sprinkling paprika, then tortilla chips (optional). Bake for an additional 18 – 20 minutes until the top cheese is bubbly and browning. Remove from oven and let rest for ten minutes before serving.

Non Wheat Version

1 pound wheat free elbow pasta (suggest quinoa version)
1 can tomatoes and green chilies
1 1/2 pounds Sharp or Medium Cheddar Cheese, grated
5 oz goat cheese
12 oz Mexican beer (suggest Negro Modelo)
¾ cups heavy cream
½ cup chicken or vegetable broth
1 Tbsp arrowroot flour
2 Tbsp butter
1 tsp salt
¼ tsp pepper
2 tsp ground cumin
1/2 cup heavy cream
2 large eggs
1 Tbsp butter (for baking dish)
1/2 lb Monterrey Jack Cheese, grated
1 tsp paprika

The instructions of the recipe are the same except for one extra step. There are ingredients substituting the cream of celery soup that need to be added when the sauce is hot. Before turning off the heat and adding cheddar cheese to the sauce, add ¾ cup cream, broth, butter, arrowroot flour, salt and pepper. Using a whisk stir until the sauce is smooth. Continue with the recipe directions.

Soupless Green Bean Casserole

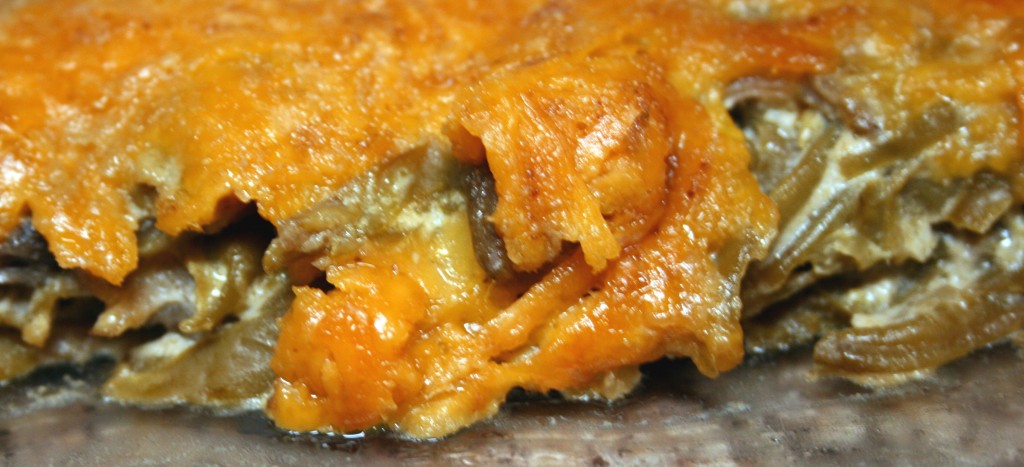
I like holiday meals. Partly because of all the lovely foods we don’t make during other times of the year, but also because the meals often require cooking all day. Darn. Heh. We like spending time in the kitchen. Besides keeping us close to the alcoholic beverage supplies, it is a place where we have great conversation and create or try new things. This is a good thing, in my opinion. Besides a huge bird, or a massive ham, I always look forward to green bean casserole. There is something about the beans and the creamy sauce and the occasional mushroom bits all swirled together in a single bite. This version of the casserole does not include the crunchy fried onions, because of the wheaty carbiness of them, but it still turned out to appease my comfort food craving for the soupy, crunch version. I don’t know how well this would work with whole fresh beans, but with the canned french style the sauce coated every bit very well and the richness I love so much was able to shine through. I am not partial to all the extra stuff they put in canned soups, as I have ranted about before, so I am always glad to figure out versions of comfort foods I enjoy with out the canned stuff. Big D got a little perturbed at how much I liked the green bean casserole over the flaxseed dressing, which was pretty good. His holiday comfort food goes back to his grandmother’s dressing, filled with biscuits, cornbread, apples and sage. I don’t know that he ever gave green bean casserole a second thought before we got together. What can I say, I am a green bean casserole girl. Have I mentioned I like green bean casserole? That last one was for Big D.

Soupless Green Bean Casserole

2 Tbsp butter
1 Tbsp coconut flour
1 tsp salt
1 tsp erythritol
1/4 cup onion, diced
2 cups mushrooms, diced
1 cup sour cream
1 Tbsp Worchestershire sauce
3 cans green beans, drained
2 cups shredded Cheddar cheese

Preheat oven to 350F. Melt 2 tablespoons butter in a large skillet over medium heat. Stir in flour until smooth, and cook for one minute. Stir in the salt, erythritol, onion, Worcestershire sauce and sour cream. Add mushrooms. Cook mixture until mushrooms sweat and liquid reduces by about 50%. Add green beans, and stir to coat and heat. Transfer the mixture to a 9×9 casserole dish. Spread shredded cheese over the top. Bake for 30 minutes, or until the top is golden and cheese is bubbly.

Zucchini Lasagna

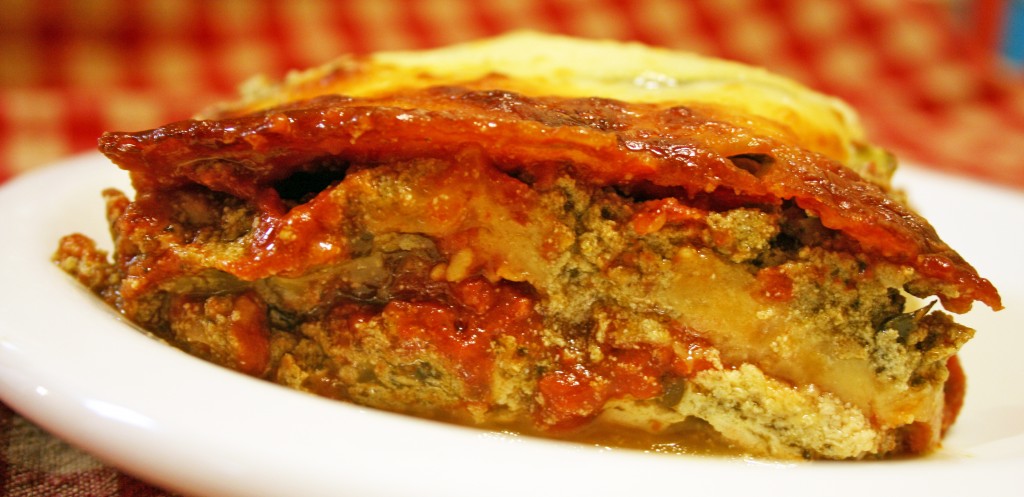
Here is another low carb dish! We are really enjoying the increased level of energy we are experiencing with our current diet, which includes avoiding grains, sugars and processed foods. I am not a die hard fan of most pasta dishes, but I am a lasagna lover. When we traveled in Italy eight years ago I was all about the meat, fish and vegetables – the pasta was, surprisingly to me, not my go to dish while there. Probably because I was corrupted by American knock offs, or because I did not go to Northern Italy, where there is supposedly ‘better’ pasta. I do not really feel like I missed out. Especially in Rome there were almost as many places to get a skewer of roasted meat as there were pizza slices. Go figure. The time we spent renting a villa in Tuscany was sprinkled with visits to the local co-op for freshly butchered meat and freshly picked produce. The cheeses and cured meats were quite an experience, too. Of course, the evil alcoholic concoction we came up with while relaxing the nights away made the eating at the villa a pleasant blur. We would take Coca Cola light (the Italian version of diet Coke) and mix it with some quite horrible tasting Grappa. We did find what I consider very good Grappa before we left, but that first bottle was nasty. Not to waste alcohol, we combined it with the soda and boom! We dubbed our creation Crappa. We got schnockered and did some skinny dipping in the pool. To make a long story short, and totally disconnected to our libation, this recipe takes care of my lasagna craving while keeping me away from the processed carbs found in pasta

Zucchini Lasagna

2 large, narrow zucchini
2 14-ounce cans diced tomatoes
1 small can tomato paste
2 tsp dried oregano leaves
2 tsp dried parsley leaves
2 cloves garlic, crushed
1/2 tsp salt
1/2 tsp Splenda or ¼ tsp sugar
12-15 ounces ricotta cheese
2 cups fresh baby spinach leaves, finely chopped
1 tsp ground nutmeg
1 ½ pounds ground Italian sausage, broken up and cooked thoroughly
1 cup sliced mushrooms
4 cups mozzarella cheese

Preheat oven to 350F. In small sauce pan combine the diced tomatoes, paste, oregano, parsley, onion powder, salt and Splenda or sugar. Bring to a boil over medium heat, turn down flame and simmer for about 15 minutes, then remove from flame and let sit. While it is cooking prepare the rest of the dish. In a medium bowl mix the ricotta cheese, spinach and nutmeg and set aside – trust me – it sounds odd, but the nutmeg enhances the ricotta flavor. Slice ends off of zucchini. With a vegetable peeler peel off long strips of zucchini. If you don’t have a peeler, instead make zucchini coins as thin as you can with a knife. To build the lasagna begin with a thin layer of sauce in the bottom of a 9×13 inch baking dish. Add a layer of zucchini strips/coins overlapping generously to make a solid layer, followed by the ricotta mixture, sauce, mushrooms, sausage and 1 cup of mozzarella. Repeat the layers again. Top with a third layer of zucchini and the last of the mozzarella. Bake lasagna until heated through and cheese on top begins to brown, about 45 minutes. Remove from oven and let cool for about ten minutes, allowing the lasagna to set.

Squash Pizza

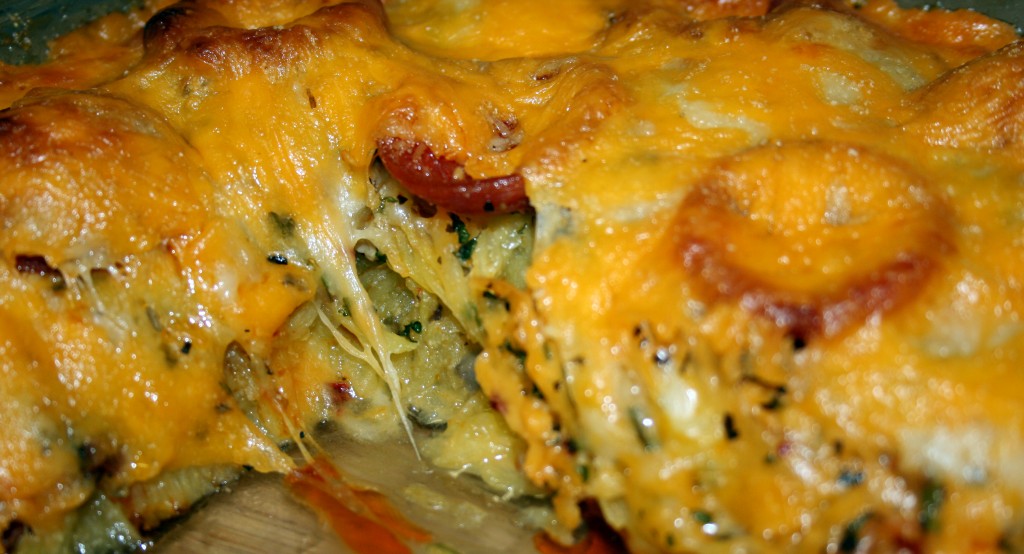
We love pizza and we love squash, especially spaghetti squash. It is not processed like store bought pasta or the flour used in most pizza crusts. Don’t get me wrong – I love pasta and pizza crust and pretty much any bread I encounter, but it never seems to leave after I eat it. I might as well just glue it on to my hips and butt instead of biting into it, because that seems to be where it goes. Not so with spaghetti squash. It is pretty darned good for you, as I have mentioned before, and is a great way to take care of those pizza cravings, because the wheaty crust of the traditional pizza is just not gonna work with our diet strategy. We have officially thrown up our hands and now make a casserole version of pizza. Yes you need a fork to eat it, but is it really a great loss? Not when it helps me keep my weight down. I am not saying this recipe will help you lose weight, but if you are watching your carbohydrate intake like me, there is nothing better for battling pizza advertisements. The squash does a wonderful job of helping the herbs mix and spread their joy, and thick sliced pepperoni is just heaven to me on a pizza. Omigosh is it good!

Squash Pizza

1 spaghetti squash
8-12 ounces pepperoni, sliced thick
2 cups shredded cheddar cheese
2 cups Italian mix cheese (romano, mozzarella, parmesan…)
2 cups roughly chopped mushrooms (or 8 ounces canned mushrooms)
2 Tbsp dried parsley
2 Tbsp dried oregano
2 tsp dried basil
2 tsp garlic powder
2-3 tsp sea salt
2 tsp red pepper flakes
1 tsp black pepper

Slice squash in half lengthwise and scrape out seeds and sinew. In a microwave safe dish place halves open side down and add about ½ cup water. Cook on high for 10-12 minutes. Preheat the oven to 350 Fahrenheit. While the squash cools prepare the rest of the dish – start with slicing pepperoni and roughly chopping mushrooms. When squash is cooled scrape out the ‘spaghetti’ with a fork into a bowl. Add mushrooms to the squash along with half of the herbs, salt and pepper and mix well. In a medium to large rectangular baking dish (no larger than 9×13) sprinkle about ½ cup of the cheddar cheese. Add the squash mixture. Take a mix of the cheese, about a cup, and spread on top of the squash mixture, pushing it into the squash a bit. Add the rest of the herbs and spices. Make a layer of the pepperoni, then top with the remaining cheese. Place in preheated oven and cook for 30-35 minutes, until cheese is melted and there is some browning. Let stand outside the oven for about ten minutes before serving. Slice like a casserole and serve with a simple garden salad.

Post Navigation