Any Kitchen Will Do

Give me a kitchen and I will cook.

Archive for the category “Silver Spring Kitchen”

Greek Salad Dressing

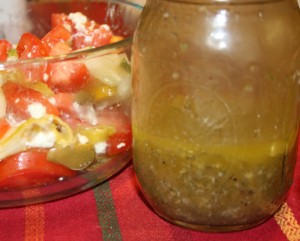
greek salad dressing_edited-1This post is the beginning of a short Greek-themed series resulting from a feast Big D and I made recently. It is all Big D’s fault. He brought home some beautiful lamb chops one evening and it started us talking about how good they would be marinated in some olive oil, lemon juice and mint. That conversation reminded us about how much we like tzatziki and dipping dolmas in it. Besides grumbling tummies we also reminisced about John the Greek’s Dressing from a restaurant of the same name we like in San Antonio, Texas. The restauruant dressing is great, and I think we figured out a pretty good version. This dressing is tangy with oregano, thyme and lemon dancing around together in my mouth! Not exactly like the stuff by John, but so much better, in my opinion, than Italian dressing, which tends to be sweeter, or straight oil and vinegar. I am still deprived of actually having a salad in Greece, much less experience the dressings used  there, so I am relying on my experiences with family-owned Greek restaurants I have frequented in the U.S. Whenever I come across one I duck in for a good meal. This dressing really stands up to a salad full of strong flavors like roasted peppers, feta and olives. The dressing also works well as a meat marinade.

Greek Salad Dressing

½ cup extra virgin olive oil
¼ cup white or red wine vinegar
¼ cup fresh squeezed lemon juice
2 cloves garlic, crushed
1 tsp dried oregano leaves
½ tsp dried thyme leaves
½ tsp fresh dill
½ – ¾ tsp sea salt
2 pinches freshly ground black pepper

Add all ingredients except oil into a glass jar with at least a two cup capacity. Stir with a fork or whisk until well combined. Continue stirring while adding oil in a thin stream. Stir a bit more after all the oil is added. Let sit overnight in the fridge before using. About ten minutes before serving pull it out to warm up a bit, since the oil may have formed solids. Shake and serve.

King Cakelettes

king cakelettes_edited-1

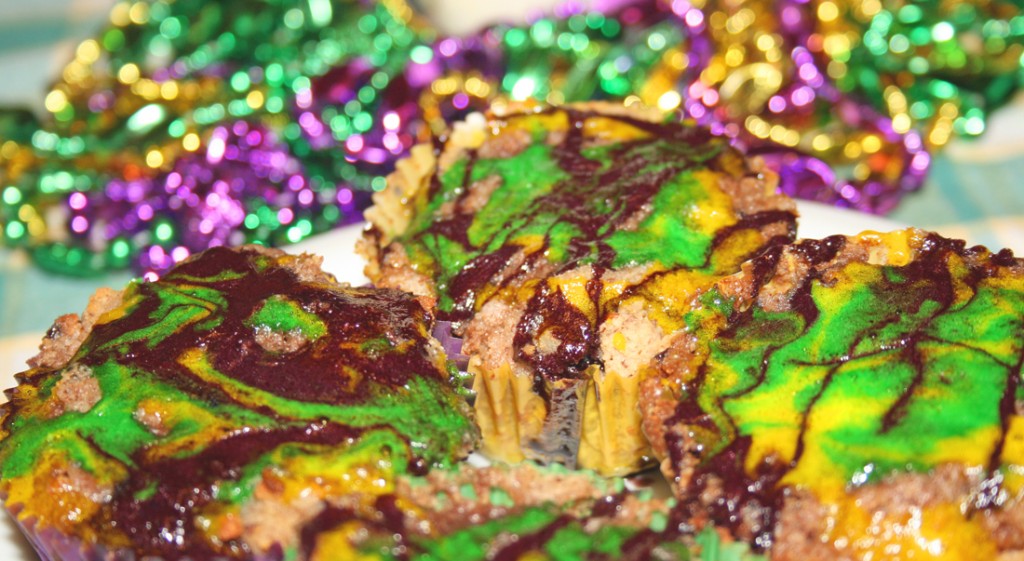
Laissez les bon temp rouler! Let the good times roll! Mardi Gras is near and as always we are celebrating. We closely followed up defrocking the house of Yule and Christmas decorations with putting up green, gold and purple for Mardi Gras. After living in New Orleans a few years back I cannot help but get in the spirit of Mardi Gras. There is never a lull down there after Christmas – the frivolity of New Years quickly turns to the Mardi Gras celebrations. Parades begin in mid-January so there is no time to waste. Last year I did a king cake marathon, making sure everyone in the house had some for celebrating. I made a regular, yeasty, cinnamon-y king cake, including sharing of details about king cake history, followed by a gluten free version of the cake. They were both delectable and fun to make. This year Mardi Gras arrives during a time when we are highly sensitive to sugar, wheat and carbohydrates. What is a girl to do? Well, adapt. That is what she does. I used my experimenting with low carb muffins over the past year and incorporated my love of king cakes into these little treats. Although not the traditional ring with colored sugar, the result definitely has the right flavors and textures in play. I usually avoid making king cakes most of the year, but this time I may not. These things are stupendous and I doubt they will last us through Fat Tuesday. I really need them to, if for no other reason but to balance the green potency of chartreuse. Enjoy!

Low Carb King Cakelettes

6 eggs
4 Tbsp heavy cream or half and half
1 tsp vanilla

3 drops liquid stevia
½ tsp sea salt
2/3 cup coconut flour
¼ cup golden flaxseed meal
½ cup splenda
½ tsp baking powder
1 cup pecans, shelled

For the Filling
6 Tbsp butter, melted
¼ cup splenda
1 tsp cinnamon
½ cup pecans

For the Icing
1 Tbsp water
1 tsp lime or lemon juice
½ cup splenda
Green, yellow, red and blue (2 drops blue, 3 drops red for purple) food coloring (optional, if coloring icing instead of using colored sugar)

For Decorating
Purple, green and gold/yellow colored sugar or Splenda (or add color to the icing)

Preheat oven to 400 degrees. On a baking pan spread out pecans in one layer. Bake in oven for about 5 minutes until they begin to brown. Prepare muffin pan with liners. In blender add wet ingredients and nuts together. Blend on low until nuts are broken up in small pieces. In separate bowl combine dry ingredients. Add wet ingredients to dry ingredients and stir just until combined. Divide batter among the 12 muffin cups. For the filling mix together butter, ¼ cup Splenda and cinnamon in a bowl. Grind into a powder the ½ cup pecans and combine with other filling ingredients. With a teaspoon drop some filling into the middle of each muffin. It will sink a bit and be covered by the muffin batter during the baking time. Bake for about 15 minutes until tops begin to brown. While the muffins are baking combine the water, juice and Splenda until smooth (make three different batches if coloring it instead of using colored sugar. A soon as the muffins come out of the oven drizzle the icing on top (drizzle all three colors on every muffin if using colored icing). Let cool for about ten minutes. If using colored sugar, sprinkle by alternating green, purple and yellow/gold*. Use all three colors on every muffin. Serve at room temperature or freeze and gently defrost in the microwave before serving.

*I planned on using colored Splenda for sprinkling, and got good information about coloring it here. My color to sweetener ratio did not turn out as well as it did for Millie, I think it was because I did not have enough coloring gel. It was definitely on its way, but I did not have time to go get more with an eager and waiting Little B, so I improvised. I added water and lemon juice to the colored sweetener and colored the icing and drizzled instead of sprinkled. Even though it did not work out this time, I am going to follow Millie’s coloring process in the future, for springtime is coming and more sprinkling opportunities are on the horizon!

Cauliflower Saute

cauliflower sautee_edited-1

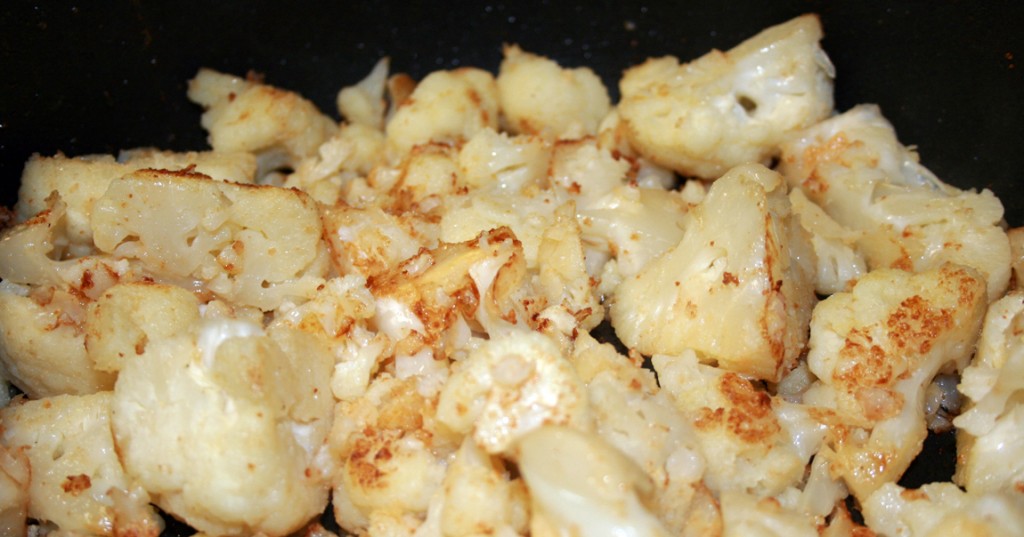
Here is another quick way to prepare cauliflower, in case you did not get enough when I cooked it with curry, or that time when I surrounded it with garlic, and don’t forget the time I made it into fritters, then there was the time I mashed it. We eat a lot of the stuff around here, and I don’t see and end in sight. I swear this time it is different, and enjoy it along a spicy or busy main dish. Nutmeg may sound like an odd spice to use outside of a dessert, but it works amazingly well with cauliflower and helps keep preparation simple and flavorful. It is pretty common in Middle Eastern and European dishes to use nutmeg in savory vegetable and meat dishes. After you use it with cauliflower you will understand why. Yum! I like making cauliflower on the stove top when we are in the RV, or whenever the oven is busy cooking the rest of the meal. It is easy to let it basically prepare itself while I am getting other parts of the meal done, then leaving it covered off the heat keeps it warm and ready to serve when you are.

Cauliflower Saute

1 head cauliflower
3 Tbsp butter
2 garlic cloves, crushed
¼ tsp nutmeg
Salt and pepper to taste

Cut cauliflower into bite-size florets. In large skillet melt butter over medium heat. Add garlic and cook for a few minutes until it softens. Turn up heat to high and add cauliflower. Toss so the butter and garlic coats the florets. Cook until the cauliflower begins to brown. Add nutmeg, salt and pepper and continue to toss every minute or so, allowing more browning. When about half the floret surfaces are browned turn heat to low and cover, cooking the cauliflower until preferred softness, about five to ten more minutes.

Whippersnapper Soup

whippersnapper soup_edited-1

Little B loves vegetable soup. I also consider her a whippersnapper. The traditional definition of the term refers to an insignificant or impertinent young person. Such a definition is not what I think of when I use the word. I think it more describes a precocious, inquisitive little one, which is much more in line with Little B’s personality. Her precociousness carries over to her view of soup. Whether it is actually chicken soup or tortilla soup or beef stew, she considers it vegetable soup. Pretty reasonable, I think, since most soup she has seen is loaded with vegetables. Big D and I like soup, too, especially if it has a bit of a spicy bite. I particularly like the limy chicken soup I make on occasion. Our ‘big people’ soup does not always go over well with Little B because her tongue is not yet attuned to hot spicy. I have never served Little B canned soup. I am sure someone has, but canned soup worries me. With the odd, faded colors of the vegetables and the grainy feel of the meat they are a bit unsettling to me. Don’t get me wrong – I grew up on Campbell’s Chicken Noodle Soup and still sometimes crave the salty soft noodles and bright yellow tinge of the broth. I don’t think they taste bad, except for the saltiness of some types, but I like to know where my food comes from, and I feel the same for what Little B eats. My know-where-it-comes-from parameters are certainly not met by canned soup. This soup recipe is simple to throw together and freezes well. I make it regularly, with a variation on the vegetables I add, depending on what is in the fridge. Little B eats three or four bowls a week, often when Big D and I eat spicy food. She even has it for breakfast sometimes. Frozen in two to three cups per resealable bag or container is perfect – enough to have in the fridge when requested without any going bad. Our whippersnapper loves it and it is so good for her.

Whippersnapper Soup

1 pound package 16 bean soup mix, flavor pack discarded
28 ounce can whole peeled tomatoes
4 celery stalks with leaves
2 cups fresh or frozen green beans, cut to 1 inch lengths
¼ head green cabbage
½ small onion
8 ounces ham, finely chopped (optional)
4 cups filtered water
1 – 2 cups chicken or vegetable broth
2 cloves garlic, crushed
1 Tbsp sea salt
½ tsp black pepper
1 tsp ground cumin
1 tsp fresh oregano, chopped

In stock pot or crock pot combine bean soup mix, tomatoes, celery, green beans, cabbage, onion, ham (optional) and broth. Add garlic, oregano, salt and cumin. Stir until spices are combined. Add water and stir a bit more. On the stove top bring soup to a boil then turn down to simmer. Cover and simmer for about four hours until beans and vegetables are soft. In a crock pot, set to low and cook for eight to twelve hours. Serve immediately or store in the freezer for up to three months.

Texan Macaroni and Cheese

texan mac and cheese_edited-1

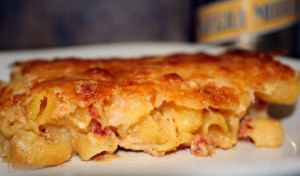
I am evil. Really evil. I had a craving for one of my dishes of yore and just had to make it. I include here the evil and less evil versions of the recipe. A few years ago I had this idea to play around with food and enter cooking contests. The hankering did not last long and I never won anything, but experimenting with one particular dish holds some sweet memories for me. I have always liked macaroni and cheese, but am often disappointed in the lack Of flavor in some versions. I like sharp cheeses and some punch in the flavors soaked up by the pasta. Growing up we would have the Kraft version on Fridays in lent. It did not feel like much of the meatless sacrifice it may have been intended, although it was a variation on the protein rich meals we usually ate. When I decided to join a macaroni and cheese recipe contest I was determined to have it taste the way I loved. At the time my brother and I happened to be visiting my parents. We spent a crazy late night making at least three batches of the stuff, working to make sure the cheese sauce was smooth and the final baked results were not dry, but also not runny. We had a lot of fun, caught up on each others lives and finished off the leftover beer, among other things. I don’t get to spend much time with my brother these days, so it was a treat to share the kitchen with him. It was a marathon cooking and picture fest, which I hope did not keep our mom up too late. She probably enjoyed lying awake laughing at our conversations. I never asked. Here is the original, non-award winning recipe and a lower carbohydrate, wheat free version. They both work, but the non-wheat pasta version results in an extra nutty flavor from the quinoa, I think. Overall, the combined flavors of Mexican beer, cheese and the tomato/chilies remind me of the south Texas foods I grew up with. Totally appeased my comfort food hankerings and brought back great memories.

Texan Macaroni and Cheese

Wheat Version

1 pound elbow pasta
1 can tomatoes and green chilies
1 1/2 lb Sharp or Medium Cheddar Cheese, grated
5 oz goat cheese
12 oz Mexican beer (suggest Negro Modelo)
1 can condensed cream of celery soup
2 tsp ground cumin
½ tsp sea salt
1/2 cup heavy cream
2 large eggs
1 Tbsp butter (for baking dish)
1/2 lb Monterrey Jack Cheese, grated
1 tsp paprika
1/2 cup crushed tortilla chips (optional)

Cook pasta per package instructions for al dente and rinse with cold water. Drain well. Heat medium pot over medium-high heat. Add tomatoes and chilies, beer, goat cheese, cream of celery soup, salt and cumin. Stir until blended and heated through. Turn heat to medium-low. Gradually add Cheddar cheese, stirring occasionally until cheese is melted. Remove pot from heat. Preheat oven to 350 degrees Fahrenheit. Add pasta to cheese mixture and combine until pasta is well coated. In separate bowl mix together cream and eggs until eggs are well beaten. Gradually fold cream/egg mixture into pasta until thoroughly combined. Butter 9 x 13 baking dish. Pour pasta mixture into dish. Bake uncovered for 20 minutes in preheated oven. Remove dish from oven and sprinkle Monterrey Jack cheese over pasta, followed by sprinkling paprika, then tortilla chips (optional). Bake for an additional 18 – 20 minutes until the top cheese is bubbly and browning. Remove from oven and let rest for ten minutes before serving.

Non Wheat Version

1 pound wheat free elbow pasta (suggest quinoa version)
1 can tomatoes and green chilies
1 1/2 pounds Sharp or Medium Cheddar Cheese, grated
5 oz goat cheese
12 oz Mexican beer (suggest Negro Modelo)
¾ cups heavy cream
½ cup chicken or vegetable broth
1 Tbsp arrowroot flour
2 Tbsp butter
1 tsp salt
¼ tsp pepper
2 tsp ground cumin
1/2 cup heavy cream
2 large eggs
1 Tbsp butter (for baking dish)
1/2 lb Monterrey Jack Cheese, grated
1 tsp paprika

The instructions of the recipe are the same except for one extra step. There are ingredients substituting the cream of celery soup that need to be added when the sauce is hot. Before turning off the heat and adding cheddar cheese to the sauce, add ¾ cup cream, broth, butter, arrowroot flour, salt and pepper. Using a whisk stir until the sauce is smooth. Continue with the recipe directions.
Cornbread Without Corn

coconut corn bread_edited-1How do you get cornless cornbread? Don’t put corn in it! And aren’t they cute? Big D made some awesome chili the other day and of course cornbread goes great with chili. Alas, the wheat and corn in traditional cornbread aren’t the greatest foods in the world to consume. Over the holidays we tried some low carb, corn free versions of ‘corn’ bread to make stuffing. It was okay, but the flavor and texture was not as close as these tasty little muffins. We previously tried to copy cornbread texture with flaxseed meal which did a pretty good job, but I look forward to trying this version next time we make dressing. I cooked these up in a mini muffin pan and easily got 20 muffins out of one batch of batter and cooked them for only 20 minutes – one minute per muffin – go figure. They were a bit on the dry side, compared to actual cornbread I have made in the past, but we easily resolved that issue with a slather of butter on top. Poor us. I may also try to do some kind of ‘corn dog’ version for Little B with some sausages and a larger muffin pan. I will let you know how they turn out!

Cornbread Without Corn

2/3 cup coconut flour
1/2 cup butter
8 large eggs
1/2 tsp sea salt
1/2 tsp baking powder

Preheat the oven to 400 degrees. Whisk together the coconut flour, salt, and baking powder. In another bowl, beat the eggs. Whisk in the melted butter. Add the coconut flour mixture to the egg/butter mixture and stir to combine until it forms a wet dough mixture. Divide the batter among 12 greased muffin tins or 20 mini muffin tins. Bake for 20 – 25 minutes or until golden brown. Let cool before removing from pan, or burn your fingers by removing them immediately from the pan to split and melt butter on the halves before eating them too soon and burning your tongue.

Adapted from the recipe here.

Creamy Vegetable Bake

creamy veggie bake

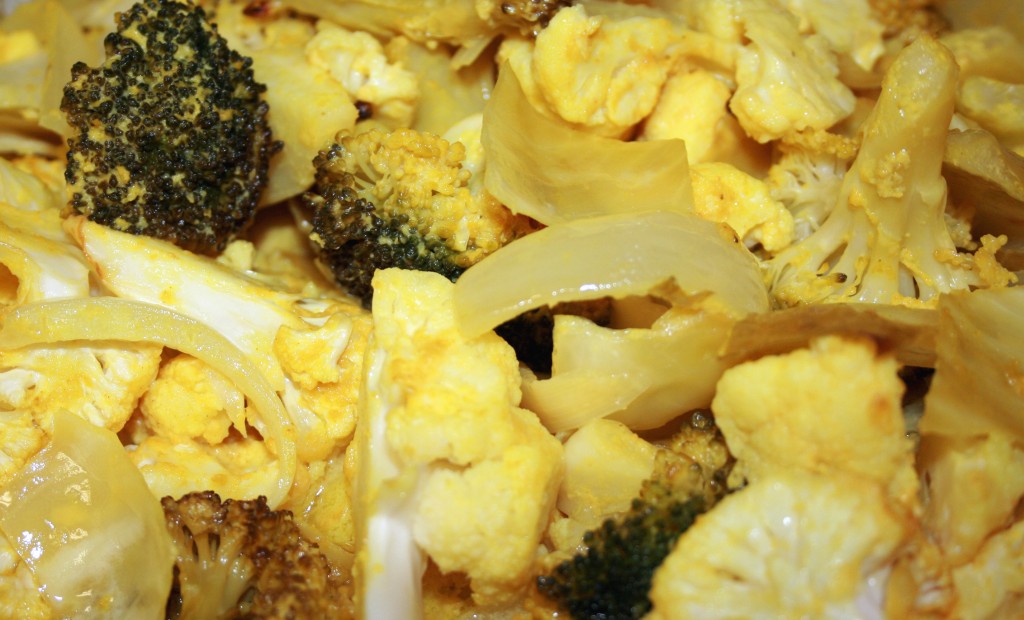
I am constantly trying to find new ways to prepare high fiber vegetables. There is only so many times a week I can chew on raw broccoli and cauliflower, no matter how good they are for me. Big D made a big, chipotle spiced pork roast in the crock pot the other day. I wanted some baked veggies to go along with it to balance the spicy. Of course I turn to a creamy, buttery sauce. I threw in a little turmeric for flavor and color. The vegetables did a good job of not taking away from the smokey chiles while also keeping my tongue from burning too much. Little B still prefers her broccoli ‘trees’ straight out of the freezer. Although I hoped she would like this baked version, which she did not find appealing, I am not going to complain. Someday she may not like broccoli. For now I will just smile and keep buying the bags of frozen green trees she can reach on her own with the help of the little red kitchen stool.

Creamy Vegetable Bake

1 crown broccoli
½ head cauliflower
½ head cabbage
1 small onion
½ cup butter, melted
½ cup heavy cream or half and half
¼ cup yellow mustard
1 tsp garlic powder
½ tsp turmeric
1 tsp sea salt
Salt to taste

Preheat oven to 350 degrees. Chop vegetables into bite size pieces. Mix vegetables together in a 9×13 baking dish. In a medium bowl combine butter, cream, mustard, garlic, salt and turmeric. Whisk until well combined. Pour sauce over vegetables and toss until coated. Cover with aluminum foil and bake for 45 minutes. Uncover and bake for an additional 15 – 30 minutes until vegetables are of preferred softness. We like them slightly crunchy. Serve immediately and make sure the sauce is drizzled over the top.

Blogiversary with Cheese Stuffed Jalapenos

stuffed jalapenosA year ago today I started this blog. Before doing so I thought about it a lot. I wondered how I would feel if it exploded with popularity, or if most interest would be from spammers. Would I want to continue it if either happened? Well, now I know. Spammers love me and I have a rather quiet following. My reaction is that I love doing it. Another thing I discovered over the past year is that I got a lot more out of blogging than I expected. I looked forward to discovering new recipes, documenting old ones and giving Little B experiences in the kitchen, like my parents did for me. The past 12 months were full of changes – I ended one job, started another, moved across the country, lived in four different abodes, said good-bye to family and friends in a number of different ways, then sought out meeting and getting to know new ones. I like my day job, but it lacks the creative outlet I crave, just as my previous full time work did. I don’t have a problem with the absence. My job fills a need for me to be challenged to solve big problems, while protecting separately the things I love. It may be wimpy of me, but I have always hesitated to rely on my passions to support a living. I think I fear it being taken away from me. The last time I tried to do so we got a new addition to our family – Little B – who influenced a change in the direction I was going and who has given me a new passion. My interest in a little, bustling catering business was not a good fit with a newborn. I don’t regret putting it to the side, for Little B is turning into quite the sous chef, the future looks bright for her and with her. Concentrating on my weekday job, knowing that Little B and Big D and cooking comes before and after it is working really well for now. Big D and I go with the flow in life, as always. Cruising the world on a sailboat full time is a ways off, but we are moving in that direction. Until then, I plan to embrace life, watch Little B grow and hold hands with Big D. I could not ask for more right now. When I looked back in the 123 blogs I did over the past year I was surprised to discover I did not start blogging sooner. I am actually an introvert, so doing the blog is stepping outside of my shell and it feels good. A whole year of yumminess. I see how my eating habits have evolved and how much better I feel without the sluggishness I get from high carbohydrate food. I also see how life experience, even over such a short period of time, changed how I approach things and find joy in small routine stuff that is easy to overlook. Oh, wait, this thing is supposed to be about food, too! I pondered for a while about what to make for this blogiversary. I considered doing something fancy and complicated, but that is not where I am right now. What I came up with is quite a gem. Today’s recipe is consistent with our low carbohydrate, wheat free leanings, and made with no concern whatsoever to what Little B likes. This is for me and Big D, who has been so supportive of my creative outlet, especially with tweak suggestions and acting as guinea pig. Spicy and cheesy and addictive these are. Thanks for visiting my blog. I hope you enjoyed your visit as much as I enjoyed preparing it for you, and please return soon!

Blogiversary Cheese Stuffed Jalapenos

6 large jalapenos, halved lengthwise and seeded
8 ounces cream cheese, room temperature
4 ounces ham, finely diced
1 tsp garlic powder
½ cup finely shredded Mexican cheese blend

Preheat oven to 400 degrees. Combine cream cheese, garlic and ham together. Fill the jalapeno halves with the mixture. Sprinkle with the Mexican cheese blend, gently pressing it into the filled halves. In a baking sheet or dish arrange the jalapenos so there is some space between them. Bake for about 20 minutes until cheese is melted and browning, possibly drizzling down the sides of the jalapenos.


Sugar Free Hot Chocolate Mix

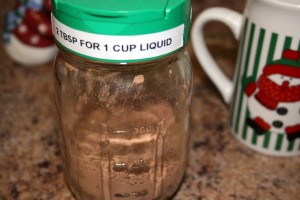
sf hot chocolate mixSitting on the balcony on a foggy, cold winter night there is nothing finer than a cup of hot chocolate and warm cookies while curled up under a thick blanket. In the process of watching my carb and sugar intake I miss the most the lovely smooth taste of that hot chocolate during the winter. Not any more. I finally found a sturdy combination of sweetener and cocoa that satisfies my hot chocolate craving for being not to sharp or too sweet, while avoiding a total diet ruination. I got the idea here, but tweaked it. The mix can go with whole milk for Little B, with coconut milk for Big D, or combine water and heavy cream for my favorite version. It is rich and smooth and I don’t even miss the marshmallows. I occasionally squirt a bit of peppermint whipped cream on top, but it is not really needed. Can you tell I am excited?! Try these yummy cookies along with it – they go great dipped in the cocoa! Making the mix also gave me an excuse for using a silly storage set up I saw on Pinterest – the top of a grated cheese container fits on a one-pint canning jar. How cool is that?! It keeps the mix dry and makes it easy to measure. The instructions on the side are convenient and serve as a gentle reminder about how to get the right proportions. Yes, I have a label machine that Big D laughs about…mostly I have it because of a kid in preschool – her name in permanent marker just isn’t right sometimes. Get it? Write…right. Okay, I will stop.

Sugar Free Hot Chocolate Mix

1 cup unsweetened cocoa powder
2 tsp pure stevia powder (equivalent to 1 1/2 cups pure cane sugar)
1 tsp sea salt
1/2 tsp ground nutmeg

For making a drink pick one of the following liquid combinations:
1 cup milk, or
1 cup unsweetened coconut milk, or
1/2 cup water, 1/2 cup heavy cream, or
1/2 cup water, 1/4 cup heavy cream, 1/4 cup coconut milk

In blender add cocoa powder, stevia, salt and nutmeg. Blend on high until sweeteners and cocoa are well combined. Store in airtight container at room temperature. For a cup of hot chocolate you will need 1 cup of liquid. I have experimented with the different liquid combinations listed above. To make cocoa combine 1 Tablespoon of cocoa mix with 1/2 cup of liquid until dissolved. Add the additional 1/2 cup of liquid and stir. Heat for 60-90 seconds until hot. Stir one more time. Enjoy!


Acorn Squash Bread

squash bread

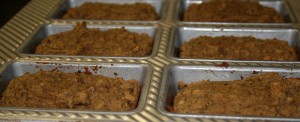
I bought a big, beautiful acorn squash a week or two ago. We have leftovers from the holidays filling the refrigerator and freezer, so in the process of figuring out what to do with the squash, I realized we were running low on goodies for Little B. Additionally, she was to begin a new preschool soon and we needed to stock up on portable wheat free snacks for her. And on top of THAT, I got an awesome new mini loaf plan as a gift and was itching to break it in. To make a bread that has some sweet and savory I included nuts and spices. Of course, relying on coconut flour and eggs to beef up the protein was a must. Little B likes this stuff a lot, and this particular squash was sweet, so the squash/snack/loaf pan goals were met with one recipe. Three birds, one stone. Big D bit into it and groaned – in a good way – it reminded him of his grandmother’s banana bread, and it had no bananas. Now THAT is a compliment!

Acorn Squash Bread

1 cup cooked, mashed acorn squash
½ cup walnuts
6 eggs
½ cup olive oil
1 Tbsp vanilla extract
½ cup coconut flour
¼ cup golden flaxseed meal
1 cup granular erythritol
1 tsp sea salt
1 tsp baking soda
½ tsp baking powder
1 tsp ground cinnamon
¼ tsp nutmeg

Preheat oven to 350 degrees. In blender combine squash, walnuts, eggs, oil and vanilla. Blend until smooth and nuts are broken up to around the size of little peas. In mixing bowl combine flour, meal, erythritol, salt, baking soda, baking powder, cinnamon and nutmeg. Add blended ingredients to dry ingredients and stir until well mixed. Pour batter into greased bread pan or mini loaf pan(s). Bake for 40 – 50 minutes if making one large loaf, or 25 – 30 minutes for mini loaves. The bread is done when the loaves look set (no longer liquid) and the edges begin to brown. Let cool in the pan before removing. Breads made with coconut flour need to cool before they are set enough to remove from pans, but making sure the pans are greased well make the removal process easier.

Post Navigation