Any Kitchen Will Do

Give me a kitchen and I will cook.

Archive for the category “vegetables”

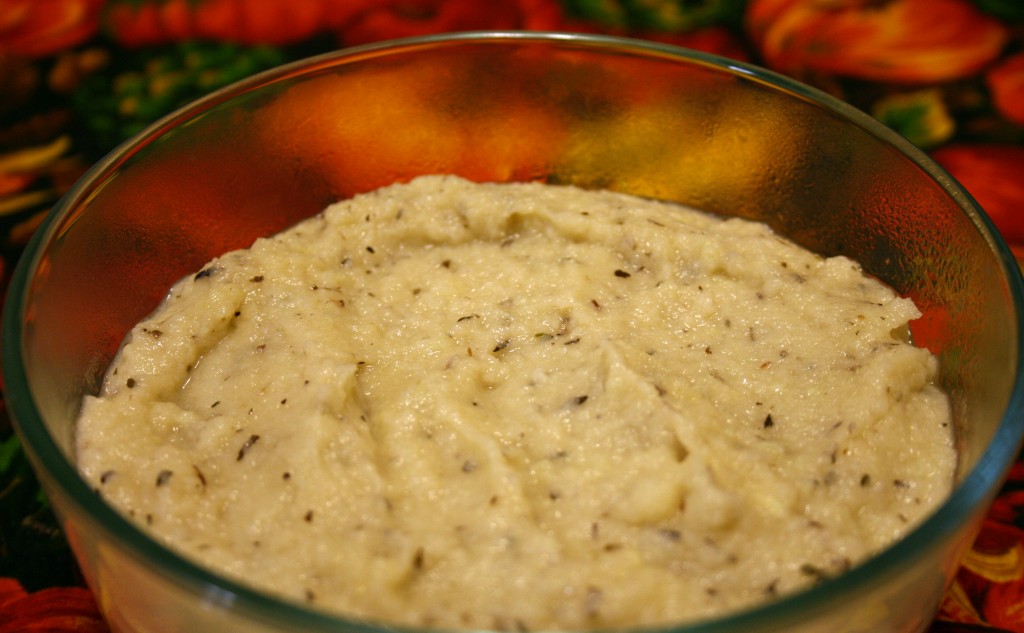
Veggie Kinda Hummus

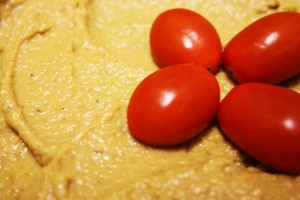
Hummus tastes good in so many ways. And by ways I mean it can be used as a dip, or spread, or side dish or a nice base for presenting other foods. My favorite use is spreading it on pita and filling with Greek salad. These days I try to not eat much pita, and frankly hummus made from chickpeas can put me over the top carb-wise on a day if I am not careful. I still like the idea of using hummus as a fiber filled  base for anything from salad to grilled meats or seafood. To reduce the carb count I came up with a way to make kinda hummus, using veggies. I can use it where I would otherwise put hummus, with fewer carbs while keeping the fiber content high. The other day Big D made a killer batch of taco meat. I slathered a layer of kinda hummus on the plate under the meat and cheese and tomatoes. Yum! The vegetable proportions can vary depending on what you have in the fridge, but keeping the cauliflower  at about half the bulk will helps obtain the hummus consistency. Be sure to let the veggies cool before pureeing, cuz they can certainly become a hot mess!

Veggie Kinda Hummus

2 cups chicken broth
1 medium head cauliflower
2 cups broccoli, chopped
1 small onion
2 celery stalks, chopped
1 carrot, chopped
2 cloves garlic
Salt and pepper to taste

Combine broth, garlic and vegetables in a large pot. Cook over medium high heat until boiling. Reduce heat and simmer for 30-45 minutes until all the vegetables are soft. Let cool until safe to transfer to use a hand blender, counter top blender  or food processor. Using a strainer or
slotted spoon separate the veggies from the liquid. Purée the vegetables until smooth, all at once or in batches. Add some of the cooking liquid only if it is too thick to purée. The vegetables will be pretty wet, so you probably won’t need the liquid. Serve warm or cold as a spread, dip or plating base for meats and other vegetables, as you would hummus.
Thyme and Lime Chicken Soup

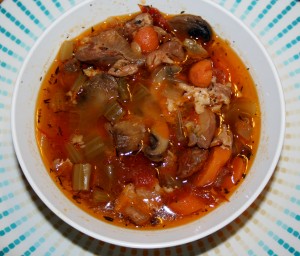
You are walking along enjoying the crisp fall breeze, when you suddenly have an urge for a bowl of hot chicken soup. You run by the store and into the soup aisle, only to discover that all their offerings include noodles, rice, tons of salt, preservatives and fillers. Where, oh where, is the veggie and chicken filled bowl of goodness you were craving? And what about that extra twist you want to be surprised with as the first spoonful slides down your throat? Well, here are all the things you’re looking for! The surprise is how wonderfully the beer mixes with the lime juice and thyme to give the soup a nip not usually found in chicken soup. Don’t worry. After hours of exposure to heat the alcohol cooks away, but the more subtle flavors of the beer stays in the soup. Little B inhaled two bowls in one sitting. Enjoy!

Thyme and Lime Chicken Soup

½ pound thick sliced mushrooms
3 Tbsp dried thyme
1 tsp sea salt
2 Tbsp extra virgin olive oil
3 limes, juiced with meat included
2 pounds cooked chicken, chopped or shredded
2 cups miniature carrots, chopped into coins
3 stalks celery, chopped
1 medium Onion, chopped
4 cloves garlic, crushed
4 small or roma tomatoes, roughly chopped
1 cup water
12 ounces beer (pick a strong flavored one – pale ale or IPA – goes well with the lime)
Salt to taste

Preheat oven to 350F. In a medium bowl combine the juice and pulp from one lime, olive oil, thyme and salt. Add the mushrooms and toss until coated. On a medium cookie sheet spread out the mushrooms slices flat with a little space between each. Drizzle any sauce over the mushrooms. Bake for 20-25 minutes, until they begin to brown. Remove from oven and set aside to cool. In crock pot add water and remaining lime juice with pulp, then turn pot to high. Add chicken, carrots, celery, onion, garlic and tomatoes. Stir and let soup heat up, about an hour. When the soup is hot add mushrooms (along with any juices left on the baking sheet) and the beer to the soup. Continue to cook on high for three more hours. Turn temperature to low and cook for 3 – 4 more hours. All the ingredients can be added to the crock pot at the same time and cooked on low for 8 – 10 hours, but the results are tangier if the vegetables are allowed to heat up in the water/lime liquid before adding the beer. Either method bears good results. If using the stove top, bring the soup to a boil before adding the mushrooms and beer, then simmer on low for 5 or 6 hours. Season with salt to taste before serving.

Stuffed Acorn Squash

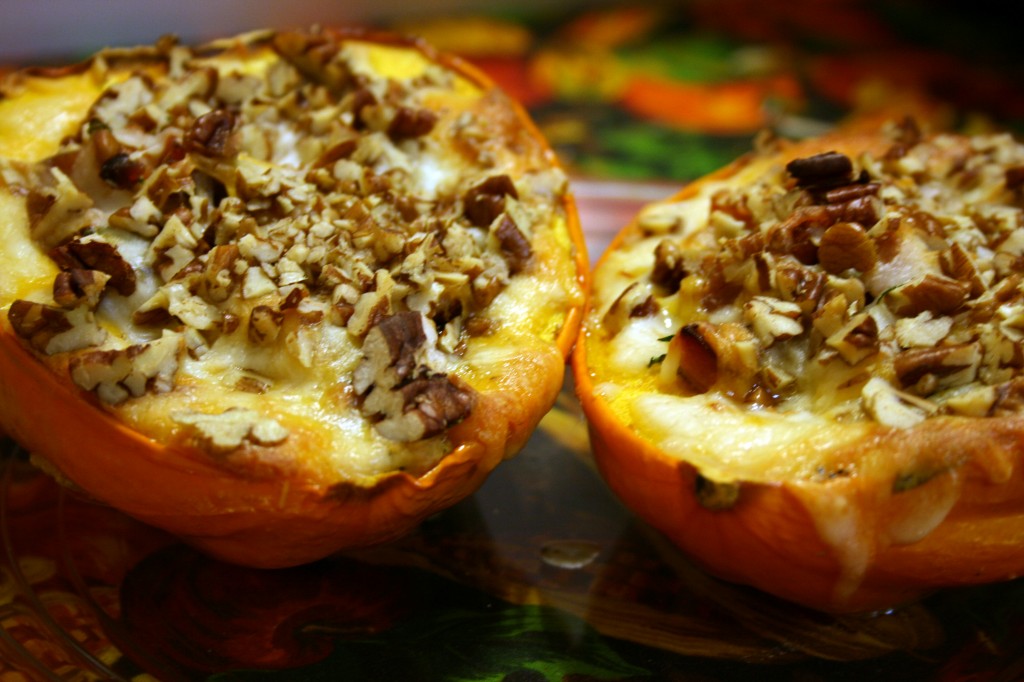
Fall has officially arrived in Maryland. The leaves are changing, the pumpkin patches are very orange and the mums are blooming everywhere I look. I worried a bit because a storm came through this evening and took away some of my beautiful fall leaves. They don’t last long and the rain likes carpeting the ground with them. Seeing all the shades of green, yellow and orange turn my cooking thoughts towards squash. The colorful vegetable compliment almost any main dish, and they are easy to prepare in many different forms. One of my favorite methods is roasting them in a way that makes them finger food, but I also found that stuffing them is another way to have delicious results. A few weeks ago we bought a variety of small squash to add a fall touch to our home décor. We included with them some Big D bought, which were orange acorn squash. Little B has enjoyed moving them around to decorate different parts of our place each day. When I get home from work I am never sure where they will be – in the bathroom, the patio or right in the middle of the kitchen floor. I wonder if Little B will realized she is eating some of her decorations for dinner…

Stuffed Acorn Squash

2 acorn squash, halved lengthwise and seeded
2 Tbsp butter
1 tsp sea salt
1 tsp ground black pepper
1 tsp garlic powder
1 tsp onion powder
1 cup fresh spinach, chopped
2 cups ham, diced*
1 cup cheddar cheese
1 cup Monterrey jack cheese
¼ cup pecans, chopped

Preheat oven to 400F. Divide the butter among the squash halves and spread it around inside each (using your fingers is the easiest way, of course). Sprinkle each half with salt, pepper, garlic powder and onion powder. In a large glass baking dish place the four squash halves. Bake for about 30 minutes, until soft and beginning to brown. Remove squash from oven and lower oven temperature to 350F.

Fill each squash half with a layer of spinach, followed by ¼ of the ham. Press the ham down firmly to remove any extra bulk from the spinach. Top with a mix of the cheeses and sprinkle with pecans. Bake for about 20 minutes, until heated through and cheese begins to brown. Remove from oven and let cool for about five minutes before serving.

*This recipe is a great way to use leftover meat, so feel free to substitute the ham for diced chicken, ground beef, pork roast or beef roast. If you don’t use ham, which is typically salty, you may want to consider sprinkling some salt on the meat before adding the cheese and pecans.

Mashed Cauliflower

I can hardly believe I did not write about mashed cauliflower before now. It is a staple of ours that appeases any craving I ever had for mashed potatoes. The flavor and texture is rich and smooth. It is a really easy dish, but the results can vary as far as thickness and smoothness. Over the years we have experimented with ingredients and processes – chopping finely before cooking, steaming the head whole, steaming then using a hand blender to puree, using a potato smasher to get a rough consistency. All of this experimentation led to a wonderful conclusion – cook the cauliflower in large chunks, then puree after draining the steaming liquid – this method seems to give it just the right texture and thickness. Too thin and you get soup, too thick and the flavors just don’t mix the right way. When it is just right – very Goldilocks is what I call it – the dish is addictive and will do you proud on any holiday dinner table. Don’t get me wrong, the soupy version and the one with flavors not mixing just righ are delicious as well, but we challenge ourselves to get dishes -just- right. The following version is wonderfully thick and flavorful. It definitely has a place of honor on our table. It is a dish that really is better the next day, so take advantage of that fact and make it the day before, only needing a quick heating up before serving.

Mashed Cauliflower

1 large head cauliflower, cut into large pieces
½ cup water
½ cup butter
4 cloves garlic, crushed
1 Tbsp dried thyme leaves
Salt to taste

In a large pot add water and 1 tsp salt. Bring to a boil and add cauliflower. Lower temperature and cover, steaming until soft, about 10 minutes. Place cauliflower in food processor or blender, retaining liquid from pot, and puree until smooth. If necessary add a small amount of the steaming liquid to help with the puree process. When smooth, return cauliflower to the pot and add butter, garlic and thyme. Turn heat on under pan to low and cook until butter is melted and spices are blended. The cauliflower can be served immediately, or chilled overnight to maximize the blending of flavors. Reheat over low heat on stove top for best results, but microwaving on 50% power until hot works as well. Serve along with anything calling for a side of mashed potatoes. You won’t regret it!

Spicy Shrimp Vegetable Toss

I didn’t want a hot meal, but I also did not want a cold meal. Between Big D and I we came up with this flavorful, crispy concoction. The vegetables are either raw or cooked just until warmed up – maximizing the nutritional potential of them all. A perfect match for shrimp, which needs very little cooking to be ready to eat. The spiciness made us feel full pretty quickly. No lead belly after this meal! We were excited about our find at the store – big, fresh shrimp calling to us. Our past is filled with Gulf Coast shrimp by the bowl full. We grew up sitting at dinners filled with peel-and-eat shrimp dipped in spicy horseradish cocktail sauce, complimented by boiled corn on the cob and new potatoes. For this dish it was Little B’s first attempt at peeling raw shrimp. The first one was pretty mangled, but serious improvement on the subsequent little shrimpies. You should see her peel an onion these days – masterful!

Spicy Shrimp and Vegetables

2 – 4 Tbsp extra virgin olive oil
½ tsp red chili flakes
5 cloves garlic, sliced thin
1 medium onion, sliced julienne
½ large red bell pepper, slice julienne
1 jalapeno, sliced julienne
½ tsp ground turmeric
1 tsp ground cumin
1 tsp ground cinnamon
1 tsp sea salt
2 pounds small/medium shrimp
½ head cauliflower, finely chopped
½ large tomato, sliced in about eight wedges
½ carrot, cut in thin strips
4 cups shredded cabbage
Additional salt to taste

Heat two Tablespoons of the oil in large skillet over medium high heat. Add chili flakes and let sizzle for a few minutes. Add garlic, onion, bell pepper and jalapeno. Saute until onions begin to sweat. Sprinkle in turmeric, cumin, cinnamon and salt, and toss until vegetables are coated. Add cauliflower and cook a few more minutes until it begins to sweat. Add shrimp and toss. Place tomatoes on top of mixture. Cover skillet and cook for about five minutes, until shrimp are cooked and pink. On serving plates spread ½ – ¾ cup cabbage. Add 1 – 2 cups shrimp and vegetable mixture, then top with carrot strips. Serve immediately.

Roasted Cabbage

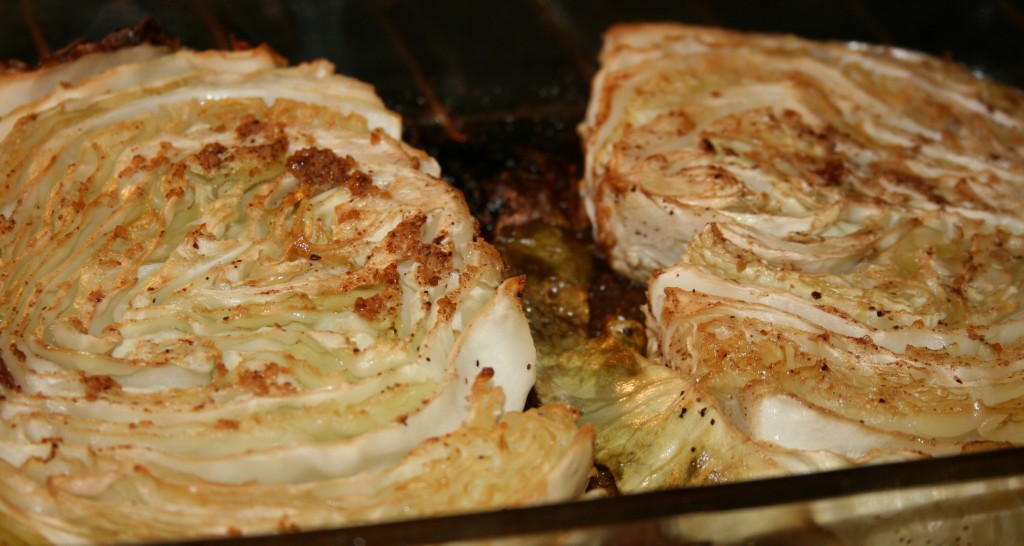
Now this – this is easy and delish! We love cabbage. And not just because it is low in carbohydrates and high in fiber, but because it tastes good, has great texture and marries up with a variety of flavors. It can double the bulk of a meat dish, or fill up the crevices of a stuffed pepper. It can also make a raw salad extra crunchy. Once when we were living in New Orleans I picked up a big head of green cabbage at a farmers market. All the heads looked pretty much the same, but I grabbed one of the smaller ones. Little B was a baby at the time, hanging around in a sling, nestled against me dozing on and off. I was tired from all the baby maintenance. When I got home and started cleaning and trimming the cabbage, it was filling up my sink. I was pretty impressed at the size. It was huge! Filled the sink. We ate on it for a week. Unlike Charlie of the Chocolate Factory, I never had to rely on cabbage water for dinner. I love the stuff. Roasting it in the oven brings out the flavor without getting watery. It is easy to cook up while something is finishing up on the grill. Enjoy!

Roasted Cabbage

1 head green cabbage
1 tsp chopped fresh garlic
1 tsp chopped fresh ginger
½ tsp ground nutmeg
2 Tbsp olive oil
Salt and Pepper to taste

Preheat oven to 375F. Cut the cabbage head in half, leaving the stem attached. Out of each half cut a 1” slice. Trim some of the stem out of the slices, but leave enough to help hold the slices together. Set aside the outer slices for another use. In medium rectangular baking dish drizzle 1 Tbsp of the oil. Sprinkle the garlic and ginger, as well as some salt and pepper over the oil in a shape approximate to the circumference of the cabbage slices. Place the slices in the pan, gently pressing down so the spices are pushed into the cabbage. Sprinkle the remaining oil on the top of the slices, along with more salt and pepper. Bake for about 30 minutes, then flip the slices. Bake for 30 more minutes, or until cabbage is softened to preferred tenderness. Serve immediately.


Stuffed Poblano Peppers

We found a new favorite dinner! Thank goodness I did not have enough peppers to double the recipe, or we would have had to roll ourselves out of the kitchen after eating them all! Did you ever go to a Mexican restaurant, order a chile relleno and end up with a kinda tasteless mound, filled mostly with rice and covered with soggy, sometimes slightly undercooked batter? Here is a way to avoid all that unpleasantness! A little more effort is needed to fill out the other elements of your own combination platter, but here is some help with enchiladas, salsa, guacamole and rice. Since I was not going to dip these peppers in batter I chose not to char and remove the skins – with all the cooking and liquid the peppers were soft and skin inconsequential. This is a a great recipe for using leftover meat and vegetables. It always works great with other pepper types, like cubanelle, etc…

Stuffed Poblano Peppers

4 Poblano peppers
4 ounces cream cheese, room temperature
2 cups shredded pork or cooked seasoned ground beef
1 cup cabbage, cooked and chopped up (or very finely chopped raw cabbage)
1 cup canned diced tomatoes
1 tsp dried oregano
1 tsp ground cumin
1 clove garlic
Salt and pepper to taste
2 cups shredded cheddar and Monterrey Jack cheese
½ cup water
Sour cream and lime wedges for serving

Preheat oven to 400F. Make one slit in each pepper lengthwise. Remove seeds and membrane from inside, careful to leave the stem attached to the pepper. Sprinkle inside of each pepper with salt. In blender or food processor combine tomatoes, oregano, cumin and a dash each of salt and pepper. Puree until you have a smooth tomato sauce. Set aside. Divide cream cheese into four pieces. With the back of your spoon (or your fingers if you don’t mind a little mess) spread the cream cheese around in the cavity off the pepper. In a medium bowl combine the meat and cabbage. Stuff the meat and cabbage mixture in the pepper, making sure the slit does not tear open any more than necessary. Top the meat and cabbage the tomato sauce, making sure it drizzles down within the pepper. Top with the cheese, tucking it in under the edges of the peppers, then gently pushing the pepper edges together as far as you can. In a baking dish just big enough to hold the peppers (9×9 or 8×11) pour in the water, then add the peppers. Cover loosely with foil and bake for 20 minutes. Remove foil and bake for 20-30 more minutes, until cheese begins to brown. Remove from oven and let cool for about five minutes before serving. Top with a dollop of sour cream and a lime wedge for drizzling juice over the stuffed pepper.


Another End of Summer Salad

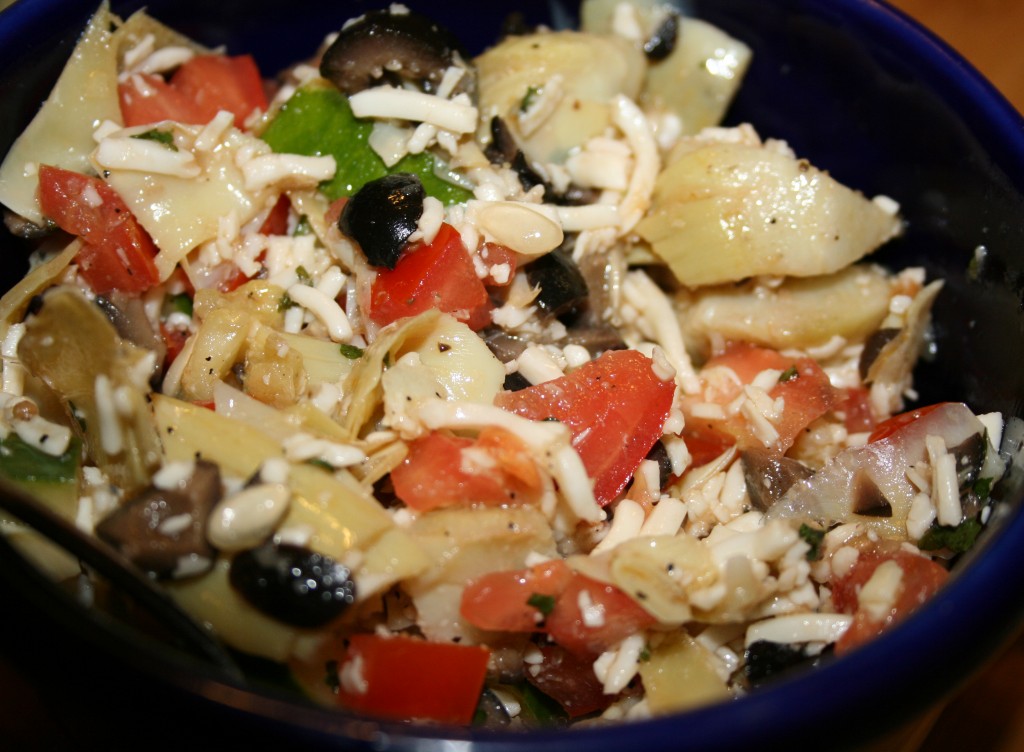
Okay, so I had a little of this and a little of that in the fridge (some of which was left over from making pizza (add link)) and thought they would make a wonderful end of summer salad. Again. It is a bit different from my other End of Summer Salad (add link), but I am really trying to squeeze in the summer produce, so I decided to post it. I know it was recently, like, right below, but this one has a totally different taste. I have to say right now that I absolutely adore my daughter and love how her fine motor skills are improving exponentially while helping me in the kitchen. Now I must also say that I really enjoyed making this salad all by myself – not having to lean over a footstool, without a helper who is learning to use a knife, or a munchkin putting a little too much parsley in the bowl or an imp who insists on measuring and pouring the olive oil from the huge bottle on her own and spilling about half a cup on the counter. While she watched the last bit of Willy Wonka and the Chocolate Factory (1971 version, thank you very much) I snuck in the kitchen and whipped up the salad. I liked doing it by myself as much as I will like the next time she helps break a dozen eggs for a frittata – its just a different way of cooking. Here she comes!

Another End of Summer Salad

3 Tbsp apple cider vinegar
1 tsp sea salt*
½ tsp ground black pepper
1 Tbsp dried parsley leaves
1 tsp garlic powder
½ tsp onion powder
Dash of dried red pepper flakes
4 Tbsp extra virgin olive oil
2 medium tomatoes, rough chopped
½ large cucumber, rough chopped
1 cup artichoke hearts, rough chopped
½ cup chopped black olives
1 cup shredded Monterrey Jack, Feta or Parmesan cheese

Add first seven ingredients in small bowl. While whisking the vinegar mixture gradually add olive oil until well combined. In medium bowl add tomatoes, cucumber, artichoke hearts, olives and cheese. Drizzle dressing over vegetables and stir until evenly distributed. Chill for at least 20 minutes. Toss again before serving.

*If you use Feta or Parmesan cheese you may need less than 1 tsp of sea salt, since they tend to be stronger flavored cheeses.

End of Summer Salad

As the temperatures gently creep lower I tend to linger over the fresh, seasonal summer produce at the markets. I know some of it, although sadder looking, will be around pretty much year round. Some will have faded colors or less flavor. Others will just get more expensive. I look forward to the squash and root vegetables that are already becoming more prevalent, but I currently plan on cherishing the last of the bright tomatoes, abundant cucumber and perfect avocados that have become a habit over the past few months. Here is a wonderful, simple, soft salad that fully appreciates some of the summer fruits that we often call vegetables. Enjoy!

End of Summer Salad

4 Tbsp extra virgin olive oil
2 Tbsp apple cider vinegar
1 small bunch basil leaves, finely chopped
1 tsp sea salt
1 tsp ground black pepper
½ lime, juiced with pulp
2 ripe Hass avocados, peeled and coarsely chopped
3 roma tomatoes, cut into about 20 pieces each
½ large cucumber, peeled and coarsely chopped

In a small bowl combine the first six ingredients. Set aside. In a large bowl combine the avocado, tomato and cucumber. Add dressing and stir gently, trying not to smash tomatoes or avocado too much. Chill covered for about an hour before serving.

Zucchini Lasagna

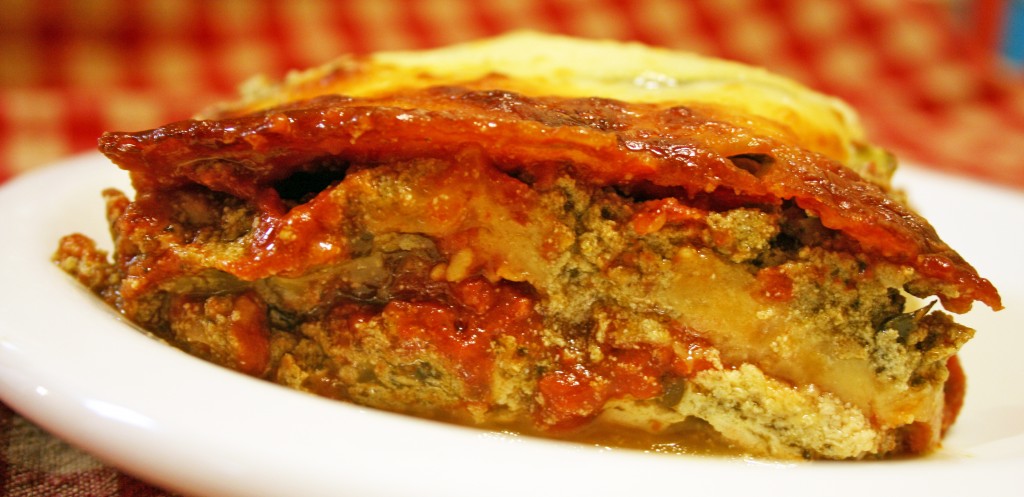
Here is another low carb dish! We are really enjoying the increased level of energy we are experiencing with our current diet, which includes avoiding grains, sugars and processed foods. I am not a die hard fan of most pasta dishes, but I am a lasagna lover. When we traveled in Italy eight years ago I was all about the meat, fish and vegetables – the pasta was, surprisingly to me, not my go to dish while there. Probably because I was corrupted by American knock offs, or because I did not go to Northern Italy, where there is supposedly ‘better’ pasta. I do not really feel like I missed out. Especially in Rome there were almost as many places to get a skewer of roasted meat as there were pizza slices. Go figure. The time we spent renting a villa in Tuscany was sprinkled with visits to the local co-op for freshly butchered meat and freshly picked produce. The cheeses and cured meats were quite an experience, too. Of course, the evil alcoholic concoction we came up with while relaxing the nights away made the eating at the villa a pleasant blur. We would take Coca Cola light (the Italian version of diet Coke) and mix it with some quite horrible tasting Grappa. We did find what I consider very good Grappa before we left, but that first bottle was nasty. Not to waste alcohol, we combined it with the soda and boom! We dubbed our creation Crappa. We got schnockered and did some skinny dipping in the pool. To make a long story short, and totally disconnected to our libation, this recipe takes care of my lasagna craving while keeping me away from the processed carbs found in pasta

Zucchini Lasagna

2 large, narrow zucchini
2 14-ounce cans diced tomatoes
1 small can tomato paste
2 tsp dried oregano leaves
2 tsp dried parsley leaves
2 cloves garlic, crushed
1/2 tsp salt
1/2 tsp Splenda or ¼ tsp sugar
12-15 ounces ricotta cheese
2 cups fresh baby spinach leaves, finely chopped
1 tsp ground nutmeg
1 ½ pounds ground Italian sausage, broken up and cooked thoroughly
1 cup sliced mushrooms
4 cups mozzarella cheese

Preheat oven to 350F. In small sauce pan combine the diced tomatoes, paste, oregano, parsley, onion powder, salt and Splenda or sugar. Bring to a boil over medium heat, turn down flame and simmer for about 15 minutes, then remove from flame and let sit. While it is cooking prepare the rest of the dish. In a medium bowl mix the ricotta cheese, spinach and nutmeg and set aside – trust me – it sounds odd, but the nutmeg enhances the ricotta flavor. Slice ends off of zucchini. With a vegetable peeler peel off long strips of zucchini. If you don’t have a peeler, instead make zucchini coins as thin as you can with a knife. To build the lasagna begin with a thin layer of sauce in the bottom of a 9×13 inch baking dish. Add a layer of zucchini strips/coins overlapping generously to make a solid layer, followed by the ricotta mixture, sauce, mushrooms, sausage and 1 cup of mozzarella. Repeat the layers again. Top with a third layer of zucchini and the last of the mozzarella. Bake lasagna until heated through and cheese on top begins to brown, about 45 minutes. Remove from oven and let cool for about ten minutes, allowing the lasagna to set.

Post Navigation