Any Kitchen Will Do

Give me a kitchen and I will cook.

Author Archive

Broccoli Cauli Mash

broccaulimash

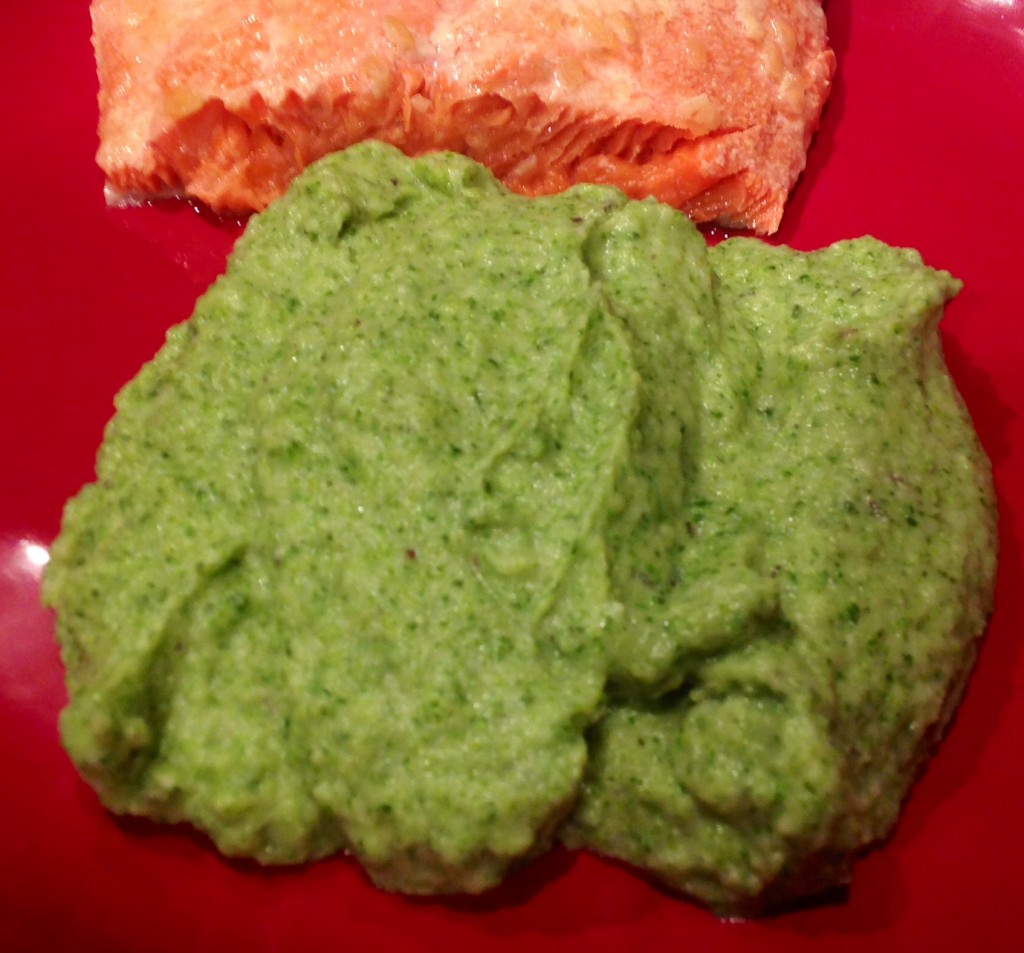
If you are looking for a quick, different, single pot, green side dish then your search is over. It really stands out from the ones that leave the vegetables all whole and overly recognizable. I first got the idea for this dish from my mother in law. We started making straight mashed cauliflower a few years ago, and I would like to think that it was contagious and soon after crept into the kitchen of the in laws. During one of our visits to Texas this broccoli cauliflower mash appeared and was delicious! I don’t know exactly what she put in her dish for seasoning, but I did ours the way we like it – buttery with a little help from garlic and thyme. When I first saw it sitting on my plate it reminded me of mushed peas. When I put it in my mouth it was definitely not made of peas, was light, dreamy, and very much complimented the tender smoked salmon Big D cooked up. A weeknight dinner was on the table in no time!

Broccoli Cauli Mash

2 pounds fresh broccoli florets
1 pound fresh cauliflower florets
1/2 small onion, diced
1/2 cup butter, sliced into eight pieces
2 tsp dried thyme leaves
3 cloves garlic, crushed
1 tsp sea salt

In a medium pot pour 1 cup water and add broccoli, cauliflower and onion. Cook over medium-high heat until vegetables are soft, 8-10 minutes. Drain and retain water from pot. Add thyme, garlic, salt and butter slices, stirring until mostly melted. Using an immersion stick blender, puree until vegetables are smooth. If puree is too thick for your taste add a small amount of the retained water, from boiling the vegetables, to thin it out. Mash can be served immediately, but flavors will combine more thoroughly after resting for an hour or more.

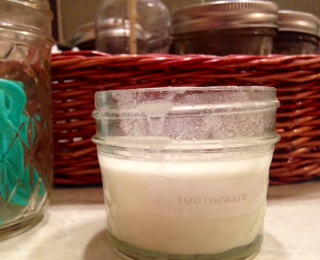
Toothpaste

toothpaste

During our ongoing effort to simplify the products we use in and on our bodies, we delved into making toothpaste a while back. Our bathroom and kitchen are looking more and more similar, what with all the bathroom products we make now! The toothpaste we came up with works really well and my teeth feel soooo good and clean after using it. We do not go to the trouble of sticking the stuff in a tube, and share the little pot of paste that lives on the bathroom counter. Some may not like the approach of double dipping with multiple brushes, but the stuff naturally has antibiotic properties from the coconut oil and antibacterial tendencies of the baking soda. We don’t worry about spreading cooties – in our little home cooties are going to be spread regardless of shared toothpaste. Each person could have their own little pot, if you get squeamish. The sweetener is optional, but makes the paste more appealing to Little B, so in it goes! There is no harm in swallowing the toothpaste, unlike the stuff from the store, for it has no fluoride. Swallow away!

Toothpaste

3 Tbsp baking powder
1 Tbsp baking soda
10 drops tea tree oil
20 drops peppermint oil
1/8 to 1 tsp Stevita granulated sweetener (optional)
1/4 cup melted coconut oil

Combine baking powder, baking soda, tea tree oil, peppermint oil and sweetener in a small bowl. Add coconut oil and stir well. Place paste uncovered in a resealable container you will use in the bathroom. Let paste sit for a day – it will thicken and rise a bit. To use, scrape a small amount onto the bristles of a toothbrush. Wet brush and clean teeth as usual.

Shampoo and Such

shampoo

Our kitchen is always full of conversation and laughing and very often a big mess. The messes come from more than meals cooked, and sometimes we use non-kitchen cooking methods. As another year of my blog begins I ponder things other than cooking we do there. During this fourth year I am going to share some of these concoctions and methods, sprinkled among the dishes we prepare fully in the kitchen. I will start this sprinkling with shampoo!

Over the past few years we have gradually replaced many store-bought toiletries in our bathroom with simple homemade versions. Our experiments resulted in combinations that work best for us, although for other people a bit of tweaking may be needed. Our goal is to avoid as many unnecessary chemicals as possible in what touches our bodies on a daily basis. Just like what you get at the store, hair and skin types influence the effectiveness of products. When I used commercial products I had to change brands every two months or so because my hair would get weighed down with build up. The solution was to use another kind that seemed to get rid of the build up, but create another, thus the rotation. This homemade shampoo never seems to create the build up. Each batch may vary a bit from lax ingredient measuring, or the measurer (my batches are apple cider vinegar heavy, while Big D’s have a bit extra baking soda). What works great for my curly hair may make Big D’s or Little B’s straight hair a bit greasy. What works best for them may or may not dry mine out – my hair is sensitive to the humidity level wherever I am, so I can’t honestly blame the shampoo. The measures in this recipe make for a good balance to clean all three of our heads, even though we do not all have the same hair type.

Shampoo

4 ounces (1/2 cup) Castile soap, any type
1 Tbsp olive oil
2 Tbsp baking soda
4 ounces (1/2 cup) coconut milk
2 ounces (1/4 cup) apple cider vinegar
8-10 drops tea tree essential oil
8-10 drops sandalwood or peppermint essential oil

Using a funnel, add all ingredients into a squeeze bottle that holds at least 16 ounces. Shake for about one minute until will combined. Shake well before each use – the picture shows it rested and separate before shaking. If after three to four uses your hair is greasy use less vinegar and a bit more baking soda. If hair feels dry when it is no longer wet add more vinegar. It may take 6-8 washings before build up from commercial shampoos and conditioners is fully out of your hair, so don’t give up after the first washing – your hair needs some transition time.


Three Year Tapenade

tapenade

Happy Blogiversary to me!!! Rarely do I pursue things for long periods of time…consecutively. I do something, then I stop, then I do it again, then I begin something new…you get the idea. It is not that I leave things incomplete, but I will find a stopping point and then go in another direction. My longest recorded continuous successes are people related – being a daughter, a brother a friend, being hitched to Big D over ten years and being mommy to Little B for over five years. Other stuff, like jobs and hobbies are more in the realm of come-and-go. I think I can definitely say that this blog is getting some longevity – a few days ago I started my fourth year, so I have passed my third blogiversary! When I started three years ago it was intended to be a place to put recipes so I could get to them easily. My cookbooks did not always make the cut when we moved and consolidated, so my creations would sometimes be lost. Tracking it on a blog let me combine the availability I wanted, my desire to do some writing and my continued joy in taking pictures. It has become more than just a place to record my food journey, but that of my little family as well. It is a place where others can come and experience it with us. The blog has given me the opportunity to share stories of my childhood, my family, friends and our geographic journeys. The name of it came from the fact that I cook in whatever kitchen I come across.  If the kitchen is not mine the owners so far have generously shared their space with me. Thanks goes out to them and to you for checking in on occasion!

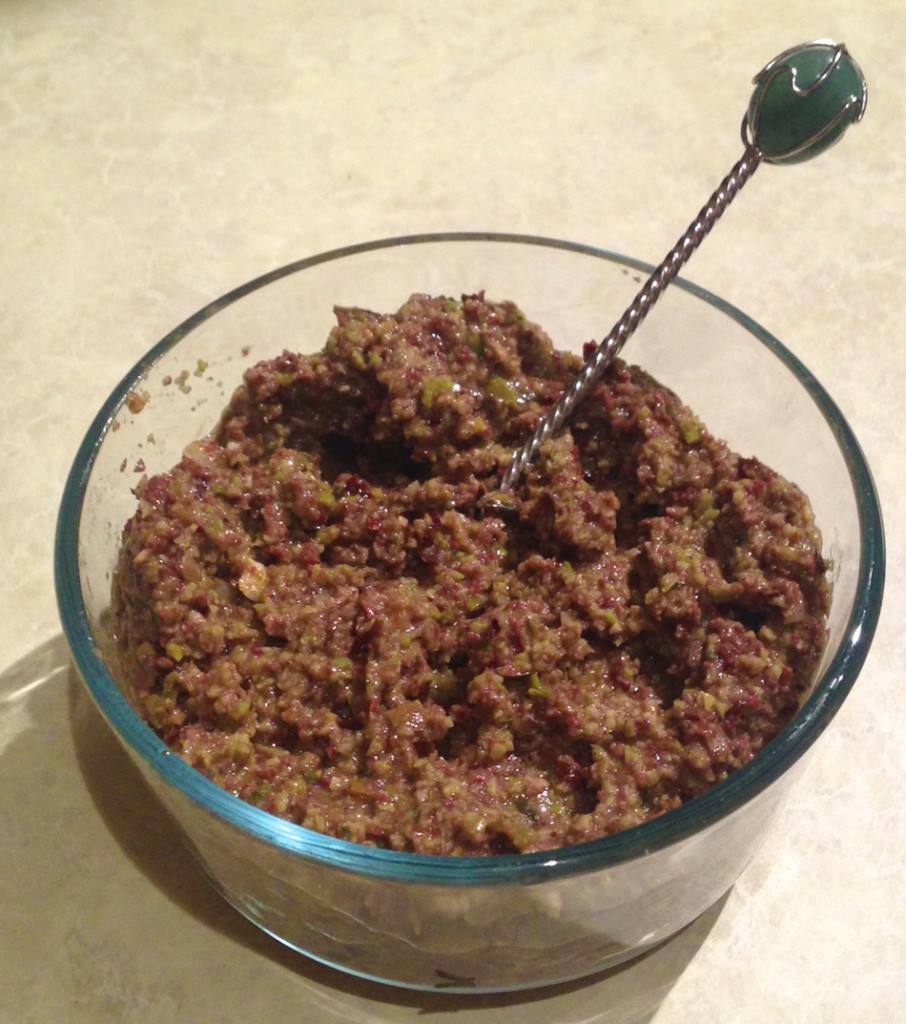
I celebrated the end of the first year with cheese stuffed jalapeno halves. Yum! The second year I did it with low carb cinnamon rolls. Double yum! This year I am taking a different slant, with a New Orleans theme.  I am taking a more savory slant this year with some tapenade. It is very easy and very flavorful. If you ever have a bunch of partially full jars of olives, like we often do, it is a great way to use them.
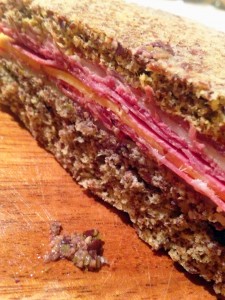
muffalettaThis is not the first time I have mentioned my family’s love for New Orleans. The New Orleans connection is the lovely sandwiches that first introduced me to tapenade when I was a kid. Muffuletta sandwiches are about as common in New Orleans as po’boy sandwiches and gumbo. They originated in the Central Grocery right there on Decatur Street in the French Quarter. When I first had one I could not get enough of the olive ‘salad’ in the sandwich. Between the olives and the meats and cheeses it was a very satisfying meal. To do a version of the sandwich that fits our eating habits I made up some one minute buns in the microwave, whipped up a batch of tapenade in the food processor and opened up a few packages of deli meats and cheeses. The picture to the left does not do it justice, but there is a thick layer of tapenade on the bread that is practically the same color. A blob of the tapenade sits next to it as proof! The tapenade leftovers will not go to waste – I have used it as a dip, a stuffing for chicken, pork and mushrooms. It has an addictive saltiness that, believe it or not, sates my salty snacking craving I used to appease by eating chips. Just a straight spoonful can do the trick! Please make a batch and toast me with a cracker or sandwich full!

Three Year Tapenade

2 cups mixed black and green olives, pitted
3 cloves garlic
1/4 cup small capers
1/4 cup extra virgin olive oil
1 tsp dried oregano leaves
1 tsp dried basil leaves
1 tsp dried parsley leaves
1 anchovy fillet (optional)

Place all ingredients except the olive oil into a food processor. Slowly add the olive oil in a stream while the mixture is blending on low speed, until mixture is an evenly sized paste. Serve as condiment for sandwiches, or with crackers as a dip. Store refrigerated in an air tight container.

To make a Muffuletta Sandwich: the traditional sandwich layers Italian meats (mortadella, salami, ham) and cheeses (mozzarella, provolone) in an alternating pattern, so there is a thick pile of it in the sandwich. The traditional bread is a large round focaccia-type loaf about 10″ in diameter, which can actually make about four sandwiches. On one side of your bread (or low carb individual muffins in our case) spread a thick layer of the tapenade. Layer your meats and cheeses until there is a healthy pile. Add the other half of the bread. Cut into portions and eat!
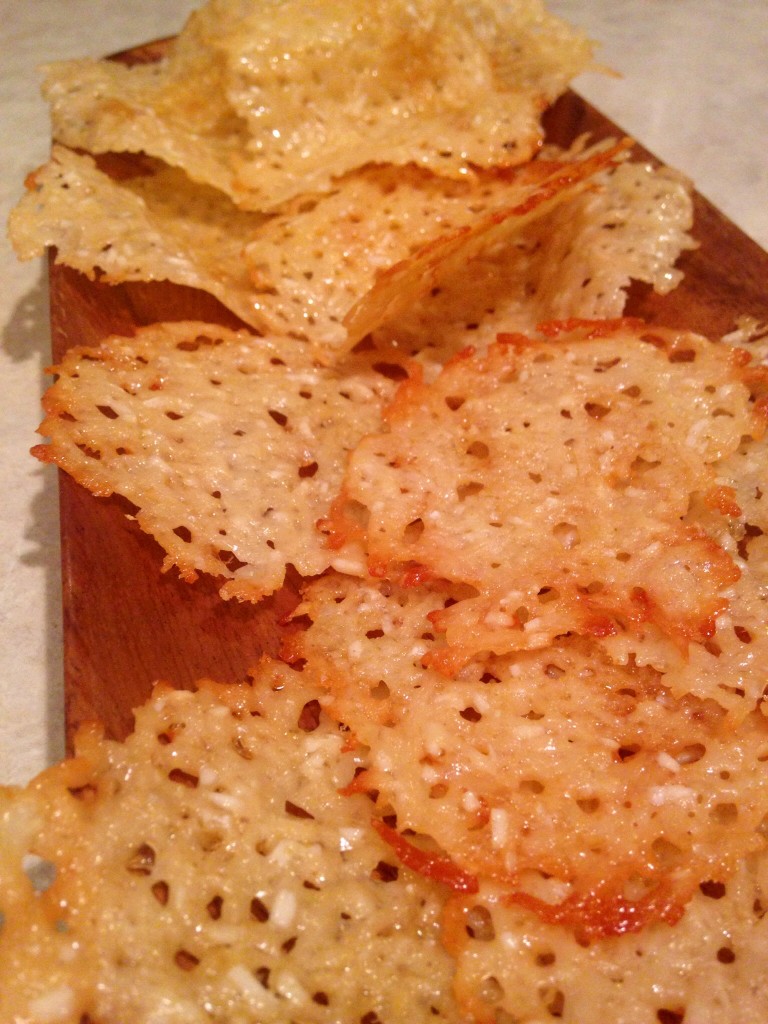
Parmesean Crisps

image

Dinner the other night was some leftover steak. Wonderful stuff, but looking kind of lonely sitting by itself on the plate. I was hard pressed to be inspired by the veggies in the fridge for accompanying the lovely steak. I made some awesome cheddar cheese crisps a while back, and there was parmesean sitting next to the sad veggies. Let’s make some with parmesean! They were quick, fun and brightened up a dinner made up otherwise of leftovers. Little B and I even took some off the baking sheet early and laid them over some spoon handles. When they cooled they looked like little bitty taco shells. Molding the cheddar cheese version did not work as well when I tried, because the parmesean cheese is a drier cheese and cooperated much better. I can’t describe how spiffy they tasted when a slice of steak was nestled in one. Our leftover dinner became a little steak and cheese party. We even finished it off with some of our homemade sugar free ice cream sundaes – party dessert! One warning: I did a few crisps on a baking sheet without parchment paper and they seemed to want to become a permanent fixture of the pan, so I strongly recommend the parchment!

Parmesean Crisps

Grated parmesean cheese
Sea salt
Garlic powder or cayenne pepper powder ( if you like a kick)

Preheat oven to 325 degrees. Line shallow baking sheets with parchment paper. Measure a heaping tablespoon of cheese and drop it onto the paper. Use your finger to spread out the cheese into a round shape of even thickness. Sprinkle lightly with salt and garlic powder or cayenne pepper powder. Leave about an inch between rounds for possible spreading. Bake for about five minutes, until the edges begin to brown. Remove pan from oven. Crisps can be removed from paper after about a ,minute with a spatula. If you want to shape them for fancy serving, do so immediately with the back of a spoon, thick handle of a ladle or press them on the bottom of a muffin pan to make them more like little bowls.

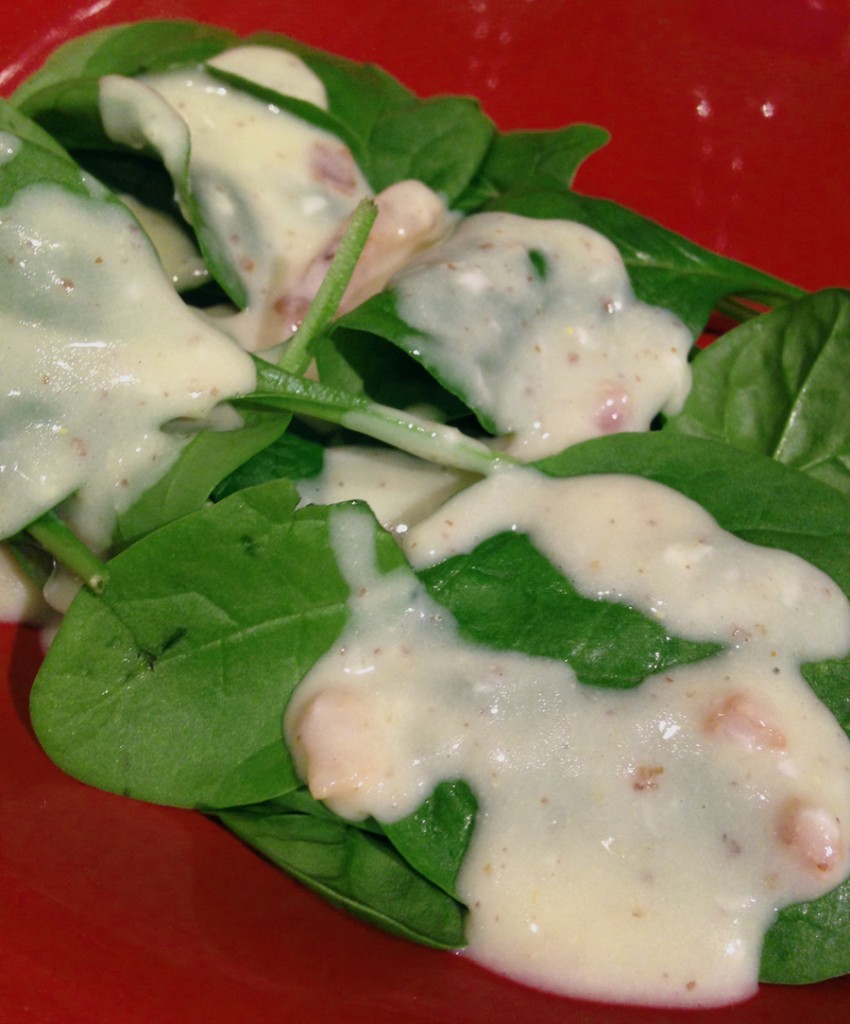
Hot Bacon Dressing

hot bacon dressing

I am sure I have previously discussed my love for spinach. As a child I was a fan of Popeye and never understood the scrunched up faces of other kids facing the green stuff on their plates. As I got older I craved salads with deep green spinach over the pale, watery nature of iceberg or other lettuces. The term ‘hot’ used for this recipe can mean two things – spicy hot and temperature hot. Other versions of the dressing can be heated up much more so as to clearly wilt the spinach as it is poured. This version, since it relies on egg as a thickener instead of flour or other powders, cannot be made so hot. I rely on the spicy version of the word hot here instead. The tang of the vinegar along with the heat of the horseradish and mustard make it so. It will probably not wilt the spinach, but will still leave a mark on your palate. The picture shows the dressing being used simply on raw baby spinach as a side dish. If I have the salad as a main course I will add onion and soft boiled eggs, and other veggies as I please. Here, it was a way to quickly boost the veggie/protein ratio at dinner one night. The dressing can also go on top of other side dishes, for it has a tang that would compliment broccoli, squash, asparagus, and so forth. If you heat it up leftovers do it gradually in the microwave at half power or low on the stove so as not to create scrambled eggs.

Hot Bacon Dressing

4 slices bacon
1/4 c. water
1/4 c. Apple cider vinegar
1 tsp Stevita granulated sweetener
1 Tbsp horseradish mustard (or 2 tsp yellow mustard and 1 tsp raw grated horseradish)
1 egg
Pinch salt
(Optional) 1/4 red onion, jullienne
(Optional) 4 soft boiled eggs (6 minute eggs)

Cook the bacon over medium high heat in small pan until crisp. Crumble bacon and set aside. Turn temperature to low under bacon grease and let cool to the lower temperature. Add water, vinegar, sweetener and mustard, stirring until combined. Whisk in egg and continue stirring constantly so the egg does not cook firm. When the egg is fully incorporated add crumbled bacon, continuing to cook and stir under heated through. Taste and add salt if needed. Turn heat up to medium, continuing to stir, and heat until steam rises from the dressing, about two minutes. Serve immediately over raw baby spinach, optionally including onion slices and soft boiled eggs sliced in half.

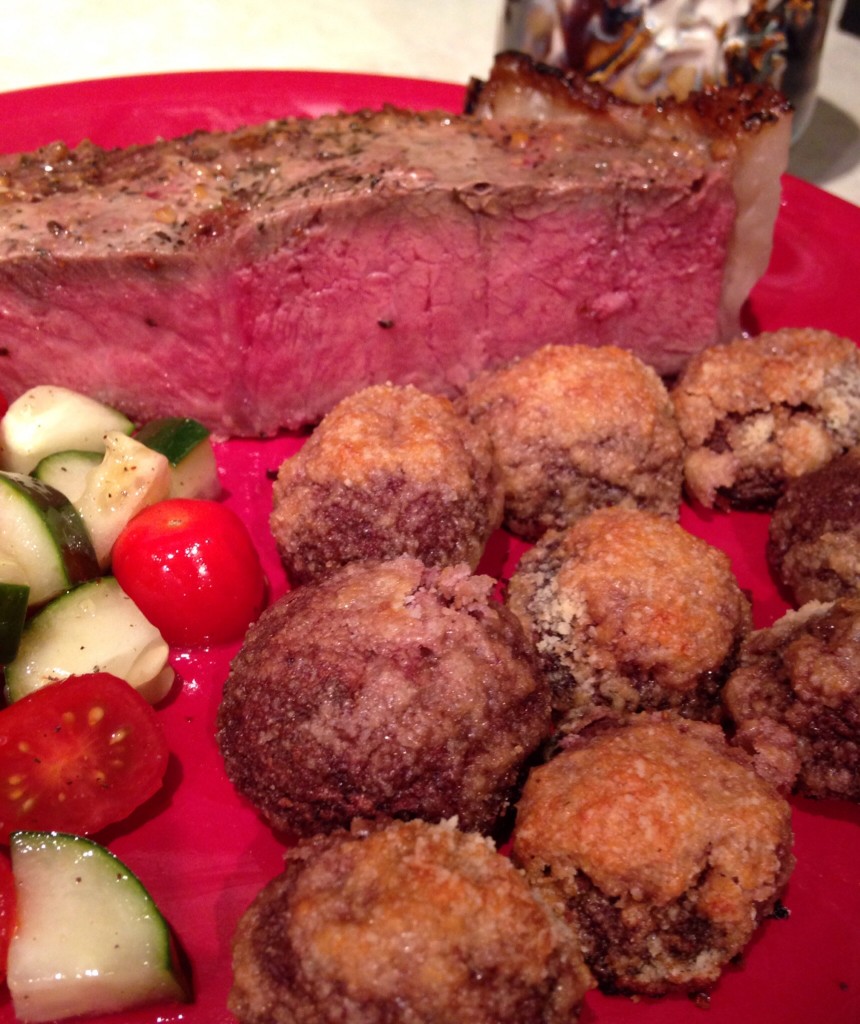
Baked Parmesean Mushrooms

image

I will start by saying this recipe was not made with Little B in mind, except that I did not expect her to eat any of it. After happily snacking on mushrooms as a toddler she summarily spurned them during the 4th and 5th years of her life. That does not deter me from putting them in meals. She has often eaten them, unbeknownst to her. Sure, they are sometimes chunky, making it possible for her to remove them and make a point of expressing her distaste for them on the edge of her plate. Other times there is not way to differentiate them from pieces of meat or other veggies and they are happily consumed. When I have made stuffed mushrooms she eats the stuffing but not the cap (but there is mushroom in the stuffing Bwahahahaha!). I hope someday she changes her mind, again, about the shrooms, but for now I am just glad she has an interest in new foods and ones that are healthy for her. There is no mistaking the mushroom-ness of this side dish. It went well with some ribeye steaks Big D smoked up for a very satisfying dinner.

Baked Mushrooms

12-18 mini portabello or white mushrooms
1/2 cup dry red wine
1/4 cup lemon juice
2 tsp garlic powder
1 1/2 tsp sea salt
1 Tbsp dehydrated chopped onion
1 cup finely grated parmesean cheese
1/2 cup almond flour

Trim mushroom stems until they are flush with the bottom of the cap. In a shallow dish or resealable bag add the marinade ingredients – wine, lemon juice, 1 tsp garlic powder, 1 tsp sea salt and onion. Stir until salt dissolves. Add mushrooms and toss in marinade until they are all coated. Leave mushrooms to marinate at room temperature for about two hours. Preheat oven to 400 degrees. Remove mushrooms from marinate and pat dry with towels. In a medium bowl combine parmesean cheese, almond flour, 1 tsp garlic powder and 1/2 tsp sea salt. Stir dry mixture until combined. One at a time coat each mushroom with the dry mixture – it should stick well to the wet mushrooms. Place each mushroom stem side down on a shallow baking sheet, evenly spaced. Bake for 20-25 minutes, until mushrooms shrink a bit and coating begins to brown. Remove from oven and let sit for about five minutes before serving.

Big D’s Eggnog

image

Some may be freaked out about this recipe. Not because it is eggy and not because it is boozy, but because it is RAW. You might get a bit antsy about consuming raw eggs, but we live on the edge. I do like the taste of cooked eggnog and in my opinion is often dominated by the alcohol taste. I much prefer the raw version – I can taste all the different flavors mixing together in each sip. It is frothy right out of a blender, and nice and smooth after it sits in the fridge for an hour or two. Do not fear, for it is still boozy, just not as obvious. We often make it between November and January. I have thought about making it other times of the year, but it seems wrong. Big D has perfected the ratios over the years and I discovered recently that I have yet to post about it! Well, here it is. I hope you enjoy it!

Big D’s Eggnog

10 eggs
2 cups heavy whipping cream
1/2 cup Stevita granular sweetener
1 tsp ground nutmeg
1 Tbsp vanilla extract
1/2 cup spiced rum
1/4 cup whiskey
Additional ground nutmeg for garnish.

Combine all ingredients in a blender. Blend on high for 10 seconds. Let eggnog sit for five minutes. Serve immediately, sprinkled with nutmeg, or refrigerate until time to serve.

Yule Platter

yule platter_edited-1
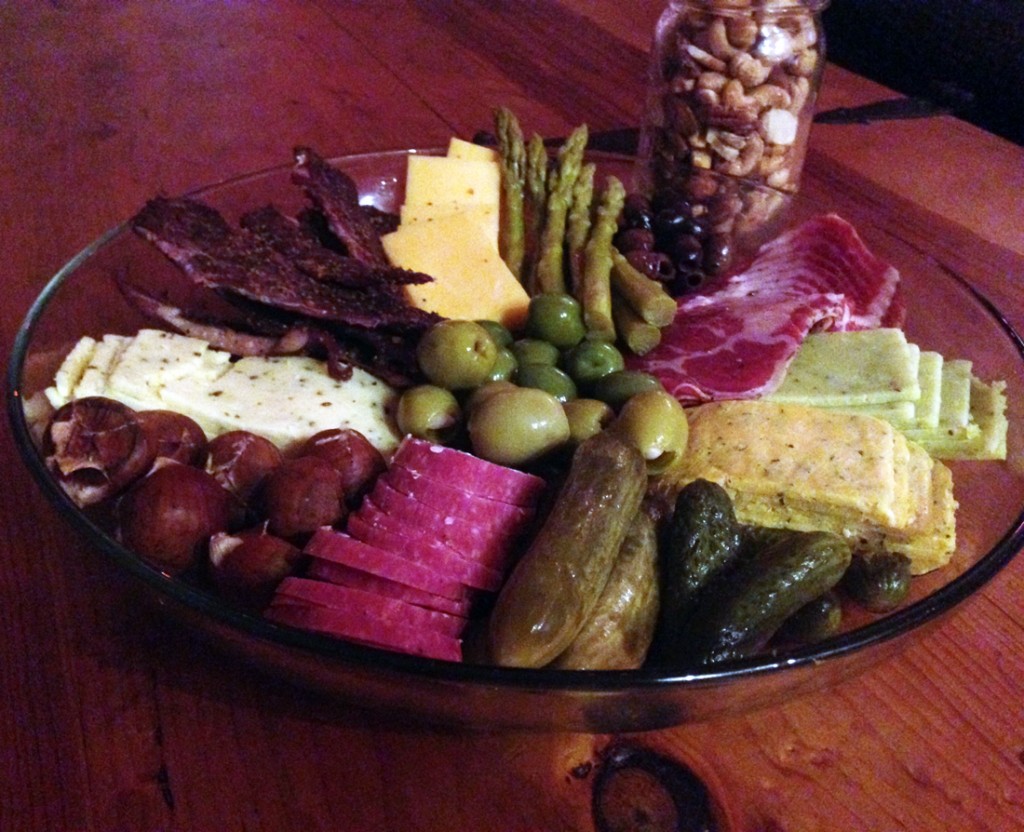
Every year on winter solstice we have a family party – Merry Yule! Especially during our winter time in Alaska this day is a big turning point – the shortest day of the year is the beginning of longer days and the approximate midpoint of chilly winter weather. Yes, there are still heavy winter storms in late March sometimes, but there is mostly rain after February here in Southeast. Most of our snow this season so far is melted, with temperatures in the high 30s, and a white Christmas is questionable. Regardless of the weather there is definitely a shortage if light. Sunrise is about 8:45am, if you can see it through the clouds, and then sets about 3pm. One way we celebrate Yule each year is to have a simple meal, made up of preserved foods that require little or no cooking. We don’t do much of the preserving ourselves, but work off the labors of others. Big D smokes some jerky, onion, garlic and cheese, while other items like pickled veggies, cured meats and nuts are added to the platter. We snack from the platter while sipping something bubbly – champagne, beer for me and Big D, and root beer for Little B.  It makes for a winter celebration we appreciate before the hustle and bustle of Christmas Eve and Day, which remind us of our childhood traditions. The simple celebration reminds us that the world is hibernating under the bare branches, blustery winds and wet ground. It reminds us of our New Year resolutions from Samhain and look forward to the Candlemas celebration of light in February. A time to ponder during a more sedate time of year when much of the natural world sleeps. Since there is not much recipe involved, here is a list of suggested items for your platter.
Yule Platter
Dry coppa, pastrami or prosciutto
Dry Salami
Beef Jerky
Roasted Chestnuts
Garlic Stuffed Olives
Jalapeno Stuffed Olives
Dry Roasted Mixed Nuts
Specialty Cheeses, sliced
Pickled Asparagus
Pickles
Roasted Mixed Nuts
Arrange ingredients in a pretty way on large platter. Offer and provide bubbly and/or fermented beverages. Eat, drink, be merry. Don’t feel guilty about the ease of this dinner, for more complicated ones are on the horizon.

Rebellious Ratattouille

image

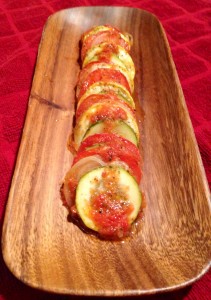
I think this is ratatouille but some people may find it lacking. What I love about it is the combination of flavors I get from the alternating, thinly sliced vegetables in a single bite. I like bell peppers in general, which are usually included in this dish, but I don’t like the taste and texture they add to the other veggies used here, so I left them out. Look at me being a ratattouille rebel. A neat thing about this recipe is it can be doubled and tripled easily by adding more sliced vegetables and a larger pan. It also makes for a lovely presentation in a serving dish or on your plate.
Rebellious Ratattouille
1 medium zucchini
1 medium yellow squash
1 medium onion
3 large Roma tomatoes
1 14.5 ounce can diced tomatoes
2 cloves garlic, crushed
1 Tbsp dried oregano leaves
1 Tbsp dried parsley leaves
1/2 tsp sea salt
1/4 tsp ground black pepper
In a medium pot over medium heat add the canned tomatoes, garlic, oregano, parsley, salt and pepper. Simmer for about ten minutes, until heated through and bubbly. Remove from heat to let cool. Preheat oven to 375 degrees. While sauce simmers prepare the vegetables by slicing them thinly, less than 1/8 inch thick. Sprinkle slices with salt and pepper. Removing seeds from tomatoes is optional. Using a stand or stick blender purée the tomatoes ito a smooth sauce. In a loaf pan pour a thin layer of tomato sauce (you will probably have leftover sauce). Alternate the slices of zucchini, yellow squash, tomatoes and onion, placing them in two long rows in the pan. Bake for 30 minutes, cover pan with foil and bake for an additional 15 minutes. Remove from oven and let sit for 5 minutes before serving.

Post Navigation