Any Kitchen Will Do

Give me a kitchen and I will cook.

Archive for the category “baked”

Scotch Eggs

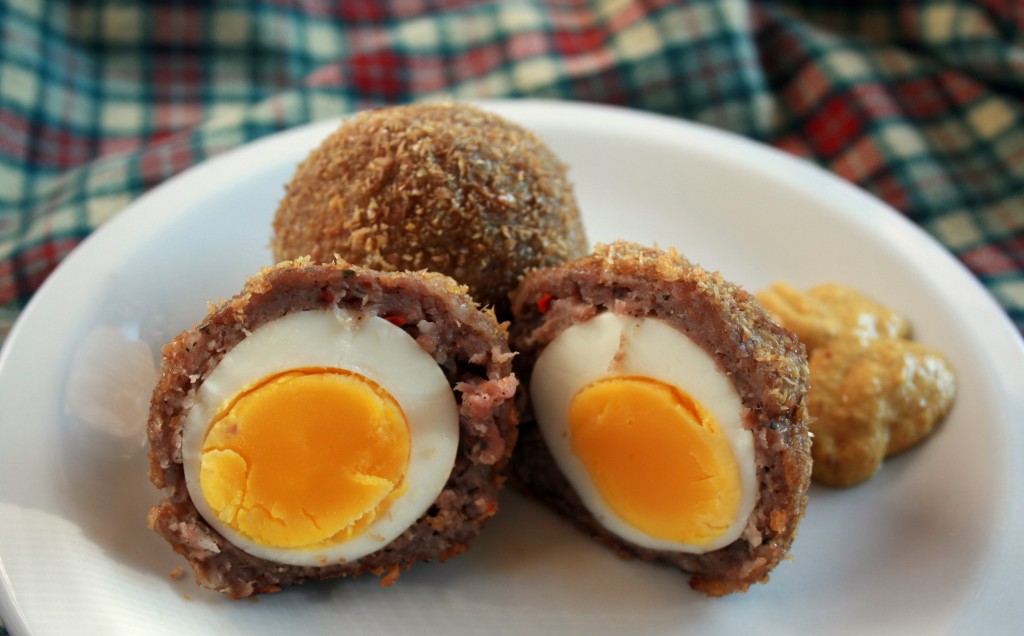
The nostalgia is dripping from my entries lately. Never fear, it continues here. Starting in high school my friends and I would go to the Texas Renaissance Festival every autumn. It ran October through November on weekends. The trip was a big deal for us because it did not include parents. Since we could not get permission (or collect the funds) for an overnight trip, our adventure was a freakishly long marathon. A one way trip from San Antonio to the festival north of Houston was at least four hours. The round trip, plus time at the festival (and staying up late the night before leaving) equaled a twenty hour day. It was a lot of fun and a lot of gas station stops. We returned home tired and smelly and happy, with bags smelling of incense and full of Christmas presents. Our first stop in the festival grounds was always along the right edge of the outer ring, to eat our first of many treats – Scotch eggs. They were great sources of protein after the doughnuts we grabbed in Flatonia and the empty calories of candy and chips. Here is a low carb version that reminds me of the festival snack. We will be going to the Maryland Renaissance Festival in August, and I am curious to see if they have them. On this fine Sunday morning while the summer sun shone brightly through the kitchen window I made a batch that tasted so very good, and introduced Little B to the dish – she inhaled her egg and ate some of Big D’s and mine. After the feast was over we lamented the fact we did not include some theme music. Consumption of the next batch will definitely include the tunes of Tartanic! I took guidance for this recipe from here. Have a happy day, and always return to happy thoughts and places whenever you can.

Scotch Eggs

1 pound hot breakfast sausage (we typically use Jimmy Dean All Natural or Spicy style)
8 medium boiled eggs, peeled
2 raw eggs
1 cup golden flaxseed meal
1 teaspoon sea salt

Preheat the oven to 350 degrees. Line a baking sheet with aluminum foil. Combine the flaxseed meal and salt together in a bowl. In another bowl whisk together the two raw eggs.

Divide the sausage into eight piles. Using your hands, press the sausage into a patty in the palm of your hand. Place a hard boiled egg in the middle of the patty and and mold the sausage around it until it is completely and evenly covered.

Roll each sausage covered egg in the raw egg, then each in the flaxseed meal to coat it. Repeat with the remaining eggs, then roll them all once more in the meal until it is gone.

Place the eggs on the foil-lined baking sheet, at least two inches apart. Bake the eggs until the outside is browned and the sausage is cooked through, about 25 to 30 minutes.

Remove from the oven and let the eggs rest for 5 minutes. Slice in half and serve with mustard.
Chocolate Coconut Flour Cake

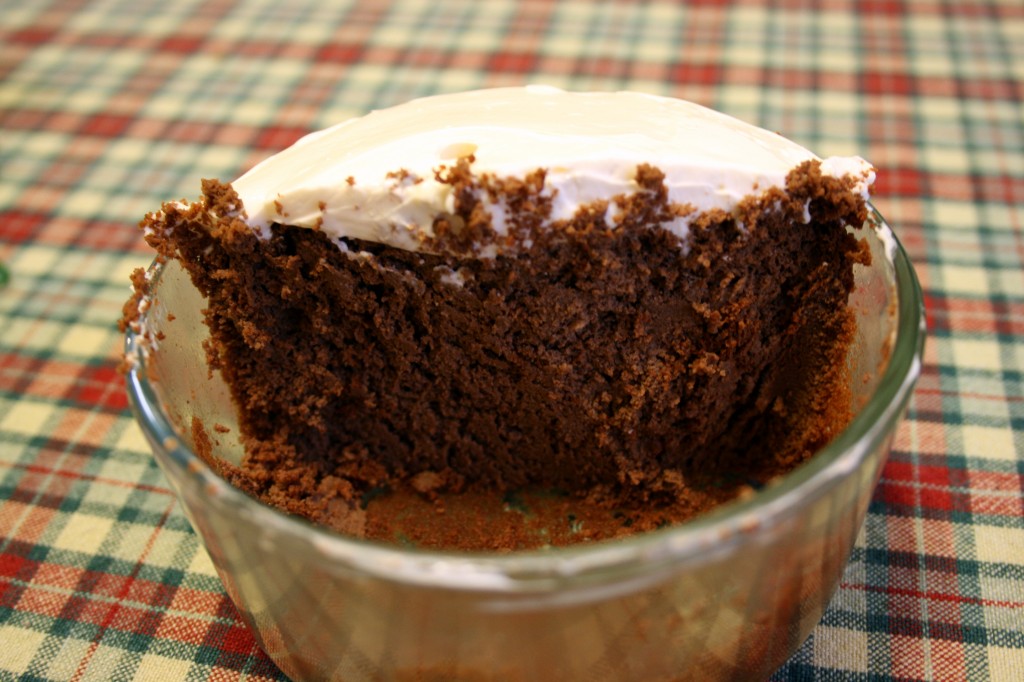
Little B turned three years old this weekend. She loves birthdays and presents, so we planned on making a big deal of it. I really wanted to make her a birthday cake, so I did. The problem I faced was when to give it to her. Friday, the day before her birthday, I could not take it for her to share with her ‘school’ friends because they only allow store bought confections with ingredients listed on the label – all that peanut allergy stuff. I did find a cute cupcake cake for her to share, but I had nothing to do with the making. We were going to the shore for the weekend. I would not be able to prepare her cake at the last minute, so I sneakily made it before we left, while Little B dreamed the night away. I carefully packed candles and a lighter, along with a knife and forks, plates and napkins. In addition to wrapped presents there would be streamers and balloons. I imagined her waking up to a decorated room, a pile of presents and a cake with candles, waiting to be wished upon and blown out before we began a fun-filled day. Well, It happened pretty much the way I imagined. Except for the cake. It stayed safely ensconced in the refrigerator at home. I forgot the darned thing! We easily found a substitute by the end of the day, but geez, what a thing to leave at home! It worked out that she had three birthday cakes in three days. It was a coincidence we hope she does not remember next year. I can picture it now, “Mommy, last year I had three cakes when I turned three. I get four cakes this year because I turn four, right?” This cake recipe is my first foray into using coconut flour – whenever we can cut out processed grains and sugar we do so. I relied on and tweaked the recipe here and Little B loved it. Even after sitting in the fridge for three days it was moist and full of the chocolate Little B requested. I made a dozen cupcakes and a small cake in a 2-cup round Pyrex dish instead of more cupcakes. We had loads of fun this weekend and Little B now knows the birthday song version she calls ‘the zoo song’ – the one that ends “…and you smell like one too!” She is so awesome!

Chocolate Coconut Flour Cake

Cake
¾ cup cocoa
½ cup olive oil
5 eggs
2 tsp vanilla
1 ½ cups powdered erythritol
1 cup coconut flour, sifted
1 Tbsp baking powder
1/3 cup heavy cream
2/3 cup water
8 ounces cream cheese
½ cup butter

Frosting
8 ounces cream cheese, room temperature
1 tsp vanilla
1 Tbsp erythritol

Preheat oven to 365 degrees. Beat together eggs. Add olive oil and vanilla. In separate bowl sift together cocoa, erythritol, baking powder and flour. Add to egg mixture and combine. Add cream and water and stir just until blended. Melt cream cheese and butter and stir together. Add to batter. Bake in 9×5 loaf pan for 45-60 minutes, or fill 12 – 18 lined cupcake papers in a muffin pan, divide batter and cook for 20-25 minutes. Cake is done when toothpick comes out clean. For loaf let cool in pan for ten minutes before turning it out onto cooling rack. If making cupcakes let cool completely before frosting.

To make the frosting whisk together the cream cheese, vanilla and sweetener until smooth. For cupcakes frost each one before serving. If making a loaf I recommend serving the frosting on the side as a spread.

Jalapeno Popper Dip

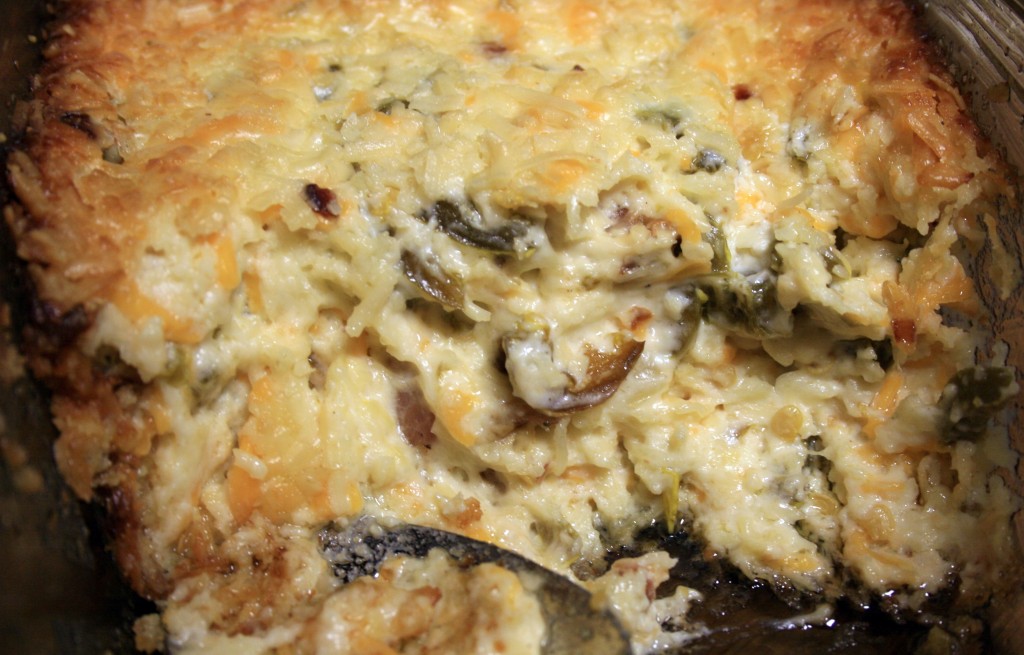
I have really been craving stuffed jalapeno poppers. Especially from Snoopy’s in Corpus Christi TX or Los Amigos in Bonham TX. Big D really loves them too, but it is almost impossible to find them without a crunchy, wheaty layer of breading all over them. Since Big D is not a wheat fan (well, he likes wheat, his body doesn’t) I feel a bit of guilt inhaling a plate full right in front of him. To appease us both I came up with the following recipe. From the urging of Big D I added double the jalapenos listed in the recipe for this batch – our sinuses are definitely cleared out now. I don’t recommend it for the faint of heart, but if the crowd you are feeding includes a lot of pepper lovers the go for it. The other ingredient quantities don’t need adjustment. As always, the leftovers a day or two later had a much more rounded taste from sitting around and hanging out together, so mixing it all up and waiting to bake it a day or so would be stellar.

Jalapeno Popper Dip

8 ounces cream cheese, room temperature
8 ounces mayonnaise
8 ounces Monterrey jack cheese, shredded
4 ounces cheddar cheese, shredded
2 cloves garlic, crushed
2 slices bacon, cooked crisp and crumbled
1 cup pickled jalapenos, roughly chopped
2 ounces Parmesan cheese

Preheat oven to 350 Fahrenheit. In a mixing bowl thoroughly combine the garlic and mayonnaise with all the cheeses except Parmesan. Stir in the bacon and jalapenos. Pour mixture into 9×9 glass baking dish, or glass bread pan or 9 inch glass pie pan – the idea is to use glass to get a crispy pretty finish all around, so the more crispy you like your dip the wider the dish you should use. Sprinkle the Parmesan cheese over the top* and pop in the oven for 30-35 minutes until brown and bubbly. A deeper bread pan or casserole dish may need 45-50 minutes to get completely bubbly. Let sit for about five minutes before serving.

*If you want the bready effect of stuffed jalapenos combine about ½ cup of bread crumbs with the Parmesan cheese before sprinkling over the top.

Squash Pizza

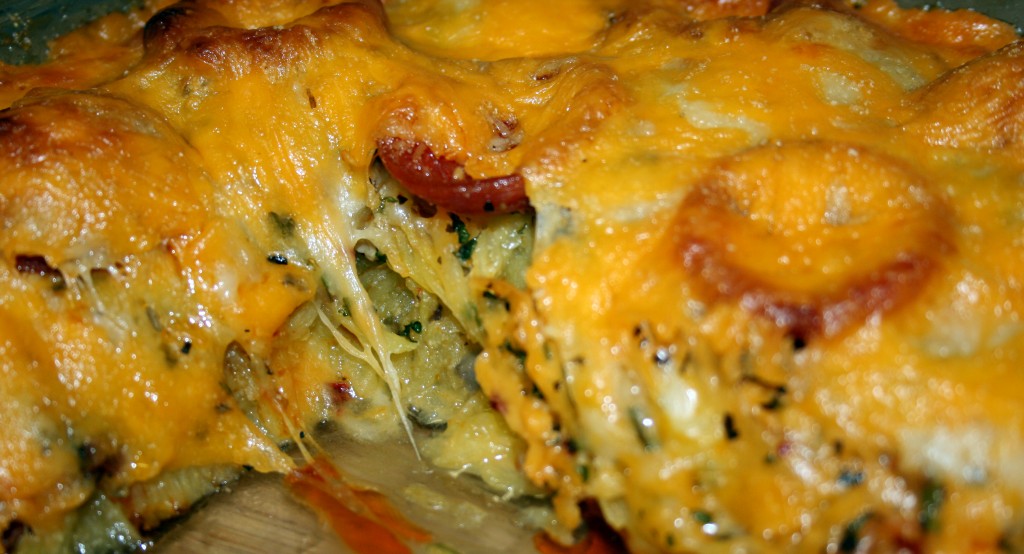
We love pizza and we love squash, especially spaghetti squash. It is not processed like store bought pasta or the flour used in most pizza crusts. Don’t get me wrong – I love pasta and pizza crust and pretty much any bread I encounter, but it never seems to leave after I eat it. I might as well just glue it on to my hips and butt instead of biting into it, because that seems to be where it goes. Not so with spaghetti squash. It is pretty darned good for you, as I have mentioned before, and is a great way to take care of those pizza cravings, because the wheaty crust of the traditional pizza is just not gonna work with our diet strategy. We have officially thrown up our hands and now make a casserole version of pizza. Yes you need a fork to eat it, but is it really a great loss? Not when it helps me keep my weight down. I am not saying this recipe will help you lose weight, but if you are watching your carbohydrate intake like me, there is nothing better for battling pizza advertisements. The squash does a wonderful job of helping the herbs mix and spread their joy, and thick sliced pepperoni is just heaven to me on a pizza. Omigosh is it good!

Squash Pizza

1 spaghetti squash
8-12 ounces pepperoni, sliced thick
2 cups shredded cheddar cheese
2 cups Italian mix cheese (romano, mozzarella, parmesan…)
2 cups roughly chopped mushrooms (or 8 ounces canned mushrooms)
2 Tbsp dried parsley
2 Tbsp dried oregano
2 tsp dried basil
2 tsp garlic powder
2-3 tsp sea salt
2 tsp red pepper flakes
1 tsp black pepper

Slice squash in half lengthwise and scrape out seeds and sinew. In a microwave safe dish place halves open side down and add about ½ cup water. Cook on high for 10-12 minutes. Preheat the oven to 350 Fahrenheit. While the squash cools prepare the rest of the dish – start with slicing pepperoni and roughly chopping mushrooms. When squash is cooled scrape out the ‘spaghetti’ with a fork into a bowl. Add mushrooms to the squash along with half of the herbs, salt and pepper and mix well. In a medium to large rectangular baking dish (no larger than 9×13) sprinkle about ½ cup of the cheddar cheese. Add the squash mixture. Take a mix of the cheese, about a cup, and spread on top of the squash mixture, pushing it into the squash a bit. Add the rest of the herbs and spices. Make a layer of the pepperoni, then top with the remaining cheese. Place in preheated oven and cook for 30-35 minutes, until cheese is melted and there is some browning. Let stand outside the oven for about ten minutes before serving. Slice like a casserole and serve with a simple garden salad.

Biscuits and Gravy

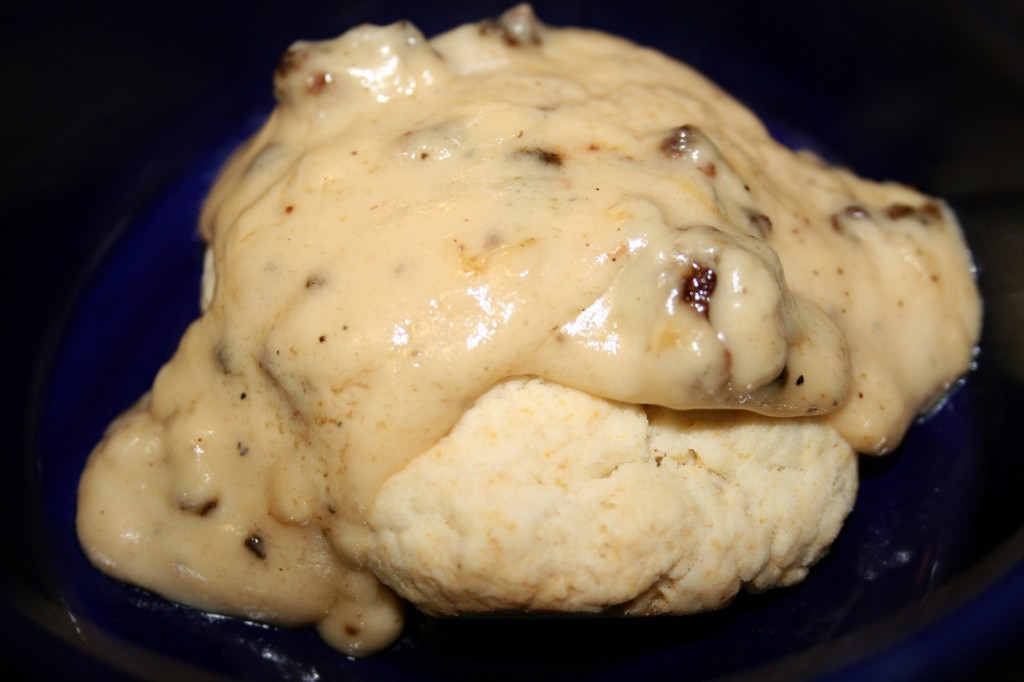
Our foster son, Tall P, is a good old southern boy. He loves his sweet tea, meat, mac n cheese and of course biscuits and gravy. We went to a diner for breakfast last week and he really wanted some. The plate came out and he dove in, but was sorely disappointed. The gravy was tasteless and the biscuits were mediocre. For anyone it would be a let down, but for someone who really likes good biscuits and gravy it was even worse. He looked so sad. I am not exactly sure where to find good biscuits and gravy in Maryland, so I decided to just make him some. Now, I know how to make biscuits and I know how to make gravy, but I had to grill him about what exactly he likes about a good plate of biscuits and gravy to make sure I did them right for him. Growing up I was never very interested in the dish, because my dad always made SOS (um, stuff on a shingle), which reminded him of Army mess halls. I never cared for the stuff, and frankly, biscuits with white sausage gravy always reminded me of the SOS. No thank you. I must say, my combination of biscuits and gravy came out pretty darned good, and was nothing like the SOS my dad made. Sorry dad, you lose this one.

Biscuits and Gravy

For the Biscuits
2 cups all purpose flour
1 Tbsp baking powder
1 tsp salt
Pepper to taste
1 tsp sugar
1/3 cup oil
2/3 cup milk

For the Gravy
¼ pound ground sausage, with drippings
1 Tbsp butter
2 Tbsp flour
1 cup milk

In medium pan cook sausage over medium high heat until browned, about five minutes. Set aside. Preheat oven to 375. In mixing bowl stir together flour, baking powder, salt, sugar and pepper. Add oil and milk. Using a fork stir together ingredients until well combined and dough forms. On a floured surface roll out dough to about an inch thick. Cut out biscuits with a round glass or dough cutters – makes about nine 2” round biscuits. Place biscuits in buttered baking dish or cookie sheet. Bake for 15-20 minutes until slightly brown on top.

When biscuits are about half done turn the heat back on under the sausage with drippings. When it starts to sizzle add butter to melt. Add flour and whisk together thoroughly with butter, sausage and drippings to make a smooth roux. Let flour darken a bit. Add milk and continue whisking until gravy thickens. When biscuits are ready spoon gravy over them and serve, eating them immediately.

Peanut Butter Banana Muffins

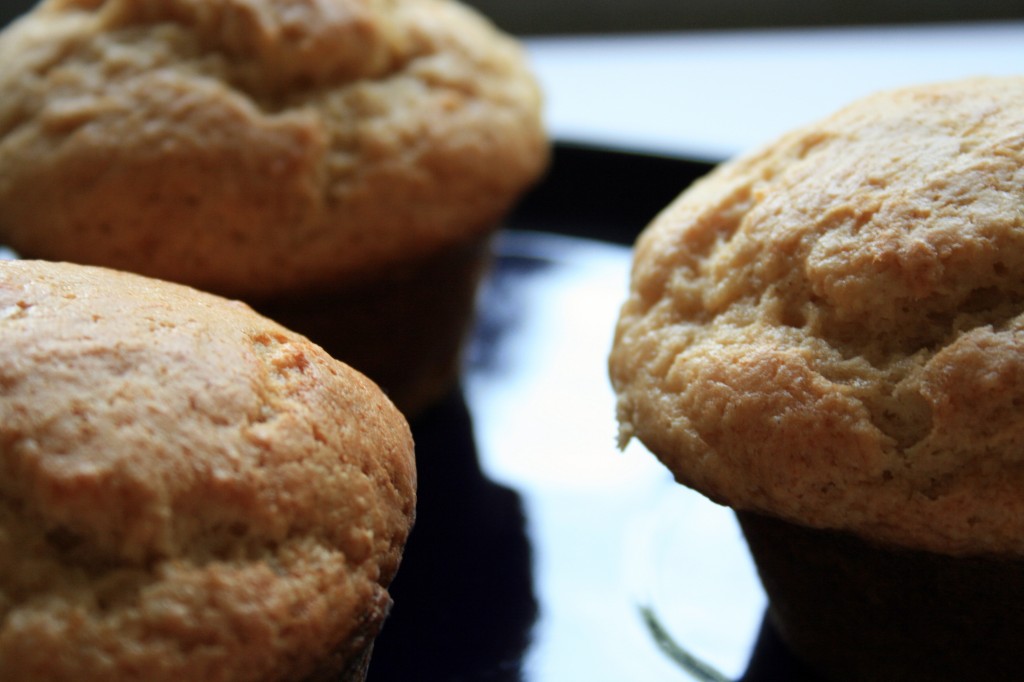
You may have noticed an influx of vegetables and meat in my entries lately. It is because we are watching our carbohydrate intake and there is no subtlety in the absence of starches. Alas, Brigit is still a lover of such things and is at an age where if she shows interest in food I definitely want to make it available. She has a constant interest in peanut butter and a dynamic interest in bananas, so I combined the two into a muffin, based on the still limited stocking of our pantry. She inhaled a muffin after dinner and there is already one packed for her to munch on during tomorrow’s commute, so I think they are a success. Some vitamins and protein are no so bad, in spite of the processed flour and sugar. I will take what I can get with my almost three-year old. Oh yeah, the 17 year old foster son Paul (who thinks it is weird to do a food blog, but finds it totally reasonable to text and IM all day) promises to eat some, but not right after dinner. Teenagers. Ugh. I was not altogether creative on this one – I just wanted to use up the old bananas and have something to make that involved Little B in breaking eggs and smooshing stuff. They came out really great, so go forth and make some muffins! Here is the source.

Peanut Butter Banana Muffins

2 cups all purpose flour
1 cup sugar
1 Tbsp baking powder
1/4 teaspoon salt
1/2 cup creamy peanut butter
2 Tbsp vegetable oil
2 eggs
3/4 cup milk
2 ripe bananas, mashed

Preheat the oven to 375°F. In a large bowl, mix together flour, sugar, baking powder and salt. In a separate bowl beat together the peanut butter, oil, eggs, milk and bananas. Stir the wet ingredients into the dry ingredients just until moistened. Spoon the batter into 12 well greased muffin cups. Bake for 20 to 25 minutes, or until a toothpick inserted in the center of a muffin comes out clean. Makes 12 muffins.

Chipotle Chops

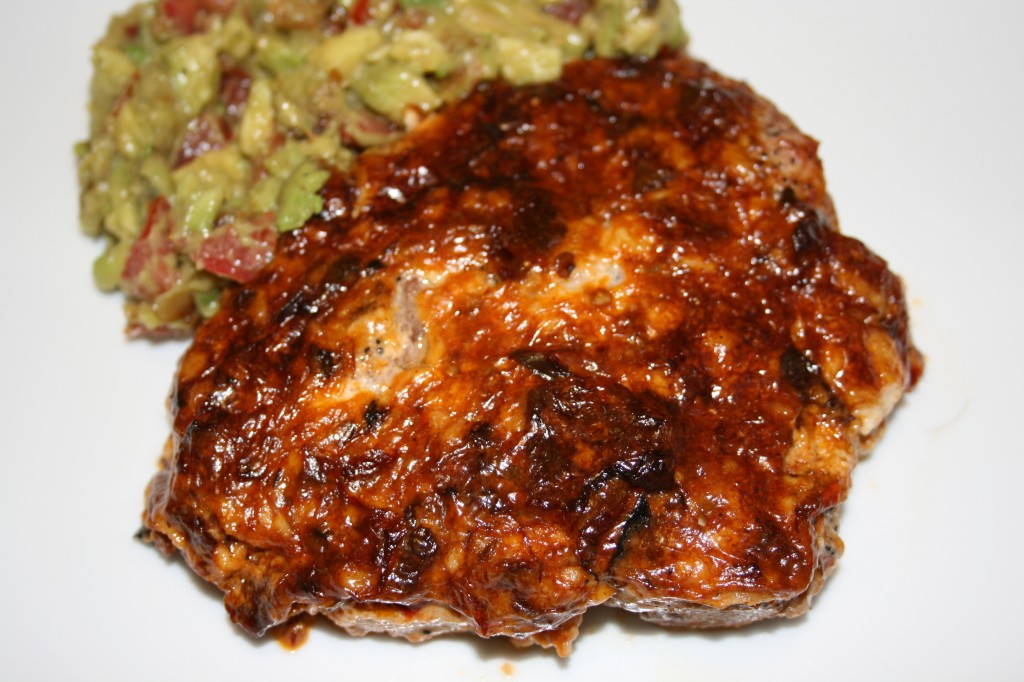
These pork chops are not only pretty, but they pack quite a punch! I was actually inspired to make these chops because we had guacamole we needed to eat before it started turning. One thing that guacamole does is soothe a tongue on fire from spice or balance out a salty chip. The can of chipotles was burning a hole in the cupboard, so I grabbed it and started cooking. We so often use the peppers in barbeque sauce or with red meat, but not so much with pork. It was a nice change to feature the peppers, when we usually use them as an accent. There is no doubt about the smoky heat chipotle peppers possess, so if you don’t like them, just move along and make something else. I don’t say that to be rude, just trying to be realistic – people tend to either love or hate them. If you need an awesome recipe for soothing guacamole to go with your chops you can find one here.

Chipotle Chops

1 Tbsp olive oil
4 bone in pork chops, 1” thick
1 small can chipotle peppers in adobo sauce*
½ cup mayonnaise
1 tsp lime juice
Salt and Pepper to taste

Season pork chops with salt and pepper. Place oil in pan on stove top over medium high heat. Add pork chops and sear on both sides. Remove from heat. Preheat oven to 375 degrees. In small bowl place about three peppers and half the adobo sauce from the can. With a fork and sharp knife cut peppers into small pieces (you can also put peppers and sauce in a food processor to chop). Add mayonnaise and lime juice. Stir until well blended. Place pork chops in a baking dish. Spread sauce over chops. Place in oven uncovered and bake until meat is cooked through, about 30 minutes. Serve with something soothing, like a salad or guacamole, to help soften the spiciness.

*This recipe also works with a small can of green chiles, which will not look as pretty but will be less spicy while remaining flavorful.

Garlic Infused Cauliflower

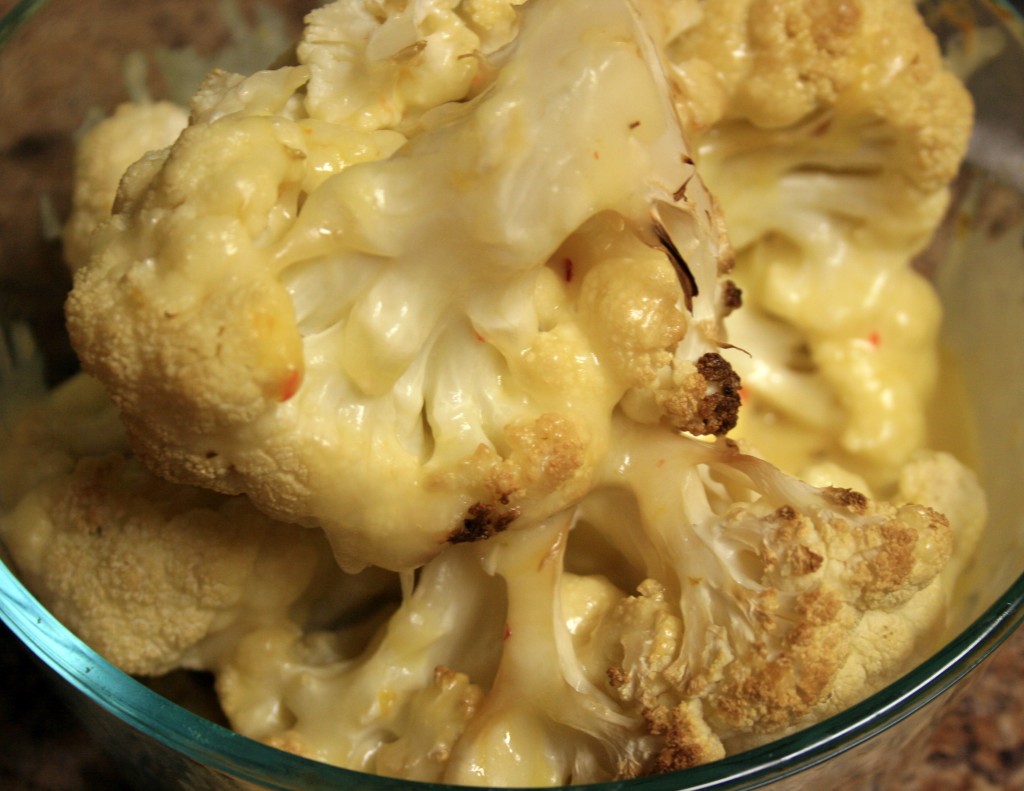
I missed roasted garlic when I was without kitchen. I also missed roasted/baked veggies. They always get that nice, slightly dense texture when roasted that you just can’t get when they are steamed or sauteed. And the garlic, which totally changes in aroma and texture when roasted, also shares its pungent flavor with everything else in the oven. Cauliflower is stellar at absorbing flavors it meets – kind of like mushrooms and tomatoes. I combined the two elements into a wonderful side dish, and of course, topped it with cheese. Filled with fiber, flavor and a minimum of carbohydrates, it fit very well into our evening meal. A few of the garlic cloves were left in the bottom of the bowl with some melted cheese. Oh, what lovely mouthfuls of wonder! Next time I will add a few extra cloves just for dessert!

Garlic Infused Cauliflower

1 large head cauliflower
3 cloves garlic
¼ cup butter, room temperature
1 cup grated Monterrey Jack cheese
Salt to taste

Preheat oven to 350F. Remove stem and cut cauliflower head into quarters. Spread florets with butter and place quarters close together in deep baking dish. Drop whole garlic cloves into dish. Cover loosely with aluminum foil. Bake for 50-60 minutes until tender. Serve immediately.

Stuffed Courgettes

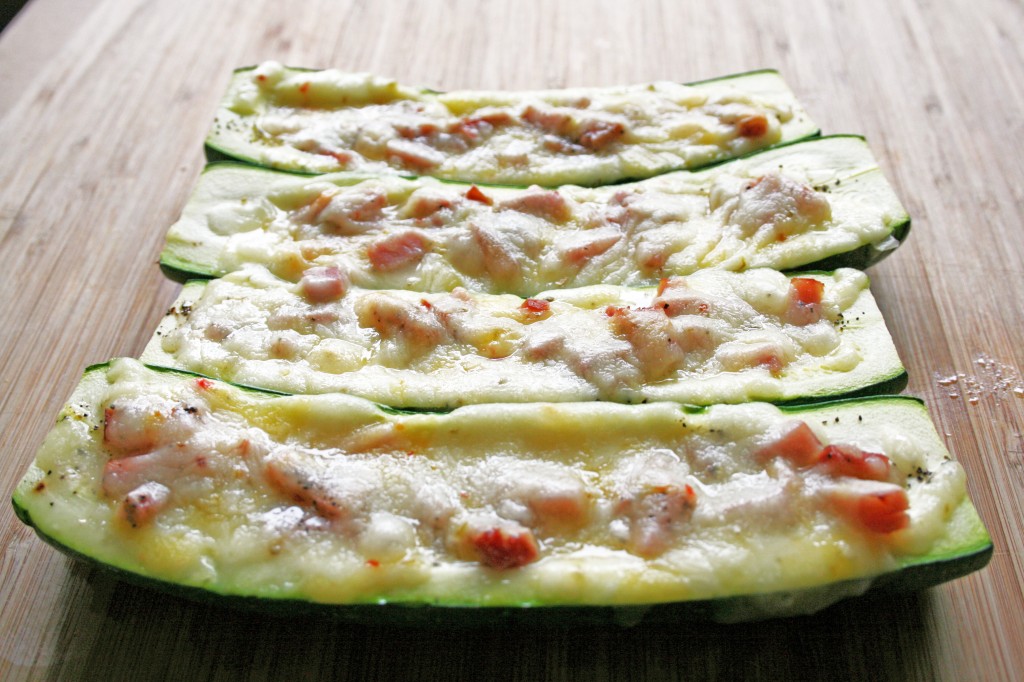
Zucchini is looking better and better at the store and markets. I was really tempted by the itty bitty little ones – about the size of a small pickle – but then I saw the diced prosciutto nearby and knew I needed to get the big ones. Here’s the thing – Big D is not a zucchini lover. Yellow squash? Yes. Acorn squash? Yes. Zucchini? Well, um, I guess. I figured if I topped it with meat and cheese it might work. It pretty much did. I know. I rule. Although I have made these many times with a variety of stuffings, I always cooked them up in a baking dish. Since our kitchen is still sparsely populated I had to adjust the baking dish pan approach, since we don’t have one yet, and made a little aluminum foil pocket for each zucchini half. They baked up nicely sitting in the foil directly on the stove rack. I am looking forward to late summer when those huge zucchini come around in the farmers markets and I can really beef up the stuffing and make a main course of it. For now, I relish the smaller, more delicate fare.

Stuffed Courgettes

2 medium zucchini, as straight as you can find
4 small garlic cloves
1 cup diced prosciutto or cured ham
1 cup shredded monterrey jack cheese
Salt and pepper to taste

Preheat oven to 350F. Slice ends off zucchini, then cut them in half lengthwise. With a small spoon gently carve out the seedy belly (heh) of the halves, stopping about ½ inch from the ends, making a groove down the middle. Sprinkle each half with salt and pepper. Slice garlic cloves into slivers and spread a clove in each half. Divide prosciutto among the halves, then top with cheese. Place zucchini in baking dish with a little space between them. Bake for about 30 minutes, depending on the size of the zucchini, until tender and cheese begins to brown. Serve immediately.

Whole Wheat Pizza Rolls

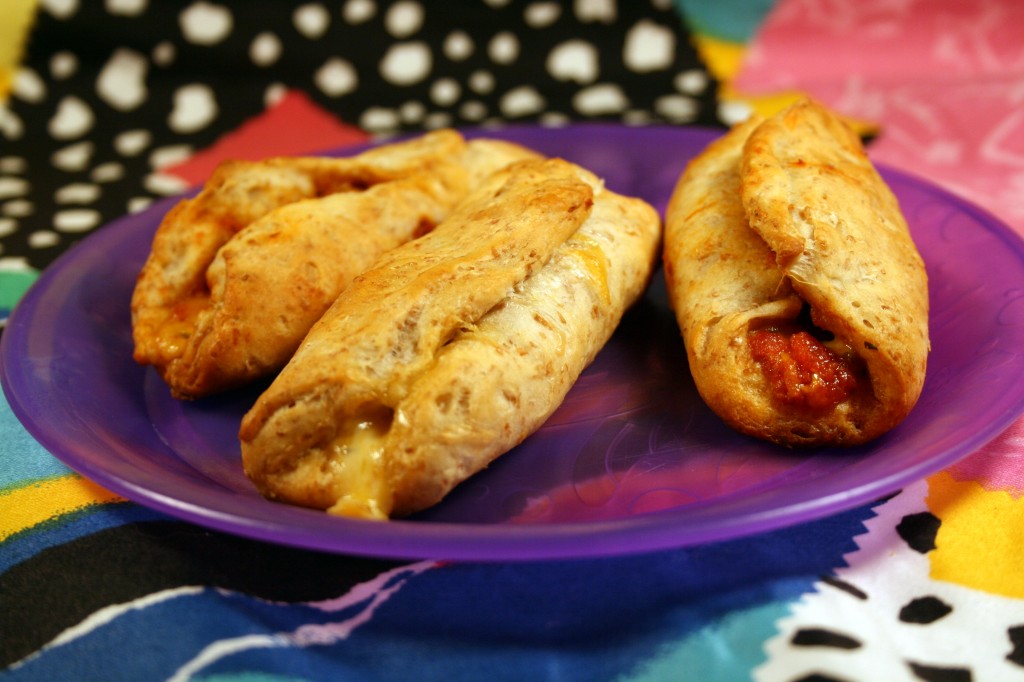
I am a bit depressed. We have been in our new place for two days and our lovely gas stove is still without gas. Imagine my dismay when I realized all my plans for a cooking frenzy came to a screeching halt and the fridge/microwave marathon continues. But I have a kitchen! An actual kitchen and I can’t really use it. My own private hell, I say. I am very much tempted to go get a camping stove and carry on. Hopefully this is the last post from old stuff I stashed from the past. It begins in a way that is no surprise to most, with my daughter. I have a particular little daughter when it comes to sandwiches. The only sandwiches she will eat are peanut butter. Not peanut butter and jelly or peanut butter and banana, just peanut butter. Occasionally she will eat a sandwich with meat and cheese, but I do not rely on her to do so because it happens so rarely. She likes a lot of foods, just not always at a convenient time, like when it is put in front of her. On top of her sandwich issues there was a little boy at her two day a week pre-school that was allergic to peanut butter. This means that making a quick school lunch for her by slapping together a sandwich is pretty much out of the question. My solution was pizza rolls. It is similar to the method I use for doing wheaty peanut butter apple rolls, just with a comPLETEly different taste. She likes them, they gives her some protein in the middle of the day and don’t cause problems for her schoolmates. When I asked Little B to tell me which type of roll she liked best she paused a moment and said both, but when I asked her which one she wanted for ever and ever (her latest phrase) she pointed to the pizza rolls. Score!

Whole Wheat Pizza Rolls

½ can Grands® Golden Wheat Reduced Fat Biscuits
16-24 Turkey Pepperoni slices
½ cup shredded reduced fat colby jack cheese
2 Tbsp Oregano
½ cup tomato or seasoned pizza sauce

Preheat oven to 375F. Lightly grease large cookie sheet. Cut each uncooked biscuit in half. Roll out each half until each is about 4” in diameter. Place 2-3 slices of pepperoni on each round, keeping them about a centimeter from the edges. Spread each biscuit with about 1 tsp of sauce, sprinkle about 1 tsp of cheese on each and sprinkle with oregano. Carefully roll each biscuit until the opposite ends overlap*. Pinch open ends together in an attempt to contain the sauce. Place each roll seam side up on the cookie sheet, about an inch apart. Bake for 12-14 minutes until biscuits begin to brown.

*Next time I make these I plan on folding the biscuits in half and using a fork to pinch together the edges. Rolling them I think makes for easier toddler finger food, but if I am serving them to a mixed, slightly older crowd I can add more filling with the fold-in-half method.


Post Navigation