Any Kitchen Will Do

Give me a kitchen and I will cook.

Archive for the category “baked”

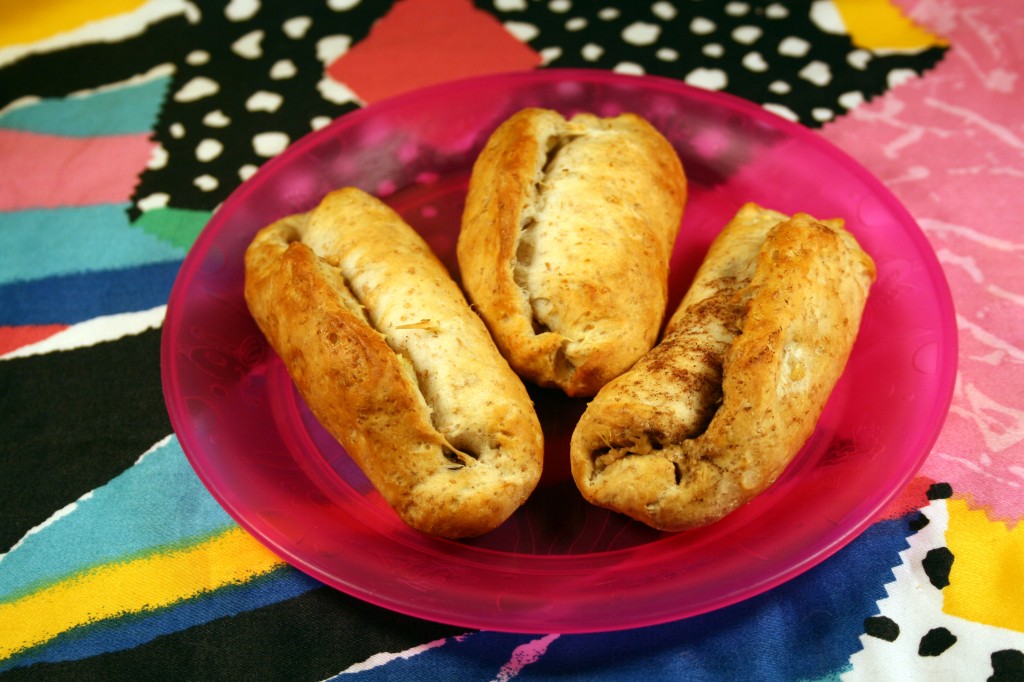
Wheaty Peanut Butter Apple Rolls

I don’t usually rely on highly processed foods for much of anything when I cook. I try really hard to do the majority of my shopping on the outer edges of the grocery store, focusing on unprocessed foods. I am not perfect, but I hope this blog represents my desire to use ingredients in their most basic form. Now, on with a recipe that contradicts most of my efforts. I came across some canned whole wheat biscuits at the store the other day. Technically, they were along the outer edge of the store, so it was not like I sought them out. They reminded me of camping when I was younger and baking biscuits in a frying pan on a little propane camping stove. They don’t brown and cook thoroughly unless they get flipped halfway through baking. They always tasted so good after sleeping hard all night. Anyway, I was trying to figure out a way to give Little B some quick finger food fun while using ingredients I know she likes. Below is a snack with two of her favorite foods – apples and peanut butter.

Wheaty Peanut Butter Apple Rolls

1 package (8 count) Grands® Golden Wheat Reduced Fat Biscuits
½ cup peanut butter
¼ cup honey
1 tsp cinnamon
½ apple, finely diced, leaving the skin on

Preheat oven to 375F. Lightly grease large cookie sheet. Combine peanut butter, honey and cinnamon together. Cut each uncooked biscuit in half. Roll out each half into 4” in diameter rounds. Spread the peanut butter mixture on each round. Sprinkle apple on top of the peanut butter and press into the round. Carefully roll each biscuit into sticks, making sure the edges overlap. Pinch ends closed to seal roll. Place each roll seam side up on the cookie sheet, leaving an inch on each side. Bake for 12-14 minutes until biscuits begin to brown.

Hash Brown Cups

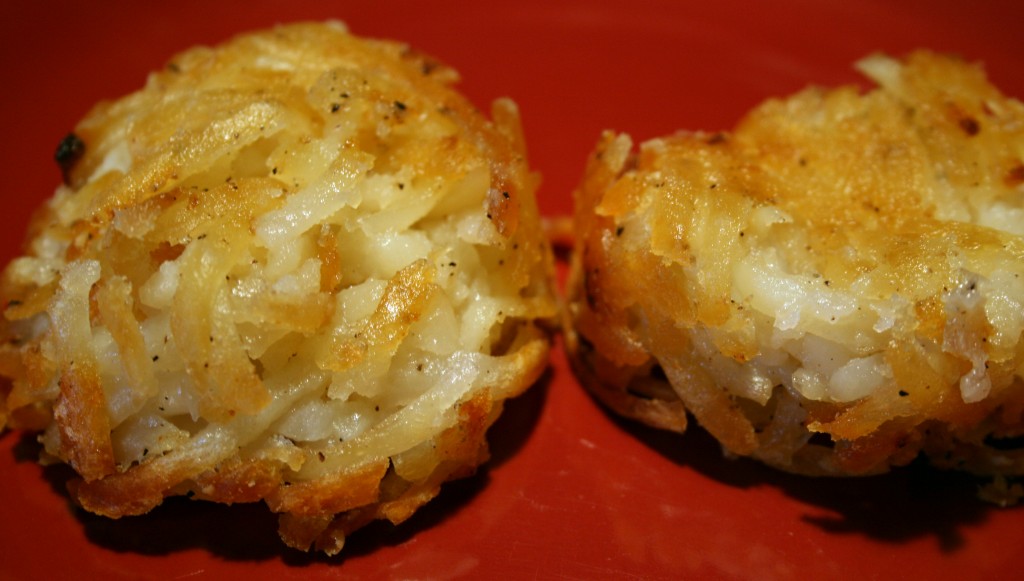
We are still living sans kitchen. I am starting to dream about cooking things that are sauteed, baked, seared, broiled and browned. Pretty much things you can’t do in a microwave. Speaking of brown…I like my hash browns brown. Some of them can be unbrown, but I like the crispy parts and the almost crispy parts the best. Especially with a little hot sauce, salt and pepper sprinkled on them. I first made these hash brown cups for a brunch when I was not going to have enough time before it was time to eat to cook them properly. I have not done it yet, but I am thinking of having a cuppy brunch some day – hash brown cups, eggy cups and maybe some cinnamon roll cups. Then I can be really creative and serve beverages in cups and everything will be just cuppy! Okay, now that tangent is out of me I can return to the hash browns. If you make them ahead of time a bit of the crispy may be lost, but they reheat just fine. The picture shows some I took out a bit early because I was running late for an appointment, so don’t do as I do, do as I say!

Hash Brown Cups

1 package (30 ounces) grated potato hash browns, thawed
1 cup finely grated parmesan
2 tsp onion powder
1 tsp garlic, diced
1 tsp salt
1 tsp ground black pepper
3 Tbsp olive or canola oil

Preheat oven to 375F. Mix all ingredients in a bowl. Divide potatoes among 12 well greased muffin pan cups. Bake for about an hour until bottoms are crispy. The potatoes touching the pan will brown but the very tops will not brown much at all. Remove from oven and let cook for about 20 minutes. If you take them out too soon they may not keep their molded form, so avoid the temptation to take them out early unless there is actually a problem and smoke is pouring out of the oven.

Crispy Baked Chips

You want fries with that? Of course, but I shouldn’t…

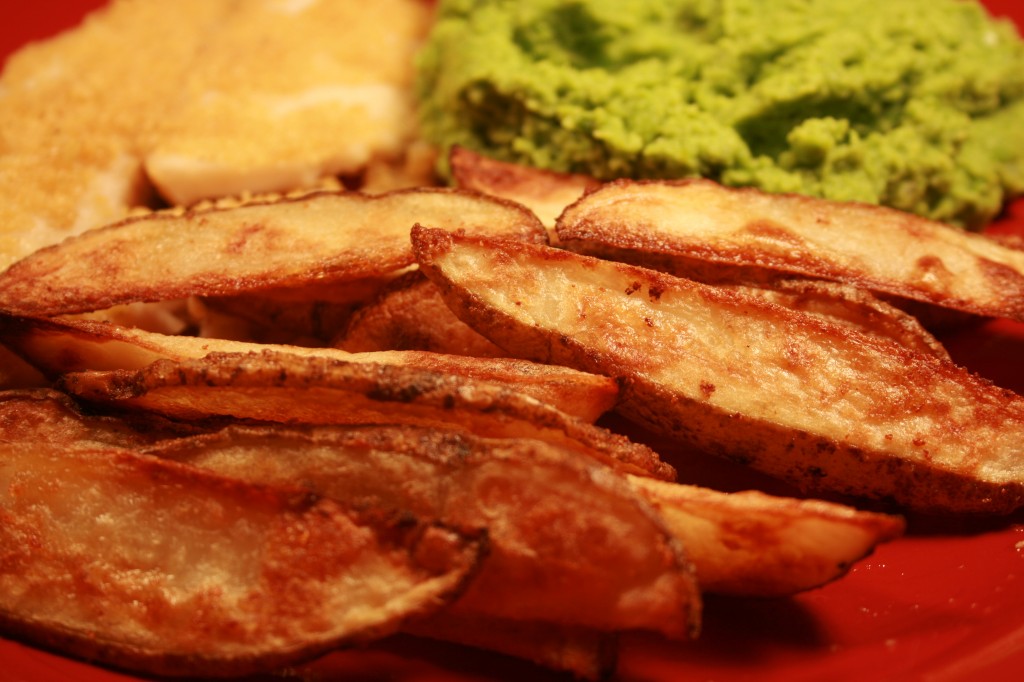
Although I like a lot of foods that are good for me, I also crave some of those foods that are quite lacking in nutritional value. You know, oreos, macaroni and cheese, loaded baked potato and of course the fries. Yum! Usually made with processed potatoes and deep fried, they go well with burgers and ribs and under a pile of chili and cheese. An occasional small serving is no problem, but when they come so easily almost everywhere we eat out – and we eat out quite frequently – it gets harder and harder to resist. One way that helps me is to make some at home, which are just as good or loads better than those found in a restaurant. They cook up so crispy, and the seasoning begs not to be dipped in ketsup, but if absolutely necessary, I guess it could be done. These are chips, as in fish ‘n chips! These little guys taste like they could have been deep fried, but they are baked, much lower fat than their deep-fried counterparts, crispy and addictive! I served them up with mushed peas and some tilapia cooked in a skidge of oil and lime juice.

Crispy Baked Chips

4 small or 3 medium russet potatoes
2 Tbsp canola or olive oil
1 tsp salt
1 tsp garlic powder
Dash of pepper

Wash and slice potatoes into thin wedges lengthwise, approximately 12 per potato. Soak slices in a bowl of cold water for 10 minutes. Preheat oven to 425F. Lay out wedges on a towel to dry, pressing down from above using another towel to get as much water off as possible. Place wedges in a bowl and sprinkle with oil, salt, pepper and garlic, tossing until completely coated. Spread wedges out in one layer on large cookie sheet. Bake in oven for about 20 minutes. Flip wedges over, rotate pan 180 degrees to ensure even baking and return to oven for 10-20 minutes. The second baking time varies so much because the size of the wedges may vary. By the time the first bake time is over the potatoes will be cooked – the second time is to ensure complete and utter crispiness. Serve immediately. The recipe can be easily doubled, just make sure you have sufficient cookie sheet space. If doubling the recipe and cooking on two cookie sheets, which probably means using two levels of the stove, you will need to cook them twenty minutes, then switch levels for the additional time to allow for even browning.


Spatchcocked Chicken

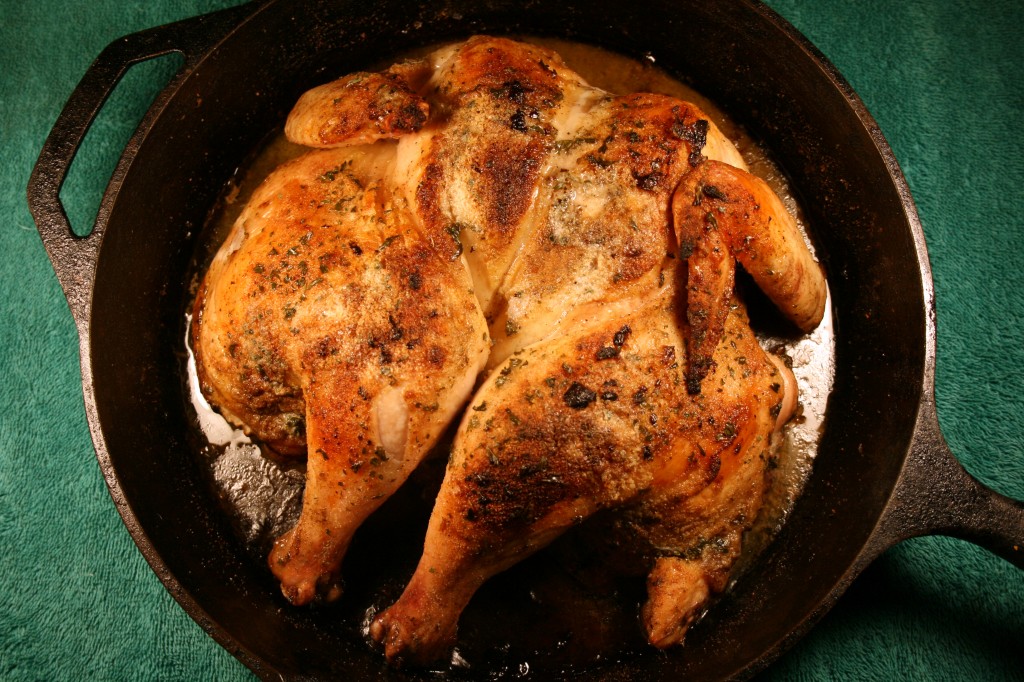
To all those who have trouble cooking a roast chicken please continue reading, for I have a solution for you. To everyone who thinks they have made a good roast chicken you should also keep reading, because you may be wrong. Being able to roast a chicken is a good skill to have, but when you find a big one at the store there is always the challenge of getting the meat evenly cooked, considering the meat is not evenly distributed around the cavity. One solution is sticking it on a full, open soda can and letting the soda keep it moist while standing on end and cooking. The can method works, but to me the meat gets an odd flavor. It might have been the fact I don’t much like Dr Pepper, but it just tasted odd. Splitting a chicken in half and cooking it in an iron skillet results in an amazingly moist, flavorful chicken. Since the bird is laid down almost flat the meat cooks evenly so the dark meat gets cooked instead of running red, and the white meat does not overcook for the sake of the dark meat. It also maximizes exposure of the skin for crispiness. The first time I used the spatchcocked method I did not expect much of a result different from when I roasted with the bird whole. When we started eating it, not only were the herbs and spices more evenly distributed in the meat, but taking the bird apart and carving it up was easier, because it was flat and easier to manipulate. If you try it you will like it, and it is also great for helping to season an iron skillet! Enjoy!

Spatchcocked Chicken

1 whole chicken, 4-5 pounds
2 Tbsp butter, room temperature
1 large lime
1 tsp salt
1 tsp pepper
2 tsp chopped garlic
1 tsp ground cumin
1 tsp onion powder
1 Tbsp chopped parsley
½ tsp ground sage
1 tsp ground thyme

Preheat oven to 375F. Place chicken on a cutting surface breast side down. Using a knife cut skin and meat down to the bone, following the spine. With a sturdy pair of scissors cut right along both sides of the spine to remove it. Turn chicken over and press down in the middle between the wings until the wishbone breaks and the chicken lays down almost flat. Take care not to push it completely flat to the point the ribs break – that is too far. Squeeze lime juice onto both sides of the chicken. Also gently pull skin away from the meat in a few places and drop some of the juice between the skin and meat. If you have fresh herbs you can slide a sprig or two of parsley, sage or thyme under the skin to add some extra flavor. Sprinkle salt and pepper on the bottom (formerly the cavity) of the chicken. Place chicken in large iron skillet skin side up. Get your hands dirty by spreading the butter all over the skin side of the chicken, including crevasses, until it is all gone. Sprinkle salt, pepper and herbs all over butter. Cover with foil and put chicken in oven and cook for about an hour, removing the foil after about 30 minutes. The chicken is done when a thermometer reads 160 degrees and juices run clear. Remove from oven and let rest for about ten minutes.

Cinnamon Roll Cake

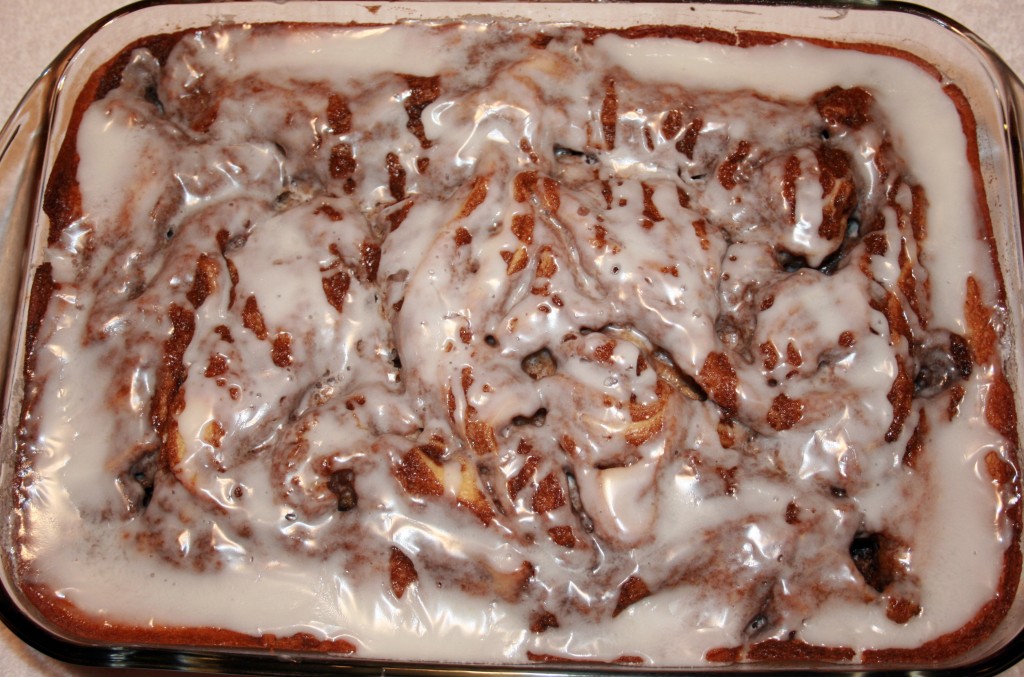
Have you ever seen a 9 x 13 cinnamon roll? Yes you have! It is right there ↑! I like sweet stuff for breakfast, but only when it is going to be a lazy day. The crash from the sugar rush is best experienced while hanging out on the couch reading a book or building a block tower with Little B. An occasional breakfast with pancakes or waffles is good (although not necessarily good for you), but I tend to be the producer of such delights, and it is much more onerous to make them compared to a plate magically appearing piled high and presented by someone else for eating.

With a gaggle of girls using my house for slumber party last weekend I could not imagine making enough fresh baked pancakes, waffles or cinnamon rolls to appease them and also have breakfast ready at a decent hour. There were bodies curled up in blankets over the majority of the living room floor. It would be hard to quietly measure and mix and roll breakfast in the kitchen, a mere four feet away from the slumbering sweethearts. This cake was quick, made the day before and did not have to go in the fridge, which was already full of other party foods. As it cooked, the sugary topping formed crevasses where cinnamon gathered, making lovely sweet nips in almost every bite. All the girls could have a little piece or a big one without committing to a whole roll. Of course I also provided healthy, savory eggy muffins for breakfast as well, but the cake is what disappeared the fastest.

I have seen cinnamon roll cakes all over the internet, but this recipe made the most sense to me, so I relied on it. I changed the order of preparation a bit, but it worked out great.

Cinnamon Roll Cake

Cake
3 cups Flour
1/4 teaspoon Salt
1 cup Sugar
4 teaspoons Baking Powder
1 1/2 cups Milk
2 Eggs
2 teaspoons Vanilla
1/2 cup ( 1 stick) Butter, melted

Topping
1 cup ( 2 sticks) Butter, softened
1 cup Brown Sugar
2 Tablespoons Flour
1 Tablespoon Cinnamon

Glaze
2 cups Powdered Sugar
5 Tablespoons Milk
1 teaspoon Vanilla

Preheat oven to 350 degrees. Spray a 9×13 glass baking pan with cooking spray. Set aside. To make the topping mix in a medium bowl the 2 sticks of butter, brown sugar, flour and cinnamon together until well combined and creamy. Set aside. In an electric or stand mixer add the flour, salt, sugar, baking powder, milk, eggs, and vanilla. Once combined well, slowly stir in the melted butter. Pour into the prepared 9×13 baking pan.

Drop the topping mixture evenly over the cake batter by the tablespoonfuls and use a knife to marble/swirl through the cake. Bake at 350 for 35-40 minutes or when a toothpick inserted near the center comes out nearly clean.

In a medium bowl, mix the powdered sugar, milk and vanilla together with a whisk. Drizzle evenly over the warm cake. Serve warm or at room temperature.


Cheesy Garlic Pull Apart Bread

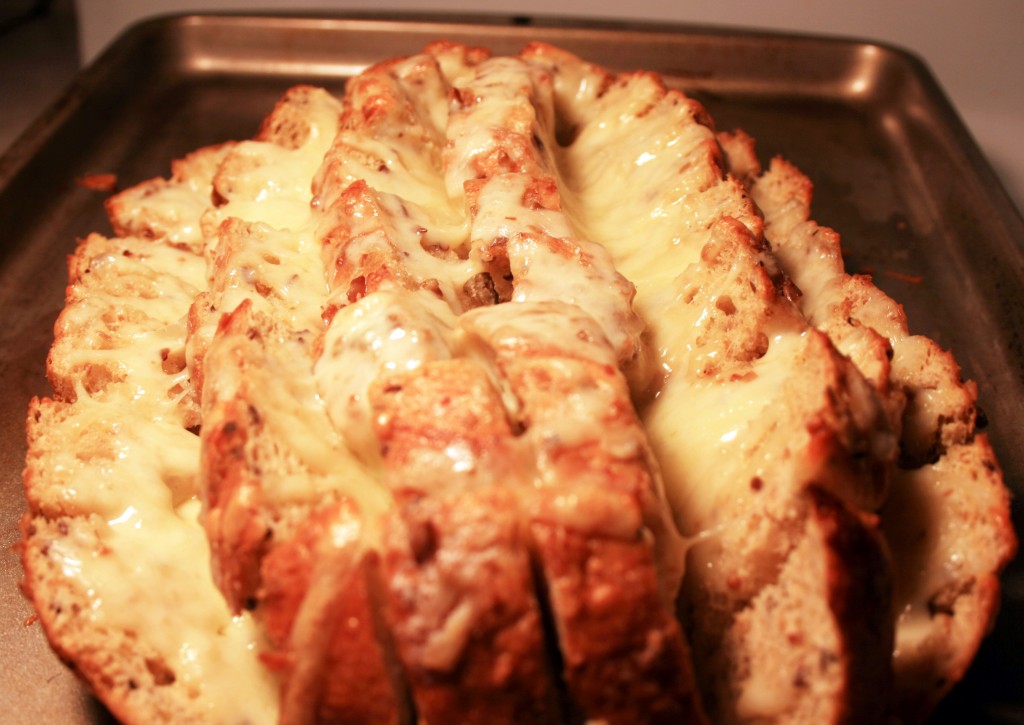
I have seen this method of preparing cheesy bread all over the place online, but had not tried it myself. We had a dinner party the other night and I thought it a perfect time to make some. It is an ooey gooey alternative to plain sliced bread. Besides making the whole house smell heavenly it was a hit with our guests. I cannot tell you anything about how leftovers keep because there were none.

Cheesy Garlic Pull Apart Bread

1 unsliced loaf whole grain bread
1 cup muenster cheese, grated
4 Tbsp butter, room temperature
3 cloves garlic, chopped

Slice the bread loaf lengthwise then crosswise, but leave the bottom crust intact, creating 1 inch squares. Using your hands (a messy method, but the best way I have found to keep the bread from tearing off of the bottom crust) spread butter between bread squares. Drop garlic between squares. Sprinkle cheese over top of bread, encouraging some to drop down in between some of the squares. Bake for approximately 15 minutes until cheese is melted and bubbly. Serve immediately.

Spicy Honey Chicken

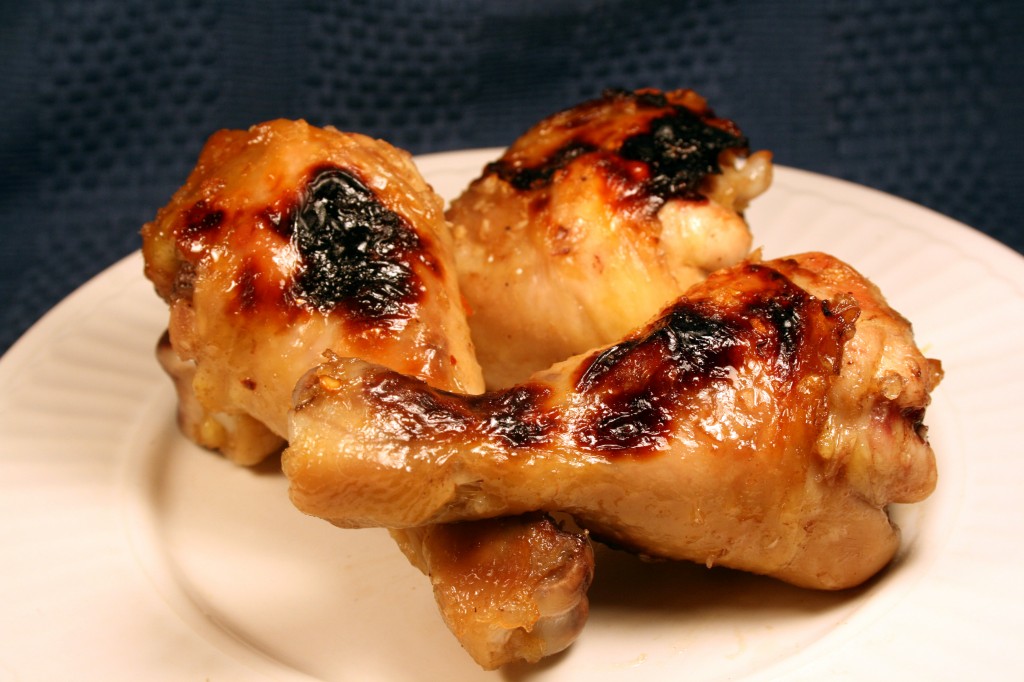
In my family there is always a fight over drumsticks. We like dark chicken meat and negotiate who gets what dark parts. I know they would look funny, but if anyone ever came up with a four or five-legged chicken I would so be in front of the line to buy some fryers, genetic distortions notwithstanding. Legs are good hot or cold, with beans or salad or slaw, and are mobile while being much easier to hold than those clumsy breasts. In recent years I have noticed more and more that packages filled with about ten legs are sold in the stores. They fit great in a crock pot or a baking dish and whenever I make them they are scarfed down. These days the bulk chicken leg packages are cheaper than the ‘buffalo wings’ that are getting more and more expensive. Quite a deal at fifty cents each at restaurants – really? Really? Not.

Chicken drumsticks always make me feel like a kid. I have been at fancy parties and felt obligated to eat them with a fork and knife, but when in more casual company I pick them up with my fingers and dig in, ready with a napkin nearby. Little B really likes them and I hope she ties many a childhood memory to hanging on to a leg while enjoying fun company.

This recipe was inspired by what I already had on hand in the kitchen, so next time I make it the recipe will probably look and taste different. I wanted sticky and sweet and a bit hot. It worked out pretty well, but I am really looking forward to having an even cooking broiler at our next place. I just can’t get this one to work the way I want. Serve them with some tangy coleslaw and dig in!

Spicy Honey Chicken

½ cup honey
2 Tbsp balsamic vinegar
2 tsp red chili flakes
1 tsp ground cumin
1 tsp black pepper
1 tsp salt
2 cloves garlic, chopped
½ small onion, finely diced

Preheat oven to 400. In a bowl mix together all ingredients except chicken. Dip each leg into the sauce, making sure each leg is covered. Place end to end in 9×13 baking dish. Pour no more than ½ cup of remaining sauce over legs, making sure the small ends get covered too (not a worry if you got yourself a little sticky while initially dipping the legs in the sauce). Bake in oven for about 25 minutes. The glaze may smoke a bit, but should not burn. If the glaze does not brown you can turn on the broiler for a bit to finish them off. A little caramelizing is wonderful.


Flourless Double Chocolate Cookies

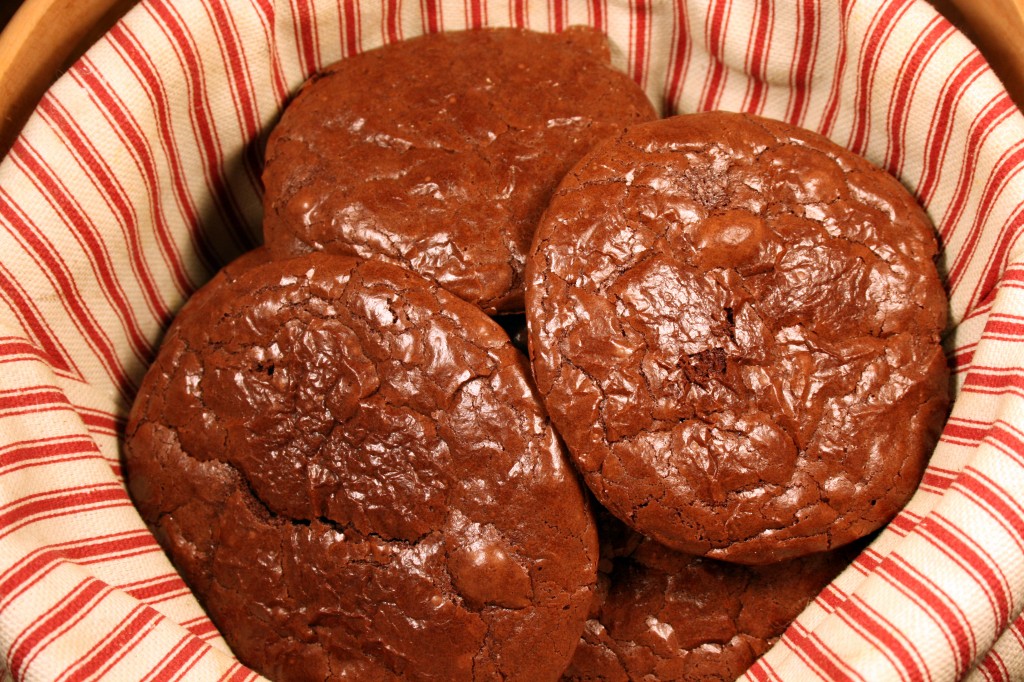
You will want to eat more than one, but you may not be able to! These cookies are rich rich rich. Have some milk handy to help wash them down. I came across the recipe for these flourless cookies here. The batter was almost that of a cake batter instead of doughy and sticky like it says in the recipe. The results I got are also less cake-y than those I saw on the blog, and they came out with almost a brownie-type shininess to them. I don’t know if it was just some random altitude thing, the fact that one of the egg whites was cold, or slightly less cocoa ended up in the batter than was prescribed in the recipe, but I don’t actually care. The results were wonderful.

While we were adding ingredients Little B carefully cracked the third room temperature egg, missed the bowl and proceeded to drop it on the floor between the counter and her learning tower, which meant I added a third egg white cold, straight from the fridge. It may also have been the fact that Little B was helping me start and stop the Kitchen Aid mixer, and at one point turned it on high when we had just added the cocoa – a cloud of chocolate dust rose from the blender and gently settled on the mixer, me, Little B and everything else within 18 inches of the bowl. Next time she started the mixer Little B covered her nose and mouth, waiting for another explosion, which did not happen. Adventures when practicing fine motor skills! I will definitely try the recipe again, and will eagerly await the results. I bet next time they will again be deliciously rich, delicate and powerful treats.

Flourless Double Chocolate Cookies

3 egg whites, at room temperature
1½ cups powdered sugar
¾ cups cocoa powder
¼ tsp salt
1 tsp vanilla extract
½ cup semi-sweet chocolate chips, melted

Preheat oven to 350˚. In a kitchen stand mixer, beat egg whites until soft peaks form (about 5 minutes). Beat in ½ cup of powdered sugar until mixture is well blended. Add the rest of the ingredients, including the remaining sugar, and beat until well blended. Dough will be stiff and sticky. Using a greased spoon or hands, drop balls of dough onto a baking sheet lined with parchment paper. Bake for 10-12 minutes; cool on a cooling rack.

Flourless Peanut Butter Chocolate Chip Cookies

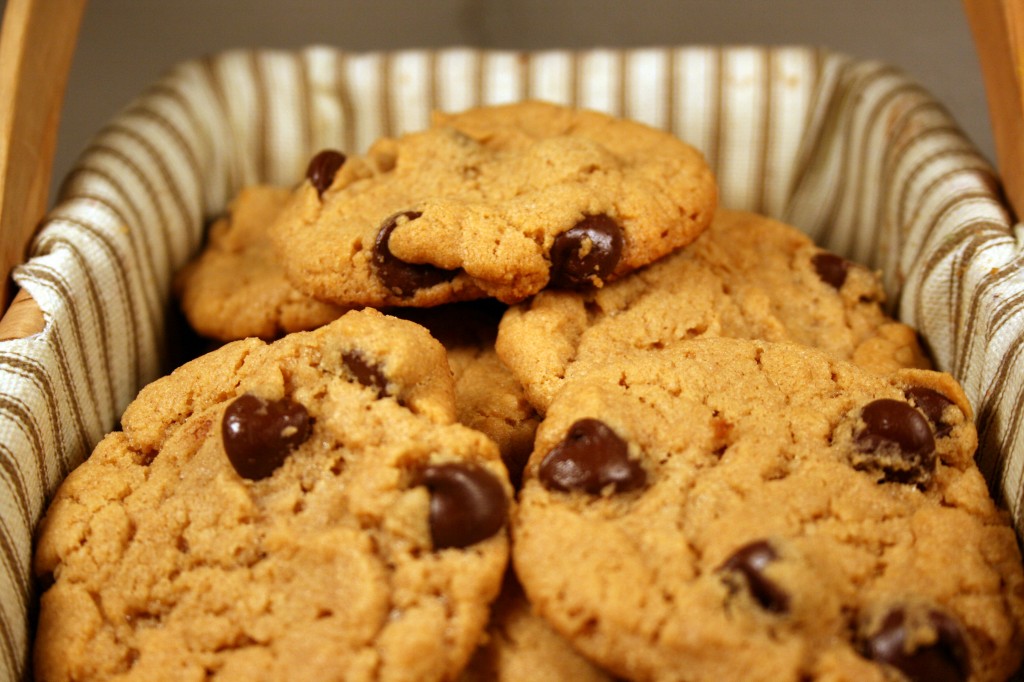
About thirty years ago (when I was an infant…well, really a bit older than that) my mom brought home a cookie cookbook for me. She got it at one of those traveling book fairs visiting the school where she taught kindergarten. We always baked sweets together and I was so proud of having my own cookbook! The book is now all beat up and stored away, nestled safely in the loft of our cabin in Alaska. Almost every page has a spot of vanilla or a place where batter dripped on it and I attempted to wipe it off. One recipe from the book I made a lot and know by heart – it is for a peanut butter chocolate chip cookie. They were actually named “The Greatest Cookie in the World”. I don’t necessarily disagree. Although I got pretty tired of eating them after a few years I still enjoy seeing people bite into them, surprised at how good they are, roll their eyes and look down at the cookie, wondering where it had been all their lives. I have taken batches of them to bake sales, given them as gifts, relied on them for potlucks, given them as ‘I’m sorry’ presents, added pounds to the waists of many a boyfriend and to this day make batches for my godfather. He freezes them and carefully rations his supply, taking one out every evening before dinner. By the time he is done eating the cookie is thawed and provides him with a daily treat. I am not as good as I used to be in keeping him stocked, but I try to make a batch for him when I visit.

After all this build up I am actually not going to share the recipe with you. One, because I want to make sure I give credit to the original source, which I have not yet found, and two, I have a recipe just about as great, but gluten free!

I have made these cookies a few times over the past year and they come out wonderfully every time. The salty, peanutty chocolaty explosion in your mouth may try convince you they are full of processed all purpose flour, but they are not. Using white cane sugar makes a big difference in the result, which is what you see above. I have also made them with Stevia in the Raw instead of white cane sugar. The Stevia version ends up a little dryer and powdery, but I make them small, about two bites, so it is not overwhelming – the peanut buttery chocolate magic still shines through. I was introduced to the recipe here by the guys at The Bitten Word, and as they say, they got it from Southern Living. Enjoy!

Flourless Peanut Butter Chocolate Chip Cookies

1 cup creamy peanut butter
¾ cup sugar
1 large egg
½ tsp baking soda
¼ tsp salt
1 cup semisweet chocolate morsels
Parchment paper

Preheat oven to 350°F. Stir together peanut butter and next 4 ingredients in a medium bowl until well blended. Stir in chocolate morsels. Drop dough by rounded tablespoonfuls 2 inches apart onto parchment paper-lined baking sheets. Bake at 350°F for 12 to 14 minutes or until puffed and lightly browned. Cool on baking sheets on a wire rack 5 minutes. Transfer to wire rack, and let cool 15 minutes.


UPDATE 01/26/2013

Little B and I made a lower carbohydrate version of these cookies tonight and they came out scrumptious! They taste a little less sweet, but using a less bitter chocolate may take care of that issue, although I like the less sweet version. Here are the revised ingredients and instructions.

1 cup natural smooth peanut butter
2 large eggs
1 tsp vanilla
1 cup powdered splenda
1/3 cup vanilla whey protein powder
1/2 tsp baking soda
1/2 tsp sea salt
1/2 ounce block unsweetened chocolate, roughly chopped

Preheat oven to 350°F. Stir together peanut butter, eggs and vanilla until well blended. In a separate bowl combine splenda, protein powder, baking soda and salt. Add dry ingredients to peanut butter mixture and mix until well blended. Stir in chocolate. Drop dough by rounded tablespoonfuls 2 inches apart onto parchment paper-lined baking sheets. Bake at 350°F for 10-12 minutes or until puffed and lightly browned. Cool on baking sheets on a wire rack 5 minutes. Transfer to wire rack, and let cool 15 minutes. They will get crispier as they cool.
Blueberry Muffins Gluten Free!

The other day I asked Big D what he wanted me to cook, or if he actually wanted to use the kitchen himself. I never mind getting out of the way to watch him do his thing. I kind of took over the kitchen since starting this blog and had not really ask how my invasion was fitting in with what he wanted to do food-wise. I know him well enough to be confident in his ability to – readily and eloquently – speak up if he feels like doing so. He is a darned good cook himself, but was busy with work recently and had not done much in the kitchen. He was certainly eating my offerings, so I made assumptions based on his words of praise and looks of contentment, along with empty plates and bowls. Fortunately I was correct. He said he was very much enjoying the food and was happy to see me enjoying myself. He did say he was interested in something spicy with curry. Oh, and some blueberry muffins. I concluded he did not want to eat them together, so I am starting with the muffins while developing future plans for the curry and spicy. In seeking guidance for making said muffins (since wheat free is a must), I of course turned to other food bloggers for ideas, since I am very new to wheat free baking. Although I made some tweaks to it, I found the discussion and recipe here very helpful.

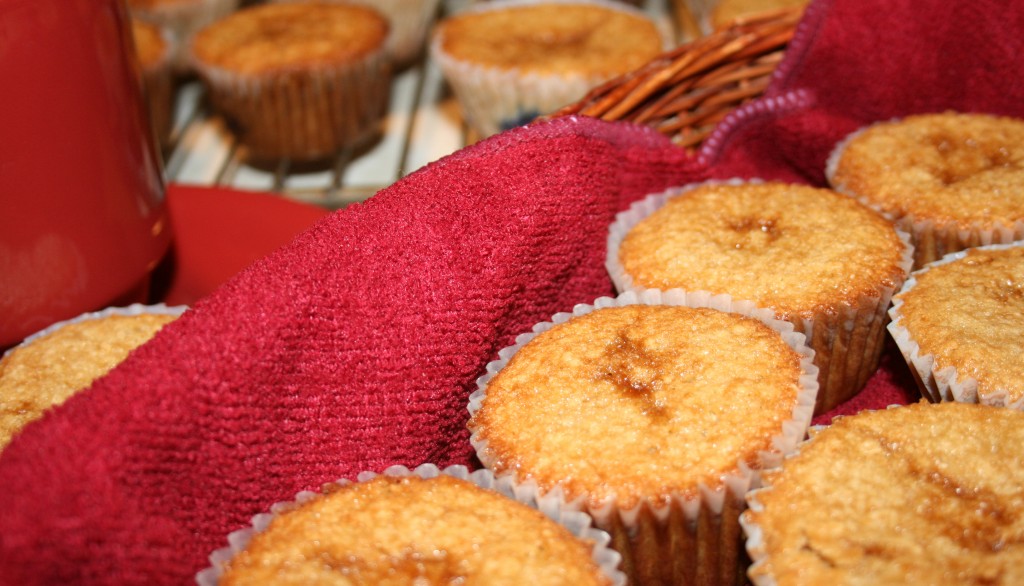
One funny thing happened when the muffins first started baking. They sputtered! I started smelling a slight burning smell about eight minutes into the baking time. I flipped on the oven light but kept my eyes shut at first, hoping that what I saw when opening them was not some kind of rare chemical reaction with the flour and oatmeal. I HATE cleaning ovens! I slowly opened my eyes and was instantly relieved. I saw bubbles rising to the surface of the muffins and popping, leaving a layer of little spots of batter glurping onto the pans. The sputters were browning quickly and giving off the smell. No harm done to the muffins, though. The rest of the baking went smoothly and was sputter free…

Gluten Free Blueberry Muffins

¾ cup butter, room temperature
1 cup white sugar
2 large eggs
2 tsp lemon zest
1 tsp vanilla extract
1 cup brown rice flour
2 cups instant oatmeal, uncooked
1 ½ tsp baking soda
½ tsp salt
1 cup Greek yogurt
1 cup unsweetened applesauce
1 cup blueberries, frozen or fresh
2 Tbsp brown sugar

Fill muffin tins with liners*. Set aside. Preheat oven to 350F. Place oatmeal in a food processor and blend until it is a rough powder. Combine flour, oatmeal, baking soda and salt. Set aside. In a mixer bowl using a flat paddle cream together cane sugar and butter just until blended. Add eggs one at a time, making sure one is combined before adding the next. Add a third of the dry ingredients, then a third of the yogurt/applesauce. Continue alternating until all is incorporated. Fold in blueberries. Fill muffin tins about ¾ full. Sprinkle a bit of brown sugar on top of each muffin. Bake for 20-25 minutes, until tops are brown and beginning to harden. Makes 20-24 muffins.

*In my current kitchen I only have one muffin pan that makes 12 muffins. Since the recipe makes more than 12 muffins, I used my back up baking cups on a cookie sheet. They are aluminum muffin cups that have white paper liners inside them. You don’t need a pan for them, so they are great to have around for overflow. The result of the two different baking tools was doneness. The pan muffins cooked a little darker than those in the aluminum cups, but they all came out good and moist.

Post Navigation