Any Kitchen Will Do

Give me a kitchen and I will cook.

Archive for the category “Silver Spring Kitchen”

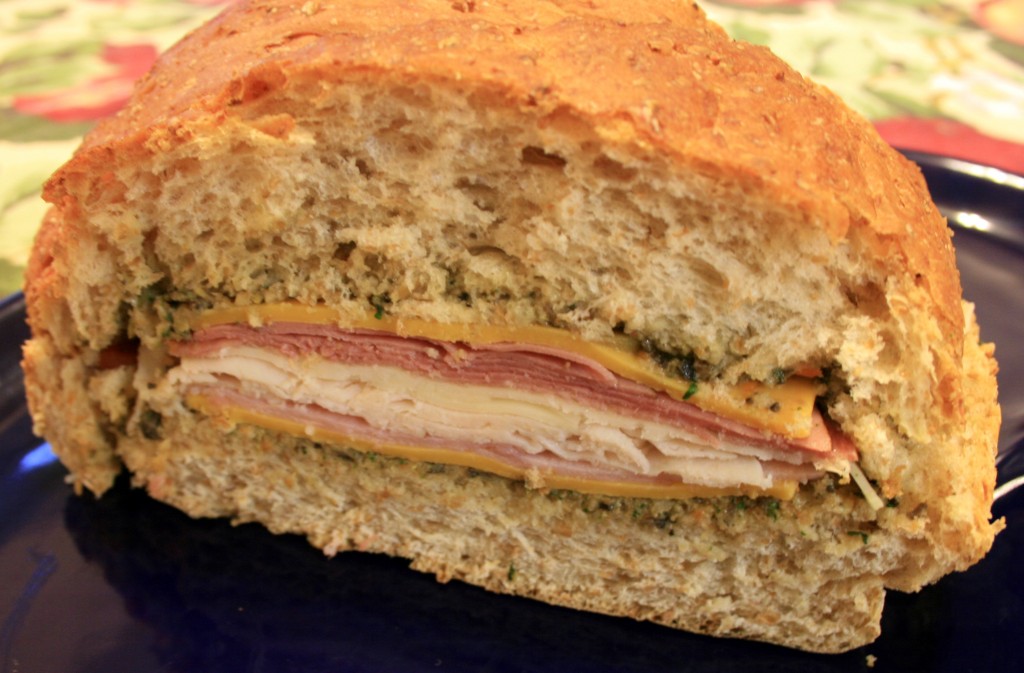
Hero Sandwich

Hero, hoagie, sub…whatever you call it, it is a sandwich with sub-stance of hero-ic size. Heh. I love hero sandwiches, which come and all shapes and sizes, depending on where you are in the country. Personally like my bread/filling ratio about 1:1, but often I find bready versions with a sad amount of filling, so I would feel inclined to pass on such a sad sandwich. For this one I wanted to make sure it was hearty. My friend hurt herself and was laid up for a while. With three hungry sons I felt the need to take over a pile of food. One thing I thought her men (and she) might like was a sandwich piled with meat and cheese. Here is what I came up with, inspired a bit by the muffaletta sandwiches I adore in New Orleans. Yes. They make more than Po’ boys down there. These are quick to make and great for parties and picnics. Have fun at the end of summer and make one for your clan!

Hero Sandwich

1 loaf French bread (white or whole wheat)
1 ½ cups black olives
1 ½ cups green olives with pimentos
3 cloves garlic
1 Tbsp extra virgin olive oil
8 ounces thin sliced salami
8 ounces thin sliced ham, honey or smoked
8 ounces thin sliced roast beef
8 ounces thin sliced turkey, smoked or roasted
6 ounces thin sliced Provolone cheese
6 ounces thin sliced cheddar cheese
6 ounces thin sliced Swiss cheese
6 – 8 long toothpicks

In food processor or blender add olives, garlic and olive oil. Pulse until it is a rough paste, adding a bit more oil if needed. Cut loaf in half lengthwise, leaving one long edge uncut, like a hinge. On the bottom and top halves of the loaf spread half the olive paste, making sure it gets spread all the way to the edges. Begin layering meats and cheeses, starting with meat – beef, cheddar, ham, Swiss, turkey, provolone, salami. Don’t be afraid to pile it on – you can smoosh it down later. If you are ready to serve, add any optional ingredients you like*. Close the sandwich and press down. Add toothpicks so they will be in the middle of each slice (about eight pieces). With a sharp knife or bread knife cut slices 1 – 2 inches thick. If you are not going to serve immediately, wrap the sandwich tightly in cling wrap and refrigerate, then when ready to serve, unwrap, add the toothpicks and slice.

*Optional ingredients (added right before cutting and serving) can include tomato slices, onion slices pickle slices and lettuce. Do not add these ingredients until right before serving, or offer them separately. They can make the sandwich soggy of they sit around in the sandwich for too long, and nobody likes a soggy hero.
Blueberry Coconut Flour Muffins

Little B used to not like blueberries at all. We stopped even offering them to her, then suddenly, they were the best thing since sliced bread! They still come after blackberries, but they rank pretty high with her these days. When we celebrated Lammas a couple of weeks ago we wanted to honor the day with what is typically use of traditional first harvest items, and the recognition that days are getting shorter and cooler. Well, not cooler yet, but linger in the anticipation. First harvest is usually grains; more specifically, wheat. Since we are avoiding wheat there was a need to focus on a more creative symbolic dish. We mixed up some grain free muffins with a different seasonal harvest item – blueberries! They were wonderful accompaniments to the other harvest items on which we feasted: apples, zucchini, pork and wine. We had a lovely evening releasing regrets and looking towards autumn – what I consider my favorite time of year. I used coconut flour again, which has become a favored ingredient in my baking lately – it does not take much to go a long way and it is good for you! I hope you enjoy the muffins, for we did, in all their bluberry-ness.

Coconut Flour Blueberry Muffins

6 eggs
4 Tbsp plus 2 Tbsp (or 12 1/2 tsp) butter
2 Tbsp heavy cream
1/2 tsp vanilla
3 drops liquid stevia
1/2 tsp sea salt
1/2 cup coconut flour
1/2 cup powdered erythritol
1/2 tsp baking powder
8 ounces blueberries

Preheat oven to 400F. Prepare muffin pan with liners. In mixing bowl blend together wet ingredients. In separate bowl combine dry ingredients. Add dry ingredients to wet ingredients and stir just until combined. Gently fold in blueberries. Divide batter among the 12 muffin cups. Bake for about 15 minutes until tops begin to brown. Let cool for about ten minutes before serving.

Update 11/26/12: Little B and I made a batch of these muffins tonight. A tweak made some doubly delicious muffins! We threw all the wet ingredients, along with the blueberries into a blender and whipped them all up together before combining with wet ingredients. We also added juice from half a very juicy lime – about 1/5 cup (very juicy lime). The tweaks made them more moist and the sweet and tang of the berries and juice worked great together. Everything else remained the same in the recipe.

Roasted Asparagus

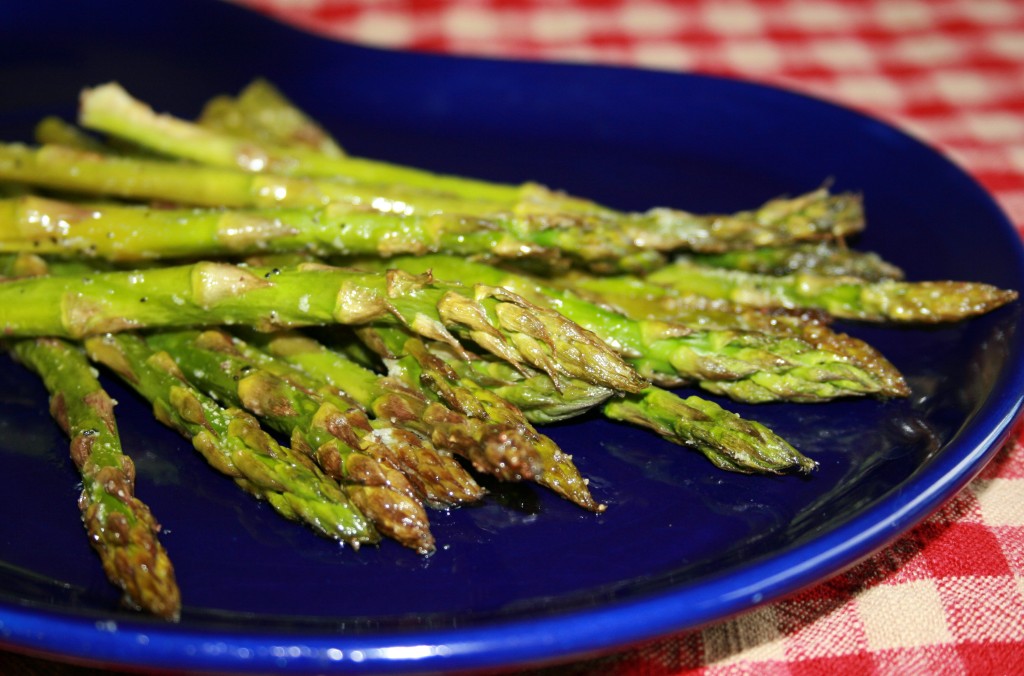
I originally learned this recipe from my old friend Karla. About ten years ago I went over to her house and she made wonderful side dishes while her husband Marcus cooked up some meat. The whole meal was delicious, especially eating under a beautiful summer sky in Denver, but the asparagus was stupendous. It was probably because I had so much trouble cooking it well in the past. I either undercooked it or overcooked it to a green mush. Now it comes out perfectly every time – the thick ends are soft enough to eat and the delicate tips still have substance. The roasting really brings out the flavor of the asparagus while making it tender to eat, hot or cold. I have often taken leftovers on picnics or in cold lunches and it works just as well as if it is right out of the oven. So simple and so scrumptious!

Roasted Asparagus

1 large bunch raw asparagus
2 Tbsp olive oil
2 tsp lime juice
½ cup chopped pecans or almonds
2 cloves garlic, diced
2 Tbsp Parmesan cheese
Salt and Pepper to taste

Heat oven to 350F. Rinse asparagus and remove the thick, tough ends. You can do this in any of three different ways:
1) cut the bottom 1-2 inches off with a knife,
2) bend the asparagus by holding it about half way down with one hand and hold the thick end with the other hand.
Bend the stalk until it naturally breaks where the tough section begins, or
3) with a vegetable peeler gently peel off thick outer skin from the bottom half of the stalk
Line a cookie sheet with aluminum foil. Lay asparagus on foil, alternating thick and thin ends. Make sure the stalks alternate the direction of the tip, so they can cook evenly. Sprinkle asparagus with olive oil and lime juice, followed by garlic, salt, pepper and nuts. Place in oven on the middle rack for 20-30 minutes, until tender. Sprinkle with Parmesan cheese and return to oven, cooking for about five more minutes until cheese is soft. Serve immediately.

Scotch Eggs

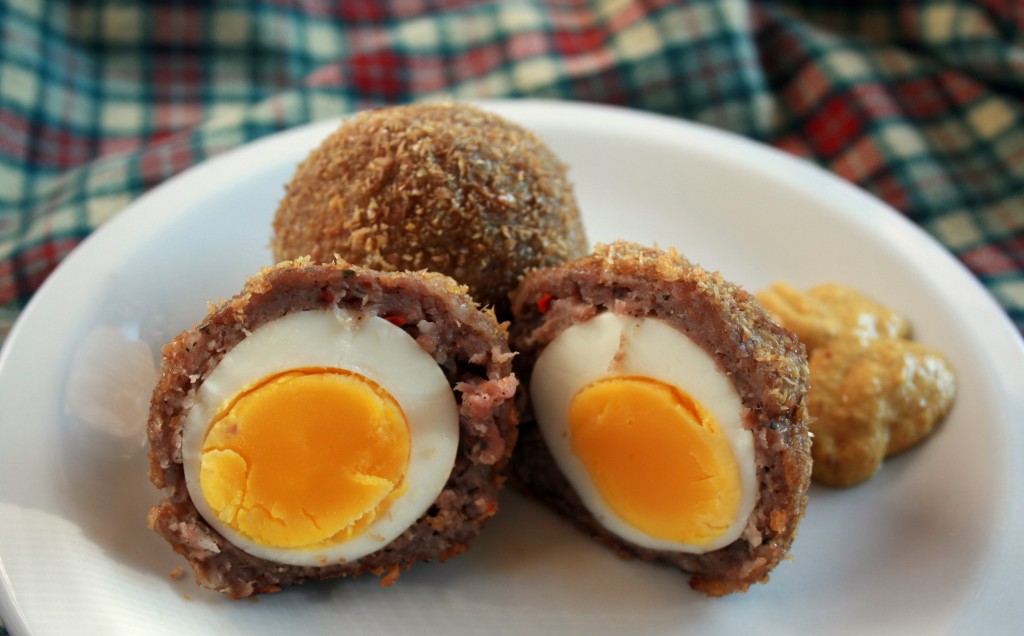
The nostalgia is dripping from my entries lately. Never fear, it continues here. Starting in high school my friends and I would go to the Texas Renaissance Festival every autumn. It ran October through November on weekends. The trip was a big deal for us because it did not include parents. Since we could not get permission (or collect the funds) for an overnight trip, our adventure was a freakishly long marathon. A one way trip from San Antonio to the festival north of Houston was at least four hours. The round trip, plus time at the festival (and staying up late the night before leaving) equaled a twenty hour day. It was a lot of fun and a lot of gas station stops. We returned home tired and smelly and happy, with bags smelling of incense and full of Christmas presents. Our first stop in the festival grounds was always along the right edge of the outer ring, to eat our first of many treats – Scotch eggs. They were great sources of protein after the doughnuts we grabbed in Flatonia and the empty calories of candy and chips. Here is a low carb version that reminds me of the festival snack. We will be going to the Maryland Renaissance Festival in August, and I am curious to see if they have them. On this fine Sunday morning while the summer sun shone brightly through the kitchen window I made a batch that tasted so very good, and introduced Little B to the dish – she inhaled her egg and ate some of Big D’s and mine. After the feast was over we lamented the fact we did not include some theme music. Consumption of the next batch will definitely include the tunes of Tartanic! I took guidance for this recipe from here. Have a happy day, and always return to happy thoughts and places whenever you can.

Scotch Eggs

1 pound hot breakfast sausage (we typically use Jimmy Dean All Natural or Spicy style)
8 medium boiled eggs, peeled
2 raw eggs
1 cup golden flaxseed meal
1 teaspoon sea salt

Preheat the oven to 350 degrees. Line a baking sheet with aluminum foil. Combine the flaxseed meal and salt together in a bowl. In another bowl whisk together the two raw eggs.

Divide the sausage into eight piles. Using your hands, press the sausage into a patty in the palm of your hand. Place a hard boiled egg in the middle of the patty and and mold the sausage around it until it is completely and evenly covered.

Roll each sausage covered egg in the raw egg, then each in the flaxseed meal to coat it. Repeat with the remaining eggs, then roll them all once more in the meal until it is gone.

Place the eggs on the foil-lined baking sheet, at least two inches apart. Bake the eggs until the outside is browned and the sausage is cooked through, about 25 to 30 minutes.

Remove from the oven and let the eggs rest for 5 minutes. Slice in half and serve with mustard.

Refrigerator Pickles

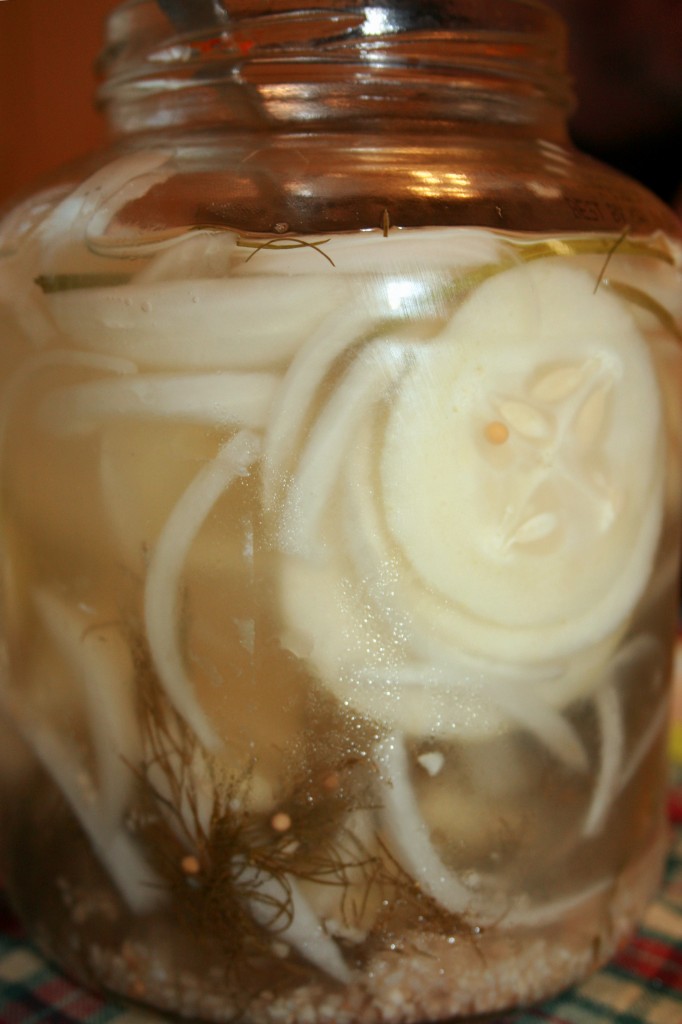
When I was a kid we had a garden in the back yard. We always grew tomatoes, sunflowers, usually included zucchini and often did cucumbers. Needless to say, we ate a lot of fresh vegetables during the summer. Sometimes I looked forward to the gardening – finding fruit and veggies ready to pick or grabbing some of the more elusive weeds while the plants matured. Other times I was not so eager to be a gardener – breaking up all the clods of dirt after they clumped over the winter, or clearing out all the dead plants when autumn came. I remember getting mad at my dad a few times, too. Me, my brother and mom did a lot of the work, but when he talked about the garden it was ‘his’. Ooooh, that got me irked! We would slave away in the heat and he would come out, point to a few things we missed, then head back in to the air conditioned house. I laugh about it now, because we learned so much about plants and self-sufficiency and responsibility, but the perspective was a bit different at the tender age of eight or nine. One thing my mom always did with some of our cucumber crop was make refrigerator pickles. For months there would be at least one jar of pickles in the fridge door – we would come in from playing outside (or gardening) and pinch a few cold, tart slices as a snack. They never lasted very long, which was good, since the simple preparation did not include any heating or effort to sterilize or pasteurize in the process. Since we currently have no garden, or yard for that matter, this batch of pickles was made with store bought cukes. They were big and perfect – the slices were nice and floppy after sitting in the jar for a day or two. Little B enjoyed watching them flop around before pretending to be a tiger and taking a bite. I never knew tigers liked pickles.

Refrigerator Dill Pickles

1 large cucumber, peeled
1 – 2 cups white vinegar (substitute with some water if you want less tang)
½ white onion, julienne sliced
2 tsp sea salt
5 sprigs fresh dill
4 – 6 cloves garlic, chopped
1 Tbsp mustard seeds
clean glass jar with tight fitting lid

Slice cucumbers into thick coins (1/8 to ¼ inch). Set aside. In a glass jar with tight fitting lid combine vinegar and spices. Put lid on jar and shake. Add cucumber to jar, making sure the slices are not sticking together. Secure lid on jar again and shake vigorously, encouraging the spices to spread out among the slices. Chill for at least 24 hours before eating. I make no promises about pickle viability beyond one week.

Cauliflower Fritters

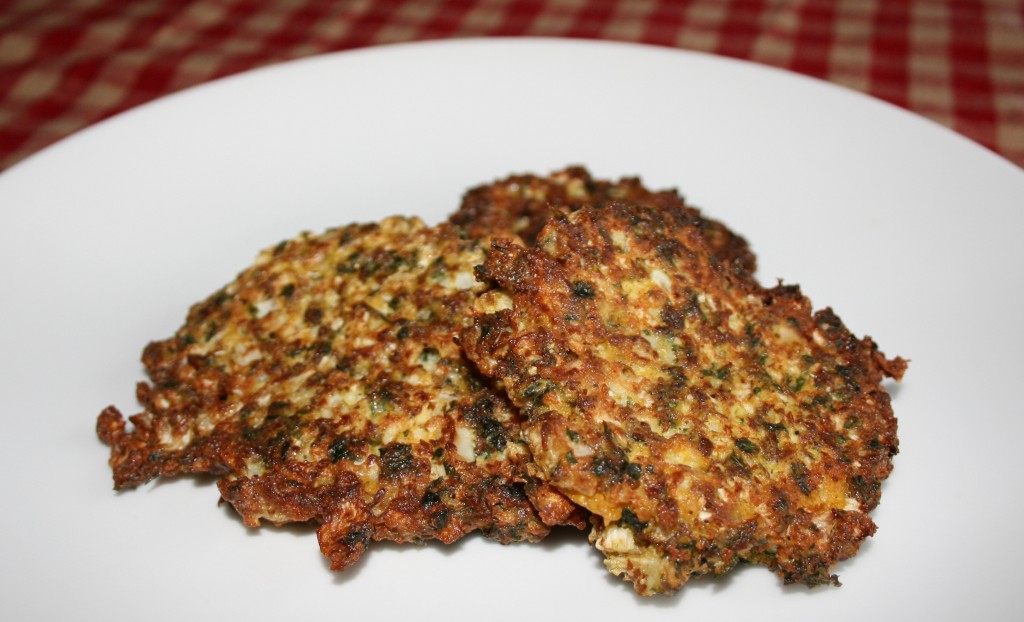
When I make it a point to avoid processed grains and starchy carbohydrates in my diet I seem to have more energy and lose weight. I also start to crave vegetables. Of course a loaded baked potato or breaded mushrooms don’t really fit the balance I want. Ideally I would crave steamed veggies with some lime juice and herbs, but the reality is I want substance and texture and flavor. These fritters help me balance the need for hearty high fiber veggie variety and a low carb energy source. I was inspired by the recipe here, but tweaked it to make chunkier fritters held together by flaxseed. Low carb and hearty. Yum!

Cauliflower Fritters

½ large head cauliflower
2 whole eggs
¼ cup flaxseed meal
¼ cup fresh parsley, finely chopped
1 tsp lime juice
½ tsp salt
¼ tsp black pepper
1 tsp fresh thyme
½ tsp ground cinnamon
¼ tsp chili powder
½ tsp cumin
½ tsp tumeric
pinch cayenne pepper
½ cup olive oil or fat of your liking

Cut cauliflower into little florets and add to the bowl of your food processor. Process on pulse until cauliflower has texture of large grains of cracked wheat*. In a large mixing bowl add the rest of the ingredients and mix until well combined. Add the cauliflower and combine until well coated. Heat a splash of olive oil in a frying pan and add about ¼ cup of the mixture for each fritter. Using a large spoon droop a mound about the size of a baseball into the oil. Cook three or four fritters at a time for 2 – 3 minutes on each side, until golden brown, then keep warm while you cook the remaining fritters.

*I just chopped them up a bunch, resulting in big and little chunks instead of cracked wheat chunks. They were yummy all the same

Cold Brewed Coffee

I just spent $3.00 for a big iced coffee. It is not exorbitantly expensive, but probably ten times what it would cost to make for myself. Now that hot weather has invaded my life I could not be less interested in steaming cups of java. Today’s iced drink reminded me that I need to pull out a big jar and grind some coffee. My favorite caffeine boost in the summer is cold brewed coffee. It is easy and delicious and does not require a coffee maker (which we are lacking right now). I like mine with a little cinnamon and cream. Big D tasted this batch – I have made many but he never before partook. As is my opinion, he thought the cold brew made for an extremely smooth, strong finished result. He usually likes triple shot espresso concoctions called sludge or the like, so I was surprised that he liked my little cold brew. I use dark roasted coffee (not French Roast – yuck) and there is no bitterness. Just deep, toasty flavors that only weaken slightly as the ice melts. Of course, there are endless possibilities when it comes to doctoring up the final product with spices and creams and sweeteners. Deep in the summer I lean towards just a splash of cream, then as fall nears I go heavier on the cinnamon and nutmeg, before I finally turn to hot coffee as the summer wind is replaced with cool breezes. I first learned about cold brewing long ago from my old friend Brian, then was reminded of it again years later by the guys over at The Bitten Word. I tweaked it a little since first making it for myself, but their version is wonderful.

Cold Brewed Coffee

1 cup dark roasted coffee, coarsely ground
4 cups cold water
Optional flavors for serving:
Heavy cream
Half and half
Cinnamon
Nutmeg
Sweetener

In a quart sized jar* with screw lid add water and coffee. Screw lid on tightly and shake. Place in refrigerator for 24 hours. Leaving it for more than a day will not hurt it. Strain liquid into another jar or bowl, through a sieve with coffee filter lining it. Rinse jar and return coffee to it. Store in refrigerator. To serve, fill your serving cup about ½ way with coffee and add ice until glass is filled. If the coffee is too strong for you add a bit of water. If you like, stir into the coffee about 1-2 Tablespoons heavy cream, a dash of cinnamon and any sweetener or other spices – the way I like it – or have it straight, which is delicious, too!

*Before my french press broke I would use it for the brewing and straining. It is a smaller volume, but makes for a faster process. The proportions are different, but I try to do 4:1 water to coffee, and it works out the same as using a jar and slightly clumsy process of straining with sieve and filter. When you put it in the fridge leave the plunger up, then before serving gently press it down to filter the coffee.

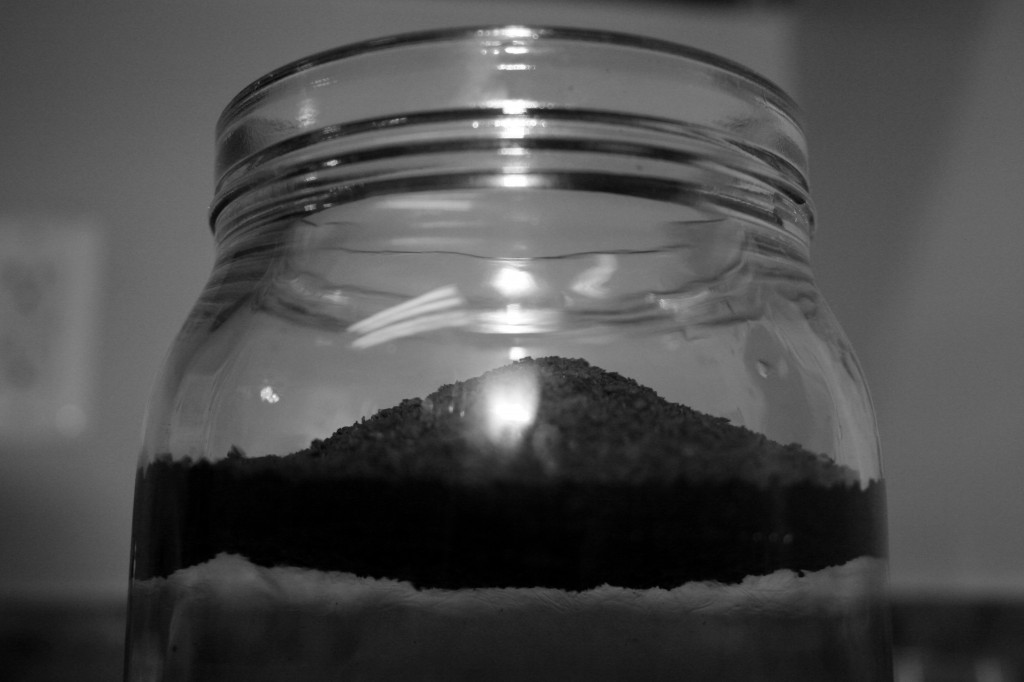
Chocolate Coconut Flour Cake

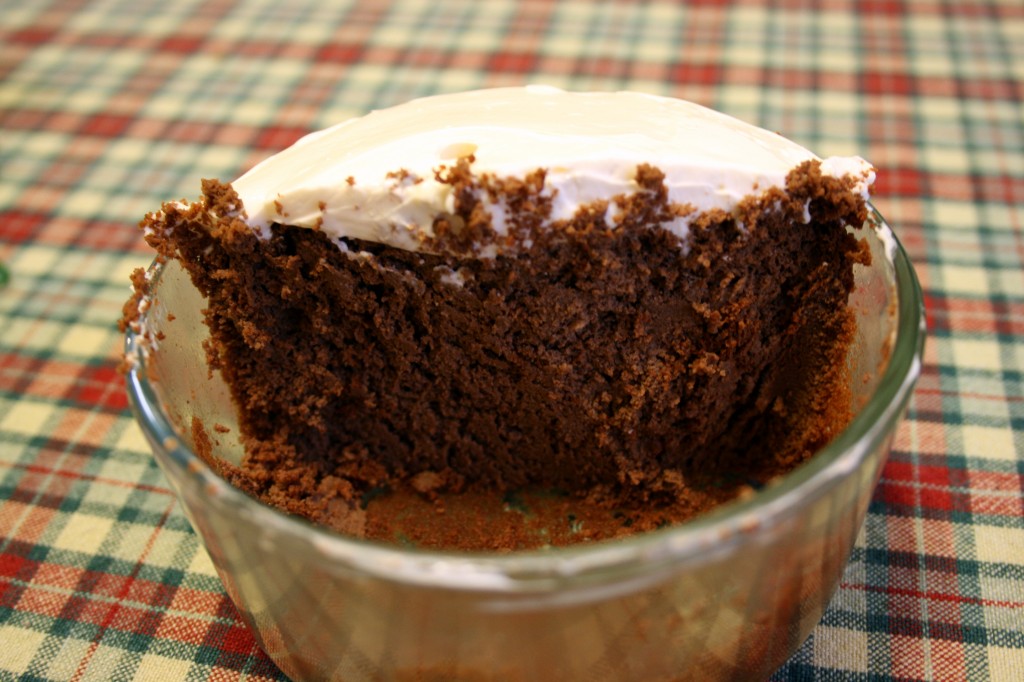
Little B turned three years old this weekend. She loves birthdays and presents, so we planned on making a big deal of it. I really wanted to make her a birthday cake, so I did. The problem I faced was when to give it to her. Friday, the day before her birthday, I could not take it for her to share with her ‘school’ friends because they only allow store bought confections with ingredients listed on the label – all that peanut allergy stuff. I did find a cute cupcake cake for her to share, but I had nothing to do with the making. We were going to the shore for the weekend. I would not be able to prepare her cake at the last minute, so I sneakily made it before we left, while Little B dreamed the night away. I carefully packed candles and a lighter, along with a knife and forks, plates and napkins. In addition to wrapped presents there would be streamers and balloons. I imagined her waking up to a decorated room, a pile of presents and a cake with candles, waiting to be wished upon and blown out before we began a fun-filled day. Well, It happened pretty much the way I imagined. Except for the cake. It stayed safely ensconced in the refrigerator at home. I forgot the darned thing! We easily found a substitute by the end of the day, but geez, what a thing to leave at home! It worked out that she had three birthday cakes in three days. It was a coincidence we hope she does not remember next year. I can picture it now, “Mommy, last year I had three cakes when I turned three. I get four cakes this year because I turn four, right?” This cake recipe is my first foray into using coconut flour – whenever we can cut out processed grains and sugar we do so. I relied on and tweaked the recipe here and Little B loved it. Even after sitting in the fridge for three days it was moist and full of the chocolate Little B requested. I made a dozen cupcakes and a small cake in a 2-cup round Pyrex dish instead of more cupcakes. We had loads of fun this weekend and Little B now knows the birthday song version she calls ‘the zoo song’ – the one that ends “…and you smell like one too!” She is so awesome!

Chocolate Coconut Flour Cake

Cake
¾ cup cocoa
½ cup olive oil
5 eggs
2 tsp vanilla
1 ½ cups powdered erythritol
1 cup coconut flour, sifted
1 Tbsp baking powder
1/3 cup heavy cream
2/3 cup water
8 ounces cream cheese
½ cup butter

Frosting
8 ounces cream cheese, room temperature
1 tsp vanilla
1 Tbsp erythritol

Preheat oven to 365 degrees. Beat together eggs. Add olive oil and vanilla. In separate bowl sift together cocoa, erythritol, baking powder and flour. Add to egg mixture and combine. Add cream and water and stir just until blended. Melt cream cheese and butter and stir together. Add to batter. Bake in 9×5 loaf pan for 45-60 minutes, or fill 12 – 18 lined cupcake papers in a muffin pan, divide batter and cook for 20-25 minutes. Cake is done when toothpick comes out clean. For loaf let cool in pan for ten minutes before turning it out onto cooling rack. If making cupcakes let cool completely before frosting.

To make the frosting whisk together the cream cheese, vanilla and sweetener until smooth. For cupcakes frost each one before serving. If making a loaf I recommend serving the frosting on the side as a spread.

Greek Burgers

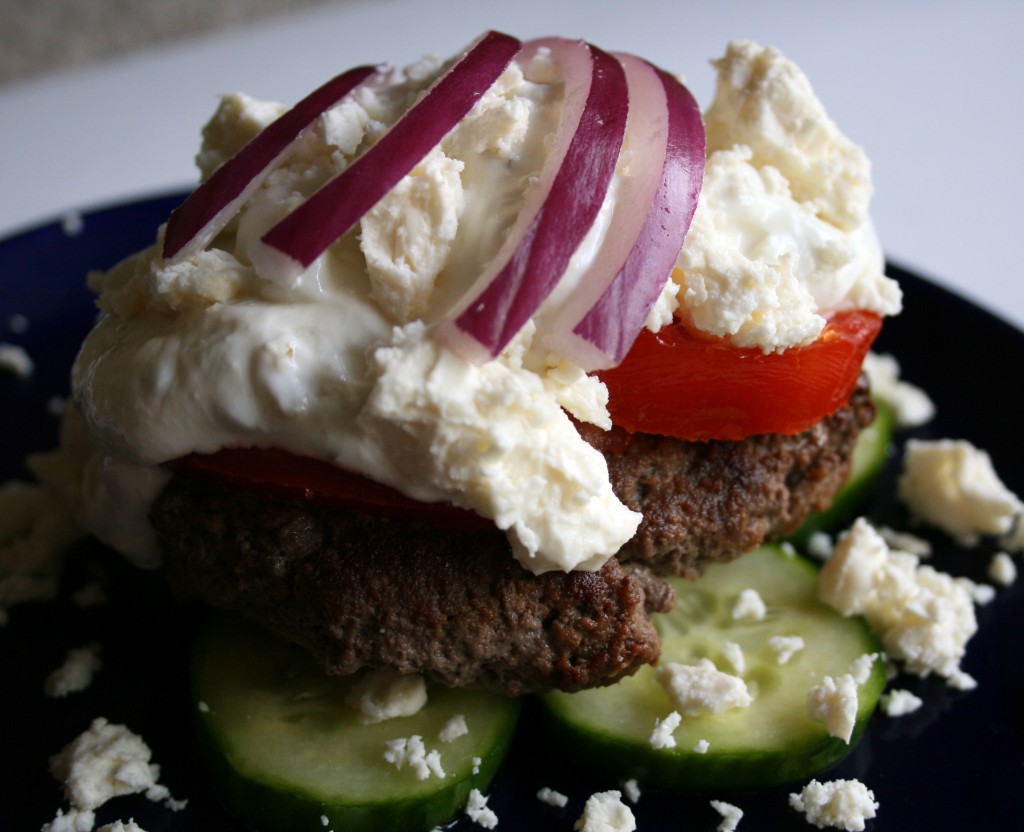
I must confess. I am a Fed. I work in a tall building in a big complex with uber security at the door and a locked work area with a bunch of cubicles around me. I am a little cog in a huge rolling maze of cogs, but I enjoy the work. Don’t get me wrong, I would prefer cooking all day, but for now I am content with my work, which is challenging and never boring. This time of year is pretty busy for me, reflected by the fact it is longer than usual between posts. I have not cooked for days, but no suffering occurred during the drought. Big D made some wonderful stuff in the evenings and there was enough for me to very much look forward to leftovers at lunch. It will be another couple of months before things slow down, so I make no promises, but I have some yummy ideas – don’t give up on me. I will persevere and post post post! Cooking relaxes me and I cannot stay away from it for long, no matter what. Take these burgers, for example. I had a burger like this at a hole in the wall restaurant somewhere in Alaska. I can’t remember where, but I was surprised how much I enjoyed it – I had expected a hockey puck with sour cream on top, but it was fresh and wonderful. With no lamb in sight my version is a tangy, filling meal that reminds me of my beloved gyros (pronounced ‘yee-rohs’ in my opinion). I had to negotiate with Little B to use the last of our Greek yogurt for tzatziki. She loves it with a little stevia, cinnamon and vanilla for dessert, but I finagled enough from her for the recipe.

Greek Burgers

Patties
½ cup parsley, finely chopped
2 Tbsp oregano, roughly chopped
½ cup mint, roughly chopped
3 cloves garlic, finely chopped
1 tsp black pepper
2 tsp sea salt
1 egg
1 Tbsp lime juice (or 2 packets True Lime) http://www.truelemonstore.com/products/true_lime
2 pounds ground beef
2 Tbsp olive oil
1 cup feta, crumbled
2 cups fresh spinach leaves, stems removed
1 English cucumber, sliced in ¼” coins
1 tomato, sliced
½ red onion, thin julienne

Tzatziki
1 cup cucumber, peeled and finely chopped
1 ½ cups Greek yogurt
1 clove garlic, crushed
2 tsp parsley, finely chopped
2 tsp mint, finely chopped
2-3 tsp lime juice
1 Tbsp olive oil
½ tsp sea salt
¼ tsp black pepper, finely ground

First make the tzatziki – doing it right before the meal works, but doing it the day before is better. Combine all ingredients together. Chill until time to serve. For patties whisk together the first eight ingredients. Pour mixture over ground beef in large bowl. Remove your rings, bracelets and watches, then get your hands dirty making sure the egg mixture is well combined with the beef. Squish it and squeeze it until all the herby bits are distributed. Form meat into patties about 4” wide and 1” deep. In large frying pan heat the oil over medium high heat. Add patties and cook until seared, about five minutes. Flip patties and sear the other side. Cover and cook to desired doneness. On a bed of spinach and a layer of cucumber coins (either on a bun or directly on a plate) place a patty. Layer toppings – tomato slices, a glop of tzatziki, feta crumbles and onion. Dig in!

Baked Zucchini Wedges

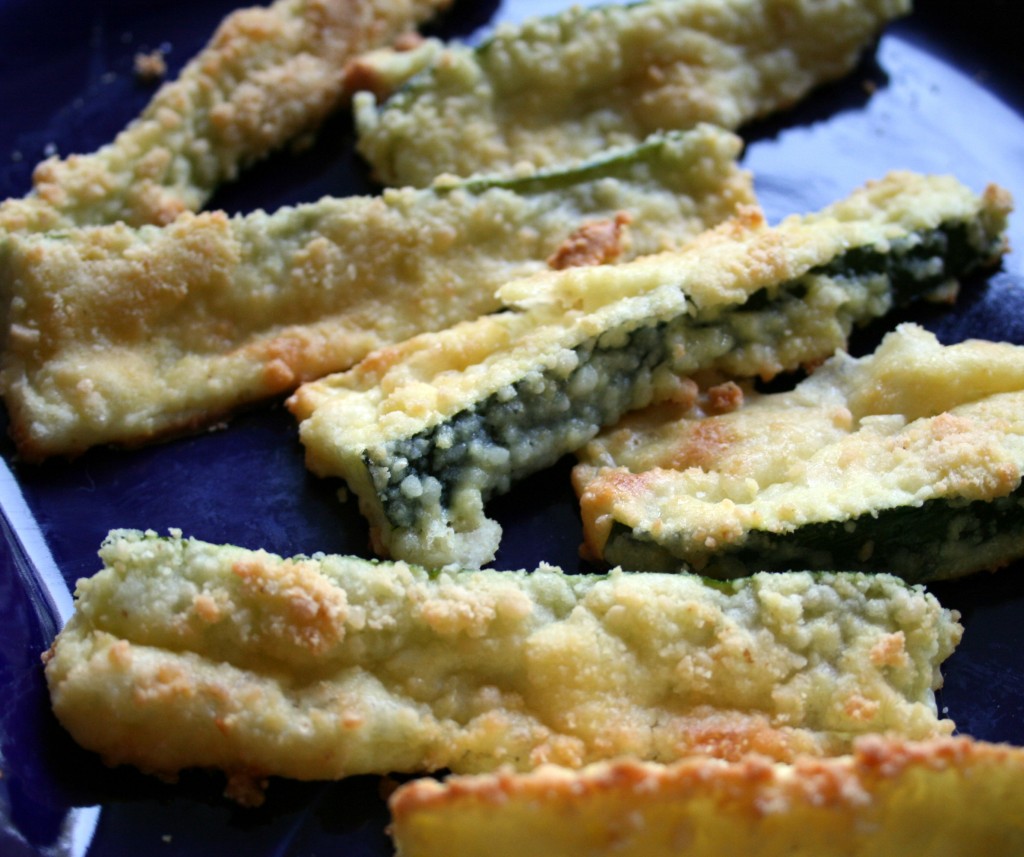
I did it! I finally did it! I made a zucchini dish that Big D declared as the best he has ever had. This is a BIG deal. I love zucchini, but Big D does not. As usual, if I cover something with garlic and cheese there is a high possibility of culinary success around here. Besides being absolutely delicious (hot or cold, we discovered) they were a great balance for the spicy meat Big D cooked up to go along with the zucchini – he has promised to guest blog about it soon (nudge nudge). I don’t know if this bread crumb-less version will work with anything other than the powdery Parmesan cheese typically found in shaker-type containers, but I do know the powdery stuff did a great job of sticking, with the help of some egg.

Baked Zucchini Wedges

2 large zucchini
2 cups finely grated Parmesan cheese
2 tsp garlic powder
1 tsp salt
2 eggs
2 Tbsp water

Preheat oven to 350 Fahrenheit. Slice zucchini in half, then lengthwise into narrow wedges – at least 20 slices per squash. Make available a large non-stick cookie sheet to receive the prepared slices. Mix together eggs and water, making sure they are well combined. Pour into a shallow bowl or deep plate. In another bowl/plate combine cheese, garlic and salt. Dip each slice into the egg mixture, followed by dipping in the cheese mixture. If they will stand on their skin edge, then set them on the sheet skin side down. If they only stand on a wide, white edge, they will be fine, but will cook brown on the side touching the pan. Bake for about 30 minutes until coating on top starts browning. Serve immediately.

Post Navigation