Any Kitchen Will Do

Give me a kitchen and I will cook.

Archive for the category “tomato”

Ketchup

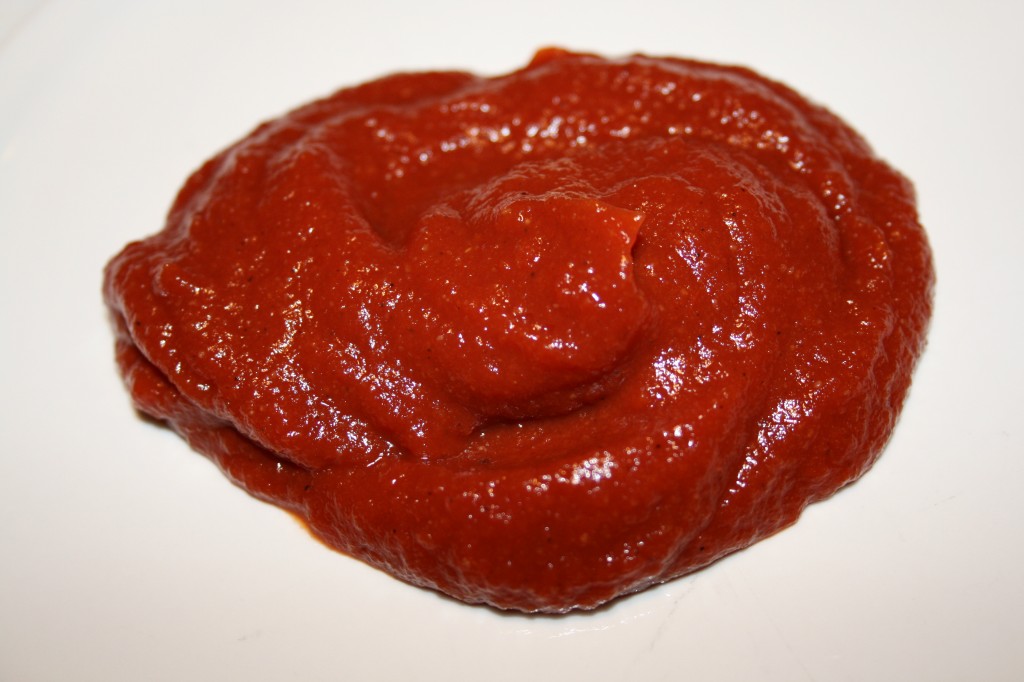
Is it Catsup or Ketchup? I don’t know the difference, but I do know that both of them are red, slightly tangy dipping sauces that are mostly tomato. A while back we had a house full of young people over and fed them burgers, hot dogs and home fries. Our household rarely uses ketchup, so we don’t usually have any around. Ack! No red stuff in the fridge! We got some wide-eyed looks when we declared the absence of the condiment. Instead of running to the store and leaving Big D to host our guests while simultaneously grilling meat, I dove into our pantry and attempted to make a batch of ketchup. With tomato paste as a base it was easy to combine some spices and vinegar to come up with a pretty darned good version. It seemed to do the trick and the party continued without a hitch. I will definitely make this again, and even eat some! Read the preparation instructions carefully. It is easy to get lost in all the steps…

Quick Ketchup

6 ounces tomato paste
¼ cup white vinegar
1 Tbsp garlic powder
1 Tbsp onion powder
Dash allspice
1 tsp salt
1 tsp honey
½ cup water

Combine all ingredients together very thoroughly. Serve.

Red Tomato Salsa

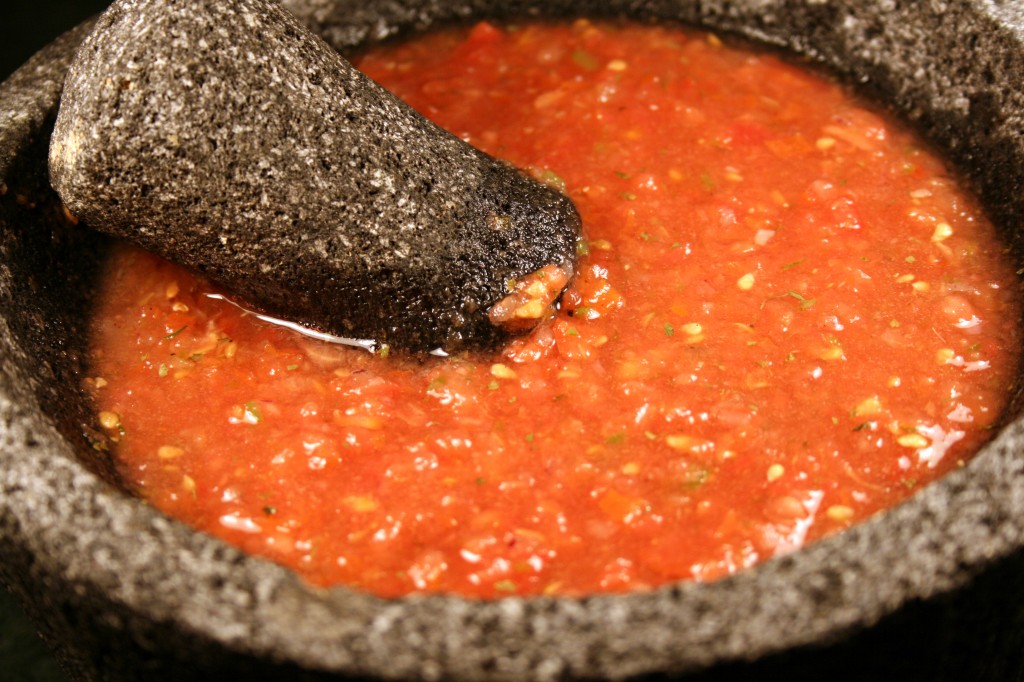
Salsa! It is low fat, low calorie, low sugar and can spice up pretty much anything. I don’t think it can be beat on top of eggs, inside tacos or all around a tortilla chip. I have made it cold, warm, roasted, raw, green, brown (it was actually good) and of course, red. The raw red version is the one that most reminds me of the tex-mex restaurants I like the most down in Texas where I grew up. Each batch is a little different, depending on the quality of the tomatoes and the bite of the jalapenos. This version of salsa comes straight out of the fridge. It is raw, red and tangy. I made the recipe mild, but it could of course be spiced up with more jalapenos.

Tomato Salsa

4 large rip tomatoes, quartered
½ small red onion, roughly chopped
1 large or 2 small jalapenos
1 lime, juiced with meat included
3 cloves garlic
1 small bunch cilantro
½ teaspoon ground sea salt

If you have a big food processor, combine one tomato with the remaining ingredients and pulse until finely pureed. Add remaining tomatoes and pulse until roughly chopped. Refrigerate overnight and serve cold.

If you are going to use a molcajete combine the onion, jalapeno, lime meat, garlic and cilantro in bowl. Grind until all the ingredients are combined. Add tomatoes and continue grinding until combined and the tomatoes are of preferred mushiness. Refrigerate overnight and serve cold.

If you have a small food processor add ½ a tomato and all the other non-tomato ingredients. Pulse until finely pureed. Empty puree into medium bowl. Add tomato to processor and pulse until roughly chopped. Empty into medium bowl. Add tomato to processor and pulse until roughly chopped. Empty into medium bowl. All the tomatoes done? Now stir everything up in the bowl and refrigerate overnight. Serve cold.


Greek Layer Dip

We are moving! Actually, we are in the process of moving, literally. I am sitting on a bed in a hotel room, somewhere between Texas and Maryland. We should arrive in Maryland tomorrow, but in the meantime I am without a kitchen. Until I am again armed with a kitchen I will share with you some recipes I collected over the past few months but did not post.

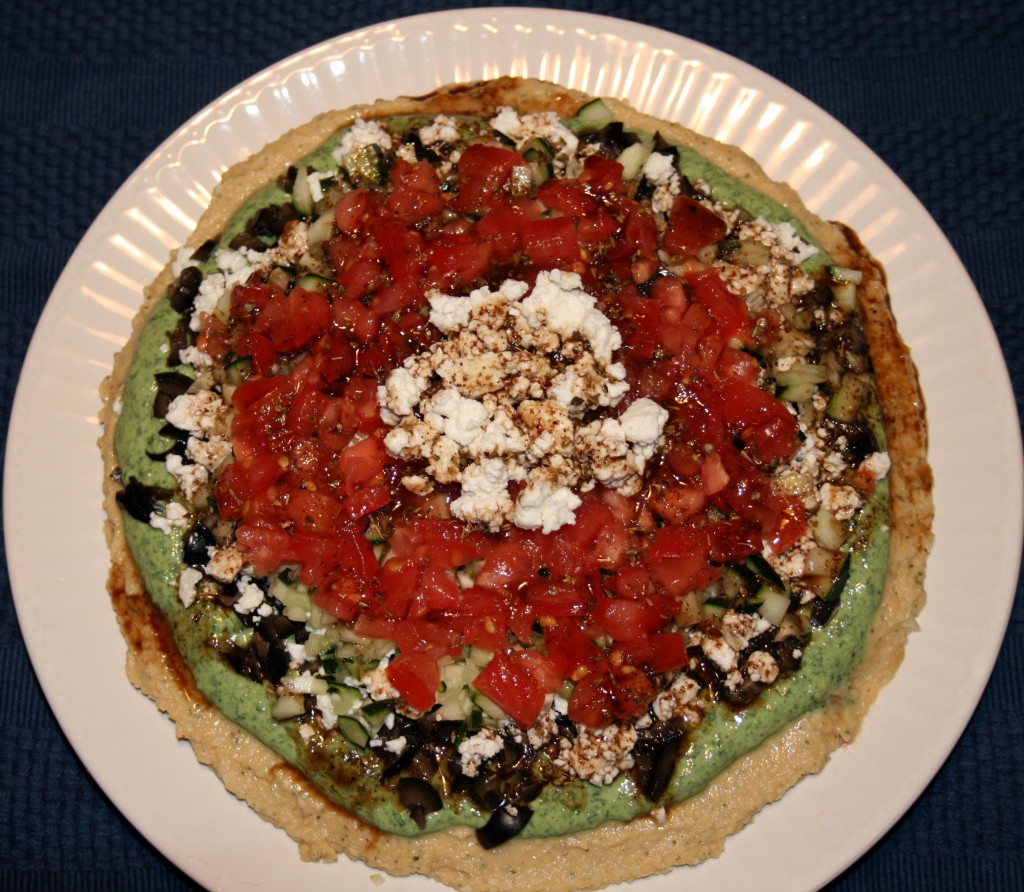
The first one is a dip. Sometimes when a big gaggle of people are coming over I like making available a variety of appetizers so they can nibble as they trickle in to the house. One of my favorites lately, to go along with the ever reliable ranch or peanut dip, is a layer dip. It is high in fiber and very colorful. It can also substitute for a green salad if you have enough Greek lovers. What I like most about it is that if you work hard enough you can get every layer into one bite, but if you don’t, you still get a mouthful of robust flavors that will make you want to seek out another scoop full. With everyone’s vegetable gardens starting to grow (except mine, of course, since I have no idea where we will be living), the dip is a great way to use up some of the bumper crops later this year.

Greek Layer Dip

2 cups hummus
1 cup plain Greek yogurt (optional)
2-3 cups raw spinach
1 cup feta cheese, crumbled
1 cup cucumber, chopped
1 large tomato, chopped
1 cup kalamata olives, chopped
1 Tbsp olive oil
2 Tbsp balsamic vinegar
2 tsp chopped oregano
2 tsp lemon juice
Salt and Pepper to taste

Combine in small bowl the oil, vinegar, oregano, salt, pepper and lemon juice. Set aside. Spread hummus on a serving tray in an even layer, about ¼ to ½ inch deep. Chop spinach into small pieces (and if you are using yogurt now is the time to combine the yogurt with spinach until well blended)*. Spread/sprinkle the spinach on top of the hummus, leaving a visible edge of hummus. Sprinkle olives on top of spinach mixture, followed by cucumber and tomato. Drizzle dressing on top of dip and add some more feta for garnish if you like, then serve. It can be prepared in advance and chilled until serving.

*If you are making the dip in advance I would recommend the yogurt not be used. Depending on the brand of yogurt, it can be a runny layer and will spread if put on the day before. It should be fine if made within an hour or two of serving. I have made it both with the yogurt and without – just sprinkling a layer of spinach makes it look a lot different, but still beautiful and you will still have a moist, dippable dip.

Tomato Artichoke Soup

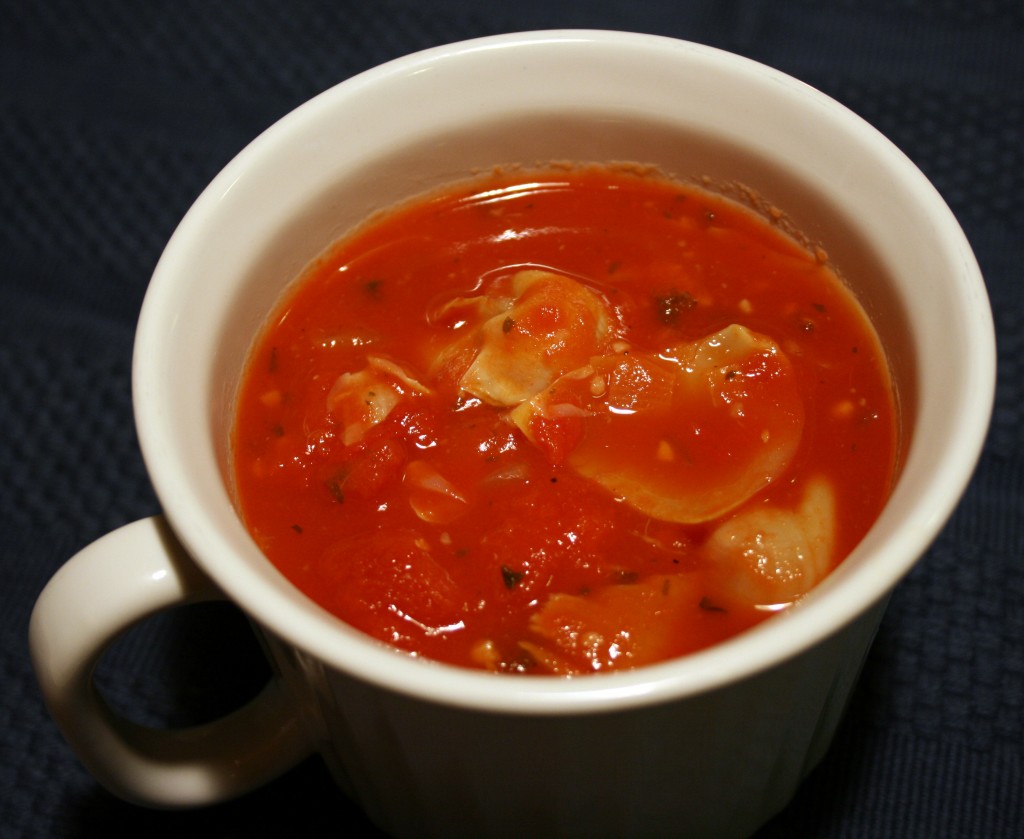
What do you make for a last minute dinner party when you are two days away from moving? Not that this would ever happen to me, but if it did I would open my pantry wide and see what I could find that needs to be used. Oooh! Canned tomatoes! And there is a can of artichoke hearts! There is still some garlic cloves left over? Where did those come from? Chicken broth! Yay! Served along with grilled cheese and egg salad sandwiches we had a wonderful spring dinner with very few leftovers. I did not use cream this time to smooth out the soup’s texture, but if you add ½ to ¾ cup during the last half of the cooking process the soup can only get better. Enjoy! I have to get back to sorting toys before Little B returns home. I found it is a really bad task to try and accomplish with her ‘help’.

Tomato Artichoke Soup

2 14.5-ounce cans diced tomatoes
1 29-ounce can tomato sauce
1 14.5 ounce can whole medium artichoke hearts
1 cup chicken broth
½ medium onion, diced
1 Tbsp finely chopped basil
2 cloves garlic
1 pinch red pepper flakes
1 tsp sugar
1 Tbsp Worcestershire sauce
Salt and Pepper to taste

Combine all ingredients except salt into a medium pot over medium high heat. Bring to a boil. Lower temperature and cover, simmering for about an hour. Break up artichoke hearts (I scooped them out one by one with a ladle and gently pushed on them with a soup spoon – they easily separated). Adjust flavor with salt as desired. Serve immediately or chill and reheat on low before serving.

Traditional Irish Breakfast

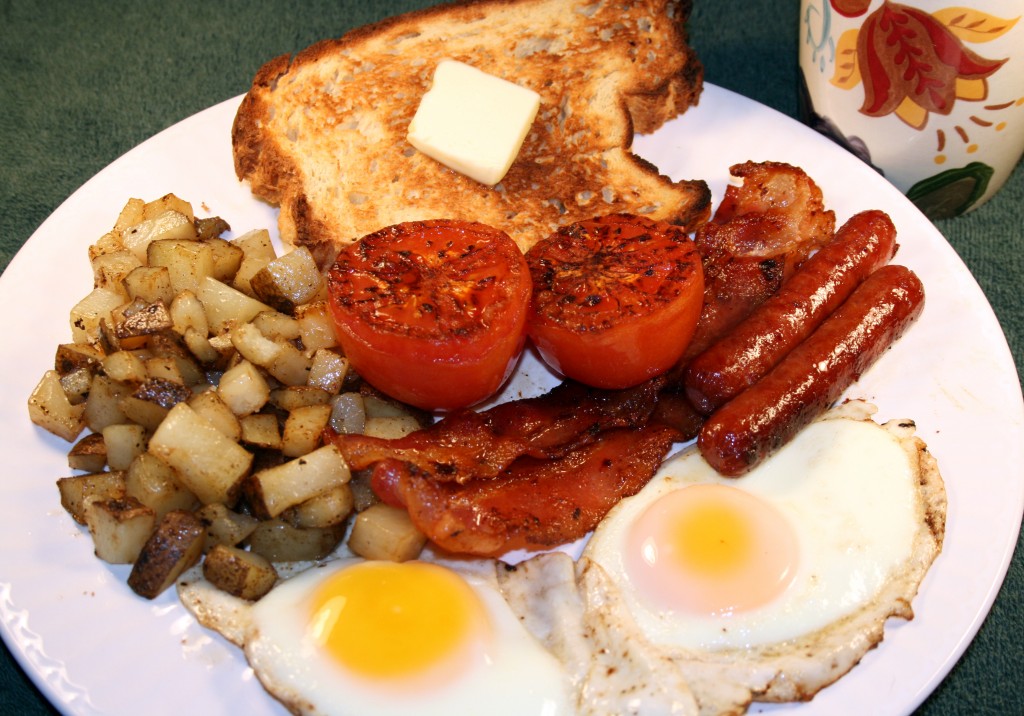
I almost did not post this recipe. Not because it is broken, but because my picture does not quite tell the whole story. I thought this to be a good reason not to post when I took it, then the next day I thought the reason silly. I love cooking and photography. One reason I began this blog was to combine these two loves. Other reasons include telling stories and sharing discoveries about food. Combine all this and it led me to an executive blogging decision. A picture is worth a thousand words, so who cares if I need to add a few more to complete the story? If I expected perfection every time I shared recipes and pictures with you I would never post anything. So here is my post about the traditional Irish Breakfast, Americanized and wheat free. I will explain.

Big D and I agree that we have found two places in the US where we can get a traditional Irish Breakfast like we had in Ireland. One is in Alexandria, Virginia, and the other is in Las Vegas, Nevada. Yep. Vegas baby! I am sure there are other places, but these are the two we have found in our travels. A bunch of places say they serve a traditional breakfast, but just don’t cut it. Like anyone else, the Irish break their fast after a night of sleep by eating a meal. For the hard working majority and tourists (like me) who relied on B&B vouchers during my trip, a hearty breakfast quickly prepared in one pan is ideal for getting on with the day and not having a growling stomach an hour later. In fact, the breakfast often held us until dinner without a problem. We did indulge in soft serve frozen cream soft serve wherever we encountered it (omigosh I can still taste it. Yum!), but that doesn’t really count, does it? If you are in pursuit of a completely traditional meal as I describe below you can get quality versions of all the hard to find ingredients from Tommy Maloney’s, but as you’ll see it will cost you.

Traditional Irish Breakfast for Two

3 Tbsp butter
2 rashers bacon
4 bangers
2 slices each black and white pudding
1 tomato, quartered
4 eggs
1 small potatoes, cut in bite-sized pieces or thin slices
1 cup baked beans, heated
2 slices Irish brown bread
2 bags Irish Breakfast Tea
2-3 cups boiling water

Preheat oven to 350F, then turn off the heat. Place two serving plates in the oven – as parts of the breakfast are cooked you will split them between the two plates. Heat beans in a small pot on low while the rest of the breakfast is prepared. Melt 2 Tbsp of the butter in large skillet and cook puddings, rashers and bangers until browned but not crisp. Remove from skillet and place on the plates in oven. Fry up potatoes in bacon/banger/butter grease. When potatoes are half done add tomatoes, cut side down, to the middle of the pan. Remove potatoes, when tender but not browned, to warm in the oven. Remove tomatoes to warm plates when done, which means they are soft and the skin begins to wrinkle. Begin bread toasting and tea brewing. Add the last Tbsp of butter into the pan and melt. Add eggs and fry to desired doneness, ideally sunny side up. I usually lower the heat after breaking the eggs into the pan and cover it, which encourages the eggs to cook evenly without needing to flip. Add bread and beans to plates and eat hot!

—————————————

Can you have a traditional Irish Breakfast without the black and white puddings? Yes, because that is what we had yesterday, but it was not quite the same without it. Like breakfast anywhere, individual preferences and what is locally available forms what goes on a plate. What the heck are rashers and bangers and pudding? Well, two are more easily explained than the third. Rashers are basically ham/bacon pieces cut from the back of the pig instead of the belly like American bacon, which makes for a hearty piece of meat. Bangers are thicker pork sausages – larger than the typical American sausage link, but smaller than, say smoked sausage. Now the pudding does not really have an American parallel. Irish pudding is a mixture of oatmeal, spices and sometimes meat set up in casings like sausage. The white pudding is primarily the oatmeal and spices, while black pudding has the addition of blood, usually pig’s blood, and prepared like other sausage. The black and white puddings have a particular taste and texture which sometimes turn people off. I appreciate them in small quantities. Big D on the other hand could eat plate fulls with a big grin on his face (along with haggis, but that is another story).

In our small Texas town we could not find the pudding, and Big D could not even find anyone who would sell him pig or cow blood to make his own pudding with his sausage making contraption. It is completely missing from our meal. Also, no rashers were available so we substituted thick cut bacon. Bangers were unavailable so we substituted beef breakfast sausages. The canned baked beans available around here are sweetened overwhelmingly, unlike Irish baked beans, so we just left them out. On top of all these changes, we also had gluten-free bread instead of Irish brown bread to address Big D’s wheat sensitivities.

As with traditional American breakfasts, some things on a traditional Irish breakfast plate vary depending on preference – some cannot bear to be without their baked beans, while others want their eggs scrambled or drink coffee instead of tea. As I mentioned earlier, the picture represents an incomplete Irish breakfast, but the recipe takes you through the traditional version to which I was introduced while traveling Éire. Regardless of my qualms about this post, the breakfast was delicious. After eating it we leaned back, smiling, full and happy.
 

Tilapia Tacos

One of my favorite past times is kayaking. Big D and I have sit-on-top kayaks we use in warmer climates, while our sit-inside kayaks and spray skirts are reserved for colder places. Besides allowing us to paddle to shallow nooks and crannies boats often cannot go, the kayaks keep me on top of the water. I never really like that vulnerable feeling when I have my feet dangling down where they cannot touch the bottom, wondering if my wiggling toes are calling large sea mammals to come feast. It is irrational and I do not get to the point where I freeze with fear, but my imagination sure runs wild. Yes, I may be able to blame images from Jaws or Deep Blue Sea for giving me trepidations, and (mom, don’t read this) I have in fact landed in the ocean with feet dangling over the abyss, hanging on the edge of my kayak while waves roll me around. Good thing I can swim and can heave ho myself back into my kayak. I can stand here today and say with confidence that I have not yet been eaten by any sea creatures, though I am pretty sure a few have come close and considered a snack. All of this kayak talk is leading me to my solution for using up some beautifully ripe tomatoes and avocados.

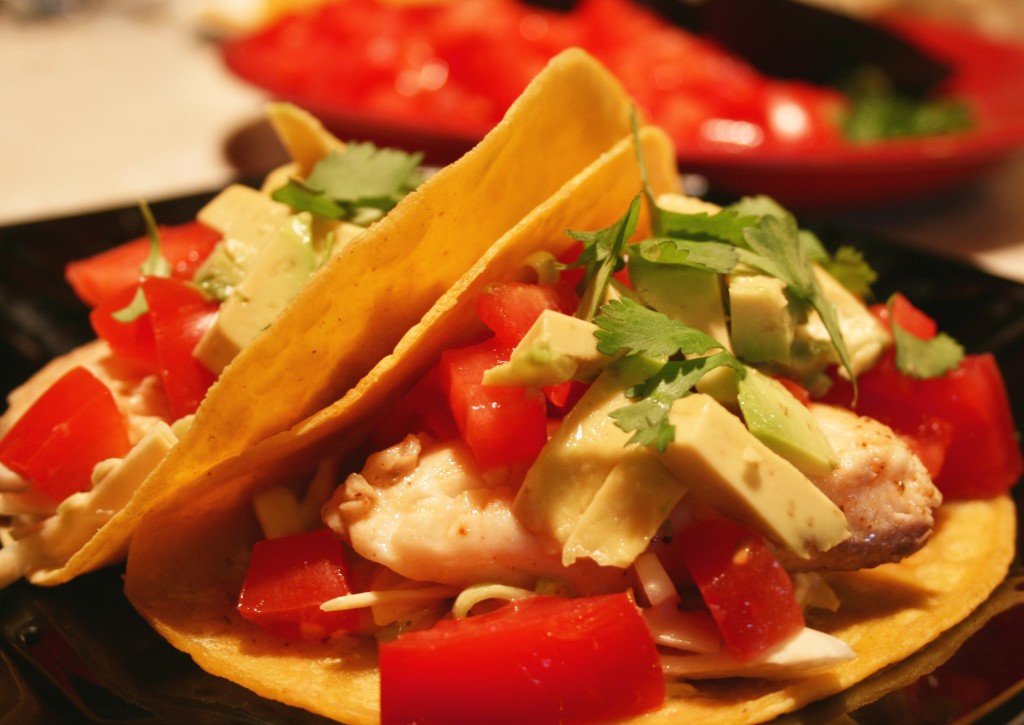
I appreciate the taste of fresh fish on fresh corn tortillas, topped with things like the previously mentioned beautifully ripe tomatoes and avocados. Such concoctions are called fish tacos in my world. When I am done kayaking for the day, and famished, I am rarely interested in cooking. I want food. Immediately. Made by someone else. Since it is a must to be near water when kayaking, it is pretty much guaranteed there is someone cooking up seafood at nearby restaurants. I will trudge over to the nearest joint, regardless of my sandy and salty and bedraggled state, drink a ton of water and chow down. When I am not eating shrimp or oysters at said restaurants I like fish tacos – a mix of fresh vegetables and fresh fish all swaddled in corn tortillas. After watching fish swim by and under me all day I can’t help but think about eating them. I have discovered in my travels the preparation of fish tacos varies in the U.S. from coast to coast to coast (yes, there are at least three in the contiguous U.S.). Here is the way I like them.

Tilapia Tacos

2 tilapia fillets
3-4 Tbsp olive oil
1 lime, juiced with meat included
1 tsp chili powder
½ tsp salt
¼ head green or red cabbage
1 Tbsp red wine vinegar
3 Tbsp sour cream
1 tsp Crystal® hot sauce
1 tsp cumin
Salt and pepper to taste
1 large ripe tomato, chopped
1 avocado, diced
¼ cup cilantro leaves
6 corn tortillas

Combine 2 tablespoons olive oil, lime juice, chili powder and salt in a bag that can be sealed. Add fillets and toss gently until the fish is covered by the marinade. Push air out of the bag and seal, marinating for at least an hour, flipping it over about half way through. For the coleslaw chop the cabbage thinly and then across, making short, bite-size pieces. Combine vinegar, sour cream, hot sauce, salt, pepper and cumin. Toss with cabbage. Refrigerate until tacos are served. Preheat oven to 300F. Brush the remaining olive oil on both sides of the corn tortillas, placing them on a large cookie sheet. While cooking the fish pop the tortillas in the oven. They should be ready about the same time as the fish – they just need to be heated up, not browned or crisped. Heat a pan on the stove top to medium high. Cut each fillet into three or four pieces, depending on the size of the fillets. Add the fish to the dry heated pan and cook about three minutes on each side, until cooked through. There should be enough oil on the fish to cook them without adding more oil, but if not, you may need to add a splash more while cooking. Remember: dry fish is gross fish! Before serving break up the fish into even smaller pieces, allowing them to better mix with the other ingredients when added to the tacos. Fill tortillas with fish, coleslaw, tomato, avocado and cilantro. Eat up! I tend to put the slaw on top so the dressing can drip down onto the rest of the taco contents. After a few bites sprinkle on some hot sauce if the tacos are not spicy enough.

Egg Bake

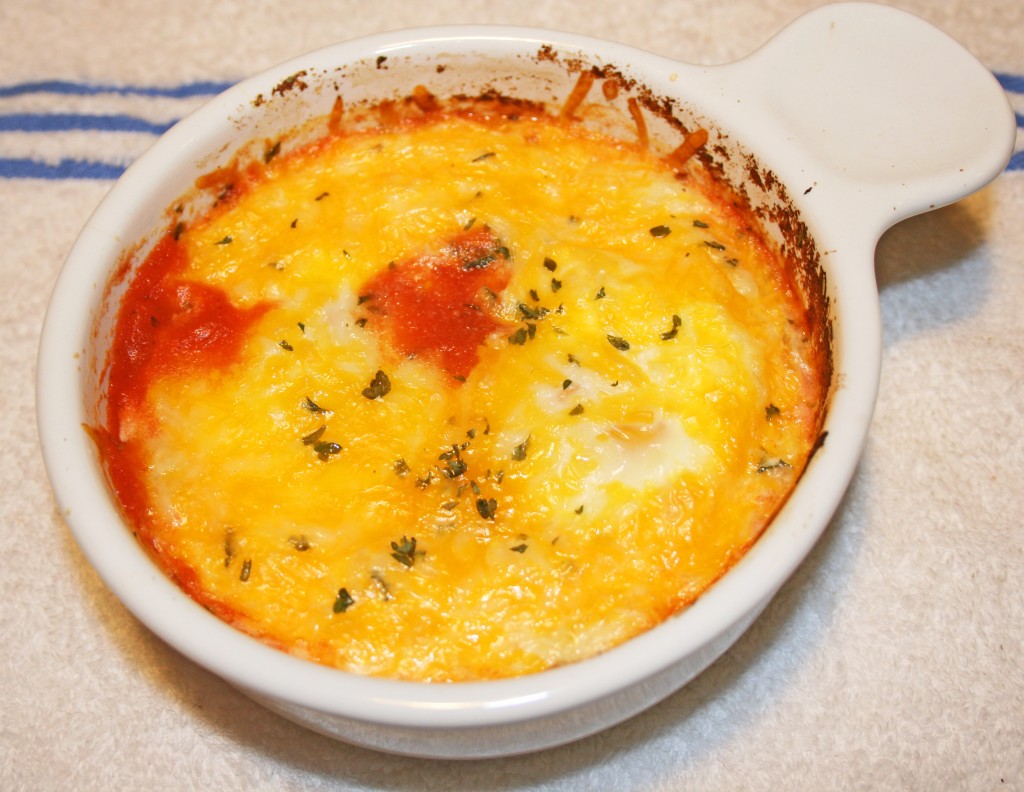
When I was a single working girl I loved making these eggs for breakfast. They would warm me up on winter mornings when I was not feeling it for oatmeal. I would set it up and start it baking right when I woke up. By the time I was ready for work my breakfast was ready too! If I wasn’t running late I would sit and enjoy every bite before leaving home. If I was running late I would snap a top on it and take it with me, enjoying it at my desk while my slower-than-molasses computer booted up.

My married version of this dish is a little different – I triple the recipe, which works wonderfully, and bake it in a small casserole dish. Big D may or may not be interested – he is not a big breakfast eater – or even be awake to decide. It also may be a morning when Little B decides she does not want any other food touching her eggs. After I eat my share eventually – following the preparation of eggs ‘without all that red stuff on them’ – the leftovers will go in the fridge. Microwaving the eggs to reheat may make an explosive mess. It tastes okay cold, but is just not the same. I end up not making it much anymore.

When I made it today I was by myself in the house. I curled up on the couch and loved every bite. I was not hurrying to leave for work, but it still warmed me up on a cold day. It tasted as good as it always did.

Egg Bake

1 14.5-ounce can diced tomatoes
4 eggs
1/2 cup grated cheese
1 tsp dried oregano
1 tsp dried parsley
Pinch garlic powder
Pinch onion powder
Salt and pepper to taste

Preheat oven to 350F. Open the can of tomatoes, but don’t pour them out. Add oregano, parsley, garlic and onion powders, as well as salt and pepper. With a spoon mix up the spices with tomatoes in the can. Divide tomato mixture between two 12 ounce oven-proof ramekins. Break two eggs into each ramekin*. Top with cheese. Bake for 20-25 minutes until eggs are cooked to desired doneness.

*Since I was usually cooking for one I placed the second ramekin with tomatoes (before adding eggs and cheese) in the fridge. The next day I could quickly add the eggs and cheese and continue preparation.

Pizza Pizza Pizza!

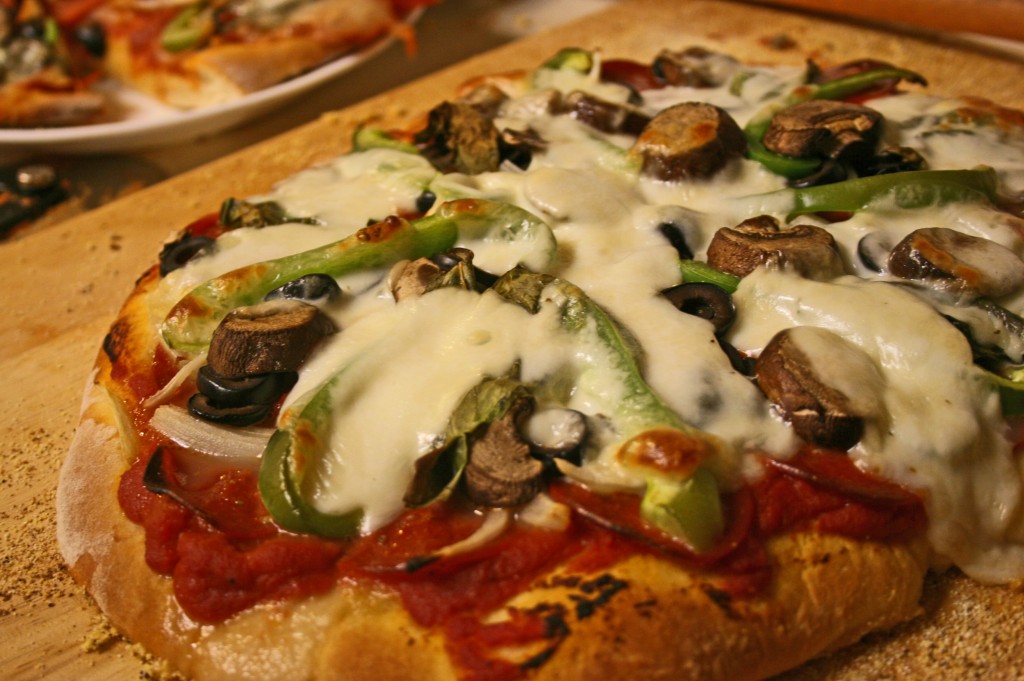
I returned home yesterday after visiting my in-laws and my mom. My brother was there too! What a treat! To commemorate our last evening together we made a total mess of the kitchen making pizza. One obstacle regarding the pizza crust was a lack of a recipe. The one I have relied on for years was at home (what I get for having not yet scanned all my old recipes), and the one my brother usually used was not at mom’s place either, so my brother dug around online and found this one, which worked great. Mom’s pizza stone got a good workout making FIVE pizzas and Grandma Heflin’s 80 year old cedar rolling pin did a darned good job on rolling out the dough. When the dough was ready and the toppings prepared we stuck Little B on a stool and had her help us with topping the pizzas. She loved throwing, er, placing the vegetables and pepperoni all over the place, especially in big piles. We had to make a couple of adjustments before they went in the oven, like reducing the pile of five cheese slices, but we all had blast. My brother was the work horse for the evening, watching the baking times, transferring the pizzas from the stone, and making sure everyone got what they wanted, or didn’t want, on the pizzas. Here is what we did. These things are fun and fun is good, to quote Dr. Seuss.

Pizza Pizza

2 batches pizza dough (makes about five 12-inch pizzas)

1 large can diced tomatoes

1 small can tomato paste

2 Tbsp plus ½ cup olive oil

1 clove garlic, crushed

Salt and Pepper to taste

2 bell peppers, cut into strips

10 baby portabello mushrooms, sliced about ½ cm thick

1 bunch basil, washed with stems removed

1 large can black olives, sliced into rings

½ large white onion, sliced thin julienne

5 ounces turkey pepperoni (or the fatty kind if you are not trying as hard as I am to justify eating pizza)

2 pounds buffalo mozzarella, sliced about ½ cm thick

1 cup corn meal

1 cup flour

Place pizza stone in cold oven. Turn oven on to 450-475F, depending on your oven. In a bowl mix together diced tomatoes, tomato paste, garlic, olive oil, and salt and pepper to taste. Smush some of the tomatoes, but leave some chunky. Roll out on floured surface 1/5 the dough into a 12 inch round. Transfer the round to a pizza peel (or the back of a cookie sheet) that has been sprinkled with corn meal. Spread a thin layer of olive oil (about 2 Tbsp) on the crust. Add about 1/5 of the tomato sauce*. Layer other toppings (mushrooms, pepperoni, olives, onions, basil) as desired, topping with 1/5 of the cheese. When oven and stone are hot, sprinkle the stone with corn meal then slide the pizza on to stone and cook for 14-16 minutes. If the first pizza does not brown on top you may need to raise the oven temperature.

While the first pizza is cooking, make sure you have transition stations set up (this is where the dishes and clean up time increased exponentially) – one platter for setting on the table, one surface for receiving a pizza just out of the oven, and one for a prepared pizza ready to go in the oven. If you have a pizza peel the pizza transfer from oven to cutting board is a breeze. If you don’t have a peel (like us), make sure you have the thickest oven mitts you can find, or check your grilling/fire pit supplies to see if you have at least one high temperature glove to help handle the stone. We had to remove it from the oven to slide it onto the cutting surface. It is really hot! If you don’t have a pizza stone the whole cooking time and transfer issue is completely different than what is described here, and I have faith you can figure it out. Good luck!

This baking method and timing melts the cheese, browns the surface a bit and cooks the crust, but it does not completely cook the vegetables until limp. We like ours a bit crispy. If you want your vegetables cooked a little more it may help to blanch or saute them before you start making the pizzas.

*On one of the pizzas we used a wonderful pesto instead of the tomato sauce. It was from Humble House Foods who sell at the Pearl Farmers Market. Amazing pizza results and the most delicious pesto ever!

Greek Salad On A Stick

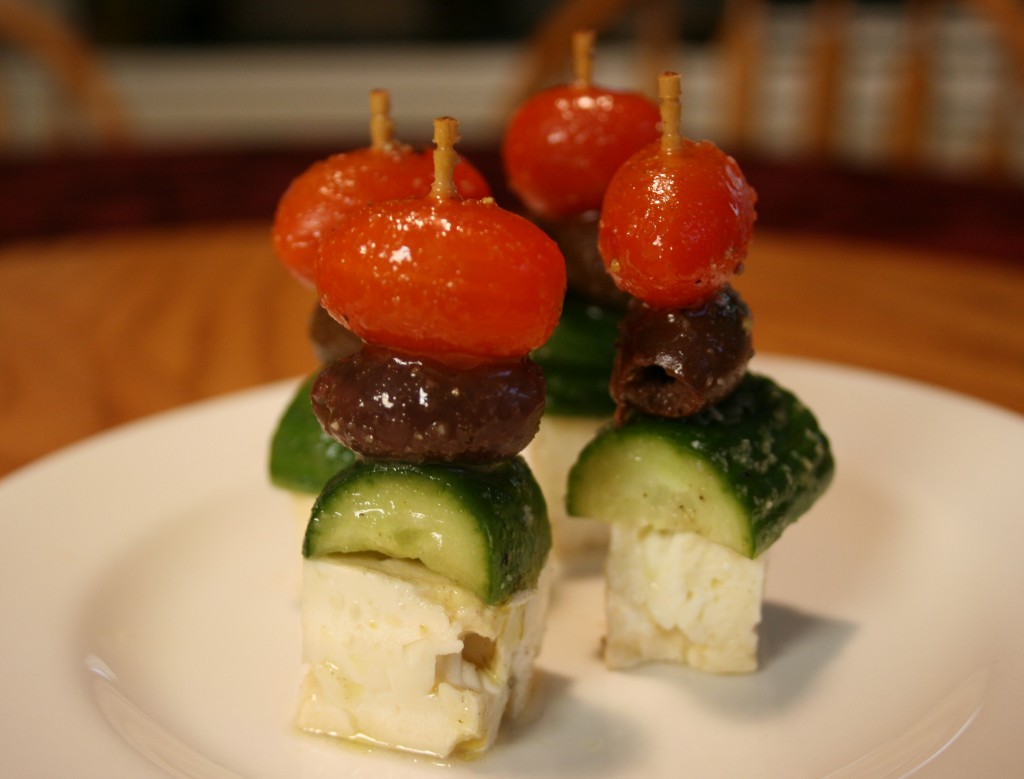
I will start by saying these toothpick-mounted wonders are the closest I got to making football shaped food this year. I actually watched quite a bit of the Super Bowl today. Good game, considering I did not feel strongly about one team or the other winning. I don’t watch much professional American Football these days; mostly because I don’t have a TV at home, but even more because any attempt I make to do something for hours at a time is frequently interrupted by a lively 2 1/2 year old daughter. When I weigh time with Little B against watching football, Little B always wins.

Greek salads are things I can just eat and eat, especially with some hot grilled kebabs on top. My favorite of all time is at Papouli’s in San Antonio – they have a killer dressing. The tanginess of the dressing, olives and feta just pull me in, and are much less bad for me health-wise than my other salad love, blue cheese dressing. Yes, I know blue cheese dressing is not a salad – I need the lettuce and tomato and cucumber to hold the dressing – but the calorie and fat load of blue cheese dressing can wreak havoc on almost any diet.

I saw this idea somewhere last year but for the life of me cannot remember where. I think it was here, but it was a while back. I tried to give credit where it is due, so I get kudos for trying, right? I have made these wonderful little appetizers a number of times and love the juiciness with the dressing added. The whole stick of salad can fit in one bite. Whoa! Heaven! I sometimes include onion, but usually not because some of my nearest and dearest have a hard time with raw onion, so I present the recipe without. I most recently served these along with my smorgastarta and they were a great compliment.

Greek Salad On A Stick

24 toothpicks

1 block feta cheese, cut into 24 cubes

24 grape tomatoes

24 kalamata olives, pitted

1 English cucumber or 3 mini cucumbers

¼ cup olive oil

1/8 cup red wine or balsamic vinegar

1 tsp lemon juice

½ tsp salt

¼ tsp pepper

1 tsp dried oregano

Whisk together the last six ingredients. Set aside. Slice cucumbers into thick slices, about ½ inch in length, then again in half or quarters, depending on cucumber size. I have found that all four elements fitting on the toothpicks is directly related to the size of the cucumber pieces (or the squishiness of the olives, but that can only go so far), so do a test ‘pick before cutting up all the cucumber. Start with putting on toothpicks the tomato, followed by an olive and cucumber, ending with the feta. Place all the filled toothpicks in a deep plate or bowl that will just hold the completed ‘picks. Drizzle dressing over the ‘picks. Refrigerate for at least an hour. Before serving move the ‘picks to a serving dish and again drizzle the dressing over the ‘picks. If you use fancy decorated ‘picks, the top of which won’t look good slimed with dressing, you may need to spoon the dressing over them with a spoon.

Impure Tabbouleh Salad

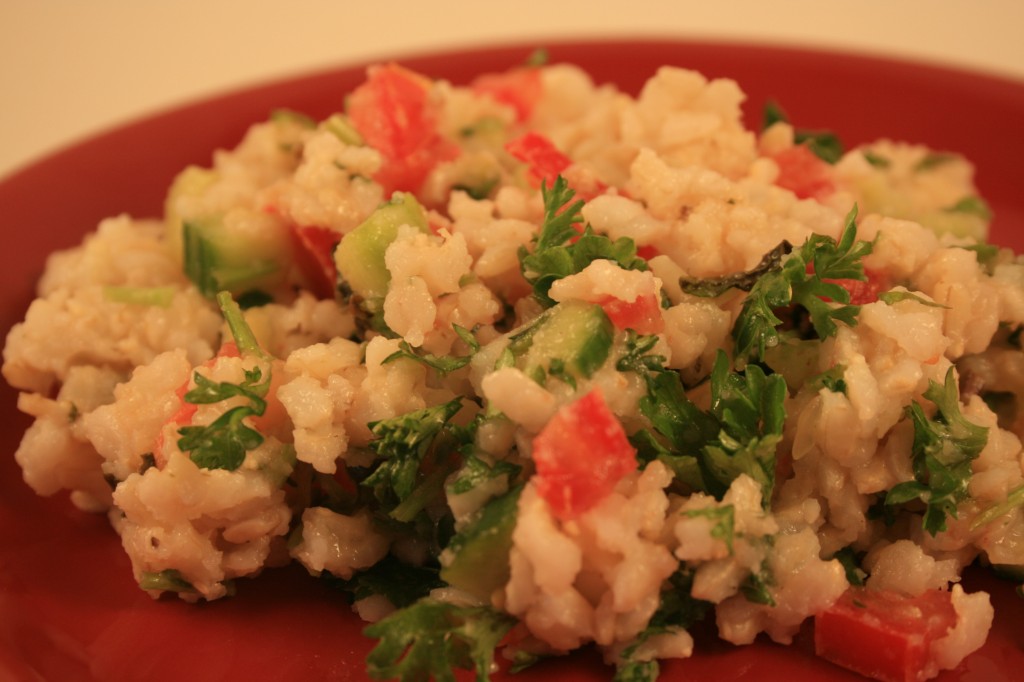
I love tabbouleh. It is tangy and filling, emphasizing the simple nuttiness of bulgur wheat. Big D hates what wheat does to his digestive system. How oh how can the two meet in a pleasant, yummy way? Rice! Brown rice. I call it impure tabbouleh. As a dish made in many different regions of the world and often consisting of local products, tabbouleh by its very nature varies from kitchen to kitchen. I decided to embrace the nature of the dish and make it ricey. A happy hubby tummy is a good thing, and I like it, too! I make a big batch and we eat on it for a week. Even our little girl digs into it when she is in the mood. The later in the week it gets the limey-er the salad gets.

Impure Tabbouleh Salad

4 cloves garlic, diced

2 medium limes, juiced with meat

¼ cup extra virgin olive oil

1 tsp sea salt

1 english cucumber, diced

4 roma tomatoes, seeds removed and diced

5 spring onions, diced

1 bunch parsley, chopped (about 2 loose cups when prepared)

¼ cup mint, chopped

7 ½ cups cooked brown rice (about 3 cups uncooked)

Black olives (optional as garnish)

Combine garlic, lime juice, olive oil and salt. Set aside. Mix together all other ingredients except for rice. Pour dressing over mixture until veggies are covered. Add mixture to rice, making sure dressing and veggies are well combined with the rice. Although the salad is immediately ready to eat, letting it sit for a few hours in the refrigerator allows the flavors to blend. Serve as a meal itself or as a side dish with grilled or roasted meats.


Post Navigation