Any Kitchen Will Do

Give me a kitchen and I will cook.

Archive for the category “tomato”

Spicy Shrimp Vegetable Toss
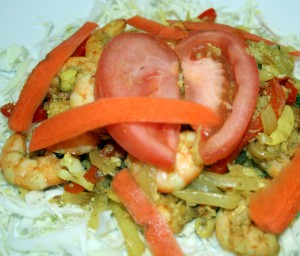
I didn’t want a hot meal, but I also did not want a cold meal. Between Big D and I we came up with this flavorful, crispy concoction. The vegetables are either raw or cooked just until warmed up – maximizing the nutritional potential of them all. A perfect match for shrimp, which needs very little cooking to be ready to eat. The spiciness made us feel full pretty quickly. No lead belly after this meal! We were excited about our find at the store – big, fresh shrimp calling to us. Our past is filled with Gulf Coast shrimp by the bowl full. We grew up sitting at dinners filled with peel-and-eat shrimp dipped in spicy horseradish cocktail sauce, complimented by boiled corn on the cob and new potatoes. For this dish it was Little B’s first attempt at peeling raw shrimp. The first one was pretty mangled, but serious improvement on the subsequent little shrimpies. You should see her peel an onion these days – masterful!

Spicy Shrimp and Vegetables

2 – 4 Tbsp extra virgin olive oil
½ tsp red chili flakes
5 cloves garlic, sliced thin
1 medium onion, sliced julienne
½ large red bell pepper, slice julienne
1 jalapeno, sliced julienne
½ tsp ground turmeric
1 tsp ground cumin
1 tsp ground cinnamon
1 tsp sea salt
2 pounds small/medium shrimp
½ head cauliflower, finely chopped
½ large tomato, sliced in about eight wedges
½ carrot, cut in thin strips
4 cups shredded cabbage
Additional salt to taste

Heat two Tablespoons of the oil in large skillet over medium high heat. Add chili flakes and let sizzle for a few minutes. Add garlic, onion, bell pepper and jalapeno. Saute until onions begin to sweat. Sprinkle in turmeric, cumin, cinnamon and salt, and toss until vegetables are coated. Add cauliflower and cook a few more minutes until it begins to sweat. Add shrimp and toss. Place tomatoes on top of mixture. Cover skillet and cook for about five minutes, until shrimp are cooked and pink. On serving plates spread ½ – ¾ cup cabbage. Add 1 – 2 cups shrimp and vegetable mixture, then top with carrot strips. Serve immediately.
Stuffed Poblano Peppers

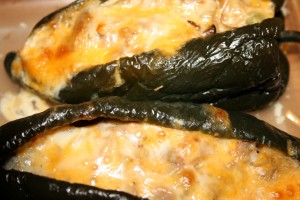
We found a new favorite dinner! Thank goodness I did not have enough peppers to double the recipe, or we would have had to roll ourselves out of the kitchen after eating them all! Did you ever go to a Mexican restaurant, order a chile relleno and end up with a kinda tasteless mound, filled mostly with rice and covered with soggy, sometimes slightly undercooked batter? Here is a way to avoid all that unpleasantness! A little more effort is needed to fill out the other elements of your own combination platter, but here is some help with enchiladas, salsa, guacamole and rice. Since I was not going to dip these peppers in batter I chose not to char and remove the skins – with all the cooking and liquid the peppers were soft and skin inconsequential. This is a a great recipe for using leftover meat and vegetables. It always works great with other pepper types, like cubanelle, etc…

Stuffed Poblano Peppers

4 Poblano peppers
4 ounces cream cheese, room temperature
2 cups shredded pork or cooked seasoned ground beef
1 cup cabbage, cooked and chopped up (or very finely chopped raw cabbage)
1 cup canned diced tomatoes
1 tsp dried oregano
1 tsp ground cumin
1 clove garlic
Salt and pepper to taste
2 cups shredded cheddar and Monterrey Jack cheese
½ cup water
Sour cream and lime wedges for serving

Preheat oven to 400F. Make one slit in each pepper lengthwise. Remove seeds and membrane from inside, careful to leave the stem attached to the pepper. Sprinkle inside of each pepper with salt. In blender or food processor combine tomatoes, oregano, cumin and a dash each of salt and pepper. Puree until you have a smooth tomato sauce. Set aside. Divide cream cheese into four pieces. With the back of your spoon (or your fingers if you don’t mind a little mess) spread the cream cheese around in the cavity off the pepper. In a medium bowl combine the meat and cabbage. Stuff the meat and cabbage mixture in the pepper, making sure the slit does not tear open any more than necessary. Top the meat and cabbage the tomato sauce, making sure it drizzles down within the pepper. Top with the cheese, tucking it in under the edges of the peppers, then gently pushing the pepper edges together as far as you can. In a baking dish just big enough to hold the peppers (9×9 or 8×11) pour in the water, then add the peppers. Cover loosely with foil and bake for 20 minutes. Remove foil and bake for 20-30 more minutes, until cheese begins to brown. Remove from oven and let cool for about five minutes before serving. Top with a dollop of sour cream and a lime wedge for drizzling juice over the stuffed pepper.


Another End of Summer Salad

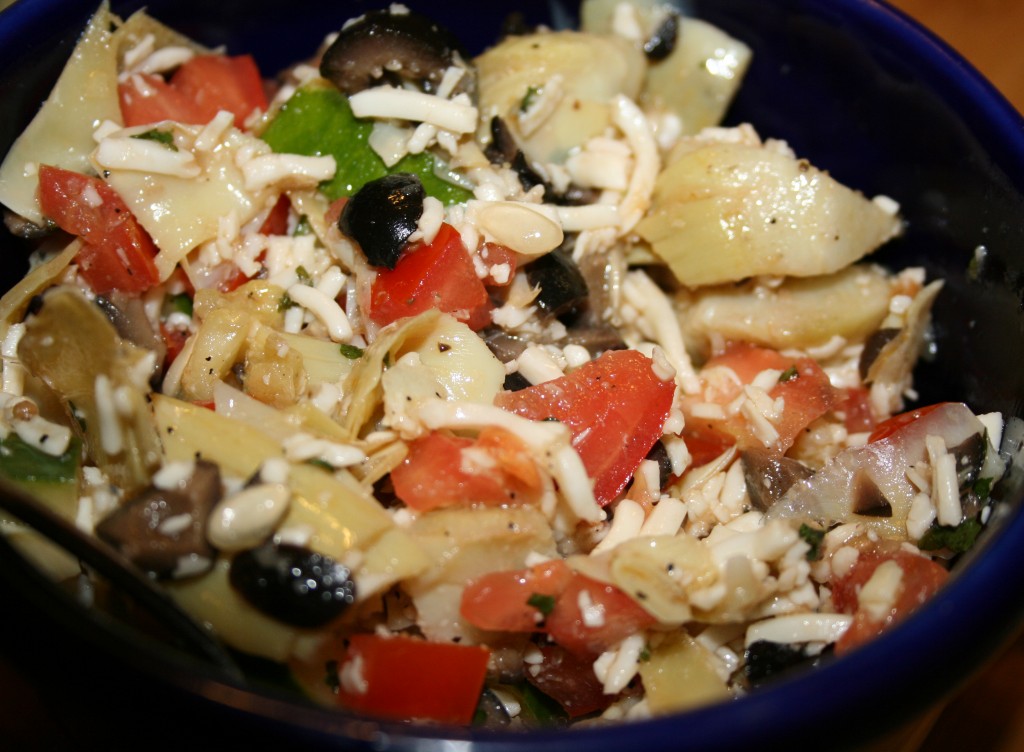
Okay, so I had a little of this and a little of that in the fridge (some of which was left over from making pizza (add link)) and thought they would make a wonderful end of summer salad. Again. It is a bit different from my other End of Summer Salad (add link), but I am really trying to squeeze in the summer produce, so I decided to post it. I know it was recently, like, right below, but this one has a totally different taste. I have to say right now that I absolutely adore my daughter and love how her fine motor skills are improving exponentially while helping me in the kitchen. Now I must also say that I really enjoyed making this salad all by myself – not having to lean over a footstool, without a helper who is learning to use a knife, or a munchkin putting a little too much parsley in the bowl or an imp who insists on measuring and pouring the olive oil from the huge bottle on her own and spilling about half a cup on the counter. While she watched the last bit of Willy Wonka and the Chocolate Factory (1971 version, thank you very much) I snuck in the kitchen and whipped up the salad. I liked doing it by myself as much as I will like the next time she helps break a dozen eggs for a frittata – its just a different way of cooking. Here she comes!

Another End of Summer Salad

3 Tbsp apple cider vinegar
1 tsp sea salt*
½ tsp ground black pepper
1 Tbsp dried parsley leaves
1 tsp garlic powder
½ tsp onion powder
Dash of dried red pepper flakes
4 Tbsp extra virgin olive oil
2 medium tomatoes, rough chopped
½ large cucumber, rough chopped
1 cup artichoke hearts, rough chopped
½ cup chopped black olives
1 cup shredded Monterrey Jack, Feta or Parmesan cheese

Add first seven ingredients in small bowl. While whisking the vinegar mixture gradually add olive oil until well combined. In medium bowl add tomatoes, cucumber, artichoke hearts, olives and cheese. Drizzle dressing over vegetables and stir until evenly distributed. Chill for at least 20 minutes. Toss again before serving.

*If you use Feta or Parmesan cheese you may need less than 1 tsp of sea salt, since they tend to be stronger flavored cheeses.

End of Summer Salad

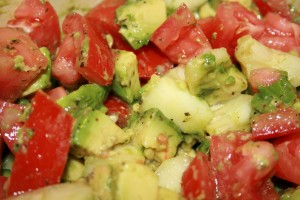
As the temperatures gently creep lower I tend to linger over the fresh, seasonal summer produce at the markets. I know some of it, although sadder looking, will be around pretty much year round. Some will have faded colors or less flavor. Others will just get more expensive. I look forward to the squash and root vegetables that are already becoming more prevalent, but I currently plan on cherishing the last of the bright tomatoes, abundant cucumber and perfect avocados that have become a habit over the past few months. Here is a wonderful, simple, soft salad that fully appreciates some of the summer fruits that we often call vegetables. Enjoy!

End of Summer Salad

4 Tbsp extra virgin olive oil
2 Tbsp apple cider vinegar
1 small bunch basil leaves, finely chopped
1 tsp sea salt
1 tsp ground black pepper
½ lime, juiced with pulp
2 ripe Hass avocados, peeled and coarsely chopped
3 roma tomatoes, cut into about 20 pieces each
½ large cucumber, peeled and coarsely chopped

In a small bowl combine the first six ingredients. Set aside. In a large bowl combine the avocado, tomato and cucumber. Add dressing and stir gently, trying not to smash tomatoes or avocado too much. Chill covered for about an hour before serving.

Zucchini Lasagna

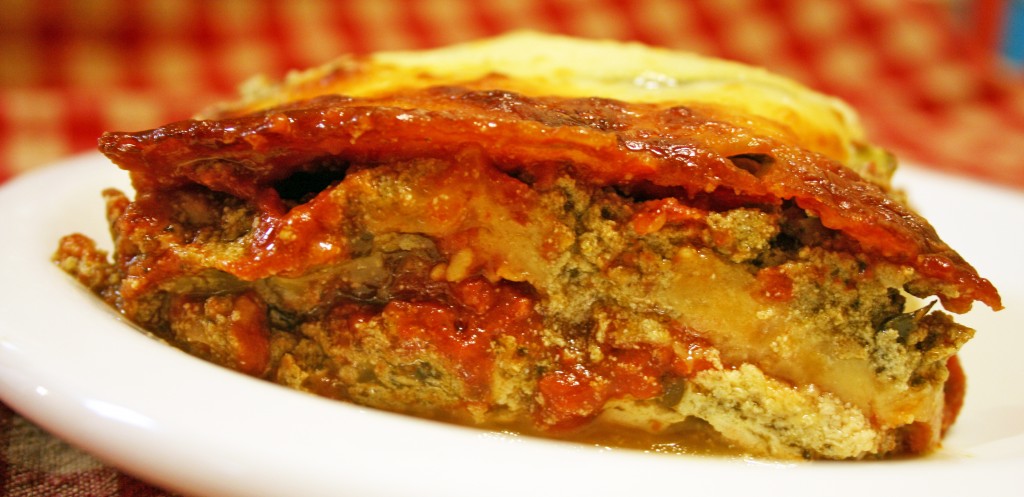
Here is another low carb dish! We are really enjoying the increased level of energy we are experiencing with our current diet, which includes avoiding grains, sugars and processed foods. I am not a die hard fan of most pasta dishes, but I am a lasagna lover. When we traveled in Italy eight years ago I was all about the meat, fish and vegetables – the pasta was, surprisingly to me, not my go to dish while there. Probably because I was corrupted by American knock offs, or because I did not go to Northern Italy, where there is supposedly ‘better’ pasta. I do not really feel like I missed out. Especially in Rome there were almost as many places to get a skewer of roasted meat as there were pizza slices. Go figure. The time we spent renting a villa in Tuscany was sprinkled with visits to the local co-op for freshly butchered meat and freshly picked produce. The cheeses and cured meats were quite an experience, too. Of course, the evil alcoholic concoction we came up with while relaxing the nights away made the eating at the villa a pleasant blur. We would take Coca Cola light (the Italian version of diet Coke) and mix it with some quite horrible tasting Grappa. We did find what I consider very good Grappa before we left, but that first bottle was nasty. Not to waste alcohol, we combined it with the soda and boom! We dubbed our creation Crappa. We got schnockered and did some skinny dipping in the pool. To make a long story short, and totally disconnected to our libation, this recipe takes care of my lasagna craving while keeping me away from the processed carbs found in pasta

Zucchini Lasagna

2 large, narrow zucchini
2 14-ounce cans diced tomatoes
1 small can tomato paste
2 tsp dried oregano leaves
2 tsp dried parsley leaves
2 cloves garlic, crushed
1/2 tsp salt
1/2 tsp Splenda or ¼ tsp sugar
12-15 ounces ricotta cheese
2 cups fresh baby spinach leaves, finely chopped
1 tsp ground nutmeg
1 ½ pounds ground Italian sausage, broken up and cooked thoroughly
1 cup sliced mushrooms
4 cups mozzarella cheese

Preheat oven to 350F. In small sauce pan combine the diced tomatoes, paste, oregano, parsley, onion powder, salt and Splenda or sugar. Bring to a boil over medium heat, turn down flame and simmer for about 15 minutes, then remove from flame and let sit. While it is cooking prepare the rest of the dish. In a medium bowl mix the ricotta cheese, spinach and nutmeg and set aside – trust me – it sounds odd, but the nutmeg enhances the ricotta flavor. Slice ends off of zucchini. With a vegetable peeler peel off long strips of zucchini. If you don’t have a peeler, instead make zucchini coins as thin as you can with a knife. To build the lasagna begin with a thin layer of sauce in the bottom of a 9×13 inch baking dish. Add a layer of zucchini strips/coins overlapping generously to make a solid layer, followed by the ricotta mixture, sauce, mushrooms, sausage and 1 cup of mozzarella. Repeat the layers again. Top with a third layer of zucchini and the last of the mozzarella. Bake lasagna until heated through and cheese on top begins to brown, about 45 minutes. Remove from oven and let cool for about ten minutes, allowing the lasagna to set.

Japanese Eggplant Tomato Salad

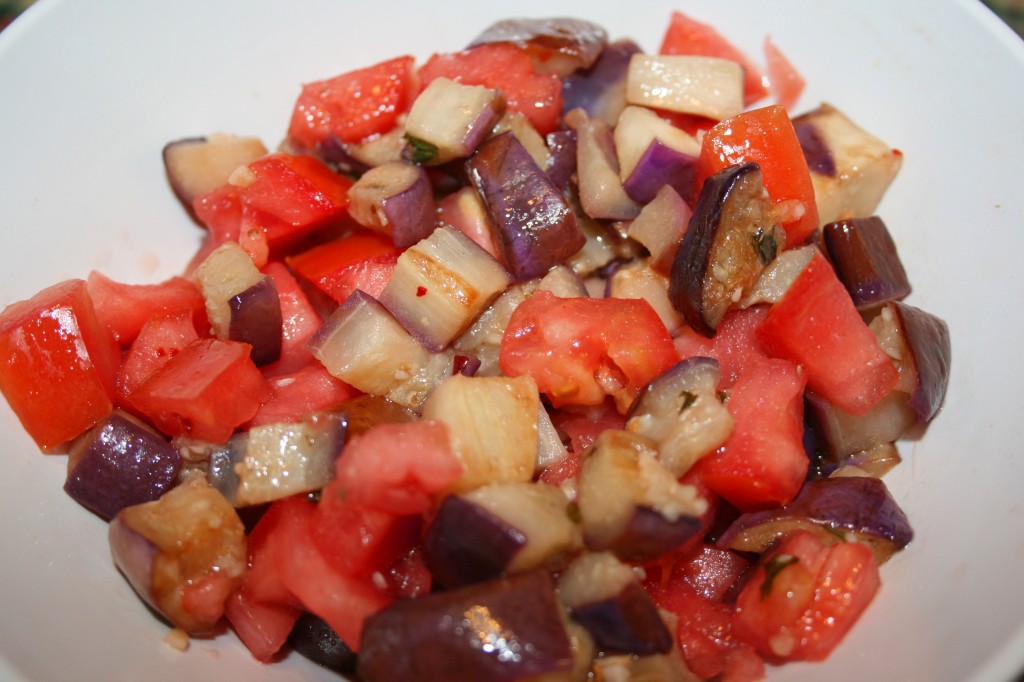
The summer heat has made itself at home in Maryland, for now. I was hopeful that the triple digit temperatures had moved on earlier this week, since the highs dropped into the 80s, but alas, it was not so. They shot right back up. I know it is August, but a girl can hope! I am very much an Autumn/Winter kind of girl – wearing sweaters and pretty scarves, taking brisk walks to get the blood flowing without sweat raining off my brow. Cooler weather will come eventually – it always does – so for now I will trudge on in the heat and make some summer salads. I found some Japanese eggplant at the store this week and grabbed a few. The are longer and more narrow than the typical eggplant, and in my opinion sweeter and more tender. Maybe I need to work with it more, but the short, fat eggplant tends to be tough and lacking flavor when I have prepared it in the past. The Japanese eggplant is more appealing, but also more elusive. I wanted a cold side dish to accompany some spicy tacos for dinner, and this is what I came up with, adapted from the recipe here.

Japanese Eggplant Salad

¼ cup white vinegar
1 clove garlic, crushed
2 tsp fresh ginger, minced
¼ tsp red pepper flakes, crushed
1 Tbsp fresh basil, chopped
1/8 cup olive oil
2 Japanese eggplants
1 large tomato

Cut off ends of eggplants, cut each lengthwise into six pieces, then cross cut into cubes. Sprinkle cubes lightly with salt and let sit for about ten minutes. While waiting for the eggplant make the dressing. Combine the first five ingredients and whisk together until combined. Slowly add oil while you continue whisking until it is all added. Set aside the dressing. Heat dry skillet over medium high heat. Add eggplant and about one Tablespoon of dressing, then saute until tender, about five minutes. Transfer cubes to paper towel and let cool to room temperature, or chill until ready to serve. Cut tomatoes in half and scoop out seeds, leaving as much flesh as possible, then cube the tomatoes so they are about the same size as the cooked eggplant pieces. Combine the tomato and eggplant cubes. Drizzle with dressing and toss lightly to coat. Serve immediately or chill until ready to serve.

Greek Burgers

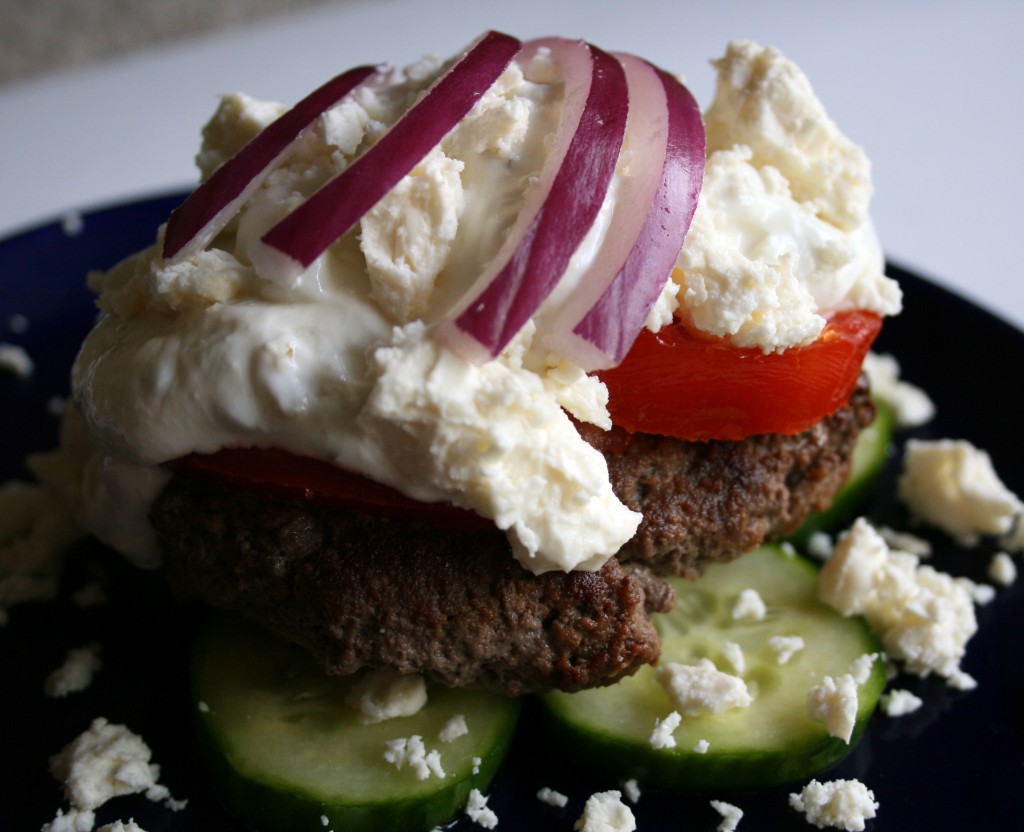
I must confess. I am a Fed. I work in a tall building in a big complex with uber security at the door and a locked work area with a bunch of cubicles around me. I am a little cog in a huge rolling maze of cogs, but I enjoy the work. Don’t get me wrong, I would prefer cooking all day, but for now I am content with my work, which is challenging and never boring. This time of year is pretty busy for me, reflected by the fact it is longer than usual between posts. I have not cooked for days, but no suffering occurred during the drought. Big D made some wonderful stuff in the evenings and there was enough for me to very much look forward to leftovers at lunch. It will be another couple of months before things slow down, so I make no promises, but I have some yummy ideas – don’t give up on me. I will persevere and post post post! Cooking relaxes me and I cannot stay away from it for long, no matter what. Take these burgers, for example. I had a burger like this at a hole in the wall restaurant somewhere in Alaska. I can’t remember where, but I was surprised how much I enjoyed it – I had expected a hockey puck with sour cream on top, but it was fresh and wonderful. With no lamb in sight my version is a tangy, filling meal that reminds me of my beloved gyros (pronounced ‘yee-rohs’ in my opinion). I had to negotiate with Little B to use the last of our Greek yogurt for tzatziki. She loves it with a little stevia, cinnamon and vanilla for dessert, but I finagled enough from her for the recipe.

Greek Burgers

Patties
½ cup parsley, finely chopped
2 Tbsp oregano, roughly chopped
½ cup mint, roughly chopped
3 cloves garlic, finely chopped
1 tsp black pepper
2 tsp sea salt
1 egg
1 Tbsp lime juice (or 2 packets True Lime) http://www.truelemonstore.com/products/true_lime
2 pounds ground beef
2 Tbsp olive oil
1 cup feta, crumbled
2 cups fresh spinach leaves, stems removed
1 English cucumber, sliced in ¼” coins
1 tomato, sliced
½ red onion, thin julienne

Tzatziki
1 cup cucumber, peeled and finely chopped
1 ½ cups Greek yogurt
1 clove garlic, crushed
2 tsp parsley, finely chopped
2 tsp mint, finely chopped
2-3 tsp lime juice
1 Tbsp olive oil
½ tsp sea salt
¼ tsp black pepper, finely ground

First make the tzatziki – doing it right before the meal works, but doing it the day before is better. Combine all ingredients together. Chill until time to serve. For patties whisk together the first eight ingredients. Pour mixture over ground beef in large bowl. Remove your rings, bracelets and watches, then get your hands dirty making sure the egg mixture is well combined with the beef. Squish it and squeeze it until all the herby bits are distributed. Form meat into patties about 4” wide and 1” deep. In large frying pan heat the oil over medium high heat. Add patties and cook until seared, about five minutes. Flip patties and sear the other side. Cover and cook to desired doneness. On a bed of spinach and a layer of cucumber coins (either on a bun or directly on a plate) place a patty. Layer toppings – tomato slices, a glop of tzatziki, feta crumbles and onion. Dig in!

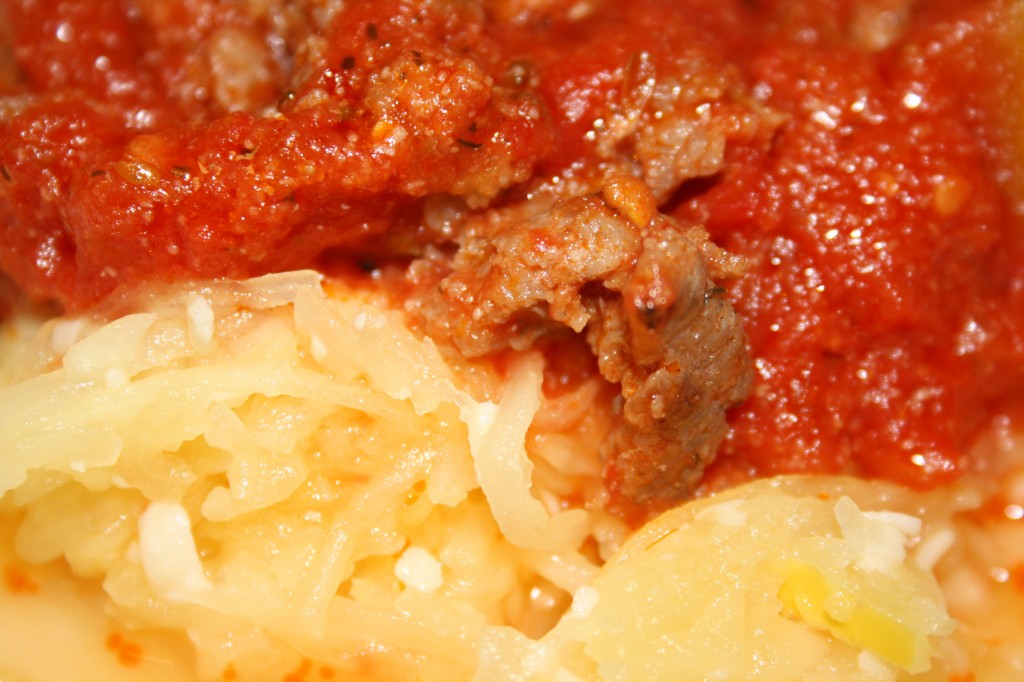
Spaghetti Squash with Meaty Sauce

This is a down and dirty delicious weekday dinner. It uses some basic kitchen pantry ingredients I have on hand pretty much all the time. The first time I had spaghetti squash I did not like it. I think I was about ten and very much looking forward to pasta. It was crunchier and the flavor is very much squashy – of course I was comparing it with soft cooked pasta, so of course it would be different. As I got older I began to appreciate it more, and now love it! We used to try and boil it, which took forever, but then we discovered the microwave method, introduced to us by my mother in law. Of course the sauce would benefit from simmering for five hours, but it was delicious with just 20 or so minutes. I will be doing more quick dishes in the future, and am inspired by my friend Stacie’s blog. Besides her awesome food ideas she also makes wonderful lotion.

Spaghetti Squash with Meaty Sauce

1 medium spaghetti squash
¼ cup parmesan cheese
1 Tbsp butter
2 14 ½ ounce cans diced tomatoes
2 cloves garlic, diced
2 tsp dried oregano
1 tsp salt
½ tsp sugar
1 pound ground sausage

In a medium sauce pan over medium heat combine tomatoes, garlic, oregano, salt and sugar. Cover and cook until bubbly. While tomatoes are bubbling away add sausage to a frying pan, break up the meat and cook until browned and well done. Drain sausage and add it to the tomato sauce. Simmer for 10-15 minutes until the flavors have time to mix. Cut spaghetti squash in half lengthwise. Scoop out seeds and stringy membrane. In shallow baking or pie dish add about ¼ inch of water. Add half of the squash, cut side down. Cover with cling wrap and place in microwave. Cook on high for about eight minutes, until squash is soft. With a fork scrape out inside of squash, pulling stringy ‘spaghetti’ out of the shell. Place squash in bowl with butter and cheese*. Stir together and let cheese and butter melt. Serve sauce on a bed of squash.

*Sometimes the squash soaks up some water. If you want to avoid the possibility of having a watery plate when serving, you can add a step before mixing the squash with butter and cheese – lay out a couple of paper towels and spread squash out to dry a bit. After doing this you may need to reheat the squash to make sure the butter and cheese melts.


Tuna Salad Sautee

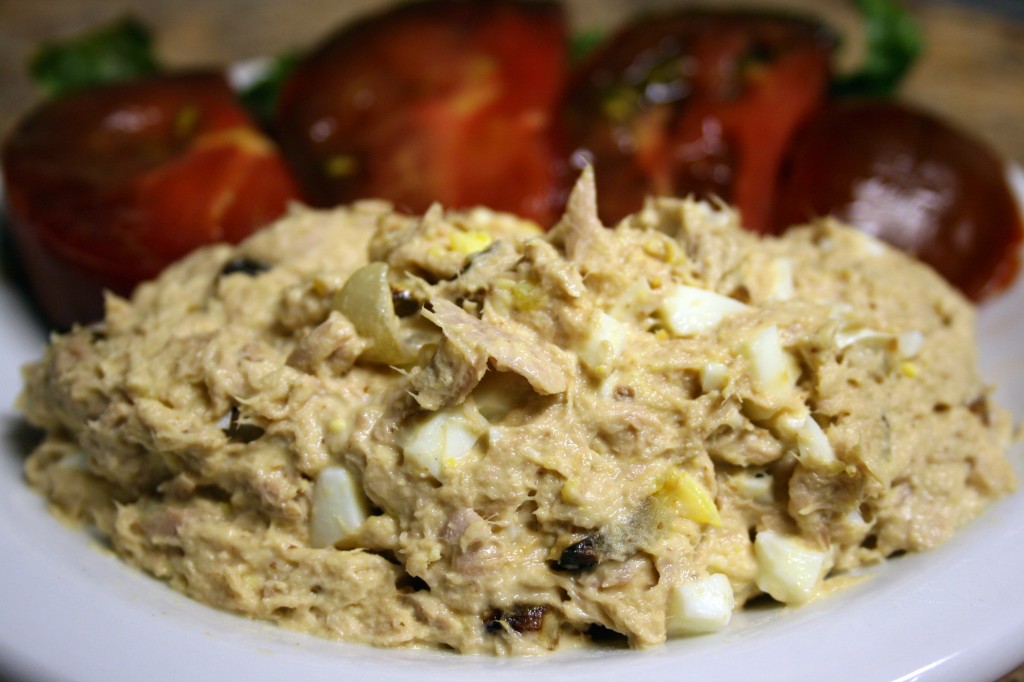
To me summer means eating cool salads. Whether they are cobb, chef, walnut, chicken or tuna, the cool salad always makes me feel happy as the temperatures rise. The word sautee to me sounds like a hot dish, but after the sautee portion of this salad cools off and is chilled, you won’t think of sautee the same again. The sweet of the onion and garlic works really well with the tuna and egg. The bite added by the mustard makes you want to alternate salad bites with those of some chocolate zebra heirloom tomatoes you picked up at the farmers’ market. Oh, that is me. But if you come across some, grab them! They are dark red and purple and green and smell marvelous. The market in Silver Spring was exploding with vegetables, and we could not pass up these tomatoes, which actually taste like a soft red wine to me…kind of a pinot noir or shiraz. They were delish, and went well with my tuna salad sautee creation. Happy summer!!!

Tuna Salad Sautee

4 small cans tuna in water
4 boiled eggs
1 tsp olive oil
½ small sweet onion, finely chopped
4 garlic cloves, finely chopped
½ cup mayonnaise
2 Tbsp horseradish mustard
Salt and Pepper to taste

Heat oil in small pan over medium heat. Add onion and garlic. Sautee until browned and beginning to caramelize. Set aside to cool while the rest of the salad is prepared. Drain water from tuna into small bowl. Place tuna in mixing bowl and serve tuna liquid to eager cats. Roughly chop eggs and add them to the tuna. Add mayonnaise, mustard, salt and pepper to tuna. Stir ingredients until mixed. Add onion and garlic and stir some more until all the dark pieces are pretty evenly distributed. Chill for at least an hour before serving.


Whole Wheat Pizza Rolls

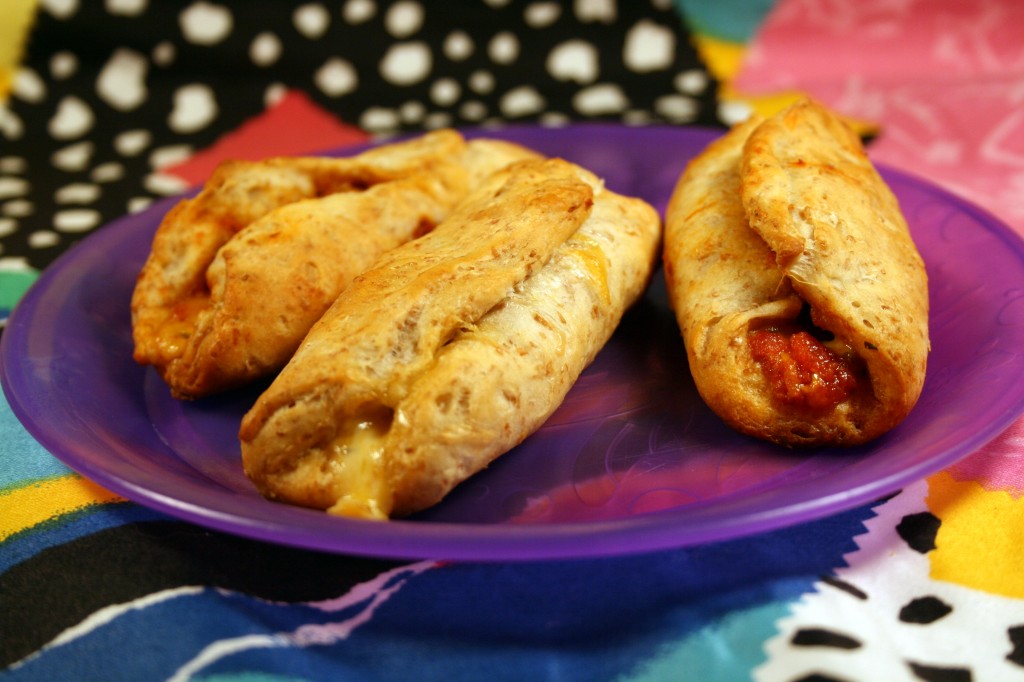
I am a bit depressed. We have been in our new place for two days and our lovely gas stove is still without gas. Imagine my dismay when I realized all my plans for a cooking frenzy came to a screeching halt and the fridge/microwave marathon continues. But I have a kitchen! An actual kitchen and I can’t really use it. My own private hell, I say. I am very much tempted to go get a camping stove and carry on. Hopefully this is the last post from old stuff I stashed from the past. It begins in a way that is no surprise to most, with my daughter. I have a particular little daughter when it comes to sandwiches. The only sandwiches she will eat are peanut butter. Not peanut butter and jelly or peanut butter and banana, just peanut butter. Occasionally she will eat a sandwich with meat and cheese, but I do not rely on her to do so because it happens so rarely. She likes a lot of foods, just not always at a convenient time, like when it is put in front of her. On top of her sandwich issues there was a little boy at her two day a week pre-school that was allergic to peanut butter. This means that making a quick school lunch for her by slapping together a sandwich is pretty much out of the question. My solution was pizza rolls. It is similar to the method I use for doing wheaty peanut butter apple rolls, just with a comPLETEly different taste. She likes them, they gives her some protein in the middle of the day and don’t cause problems for her schoolmates. When I asked Little B to tell me which type of roll she liked best she paused a moment and said both, but when I asked her which one she wanted for ever and ever (her latest phrase) she pointed to the pizza rolls. Score!

Whole Wheat Pizza Rolls

½ can Grands® Golden Wheat Reduced Fat Biscuits
16-24 Turkey Pepperoni slices
½ cup shredded reduced fat colby jack cheese
2 Tbsp Oregano
½ cup tomato or seasoned pizza sauce

Preheat oven to 375F. Lightly grease large cookie sheet. Cut each uncooked biscuit in half. Roll out each half until each is about 4” in diameter. Place 2-3 slices of pepperoni on each round, keeping them about a centimeter from the edges. Spread each biscuit with about 1 tsp of sauce, sprinkle about 1 tsp of cheese on each and sprinkle with oregano. Carefully roll each biscuit until the opposite ends overlap*. Pinch open ends together in an attempt to contain the sauce. Place each roll seam side up on the cookie sheet, about an inch apart. Bake for 12-14 minutes until biscuits begin to brown.

*Next time I make these I plan on folding the biscuits in half and using a fork to pinch together the edges. Rolling them I think makes for easier toddler finger food, but if I am serving them to a mixed, slightly older crowd I can add more filling with the fold-in-half method.


Post Navigation