Any Kitchen Will Do

Give me a kitchen and I will cook.

Archive for the category “vegetables”

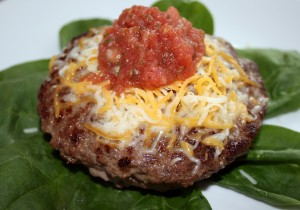
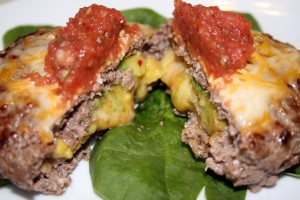
Stuffed Burgers


If it can all go on top, why can’t some go in the middle, too? In the world of hamburgers there is a limitless number of topping combinations and I have tried a lot of them. My go to combinations are usually the traditional bacon and cheddar, or bleu cheese with mushrooms. I am not a fan of Hawaiian themed burgers – it is my opinion that pineapple is for dessert, not for pizza or burgers. The more exotic burgers with truffles and seafood are okay, but such toppings seem to pair better with pasta. Sometimes I go for a couple of onion rings with barbeque sauce, but the sauce has to be just right. Although messy, cover my burger anytime with spicy queso dip and guacamole. I will be on it like a bee on honey. As often wont to do, I lean towards a more Tex-Mex theme for this latest dish. I have not made these in a while, so I figured it was time to do so again. These can be pretty messy if eaten on a bun, but that is okay. A good burger is always messy.

Stuffed Burgers

2 pounds ground beef
½ tsp sea salt
¼ tsp ground black pepper
½ tsp cumin
Dash dried red pepper flakes
1 Hass avocado
8 – 12 ounces shredded co-jack cheese
Salsa for serving
Fresh spinach and/or buns for serving

Combine beef, salt, pepper, cumin and pepper flakes together. Remove avocado meat from skin and roughly chop into small pieces. Divide beef into eight portions, then form portions into thin, equal sized patties. On four of the patties add 1/3 of the cheese, avocado and then 1/3 more of the cheese, leaving about ½ inch of meat around the edges. Place the other four patties over the loaded ones, then press together the edges so there is no seam. In a frying pan over medium heat add the olive oil. When oil is hot add the burgers. Cook for 5 – 7 minutes on each side, until cooked to desired doneness. The burgers will not take as long as regular burgers to cook because the cheese and avocado will heat up quickly in the middle. At the last minute add a bit more cheese to the top and cover until melted. Top with salsa on a bed of spinach (or buns) and serve immediately.


Roasted Asparagus

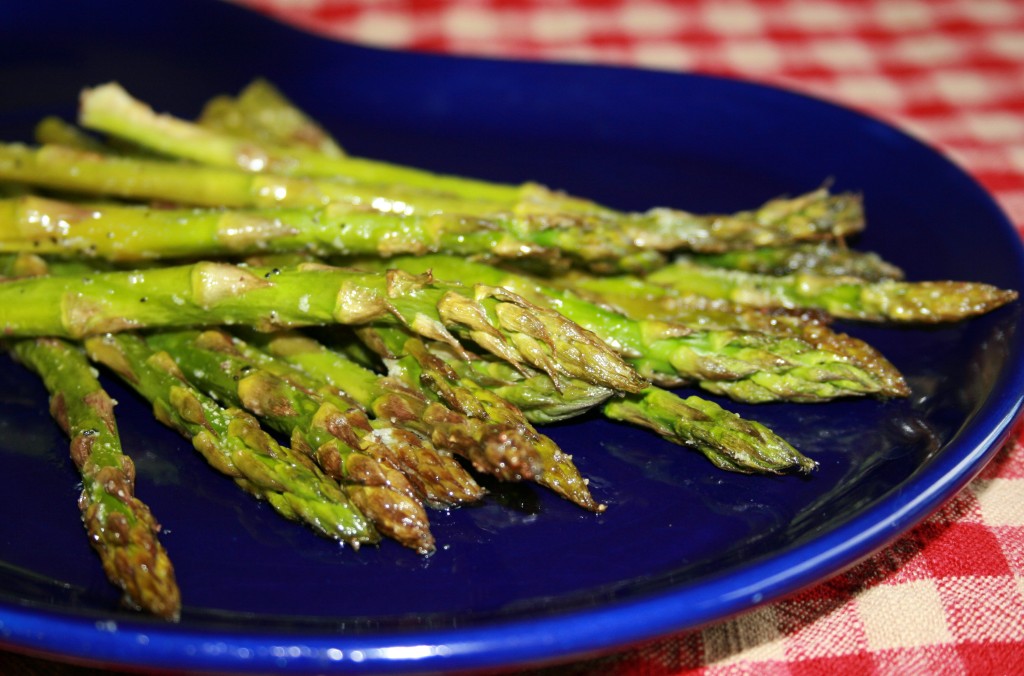
I originally learned this recipe from my old friend Karla. About ten years ago I went over to her house and she made wonderful side dishes while her husband Marcus cooked up some meat. The whole meal was delicious, especially eating under a beautiful summer sky in Denver, but the asparagus was stupendous. It was probably because I had so much trouble cooking it well in the past. I either undercooked it or overcooked it to a green mush. Now it comes out perfectly every time – the thick ends are soft enough to eat and the delicate tips still have substance. The roasting really brings out the flavor of the asparagus while making it tender to eat, hot or cold. I have often taken leftovers on picnics or in cold lunches and it works just as well as if it is right out of the oven. So simple and so scrumptious!

Roasted Asparagus

1 large bunch raw asparagus
2 Tbsp olive oil
2 tsp lime juice
½ cup chopped pecans or almonds
2 cloves garlic, diced
2 Tbsp Parmesan cheese
Salt and Pepper to taste

Heat oven to 350F. Rinse asparagus and remove the thick, tough ends. You can do this in any of three different ways:
1) cut the bottom 1-2 inches off with a knife,
2) bend the asparagus by holding it about half way down with one hand and hold the thick end with the other hand.
Bend the stalk until it naturally breaks where the tough section begins, or
3) with a vegetable peeler gently peel off thick outer skin from the bottom half of the stalk
Line a cookie sheet with aluminum foil. Lay asparagus on foil, alternating thick and thin ends. Make sure the stalks alternate the direction of the tip, so they can cook evenly. Sprinkle asparagus with olive oil and lime juice, followed by garlic, salt, pepper and nuts. Place in oven on the middle rack for 20-30 minutes, until tender. Sprinkle with Parmesan cheese and return to oven, cooking for about five more minutes until cheese is soft. Serve immediately.

Japanese Eggplant Tomato Salad

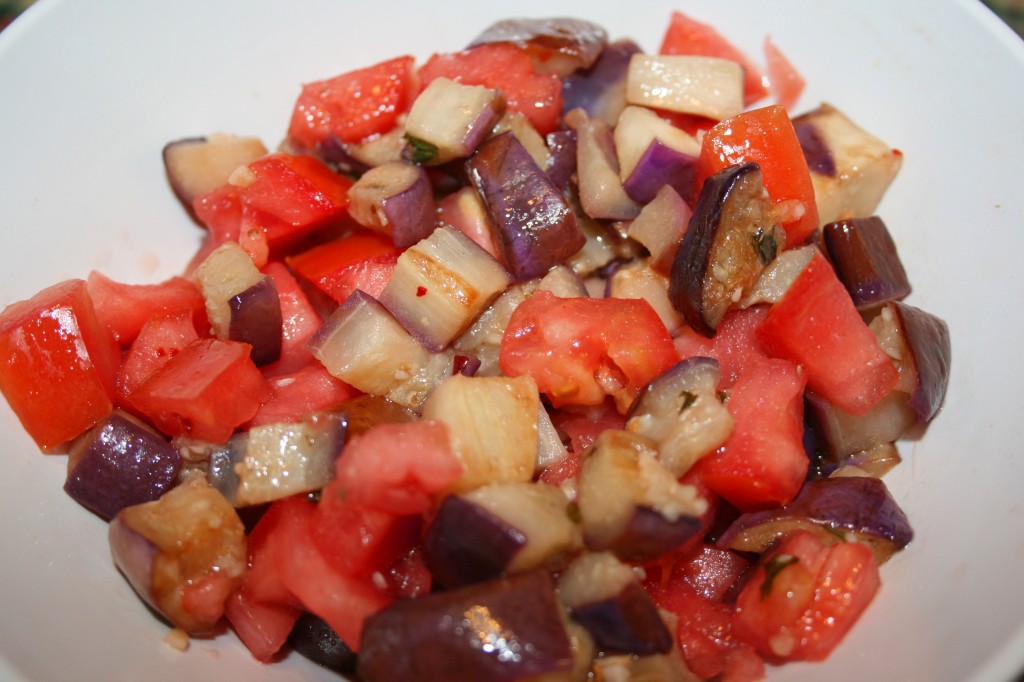
The summer heat has made itself at home in Maryland, for now. I was hopeful that the triple digit temperatures had moved on earlier this week, since the highs dropped into the 80s, but alas, it was not so. They shot right back up. I know it is August, but a girl can hope! I am very much an Autumn/Winter kind of girl – wearing sweaters and pretty scarves, taking brisk walks to get the blood flowing without sweat raining off my brow. Cooler weather will come eventually – it always does – so for now I will trudge on in the heat and make some summer salads. I found some Japanese eggplant at the store this week and grabbed a few. The are longer and more narrow than the typical eggplant, and in my opinion sweeter and more tender. Maybe I need to work with it more, but the short, fat eggplant tends to be tough and lacking flavor when I have prepared it in the past. The Japanese eggplant is more appealing, but also more elusive. I wanted a cold side dish to accompany some spicy tacos for dinner, and this is what I came up with, adapted from the recipe here.

Japanese Eggplant Salad

¼ cup white vinegar
1 clove garlic, crushed
2 tsp fresh ginger, minced
¼ tsp red pepper flakes, crushed
1 Tbsp fresh basil, chopped
1/8 cup olive oil
2 Japanese eggplants
1 large tomato

Cut off ends of eggplants, cut each lengthwise into six pieces, then cross cut into cubes. Sprinkle cubes lightly with salt and let sit for about ten minutes. While waiting for the eggplant make the dressing. Combine the first five ingredients and whisk together until combined. Slowly add oil while you continue whisking until it is all added. Set aside the dressing. Heat dry skillet over medium high heat. Add eggplant and about one Tablespoon of dressing, then saute until tender, about five minutes. Transfer cubes to paper towel and let cool to room temperature, or chill until ready to serve. Cut tomatoes in half and scoop out seeds, leaving as much flesh as possible, then cube the tomatoes so they are about the same size as the cooked eggplant pieces. Combine the tomato and eggplant cubes. Drizzle with dressing and toss lightly to coat. Serve immediately or chill until ready to serve.

Refrigerator Pickles

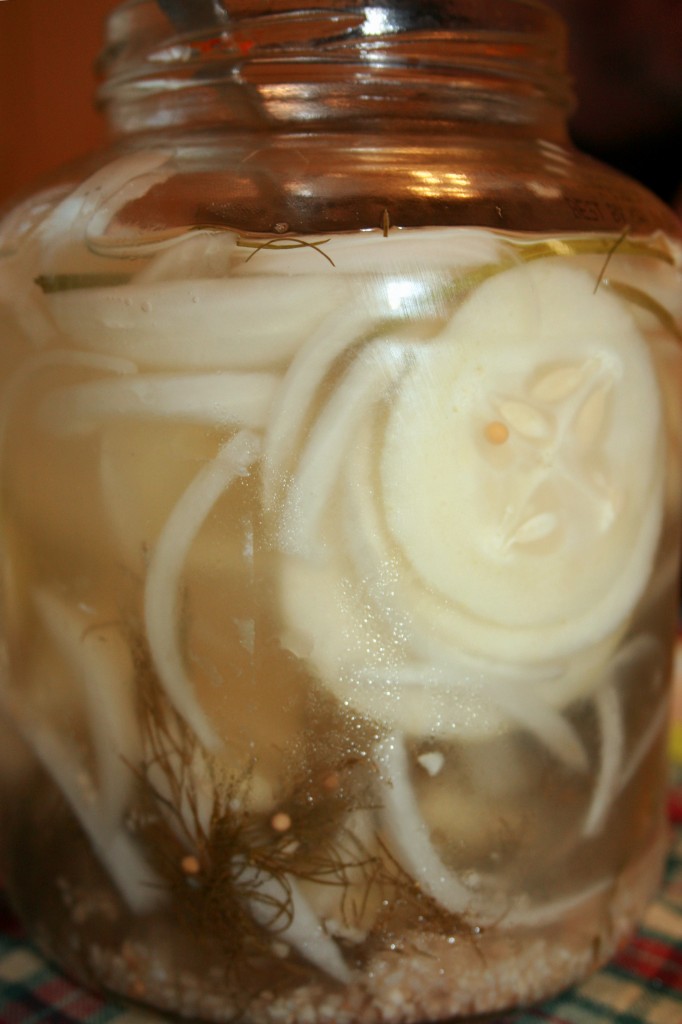
When I was a kid we had a garden in the back yard. We always grew tomatoes, sunflowers, usually included zucchini and often did cucumbers. Needless to say, we ate a lot of fresh vegetables during the summer. Sometimes I looked forward to the gardening – finding fruit and veggies ready to pick or grabbing some of the more elusive weeds while the plants matured. Other times I was not so eager to be a gardener – breaking up all the clods of dirt after they clumped over the winter, or clearing out all the dead plants when autumn came. I remember getting mad at my dad a few times, too. Me, my brother and mom did a lot of the work, but when he talked about the garden it was ‘his’. Ooooh, that got me irked! We would slave away in the heat and he would come out, point to a few things we missed, then head back in to the air conditioned house. I laugh about it now, because we learned so much about plants and self-sufficiency and responsibility, but the perspective was a bit different at the tender age of eight or nine. One thing my mom always did with some of our cucumber crop was make refrigerator pickles. For months there would be at least one jar of pickles in the fridge door – we would come in from playing outside (or gardening) and pinch a few cold, tart slices as a snack. They never lasted very long, which was good, since the simple preparation did not include any heating or effort to sterilize or pasteurize in the process. Since we currently have no garden, or yard for that matter, this batch of pickles was made with store bought cukes. They were big and perfect – the slices were nice and floppy after sitting in the jar for a day or two. Little B enjoyed watching them flop around before pretending to be a tiger and taking a bite. I never knew tigers liked pickles.

Refrigerator Dill Pickles

1 large cucumber, peeled
1 – 2 cups white vinegar (substitute with some water if you want less tang)
½ white onion, julienne sliced
2 tsp sea salt
5 sprigs fresh dill
4 – 6 cloves garlic, chopped
1 Tbsp mustard seeds
clean glass jar with tight fitting lid

Slice cucumbers into thick coins (1/8 to ¼ inch). Set aside. In a glass jar with tight fitting lid combine vinegar and spices. Put lid on jar and shake. Add cucumber to jar, making sure the slices are not sticking together. Secure lid on jar again and shake vigorously, encouraging the spices to spread out among the slices. Chill for at least 24 hours before eating. I make no promises about pickle viability beyond one week.

Cauliflower Fritters

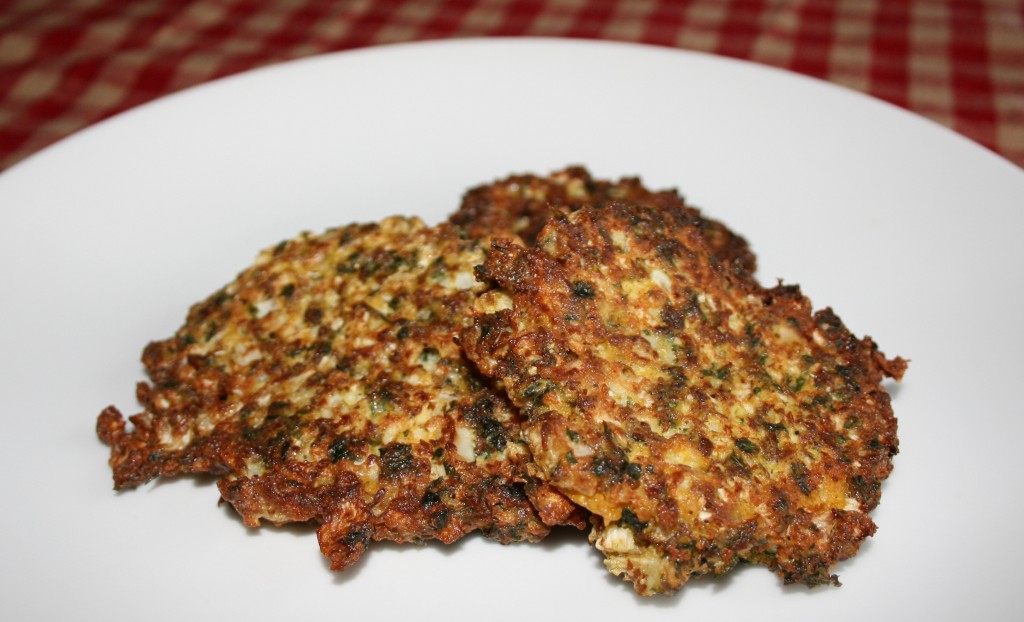
When I make it a point to avoid processed grains and starchy carbohydrates in my diet I seem to have more energy and lose weight. I also start to crave vegetables. Of course a loaded baked potato or breaded mushrooms don’t really fit the balance I want. Ideally I would crave steamed veggies with some lime juice and herbs, but the reality is I want substance and texture and flavor. These fritters help me balance the need for hearty high fiber veggie variety and a low carb energy source. I was inspired by the recipe here, but tweaked it to make chunkier fritters held together by flaxseed. Low carb and hearty. Yum!

Cauliflower Fritters

½ large head cauliflower
2 whole eggs
¼ cup flaxseed meal
¼ cup fresh parsley, finely chopped
1 tsp lime juice
½ tsp salt
¼ tsp black pepper
1 tsp fresh thyme
½ tsp ground cinnamon
¼ tsp chili powder
½ tsp cumin
½ tsp tumeric
pinch cayenne pepper
½ cup olive oil or fat of your liking

Cut cauliflower into little florets and add to the bowl of your food processor. Process on pulse until cauliflower has texture of large grains of cracked wheat*. In a large mixing bowl add the rest of the ingredients and mix until well combined. Add the cauliflower and combine until well coated. Heat a splash of olive oil in a frying pan and add about ¼ cup of the mixture for each fritter. Using a large spoon droop a mound about the size of a baseball into the oil. Cook three or four fritters at a time for 2 – 3 minutes on each side, until golden brown, then keep warm while you cook the remaining fritters.

*I just chopped them up a bunch, resulting in big and little chunks instead of cracked wheat chunks. They were yummy all the same

Greek Burgers

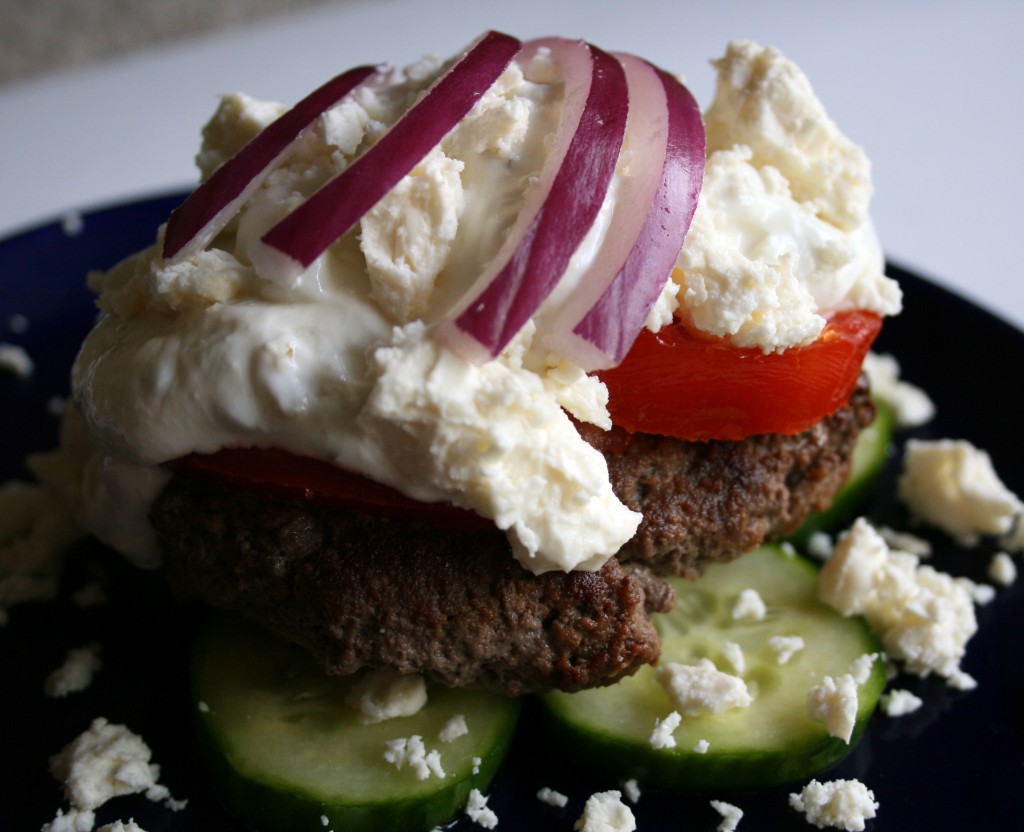
I must confess. I am a Fed. I work in a tall building in a big complex with uber security at the door and a locked work area with a bunch of cubicles around me. I am a little cog in a huge rolling maze of cogs, but I enjoy the work. Don’t get me wrong, I would prefer cooking all day, but for now I am content with my work, which is challenging and never boring. This time of year is pretty busy for me, reflected by the fact it is longer than usual between posts. I have not cooked for days, but no suffering occurred during the drought. Big D made some wonderful stuff in the evenings and there was enough for me to very much look forward to leftovers at lunch. It will be another couple of months before things slow down, so I make no promises, but I have some yummy ideas – don’t give up on me. I will persevere and post post post! Cooking relaxes me and I cannot stay away from it for long, no matter what. Take these burgers, for example. I had a burger like this at a hole in the wall restaurant somewhere in Alaska. I can’t remember where, but I was surprised how much I enjoyed it – I had expected a hockey puck with sour cream on top, but it was fresh and wonderful. With no lamb in sight my version is a tangy, filling meal that reminds me of my beloved gyros (pronounced ‘yee-rohs’ in my opinion). I had to negotiate with Little B to use the last of our Greek yogurt for tzatziki. She loves it with a little stevia, cinnamon and vanilla for dessert, but I finagled enough from her for the recipe.

Greek Burgers

Patties
½ cup parsley, finely chopped
2 Tbsp oregano, roughly chopped
½ cup mint, roughly chopped
3 cloves garlic, finely chopped
1 tsp black pepper
2 tsp sea salt
1 egg
1 Tbsp lime juice (or 2 packets True Lime) http://www.truelemonstore.com/products/true_lime
2 pounds ground beef
2 Tbsp olive oil
1 cup feta, crumbled
2 cups fresh spinach leaves, stems removed
1 English cucumber, sliced in ¼” coins
1 tomato, sliced
½ red onion, thin julienne

Tzatziki
1 cup cucumber, peeled and finely chopped
1 ½ cups Greek yogurt
1 clove garlic, crushed
2 tsp parsley, finely chopped
2 tsp mint, finely chopped
2-3 tsp lime juice
1 Tbsp olive oil
½ tsp sea salt
¼ tsp black pepper, finely ground

First make the tzatziki – doing it right before the meal works, but doing it the day before is better. Combine all ingredients together. Chill until time to serve. For patties whisk together the first eight ingredients. Pour mixture over ground beef in large bowl. Remove your rings, bracelets and watches, then get your hands dirty making sure the egg mixture is well combined with the beef. Squish it and squeeze it until all the herby bits are distributed. Form meat into patties about 4” wide and 1” deep. In large frying pan heat the oil over medium high heat. Add patties and cook until seared, about five minutes. Flip patties and sear the other side. Cover and cook to desired doneness. On a bed of spinach and a layer of cucumber coins (either on a bun or directly on a plate) place a patty. Layer toppings – tomato slices, a glop of tzatziki, feta crumbles and onion. Dig in!

Baked Zucchini Wedges

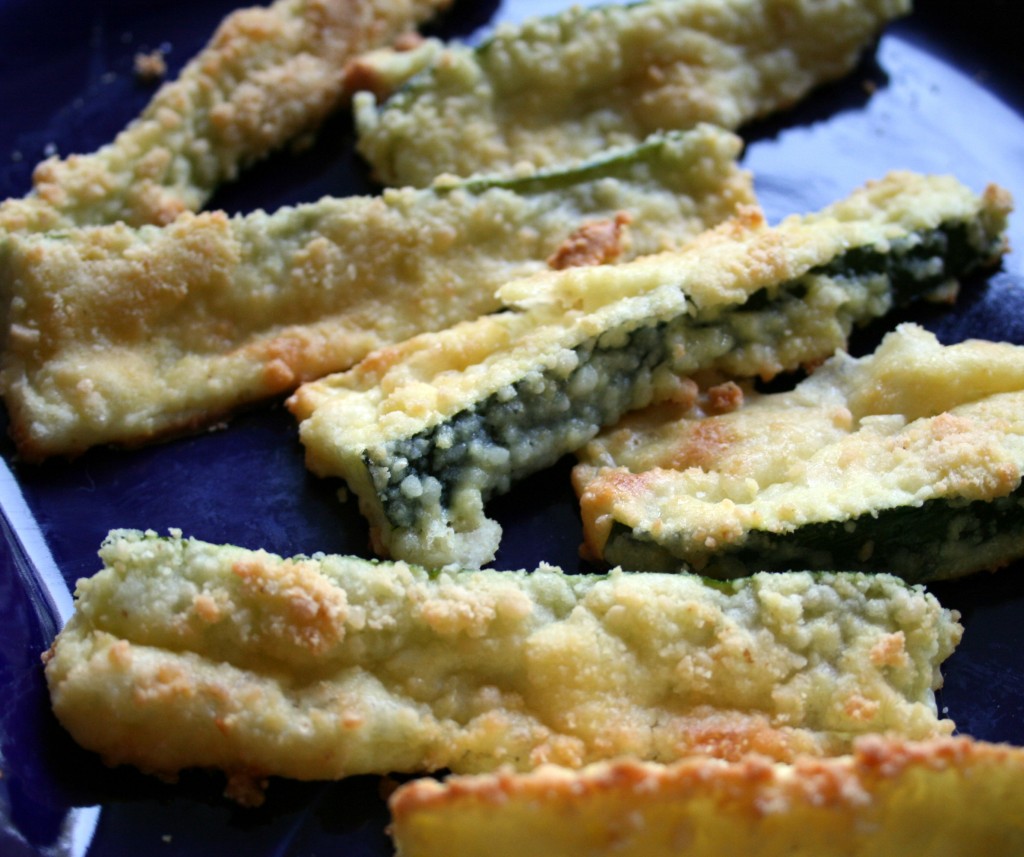
I did it! I finally did it! I made a zucchini dish that Big D declared as the best he has ever had. This is a BIG deal. I love zucchini, but Big D does not. As usual, if I cover something with garlic and cheese there is a high possibility of culinary success around here. Besides being absolutely delicious (hot or cold, we discovered) they were a great balance for the spicy meat Big D cooked up to go along with the zucchini – he has promised to guest blog about it soon (nudge nudge). I don’t know if this bread crumb-less version will work with anything other than the powdery Parmesan cheese typically found in shaker-type containers, but I do know the powdery stuff did a great job of sticking, with the help of some egg.

Baked Zucchini Wedges

2 large zucchini
2 cups finely grated Parmesan cheese
2 tsp garlic powder
1 tsp salt
2 eggs
2 Tbsp water

Preheat oven to 350 Fahrenheit. Slice zucchini in half, then lengthwise into narrow wedges – at least 20 slices per squash. Make available a large non-stick cookie sheet to receive the prepared slices. Mix together eggs and water, making sure they are well combined. Pour into a shallow bowl or deep plate. In another bowl/plate combine cheese, garlic and salt. Dip each slice into the egg mixture, followed by dipping in the cheese mixture. If they will stand on their skin edge, then set them on the sheet skin side down. If they only stand on a wide, white edge, they will be fine, but will cook brown on the side touching the pan. Bake for about 30 minutes until coating on top starts browning. Serve immediately.

Squash Pizza

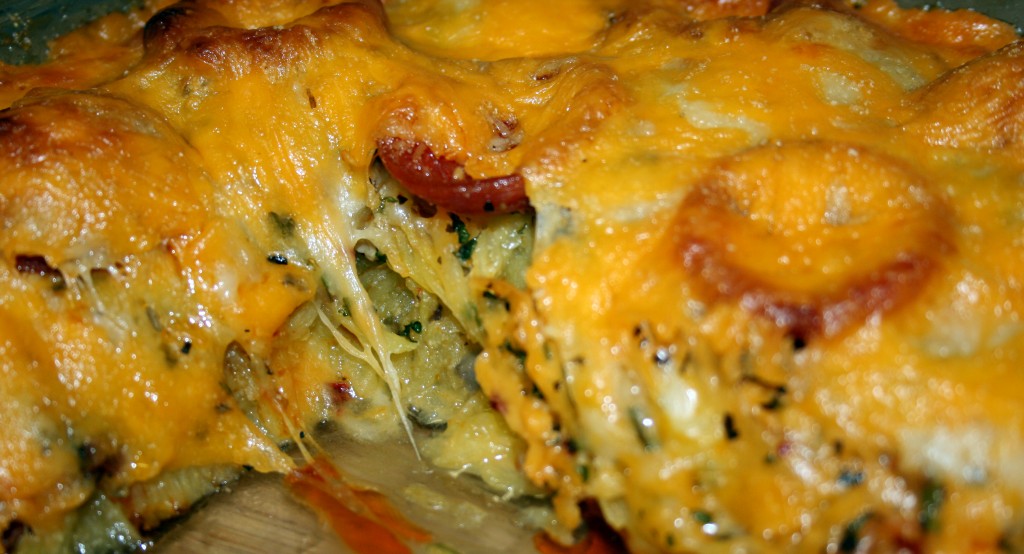
We love pizza and we love squash, especially spaghetti squash. It is not processed like store bought pasta or the flour used in most pizza crusts. Don’t get me wrong – I love pasta and pizza crust and pretty much any bread I encounter, but it never seems to leave after I eat it. I might as well just glue it on to my hips and butt instead of biting into it, because that seems to be where it goes. Not so with spaghetti squash. It is pretty darned good for you, as I have mentioned before, and is a great way to take care of those pizza cravings, because the wheaty crust of the traditional pizza is just not gonna work with our diet strategy. We have officially thrown up our hands and now make a casserole version of pizza. Yes you need a fork to eat it, but is it really a great loss? Not when it helps me keep my weight down. I am not saying this recipe will help you lose weight, but if you are watching your carbohydrate intake like me, there is nothing better for battling pizza advertisements. The squash does a wonderful job of helping the herbs mix and spread their joy, and thick sliced pepperoni is just heaven to me on a pizza. Omigosh is it good!

Squash Pizza

1 spaghetti squash
8-12 ounces pepperoni, sliced thick
2 cups shredded cheddar cheese
2 cups Italian mix cheese (romano, mozzarella, parmesan…)
2 cups roughly chopped mushrooms (or 8 ounces canned mushrooms)
2 Tbsp dried parsley
2 Tbsp dried oregano
2 tsp dried basil
2 tsp garlic powder
2-3 tsp sea salt
2 tsp red pepper flakes
1 tsp black pepper

Slice squash in half lengthwise and scrape out seeds and sinew. In a microwave safe dish place halves open side down and add about ½ cup water. Cook on high for 10-12 minutes. Preheat the oven to 350 Fahrenheit. While the squash cools prepare the rest of the dish – start with slicing pepperoni and roughly chopping mushrooms. When squash is cooled scrape out the ‘spaghetti’ with a fork into a bowl. Add mushrooms to the squash along with half of the herbs, salt and pepper and mix well. In a medium to large rectangular baking dish (no larger than 9×13) sprinkle about ½ cup of the cheddar cheese. Add the squash mixture. Take a mix of the cheese, about a cup, and spread on top of the squash mixture, pushing it into the squash a bit. Add the rest of the herbs and spices. Make a layer of the pepperoni, then top with the remaining cheese. Place in preheated oven and cook for 30-35 minutes, until cheese is melted and there is some browning. Let stand outside the oven for about ten minutes before serving. Slice like a casserole and serve with a simple garden salad.

Purple Cauliflower

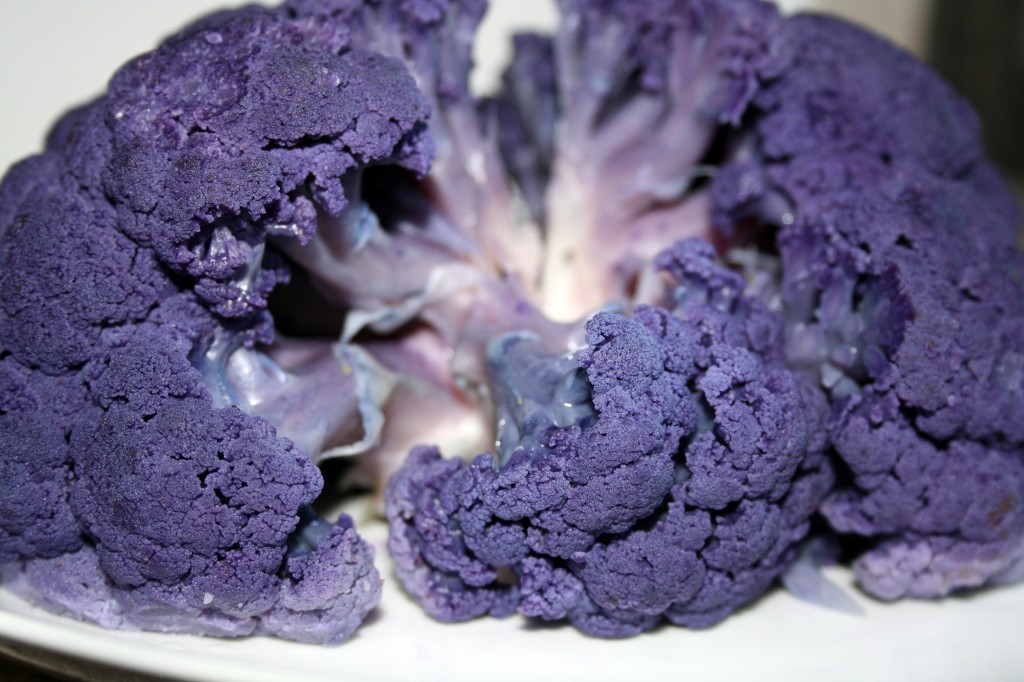
With my new job rolling along and Big D deep in his ongoing projects we have not been as creative with our food preparation as we are wont to be. The wonderful selection of fruits and vegetables available at the local markets is starting to get me out of my rut. As we settle into our new routine I am getting back into my creative food groove as well. The wonderful cauliflower we found recently does not need fancy preparation, so I kept it simple. If you are looking for a colorful vegetable to brighten up a drab, brown dish, then look no further than purple cauliflower! Little B could not stand to walk away from it at the farmers market without buying a head. Now, you might think the almost toxic color of it must be fake, but it is actually naturally occurring, caused by the same antioxidants that make some cabbage and wine have a purple hue. While cooking it up is similar to the plain white version of cauliflower, the purple stuff seems to be more tender and have a more powerful, nutty, buttery flavor that the white stuff lacks. The color definitely bleeds when cooked, so if you don’t want your whole dish purple, and you want to keep the purple from fading, it is best to cook it separately and use my stand up steaming technique. You can see in the picture that some of the lower florets dropped while being cooked and faded a bit after hanging out in the water. If the stem is too short to hold it above the water you can use a steamer basket. I prepared it simply to balance out a spicy meat dish, but if you want more punch with your purple cauliflower, there are some delicious sounding recipes here. Enjoy your colorful side dish!

Purple Cauliflower

1 large head purple cauliflower
1 – 1 ½ cups water
1 tsp salt

Trim bottom of cauliflower stem, but leave the head intact. Place water and salt in large pot that will hold the whole head. Bring water to a boil, then place the cauliflower standing on the stem in the pot. Cover and steam for about 10 minutes, until tender. Serve immediately, either as a whole head (stems will pull off easily) or after cutting into pieces.

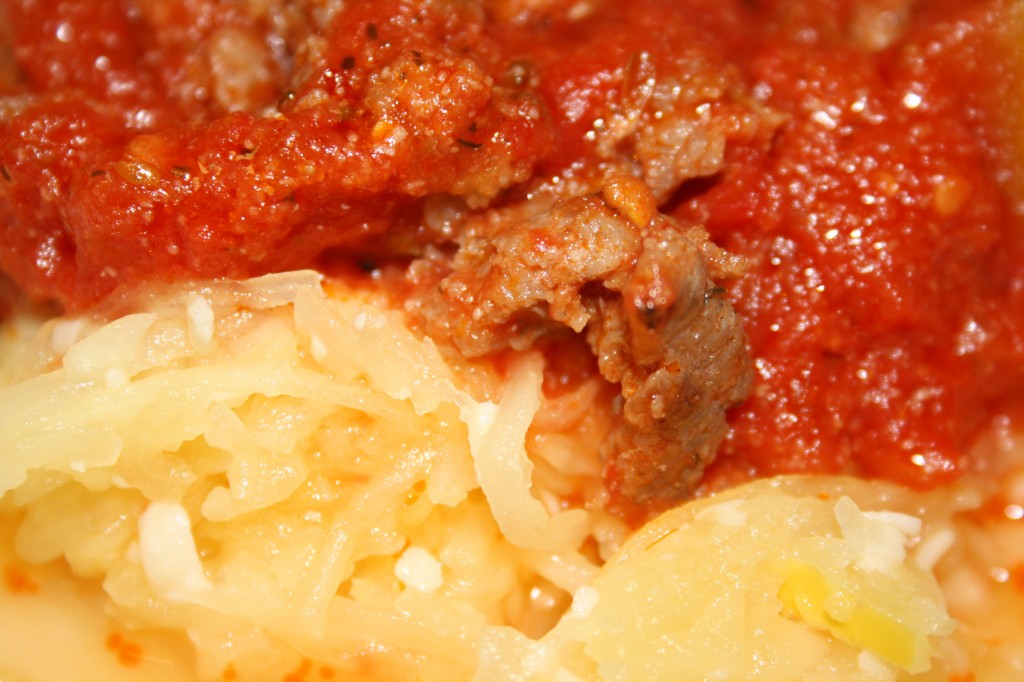
Spaghetti Squash with Meaty Sauce

This is a down and dirty delicious weekday dinner. It uses some basic kitchen pantry ingredients I have on hand pretty much all the time. The first time I had spaghetti squash I did not like it. I think I was about ten and very much looking forward to pasta. It was crunchier and the flavor is very much squashy – of course I was comparing it with soft cooked pasta, so of course it would be different. As I got older I began to appreciate it more, and now love it! We used to try and boil it, which took forever, but then we discovered the microwave method, introduced to us by my mother in law. Of course the sauce would benefit from simmering for five hours, but it was delicious with just 20 or so minutes. I will be doing more quick dishes in the future, and am inspired by my friend Stacie’s blog. Besides her awesome food ideas she also makes wonderful lotion.

Spaghetti Squash with Meaty Sauce

1 medium spaghetti squash
¼ cup parmesan cheese
1 Tbsp butter
2 14 ½ ounce cans diced tomatoes
2 cloves garlic, diced
2 tsp dried oregano
1 tsp salt
½ tsp sugar
1 pound ground sausage

In a medium sauce pan over medium heat combine tomatoes, garlic, oregano, salt and sugar. Cover and cook until bubbly. While tomatoes are bubbling away add sausage to a frying pan, break up the meat and cook until browned and well done. Drain sausage and add it to the tomato sauce. Simmer for 10-15 minutes until the flavors have time to mix. Cut spaghetti squash in half lengthwise. Scoop out seeds and stringy membrane. In shallow baking or pie dish add about ¼ inch of water. Add half of the squash, cut side down. Cover with cling wrap and place in microwave. Cook on high for about eight minutes, until squash is soft. With a fork scrape out inside of squash, pulling stringy ‘spaghetti’ out of the shell. Place squash in bowl with butter and cheese*. Stir together and let cheese and butter melt. Serve sauce on a bed of squash.

*Sometimes the squash soaks up some water. If you want to avoid the possibility of having a watery plate when serving, you can add a step before mixing the squash with butter and cheese – lay out a couple of paper towels and spread squash out to dry a bit. After doing this you may need to reheat the squash to make sure the butter and cheese melts.


Post Navigation