Any Kitchen Will Do

Give me a kitchen and I will cook.

Archive for the category “vegetables”

Three Year Tapenade

tapenade

Happy Blogiversary to me!!! Rarely do I pursue things for long periods of time…consecutively. I do something, then I stop, then I do it again, then I begin something new…you get the idea. It is not that I leave things incomplete, but I will find a stopping point and then go in another direction. My longest recorded continuous successes are people related – being a daughter, a brother a friend, being hitched to Big D over ten years and being mommy to Little B for over five years. Other stuff, like jobs and hobbies are more in the realm of come-and-go. I think I can definitely say that this blog is getting some longevity – a few days ago I started my fourth year, so I have passed my third blogiversary! When I started three years ago it was intended to be a place to put recipes so I could get to them easily. My cookbooks did not always make the cut when we moved and consolidated, so my creations would sometimes be lost. Tracking it on a blog let me combine the availability I wanted, my desire to do some writing and my continued joy in taking pictures. It has become more than just a place to record my food journey, but that of my little family as well. It is a place where others can come and experience it with us. The blog has given me the opportunity to share stories of my childhood, my family, friends and our geographic journeys. The name of it came from the fact that I cook in whatever kitchen I come across.  If the kitchen is not mine the owners so far have generously shared their space with me. Thanks goes out to them and to you for checking in on occasion!

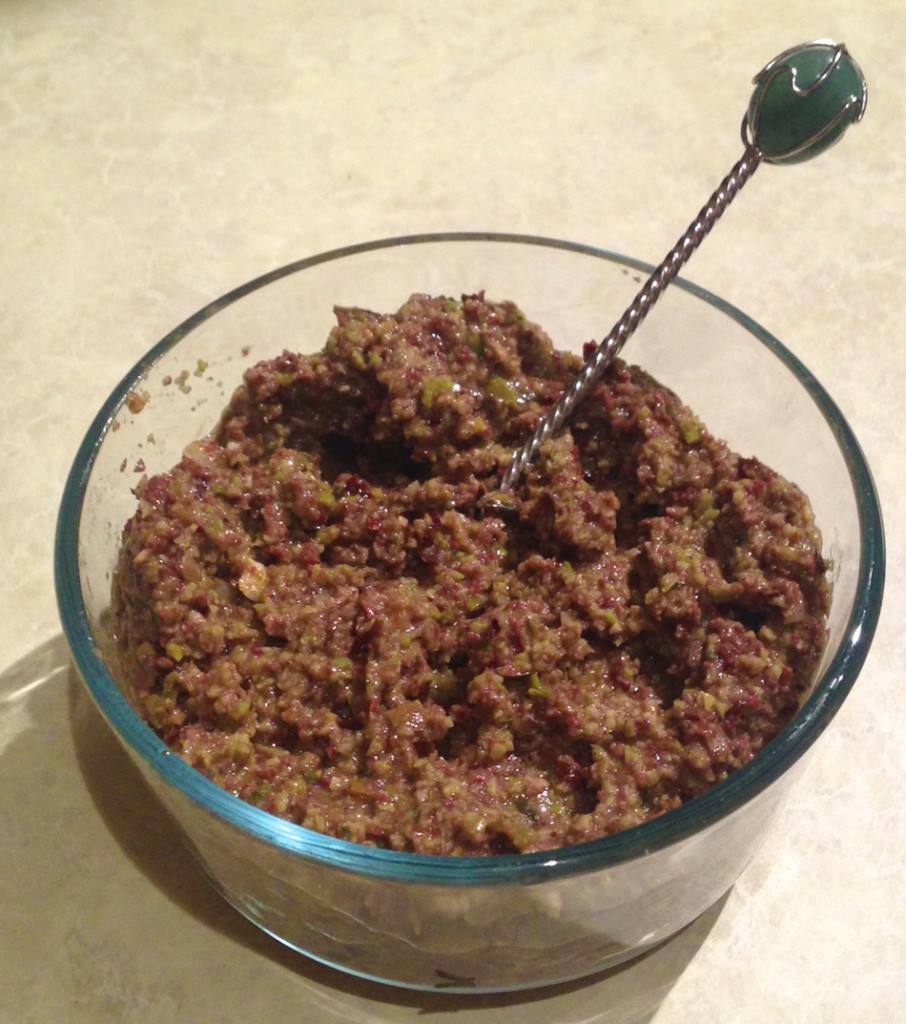
I celebrated the end of the first year with cheese stuffed jalapeno halves. Yum! The second year I did it with low carb cinnamon rolls. Double yum! This year I am taking a different slant, with a New Orleans theme.  I am taking a more savory slant this year with some tapenade. It is very easy and very flavorful. If you ever have a bunch of partially full jars of olives, like we often do, it is a great way to use them.
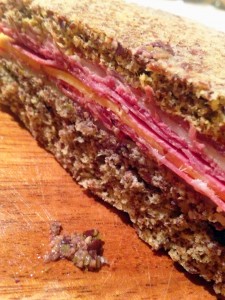
muffalettaThis is not the first time I have mentioned my family’s love for New Orleans. The New Orleans connection is the lovely sandwiches that first introduced me to tapenade when I was a kid. Muffuletta sandwiches are about as common in New Orleans as po’boy sandwiches and gumbo. They originated in the Central Grocery right there on Decatur Street in the French Quarter. When I first had one I could not get enough of the olive ‘salad’ in the sandwich. Between the olives and the meats and cheeses it was a very satisfying meal. To do a version of the sandwich that fits our eating habits I made up some one minute buns in the microwave, whipped up a batch of tapenade in the food processor and opened up a few packages of deli meats and cheeses. The picture to the left does not do it justice, but there is a thick layer of tapenade on the bread that is practically the same color. A blob of the tapenade sits next to it as proof! The tapenade leftovers will not go to waste – I have used it as a dip, a stuffing for chicken, pork and mushrooms. It has an addictive saltiness that, believe it or not, sates my salty snacking craving I used to appease by eating chips. Just a straight spoonful can do the trick! Please make a batch and toast me with a cracker or sandwich full!

Three Year Tapenade

2 cups mixed black and green olives, pitted
3 cloves garlic
1/4 cup small capers
1/4 cup extra virgin olive oil
1 tsp dried oregano leaves
1 tsp dried basil leaves
1 tsp dried parsley leaves
1 anchovy fillet (optional)

Place all ingredients except the olive oil into a food processor. Slowly add the olive oil in a stream while the mixture is blending on low speed, until mixture is an evenly sized paste. Serve as condiment for sandwiches, or with crackers as a dip. Store refrigerated in an air tight container.

To make a Muffuletta Sandwich: the traditional sandwich layers Italian meats (mortadella, salami, ham) and cheeses (mozzarella, provolone) in an alternating pattern, so there is a thick pile of it in the sandwich. The traditional bread is a large round focaccia-type loaf about 10″ in diameter, which can actually make about four sandwiches. On one side of your bread (or low carb individual muffins in our case) spread a thick layer of the tapenade. Layer your meats and cheeses until there is a healthy pile. Add the other half of the bread. Cut into portions and eat!
Baked Parmesean Mushrooms

image

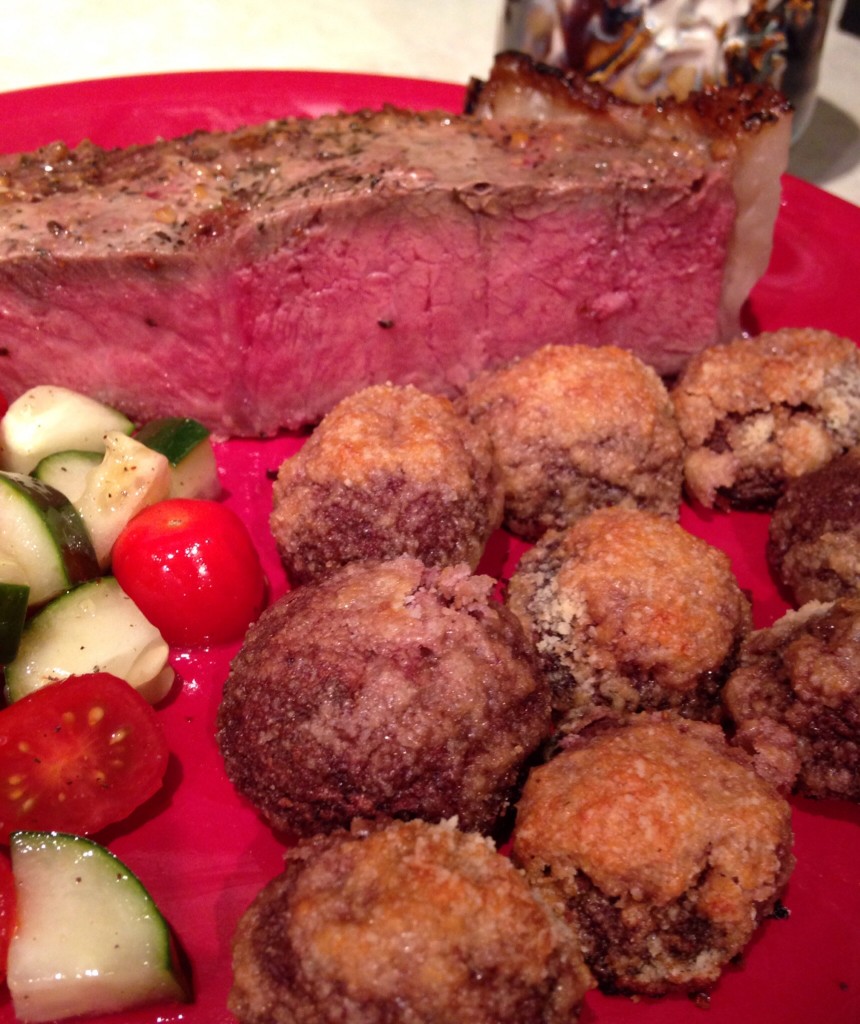
I will start by saying this recipe was not made with Little B in mind, except that I did not expect her to eat any of it. After happily snacking on mushrooms as a toddler she summarily spurned them during the 4th and 5th years of her life. That does not deter me from putting them in meals. She has often eaten them, unbeknownst to her. Sure, they are sometimes chunky, making it possible for her to remove them and make a point of expressing her distaste for them on the edge of her plate. Other times there is not way to differentiate them from pieces of meat or other veggies and they are happily consumed. When I have made stuffed mushrooms she eats the stuffing but not the cap (but there is mushroom in the stuffing Bwahahahaha!). I hope someday she changes her mind, again, about the shrooms, but for now I am just glad she has an interest in new foods and ones that are healthy for her. There is no mistaking the mushroom-ness of this side dish. It went well with some ribeye steaks Big D smoked up for a very satisfying dinner.

Baked Mushrooms

12-18 mini portabello or white mushrooms
1/2 cup dry red wine
1/4 cup lemon juice
2 tsp garlic powder
1 1/2 tsp sea salt
1 Tbsp dehydrated chopped onion
1 cup finely grated parmesean cheese
1/2 cup almond flour

Trim mushroom stems until they are flush with the bottom of the cap. In a shallow dish or resealable bag add the marinade ingredients – wine, lemon juice, 1 tsp garlic powder, 1 tsp sea salt and onion. Stir until salt dissolves. Add mushrooms and toss in marinade until they are all coated. Leave mushrooms to marinate at room temperature for about two hours. Preheat oven to 400 degrees. Remove mushrooms from marinate and pat dry with towels. In a medium bowl combine parmesean cheese, almond flour, 1 tsp garlic powder and 1/2 tsp sea salt. Stir dry mixture until combined. One at a time coat each mushroom with the dry mixture – it should stick well to the wet mushrooms. Place each mushroom stem side down on a shallow baking sheet, evenly spaced. Bake for 20-25 minutes, until mushrooms shrink a bit and coating begins to brown. Remove from oven and let sit for about five minutes before serving.

Rebellious Ratattouille

image

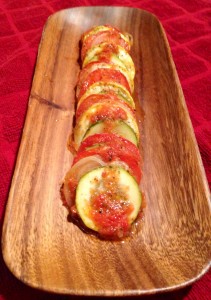
I think this is ratatouille but some people may find it lacking. What I love about it is the combination of flavors I get from the alternating, thinly sliced vegetables in a single bite. I like bell peppers in general, which are usually included in this dish, but I don’t like the taste and texture they add to the other veggies used here, so I left them out. Look at me being a ratattouille rebel. A neat thing about this recipe is it can be doubled and tripled easily by adding more sliced vegetables and a larger pan. It also makes for a lovely presentation in a serving dish or on your plate.
Rebellious Ratattouille
1 medium zucchini
1 medium yellow squash
1 medium onion
3 large Roma tomatoes
1 14.5 ounce can diced tomatoes
2 cloves garlic, crushed
1 Tbsp dried oregano leaves
1 Tbsp dried parsley leaves
1/2 tsp sea salt
1/4 tsp ground black pepper
In a medium pot over medium heat add the canned tomatoes, garlic, oregano, parsley, salt and pepper. Simmer for about ten minutes, until heated through and bubbly. Remove from heat to let cool. Preheat oven to 375 degrees. While sauce simmers prepare the vegetables by slicing them thinly, less than 1/8 inch thick. Sprinkle slices with salt and pepper. Removing seeds from tomatoes is optional. Using a stand or stick blender purée the tomatoes ito a smooth sauce. In a loaf pan pour a thin layer of tomato sauce (you will probably have leftover sauce). Alternate the slices of zucchini, yellow squash, tomatoes and onion, placing them in two long rows in the pan. Bake for 30 minutes, cover pan with foil and bake for an additional 15 minutes. Remove from oven and let sit for 5 minutes before serving.

Mediterranean Meatloaf

mediterranean meatloaf 2
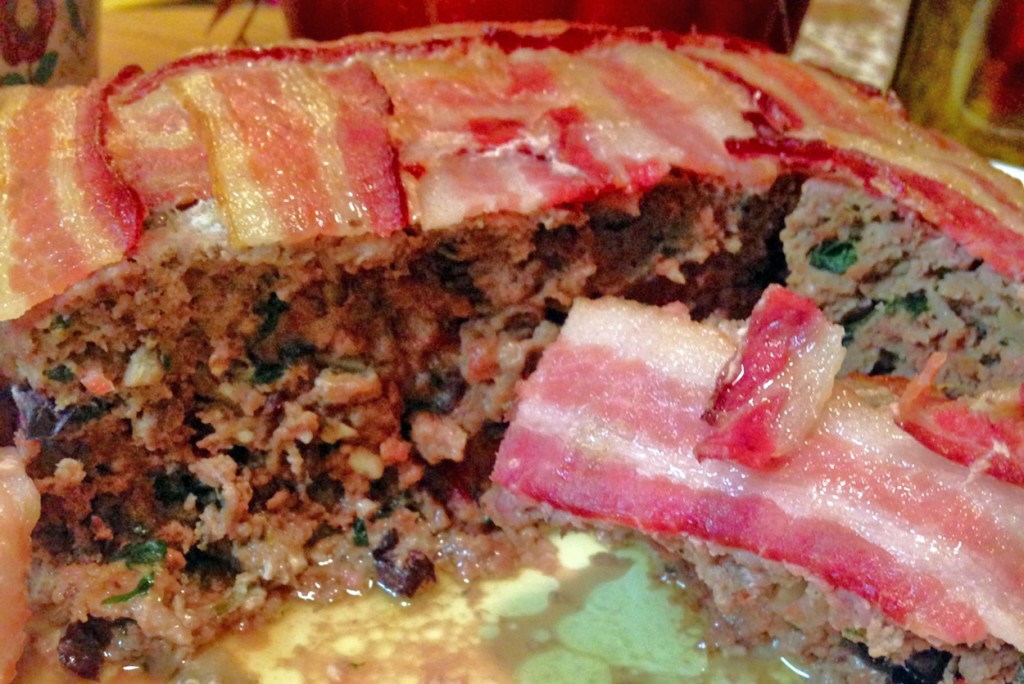
I have shared a couple different meatloaf recipes with you in the past, like the spicy one and the veggie one, but never one wrapped in bacon! This one has a bit of a Greek twist, like my recent foray into stuffed mushrooms. I would blame other things, but the extreme moistness of this loaf I attribute to the bacon. It is great for the loaf protection. As with many baked meals, it tastes great the day it is made, but after sitting in the fridge and reheating, it is even better! I may even get all crazy next time I make this and serve a little tzatziki on the side!
Mediterranean Meatloaf
1 1/2 – 2 pounds ground beef
2 eggs
2 cups crumbled feta cheese
1 cup chopped raw spinach
1 cup chopped kalamata olives
1 cup chopped marinated artichoke hearts
1 cup finely chopped onion
4 cloves garlic, crushed
1/4 cup chopped fresh mint
1/4 cup fresh oregano leaves
1/2 cup chopped fresh parsley
1 Tbsp sea salt
1 tsp ground black pepper
8-10 slices bacon, uncooked
Preheat oven to 350 degrees. In a large bowl place the ground beef, making a lower section in the beef. Add the eggs, cheese, spinach, olives, artichoke hearts, onion, garlic, herbs, salt and pepper. Using your hands, break up egg yolks and squish other bowl contents together with meat until well combined. Press meat mixture evenly into 9×9 inch baking dish or large loaf pan. Arrange bacon slices on top of the meat in a criss cross pattern, tucking the ends around the sides of the meat. Gently press down on the loaf to avoid any uneven shaping resulting from tucking the bacon. Bake in oven for one hour. Remove and let sit for about ten minutes before removing to serving dish, then serve.

Kelley’s Killer Stuffed Mushrooms

image
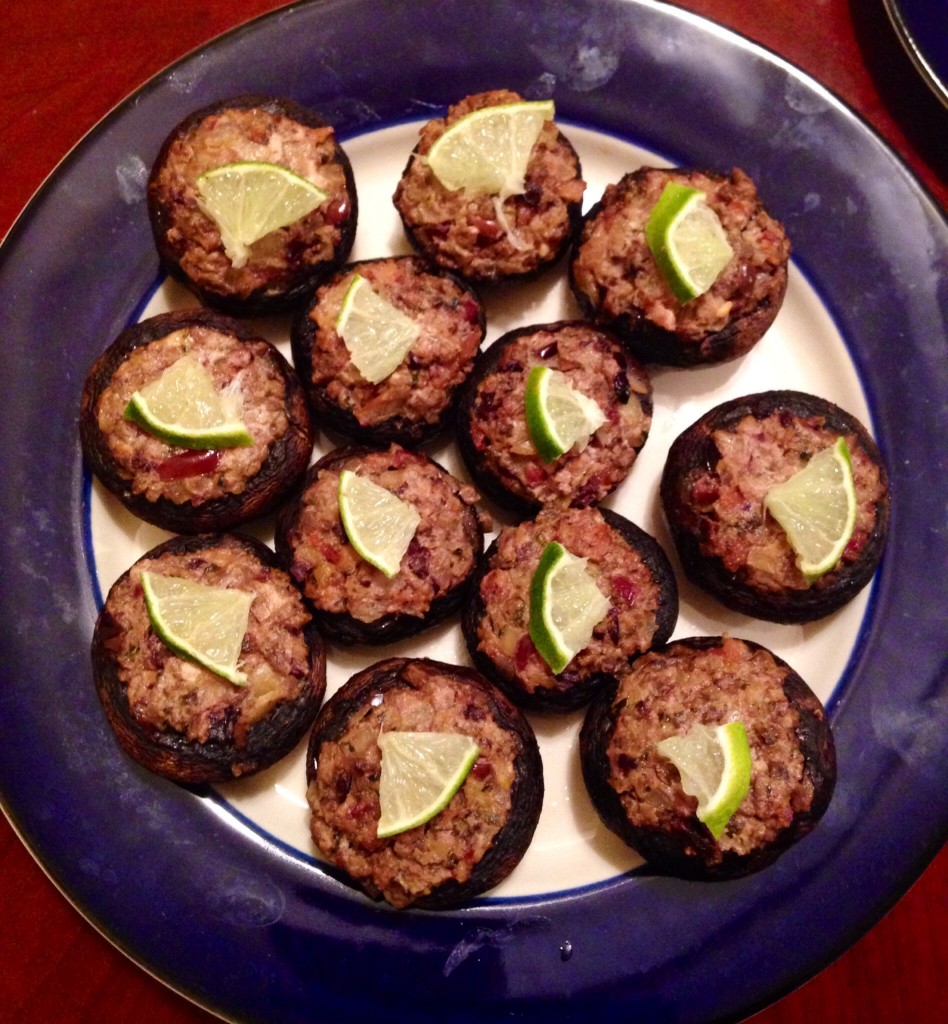
Have you ever felt like you are being watched? I did just the other day. I was sitting on my mom’s patio and suddenly felt like I was being observed, with the strong need to figure out what was doing it. No people. No pets. A few birds were out there, but they were busy with the feeders. In the end I decided it was the basil. Tall, healthy stalks rising out of a huge pot, with big, bright green leaves soaking up the morning sun. They were leaning slightly in my direction, so the little leaves at the very tips of the stalks worked like cyclop eyes…I decided the only way to rid myself of the paranoia was to use some basil. It wants me to, right? A functional plant that just happens to be pretty, too? I was sure mom’s well stocked fridge would reveal a wealth of ingredients to go with the stalking stalks. As you can see from the list of ingredients I was right. I called them Kelley’s Stuffed Mushrooms because Kelley likes all things Greek, and these have a leaning in the Greek direction, and they would be consumed at her house. Besides all that, she is one of the most awesome people on the planet. This is not my first Greek themed dish, but it is the first time I remember splitting kitchens when making a dish – prepared in one kitchen and cooked in another. These lovely ‘shrooms went stuffed but uncooked with us to a dinner party, and were baked in S&K’s kitchen right before serving. I do think transporting the broth separate from the dish was a good idea, though. Adding the little lime wedges helped add a bit of color, and squeezing a bit on right before enjoying them brought out the lovely flavors of the cheese and olives.
Kelley’s Killer Stuffed Mushrooms

12 baby Portabello mushrooms
2 garlic cloves, finely diced
1/4 medium white onion, finely diced
12 kalamata olives, pitted and finely chopped
3 slices of bacon, cooked crisp and crumbled
4 quarters marinated artichoke hearts, finely chopped
1 cup crumbled feta cheese
8-10 fresh basil leaves, chopped
1/2 tsp ground oregano
1/2 lime, juiced
2 Tbsp extra virgin olive oil
1/2 cup chicken broth
Salt to taste
Lime, thinly cut into small slices (garnish)
Remove stems from mushrooms. With a small spoon scrape out brown gills from each mushroom cap, making more room for the stuffing. Finely chop the stems and scrapings. In a large skillet over medium high heat add the oil. When oil is hot add onion and garlic. Cook until soft. Before onions and garlic begins to brown add the chopped stems, olives, bacon, artichoke hearts, basil and oregano. Stir occasionally until stems are soft and combined with the other ingredients. Add feta to the pan and stir until it is melted and combined. Remove pan from heat, add juice from the half lime and stir. Preheat oven to 375 degrees. Divide stuffing among the mushroom caps, placing them, spaced evenly, in a 9×12 inch baking dish. Slowly pour the broth in the pan, making a shallow pool under the caps. Place pan in oven and bake for 30 minutes, until mushrooms sweat and shrink. Remove from oven and let sit for about five minutes. Garnish with small lime slices and serve.

German Potato Salad

20141108-103935.jpg

I am a bit evil on this one. The good thing is, I can blame Little B. We were doing a multi-day lesson with her about Germany, leading up to local Wurstfest celebrations. Believe me, she was absolutely adorable in her uncle’s old lederhosen! As always, if there is a slim chance that food can be included in a learning experience I will find it. There was cabbage at bratwurst and apples flying all over the kitchen. For this salad I was sorely tempted to find a substitute for the starchy new potatoes, but in the end went with the real thing. My big excuse was that I was trying to make as authentic a German dinner as I could, with guests coming over for it to boot. I had already tweaked a dessert to be less than authentic, and got store bought saurkraut, so I caved and went pure with the salad. This by no means prevents me from making a less starchy, lower carb version in the future, but I can definitely say that I know how to make an absolutely delicious German potato salad now! I really don’t see why turnips or parsnips (and maybe a little cauliflour) can’t be substituted for the taters. If you try a version of this recipe with them let me know how it goes! Back to behaving now…

German Potato Salad

2 pounds small new potatoes
4 quarts water
1 Tbsp sea salt
8 thick cut slices of bacon
1 medium white onion, roughly chopped
1/2 cup chicken stock
1/3 cup apple cider vinegar
1/4 cup chopped fresh chives
Salt to taste

Place the water and salt in a large stock pot. Add potatoes. Bring water to a boil and continue cooking for about twenty minutes, until potatoes are tender. Drain water and set aside potatoes to cool. While potatoes boil prepare the bacon. In a large skillet over medium high heat cook the bacon until crisp. Remove the bacon and crumble, then set it aside, retaining the bacon grease in the pan. Lower heat under the grease to medium and add onions. Cook onions until soft. While onions cook slice the potatoes into halves or quarters so they are bite-sized. Return crumbled bacon to the pan with onions, along with the stock and vinegar. Continue cooking until mixture is hot. Add potatoes to onion mixture, tossing gently until they are coated and hot. Sprinkle with salt if needed to enhance flavors. Add chives and toss again. Serve immediately or reheat to serve warm.

Adapted from http://www.foodnetwork.com/recipes/anne-burrell/german-potato-salad-recipe.html#!

Tomato Soup

tomato soup

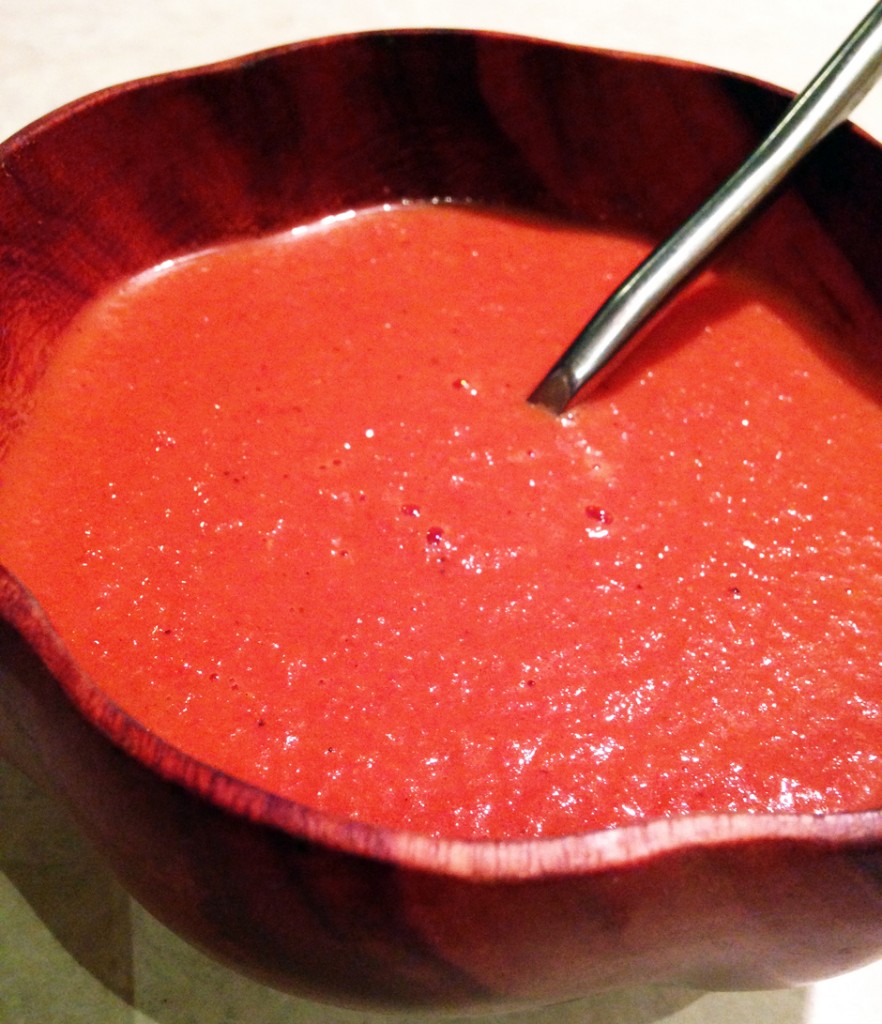
In the past I have talked about gazpacho and tomato artichoke soup, but this one is smoother and just as simple. There is a Little B story behind it. Kid menus in restaurants are horrible, for the most part. Hey kids! Have some wheat bread, some wheat pasta, some breaded stuff and some candy! Oh joy. Just what I want my daughter to consume and ping from for hours. True, there are some places that have good options (some steak houses actually have kid steaks – go figure!). We usually end up ordering vegetable sides or soups for Little B when we eat out. That, or share food we order jointly to share. No problem really, and agreeing on a dish with Little B always comes with negotiations. All of these possibilities work, and heavy reliance on servers who can actually take orders. One of Little B’s favorite restaurant soups is tomato. There are a few places in town that offer it regularly, so she often seeks it out. When we cannot find it we figure something out at the restaurant, then when she still yearns for it, I will whip up a batch of tomato soup at home. I often vary it a bit, depending what is in the fridge, but this is the basic tasty recipe, including bunches of veggies and some cream for fat. She slurps it up and always gives me a big thank you smile. The greatest thing ever.

Tomato Soup

3 14.5 ounce cans diced tomatoes
1/4 cup red wine
2 cloves garlic, crushed
1/4 cup chopped onion
1 stalk celery, chopped
1/2 tsp sea salt
Dash ground black pepper
1/4 tsp turmeric
1/4 cup heavy whipping cream

In medium pot over medium-high heat add all ingredients except cream. Cover and cook until bubbly. Stir, reduce heat to low and cover. Simmer for 30 minutes, until onions and celery are soft. Turn off heat and let cool for about ten minutes. Add cream and stir. Using a stick blender puree the soup until smooth. Alternately, put soup in a blender and puree until smooth. Serve immediately, or reheat but do not boil.


Fire Pit Vegetables

fire pit cooking

fire pit carrotsfire pit zucchini

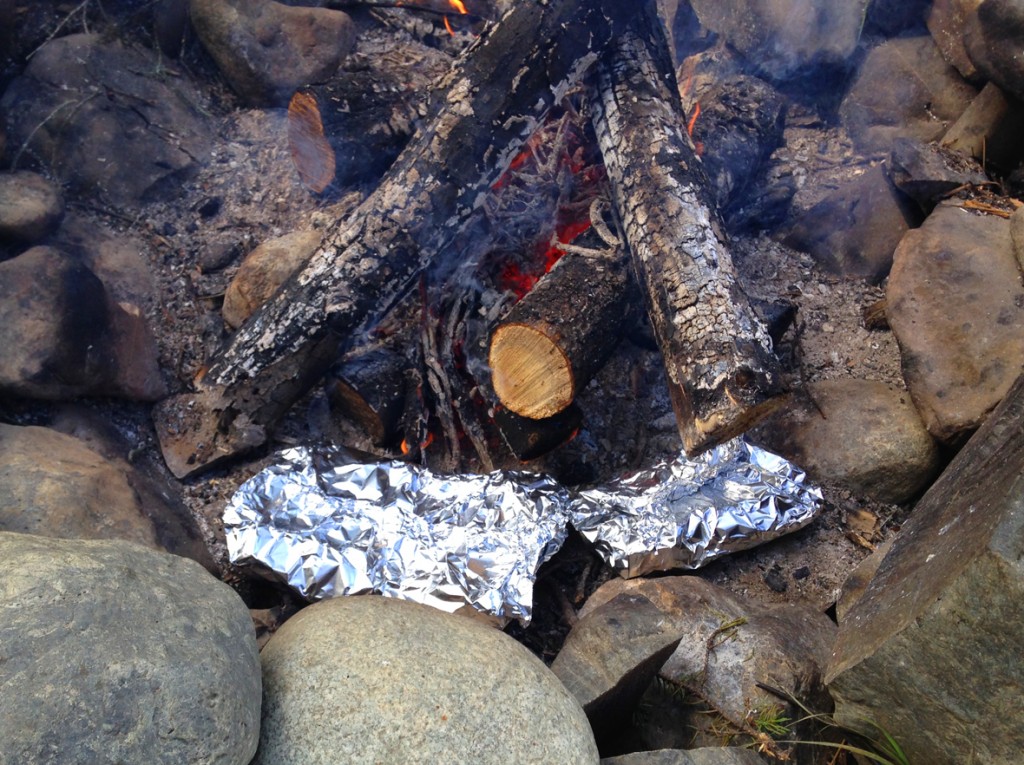
Sometimes when we cook over fire pits we are lazy – impaling sausages and hot dogs on sharpened stick and holding them over the flames until they sizzle. It is pleasant, relaxing, and an easy prep – open sausage package, remove sausages, impale. Other times we get a bit more elaborate. Pretty much any meat can be cooked over a pit fire. Same for vegetables, but some veggies are more cooperative than others. I would not try this with greens or other stuff that shrinks substantially, but most vegetables cook up great, anywhere from root vegetables to asparagus and squash. I have also done corn, tomatoes and cabbage. Little B is usually on the side of sausage impaling, because she can be more involved – we are not yet ready to have her reaching in and fiddling with foil packets an inch from hot coals, or leaning over the fire itself to manipulate stuff on a grill grate. Her turn will come in time, but now is not the time. I typically start baking the vegetables an hour or more in advance of cooking meats, so they are ready to serve on time and out of the way. We are sitting around the fire long before eating anyway, so why not let the fire do some work for us? Also, it does not hurt to let the cooked vegetables rest and allow flavors to settle together. Seasoning is simple, because the wood smoke adds an element that does not need much help.

Fire Pit Vegetables

2 cups mini carrots, 2 – 4 turnips or 3 – 4 zucchini/yellow squash
1/4 cup butter
Fresh yarrow or parsley
Salt to taste
Aluminum foil

Tear aluminum foil into sheets, ensuring they are of a length that will wrap around the vegetables – ideally not to exceed 8×8 inch pouches. Some larger vegetables can be individually or group wrapped, like turnips and corn on the cob. Prepare vegetables in bite-sized pieces, or halved/quartered in equal sized pieces. Place vegetables in the middle of foil sheets in a single layer. Spread butter on vegetables, sprinkle them with salt and place yarrow or parsley on top of the pieces. Wrap foil around vegetables, making sure it wraps around twice and roll the foil at seams to prevent leaking. Follow one of these methods: 1) Place packets around the edges of a pit fire. Rotate pouches every 15-20 minutes, changing the side closest to the heat. After 40 – 60 minutes cooking time remove from pit, open pouches and check for doneness. Return to heat if not done. 2) Place pouches on grill grate suspended above fire, flip packets upside down after about 20 minutes, to help even cooking. Check doneness after about 45 minutes, depending on fire size and heat. When cooked to desired doneness, reseal and set aside until time to serve.


Creamy Baked Asparagus

cremy asparagus

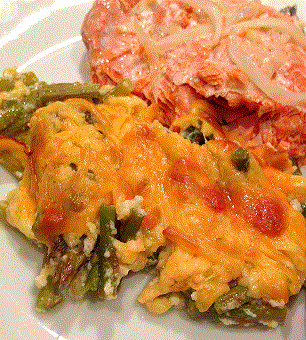
The other day Big D brought home some slim, tender asparagus. They looked wonderful, but were not the best candidates for making our favorite bacon wrapped version. I grabbed some of our pantry staples and created this easy side dish. It ended up very rich, and almost overpowered the smokes salmon we served it with. Not quite, but I will seriously consider serving it with roast pork or beef next time. This would probably work just as well with green beans. Let’s see if Big D comes home with some soon…

Creamy Baked Asparagus

1 bunch slender asparagus
1/2 cup heavy whipping cream
1 egg
1 tsp garlic powder
1/2 tsp onion powder
1 tsp sea salt
1 cup cheddar cheese, grated

Preheat oven to 375 degrees. Chop rough ends off of asparagus spears. Chop the asparagus into 1/2 inch pieces, leaving the tip pieces a little bit longer – makes about three cups of chopped pieces. In a small bowl whisk the egg. Add the cream, garlic powder, onion powder and salt. Whisk until egg is fully incorporated. Place asparagus in 9×11 or 9×9 baking dish. Pour cream mixture over the top and stir slightly to make sure all pieces are coated. Sprinkle cheese on top. Bake uncovered for 30-35 minutes, until cheese is gold and bubbly. Remove from oven and let sit for about ten minutes, until cream mixture is set.


Mushroom Onion Saute

mushroom onion sautee

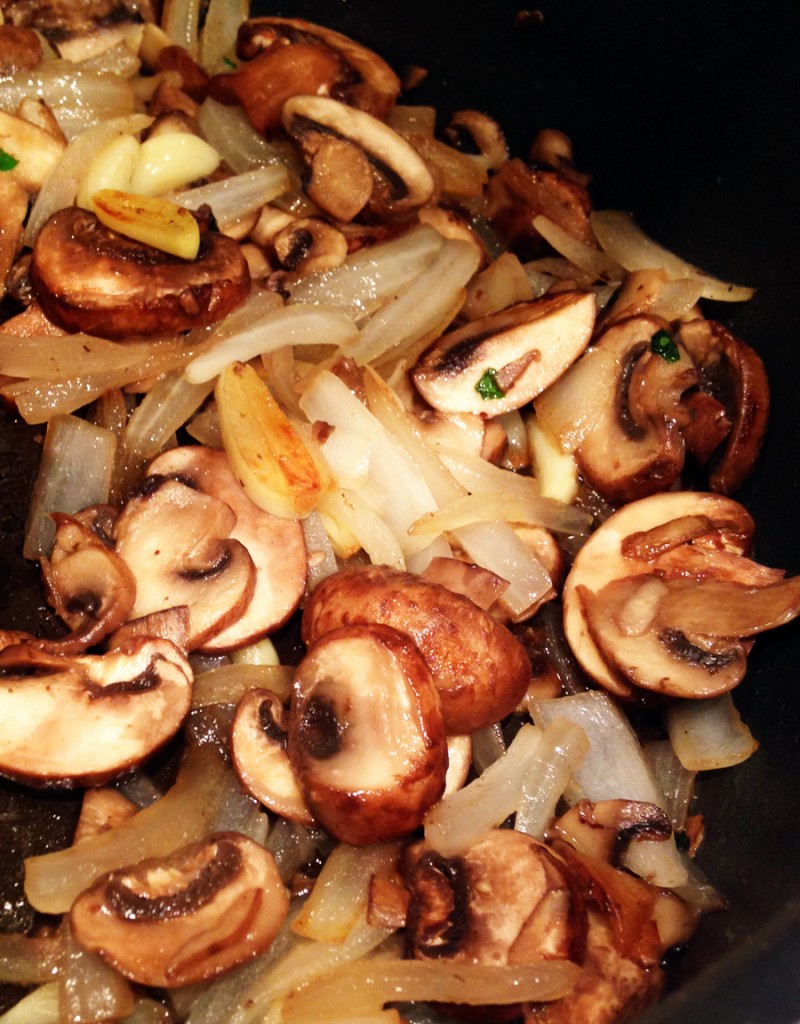
I have spoken before about the delicate balance of having side dishes hot and ready when gorgeous meats are pulled off the grill. The grilled meat is best served warm, so everything needs to be ready and waiting! Here is a quick side dish that works with grilled stuff, and frankly, anything that is baking in the oven and needs something on the side. I sometimes forget that sharing main dishes can overshadow the often quick and easy sides, which are not to be discounted or forgotten. I remember when I first began to cook on my own I always though complicated was better tasting, and I was sooooo wrong! Simple is better, but complicated is fun! Try this. Can’t go wrong.

Mushroom Onion Saute

2 Tbsp butter
4 cups mini portobello
1 medium white onion
4 garlic cloves
1/4 cup fresh parsley, finely chopped
Sea salt taste

In medium frying pan over medium high heat add butter. When butter is melted add onion and garlic. Toss until coated with butter and let cook until they release water (sweat). Add mushrooms and parsley. Toss until well mixed and coated. Continue cooking until mushrooms soften and onions begin to brown. Season with salt and cook three more minutes until salt is able to saturate vegetables. Remove from heat and cover until ready to serve. When served with or on top of grilled meats these vegetables soak up meat juices and complement them well.

Post Navigation