Any Kitchen Will Do

Give me a kitchen and I will cook.

Archive for the category “vegetables”

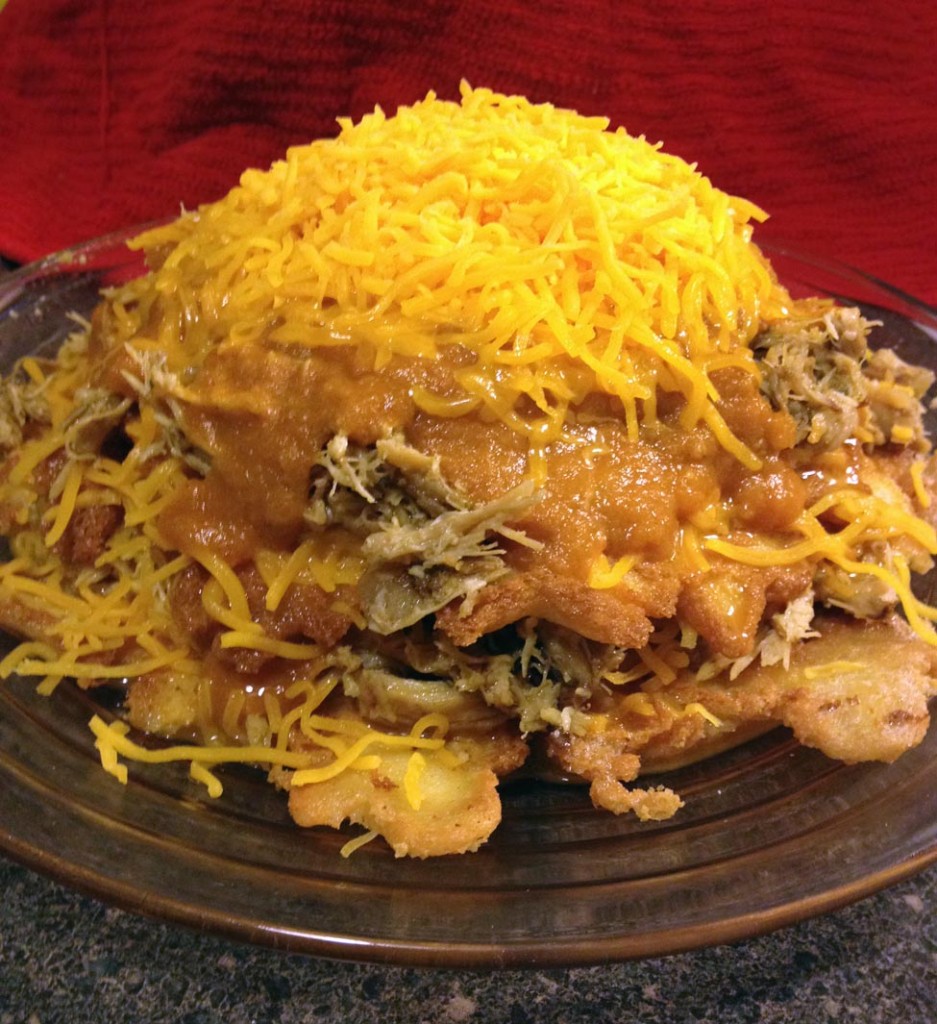
Low Carb Layered Enchiladas

lc layered chicken enchiladas

As I have stated many times before, we are hard pressed to find good Tex-Mex food north of Austin. Actually, north of the south of Austin. Enchiladas are a dish where I find it very important to have perfect bites. If you just get tortilla and sauce, it is just off. A bite full of only filling and there is something lacking. I need filling AND tortilla AND sauce AND cheese in every bite. Otherwise, it is just a pile of stuff on a plate. A good Tex-Mex combination platter has the enchiladas perfectly rolled with just enough sauce, sandwiched between refried beans and rice. A chance of leftovers is not favorable to a combination platter. It is nearly impossible to transfer the enchiladas in a way that allows the perfect bites to be experienced in leftovers. The easy way to ensure many perfect bites when I anticipate leftovers or reheating is to approach them in layers.  One of the comfort foods from my childhood was layered enchiladas. Rolled enchiladas are good, but when you want to reheat them after playing in a late high school soccer game, the layered version has been sitting in the fridge after mom made them earlier, or even a day or two earlier. Trust me, they are much better later than the first day. Now, to make my mom’s masterpiece low carb seemed overwhelming. My approach to layered enchiladas came out so very much better than I expected! Not only was it good hot, but the leftovers were good cold, too! The texture of the coconut flatbread gave a similar effect as corn tortillas and soaked up the sauce just right, just like mom’s. I am experimenting with low carb tortillas, most recently with coconut flatbread versions. I used them for this recipe, so serving these layered enchiladas was done right before serving, as opposed to layering a casserole then baking it. I am now convinced a baked version would work, but this recipe is a quicker version without a long baking period. I hope you enjoy it, for it is filling, satisfying and has a bit of a bite that remind me of mom.

Low Carb Layered Enchiladas

1 Tbsp extra virgin olive oil
11/2 small yellow onion, finely diced
15-ounce can tomato sauce
1 to 2 4-ounce cans green chiles
1 Tbsp paprika
1 tsp ground cumin
1/4 to 1/2 cup water or chicken broth
4 – 6 cups cooked, shredded chicken (pre-cooked in a crock pot or strip a roasted chicken from the grocery store)
1 to 2 batches coconut flatbread or corn tortillas
2 – 4 cups shredded cheddar cheese
1/2 cup sour cream (optional)

In a medium sauce pan over medium high heat add oil. When oil is hot add the onion and cook until translucent. Add tomato sauce, green chiles, paprika and cumin. Stir until combined and lower temperature to simmer. Cover and cook for about twenty minutes. Add water or chicken broth to thin out to the consistency of thin gravy. Let simmer for about ten more minutes, then set aside until time to serve. While the sauce simmers make the coconut flatbread, or rely on your personal preference of corn tortillas. When you are ready to serve make sure the flatbread is made and the chicken is hot. Start layering on serving plates with flatbread/tortillas. Next pour some sauce, followed by cheese and chicken. Repeat layers again, topping with more cheese. Serve immediately with sour cream.
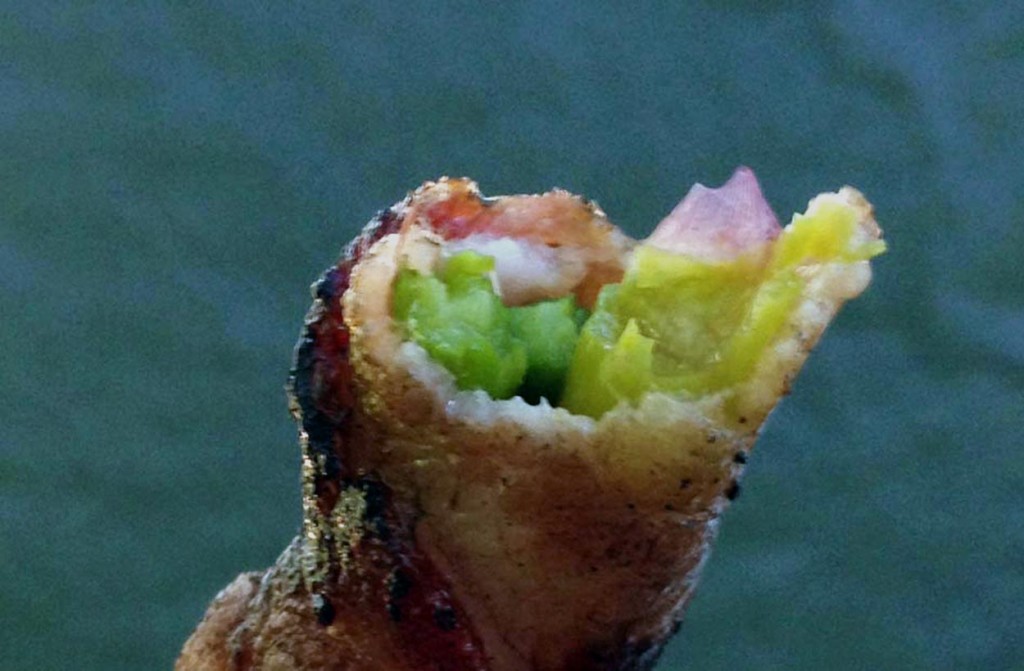
Bacon Wrapped Asparagus

bacon asparagus final

These were fun! Not only were they easy to make, mostly by Little B, but no complication, even minor, of adding seasoning or flavors. Yes, I know. That is the magic of bacon! I was tempted to marinate the asparagus first, but decided to try simpler, and it worked wonderfully. We sat on the porch and rolled them while Big D set up the fire in the grill. Is it gas or charcoal, you ask? I won’t tell Big D yo said that. Of course it is charcoal. Although level and length of heat may vary compared to gas, there is no comparison when it comes to the flavors transferred to food from the charcoal fire. For the pictured batch of asparagus we (more precisely he) grilled it. They were a little dark, because of the high fire heat, but it gave the dish a wonderful crispiness and the asparagus was bright green and just tender enough. Although easy to serve as a side dish daintily cut up alongside a steak, we scarfed them down with our fingers, which made them more of an appetizer. In the future I plan on cooking them up in a pan on the stove or in the oven. I will update you on how it goes. For now, we have a quick side dish for an all-grilled meal. The accompanying steaks were to die for, by the way…

Bacon Wrapped Asparagus

1 pound asparagus spears, tough ends removed
1 pound sliced bacon, room temperature

Combine asparagus spears in multiple bundles so each one does not exceed 1/2 inch diameter (could be one to three spears). Wrap a strip of bacon around each bundle at a diagonal, so most of the asparagus is covered. Cooking approaches: 1) grill bundles over medium to high heat until bacon is crisp. Remove and let cool until warm enough to eat, or 2) heat the broiler to medium and place on broiling pan. When top side is crisp (three to five minutes) turn over to crisp on underside. Remove from broiler and let cool, or 3) heat large skillet to medium high heat. Place rolls in the pan and cook until bacon is crisp, like you would for breakfast. Remove from pan and let cool before serving.

Cabbage Saute

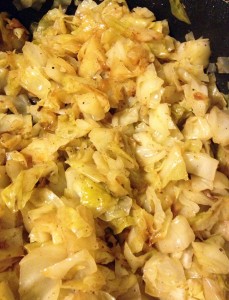
sauteed cabbageI noticed that my entries are absent of side dishes. Lately I have been cooking some staples for meals, because it is a hectic time of year for us. Stuff that I posted already, likebaked spaghetti squash, taco meat or a fritatta. I have cooking and baking ideas, but a lack of time to implement. I am sure I am not the only one out there that has more project ideas than time to do them. You should see my Pinterest boards! So many things to do, so little time. This is a simple side dish that is easy, high in fiber, filling and my family loves it. Great as a base for many a dish as a substitute for rice, pasta or other grains. Don’t forget the nutmeg – it sounds odd, but works so very well with the cabbage.

Cabbage Saute

3 Tbsp olive oil, butter or bacon grease
1 small head green cabbage
1 tsp ground nutmeg
Salt and pepper

In large saute pan heat olive oil over medium high heat. Chop cabbage in 1/2-inch to 1-inch pieces. Toss cabbage in pan and stir to coat in oil. Sprinkle with salt, pepper and nutmeg. Continue cooking and stirring until about half of the cabbage begins to brown. Turn down heat by half and cover. Cook for another ten minutes or so, until all the larger chunks are softened. Keep covered until ready to serve, then do so immediately while it is hot. If preparing it in advance and chilled, it is easy to toss it in a hot saute pan and serve hot.

Portabello Pizza

portabello pizzaThe first time I ever cooked with portabello mushrooms was about 15 years ago. At the time I was making a lot of pizzas closely following my discovery of pizza stones. They make the crust crispy all around and are  great for even cooking. I got into the habit of topping each pizza with two to three veggies and a meat. On some occasions my dinner guests were vegetarians, so minus the meat, but what to add to make the pizza hearty? I explored the produce section of the grocery store and came upon the portabellos – huge caps sitting over a sign that described them as meaty. Well, why not? If they don’t eat meat, why not serve them meaty mushrooms? The pizza with portabellos turned out great, and marinating the mushrooms added an extra layer of flavor. Since my last pizza stone broke and I started leaning toward low carb, I never replaced it. One recent tendency has been to make pizzas with low carb crust, and another is to reach back into my pizza past and snatch up the portabellos. This time I used them as the crust. They are quick and of course Little B can help with every step. Using tomato paste adds a spike of tomato flavor without adding much liquid. The one flaw, but not really, in this recipe is the wetness of the mushrooms. I will continue to explore how to dry out the mushrooms, because they soaked up a bit of liquid and the result is not what I would call hand pizza, but it tasted great. Grab a fork and knife for this flavorful rounds and dig in!

Portabello Pizza

4 large Portabello mushrooms, stems removed
1 Tbsp lime juice
1 small can Italian herb tomato paste (or plain past mixed with 1 Tbsp Italian herbs)
2 tsp dried oregano leaves
2 tsp dried parsley leaves
2 tsp dried basil leaves
2 tsp garlic powder
8 ounces pepperoni, sliced thick
2 cups grated mozzarella cheese
½ cup Parmesan cheese
Salt and pepper to taste

Preheat oven to 350F. Place caps stem side up on baking sheet, then sprinkle with lime juice, salt and pepper. Spread tomato paste on mushrooms, followed by a layer of basil, oregano, parsley and basil leaves, along with garlic powder. Place a layer of pepperoni slices and top with mozzarella and Parmesan cheeses. Bake for 20-25 minutes, until mushrooms are tender and cheese is melted and browning.

Non Vodka Chicken

non vodka chicken

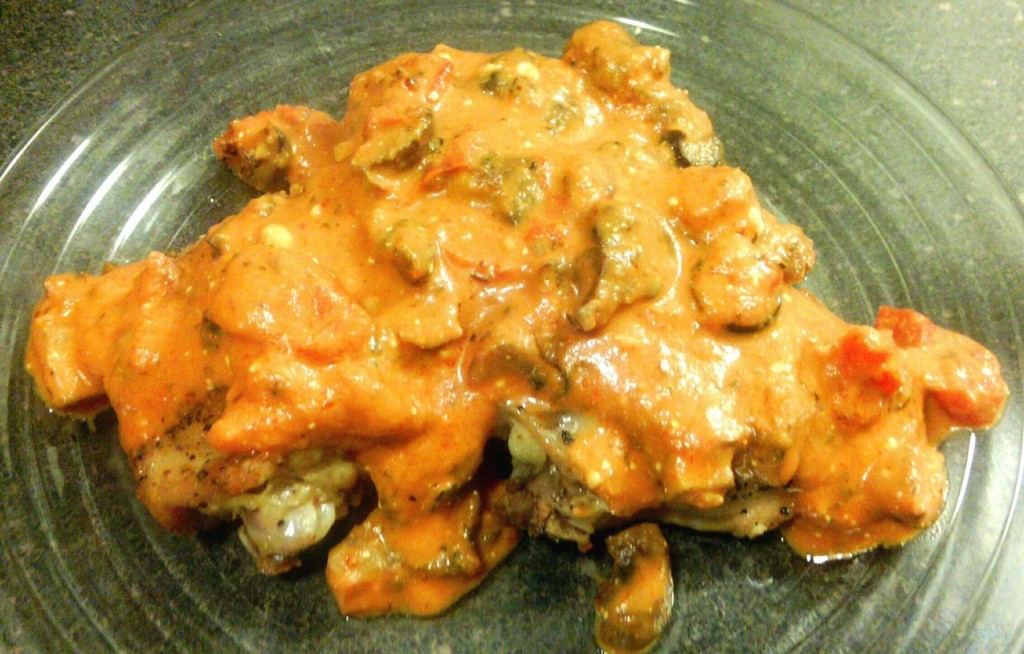
I have been absent for a bit, and so has chicken from my blog. I am always trying to find variety, because chicken is always chicken, and absence makes the heart grow fonder, right? Busy work and busy weekends made for a quiet kitchen lately, and the repeating of old, reliable recipes. Also, Big D has been on a culinary swing while I go about other things. Work is busy, and spending a bunch of time outside in the heat makes me groggy, so hanging out reading books to Little B is much more appealing than a hot oven or stove. This recipe I almost called pizza chicken, because when Big D first took a bite he said it reminded him of pizza. Did the same for me! I was inspired by my hankering to inhale a bowl full of pasta with vodka sauce. The thing about vodka sauce is not necessarily the vodka, but what it does to the flavor of the tomatoes. The vodka, when used, actually soaks into the tomatoes and enhances their flavor with a tart tanginess. The alcohol itself evaporates. If you have had the sauce before you know what I mean. If not, then imagine a mild bloody mary – a skidge of pepper and hot sauce – not to ferocious, but an extra bite beyond plain tomato. I decided to try to find the same flavor as the vodka sauce, but without the vodka. What else could I do with a hankering for vodka sauce while experiencing an absence of vodka? It was my own fault. I used the last of it from our stash to make a Greyhound (vodka and grapefruit juice with a twist). A little bit of this, a little bit of that resulted in the sauce taste I was looking for to go on top of chicken, and then I made it chunky, a la pizza. Yum!

Non Vodka Chicken

1 Tbsp butter
8 ounces mushrooms, roughly chopped
1/2 tsp sea salt
1/4 onion, finely diced
4 ounces chopped black olives
3 cloves garlic, minced
1 – 14.5 ounce can fire roasted diced tomatoes
1 – 15 ounce can tomato sauce
1 Tbsp dried parsley leaves
2 tsp dried oregano leaves
6 – 8 chicken thighs, skin trimmed, but some left on meat
4 ounces cream cheese
2 – 3 tsp Crystal hot sauce

In medium sauce pan over medium high heat melt butter. Add mushrooms, salt, olives and garlic. Saute for about five minutes until mushrooms and garlic soften and butter browns a bit. Add tomatoes and tomato sauce, parsley and oregano. Stir and lower heat. Let simmer for about 15 minutes. While sauce simmers place chicken thighs in frying pan over medium high heat, skin side down. When skin is crispy flip thighs, turn down heat to medium and cover. While chicken cooks finish the sauce. Add cream cheese to the sauce and stir occasionally until cheese is melted and sauce is smooth (except for vegetable chunks, of course). Sprinkle one to two teaspoons hot sauce and stir. Taste to confirm there is a tang in the sauce, but not necessarily a bite. If no tang, then add more hot sauce. Simmer for about 15 more minutes. When chicken is cooked through and juices run clear, remove from heat and let rest. Remove chicken from pan and place on serving dish. Pour sauce over chicken and serve immediately.

Chef Salad

chef salad

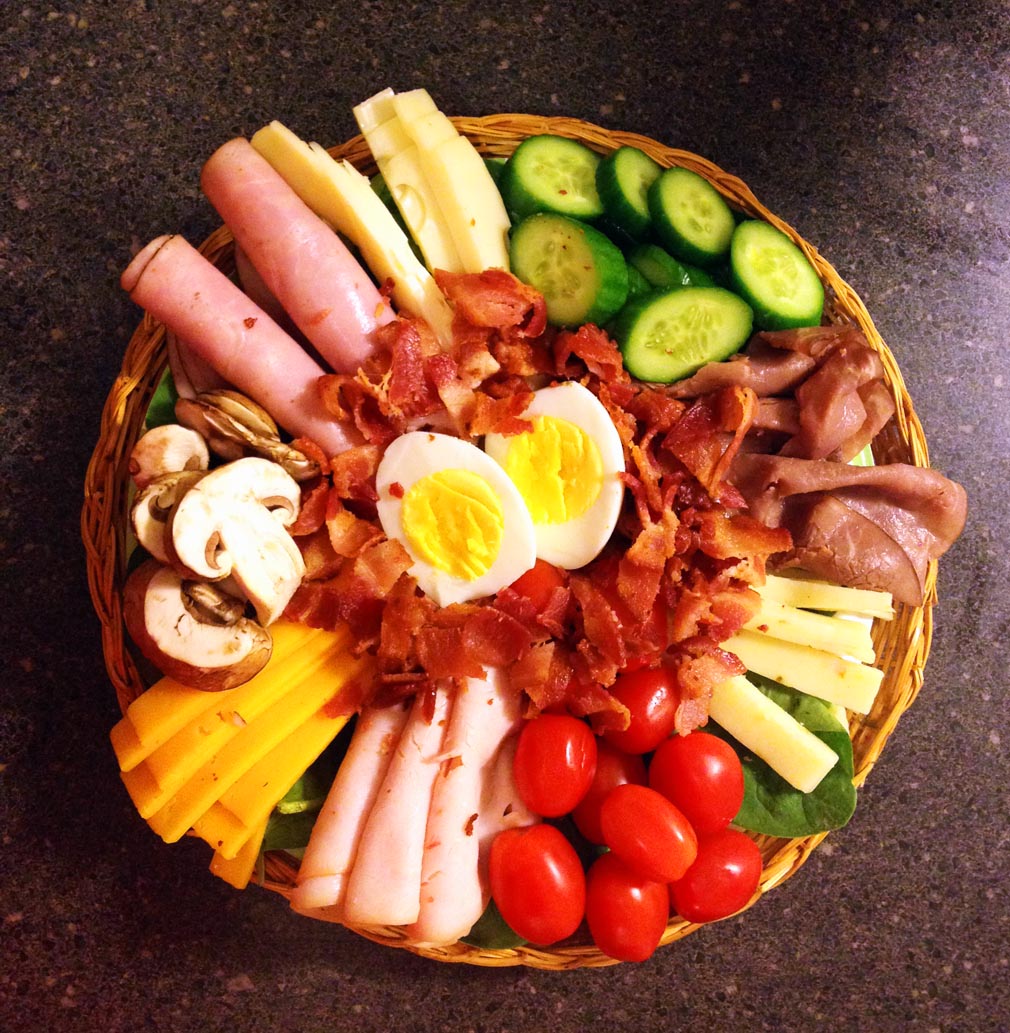
I am avoiding a serious subject. A hot oven. I try to avoid it as much as possible in the Takoma Kitchen.  For one, it is an electric oven, which heats up very differently than gas, and regardless of electric or gas, it also makes our little place pretty warm. Here is one of the concoctions I do that does not take much stove or oven heat. The original chef salad is very American, originating in Pennsylvania or New York, depending on which claims you believe, first created in the 1930s or ’40s. Throw a few types of meat and cheese on a plate with a boiled egg and dressing and there you have it, a salad with a bunch of stuff on it so you don’t have to make a bunch of choices. I like the approach on a hot summer evening, and the reduced exposure to even more heat is a plus. Technically, the bacon and eggs require heat to prepare, but they are often left over and already in the fridge. That, or I send a heads up message to Big D and he takes a break from work and cooks up a pan of rashers while boiling some eggs ‘the way grandma did them’, with the shells practically falling off in the pan. Dinner can be custom made on each plate and put together pretty quickly – Little B gets eggs, bacon, cucumber and tomato, while Big D gets an extra pile of meat with ranch dressing, and I get a little bit of everything, especially the pepper jack cheese.

Chef Salad

6 ounces thin cut roast beef
6 ounces thin cut roast turkey
6 ounces thin cut virginia baked ham
4 ounces sliced swiss cheese
4 ounces sliced medium cheddar cheese
4 ounces sliced pepper jack cheese
8 ounces grape tomatoes
2 ounces baby portabello mushrooms, sliced
2 mini cucumbers, sliced into coins
2 – 4 medium boiled eggs, sliced in half
6 slices bacon, cooked and chopped
8 ounces raw baby spinach leaves, rinsed and dried
4 – 6 ounces salad dressing (traditionally French or Thousand Islands)

On two large dinner plates divide the spinach and spread evenly. Slice cheese into ¼ inch wide strips. Roll each slice of meat individually. Alternate cheese strips and meat rolls in a circle on top of the spinach bed.  Arrange the mushrooms, tomatoes and cucumber coins between the cheese and meat. In the center of the salad place the egg halves. Sprinkle bacon over top of salad. Serve immediately after drizzling with preferred dressing.

Veggie Meatloaf


veggie meatloaf

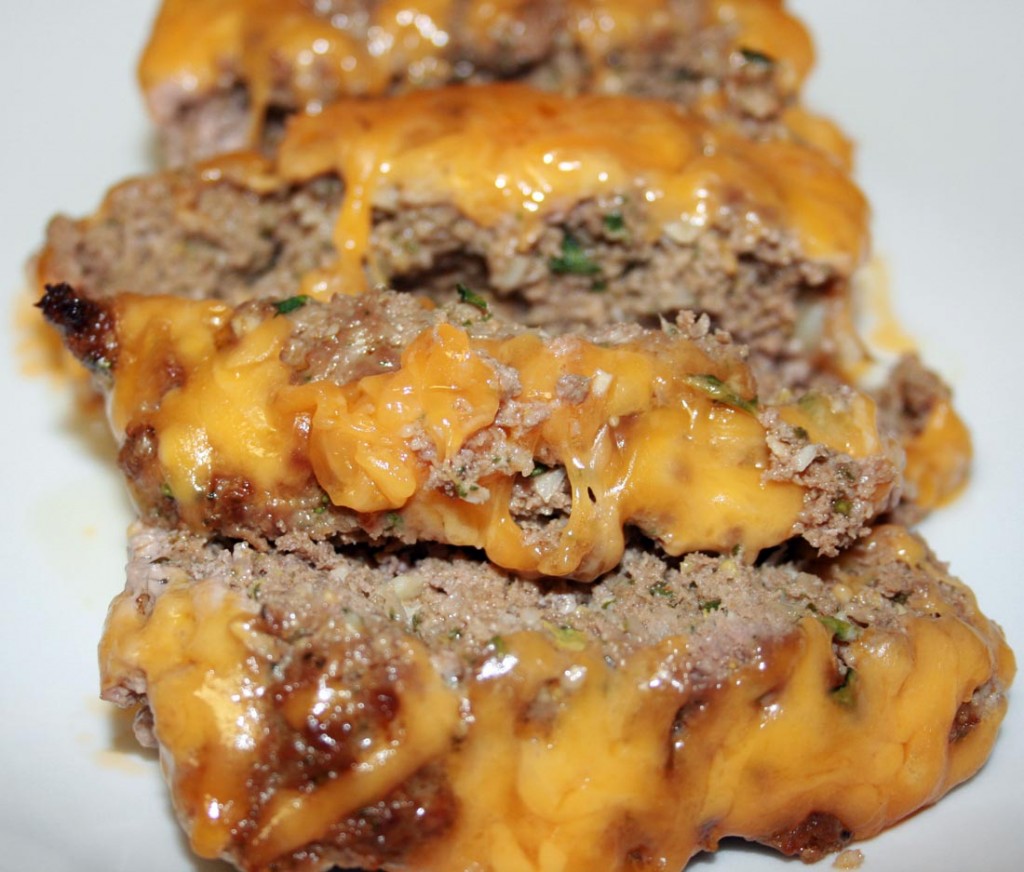
For the most part I don’t have to hide veggies in food to get Little B to eat them. She goes after most of them with a vengeance or by way of an earnest request. Like her all time favorite snack, frozen broccoli “trees”. Yep. Straight out of the freezer. They started out as something to gnaw on when she was teething, but survived as a favorite long after. We try to offer her vegetables every chance we get, even in restaurants, in spite of the restaurants efforts to fill her otherwise. The kid menus at most places include breaded chicken tenders, pasta, sad little mini burgers or a hot dog. Besides being loaded with carbs and often deep fried, such offerings have little nutritional value or variety to expand little palates. More often than not we end up ordering soup or a side of vegetables for her from the non-kid menu. She dives right in. A few times I have tried to order the kid food, but she finds the food as unappealing as I do. It is refreshing to go to a restaurant and actually see smaller versions of the food offered on the rest of the menu, like 1/4 rack of ribs at a barbeque joint, or a kid size version of seafood at a seafood joint. What a concept! I rant because our travels recently have taken us to new restaurants in new places, and I am reminded that sometimes it is not easy to keep Little B eating our version of healthy away from home. This recipe actually stemmed from my desire to use up the vegetable odds and ends in the fridge. It worked very well, held together like meatloaf tends to not want to do. On top of it all Little B ate it up in spite of not being one of her favorite veggies – frozen broccoli, green beans or squash.

Veggie Meatloaf

1 ½ pounds ground beef
2 Tbsp tomato paste
2 stalks celery
1 carrot (or 1 ½ cups mini carrots)
1 small yellow onion
2 cups fresh spinach
4 cloves garlic
3 eggs
½ cup fresh parsley
1 Tbsp dried thyme leaves
1 tsp ground cumin
1 tsp sea salt
½ tsp ground black pepper
1 tsp paprika
1 cup sharp cheddar cheese, grated

In a blender or food processor add tomato paste, celery, carrot, onion, spinach, garlic, eggs, thyme, cumin, salt, pepper and paprika. Pulse until vegetables are very small pieces and herbs are combined. In large bowl combine beef and vegetable mixture. With your bare hands mix meat and vegetables until all the meat is coated and the vegetables are combined with the meat. Press mixture into rectangular bread pan. Bake at 350 for 45 – 55 minutes, until cooked through. Sprinkle top of loaf with cheese and place in hot oven with heat off for five to ten minutes, until cheese is melted. Remove from oven and let rest for about five minutes. Slice in pan, arrange on serving tray and serve.

Caprese Salad

caprese

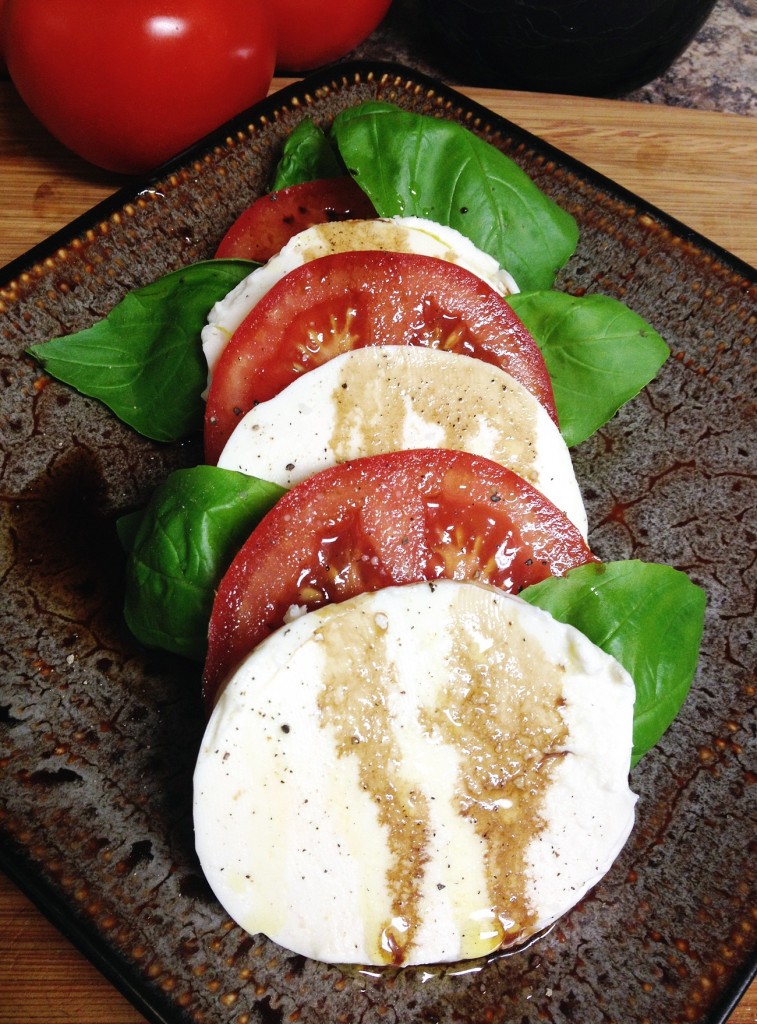
Basil always reminds me of Italy. In 2004 Big D and I explored Rome and Tuscany with another couple. There were, as always, some ups and downs during the trip. Big D’s luggage was not found until halfway through the trip, the pool at our villa was too darned cold for midnight skinny dipping, and cheap grappa is nasty when imbibed warm and straight. The luggage was finally found and took forever because the villa was not easy to find and the local washer/dryer machine was not really a dryer. No solution about the pool, except for some teeth chattering. The grappa was resolved with ice and mixing it with Coke Light (Italy’s version of Diet Coke). Very potent. The reminder basil gives me relates to the week we spent at the little villa. It had three bedrooms upstairs, a dining area and living area downstairs. There was also a lovely, large kitchen. Right outside the kitchen was an herb garden. Even being early summer, it overflowed with rosemary, oregano, thyme, parsley and of course basil. Most nights Big D and I would walk to the co-op in the nearby village, pick out fresh beef and vegetables, walk home, pick a collection of herbs and cook cook cook! The couple we traveled with often went out to eat at one restaurant or another, so we had the place to ourselves for the night. It was a wonderful, quiet time of day after exploring Siena, Pisa, Florence, Rome…. When I smell basil I think of the quiet evenings, fresh steaks and veal, and another, funny and memorable element – frogs croaking in the pond below our bedroom window all night. Believe it or not it was like an elixer, lulling us to sleep. On to the salad. I almost called it insalata caprese, but decided not to because of the – dum dum dum – basalmic vinegar. I loved salad when made with fresh ingredients and high quality olive oil, but never recall seeing the basalmic vinegar offered in Italy, only in the US. My research was consistent. Insalata caprese is typically seasoned with salt, pepper and olive oil.

Caprese Salad

1 large red tomato
1 ball fresh mozzarella
1 large stem fresh basil
Extra Virgin Olive Oil
Aged Basalmic Vinegar
Salt and Pepper to taste

Slice tomato and mozzarella into slices of equal thickness. Sprinkle slices with salt and pepper. Layer slices with leaves of basil. Sprinkle salad with olive oil and basalmic vinegar. Serve immediately.


Stuffed Flank Steak

stuffed flank steak

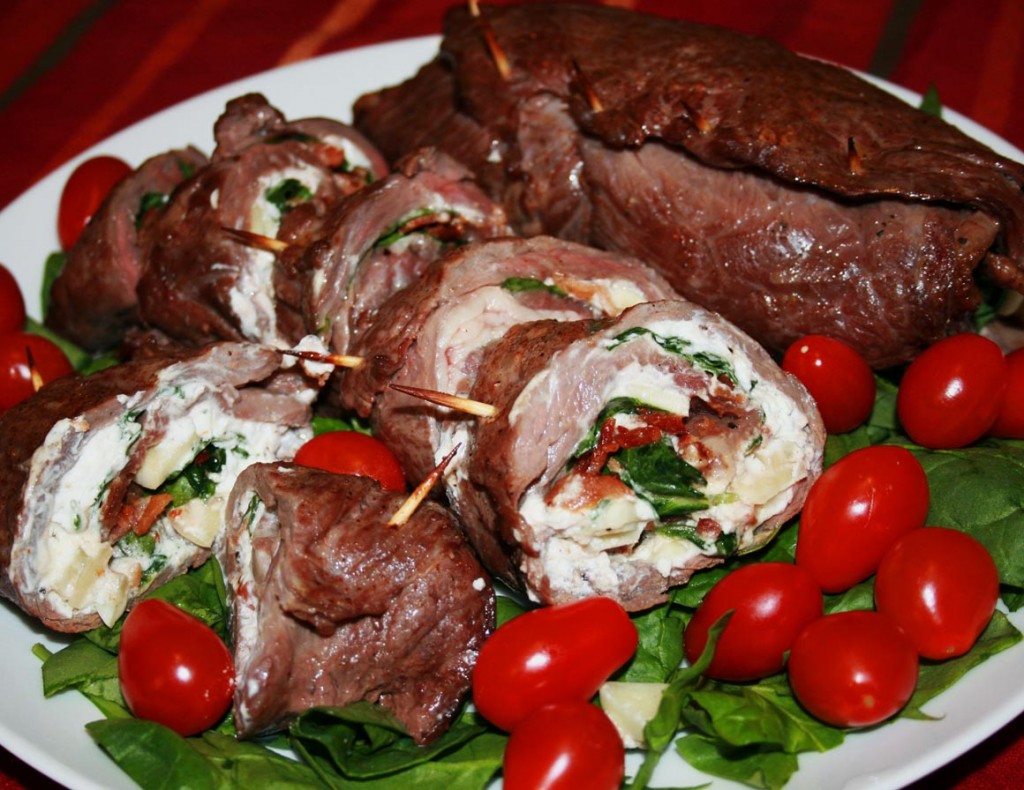
Flank steak, also known as skirt steak, used to be cheap. It was a slightly tougher cut of meat that could be marinated and grilled or broiled, cut up and served south Texas style as fajitas. It still can, but the cheapness is gone. I don’t know what happened. Maybe, like buffalo wings, it got popular and so the price hiked. Did price hike because of demand, or the mere fact the price was higher, and so demand increased? I guess I could go back to my college business textbooks and try to dig deeper, but not gonna do it. The point here is I have turned the once cheap fajita meat into a fancy looking main dish that went POW! Of course, anything with goat cheese tickles my fancy, but the cheese combined with the steak resulted in a tangy, juicy roll. I made a couple and ended up freezing one, and I discovered it froze well, too! Double POW! You can still make old, reliable fajitas with flank steak, but if you want to get a little fancier, you definitely can!

Stuffed Flank Steak

1 – 2 large flank steak (1 ½ – 2 pounds total)
8 ounces bacon
½ cup red onion, finely chopped
4 garlic cloves, sliced
4 – 5 ounces goat cheese
1 Tbsp fresh oregano leaves, coarsely chopped
8 ounces baby spinach leaves
8 – 12 wooden toothpicks

Preheat oven to 400 degrees. Slice bacon into ¼ inch strips. In a medium skillet over medium heat  cook bacon until it begins to release fat. Add onion and garlic and continuing to cook until garlic slices begin to brown. Transfer bacon, onion and garlic to paper towel to soak up extra grease. Lightly salt and pepper the steak. Place steak between two layers of cling wrap. With a tenderizing mallet or side of a regular hammer flatten steak until about ¼ inch thick. Remove the top layer of wrap. Spread the goat cheese on the steak, leaving about ½ inch border around the edges. Make a layer of spinach leaves on top of the cheese. Sprinkle the bacon, garlic and oregano on top of the spinach. Add another layer of spinach. Sprinkle spinach with a little more salt. To roll the steak, begin by lifting the wrap edge on the long side of the steak, pull the steak off the wrap and begin curling it over the spinach. Continue rolling it, squeezing slightly to keep the roll an even size along the length. When completely rolled, place the seam facing up. Impale the roll every inch along the seam with toothpicks. If it is thin enough on the ends, weave a toothpick across them to seal it – like you would a straight pen through cloth. Place the roll in a shallow baking dish or baking sheet covered with foil. Bake for 20 minutes. Turn oven temperature down to 350 degrees and cook for 20 – 30 minutes longer, depending on thickness of steak and desired doneness. I like it more rare, so the shorter cooking time appeals to me.

Steak in Tomato Spinach Sauce

sauteed beef with tomato and spinach sauce

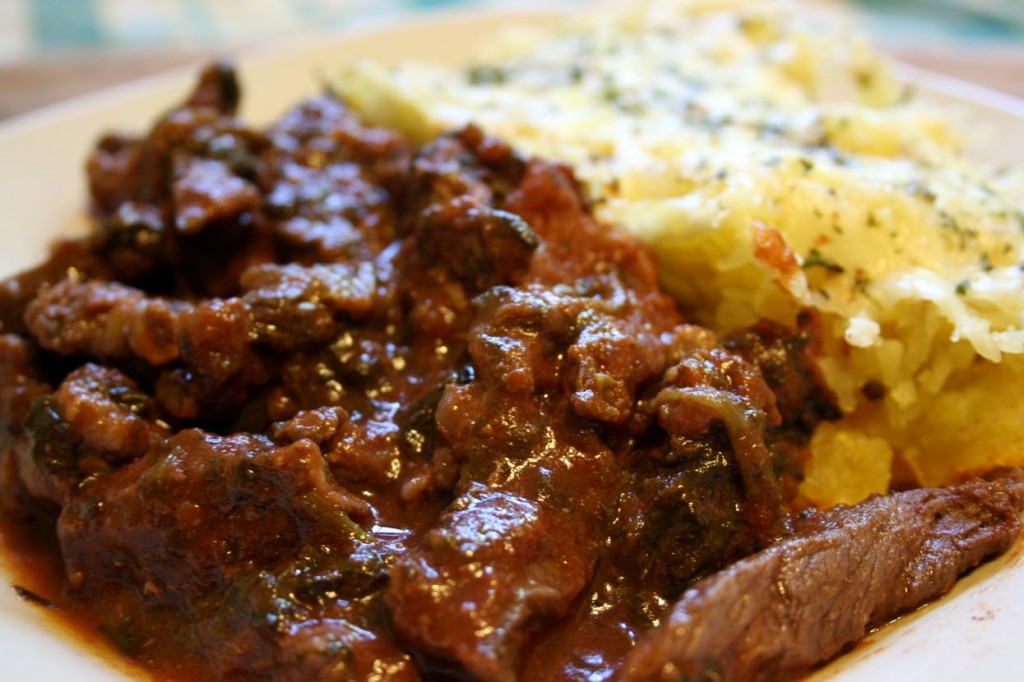
We are moving soon. Again. Not a big move for now, just a short term local move before a bigger move. We don’t know when or where the bigger move will occur, but want to be ready, which means not signing a long term lease or making a real estate purchase. A move translates into me trying to clear out the fridge, freezer and pantry. The less I have to move that is perishable or heavy, the better. This recipe used the last big can of tomatoes from the pantry and some stray steak from the freezer. I like never-been-frozen steak straight off the grill, but if it has been frozen I don’t mind baking or broiling or smothering it in sauce. I like how the tomato and spinach made the sauce nice and rich. Serve it next to or on top of some baked spaghetti squash. I ate too much. Roll me on over to the couch!

Sauteed Steak with Tomato and Spinach

1 Tbsp extra virgin olive oil
½ medium yellow onion, roughly chopped
3 cloves garlic, roughly chopped
2 cups fresh spinach
12 – 14 ounces tomato puree
½ cup dry red wine
2 tsp dried oregano
2 tsp dried parsley
1 tsp ground thyme
1 tsp sugar or sweetener equivalent
1 ½ Tbsp butter
1 pounds thin steak
Salt and pepper to taste

Slice steak against the grain into bite-sized pieces, then season generously with salt and pepper. Set aside. Roughly chop spinach into 1-inch pieces. In medium pot over medium-high heat add olive oil. When oil is hot add onion and garlic. Cook until onion and garlic begins to brown, about two minutes. Add spinach and toss with onion and garlic until most of it wilts, about three minutes. Add oregano, parsley, thyme, tomato, sugar/sweetener and wine, then stir. Lower heat to simmer, and cook uncovered for about ten minutes until it begins to thicken. Cover sauce and cook for 20 – 30 more minutes. Set aside. Right before the simmer time is over heat a shallow saute pan over high heat. Add the butter. Just before it begins to brown add the meat and toss until coated with butter. Continue tossing until steak is cooked to desired doneness (for me about 3 minutes for medium rare). Remove from heat. Add the meat to the sauce, stir and continue simmering for about five minute. Salt to taste. Serve immediately over spaghetti squash, pasta or rice.

Post Navigation