Any Kitchen Will Do

Give me a kitchen and I will cook.

Archive for the category “baked”

Tortilla Fun

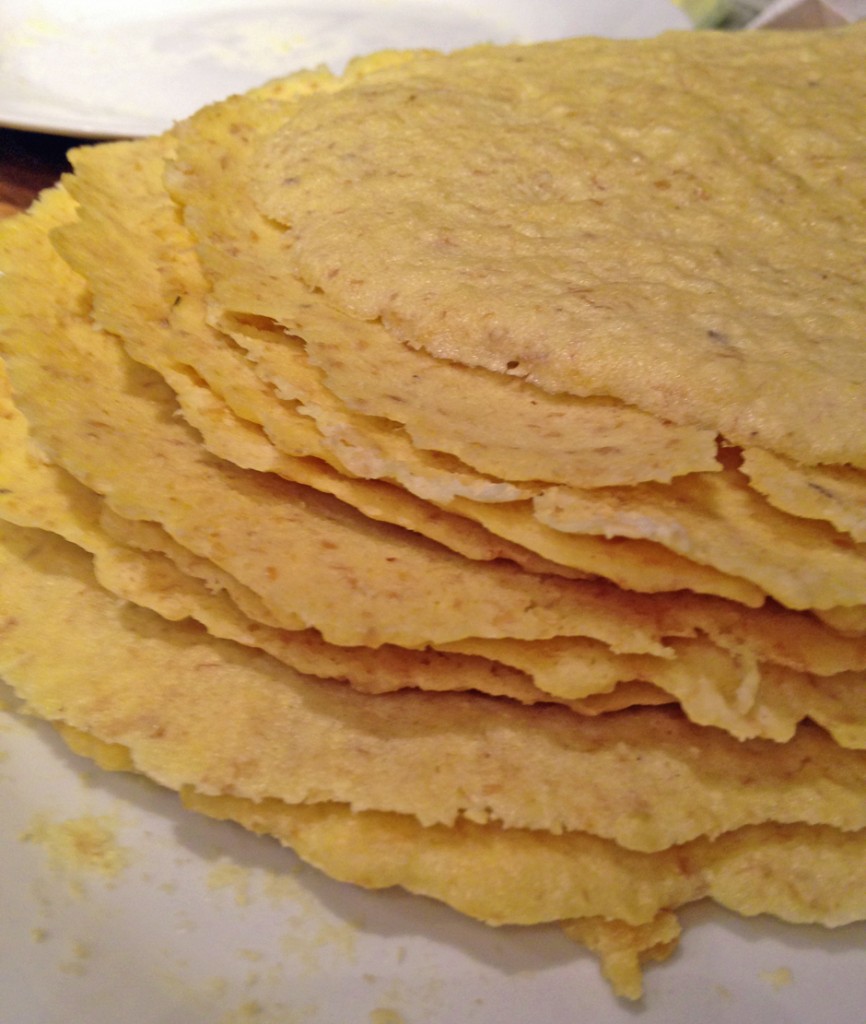
tortilla pile

I cannot believe how freakingly awesome these tortillas are! Freakingly! Not a spec of wheat or corn, but the taste and texture reminds me of some delicious, substantial homemade corn tortillas made at a little restaurant in San Antonio, Taqueria Aguascalientes. As with a few other recipes recently, we are discovering that some quick cooking in a microwave makes for some satisfying low carb substitutes for otherwise carby buns and desserts.  Many of our living situations have included a distinct absence of microwaves, so when we actually have one we tend to forget to use it. They are convenient, but the unbalanced heating they do is either a result of the technology, or from an absence of experience we have from rarely using them. When I was tortilla prepa kid there was an ever present microwave. I relied on it heavily to reheat leftovers after soccer or volleyball practice, and to concoct a comfort food, which I will not reveal now, but maybe in the future. We have officially rediscovered the ’80s cooking phenomenon. Now, back to the tortillas! Big D has made dozens of them. We have spent many an evening experimenting with different thicknesses and cooking times. They can be smaller and thicker, like a gordita tortilla, thin like a corn tortilla or big and thick like a wheat flour tortilla. They have returned to our menu things like breakfast tacos, tostadas and the ever popular fajita tacos. Now, the recipe says to spread a thin layer of batter on a plate with wet hands, I really mean a thin layer, like you can see the plate through it. For thicker ones you just need to see less of the plate. Notice what I mean by thin in the picture to the right. THIN!!! One last note – these guys keep well in the fridge, so make a big batch and eat them all week. Or do what I do and sit googly-eyed while your hubby makes a batch that you can eat on all week…
Tortilla Fun

4 cups almond flour
4 Tbsp coconut flour
½ cup golden flaxseed meal
1 ½ tsp sea salt
8 eggs
2 Tbsp coconut oil or lard
½ tsp stevia/erythritol powder
4 Tbsp apple cider vinegar
Butter for cooking plates

Place almond four, coconut flour, flaxseed meal, salt, baking soda and erythritol in a bowl and stir until well mixed. Add eggs, vinegar and oil and stir until well combined, using your hands if necessary – it should be thin batter. Spread a thin layer of butter in the middle of a dinner plate. Drop about 3 level Tbsp of batter on the plate. Using wet hands spread batter from the middle to the outer edge until it is the desired size and very thin. Have nearby a flat bottomed bowl or plate nearby for when the tortilla comes out of the oven. Microwave for approximately 2 minutes, until the middle is cooked evenly as the outer portion. Immediately press down firmly for a few seconds with the bowl or plate on top of the warm tortilla. Slide off of the plate and let cool. Repeat process until all the batter is used up. Serve or refrigerate in an airtight container.
Almond Pizza Crust

no flaxseed pizza crust

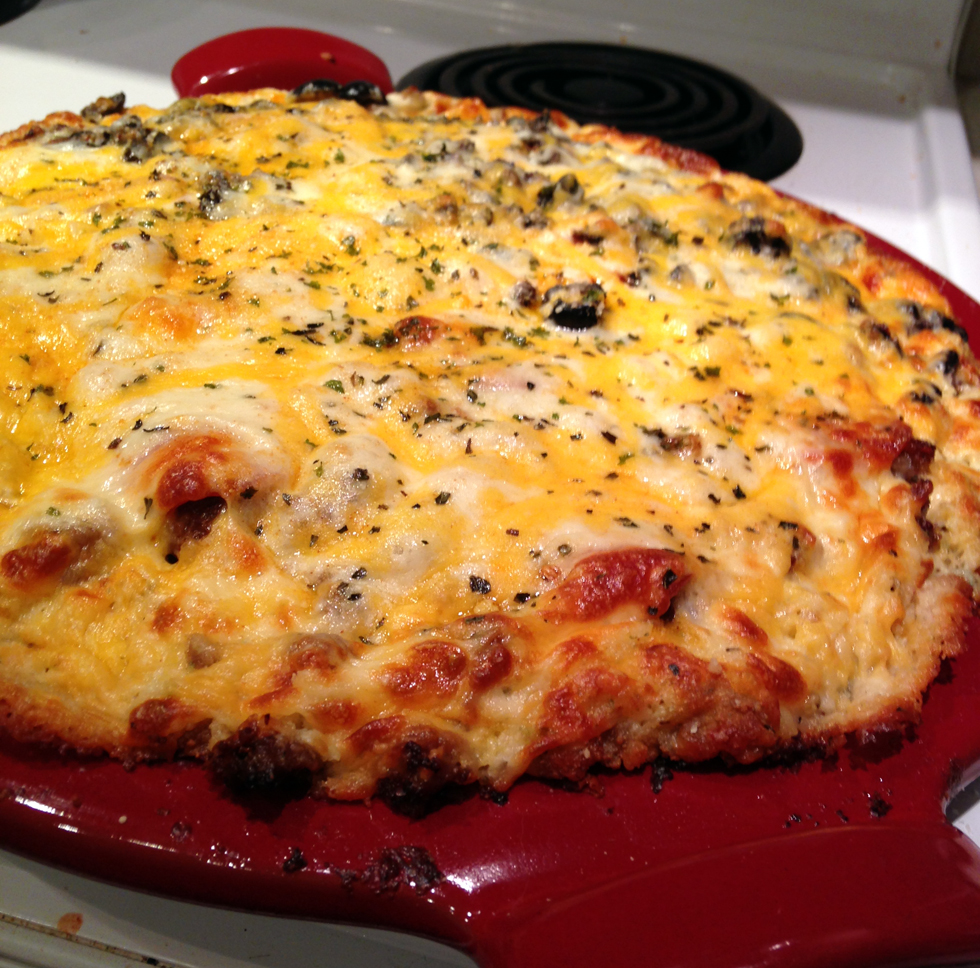
A long time ago Big D and I started a tradition of pizzabeer. No, that is not a typo. We would go to a spot – whether it was in Alaska, Virginia, Nevada, Texas…wherever we were, we would sit and eat pizza, drink beer and have long, winding talks about where we were going together. Sometimes they were about short term goals, other times they were longer term. Regardless, they were talks over food and beverage. Without some effort it is difficult to have wheat free pizzabeer. When making pizza these days we do it at home and we regularly use a wheat free crust figured out a couple of years ago. It is delicious, but includes flaxseed meal and coconut flour, which gives it a nuttier taste than what we like for some pizzas. This version of a wheat free crust is made by relying on almond meal and cheese. It makes for a crust that can hold the excess of toppings we are wont to use, while not adding a ton of strong flavor. Just think about it – when you eat pizza are you tasting the crust, or is it the toppings? I realized when I was pondering pizza that what I missed most was the toppings, not the crust taste, and the ability to pick up a piece of pizza and take a big bite. There was a simple concept I realized a few years ago when trying to eat healthier – if I am craving a food it was important to figure out what I craved – was it taste, texture, occasion or appearance? The craving focus varies by dish, but it was easy to identify for pizza. Other examples include the creamy of ice cream, the crunch of chips, the heaviness and nuttiness of a piece of bread. Now, back to the crust. We stumbled upon this more subtle tasting version one night when we wanted pizza and were woefully short of coconut flour and flaxseed meal. Necessity is the mother of invention, right? Oh, and look at my new pretty! Big D got me a new pizza stone! It is all fancy with an enamel finish that does not stick and gets crazy hot. Works as well as the more porous versions I have had in the past, but much more versatile.

Almond Pizza Crust

4 cups shredded mozzarella cheese
6 Tbsp almond flour
1 tsp baking soda
2 tsp dried parsley flakes
1 tsp dried basil
1 tsp garlic powder
1/2 tsp onion powder
1 tsp sea salt
2 eggs, beaten

Toppings (Used in the picture)

1/2 cup pizza sauce or tomato paste
1 cup mozzarella cheese and cheddar cheese, grated and mixed
20-24 pepperoni slices
1/2 cup black olives, chopped
Sprinkling of finely chopped basil and oregano

Preheat oven to 450 degrees (if using a pizza stone prepare as directed). Combine together in a medium bowl all ingredients except the eggs. When well combined add the eggs and stir with a fork until a moist dough forms. Spread enough dough onto the pizza stone or baking dish to have a layer about 1/4 inch deep. The pizza stone in the picture needs about 1/2 the dough, and since it is preheated the dough begins to soften as soon as it touches the surface. A stone without an enamel finish may not work with this crust. Bake the crust for no more than five minutes, allowing it to set and just begin to brown. Lower oven temperature to 425 degrees. Remove crust from oven and add sauce, toppings and cheese. Return to oven and bake for 10 – 15 minutes, until top is browning. Let cool for about ten minutes, allowing crust to set and toppings to cool. Slice and serve.

Bred Bread

bred

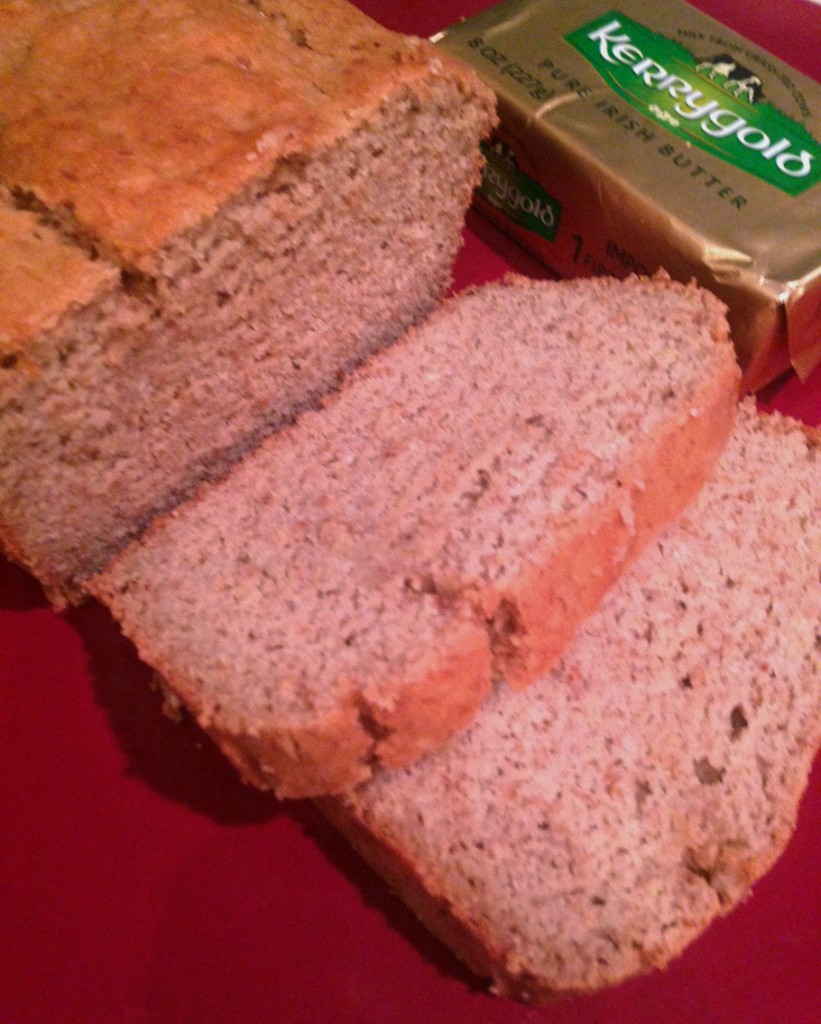
What an adventurous effort this bread recipe has been! It is officially named Bred, just because, and as a homage to Big D’s tendency to play with words. Actually, the recipe has mostly been a result of Big D’s efforts, but Little B and I supervised, mixed, provided input (solicited and not) and were overall cheerleaders. We certainly ate a lot of the results. It all began with cravings. As we continue on our low carb journey we longed more and more for sandwiches and bread. We thought there must be a way to make a nutritious, low carb bread-like thing to sate our desires. Some gluten free breads on the market are okay, but have more carbs that we want to deal with, and include non-wheat grains that we prefer to avoid. They also tend to be a bit rubbery and tasteless, without the help of other flavors slathered all over. After my experimenting with various baked goods, we were already familiar with the impact of flaxseed meals, coconut flour, and almond meal – in muffins, pies, rolls, etc. Not only their impact on the end product, but on our personal weight management, which was not negatively.

Big D searched the interwebs and found this recipe from the wonderful Miss Elana. Our first batch using the recipe was okay, but did not have the texture and flavor we craved. We also did not have the dainty bread pan she recommended, so the first attempt was not as loafy as we wanted. It was a good launching pad for what you find below. This bread is substantial enough for deli sandwiches, garlic bread, and especially grilled cheese sandwiches. After mastering the basic Bred recipe we found that some slight variations make for different, yet still satisfying results. The ‘rye’ version has the tang of traditional rye bread, making for wonderful reuben sandwiches. The version using non-golden flaxseed meal gives the bread a much lighter, almost poppy seed flavor that lends itself to more delicate tea and fish sandwiches. If you miss the very obvious point here, we are so very excited to have bread back in our diet! It adds variety and convenience and helps in stretching out leftovers, which are always hanging out in our fridge.

A related and concurrent discovery was a source of Kerrygold Butter here in town! There is such a superior flavor and texture difference with Kerrygold when compared to other butters – a difference we fell in love with many years ago. We have been searching for it locally for many months now and dreaded the expense of getting it shipped directly. Of course we bought out the supply when we found it, but we don’t feel bad. I am pretty sure others did the same before us. Maybe since it sold out they will restock? We hope so, but that is not always how the bread crumbles…give our Bred recipe a try, and do so with Kerrygold. Yum!

Bred Bread

4 cups almond flour
1/4 cup coconut flour
½ cup golden flaxseed meal
1 ½ tsp sea salt
2 tsp baking soda
½ tsp stevita/erythritol powder
10 eggs
2 Tbsp coconut oil or lard
1/4 cup apple cider vinegar

Rye Version
When combining first six ingredients also add:
1 Tbsp caraway seeds
1 tsp ground turmeric
½ tsp ground mustard
¼ tsp ground black pepper

Lighter Version
Use regular instead of golden flaxseed meal

Place almond four, coconut flour, flaxseed meal, salt, baking soda and erythritol in a bowl and stir until well mixed. Add eggs and oil and stir until well combined, using your hands if necessary as the dough thickens. Add vinegar and stir until well combined. Place dough into a greased 9″x5″ bread pan. Bake at 325 degrees for 50  minutes – knife should come out clean from tallest point of the loaf. Bake for ten more minutes if knife is damp. Remove from pan immediately. Serve.

Pork Chops with Goat Cheese Crumbles

pork chops goat cheese crumbles

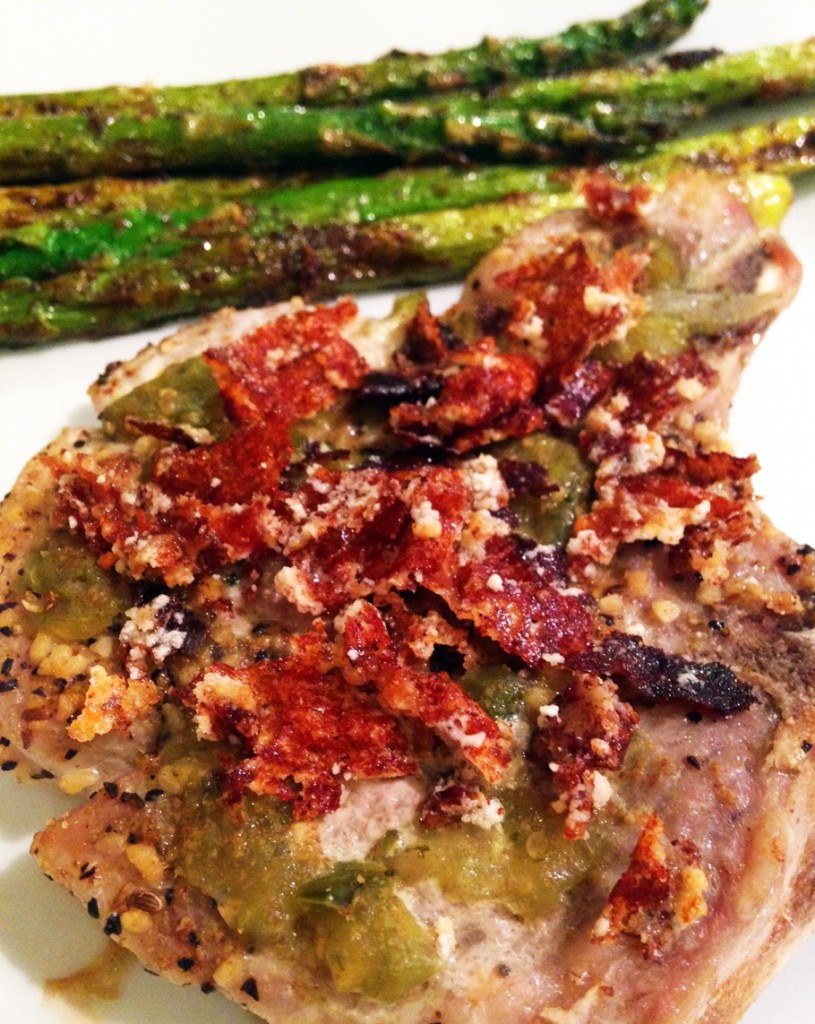
Sometimes when I cook I have a plan. Not all the time, but most of the time the results come out just the way I wanted. For these pork chops I had a plan, and the results were good, but not quite what was predicted. I planned on having delicately browned rounds of goat cheese, floating atop the baked pork chops. There ended up being no rounds and no floating. In the future I will again attempt making the floaty goat cheese rounds, but for the time being, here is the yummy, crunchy, unexpected results of the first attempt.

Pork Chops with Goat Cheese Crumbles

4 – 5 pork chops, medium thick cut, bone-in
1 cup salsa verde
1 tsp ground cumin
1 tsp garlic powder
Salt and pepper
4 ounces goat cheese

Preheat oven to 350 degrees. Season pork chops generously on both sides with cumin, garlic powder, salt and pepper. Place chops on large baking sheet. Spread salsa verde over the top of each chop. Place in oven and bake until pork is fully cooked, about 40 minutes. While the chops are cooking prepare the cheese. Heat a dry a frying pan over medium heat. Place thin slices of goat cheese in the pan, leaving about one inch of space around each slice (you should be able to get 8 – 10 slices out of a 4 ounce roll of cheese). After about one minute the goat cheese will soften and the bottom will be brown. Gently scrape off the soft, white cheese to reveal the bottom layer that is browning on the pan cooking surface. Place the white cheese in an empty place in the pan. Gently scrape the browned cheese off the pan and place the cheese ‘crisp’ on a piece of parchment paper or cutting board. Continue the scraping process until all the cheese has been crisped. Let the crisps cool for about five minutes, then roughly chop the crisps into bite sized pieces. Sprinkle the chops with cheese crumbles and serve.

Note: although all the crumbles were yummy, the lighter brown crumbles retained more of the goat cheese flavor.


Simple Salmon Frittata

salmon frittata

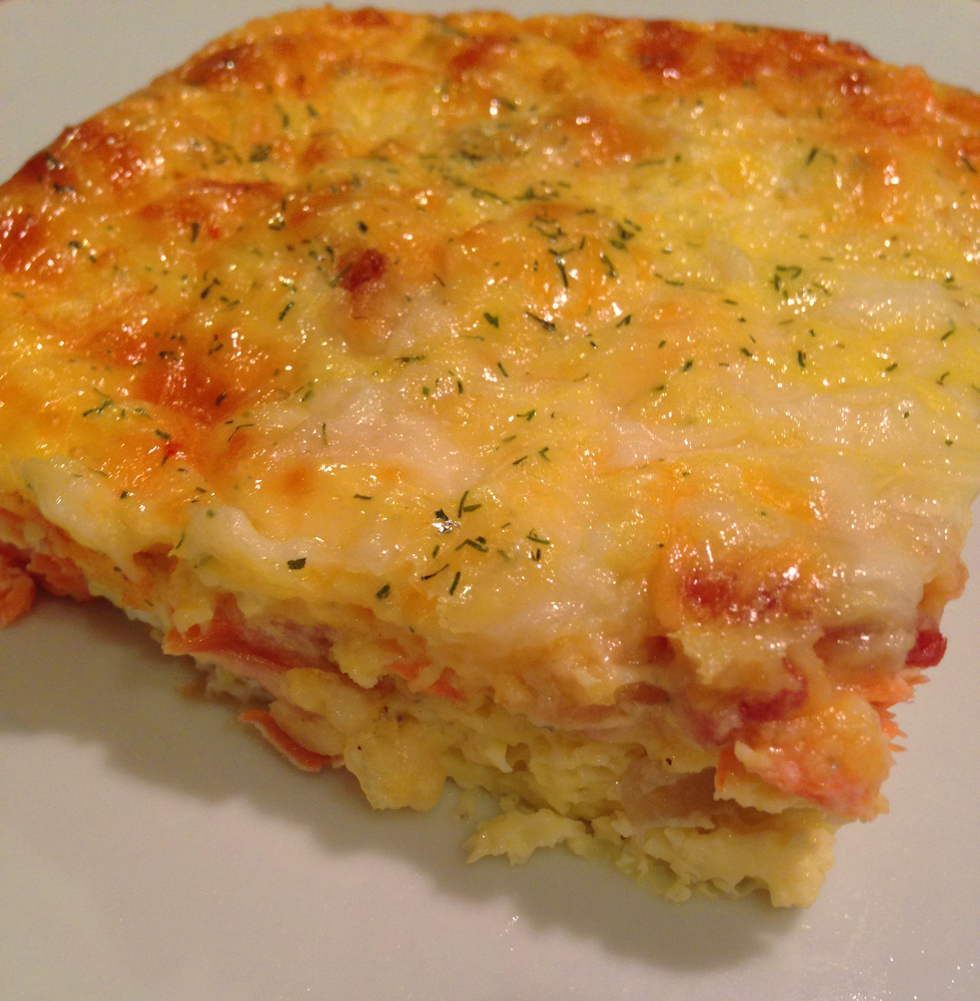
I have shared a frittata recipe with you before, but the ingredients this time combined so nicely, and made such a great weekend breakfast that I decided to share another. Living in Southeast Alaska there is a year round craving for seafood, but it gets magnified as the spring days get longer, and the call to play outside with fewer layers on gets stronger. Our smoker has been busy flavoring meats, vegetables and cheeses for us all winter, but now we ask it to prepare our salmon. A local fish shop – and I mean a fish shop that sells catches from local fisherpeople – Pinkies, had some beautiful, fresh King Salmon. The smoker used alder wonderfully to compliment it, so we feasted on some wonderful marine life. The King Salmon is a big fish, so the leftovers were waiting on us the next morning. I get very used to tossing onion and garlic into many morning egg dishes, but I also leave them out sometimes, depending on the ingredients. This time I chose to let the salmon sing, and it did! I used smoked salmon, but any leftover cooked salmon would work.

Salmon Frittata

8 eggs
1/2 cup heavy cream
1 1/2 tsp dill weed
1/2 tsp sea salt
1/4 tsp ground black pepper
Dash dried red chili flakes
4 ounces smoked salmon, roughly chopped
3 slices cooked bacon, crumbled
1 cup Colby jack cheese, grated
1/2 cup mozzarella cheese, grated

Preheat oven to 350 degrees. Crack eggs into a medium bowl and whisk until slightly frothy. Whisk in cream salt, pepper, chili flakes and 1 tsp of dill. Grease a 9×9 baking or pie dish. Pour in egg mixture. Sprinkle salmon and bacon evenly into the egg mixture. It should sink down into the egg. Follow the fish and bacon with the Colby Jack cheese and then mozzarella cheese. Spread the last of the dill weed and a bit more salt on top. Bake for 30-40 minutes, until edges are browning, middle egg is set and middle cheese is slightly bubbly. Remove from oven and let sit for about ten minutes. Slice and serve.

Meaty Squash Bake

meaty squash bake

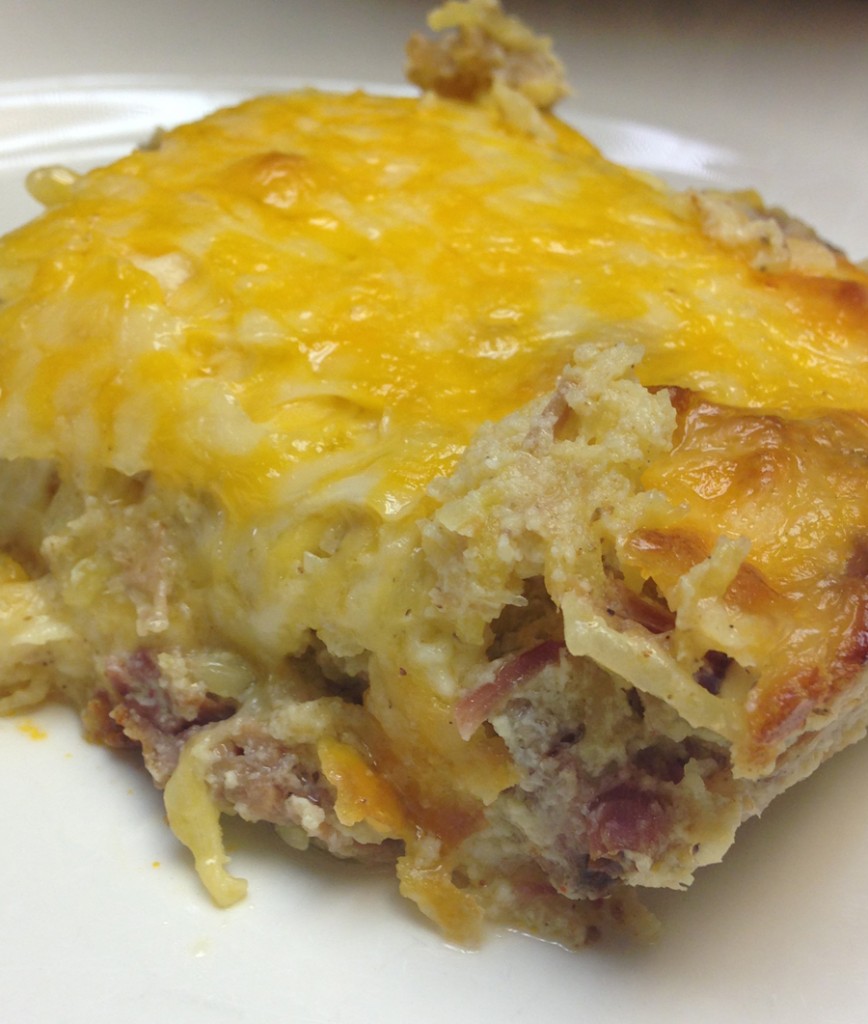
This dish was purely delish and purely a result of leftovers. We had spaghetti squash left over from serving as a side dish with the rolled chicken, and a lovely brisket our friends brought over was still calling to us from the fridge. Knowing we would have leftovers from the leftovers, I wanted to make sure it would be something that would freeze and reheat well. I think we hit the jackpot! I don’t know of many savory leftovers that can’t be combined and topped with cheese, do you? The nice thing about it is you can also cook up some fresh spaghetti squash, and maybe some ground beef for it if you don’t have leftovers to manipulate. It freezes well too! As you see, I made this in my mom’s kitchen, and while I was visiting her I definitely cooked more than we and our visitors could possibly consume, so freezer friendly is a good thing.

Meaty Squash Bake

1 pound chopped meat (leftover brisket, chicken, pork, etc)
2 1/2 cups cooked spaghetti squash
2 tsp garlic powder
1 tsp sea salt
1 cup heavy whipping cream
3 eggs
2 cups Colby jack cheese, shredded

Preheat oven to 350 degrees. In large bowl stir together squash, garlic powder and salt. Add meat and stir again. In small bowl whisk together eggs and cream. Add cream mixture to squash and meat. Fold until everything is coated with cream mixture.  Pour mixture into 9×12 baking dish. Sprinkle top with cheese. Bake for 35 – 45 minutes until outer edge of cheese begins to brown. Remove from oven and let sit for about ten minutes before serving.

Rolled Chicken Breasts

stuffed chicken rolls

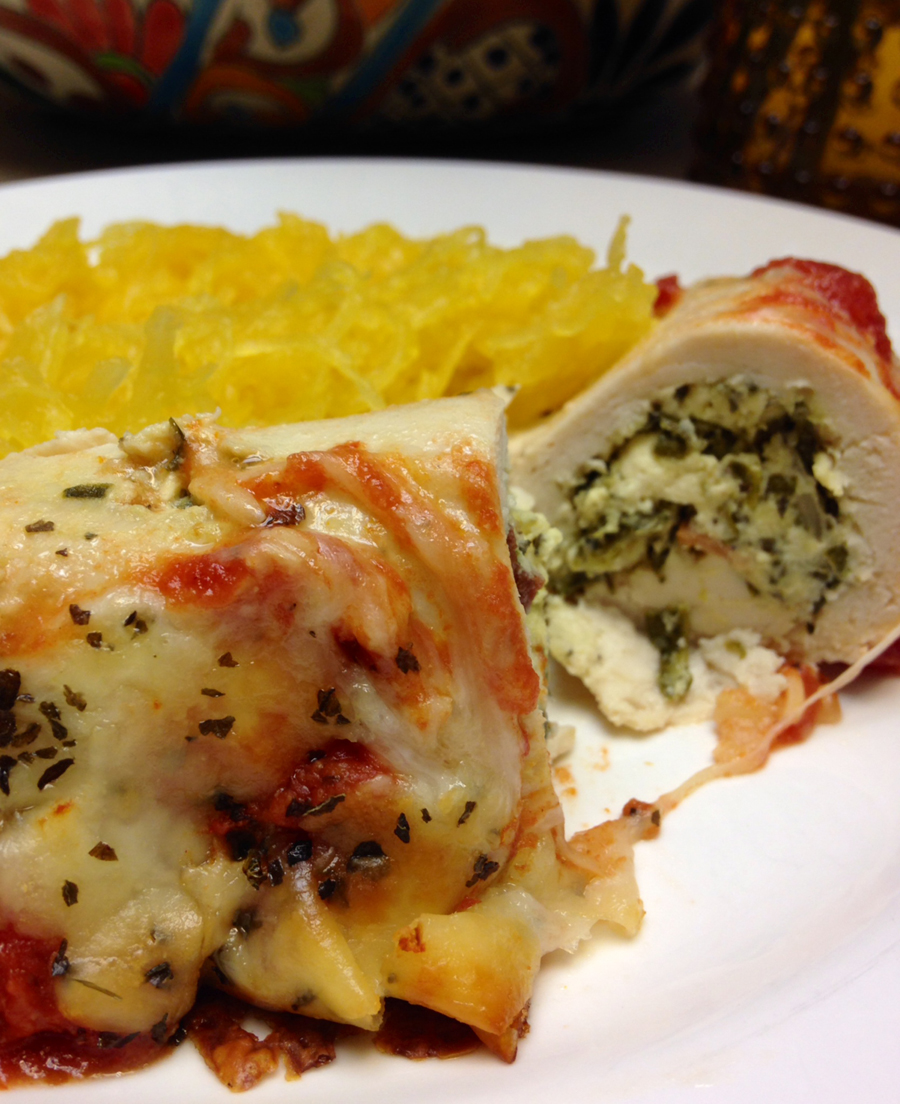
Big D does not prefer fowl white meat. Whether it is turkey or chicken or other, more exotic birds, he goes for the dark meat as much as possible. He will eat the white stuff, but only out of necessity. When he has to resort to a chicken topped salad when dining out he will eat it, but begrudgingly and with thoughts of thighs dancing in his head.  I have similar preferences, but they do not run as deep, so when I was visiting my mom I took advantage of white fowl connoisseurs and made a recipe I have long pondered. Besides the satisfaction of pounding flesh into oblivion, the balance of flavors was supreme, with the mildness of white chicken meat and kick of the stuffing. Since the chicken was thin, the cooking time was kept short and the dish was moist, in a good way. Never hesitate to pound the meat just a little bit more, for it won’t hurt the chicken, and it can’t help but release anything lingering and seething in you. I almost called this recipe ‘stuffed’, but since I did such a good job of pounding the ‘rolled’ version of the name seemed appropriate. I served the rolls with some baked spaghetti squash and viola! Dinner!

Rolled Chicken Breasts

6 boneless chicken breasts
2 cups baby spinach leaves
1 1/2 cup crumbled feta cheese
6 pieces bacon, cooked crisp
1 tsp dried basil leaves
2 cups mozzarella, shredded
4 ounces tomato sauce
12.5 ounces diced tomatoes
1 tsp garlic powder
1 tsp onion powder
Salt and pepper to taste

Preheat oven to 350 degrees. Pound chicken breasts with kitchen mallet until no thicker than 1/4 inch. Chop spinach finely, crumble bacon and combine them with feta and basil in medium bowl. Season both sides of chicken with salt and pepper. Lay a breast flat on your work surface with the longest section going left to right. Place 1/4 to 1/3 cup (divided equally among the breasts) of filling in the middle of the flat meat. Starting from the left or right carefully roll the breast until it overlaps with the chicken on the opposite side of the filling. Place stuffed breast in a 9×9 (snugly) or 10x 10 (close but not so snug) or similar sized baking dish. Repeat with the other five breasts and place them in the dish. Place in preheated oven, covered. Bake for about 20 minutes. While chicken is baking combine tomatoes, tomato sauce, garlic powder and onion powder in a medium sauce pan over medium high heat. When the mixture begins to bubble turn the heat down and summer uncovered for about 15 minutes. Add salt to sauce if needed. When chicken finishes cooking for 20 minutes remove it from the oven. Sprinkle half the cheese on the chicken, top with the tomato sauce and then the rest of the cheese. Return the pan to the oven uncovered and cook for 15 – 20 more minutes, until the edges begin to brown. Remove from oven and let sit for five minutes before serving.

Unholy King Cake

unholy king cake_edited-1

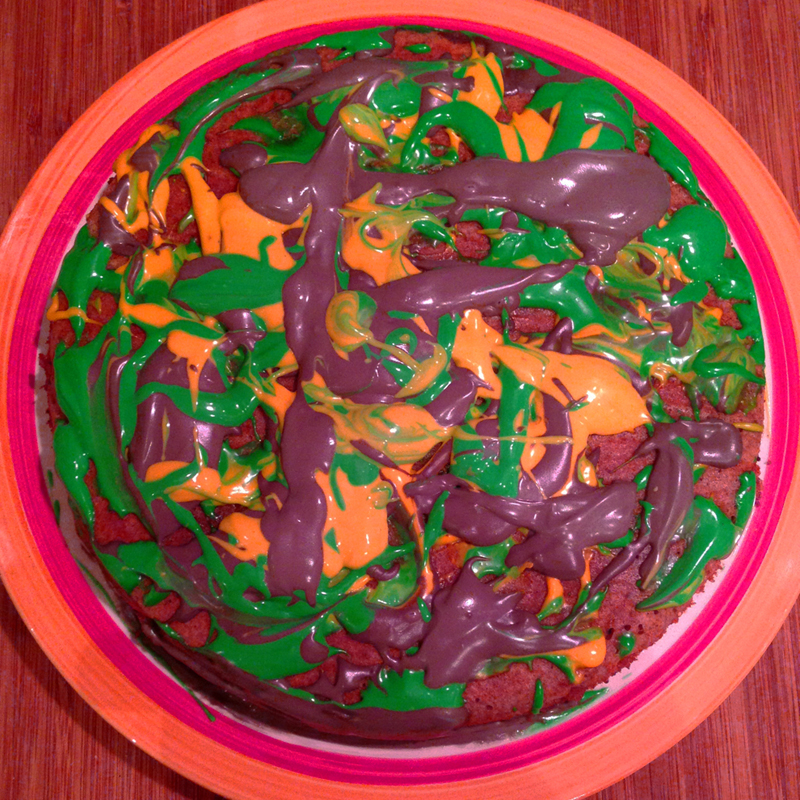
For the past few years, since moving away from N’Awlins, we’ve made our own King Cakes as part of our Mardi Gras and Fat Tuesday celebration. We party on Fat Tuesday wherever we are, regardless of the location. This year I was hard pressed to find acceptable decorations in our Alaska town, having to resort to mail order for beads and masks and shiny purple/gold/green curtains for out doorways. Our little place looks cheery and ready for fun. Again this year I made a King Cake, and again it is a version different from previous years. I seem to experiment with a new recipe each year instead of just going with what I did the previous year. One reason for the annual variation is because I like trying new things, and another is because of our evolving diet – from sugar and wheat and carbs to less or none of all three. The first cake was traditional, made with wheat flour, another was gluten free version but with sugar and not much nutritional value. A third version was a concoction of low carb sugar free cinnamony cakelettes, with a very sticky icing. This year it is an unholy cake, absent the traditional hole in the middle, as well as absent of sugar and wheat. I guess I could have made it holy, but then where would all the frosting go?!  I guess if you want to cut a hole in the middle you could, but I am not as holy as I used to be, so don’t miss the ring-ness of this cake. It looks very different from a traditional rolled cake, but I think it definitely carries the spirit of the original, and we can eat it without worry of allergic reactions or sugar buzzes. It was fun to make and everybody helped splatter the frosting, although the first batch of purple turned too gray to use. Try, try again I say. Now I wonder who will find the baby this year? Laissez les bons temps rouler!

Cake
1 cup finely chopped coconut
1 cup almond meal
6 eggs
1 tsp ground nutmeg
1 Tbsp ground cinnamon
1 Tbsp Stevita
½ tsp sea salt
1 tsp baking powder
2 Tbsp heavy whipping cream
1 Tbsp lime juice
2 tsp vanilla extract

Topping
1 cup raw pecans
1 cup raw walnuts
2 Tbsp ground cinnamon
1 Tbsp Stevita
½ cup butter, melted
¼ tsp sea salt

Frosting
4 ounces cream cheese
3 ounces butter
1 Tbsp Stevita
Food coloring (green, yellow, purple – made with one part blue and three parts red)

Preheat oven to 350 degrees. In a food processor grind the coconut into very small pieces, about the same size as the almond meal. In a medium bowl combine coconut, almond meal, nutmeg, cinnamon, Stevita, salt and baking powder. Add eggs, whipping cream, vanilla and lime juice. When well combined, pour mixture into 9” round cake pan lined with parchment paper. In a food processor combine pecans, walnuts, cinnamon, Stevita, butter and salt. Pulse until combined and nuts are a uniform size. Drop the nut mixture by spoonfuls until mixture is covering most of cake batter in pan. If you want to give the impression of a hole in the middle, drop the spoonfuls so batter in the middle of the cake is not covered with nut mixture. Place in preheated oven and bake for 30 – 40 minutes, until middle is firm and edges are pulling away from pan. When cake is cooled, flip out of baking dish onto cooling rack, removing parchment paper. Flip over again so cinnamon/nut filling is face up. In microwave safe dish warm the cream cheese and butter until softened, but not completely melted. Add sweetener and whisk together until smooth. Divide frosting into three separate bowls. Add yellow food coloring to one, green coloring to another, then 3 parts red and 1 part blue to the third to make purple. Add more coloring as desired so they are bright and a similar tone. With small spoons drop the frosting with a slashing motion until the top of the cake is covered with spatters. Store in the fridge until about an hour before serving, allowing it to soften and come to room temperature.


Simple Chopped Cabbage Bake

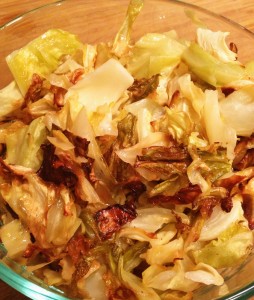
baked cauliflourThe other day we had a busy stove top. Three of the four burners had things simmering or sauteing or boiling. I wanted to make cabbage, but the last, small burner was hidden among the pots and pans, willing to do the job, but just not roomy enough. I still wanted cabbage, so I looked around and spotted the oven. Of course! Usually I cook up cabbage on the stove top because the oven is busy, so I got a little chuckle about the reverse happening. Okay, so it is not funny, like a gag in a movie or a stand up comedian, but when I think of, say, Thanksgiving when four things need to be baked at once, including the turkey, there is always a wish to have a dish that can be done on the stove top. Okay, not actually chuckle worthy. It was so good I was surprised I had not thought of doing it sooner. Silly. Maybe it is silly. I will stop, because it actually does not matter. This dish is so simple I am not even doing an ingredients list.

Just take half a head of cabbage and chop it into one inch pieces. On a large cookie sheet toss the cabbage with 2 Tbsp of bacon grease or extra virgin olive oil (add some salt of you use olive oil). Tossing it is most effective with your hands. Place pan in unheated oven. Turn oven to 350 degrees. After about ten minutes toss the cabbage and bake for ten more. Some cabbage will be darker, beginning to caramelize, and the rest should be soft enough to eat. Serve immediately.

Cauliflower Mac Bake

cauli mac bake

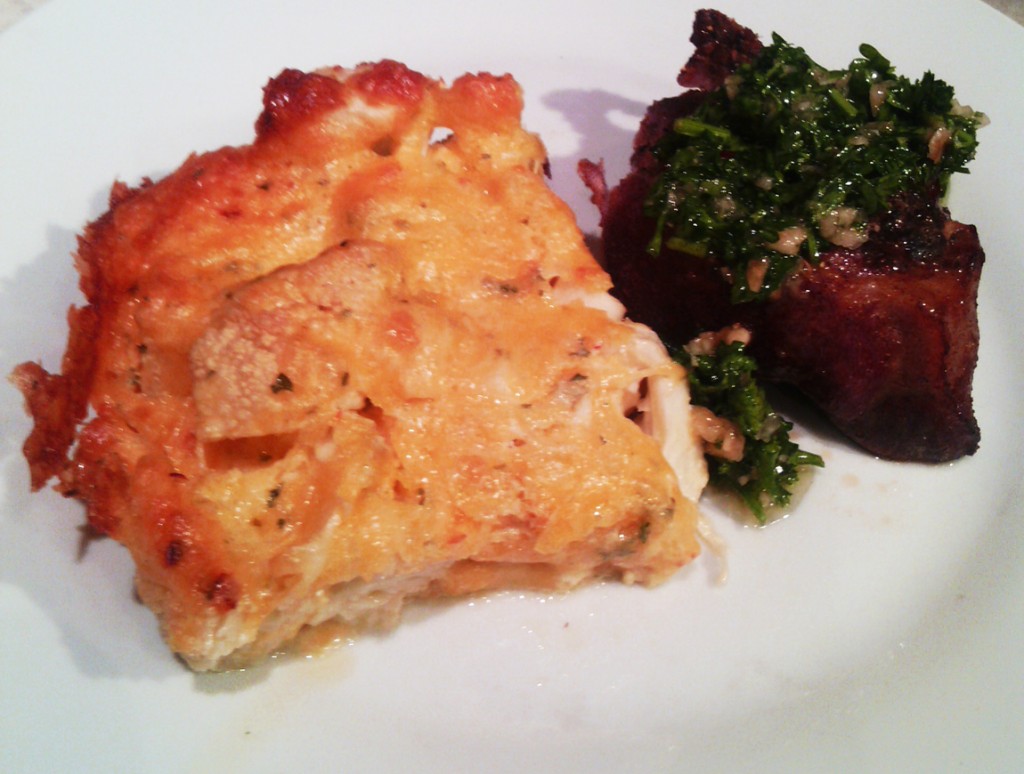
Our foster son Tall P makes really good cheesy scrambled eggs. Somehow he cooks the eggs just right and puts in just enough cheese right at the end to make it taste like baked macaroni and cheese. I won’t try to duplicate it, for it is something he does for us, so why try? He is the master! I had a hankering for them the other day when he was busy at school, so I decided to try a baked cauliflower version of mac n cheese. I think I found a great way to do a veggie version, although I bet he would not agree. I have to reveal here that Tall P is not a vegetable lover. He likes corn on the cob and vegetables in soup, and only if they are an unrecognizable puree added as a thickener and he does not know they were added. Yes, Paul, you now know the veggie soup secret! This dish was inspired by the cheesy eggs, created with cheesy veggies.  Go figure. It definitely appeased my craving for baked mac and cheese (not so much the Kraft version I grew up eating, but the baked stuff I discovered later in life). The dish was easy to prepare and bake, allowing me to time it perfectly with the smoked pork Big D made. Add some chimichurri to the pork and what a meal!

Cauliflower Mac Bake

1 large head cauliflower
1/2 cup heavy cream
2 eggs
1 Tbsp parsley, finely chopped
1/2 tsp garlic powder
1/2 tsp sea salt
1 tsp ground mustard
1/2 tsp red chile flakes
2 cups cheddar cheese, grated
1/4 pound sharp white cheddar cheese, sliced into thin pieces
3 Tbsp butter

Preheat oven to 350 degrees. Chop cauliflower head into bite-sized pieces, making sure stem pieces are a little smaller. Place white cheddar cheeses slices in the bottom of a 9×9 or 9-11 baking dish. Spread cauliflower evenly over cheese. In a medium bowl combine cream, eggs, garlic, salt, mustard and chile flakes. Whisk until well combined. Add cheese and stir until well coated. Pour cheese mixture over cauliflower, spreading it evenly. Make thin slices over butter and place them on top of cheese mixture. Place in preheated oven for 60 – 75 minutes. The thicker the cauliflower the longer the baking time to make sure the middle is baked soft. Remove from oven and let sit for five minutes before serving. Slice into six or nine pieces for side dishes – it should come out intact, but if it doesn’t, it will still taste awesome.

Post Navigation