Any Kitchen Will Do

Give me a kitchen and I will cook.

Archive for the category “eggs”

Cauli n Cheese

cauli n chz

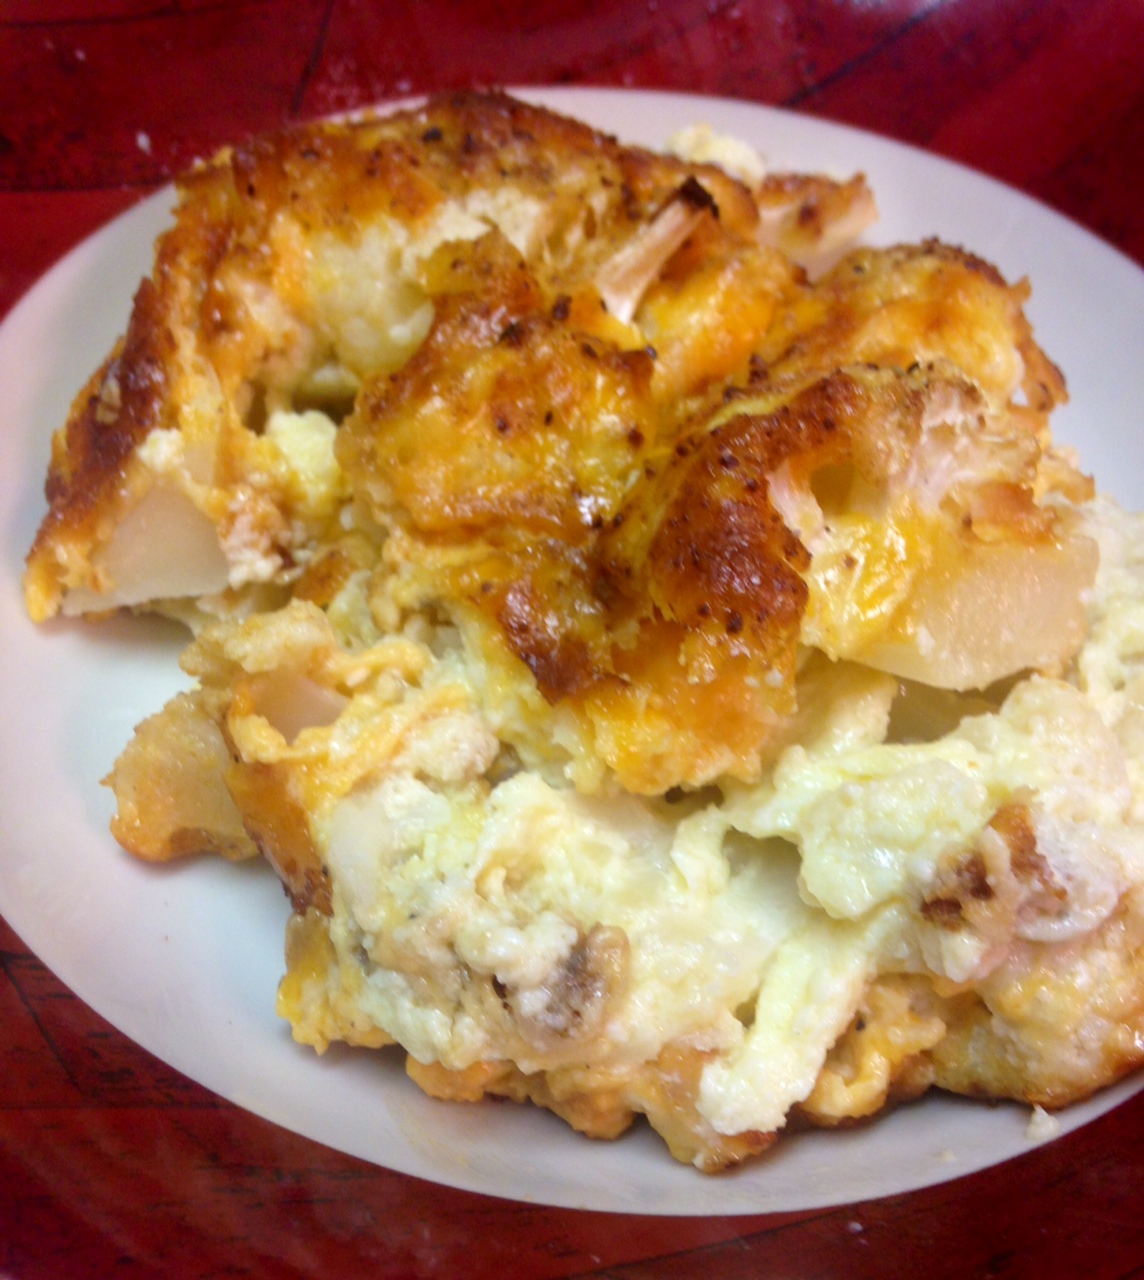
I have made this before but did not have the just right combination for creamy and cheesy, so did not share it. Other cheesy things with cauliflower, like the Cauliflower Mac Bake is cheesy but not so creamy, and the Cheesy White and Green Bake is good, but the fibrous broccoli does not quite bring to mind a replacement for mac n cheese. I think the combination of cheeses and cream really worked this time. The cheese merged with the cauliflower and cream instead of becoming stretchy. This time was different. This time it worked just right. There was a chewiness, cheesiness and creaminess that worked like a comfort food for me. THIS time I was reminded of the nights as a child when mom and dad did not have time to make dinner and grabbed a box of pasta and cheese pouch, threw it in a pot and cooked it up. Sometimes ham or hot dogs were chopped up with it and made it even more salty. The taste of this meal also reminded me of meatless Fridays that were part of the religious aspects of my upbringing. I never actually missed the meat as I dug into the creamy cheesiness. After a few mouthfuls Little B asked if I would make this every night because it was ‘soooooo good!’. I don’t know if I can accomplish that, but it certainly is not hard to do if there is a kitchen nearby and barely took more time than fixing mac n cheese from a box! It would be so cool if she craved cauliflower instead of pasta in 20 years…

Cauli n Cheese

1 head cauliflower
2 eggs
1 cup heavy whipping cream
1 Tbsp sea salt, plus more for top
1 tsp ground black pepper, plus more for top
1 tsp onion powder, plus more for top
1 tsp garlic powder, plus more for top
2 cups grated sharp cheddar cheese
1 1/2 cups grated parmigiano reggiano cheese

Preheat oven to 350 degrees. Remove leaves and stem from cauliflower. Cut cauliflower head into bite-sized pieces, keeping as much of the florets attached to the base as possible – avoid the crumbling of the florets. In a medium bowl whisk the eggs and cream, then add the salt, pepper, onion powder and garlic powder. Whisk in the seasoning. Add the cheese and stir in with the cream mixture. Arrange the cauliflower evenly in a 9″x13″ baking dish. Sprinkle some salt on cauliflower. Pour creamy cheese mixture over cauliflower, spreading cheese to cover the top entirely. Sprinkle a bit more salt, pepper, onion powder and garlic powder on top. Place uncovered in preheated oven for 40-45 minutes, until top is browned and bubbly. Remove from oven and let sit for ten minutes before serving.

Pecan Crusted Chicken

pecan crusted tenders

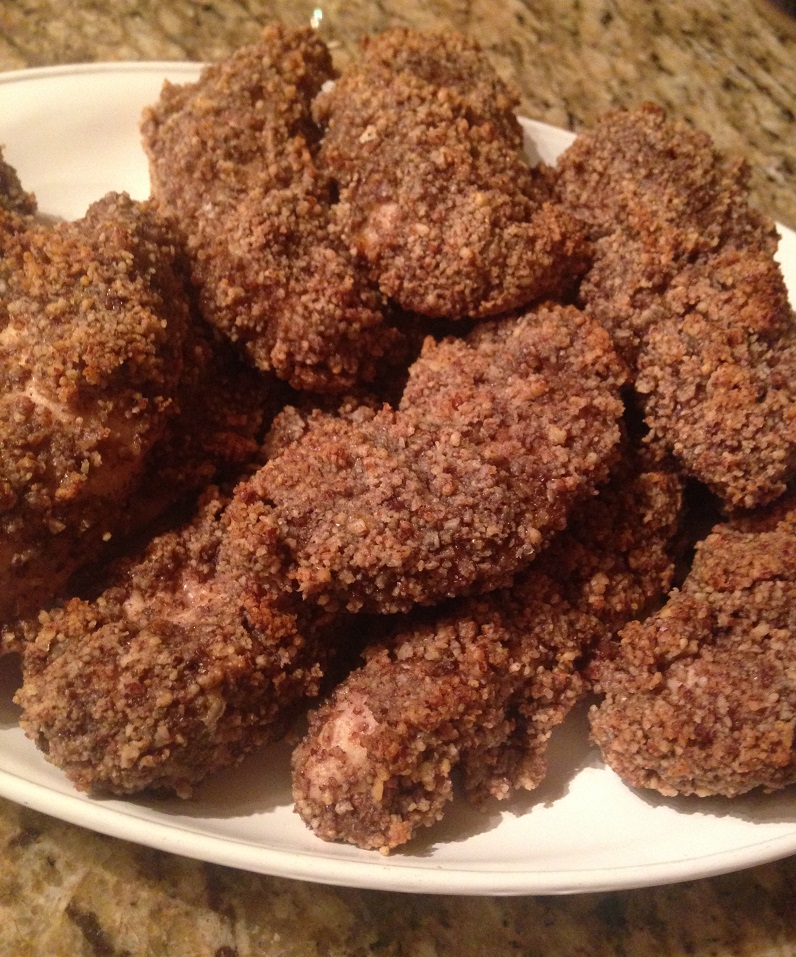
A few years ago we stopped eating wheat for a number of reasons. We have not been perfect about it, but try really hard. It is amazingly difficult to avoid wheat in convenience foods at stores and restaurants in America. Take a quick look at kid menus in quick serve and sit-down service restaurants – you are most likely to see choices like burgers,  grilled cheese sandwiches, corn dogs, macaroni and cheese, and some sort of breaded chicken. Most often included are the lovely and mysterious chicken nuggets and tenders – lovely because they are often crispy and mysterious because it not always clear what parts of the chicken are tendered or nuggetted. Little B and I like having such things on occasion, and am glad I have found a few versions that are not only wheat free but completely grain free. I like using the baked crispy chicken recipe for tenders and nuggets too, but wanted something with a little more crunch and bulk. The pecans sure fit the bill in this new recipe! The nuts chop up into various sizes, adding a nice texture which mixes well with the chicken. Little B eats them plain, but I like dipping in spicy dressing or mustard. They are filling too – instead of feeling hungry soon after eating like with wheat, the nut coating fills me up fast and keeps me full for a while. My in laws generously let me take over their kitchen during a recent visit and really liked them. Little B inhaled this stuff too – another score!

Pecan Crusted Chicken

3 pounds boneless skinless chicken pieces (tenders and thighs recommended)
2 pounds raw pecans
1 tsp sea salt
1 tsp garlic powder
3 egg whites
2 Tbsp dijon mustard
Sea salt and ground black pepper to taste

Preheat oven to 400 degrees. In a food processor pulse pecans, salt and garlic powder until nuts are finely chopped. In a medium bowl whisk together egg whites and mustard until well combined, but stop short of the whites becoming stiff. Line one to two shallow baking sheets with aluminum foil. Spread the nuts on a third sheet or large plate. Generously season chicken with salt and pepper. Dip the chicken in the egg wash, letting the excess run off. Roll chicken in the nuts, gently pressing them into the meat. Place chicken on the foil lined baking sheets with about an inch between pieces. Bake for 35-45 minutes, until juices run clear (whole chicken breasts or bone-in chicken may take longer). Serve immediately, plain or with desired dipping sauces.

Red Eggs

red poached egg

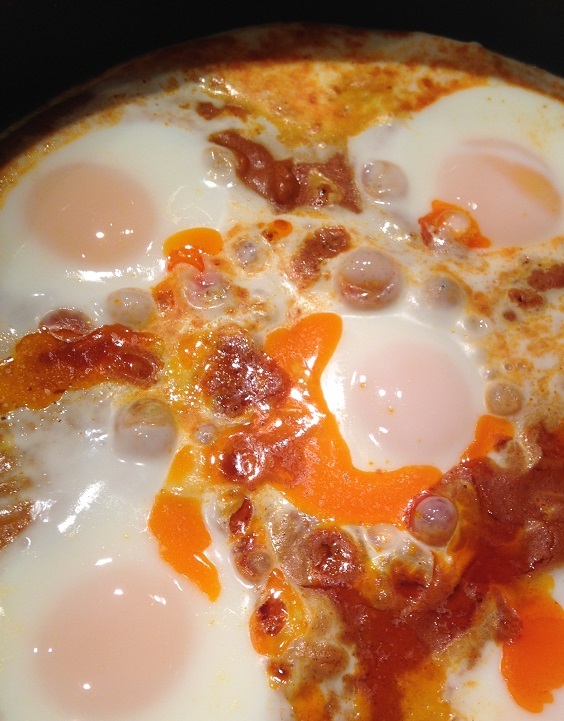
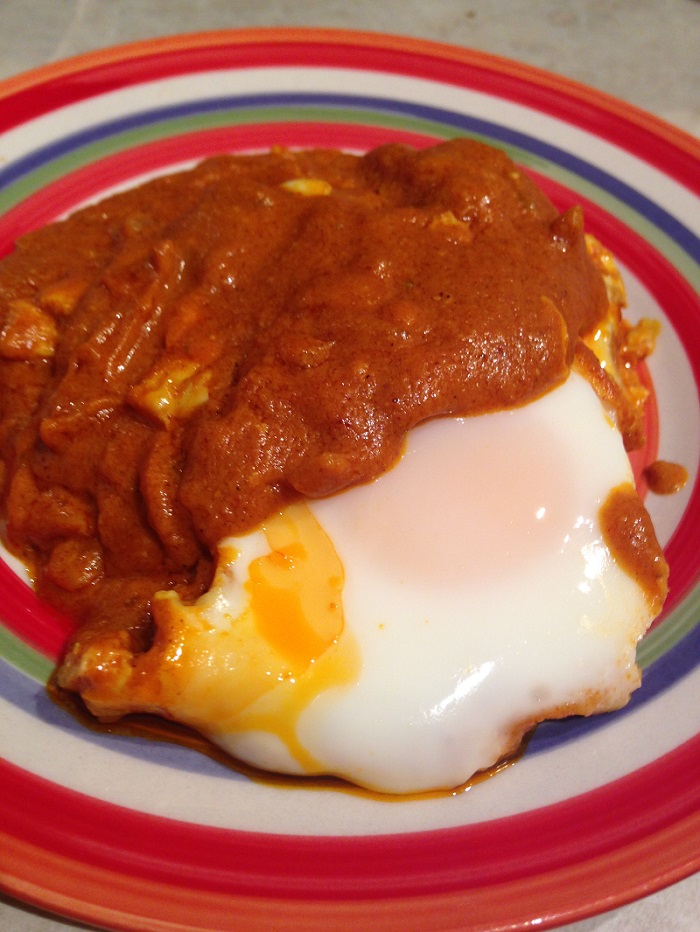
We had leftover sauce! My aptly named Red Chicken was delish, and left us with some sauce that was taunting us from the fridge the other morning. I was reminded of the simple egg bake I posted about a few years ago. It is also reminiscent of Indian shakshuka or Mexican huevos rancheros, which have a bit more than smooth sauce and eggs, but the concept sounded really good, easy and filling.

We were in the middle of a significant effort to reduce our worldly belongings and using up stuff from our food stores before moving. Such a process is pretty emotionally draining. More so than I ever expected. Not the use of food stores, but the reduction of belongings. I would think that getting rid of sweaters not worn in years would be easy, but remembering wearing them when spending time with family and friends brought a bunch of memories to the forefront,  good and bad. After the sweaters were done I shifted over to sorting other stuff. The same type of memories rise, everywhere from who gifted them to me to remembering all the places I wore them. If I was doing the process over the span of months is one thing, but we were doing this type of sorting day after day for a week. Although most of the time was spent sitting or standing and sorting, we were all exhausted at the end of the day. We were all doing it (me, Big D and Little B) and all felt the energy drain.

red poached egg platedThe cooking during this week of great purging helped us relax and talk about our goal – keep the things that serve us and we cherish, not being tempted by keeping stuff just because we always did before. We successfully got through the grand project and winnowed down our stuff to the amount we agreed to (two pick up trucks worth of bins, etc). We make no promises of avoiding the rut of collecting things again, but I think the experience will make us think twice before nonchalantly filling the cart at the big box stores. Keeping things simple provides clarity and encourages creativity – things we can never have too much of. On another note, we are so very proud of Little B. It would have been easy to send her off to a friend’s house and quietly sort through her stuff in absentia, but since we consider her a little person, we thought it important to take her through the process with us. It was not easy, but we took the time to work with her about what she used, what she had outgrown, what she had not touched in a year, and what she cherished. Of course, she is looking forward to more stuff as her interests change in the future, so she leapt in with both feet and made very thoughtful decisions, way beyond her five years on this earth. We surrounded ourselves with comforting food as we moved forward with the purge, including these eggs. Fortunately I did not step away from the pan at the wrong minute, so the poachiness of the eggs was pretty darned perfect. They helped us move on and gave us a new go to dish.

Red Eggs

2 Tbsp butter
1/2 white onion finely chopped
4 cloves garlic, finely chopped
1/2 cup natural peanut butter
15 ounces tomato sauce
1/2 cup lemon juice
2 Tbsp ground turmeric
2 tsp ground ginger
1 tsp ground cinnamon
1 Tbsp cayenne pepper
1 tsp sea salt
1tsp ground black pepper
8 ounces full fat coconut milk
4 – 6 eggs

In medium saute pan over medium high heat melt butter. Add the onion and garlic, cooking until browning begins. Add remaining ingredients except for coconut milk. Stir until all ingredients are combined, turning down heat to low. Stir in coconut milk and simmer until steam is rising from sauce. With the back of a spoon make a divet along the edge of the sauce in the pan. Drop a raw egg into the divet. Repeat with remaining eggs, evenly distributing them in the sauce. Cover pan and let simmer until eggs are cooked to desired doneness – about five minutes for soft. Serve immediately by scooping egg(s) onto a place and drizzle sauce on top.


Secret Muffins

secret muffin
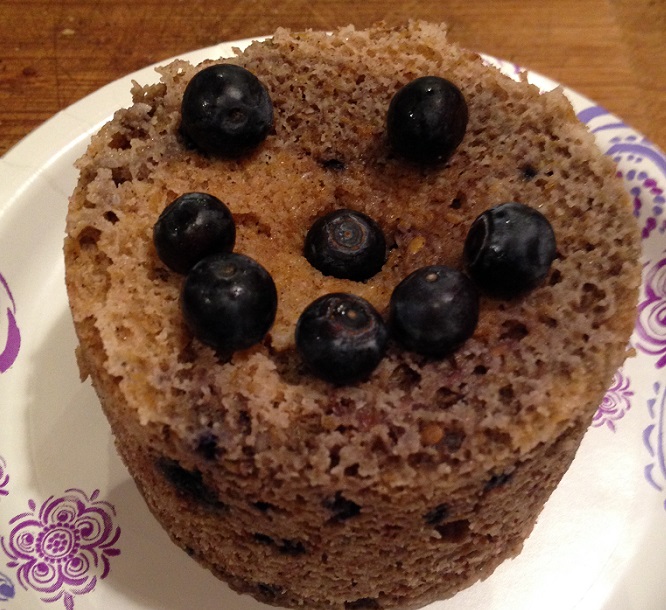
Little B and I have a wonderful opportunity to start spending more time together for a while. I guess that would be an obvious (to me) wonderful consequence of quitting my job. Of course part of the time will definitely be spent doing stuff in the kitchen. In recent months she has randomly thrown together fruit and veggies with cheese and called it soup. While some has been yummy, other batches not so much. Knowing that I often share kitchen experiences on my blog, she insisted this time I don’t share the recipe. It must be kept a secret! I cannot tell you we puréed a banana and berries, using them to substitute for butter, and then doubled the sweetener in some microwave muffins. At least I will stop short of listing all the ingredients or tell you how to cook them. I am a bad person, but they were soooo good!

Cheesy White and Green Bake

image

We have been very busy lately, so you may have noticed more often than not my posts include quick, easy recipes, good as leftovers for days we don’t have time to cook. I am so busy I noticed how much of a run on sentence I just wrote. Everything is moving quickly for us at the moment, but we still enjoy cooking a good meal, and want to make sure there is variety and a healthy dose of vegetables. This bake is filled with staples we always have in our kitchen. I hope you try it. As of the date of this posting, Little B inhaled this side dish the day I made it (along with a hunk of steak) then proceeded to request it three days in a row until the leftovers were all gone. This is noteworthy for two reasons: 1) although Little B is a fruit and vegetable nut, she tends toward raw rather than baked, so interest in this dish was refreshing, and 2) Little B is not a fan of leftovers, which may be rooted in our penchant for constant variety, or just a general tendency of a typical five year old. Regardless, she inhaled it and we happily watched! I may throw in some tuna or chicken next time and make it a full on casserole…

Cheesy White and Green Bake

1 small head cauliflower
1 stalk broccoli
1/2 small onion
2 eggs
1 cup heavy whipping cream
1 tsp sea salt
1 tsp ground black pepper
2 tsp granulated garlic
1/2 tsp ground thyme
2 Tbsp lemon juice
3 cups shredded mozzarella cheese

Preheat oven to 350 degrees. Roughly chop onion, cauliflower and broccoli into bite-sized pieces. Toss together then spread vegetables evenly in a 9×13 inch baking dish. In medium bowl combine eggs, cream, salt, pepper, garlic, thyme and lemon juice. Whisk together until eggs are combined with other ingredients. Pour sauce over vegetables, gently tossing vegetables until they are coated. Sprinkle cheese on top of vegetables. Bake for 30 minutes until edges are browning and middle is bubbly. Remove from oven and let rest for five minutes before serving.

Bacon Muffins

bacon egg muffins

These eggs were so good Big D inhaled three, then went to stare at the leftovers, wishing he had belly room to eat more. I know the ingredients are the traditional stuff you may find in a breakfast, only the convenience of having it all together in a little ball makes them taste oh so much better! Depending on my mood I may add garlic powder, parsley, chili powder….whatever is sprinkled on top mixes nicely with the egg and cheese to give them even more character. They also travel well, for those mornings when we run late and breakfast is in the car! If you like crispy bacon line the cups with the meaty side up (the pictured egg in the foreground). If you like softer bacon line the cups with fat edge up (eggs in the background). Another nice thing about these eggs is breakfast prep time drops exponentially. A typical bacon and eggs breakfast requires me to stand over crackling bacon and gently fondling eggs for 20 minutes or so, while sometimes taking special orders for soft bacon or easy over eggs. With this dish I did five minutes of prep then sat down and read some Harry Potter to Little B until the oven timer went off. Always looking for more cuddle time! And she insisted they be called Bacon Muffins when I started suggesting other names. Sometimes it is wise not to argue.

Bacon Muffins

2 Tbsp butter, cut into 12 pieces
12 slices bacon
12 eggs
1 cup shredded cheese
Sea salt and coarse ground black pepper to taste

Preheat oven to 350 degrees. In a muffin tin that holds twelve muffins, line each cup with a piece of bacon. For crispier bacon stand the meaty side up in the pan; for less crispy bacon stand the bacon fat side up. Drop a piece of butter in the bottom. Crack an egg into each cup. Sprinkle salt and pepper (or other seasonings to your liking) on top of the egg. Sprinkle cheese equally among the twelve cups. Bake 18 minutes for soft, and up to 21 minutes for firm eggs. Remove from oven and let sit for a few minutes to cool, then serve.


King Cheesecake

king cheesecakeIn past years I have created a myriad of different King Cake-themed treats. This year I almost passed up creating a new treat, but then Big D opened his mouth. I do admit that most times when he does that the result is positive. Other times, not so much. This time when he got a look on his face and was about to talk I held my breath. Really? We don’t have enough possibilties to choose from? Really?! Well, after he finished sharing his idea (aka closed his mouth) I was sold. Really, we don’t have enough. More more more! This here treat is a wonderful combination of past creations – the limey cheesecake, the Unholy King Cake and King Cakelettes.  I officially say, Big D, here and now, you were right…this time. The cheesecake is, as always, extremely creamy and satisfying. The crumbly, nutty topping reminds me of the spicy middle of a traditional King Cake, and the colored frosting provides for the traditional colors of Mardi Gras – green, gold and purple. I do wish the colored frosting was more vibrant in the picture, for I had to make a choice while waging a gentle battle. Today, being a gymnastics workshop day, Little B ran and flipped and tumbled pretty much nonstop for four hours. This means that her temperament, and mine, were at a bare minimum. After promising her for days she could help with this treat I could not refuse her here at the end. There was no margin for adjusting color or hue when mixing the three little bowls, so what you see is our wondrous treat with a pastel version of our dream. The good thing is she helped and looks forward to ending our feast tomorrow with a big slice. The bad thing is the decor is about four shades darker than planned. A small price to pay for some fun time with my little chef! Laissez les bon temps rouler!!!!! I hope you all have a wonder Fat Tuesday celebration tomorrow and are properly somber (whether from absinthe or faith or both) on Wednesday!

King Cheesecake

Crust
2 cups finely ground almond flour
2 Tbsp coconut flour
2 Tbsp butter, melted
1 tsp Stevita granulated sweetener
1 tsp ground cinnamon
1/4 tsp ground nutmeg
1/4 ground ginger
1 egg white, whisked (save yolk for filling)

Filling
16 ounces cream cheese, room temperature
1/3 cup sour cream
2 large eggs and 1 egg yolk, room temperature
3 Tbsp butter, room temperature
2 Tbsp heavy whipping cream, room temperature
1/3 cup Stevita, granular sweetener
2 large limes, zested and juice separated from meat (use less for milder lime tang)
1 tsp vanilla extract

Topping
1/2 cup raw pecans
1/2 cup raw walnuts
1 Tbsp ground cinnamon
2 tsp Stevita granulated sweetener
1/4 cup butter, melted
Dash sea salt

Frosting
4 ounces cream cheese, room temperature
3 ounces butter, room temperature
1 Tbsp Stevita
Food coloring (green, yellow, purple – made with one part blue and three parts red)

Make the Topping. Preheat oven to 350 degrees. Spread raw walnuts and pecans in one layer on a shallow, metal baking sheet. Place in oven for about five to eight minutes, until they begin to darken. Remove from oven, and set aside to cool. In a microwavable bowl add the butter. Melt on medium power, checking every 30 seconds, until completely melted. In food processor grind toasted nuts until they are a consistency of a rough meal. Add to the butter the ground nuts, cinnamon, Stevita and salt. Stir until well combined. Set aside.

Make the Cake. Preheat oven to 325 degrees. In 9″ pie dish cut a round of parchment paper that fits the bottom of the dish. In medium bowl stir together all dry crust ingredients. Add the butter and stir until the ingredients clump. Add the egg white mix until well combined. Crust will still be crumbly. Press crust into dish until bottom and sides are covered.For the filling add to a large bowl the cream cheese and sour cream. Whisk together until completely smooth. Add butter and stir again until smooth. Add eggs and yolk, stirring to incorporate and until smooth. Add sweetener, lime zest, lime juice and vanilla. Beat until well combined and smooth (see a pattern?). Pour filling into crust and gently smooth surface. Place cheesecake in oven. Bake for 20 minutes, until filling sets. Remove cake from oven and sprinkle topping on top – either evenly over the the entire top of the cheesecake, or Just along the edges, leaving a 2″ diameter space the middle uncovered, like the hole in the middle of a traditional King Cake. Return cake to oven for 10 more minutes. Turn off heat without opening oven door. Leave cake in the oven until mostly cooled, about two hours.

Make Frosting and Decorate. Whisk together cream cheese, butter and sweetener until well combined and smooth. Divide mixture into three separate bowls. Using green, yellow and purple food coloring, color the mixture in the different bowls until the desired tint is achieved. Using a spoon for each color drizzle the frosting over the top of the cheesecake – if you left the middle of the cheesecake clear of topping, I suggest you continue the theme of leaving the middle plain and drizzle the frosting over the portions with the topping. If the frosting is too firm to spread randomly you have two choices: 1) scoop frosting onto the bottom of a spoon and run it over the top of the cake, allowing it to catch on the pieces of topping, or 2) heat the frosting in the microwave at half power for 15-30 seconds until it is runny, then drizzle it over the top of the cake. If the topping was spread over the top of the entire cheesecake, then use any pattern you choose to apply the frosting.

Chill finished cheesecake at least one hour before serving.
 

Big D’s Eggnog

image

Some may be freaked out about this recipe. Not because it is eggy and not because it is boozy, but because it is RAW. You might get a bit antsy about consuming raw eggs, but we live on the edge. I do like the taste of cooked eggnog and in my opinion is often dominated by the alcohol taste. I much prefer the raw version – I can taste all the different flavors mixing together in each sip. It is frothy right out of a blender, and nice and smooth after it sits in the fridge for an hour or two. Do not fear, for it is still boozy, just not as obvious. We often make it between November and January. I have thought about making it other times of the year, but it seems wrong. Big D has perfected the ratios over the years and I discovered recently that I have yet to post about it! Well, here it is. I hope you enjoy it!

Big D’s Eggnog

10 eggs
2 cups heavy whipping cream
1/2 cup Stevita granular sweetener
1 tsp ground nutmeg
1 Tbsp vanilla extract
1/2 cup spiced rum
1/4 cup whiskey
Additional ground nutmeg for garnish.

Combine all ingredients in a blender. Blend on high for 10 seconds. Let eggnog sit for five minutes. Serve immediately, sprinkled with nutmeg, or refrigerate until time to serve.

Mediterranean Meatloaf

mediterranean meatloaf 2
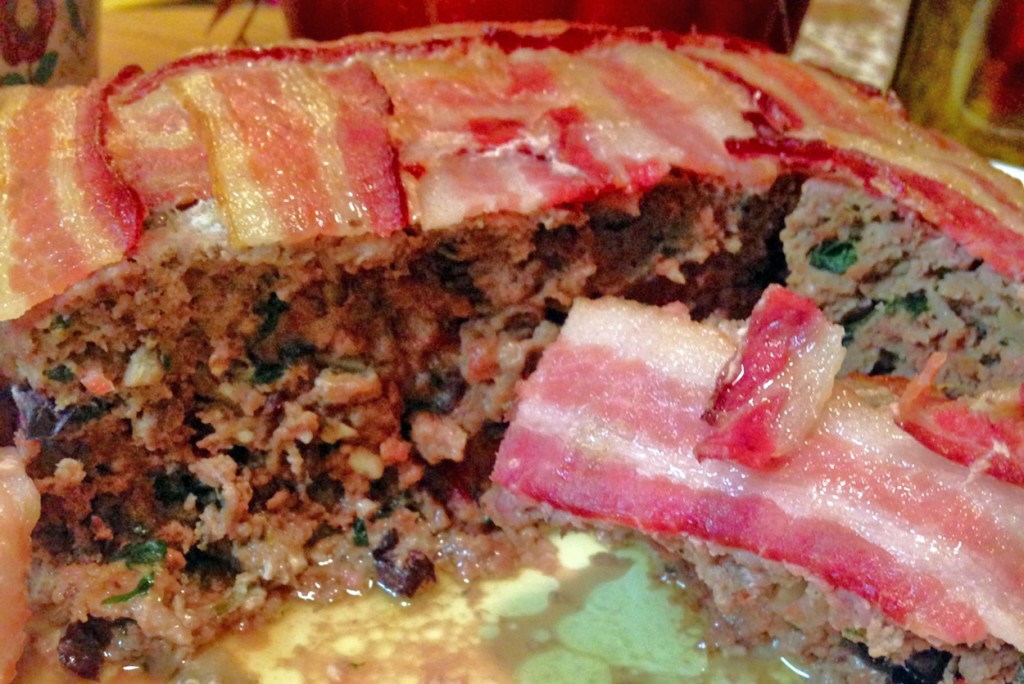
I have shared a couple different meatloaf recipes with you in the past, like the spicy one and the veggie one, but never one wrapped in bacon! This one has a bit of a Greek twist, like my recent foray into stuffed mushrooms. I would blame other things, but the extreme moistness of this loaf I attribute to the bacon. It is great for the loaf protection. As with many baked meals, it tastes great the day it is made, but after sitting in the fridge and reheating, it is even better! I may even get all crazy next time I make this and serve a little tzatziki on the side!
Mediterranean Meatloaf
1 1/2 – 2 pounds ground beef
2 eggs
2 cups crumbled feta cheese
1 cup chopped raw spinach
1 cup chopped kalamata olives
1 cup chopped marinated artichoke hearts
1 cup finely chopped onion
4 cloves garlic, crushed
1/4 cup chopped fresh mint
1/4 cup fresh oregano leaves
1/2 cup chopped fresh parsley
1 Tbsp sea salt
1 tsp ground black pepper
8-10 slices bacon, uncooked
Preheat oven to 350 degrees. In a large bowl place the ground beef, making a lower section in the beef. Add the eggs, cheese, spinach, olives, artichoke hearts, onion, garlic, herbs, salt and pepper. Using your hands, break up egg yolks and squish other bowl contents together with meat until well combined. Press meat mixture evenly into 9×9 inch baking dish or large loaf pan. Arrange bacon slices on top of the meat in a criss cross pattern, tucking the ends around the sides of the meat. Gently press down on the loaf to avoid any uneven shaping resulting from tucking the bacon. Bake in oven for one hour. Remove and let sit for about ten minutes before removing to serving dish, then serve.

Soft Boiled Eggs

image

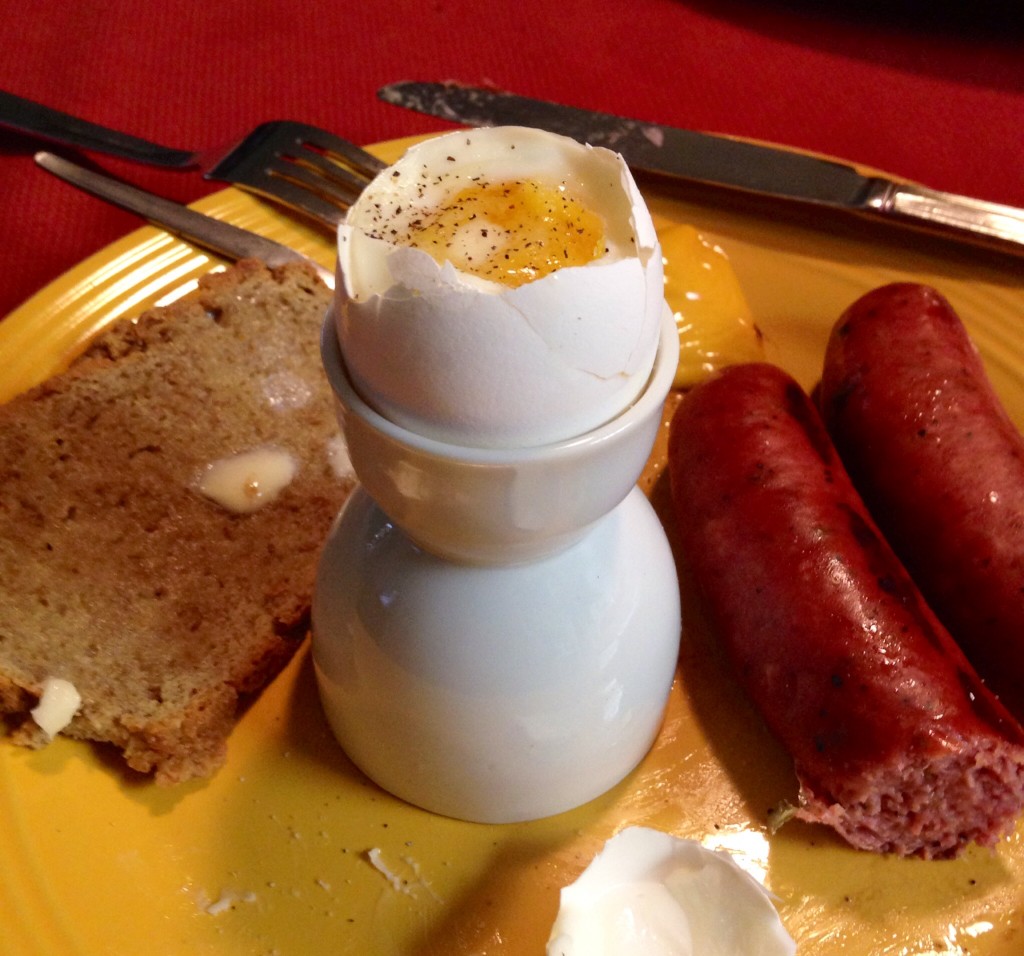
I almost feel guilty making this a post, but decided that doing so from my mom’s kitchen was so very appropriate. When I was growing up my brother and I were taught cooking basics and how to eat basics. They included the typical topics, like the use of fork, knife, spoon and napkin. Little B’s current challenge is elbows on the table, but that is a different story altogether. In addition to the basics we were also taught more specific skills we used less often, but practice never hurts! Things like getting every bit of meat off bones of roast chicken with a fork and knife (no fingers allowed), escargot with shell fork and tongs, crab with mallets and picks, grapefruit halves with serrated spoons, rolling long pasta with spoons and separating mussels and clams from their shells (again, no fingers allowed). I promise we did not end up snooty, just knew how to mind our manners in pretty much any food situation. We also learned how to sop roast meat off a platter using bread chunks, double dipping chips, licking our fingers and nibbling while we cooked. I am sure my mom loooves this disclosure! It was always interesting to see what mom and dad would come up with next. A fun breakfast skill we learned quite young was how to eat a soft boiled egg from a cup. It sounds almost silly. Why not just peel it and eat from your hand, you ask? The practice is actually used in many parts of Europe. My dad learned it from his Irish father and both my parents ate them in this manner while living in France, Germany, etc. Most people probably don’t have the requisite egg cups or tiny spoons, but you can probably adapt. I was very happy to introduce such a breakfast to Little B during our most recent visit to Texas. She was more excited about opening the egg than eating it all, but that’s okay. I was always around to finish it up. You may not believe me, but eggs cooked and eaten like this taste different than using your hands or frying some up over easy. Maybe it is the gentle cooking of the yolk while protected by the white, but a spoonful with a little yolk, white, butter, salt and pepper is a wonderful way to start the day, and appreciate the humble egg.
Soft Boiled Eggs
Large fresh eggs (quantity varies)
Water
Salt
In a medium pot add water, enough to cover the eggs, and a sprinkling of salt. Bring water to a full boil. With a large spoon gently lower each egg into the boiling water. Lower heat slightly but maintain the boil, and cook for exactly six minutes. Remove eggs with large spoon to serving cups or serving bowl. Serve with salt, pepper, butter, breakfast meats and bread.
To Eat: place an egg in an egg cup, pointy side down. Some eggs may not have a pointy end, so just guess – typically the round end will have the yolk closer to it in a boiled egg (think where the filling goes in a deviled egg) so the next step will more likely reveal yolk. While gently steadying the egg with one hand and using a knife in the other, tap the egg about 1/4 inch from the top, turn the egg and continue tapping until there is a ring of cracked shell all the way around. Using the point of the knife pierce all the way through and lift the knife away from you, catching the egg top with your knife-free hand. There should be soft yolk showing. Place a small piece of butter into the yolk and sprinkle with salt and pepper. Using a small spoon scoop out a bite, making sure it includes white and yolk. Eat. Repeat. Don’t forget to scoop the yummy bite from the egg top!

Post Navigation