Any Kitchen Will Do

Give me a kitchen and I will cook.

Archive for the category “onion”

Dad’s Spaghetti Sauce
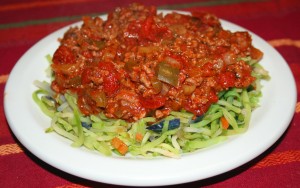
dads spaghetti sauceYou may not have noticed, but earlier this month I began a greenish/Irish theme, which will lead us up to St Patrick’s Day and beyond. Last year I covered traditional stuff like corned beef and cabbage, colcannon and the less traditional but politically symbolic white chocolate frito popcorn. This year I started with coleslaw, which has green cabbage, followed by some chicken with the green of spinach, then the Dublin Coddle, with a slightly more Irish leaning. I really enjoy St Patrick’s Day. Not only because I am about 87% Irish, or that I have a dual citizenship, or that it is another excuse to drink a little too much, but also because when I was growing up we laughingly called everything my dad made ‘Irish’. Irish popcorn, Irish fajitas, Irish potato salad, Irish steak…you get the idea. The dishes did not necessarily have a historically Irish origin, but because a big Irishman with blue eyes put effort into making it for his loved ones. My dad’s specialties were typically products from the outside charcoal grill. He cooked meat exceptionally well. Whether it was fajitas, steak, chicken or a whole passel of meats in his tower smoker – ribs, ham, turkey, roast – if it used to walk he could cook it, and it tasted great. He was the reason I rarely ever ordered steak in a restaurant until I moved out of the house. Restaurant steak always tasted salty, but not flavorful. I know most of his secrets, and I may share them one day, but today is not the day. Today I share with you his spaghetti sauce. One of his two significant non-grill, non-smoker dishes. In case you were wondering, his other dish was potato salad. Now on with the spaghetti sauce. I have done other tomato-based sauces, but this one is consistent with what he always made. Huge batches filled a big old aluminum pot that simmered on the stove top all day. It smelled heavenly, especially walking into a warm house on a cold, wet Texas day. It smelled like comfort, which is what I often sought on a wet Saturday after playing soccer or doing yard work. When I got older I helped him make it, discovering his penchant for perfectly sized chopped veggies and just the right combination of herbs. Another thing about his sauce – he rarely used fresh ingredients. I don’t consider it a good or bad thing. The sauce was always full of flavor and satisfying. He grew up during the Great Depression, which I think established for him certain habits, including the stockpile of canned and dried goods. You should have seen our pantry when I was growing up – we never failed to have fresh meat, fruit or veggies, but if we didn’t there were always canned. I still love the taste of canned spinach and pineapple – separately, of course. I recognize the canned and dried elements in this recipe. I don’t think you can beat the finished product very easily. I have made a version of this from scratch – fresh tomatoes, fresh herbs…it was good, but you know, after cooking it for so long, I could hardly tell the difference. Maybe it was because I tweaked it until it tasted like Dad’s version, or maybe because after enough cooking the fresh version tastes like the Hunt’s canned version. On top of everything else, I found a great new base to hold the sauce – broccoli slaw. In the past I have used traditional spaghetti pasta, gluten free pasta, spaghetti squash and just chopped sauteed squash. This time I saw some broccoli slaw on sale at the store – it is basically broccoli stems cut julienne and packaged with a bit of carrot and red cabbage. I microwaved it straight from the freezer for five minutes to soften, salted it then set it on a plate and topped it with sauce. The texture worked great – not pasta-y, but definitely a strong texture that worked with the sauce. It is my new favorite to pour things over. I can imagine a decadent cheesiness next time, or maybe some kind of lasagna concoction…

Dad’s Spaghetti Sauce

2 Tbsp extra virgin olive oil
1 small white onion, chopped
6 cloves garlic, crushed
1 pound ground beef, 15% fat or less
1 medium green bell pepper, chopped
3 stalks celery with leaves, chopped
1 tsp sea salt
½ tsp ground black pepper
2 Tbsp dried parsley leaves
1 ½ Tbsp dried oregano leaves
1 Tbsp dried basil leaves
42-56 ounces Hunt’s brand canned diced or plum tomatoes
6 – 8 ounces tomato paste
1 tsp truvia, or one small pinch of pure stevia
More salt to taste

In a deep stock pot heat to medium high and add olive oil. When oil is hot add onions and garlic, saute until the onion sweats (gets shiny and releases liquid). Add ground beef. Break meat up with a wooden spoon and saute until browning begins, but not until it is completely cooked. Add bell pepper, celery, salt, pepper, parsley, oregano and basil. Stir and cook until vegetables begin to soften. Add tomatoes and stir some more. Bring to a boil, cover, reduce heat and simmer for 2 hours (or more). Sprinkle in sweetener, to bring out the tomato flavor, and stir well. For an additional 30 minutes to an hour simmer with the top tipped so steam escapes. The sauce should thicken noticeably. Turn off heat and cover. Let sit until ready to serve, or cool to room temperature and refrigerate overnight. If you double or triple the recipe there will be plenty to freeze in reasonable portions. Reheat slowly on the stove top. Serve over your preferred base – either al dente pasta, spaghetti squash, or my new favorite, cooked broccoli slaw.
Dublin Coddle

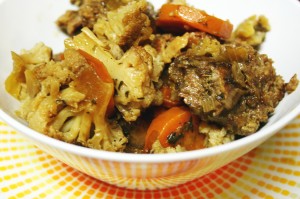
dublin coddleI adore the name of this dish. And oh my flippin’ floopie, it is rich and delish! It reminds me of a chilly, rainy day I spent in Dublin many years ago, popping into a pub to warm up a bit with some food and drink. I did not have a coddle, but the feeling was the same. It totally has a comfort food vibe, and is considered such in Ireland. I thought of it with St. Patrick’s Day coming up and my Irish-ness starting to raise it’s head here in my blog. It is called a coddle because of the slow simmering manner of cooking the dish. Dublin, of course, comes from the popularity of the dish in the Dublin area. I read one place once that the convenience of slow cooking the one-dish meal and the ease of keeping it warm in the oven has a logical basis – it allowed for a warm meal to be ready for the man of the house when he came home late from the pub, after the rest of the family was already in bed. Heh. From my experience there are almost as many variations of this dish as there are mothers and grandmothers. Just like in the US there are delicious recipe variations for meatloaf, chicken soup and apple pie, each cook makes it their own way. I probably committed some form of blasphemy by excluding potatoes from my version of this dish, but we are stubborn about our use of cauliflower as a potato substitute in our diet, so I happily blasphemed. The results were like a beef stew. I know, I know, there is no beef in the recipe. It is just a bunch of pig. That is what I thought! I think the beer mixes with all the other juices and just makes a darned rich broth that is reminiscent of beef broth. Sooooo good! A layer of thinly sliced potatoes as the top layer is the more traditional route, so I included it as an option in the recipe. I thought the quantities would serve four, but we did not have any sides, just a big bowl of coddle. Since there were so many veggies and protein in the coddle it ended up being healthy servings for two very hungry people. If you are not serving sides with the coddle I would recommend doubling the recipe for a party of more than three.

Dublin Coddle

8 slices thick bacon
6 thick pork sausages (mild Italian or ideally some Irish bangers)
1 Tbsp butter
1 large yellow onion, roughly chopped
3 cloves garlic, sliced
1 cup water
1 head cauliflower or 3 medium potatoes
1 large carrot
1 12-ounce beer or hard cider
1 Tbsp dried parsley leaves
2 tsp dried thyme leaves
Salt and Pepper to taste

Cut bacon into 1-inch pieces. In a large frying pan cook the bacon over medium heat until browned. Transfer cooked bacon to Dutch oven. In bacon grease over medium high heat add sausages and cook until browned, but stop before they are completely cooked through. Cut the sausages into one-inch pieces and transfer them to the Dutch oven. In what is left of the bacon grease add the butter. When the butter is melted add the onion and garlic. Saute until onions are softened but not browned. Transfer onion and garlic to Dutch oven. You are now done with the frying pan. Salt and pepper the stuff in the Dutch oven to your liking, then pour in the water. Slice the carrot into coins, no more than ¼ inch thick. Chop cauliflower into bite-sized floret pieces, or peel and slice potatoes, no more than ¼ inch thick. Add to the Dutch oven a layer of carrot, followed by a layer of cauliflower. You may not need the whole head of cauliflower, but there should be an even layer of it over the top of everything else. If using potatoes make an even layer of slices on top, overlapping them so the other ingredients are substantially covered. Sprinkle the parsley and thyme on top of the cauliflower/potatoes, followed by salt and pepper to your liking. Add the beer or cider. The liquid in the Dutch oven should come up to about the middle of the pot and not totally submerge all the ingredients. Cover the Dutch oven with a tight fitting lid or two layers of foil. Place in 400 degree preheated oven and cook for 45 minutes, then turn heat down to 325 degrees and cook for another 1 to 1 ½ hours, until the cauliflower/potato layer is soft and ready to eat. Turn off the oven and leave the coddle inside it until time to serve. It will stay hot for quite a while.


Coleslaw Perfection

coleslaw_edited-2

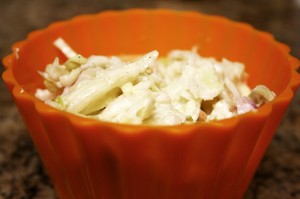
Big D and I have issues. I like tart coleslaw and he likes slightly sweet coleslaw. It makes for a challenge when making, well, coleslaw. I could make two batches, but that seems silly, so I just kept experimenting until I figured out a just right combination of sweet and tart in one bowl of slaw. I previously tried to use sweetener and wine vinegar to get a balance, but then had a revelation and tried – duh – a different kind of vinegar. The apple cider vinegar has just enough sweet and tart to get to the balance we like. Viola! The perfect coleslaw.

Coleslaw

4 cups shredded green cabbage
1 cup shredded purple cabbage
½ cup shredded carrot
½ cup finely chopped red onion
1 clove garlic, crushed
1 cup mayonnaise
¼ cup apple cider vinegar
1 tsp sea salt
½ tsp ground black pepper

In a medium bowl combine garlic, mayonnaise, vinegar, salt and pepper. Whisk until combined. Add green cabbage, purple cabbage, carrot and onion. Toss vegetables until coated with dressing. Chill for at least an hour before serving.

Whippersnapper Soup

whippersnapper soup_edited-1

Little B loves vegetable soup. I also consider her a whippersnapper. The traditional definition of the term refers to an insignificant or impertinent young person. Such a definition is not what I think of when I use the word. I think it more describes a precocious, inquisitive little one, which is much more in line with Little B’s personality. Her precociousness carries over to her view of soup. Whether it is actually chicken soup or tortilla soup or beef stew, she considers it vegetable soup. Pretty reasonable, I think, since most soup she has seen is loaded with vegetables. Big D and I like soup, too, especially if it has a bit of a spicy bite. I particularly like the limy chicken soup I make on occasion. Our ‘big people’ soup does not always go over well with Little B because her tongue is not yet attuned to hot spicy. I have never served Little B canned soup. I am sure someone has, but canned soup worries me. With the odd, faded colors of the vegetables and the grainy feel of the meat they are a bit unsettling to me. Don’t get me wrong – I grew up on Campbell’s Chicken Noodle Soup and still sometimes crave the salty soft noodles and bright yellow tinge of the broth. I don’t think they taste bad, except for the saltiness of some types, but I like to know where my food comes from, and I feel the same for what Little B eats. My know-where-it-comes-from parameters are certainly not met by canned soup. This soup recipe is simple to throw together and freezes well. I make it regularly, with a variation on the vegetables I add, depending on what is in the fridge. Little B eats three or four bowls a week, often when Big D and I eat spicy food. She even has it for breakfast sometimes. Frozen in two to three cups per resealable bag or container is perfect – enough to have in the fridge when requested without any going bad. Our whippersnapper loves it and it is so good for her.

Whippersnapper Soup

1 pound package 16 bean soup mix, flavor pack discarded
28 ounce can whole peeled tomatoes
4 celery stalks with leaves
2 cups fresh or frozen green beans, cut to 1 inch lengths
¼ head green cabbage
½ small onion
8 ounces ham, finely chopped (optional)
4 cups filtered water
1 – 2 cups chicken or vegetable broth
2 cloves garlic, crushed
1 Tbsp sea salt
½ tsp black pepper
1 tsp ground cumin
1 tsp fresh oregano, chopped

In stock pot or crock pot combine bean soup mix, tomatoes, celery, green beans, cabbage, onion, ham (optional) and broth. Add garlic, oregano, salt and cumin. Stir until spices are combined. Add water and stir a bit more. On the stove top bring soup to a boil then turn down to simmer. Cover and simmer for about four hours until beans and vegetables are soft. In a crock pot, set to low and cook for eight to twelve hours. Serve immediately or store in the freezer for up to three months.

Meaty Fritatta

meaty frittata

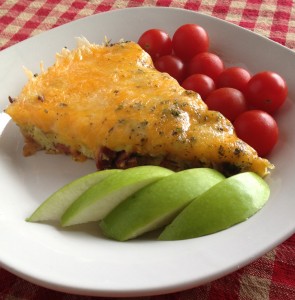
Yep. We are on a run of two meals a day. Not because we are watching calories or anything, but because we are having big holiday lunches or dinners, or leftovers of big holiday lunches or dinners, so any other meals are simple and small. For example, we have quick plates of eggs and greens, or a plate of antipasto because of a big meal happening later. Here is a meal that can use leftover meats and will keep you filled until “the” big meal later. A fritatta is easy to put together while also giving you (aka, me) a few minutes sit and sip some coffee while it cooks, but before digging in. Besides the holiday balancing of big meals, this is something we have on weekend mornings when we are not exactly sure what to do for the day. It is a great time to sit and ponder what we are going to discover in the world with Little B. The awesome part these days is that Little B is very vocal about what she wants to do, and not do, so having a conversation with her about our activities while brunch cooks is pretty darned cool.

Meaty Veggie Fritatta

2 Tbsp extra virgin olive oil
4 cloves garlic, chopped
½ sweet onion, finely chopped
8 ounces sausage, roughly chopped
8 ounces ham or bacon, roughly chopped
1 cup broccoli, finely chopped
8 eggs
¼ cup fresh basil, chopped
1 Tbsp dried oregano
1 tsp dried parsley
½ tsp ground cumin
½ tsp sea salt
¼ tsp ground black pepper
2 cups shredded cheese, a combination of cheddar, colby jack, monterrey and pepper jack

In large frying pan add oil over medium heat. When oil is hot add garlic and onion. Cook until they begin to brown. Add sausage, ham and broccoli. Toss and cook until broccoli begins to wilt. In medium bowl while meat is cooking add eggs, basil, oregano, parsley, cumin, salt and pepper. Whip until eggs yolks and whites are combined and spices are mixed up. When meat is ready add eggs and stir until meat mixture and eggs are combined. Turn heat down as low as possible and sprinkle cheese on top. Cover pan and cook for ten to fifteen minutes, until eggs are set and cheese is melted all the way to the middle. Remove from heat and leave covered for about ten minutes. Uncover and slice into wedges. Serve with fresh fruits and vegetables.

Soupless Green Bean Casserole

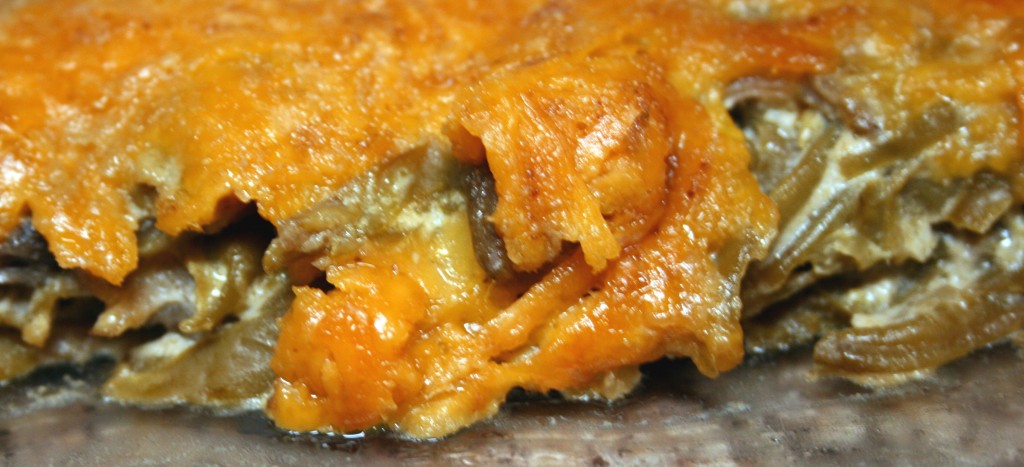
I like holiday meals. Partly because of all the lovely foods we don’t make during other times of the year, but also because the meals often require cooking all day. Darn. Heh. We like spending time in the kitchen. Besides keeping us close to the alcoholic beverage supplies, it is a place where we have great conversation and create or try new things. This is a good thing, in my opinion. Besides a huge bird, or a massive ham, I always look forward to green bean casserole. There is something about the beans and the creamy sauce and the occasional mushroom bits all swirled together in a single bite. This version of the casserole does not include the crunchy fried onions, because of the wheaty carbiness of them, but it still turned out to appease my comfort food craving for the soupy, crunch version. I don’t know how well this would work with whole fresh beans, but with the canned french style the sauce coated every bit very well and the richness I love so much was able to shine through. I am not partial to all the extra stuff they put in canned soups, as I have ranted about before, so I am always glad to figure out versions of comfort foods I enjoy with out the canned stuff. Big D got a little perturbed at how much I liked the green bean casserole over the flaxseed dressing, which was pretty good. His holiday comfort food goes back to his grandmother’s dressing, filled with biscuits, cornbread, apples and sage. I don’t know that he ever gave green bean casserole a second thought before we got together. What can I say, I am a green bean casserole girl. Have I mentioned I like green bean casserole? That last one was for Big D.

Soupless Green Bean Casserole

2 Tbsp butter
1 Tbsp coconut flour
1 tsp salt
1 tsp erythritol
1/4 cup onion, diced
2 cups mushrooms, diced
1 cup sour cream
1 Tbsp Worchestershire sauce
3 cans green beans, drained
2 cups shredded Cheddar cheese

Preheat oven to 350F. Melt 2 tablespoons butter in a large skillet over medium heat. Stir in flour until smooth, and cook for one minute. Stir in the salt, erythritol, onion, Worcestershire sauce and sour cream. Add mushrooms. Cook mixture until mushrooms sweat and liquid reduces by about 50%. Add green beans, and stir to coat and heat. Transfer the mixture to a 9×9 casserole dish. Spread shredded cheese over the top. Bake for 30 minutes, or until the top is golden and cheese is bubbly.

Bacon Wrapped Thanksgiving Turkey

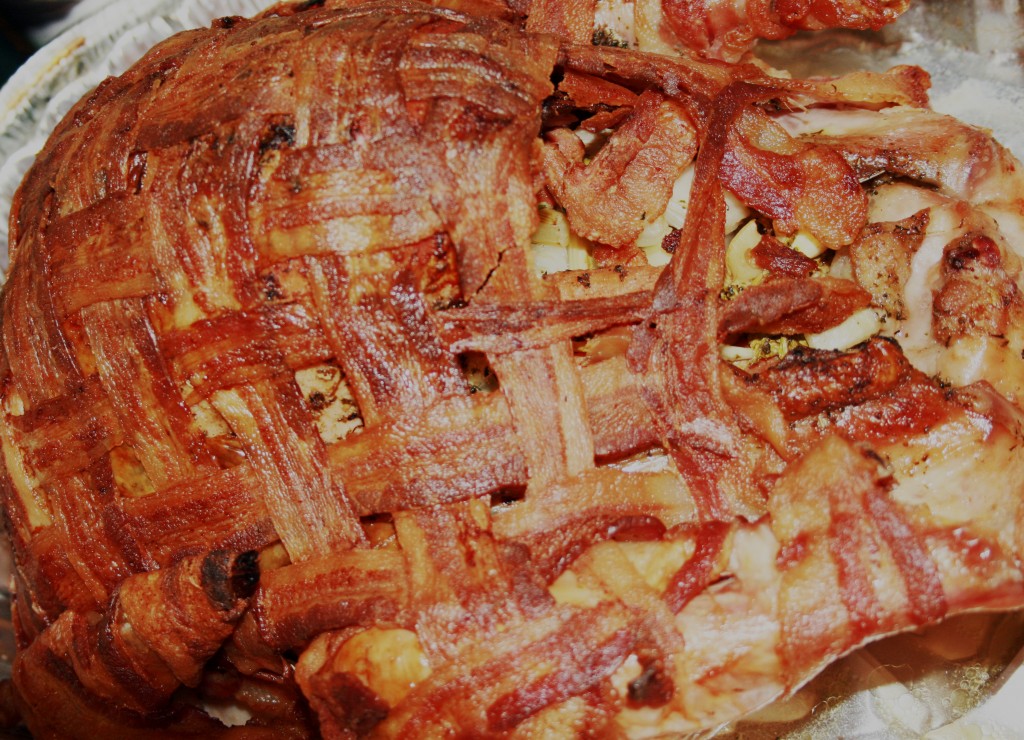
To all fellow bacon lovers – what may be even better than wrapping steak or jalapenos or chicken breasts in bacon? Turkey! The end result may not look like the quintessential golden skinned turkey, but boy is it moist and flavorful! Our traditional method is to use a smoker to do the turkey, along with whatever appetizers we crave, like stuffed mushrooms, and even throw in the occasional bunch of jalapenos, tomatoes and onions, which make a smokin’ salsa. Our current living situation, at the top of an apartment building, is not conducive with smoker use. We didn’t want the landlord following the trail of smoke and nagging us about rule breaking. A quick searing of steaks on the balcony grill is one thing, but eight or so hours of trailing smoke is more than what we thought we could get away with. We went ahead and did an oven version this year. I am curious about how this recipe would work in a smoker, but we will have to find out another time. It was fun to do the bacon wrapping and watch the bacon get dark and crispy. Instead of having the typical crispy skin to eat, we had a blanket of bacon. The skin kind of melted into the meat, becoming part of the bacon. I am not sure how it happened, but the results were very satisfying. I got the idea from here, but made adjustments, since we are particular about fresh herbs for Thanksgiving, even though we often rely on the dried stuff most of year. The bird was stuffed with carrots, celery, onion, garlic and the herb combination that turned out wonderful. There are various versions of this recipe with comments about soft bacon, but I don’t know what they are talking about. As you can see, there is a crispy shell on it and the meat is well cooked and moist and wonderful. If you follow my instructions you should be able to get the same results. Enjoy!

Bacon Wrapped Thanksgiving Turkey

One 15-pound turkey
1 cup fresh parsley leaves
½ cup fresh tarragon leaves
½ cup fresh sage leaves
¼ cup rosemary leaves
10 cloves garlic, peeled and crushed
½ cups olive oil
4 cups vegetables, including carrots, celery, onion and garlic
3 pounds bacon, sliced into thin strips

Wash the turkey inside and out and pat dry. Place in refrigerator for at least an hour uncovered to cool. Preheat the oven to 500 degrees. Mix together the herbs, minced garlic and olive oil to make a paste. Rub the paste in the cavity and underneath the skin of the breasts of the turkey, carefully so you do not tear the skin. Fill the cavity with the vegetable mixture, and place in a roasting pan. Add 1-2 cups of water in the roasting pan, so there is about ¼ inch of water, then roast the turkey in the oven for 30 minutes. Remove from the oven and turn the heat to 350 degrees. Cover the turkey in the bacon slices, in cross-hatch form* or just by overlapping the slices in strips. Insert a meat thermometer in the thickest part of the breast. Put the turkey back in the oven and continue to cook for about 20 minutes per pound (about three hours total, including the high temperature period) until an internal thermometer temperature reaches 160 degrees. 

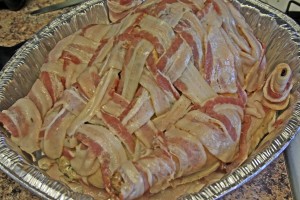
*To do the cross hatch on top and bottom there can be preparation while the high temperature cooking happens. Take two pieces of wax or parchment paper, about two feet long each. Create the cross hatch by alternating bacon pieces into one foot by one foot sections. After the turkey finishes the first half hour of cooking, move the turkey to a surface where juices can drain. In the baking pan flip one of the cross hatch sections into the dish and spread it out. Place the turkey on top, then flip the second cross hatch on top. Between the wings and legs connect the cross hatch edges as much as reasonably possible. Wrap the wings and legs with bacon strips, making sure to cover all the meat and skin. Add a few more pieces on the top and bottom of the cross hatch pattern to cover all surfaces of the turkey.

Veggie Kinda Hummus

Hummus tastes good in so many ways. And by ways I mean it can be used as a dip, or spread, or side dish or a nice base for presenting other foods. My favorite use is spreading it on pita and filling with Greek salad. These days I try to not eat much pita, and frankly hummus made from chickpeas can put me over the top carb-wise on a day if I am not careful. I still like the idea of using hummus as a fiber filled  base for anything from salad to grilled meats or seafood. To reduce the carb count I came up with a way to make kinda hummus, using veggies. I can use it where I would otherwise put hummus, with fewer carbs while keeping the fiber content high. The other day Big D made a killer batch of taco meat. I slathered a layer of kinda hummus on the plate under the meat and cheese and tomatoes. Yum! The vegetable proportions can vary depending on what you have in the fridge, but keeping the cauliflower  at about half the bulk will helps obtain the hummus consistency. Be sure to let the veggies cool before pureeing, cuz they can certainly become a hot mess!

Veggie Kinda Hummus

2 cups chicken broth
1 medium head cauliflower
2 cups broccoli, chopped
1 small onion
2 celery stalks, chopped
1 carrot, chopped
2 cloves garlic
Salt and pepper to taste

Combine broth, garlic and vegetables in a large pot. Cook over medium high heat until boiling. Reduce heat and simmer for 30-45 minutes until all the vegetables are soft. Let cool until safe to transfer to use a hand blender, counter top blender  or food processor. Using a strainer or
slotted spoon separate the veggies from the liquid. Purée the vegetables until smooth, all at once or in batches. Add some of the cooking liquid only if it is too thick to purée. The vegetables will be pretty wet, so you probably won’t need the liquid. Serve warm or cold as a spread, dip or plating base for meats and other vegetables, as you would hummus.

Thyme and Lime Chicken Soup

You are walking along enjoying the crisp fall breeze, when you suddenly have an urge for a bowl of hot chicken soup. You run by the store and into the soup aisle, only to discover that all their offerings include noodles, rice, tons of salt, preservatives and fillers. Where, oh where, is the veggie and chicken filled bowl of goodness you were craving? And what about that extra twist you want to be surprised with as the first spoonful slides down your throat? Well, here are all the things you’re looking for! The surprise is how wonderfully the beer mixes with the lime juice and thyme to give the soup a nip not usually found in chicken soup. Don’t worry. After hours of exposure to heat the alcohol cooks away, but the more subtle flavors of the beer stays in the soup. Little B inhaled two bowls in one sitting. Enjoy!

Thyme and Lime Chicken Soup

½ pound thick sliced mushrooms
3 Tbsp dried thyme
1 tsp sea salt
2 Tbsp extra virgin olive oil
3 limes, juiced with meat included
2 pounds cooked chicken, chopped or shredded
2 cups miniature carrots, chopped into coins
3 stalks celery, chopped
1 medium Onion, chopped
4 cloves garlic, crushed
4 small or roma tomatoes, roughly chopped
1 cup water
12 ounces beer (pick a strong flavored one – pale ale or IPA – goes well with the lime)
Salt to taste

Preheat oven to 350F. In a medium bowl combine the juice and pulp from one lime, olive oil, thyme and salt. Add the mushrooms and toss until coated. On a medium cookie sheet spread out the mushrooms slices flat with a little space between each. Drizzle any sauce over the mushrooms. Bake for 20-25 minutes, until they begin to brown. Remove from oven and set aside to cool. In crock pot add water and remaining lime juice with pulp, then turn pot to high. Add chicken, carrots, celery, onion, garlic and tomatoes. Stir and let soup heat up, about an hour. When the soup is hot add mushrooms (along with any juices left on the baking sheet) and the beer to the soup. Continue to cook on high for three more hours. Turn temperature to low and cook for 3 – 4 more hours. All the ingredients can be added to the crock pot at the same time and cooked on low for 8 – 10 hours, but the results are tangier if the vegetables are allowed to heat up in the water/lime liquid before adding the beer. Either method bears good results. If using the stove top, bring the soup to a boil before adding the mushrooms and beer, then simmer on low for 5 or 6 hours. Season with salt to taste before serving.

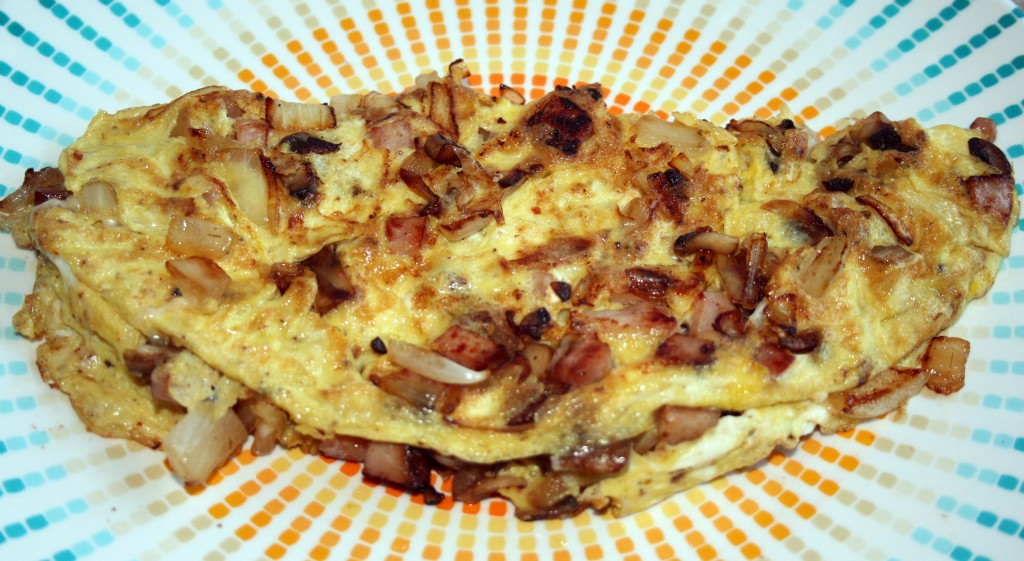
Oniony Omelet

So many weekday evenings there is a need for food, but not necessarily a desire for cooking. Don’t get me wrong, I adore cooking, but sometimes I walk into the house in the evening and just want to collapse and enjoy my family while doing the minimum necessary to prepare for the next day, much less for the evening. That includes dinner. Preparing a quick meal can add to the evening enjoyment, but only as long as it stays quick. The past couple of weeks have included crazy busy long days at work, so the oldie but goodie – breakfast for dinner – is ideal and filling. For me, there is just something about an oniony, cheesy omelet that hits the spot. Slap a couple of tomato slices on the side and dinner is served!

Oniony Omelet

1 Tbsp butter
½ small sweet onion
1 clove garlic, crushed
2 slices ham, finely diced
½ tsp salt
¼ tsp ground black pepper
1 tsp dried parsley
3 eggs, cracked and mixed
½ cup shredded Monterrey Jack cheese

In medium skillet melt butter over medium high heat. Add onion and garlic. Saute for a few minutes until they begin to sweat. Add ham and cook until ham, garlic and onions begin to brown. Add salt, pepper and parsley. Lower heat to medium low. Spread out ham mixture in pan. Pour in egg and swirl pan around to spread it out. Let cook for a few minutes until egg sets. Using a spatula pull egg in from the edges of the pan. When egg from the middle of the pan begins to bubble slide your spatula under half of it and quickly flip it over the other half of the egg, pushing a little from the middle to complete the folding in half. Cover and cook for another minute until the egg is to desired doneness. Serve immediately.


Post Navigation