Any Kitchen Will Do

Give me a kitchen and I will cook.

Archive for the category “snack”

Whiskey Watermelon

whiskey watermelon
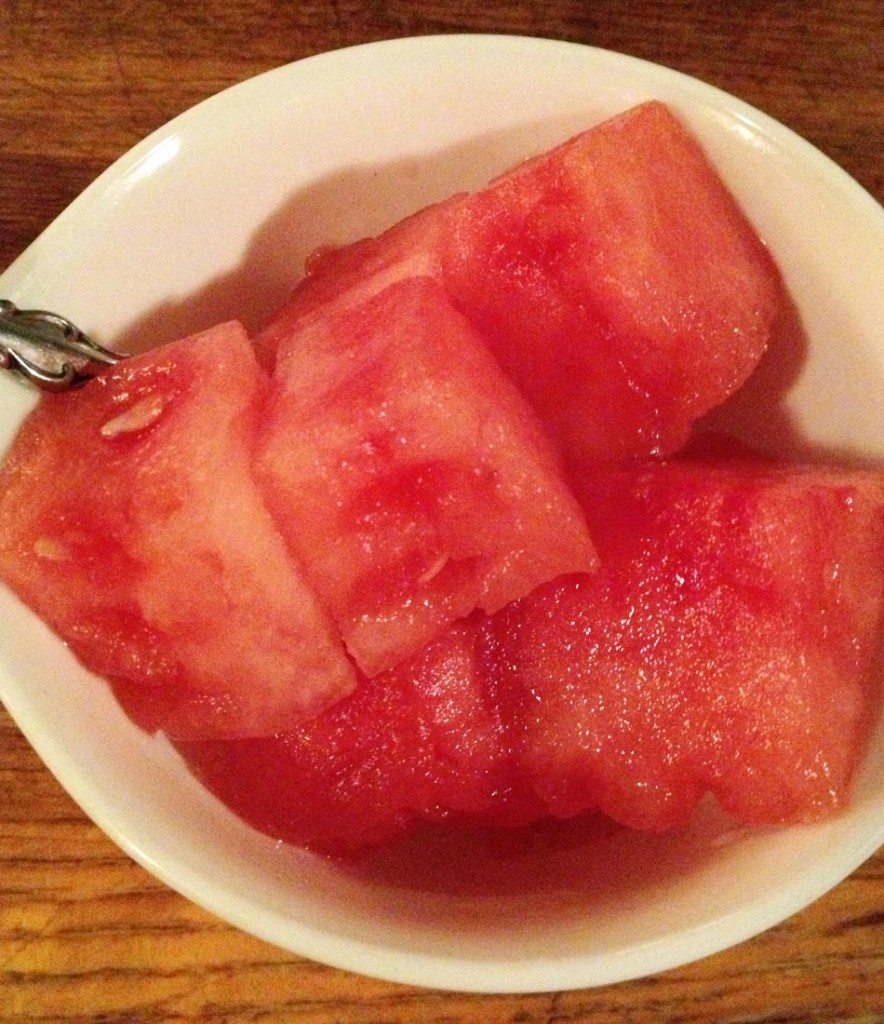
This treat was fun! After some frustration. Little B had been asking for watermelon for a week or so, but it was never when we were actually in the store. Big D and I don’t really eat much of it, so getting a whole one is often wasteful. Finally, one day I was at the store and there were smaller packages with just a few slices for sale. Is it cheaper to buy a whole melon and waste most of it, or pay a little more for a smaller quantity? It is often the question I ask myself in such situations, but it was a non-issue this time because the price was the same per unit. I grabbed it, excited to be surprising Little B. Alas, when I returned to the RV with the watermelon she had decided that she no longer liked it, it was yucky and she never wanted to eat it again. The reaction probably had something to do with not getting a nap on a busy, hot, humid Saturday, but I was still bummed. So now I have watermelon on my hands and the cocktail hour is approaching. In the past I made watermelon margaritas in such a situation, but no tequila. Then, I spotted the whiskey. Not an expensive, aged sipping whiskey, but a simple bottle of the stuff we use with mixers. Perfect! Let’s get the watermelon drunk! I set it all up and let the morsels soak for about an hour. Yummy! Reminded me of college days when the impact of a few jello shots in a row hits all at once. Be careful with these things. The watermelon soaked up the whiskey all right. And the juice left over at the bottom of the bowl worked quite well for a mixed drink later. Enjoy summer and watermelon while it lasts, in spite of your three year old’s protestations.

Whiskey Watermelon

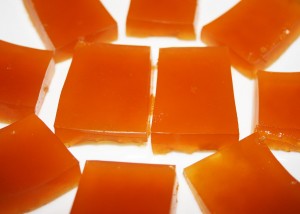
1/2 small watermelon
1/2 cup whiskey

Remove rind from watermelon and cut melon into 1 inch square pieces, smalller if you want the alcohol effect stronger. In a resealable bag combine the watermelon squares and whiskey. Gently press the back to remove excess air and seal. Place in refrigerator for at least an hour, but four hours is better. Remove and serve in small bowls with forks or toothpicks.


Double Chocolate Cupcakes

dbl choco cupcakesThese cupcakes came from the mouth of my babe, Little B. As with our strawberry concoction from a while back, she got a baking hankering and we followed it through. Little chocolate cupcakes with chocolate frosting that don’t have any wheat or sugar. She is adamant about those two points, which meant we got to create a new recipe “with only really good tasting ingredients Mommy. Don’t forget they have to be really good” she tells me. Well, they are really good, and buttery and rich. Also a chance to crack eggs and spread frosting, which are always good things. Really good things.

Double Chocolate Cupcakes

Cakes
6 eggs
½ cup butter, room temperature
1 tsp vanilla
¼ cup coconut flour
½ cup golden flaxseed meal
¼ cup cocoa powder
1 tsp pure stevia powder
1 tsp baking soda
½ tsp sea salt
1 tsp ground cinnamon

Frosting
1 8 ounce block cream cheese, room temperature
½ cup butter, room temperature
½ tsp vanilla
¼ cup cocoa powder
½ cup granulated erythritol

Preheat oven to 350 degrees. Combine eggs, butter and vanilla in a medium bowl. Whisk together until combined. In a separate bowl combine flour, meal, cocoa powder, salt, baking soda, cinnamon and stevia. Add dry ingredients to egg mixture and stir until well combined. Divide batter among a lined 12 regular sized or 24 mini muffin pan. Bake for 15 – 18 minutes until tops are firm. Remove from oven and let cool completely. For the frosting add the cheese, vanilla and butter in a medium bowl. Whisk until combined. Add cocoa and erythritol and continue whisking until combined. Chill a few minutes if it comes out thin. Spread frosting over cupcakes. Store cupcakes in the refrigerator until serving – mostly to keep the frosting firm, otherwise they can sit at room temperature.

Wiggly Gelatine Rectangles

wiggly gelatin rectanglesRooibos tea is a beautiful thing. It tastes good when simply brewed, or in the special way Big D spices it up as iced tea with cinnamon, nutmeg, cloves and citrus when he brews it. Actually, a combination of red rooibos and green rooibos produced the best batch of iced tea I ever had. When Big D first discovered it we could not find it plain in stores, just with other flavors or sweetened up. I found the quick dissolve versions of the tea with peach flavoring to be okay, but not really tasting like tea. We ended up ordering red and green rooibos it in bulk online out of necessity – it was not to be found in any store anywhere near us. The special thing about rooibos tea is the fact it is naturally caffeine free – not processed to be decaffeinated or manipulated to be some arrogant, snooty herbal tea combination. Rooibos is really flavorful tea without pretense. From what I can tell, it is a common beverage in South Africa grown in a specific regions there, and not something you typically find at your local cafe in America. It is a sad thing for America, because it is a lovely tea, if you had not noticed my opinion from the above tea meanderings. Try it if you get a chance. On to the wiggly squares. I found that the flavored gelatine selection at the store includes two bad choices: sweetened either with sugar, or aspartame. Both options are very unappealing. I turned to the top left section of the shelf and saw my solution. Good old plan unflavored gelatin. It can be manipulated in so many ways. Here is a fun, slightly sweet treat that lasted two days, because Little B was very much on a wiggly streak.

Wiggly Gelatin Squares

½ cup lemon or lime juice (you can use orange juice if fresh squeezed)
2 – ¼ ounce packs unflavored gelatine
1 ½ cups brewed rooibos tea, reheated to boiling
1 ½ tsp equivalent of pure stevia

OR

½ cup lemon or lime juice (you can use orange juice if fresh squeezed)
2 – ¼ ounce packs unflavored gelatine
1 pack 4C Totally Light Tea2Go Iced Tea Mix Red Tea Antioxidant Peach Flavor
1 ½ cups boiling water

OR

½ cup lemon or lime juice
2 – ¼ ounce packs unflavored gelatine
1 cup boiling water
5 drops red food coloring
½ cup seltzer water

In a medium bowl add juice and gelatine. Let sit for about one minute, until it the gelatine soaks up all the liquid. Add the tea and stevia (or the tea pack dissolved in the boiling water), then stir until gelatine powder is dissolved. If using ½ cup seltzer add it now and stir a bit. Pour liquid in small baking dish or baking sheet, so it is about ½ inch deep. Chill until set, about three hours. Cut in squares or rectangles and gently lift out with spatula. Play with your wiggly treats then eat! If you have any leftovers store with cling wrap between layers in an airtight container.

Strawberry Cupcakes with Strawberry Frosting

strawberry cupcakes frosted small

These little cakes came out beautifully imperfect. And Little B frosted every single one of them. We were long overdue making a batch of cupcakes, so I started by asking her what flavor she wanted. Strawberry. Then, I asked her what kind of frosting she wanted. Strawberry. I followed up by asking what she wanted to put on top. Strawberries. I saw a theme. So, guess what we got at the store? You guessed it! Strawberries. She loves pushing buttons on the blender and watching all the ingredients swirl and twirl around. The frosting is very similar to what I put on the birthday cake I made a while back, but without the icky whipped topping. Fortunately, after her taste testing between the frosting of each cupcake, there was still enough to finish the job. We got so involved with making sure there was strawberry in the cupcakes we forgot to keep some for on top! Oh well. And Tall P really liked them too! This is actually a big deal, because he claims to not like sweets. Yep. The guy who drinks sweet tea and eats box after box of fresh strawberries coated in sugar. He does not like sweet stuff. I don’t quite understand where his line between sweet and not are actually drawn. I think he has taste bud issues. Regardless, he ate up these little guys! Score one for me and Little B! They definitely taste like strawberry. Just a little nudge of sweetener made them sweet treats and the berry flavor really shines. They taste like summer.

Strawberry Cupcakes with Strawberry Frosting

Cakes

1 pound strawberries, cored

1 Tbsp lime juice

1 tsp pure stevia powder

6 eggs

1 Tbsp vanilla

¾ cup coconut flour

¼ cup golden flax seed meal

1 Tbsp baking powder

½ tsp sea salt

Strawberry Cream Cheese Frosting

8 ounces cream cheese, room temperature

½ cup salted butter, room temperature

½ cup granulated Splenda

2 Tbsp sugar free strawberry syrup

Preheat oven to 350 degrees. In a blender or food processor add the strawberries and lime juice. Blend until there are no large strawberries remaining. Add the Stevia powder and eggs. Blend again until combined. In a separate bowl combine the coconut flour, meal, baking powder and salt. Add the dry ingredients to the wet ingredients and blend some more until combined. Let the batter sit for a few minutes – you will notice it thicken a bit. Pour batter into 24 lined regular sized muffin tins (or 12 regular muffin tins and 24 mini muffin tins). Bake for 20-25 minutes until set and browning. While the cupcakes are baking prepare the frosting. In a medium bowl combine the the cream cheese, butter and Splenda. In a small bowl combine the arrowroot powder and strawberry syrup. Mix until smooth and thick. Stir the syrup mixture with the cream cheese mixture until the color is evenly distributed. When cupcakes are cooled frost them. Store in the refrigerator.

Crunchy Cinnamon Chickpeas

crunchy chickpeas

Spring is coming and the increase of daylight highlights in our home the pack rat tendencies we had over the winter. This time of year, especially when it begins to get warmer, I want to throw open the windows and refresh my surroundings. The refresh includes finding new ways to feed Little B. She is often open to trying new things, except when she isn’t. I thought some crunchy chickpeas would be right up her alley, and since I found a can of them in the pantry during spring cleaning, I decided to try and copy some chickpeas I found in a convenience store a while back. They were bought during a road trip when I was desperately trying to avoid potato chips – a traditional road trip food that is also traditionally not very good for a body. The chickpeas were crunchy and spicy, I suspect from cayenne or chili powder, and very satisfying. There was probably also mono sodium glutamate and other chemicals, but I don’t recall. I make a simple, less spicy version here for Little B, but the crunchy is definitely the same.

Crunchy Cinnamon Chickpeas

1 can chickpeas
1 Tbsp extra virgin olive oil
½ tsp sea salt
¼ tsp cinnamon
Tiny pinch of pure stevia

Preheat oven to 425 degrees. Rinse and drain chickpeas. In a medium bowl add chickpeas and drizzle with oil. Sprinkle in the salt, stevia and cinnamon. Toss until chickpeas are coated. Line a cookie sheet with aluminum foil, then spread out the chickpeas in one layer. Bake in preheated oven for 15 – 20 minutes until they begin to brown, then shake them around so they change positions, but are still spread out in one layer. Bake for 15 more minutes – if there is extra coating dropped on the foil it may make it smell like it is burning, but the chickpeas themselves should be fine. Remove from oven and let cool to room temperature. If there is any left after snacking on them, store at room temperature in an air tight container.

Acorn Squash Bread

squash bread

I bought a big, beautiful acorn squash a week or two ago. We have leftovers from the holidays filling the refrigerator and freezer, so in the process of figuring out what to do with the squash, I realized we were running low on goodies for Little B. Additionally, she was to begin a new preschool soon and we needed to stock up on portable wheat free snacks for her. And on top of THAT, I got an awesome new mini loaf plan as a gift and was itching to break it in. To make a bread that has some sweet and savory I included nuts and spices. Of course, relying on coconut flour and eggs to beef up the protein was a must. Little B likes this stuff a lot, and this particular squash was sweet, so the squash/snack/loaf pan goals were met with one recipe. Three birds, one stone. Big D bit into it and groaned – in a good way – it reminded him of his grandmother’s banana bread, and it had no bananas. Now THAT is a compliment!

Acorn Squash Bread

1 cup cooked, mashed acorn squash
½ cup walnuts
6 eggs
½ cup olive oil
1 Tbsp vanilla extract
½ cup coconut flour
¼ cup golden flaxseed meal
1 cup granular erythritol
1 tsp sea salt
1 tsp baking soda
½ tsp baking powder
1 tsp ground cinnamon
¼ tsp nutmeg

Preheat oven to 350 degrees. In blender combine squash, walnuts, eggs, oil and vanilla. Blend until smooth and nuts are broken up to around the size of little peas. In mixing bowl combine flour, meal, erythritol, salt, baking soda, baking powder, cinnamon and nutmeg. Add blended ingredients to dry ingredients and stir until well mixed. Pour batter into greased bread pan or mini loaf pan(s). Bake for 40 – 50 minutes if making one large loaf, or 25 – 30 minutes for mini loaves. The bread is done when the loaves look set (no longer liquid) and the edges begin to brown. Let cool in the pan before removing. Breads made with coconut flour need to cool before they are set enough to remove from pans, but making sure the pans are greased well make the removal process easier.

Dragon Fruit Frenzy

dragon fruit salad

Dragon Fruit is the funkiest fruit I know. It is bright and crazy on the outside and and a neutral black, white and mild on the inside. It kinda tastes like kiwi fruit, but unlike the skin of the kiwi, you should shy away from eating the thick pink skin of the dragon fruit. With the single dragon fruit I got from the market I made two simple recipes – a fruit salad for Little B and a rather odd looking cocktail for myself. The meat of the dragon fruit can be sliced or cubed and looks really pretty with brightly colored fruit – in this case, strawberries. dragon fruit margaritaFor my cocktail I did a margarita-type drink (I know, blasphemy for the margarita purist), and sipped it while having a nice green salad with shrimp. The whole meal felt kind of summery, which felt odd, since it is December, but very refreshing after some of the heavier foods we are eating lately. With my eyes closed the cocktail was soft and lovely. With my eyes open it looked like a gray sludge that tasted soft and lovely. I don’t know what to do about the color, but it tastes wonderful.

Dragon Fruit Frenzy

Strawberry Dragon Fruit Salad

½ dragon fruit, meat only, cubed
¾ cup strawberries, chopped
1 Tbsp lime juice

Combine dragon fruit cubes and strawberries. Drizzle juice over fruit and gently toss. Serve immediately or chill before serving.

Dragon Fruit Cocktail

½ dragon fruit, meat only
¼ – 1/3 cup tequila
½ lime, juiced
1 – 2 tsp truvia
6 cubes ice

Add 1 tsp truvia and remaining ingredients to blender. Blend on high until ice is broken up. The sweetness of the fruit can vary, so taste the cocktail and add more truvia to preferred sweetness. Serve immediately.

Peppermint Bark

I did it again. Had a hankering to make something sweet, delicious and addictive, only to then take it to work and encourage bad habits for my co-workers. There are fancier versions of peppermint bark out there, but I have found this one to be consistent and delish. It can be doubled, tripled, taken to a potluck or divvied among gifts for teachers or neighbors. I warn you to not make it just because you want some. If you are anything like me you will have ‘just a bite or two’ so many times it will suddenly be gone and you are the sole culprit. Either have plans to share it or go ahead and get elastic waist pants. Another warning: don’t confuse peppermint extract and oil – the oil is much more potent than extract, and the results will vary widely, sometimes in a bad way. Yet another suggestion: if you have an energetic young person who wants to help make the bark, hand them the bag of canes and let them whack it on the ground. It will probably do the trick. Happy Holidays!

Peppermint Bark

2 pounds white chocolate chips or roughly chopped white chocolate bark
1 package (about 12) peppermint candy canes
½ tsp peppermint extract or 2-3 drops peppermint oil

Prepare medium sized cookie sheet by lining with parchment or wax paper. Crush candy canes: place unwrapped canes in a resealable bag, then use a rolling pin or tenderizer hammer to break them up, making sure all pieces are less than 1 centimeter long. Set aside candy. Into a medium glass bowl add chocolate. Melt in microwave for one minute. Stir. Continue heating in microwave by using 30-second increments, stirring after each increment. You can also melt the chocolate in a metal bowl over a double boiler with gently simmering water. When the chocolate is warm, smooth and completely melted, add extract or oil and stir well. Pour chocolate onto prepared pan and spread until chocolate is evenly distributed. Sprinkle crushed candy over top and gently press it into the chocolate. Let cool completely at room temperature or in the refrigerator, then break into desired serving sizes – I usually make 2-inch square-ish pieces. Store in air tight container.

Oatmeal Vanilla No Bake Cookies

I know I know. This recipe is totally not in line with what I have been making lately, but I have a reason. I wanted to make a little something for people at work, and since 95% of them eat whatever comes there way, I decided to make something with a -little- bit of nutrition, but not exactly sugar free. I took some gluten free sugar free treats for the souls with more sensitive diets, but the majority happily scoffed down these cookies. The result was a big hit, and apparently addictive. I like that. I ate a crumb when I was slicing them up, and wow! One guy at work insisted he really liked the coconut, but I think it was oats, since there is not a speck of coconut in them. Maybe it was a texture thing? His insistence is ironic, considering all the coconut products I use these days. The good thing about this recipe is the fact you can make it from dry goods typically found in your pantry, and staples from the fridge. I would eventually like to try a gluten free sugar free version, but my hunt for sugar free pudding mix without aspartame has yet to be successful…oh well, maybe some day. In the meantime, you now have a recipe that is quick to whip up and will disappear in the blink of an eye!

Vanilla No Bake Cookies

2 cups white sugar
1 tsp ground cinnamon
¾ cup butter
2/3 cup milk
1 (3.4 ounce) box vanilla pudding mix
3 ½ cups quick cooking oats
1 tsp vanilla extract

In a large pan mix together sugar, butter and milk. Bring to a boil. Boil for two minutes. Turn off the heat, add in the pudding mix, oats and vanilla. Let stand five minutes. Drop by tablespoon onto wax or parchment paper and let cool. You can also pour the mixture into a small cookie sheet or baking dish (9×11). Spread evenly and let cool completely before slicing up into desired serving size. Store in airtight container.

Inspired by: http://auntpegsrecipebox.blogspot.com/2012/04/vanilla-oatmeal-no-bake-cookies.html#.UEJBNZbAETA


Refrigerator Pickles

When I was a kid we had a garden in the back yard. We always grew tomatoes, sunflowers, usually included zucchini and often did cucumbers. Needless to say, we ate a lot of fresh vegetables during the summer. Sometimes I looked forward to the gardening – finding fruit and veggies ready to pick or grabbing some of the more elusive weeds while the plants matured. Other times I was not so eager to be a gardener – breaking up all the clods of dirt after they clumped over the winter, or clearing out all the dead plants when autumn came. I remember getting mad at my dad a few times, too. Me, my brother and mom did a lot of the work, but when he talked about the garden it was ‘his’. Ooooh, that got me irked! We would slave away in the heat and he would come out, point to a few things we missed, then head back in to the air conditioned house. I laugh about it now, because we learned so much about plants and self-sufficiency and responsibility, but the perspective was a bit different at the tender age of eight or nine. One thing my mom always did with some of our cucumber crop was make refrigerator pickles. For months there would be at least one jar of pickles in the fridge door – we would come in from playing outside (or gardening) and pinch a few cold, tart slices as a snack. They never lasted very long, which was good, since the simple preparation did not include any heating or effort to sterilize or pasteurize in the process. Since we currently have no garden, or yard for that matter, this batch of pickles was made with store bought cukes. They were big and perfect – the slices were nice and floppy after sitting in the jar for a day or two. Little B enjoyed watching them flop around before pretending to be a tiger and taking a bite. I never knew tigers liked pickles.

Refrigerator Dill Pickles

1 large cucumber, peeled
1 – 2 cups white vinegar (substitute with some water if you want less tang)
½ white onion, julienne sliced
2 tsp sea salt
5 sprigs fresh dill
4 – 6 cloves garlic, chopped
1 Tbsp mustard seeds
clean glass jar with tight fitting lid

Slice cucumbers into thick coins (1/8 to ¼ inch). Set aside. In a glass jar with tight fitting lid combine vinegar and spices. Put lid on jar and shake. Add cucumber to jar, making sure the slices are not sticking together. Secure lid on jar again and shake vigorously, encouraging the spices to spread out among the slices. Chill for at least 24 hours before eating. I make no promises about pickle viability beyond one week.

Post Navigation