Any Kitchen Will Do

Give me a kitchen and I will cook.

Author Archive

Yowza Anniversary Cinnamon Rolls

cinnamon rolls

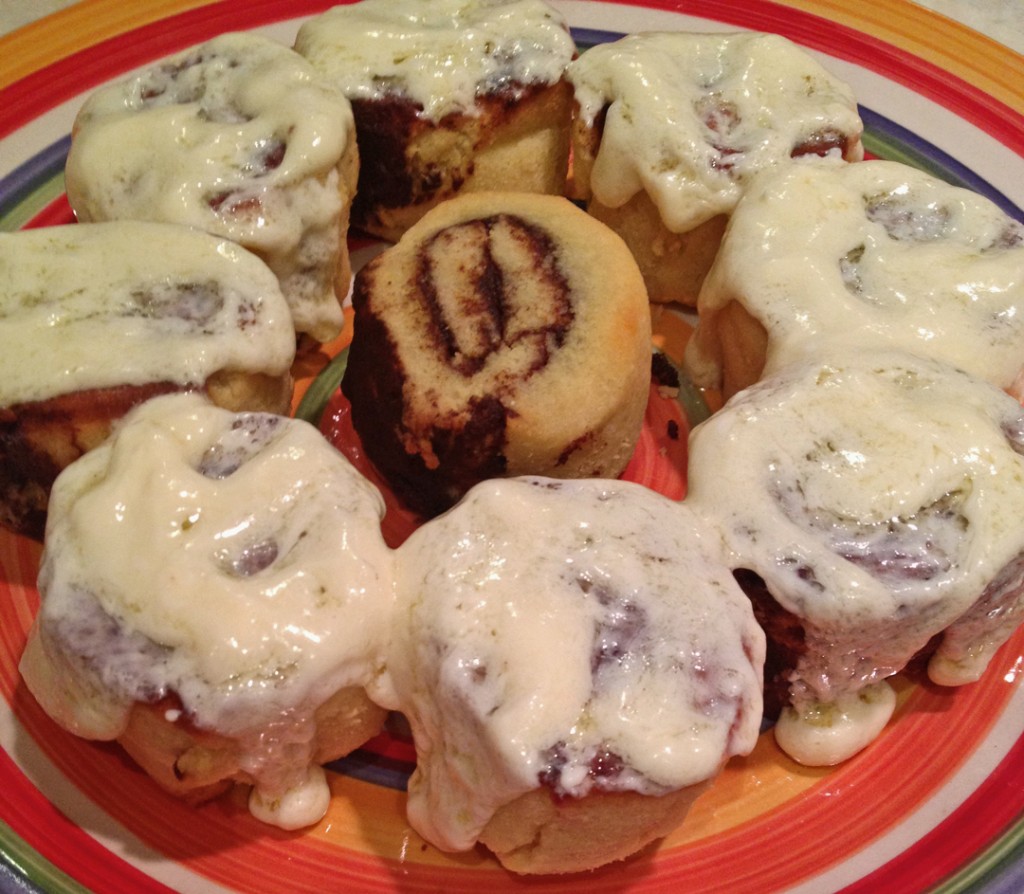
Year three of my blog is starting. Tomorrow. Wow. Yowza. It amazes me that I have been able to continue with it. Not because it is hard, for I love exploring new recipes and sharing old ones, but because making it a priority has given me so many opportunities to focus on myself. This may mean more to people that know me well, but can also make sense to those who don’t. I very often get caught up in helping and supporting people around me – family, friends, co-workers. I discover too late that I do not do ‘me’ stuff frequently enough, so my energy stores and momentum fade away. Knowing that I promised myself to continue the blog has given me a way to keep my personal enthusiasm up. With all the changes and moves and adjustments our family has gone through during the past year I am proud of myself for continuing the blog. Picking up and moving cross country (contiguous) and beyond takes a lot of energy, to embrace the experience and joy of every day. I love we had the experience and expect to do it again and again in our lifetimes. As I look back on the past two years I also see how our eating habits have changed. Moving from eating everything imaginable to excluding wheat to also excluding most starchy carbs and sugar, I see how our journey has evolved. We are not perfect, as with all human being, but we try. Some exclusions have driven us to challenge ourselves to continue our traditions without the ‘evil to us’ ingredients. Things like tamales and king cakes and cookies and muffins are part of the plethora of recipes we rely on to add variety to our diet without deviating. As I work through the various recipes that we love in nostalgia, and discovering new ones, I am so excited to share them with our daughter. It is a constant effort to balance our memories while developing new, healthier versions for her. Miss Marie has recently shared a recipe for cinnamon rolls. I made some changes, of course, and the result made for some amazing treats to celebrate my second anniversary. Between Big D’s love for such rolls and my extensive time spent in airports sniffling the wafting aromas from the cinnamon roll denizens who live there, the treats are cherished and longed for. I am ecstatic about finally making some and feeling indulgent in celebration. What better way to celebrate an anniversary than to make such succulent yummies. Little B loved helping spread the filling and, as always, frosting, just like the cupcakes we made a while back. Thank you to those who have followed my journey the past two year and welcome to those who joined me recently! Slainte!

Yowza Anniversary Cinnamon Rolls

Pastry
3 eggs
1/2 cup butter or coconut oil, softened
3 Tbsp erythritol/stevia blend
1/2 cup coconut flour
1/2 cup blanched almond flour
1/2 tsp aluminum free baking powder
1/2 tsp Celtic sea salt
1 tsp vanilla extract

Filling
3 TBS Coconut oil or Butter, softened
2 TBS Cinnamon
3 TBS erythritol/stevia blend
1/4 tsp stevia glycerite

Frosting
6 TBS cream cheese, softened (or coconut cream if dairy allergy)
3 TBS butter, softened
2 TBS spoonable erythritol/stevia blend
A little heavy cream (to thin it out, if desired)

Pastry: In a medium bowl, cream the butter and the sweetener until very smooth. Add in the eggs. In another bowl mix together the coconut flour, almond four/meal, salt and baking powder. Slowly add in the dry ingredients into the wet, then add in the vanilla. Stir until a thick dough forms. Cover and place in fridge to chill the dough for 1 hour or overnight.

Frosting: Place all ingredients into a medium sized bowl and combine until smooth. Store in fridge overnight. When you start the Pastry Again section below remove Frosting from the fridge.

Filling: Mix all ingredients together.

Pastry Again: Place a sheet of parchment on counter, then spray with coconut oil spray. Place dough on greased parchment, push the dough down a bit, and spray with another layer of coconut oil. Top with another sheet of parchment. Roll the dough out with a rolling pin until a long rectangle shape, about one foot long. Remove the top layer of parchment.

Spread filling evenly over the dough. Roll up dough, with the longer side becoming the roll, using the edge of the plastic to make a tight log. Cut into 1 1/2 inch pieces.

Place the rolls into a greased muffin tin or onto a cookie sheet about 1 inch apart. Bake in a preheated 350 degree oven for 15-20 minutes or until baked through. Insert a toothpick to check doneness…the toothpick should come out clean.

Spread the frosting on the rolls. Serve immediately to family members who were drooling over the smell of the baking rolls. Store extras in airtight container for up to one week at room temperature, or freeze.
 

Divorce Shrimp over Spaghetti Squash

divorce shrimp spagh sq

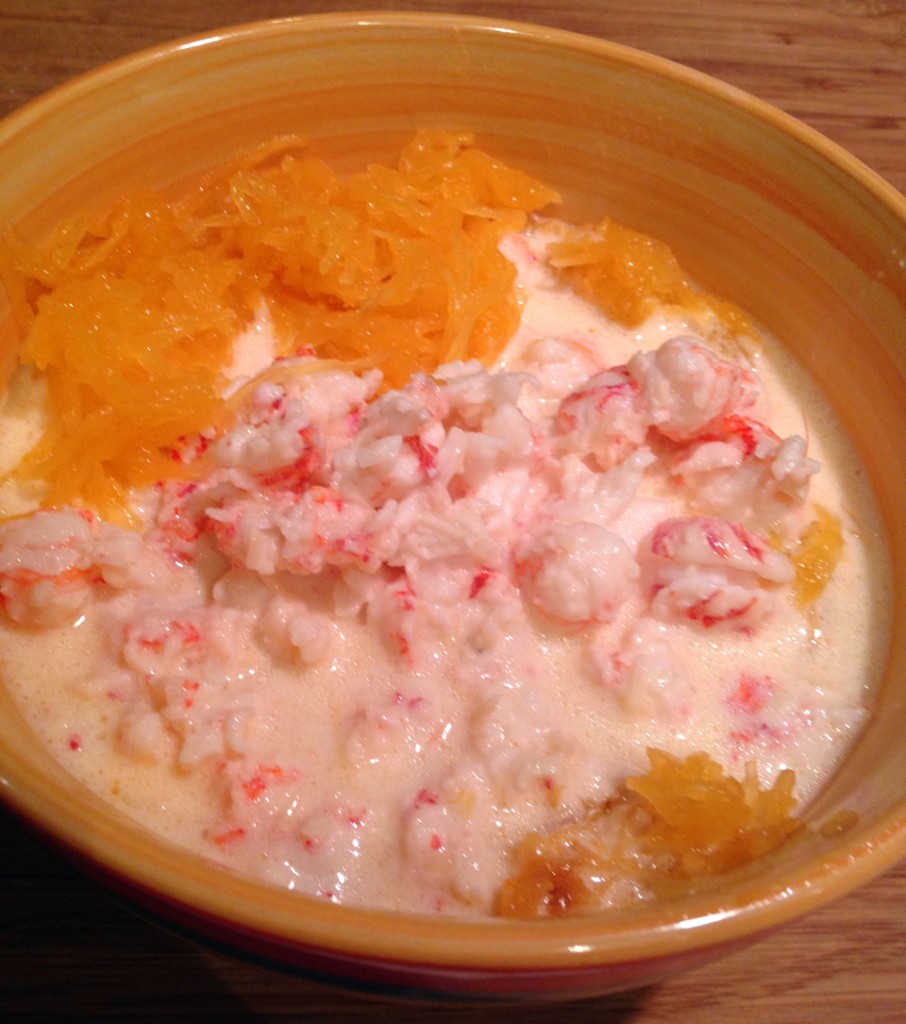
There is a story/urban legend known down in Texas about a restaurant called Paesano’s. It was (and still is) popular for a Texas version of Italian, including a particular shrimp dish. The shrimp is butterflied and gently dragged through flour and lightly cooked in softly boiling oil.  A creamy lemon sauce is made and poured over the top. Totally addictive. I don’t know how true the story is, but here is what I heard many years ago. The married couple who owned the restaurant got divorced. Rumor has it the husband got the restaurant, but the wife got the recipes. It was not enough to have the recipes, so to even the score she widely distributed them and they gradually crept into kitchens far and wide. Eventually I got a fuzzy copy of the recipe titled ‘shrimp paesano’. I have made it many times, laden with flour and served on top of linguine or angel hair pasta. Each time I made it the kitchen is left fragrant and an absolute mess – multiple pots and pans dirty, the counter sprinkled with shrimp shells and flour, but some beautifully presented shrimp resting on a pile of creamy, lemony pasta with sauce. I think I usually remember the mess in the kitchen because you serve immediately and don’t do the final clean up until much later, after food coma passes. I prefer cleaning as I go, then have little to do after dinner. For this recipe you need to drop everything right when the shrimp is ready and sit down and eat. Of course, the dishes are always waiting when dinner is through, just a little stickier than I prefer. Since the restaurant is nowhere near where we live now, and quite pricy when within reach, I can do nothing but make it myself. Here is my attempt to make a version more in line with our less expensive, wheat free, low carb eating habits. The kitchen still is a mess when all is said and done, but the flavor shines through just like the original. I may do a ‘breaded’ shellfish version in the future, but for now the two pot version below really hit the spot on a staying in, snowy Saturday night!

Divorce Shrimp over Spaghetti Squash

1 pound large shrimp or langoustines, shelled
2 eggs, whisked
¾ cup plus 2 Tbsp butter
3 lemons, juiced with meat and seeds removed (about ¾ cup)
4 cloves garlic, crushed
2 cups heavy cream
½ cup grated parmesan cheese
1 tsp arrowroot powder
1 medium or large spaghetti squash
1 cup extra virgin olive oil
Salt to taste

Preheat oven to 400 degrees. Cut spaghetti squash in half and scrape out seeds. Place halves face down on baking sheet. Place in oven and bake for about 45 minutes, until meat is soft. Scrape out meat with a fork to make spaghetti ‘noodles’.  Melt 2 Tbsp butter into noodles and sprinkle lightly with salt. Cover and keep warm until time to serve. While the squash cooks prepare the sauce and prep the shrimp or langoustines. In a large skillet over medium heat melt 2 Tbsp butter. Add shellfish and gently toss, only cooking long enough so they shellfish is only half cooked – the rest of the cooking will happen later when simmering in the sauce. Set aside the shellfish and make the sauce.  In medium sauce pan over medium heat melt ¾ cup butter. Add all the lemon juice and garlic. Heat until steamy. Add cream, lower heat and cook until sauce is mixed well, stirring frequently. Add cheese and stir slowly, making sure it melts and blends in with the smooth sauch. Add arrowroot powder and whisk. Sauce should bubble and thicken, but not boil. Add shellfish and gently simmer for about five more minutes, allowing the shellfish to cook through completely. Remove from heat and keep covered. On individual serving plates make a bed of spaghetti squash, then generously drizzle a ladle full of shellfish and sauce. Serve immediately.

Cornless Tamales…What?!

tamales loaded

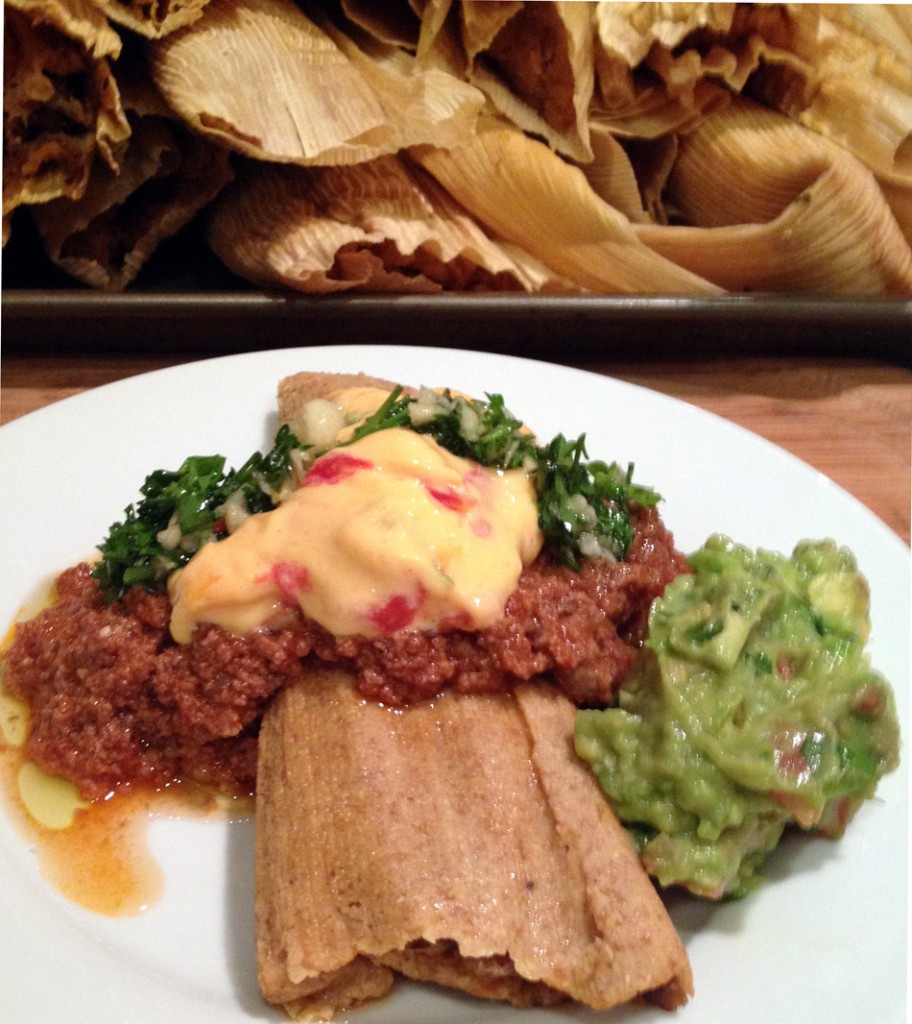
Growing up in south Texas we adopted a Christmas Eve tradition of a tamale feast. This year was no exception. We made enough for Christmas Eve, Christmas Morning as well as New Years Eve! Our tradition used to include purchasing tamales, then piling them with queso, guacamole, meaty chili and chimichurri. A few years ago, when we no longer spent Christmas in San Antonio, there was difficulty finding good tamales. Tamales were available, but they were just off in size and flavor. We had no choice but to start making our own. At the time we made the masa with corn meal, and perfected the flavor of it to wonderfully compliment the pork filling. Now that we are watching our carbohydrate intake, the reliance on corn products is nil, which we wanted to carry over into our holiday tradition. If you have ever had tamales, you know there is a specific texture to masa in a tamale, and there is supposed to be a hint of smoky spiciness to the middle meat filling. Some people may be on the verge of offended when I talk about masa without corn, for the word typically represents a corn-based dough used for all kinds of dishes, including pupusas, tortillas and of course tamales. For our version we used flaxseed meal and coconut flour to achieve the required texture. We also used what may seem like a lot of salt, but with the flaxseed and coconut products it is needed, to give a little help to the pork for it all to work together and carry the spice flavors through to the final dish. The tamales turned out flavorful and robust, able to compete (in a good way) with the toppings, and with a texture almost exactly like corn masa. Big D appeased me by measuring the ingredients this time around so we could record an actual recipe it for posterity. He is usually an eye it, taste it, add more, dash here, sprinkle there kind of cook, so it was a bit of a stretch, but he survived. With my mom visiting for the holidays we had loads of fun showing her the process and had three generations of family in the tamale-making production line, just like things should be. I hope you enjoyed your holidays and consider our scrumptious medley in your future celebrations. We will never forget it and hope to repeat it in the years to come!

Cornless Tamales….What?!

Masa
2 cups coconut flour
2 cups golden flaxseed meal
¼ pound lard, melted
2 eggs
2 Tbsp ground cumin
1 Tbsp garlic powder
1 Tbsp chili powder
3 Tbsp sea salt
5 – 6 cups liquid retained from meat filling

24 – 36 corn husks, soaked in water for at least one hour

Meat Filling
2 pound pork roast
1 small onion, diced
5 cloves garlic, crushed
1 Tbsp cumin seeds
2 jalapenos, diced
1 cup roasted green chiles (canned or fresh), diced
2 chipotle peppers with adobo sauce from can (use about 1 Tbsp of sauce)
1 cup water
2 Tbsp sea salt

Toppings
1 Batch fresh or canned beef chili
1 Batch Guacamole
1 Batch Chimichurri
Queso (1 pound processed cheese loaf melted with 1 can Rotel tomatoes and chiles)
Sour Cream

Sear sides of the pork roast in a large skillet, then place roast in a crock pot. In the same skillet add bacon grease and melt over medium-high heat. When melted add onion, garlic, cumin seeds, jalapeno and chiles. Cook until seared. Add chipotle peppers and adobo sauce to mixture and continue cooking until combined and heated through. Transfer seared mixture to crock pot over the roast. Add 2 tablespoons of salt and water, then cook roast on low for 8 – 10 hours. Turn crock pot off and let cool for a few hours. Drain liquid and shred meat with a fork, retaining the liquid for masa.

While meat cools make the masa. Combine flaxseed meal, coconut flour, cumin, salt and garlic powder in a bowl. Add lard to mixture and combine into a dough. Add liquid from the meat one cup at a time until it is the consistency of soft peanut butter – you will need anywhere from four to six cups.

To build the tamales pat dry one corn husk, then lay it flat on your work surface. Spread masa evenly in the middle of the husk, leaving 1 – 2 inches clear at the top and bottom, and along one side. Drop a row of pork along the middle of the masa, to the very edges of where it is spread. Gently roll the tamale, making sure the masa completely envelopes the pork in the middle. Overlap the sides of the husk and fold the small end up. A small strip of husk can be used to tie around the tamale to keep it closed, or just lay completed tamales face down so seams to not come apart. Repeat process until you run out of supplies.

In a deep stock pot with pasta/steamer insert, fill bottom of pot with water, but no higher than the bottom of the steamer insert – tamales should not be sitting in water at all. Fill the insert with tamales by lining them up vertically, with folded end down. Place cover on pot and heat to boiling, then turn heat down to simmer, making sure steam continues to rise. Steam tamales for about one hour, until the masa is firm and they are heated through. Remove tamales from pan and lay out in a single or double layer, allowing them to dry out a bit. When ready to eat, unroll the tamales from the husk and eat plain or smother with your toppings of choice.


Wheatless Pecan Pie

low carb pecan pie

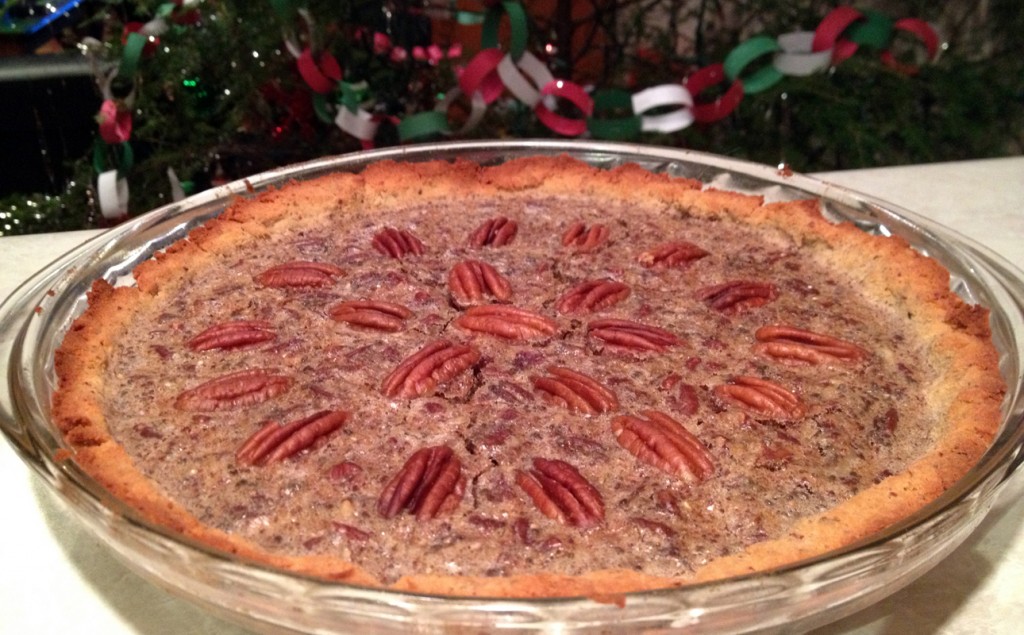
Posting about a wheatless, sugar free pecan pie has been a long time coming. We have tried a number of variations, trying to get the texture and flavor of the pie just right. I officially think we have gotten so very very close that we are going to call it good. No, great! Pecan pies have a deep history in both mine and Big D’s histories. It begins with pecans. Harvesting pecans is a popular past time in the South, and in Texas. Yes, Texas and ‘the’ South are different. That is a whole other conversation/discussion/argument. For the here and now we are talking about a traditional holiday dessert. The challenge we faced was getting that smooth, gelatinous, caramel texture of the pie, while still having pecan halves floating atop the pie. You cannot imagine how challenging it is to accomplish without sugar, milk or flour. It is not impossible, which I must say, is proven below, but was definitely not a first-time feat. We very much enjoyed the pie, along with some pumpkin pie, after our feast of prime rib and mashed cauliflower. It was a simple, delicious meal. I hope you kept your holiday meal simple and focused on your people, because I know in my life that my people are most cherished.

Wheatless Pecan Pie

Crust
3/4 cup coconut flour
1/2 cup toasted pecan halves
3 large eggs
8 tablespoons chilled butter or coconut oil
2 tablespoons Stevia in the Raw granular
1/4 teaspoon fine sea salt

Filling
3 eggs, beaten
1 cup Stevia in the Raw granular
1 teaspoon vanilla extract
1/8 tsp salt
2 tablespoons butter, melted
1 cup Walden Farms Pancake Syrup
2Tbsps chia seeds
1 1/2 cups toasted pecans (chopped or halves)

For the crust combine the coconut flour, 1/2 cup pecan halves, fat (either butter or coconut oil), Stevia in the Raw and salt in food processor and pulse until combined and pecans are finely chopped. Add the eggs and pulse until a dough is formed. Spread the dough evenly into the bottom and sides of a 9 1/2 inch tart or pie pan. For the filling beat the eggs with the Stevia in the Raw. Add the vanilla, butter and syrup, then add the pecans. Pour into the crust and bake at 350°F for about 45 minutes, but check after about 30 minutes in case it is cooking quickly. Let pie cool to room temperature before serving, or after it cools to room temperature, chill before serving.

Place the tart onto a sheet pan and bake in the oven at 350 degrees for approximately 45-50 minutes. Check the tart at 30-35 minutes. Cool on a wire rack.


Cookie Cut Ups

cookie cut upsThis is the tale of the cookies that kept cutting up. I found the delicious recipe from Ginny at Ginny’s Low Carb Kitchen. I mostly followed it, but made a tweak or two because of timing – there was nooooo way I was going out in the snow storm to buy xanthan gum, and Little B was gonna die if she could not make cookies soon! I don’t know how different they turned out without it, but we had success! Eventually. Little B and I mixed up the dough, rolled it out and ugh. A bit too soft for manipulating. I suggested to Little B that we form the cookies into shapes with our hands, but she insisted on using the cookie cutters. The cookie cutter use was a disaster. We piled up the dough and stuck it in the refrigerator for an hour. We rolled it out – again – with slightly more success, but still smooshing of the shapes by the spatula, even with a bit of help from arrowroot powder. Ack! Little B still insisted on cookie cutter use, so we again chilled the dough, for about six hours this time, occupying ourselves with movies and art projects and carols. When it was finally time to try again it worked! The cookie cutters did their duty, as long as we made sure to ‘shimmy’ them before pulling them off, separating the shape from the extra dough around it. I then carefully tilted the parchment paper and the shapes, one by one, fell onto my hand. They were delicate, but cooked up nicely and were very buttery and nutty; a wonderful accompaniment to hot chocolate. I will be more adventurous next time figuring out icing, but for now, we were able to experience cut out cookies on a snowy Alaska day, even though they resisted. Kudos to Little B for holding out for use of cookie cutters, and being flexible enough to hand shape those pesky candy canes! Three were set aside especially for Santa. Fingers crossed to have them survive that long!

Cookie Cut Ups

1/2  cup  Stevia in the Raw
1/2  cup  butter
1  large  egg
1  teaspoon  baking powder
1  teaspoon  vanilla
1/2  teaspoon  salt
2 cups  almond flour
In a food processor blend together Stevia, butter, egg and vanilla. In a medium bowl combine the baking powder, salt and flour. Add the butter mixture to the flour mixture and combine into a stiff dough. Refrigerate for 2 – 6 hours. Sprinkle a square piece of parchment paper with arrowroot powder, and have another piece of parchment of the same size nearby. Also prepare a large baking sheet covered with parchment paper and preheat the oven to 350 degrees. Remove dough from refrigerator and work quickly with it. Place dough between parchment paper and roll it out 1/8 to 1/4 inch thick. Carefully peel off top layer of paper and use cookie cutters to make cookies. Two methods can be used to transfer cookies to the baking sheets. Either tilt the paper, letting the cookie fall into your hand, transferring the cookie to the baking sheet, or sprinkle a thin spatula with arrowroot powder and use it to slide under the cookies and remove them from the parchment paper. Bake for 10 – 15 minutes, until the edges start to turn a golden brown. Let cookies cool completely before removing them from the baking sheet. Frost as desired and store in airtight container.
 

Cheese Ball(s)

cheese ball

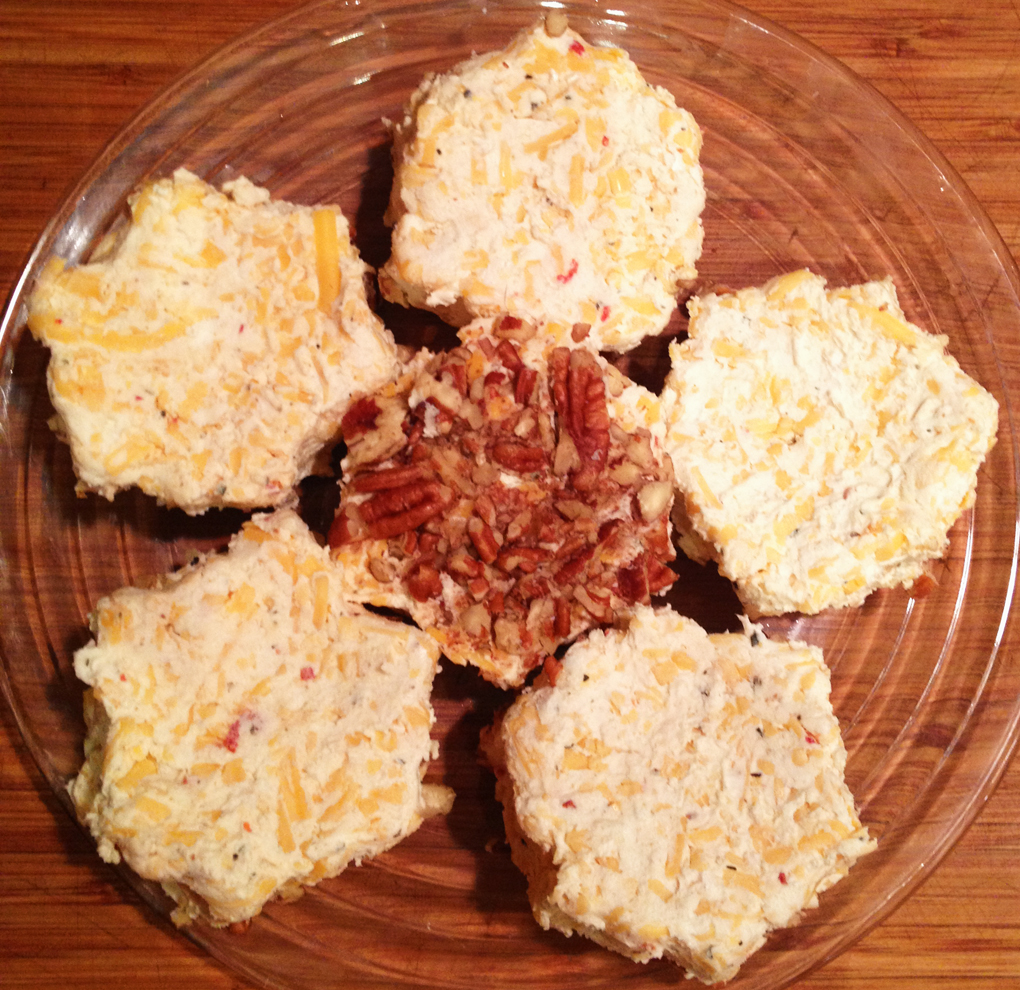
To continue with my appetizer trend, after a longer than expected pause, I offer you a cheese ball! If you look closely at the various balls available at the market, there is a curiously large amount of products that have added sugar and/or wheat. As frequent cheese consumers I found it logical to make our own. This one is simple and can be molded in all kinds of ways. The instructions below tell you how to make an actual ball, but the picture shows the result of using a silicone snowflake mold. I used the mold to make individual servings for a holiday meal, pressing nuts into the bottom, then chilling and turning them out. I served them with nuts face down, along with a smoked beef roast and cabbage saute. We have been eating wonderful meats lately, after our recent acquisition of an electric smoker. Our living situation necessitates the absence of charcoal-related activities on our balcony, so electric it is. The results are stupendous, and our refrigerator is full of delectable, smoked protein. The individual cheese servings were a perfect accompaniment to the meat and vegetables. You can probably tell, but the cheese mixture is extremely versatile and delicious! I recommend it in all forms and fashions to decorate and compliment as an appetizer or side dish. The snowflakes are not necessarily clearly defined, but the plate arrangement certainly gave a hint to the theme. I hope your holiday season is pleasant and not too cold, for the warmth of family and friends always makes the season cozy.

Cheese Ball

2 1/2 cups sharp cheddar cheese, grated and at room temperature
8 ounces cream cheese, room temperature
4 ounces goat cheese, room temperature
1/2 tsp red chili flakes
1 tsp ground cumin
1 cup toasted pecans, chopped (optional)
Whisk together cream cheese, goat cheese, chili flakes and cumin. Add cheddar cheese and stir together. The mixture may be a bit stiff if you don’t have a strong mixer, so mixing it together with your hands (like I often do) works great. Drop cheese mixture onto a piece of cling wrap that is twice the size of the mixture. Using the cling wrap mold the cheese into the desired shape – sphere, log, oval, etc. you can also use a gelatin mold or other shape to form the cheese. If desired, roll shaped cheese in pecans and gently press them into the cheese. Chill at least an hour before serving with vegetables or crackers.

Smoked Salmon Spread Crudite

sss crudite celery smallsss crudite tomato smallsss crudite cheese small

With the holiday season upon us, I find there are three versions of being a guest. The first is the kind where you just show up with a host(ess) gift and enjoy the evening, offering to help, but getting the expected, “oh no, I got it, you just relax”. Sometimes I just relax, and other times I relax by helping. The second is when you are expected to arrive with a side dish or appetizer. There is always the wondering about who can and cannot eat the ingredients you use, much less whether or not it will come out right. You cannot even taste the results of say, a pie, because the pretty presentation would be ruined! Yes, you might have made two, but what if you didn’t? How dare you even think of cutting into the puffy, browned top of sweet potato casserole or lattice topped cherry pie! I have been pretty lucky in the past, but I have also been known to accidentally mix up salt and sugar – yowza! The third version is the grand American tradition of potluck. If it is laid back and you can bring anything, go crazy! Make what you want, cut it into portions and taste a bit to make sure it is perfect; bring it hot, bring it cold, whatever! I like all three versions because they all involve two things I love – cooking and enjoying the company of people I care about. This year has been busy with our family being in limbo, then moving, then having complications with moving, then a new job. Through it all we had a wonderful little girl who hung in there with us through all the changes. For all these reasons we are keeping our holidays simple this year, focusing on enjoying the company of our little family and of our new friends. We are planning cooking marathons, as usual, for the holidays, but they will be a little smaller, including simple appetizers. This simple recipe for crudité can be adjusted to accommodate all types of diets and give variety to a meal, either before or during – even make them a meal on their own. They can fit any version of being a guest, or as a host(ess). Change up the vegetables and cheeses – pretty much anything you can cut in half and fill or top (carrots, cucumbers, olives, pickles). Of course, crisped bread or crackers would work too! I hope you enjoy the holidays and spend more time with your loved ones than you do in the stores, because when it is all said and done, the people are what give you purpose.

Smoked Salmon Spread Crudité

1 cup cream cheese, room temperature
½ cup sour cream
4 ounces smoked salmon, roughly chopped
1 garlic clove, crushed
1 tsp fresh dill, chopped (and a bit more for optional garnish)
2 celery stalks
5 large cherry tomatoes
5 – 10 slices sharp white cheddar cheese

Whisk together cream cheese and sour cream. Add salmon and garlic, folding it into the cheese mixture until well combined. Chill for about an hour. While it chills prepare the serving bases. Clean celery stalks, peel off tough strings and cut into 1 – 2 inch sticks. Clean tomatoes and slice in half lengthwise, scoop out the seeds and meat and pat dry. Slice cheese into 1 – 2 inch squares, making them thick enough to pick up and take a few bites out of, but thin enough not to over cheese the bites – a bit thicker than sandwich slices. Spread the spread (heh) on all the bases, taking time to form it to compliment the shape of the base – round like a tomato, within the crevice of the celery, and a bit random to soften the edges of the cheese slices. Top with dill if you please. Serve immediately or chill until time to serve/leave for the party.

Pancakes a la Coconut Flour

coconut flour pancakes

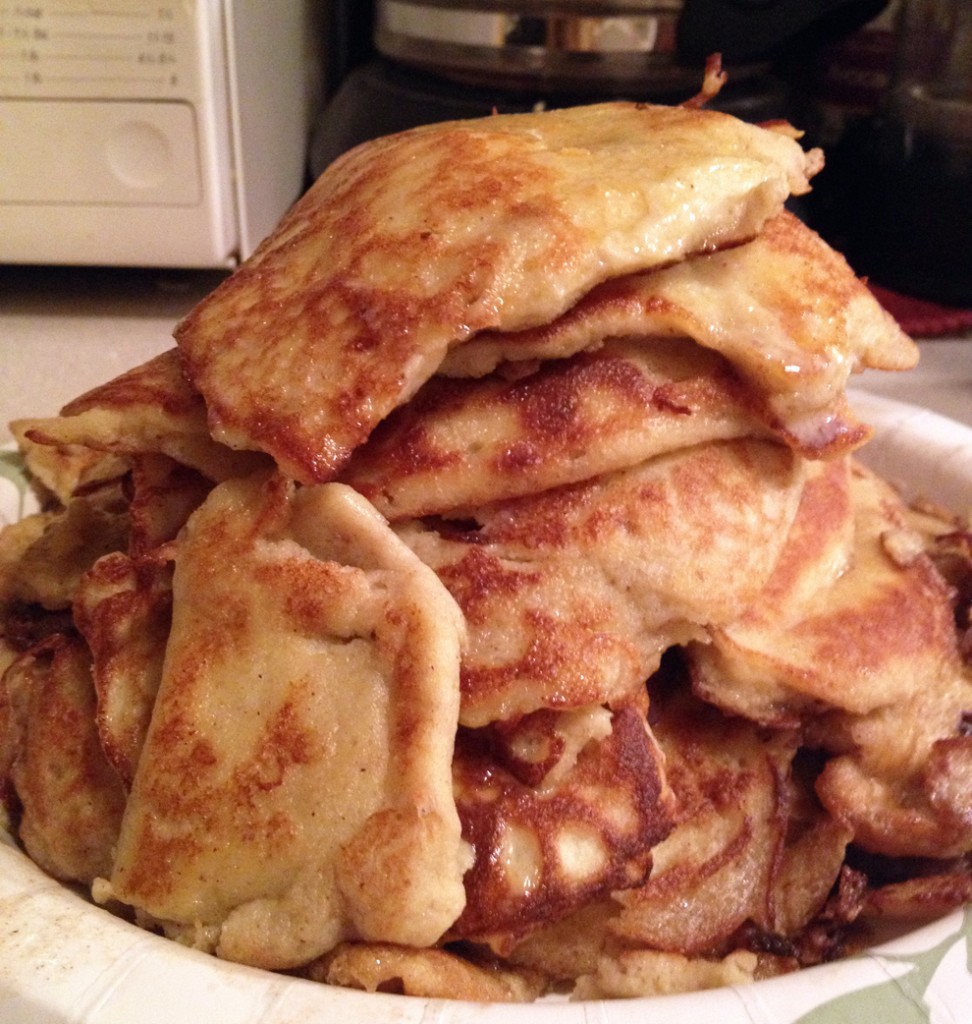
On weekend mornings we sometimes go to a restaurant for brunch. More often then not we end up making complicated orders to cut out starches and wheat, or rely solely on the a la carte menu to fit our diet. Inevitably the ordering process is interrupted while the server makes a trip back to the kitchen to confirm whether or not we can substitute a salad or vegetables for the hash browns and toast. Skimming through the majority of the menu items, most of which involve cakes, toasts, waffles and syrups, reminds me of Sunday mornings growing up. After returning home from church we would all change into our sweats and dad would set up the production line – he would make dozens of waffles, which we would eat on for a month out of the freezer, and enjoy hot, fresh ones immediately. Other days he would make pancakes, with a resulting mound of leftovers reaching a foot high or more. Those extras went into the freezer, too. There was always a bag of one or the other that could be pulled from and popped in the microwave for a quick meal anytime. I have avoided making waffles or pancakes since our shift to wheat free eating because of the obvious barriers of wheat and syrup. After pondering for a while and looking into a bunch of recipes, I think I came up with one that will fill in the sentimental weekend brunch gap. Thank you Carol over at Ditch the Wheat for the trial and error and the resulting great recipe (even though I did tweak it a bit). The cakes turned out great – when Big D and I bit into them we looked at each other, our eyes got wide and we shared our amazement at how similar they were to the pancakes of our childhood! Topped with some Kerry Gold Irish Butter and some Da Vinci sugar free syrup, they were extremely satisfying. Making them also brought back some fond memories of my dad, who passed away about two years ago and always spent happy times in the kitchen. We are definitely making these again, if for no other reason than because I promised Little B we would do so, after seeing her face was so sad when she learned they were all gone. Gotta stock up that freezer! And next weekend I am gonna show her how to eat them with my mom’s wonderful southern contribution slathered on top – peanut butter!

Pancakes a la Coconut Flour

2 tbsp extra virgin coconut oil
Sprinkle of ground cinnamon
3 large eggs
1/4 cup coconut milk
1/2 tsp vanilla extract
1/4 cup coconut flour, sifted
1 tsp powdered stevita (or 1 Tbsp Stevia in the Raw)
1/4 tsp cream of tartar
1/8 tsp baking soda
1/8 tsp sea salt
Additional coconut oil or butter for cooking

Cream together the coconut oil and cinnamon. Add the eggs one at a time. Add coconut milk and vanilla. Mix until smooth. Add coconut flour and stevita. Mix until smooth. Lastly add cream of tartar, baking soda and salt. Do not over mix the batter. Over mixing will result in the baking agents (cream of tartar & baking soda) not working. Use a ladle and pour small amount of batter into a crepe pan or large frying pan with butter or coconut oil on medium heat. Flip once the bottom is light brown and edges are set enough to flip without losing shape. The pancakes will not bubble as much as “regular” pancakes. Serve immediately with a drizzle of syrup. One batch makes about 8 pancakes, so double and triple as needed to feed your clan.

Chorizo Burgers

chorizo burgers
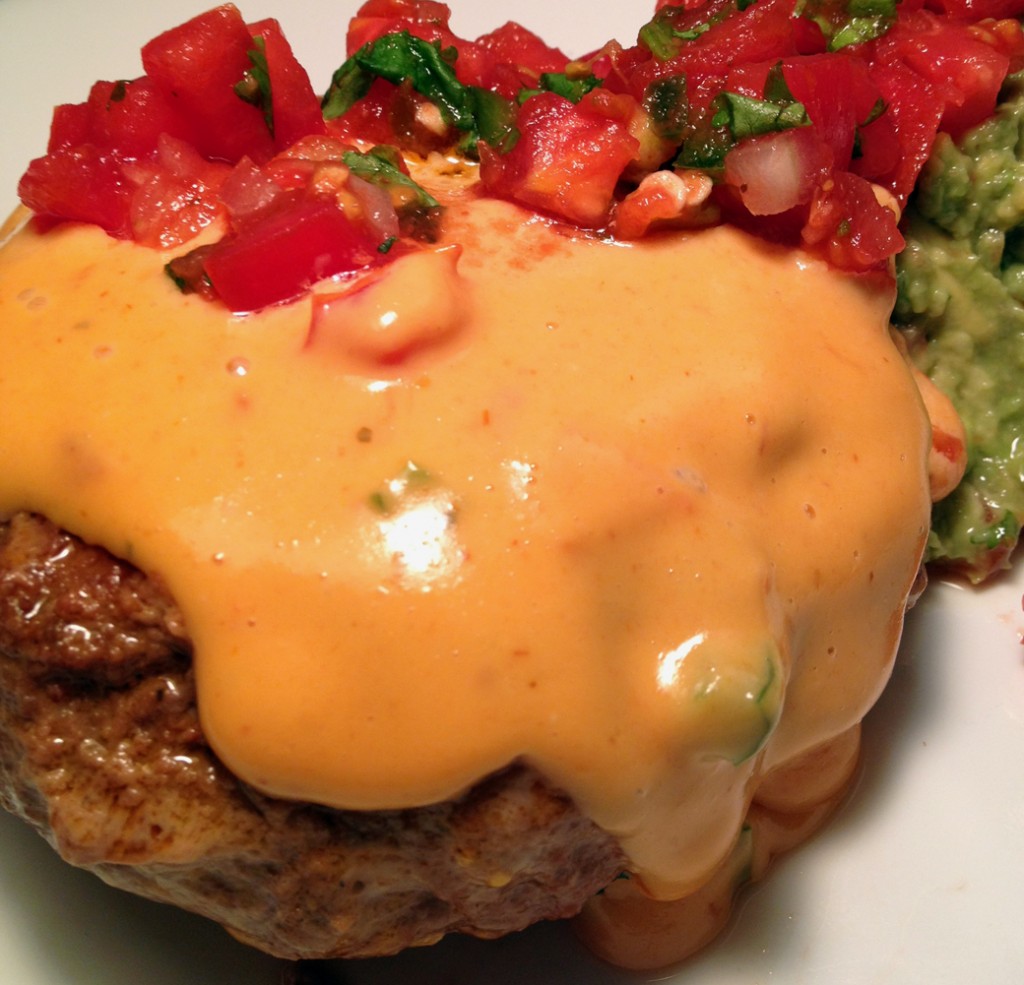
We eat a lot of burgers. A lot. They are our go to meal when we can’t think of anything else, or are running late, or are bored, or end up at a quick serve restaurant. The quick serve restaurant is always  a challenge. You cannot imagine the number of blank looks I get when ordering and tell them I don’t want buns. “No, I do not want buns.” “No, no buns.” “You can use salad containers and just put the condiments, meat and cheese in it. It will work fine. I promise you.” “Do I need to go in the back and talk the food prep team on how to do it?” “No, I don’t want the combo/meal. Just the burgers. I know the meal is a better deal compared to buying separately the fries and burger and drink, but I don’t want the fries. And don’t forget, I don’t want the bun either.” What usually happens is Little B and Big D will go find the perfect table and I do the ordering. Not because Big D can’t order. He is extremely articulate. The advantage to to me ordering is my patience – I soooo beat him in that arena when it comes to dealing with ordering food and other people are involved. In contrast, he is most awesome in the patience arena when dealing with me. I tend to be passive aggressive and get stuff pent up until the straw that breaks the camel’s back, and not everyone can deal with it, but he is a magician with me. Okay, on with the dish. Since we avoid traditional buns, and I rarely make low carb buns, the variety in our burger-ness relies on combining meats and the toppings. I was longing for a Tex-Mex feast, but our current situation does not allow for expansive storing of leftovers, which rules out some more bulk preparations of the guacamole, salsa and chile con queso I usually prepare. I did mini versions of the sides, so we ate most of them and storage was not an issue (phew). Also, with my previous exploration into creative meats in burgers, I wanted to do something a little different. Here are my results, which gave me the Tex Mex element, while also giving variety to our burgers with a spicy flair. It may be hard to find good jalapenos in Alaska, but when I do, they are pretty potent. Between the pepper and the ancho chile the burgers definitely left a slow burn in my mouth, and on my lips, and under my fingernails felt the heat to. I was also reminded of those little webbed parts between my fingers that have dry skin but I don’t realize it until I chop up a jalapeno. Ouch but yum!

Chorizo Burgers

Burgers
2 pounds ground beef
1 pound chorizo sausage
2 eggs
½ cup fresh cilantro, chopped
3 garlic cloves, crushed
½ tsp ancho chile powder
½ tsp sea salt
1 tsp ground cumin

Condiments
1 batch chile con queso (melt processed cheese block with a can of tomatoes and chiles, add some chopped fresh tomatoes and jalapenos if you like)
1 batch salsa
1 batch guacamole

Prepare all condiments in advance. I did 1/3 batches and they were enough for these burgers, but do full batches if you have the fridge space – they are great the day after! For the burgers combine the eggs, cilantro, garlic, chile powder, salt and cumin. Whisk together until eggs are scrambled. In a large bowl smush together beef and sausage until there are no recognizable chunks of sausage. Add egg mixture and smush some more until eggs, herbs and spices are well combined. Form meat mixture into six or eight large patties. In a large frying pan over medium high heat sear one side of the burgers, about five minutes. Flip burgers and sear other side. Reduce heat by half, cover burgers and cook until done, about eight minutes. When done cooking immediately place a burger on a serving plate and top with queso and guacamole. Sprinkle with salsa and serve. If you have leftover burgers I recommend storing them separate from the condiments.

Brussel Sprouts in Cream

creamy brussel sprouts

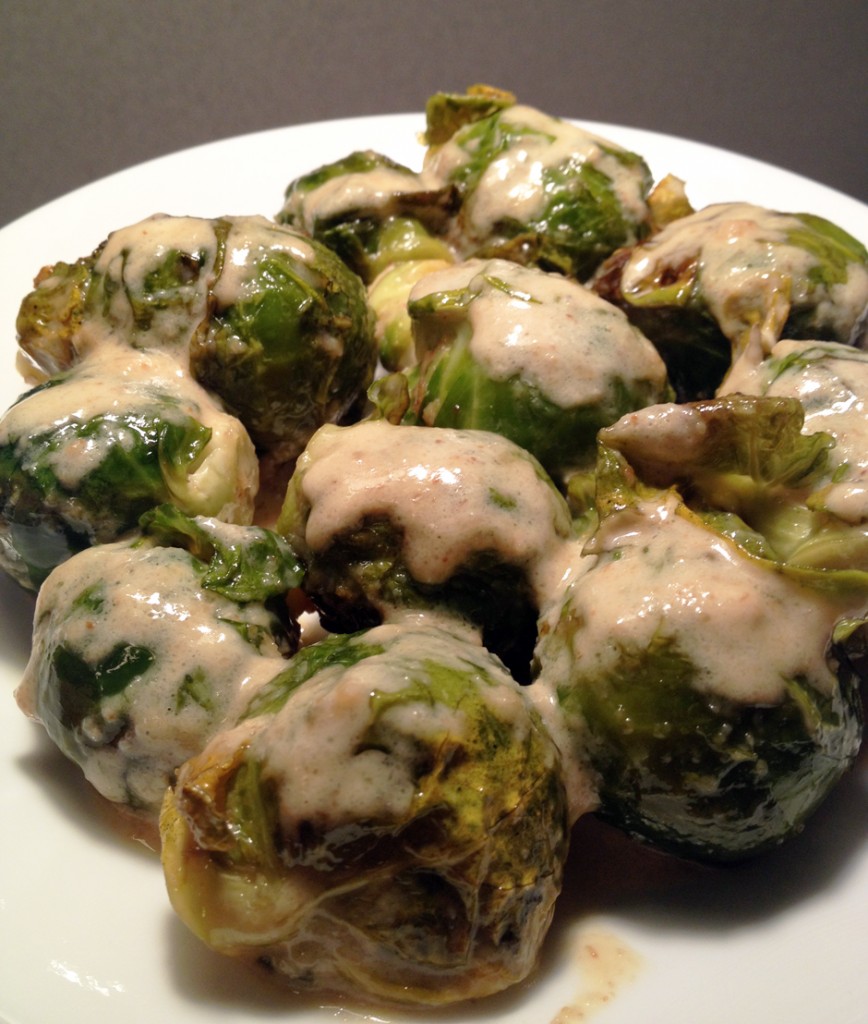
Could I ignore it? Just walk by as if it was not there? Pretend it would not be loads of fun to explore? No, I was not strong enough. It drew me towards it like no other stalk. I became a stalker. A stalker of of brussel sprout stalks. I thought maybe I should deny myself yet another green vegetable, but why?! I seem to be on quite the green vegetable streak these days – asparagus then artichokes, and now brussel sprouts! Big D has been doing a lot of meat and soup cooking, so I enjoy the yummy stuff when I get home and fill in the vegetable part of meals where I can. Brussel sprouts are a relative of green cabbage – high in fiber, good for you and the sprouts grow on stalks! I usually see them in the store in bags, but this week they arrived on the stalk. How fun! Little B was so excited about this strange thing when I got home she could not stand to wait until they were cooked. Whenever I can I try to show Little B where food comes from – whether it is pulling wild garlic, to showing her vanilla comes from orchids, her breakfast sausage comes from pigs, or the plants that are the source of her popcorn. I showed her the stalks and explained what the sprouts were. Little B immediately wanted one raw. Um, okay. I gave it to her, she took a big bit and LOVED IT! Chewed it up like Halloween candy!

brussel sprout stalk

brussel sprout tastingI had to promise to cook them up as soon as possible because she would not leave me alone about them. This could get interesting. Sometimes I have to coax Little B into helping with cooking projects and other times I can’t keep her from being overly underfoot (in a good way). This was definitely an underfoot project. She helped me cut them off the stalk and cook them up.  I had a plan and she had a different one, but we figured out how to combine them, and an ordinary weekday evening turned into a stalker party! We came up with two dishes in the end – one that she liked and one that I wanted. The cool thing was the two dishes took the same route to a point, then easily diverged to make everybody happy. Besides raw she tasted them sauteed in the butter, then with her added veggie and cheese, and also after adding the cream to the butter saute. Apparently she prefers them raw, but I think the creamy sauce balanced out the natural bitterness of the sprouts. I am very happy to learn of Little B’s continued interest in green vegetables – from when she started gnawing on frozen broccoli during her teething period as a baby, to snacking on green beans to the brussel sprouts of today. What has your kid eaten and liked that surprised you?

Brussel Sprouts in Cream Sauce

I large stalk brussel sprouts
1/2 cup heavy cream
1/4 cup butter
2 cloves garlic, crushed
1/2 tsp sea salt

Cut sprouts off of the stalk, leaving enough stem on each to hold the sprouts together. Melt butter over medium heat in large saute pan you can cover later. Add garlic and cook until you can smell the garlic aroma. Add sprouts and toss to coat them with butter. Sprinkle with salt. Cover and let cook until sprouts are softened, about ten minutes. Lower the temperature to simmer and add the cream. Gently stir – enough to blend the cream into the sauce, but gently enough to prevent the sprouts from falling apart. Simmer covered for a few more minutes until the sauces is hot, bubbly and begins to brown, about four or five minutes. Serve immediately.

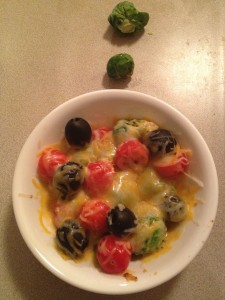
Little B’s version – after sprouts are cooked and softened in the butter, transfer a serving to an oven or microwave-safe bowl. Add some grape tomatoes and black olives cut in half. Sprinkle with grated cheese. Microwave for about one minute, or bake in oven at 300 degrees for about five minutes until cheese is melted.


Post Navigation