Any Kitchen Will Do

Give me a kitchen and I will cook.

Archive for the category “baked”

Mustard Baked Chicken

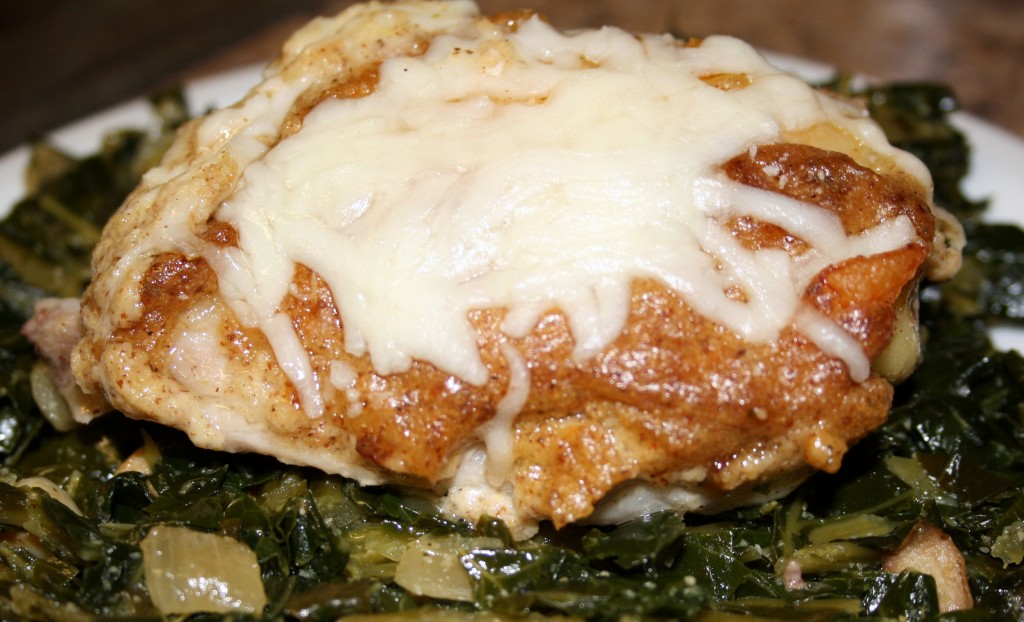
I know it is not very exciting, but there are not many dishes simpler than baked chicken parts for a weekday dinner. We always have chicken pieces of some sort in the freezer. Instead of pretending we eat exotic meals every day of the week I will continue to share variations of staples we rely on for dinners and very often lunches the next day. We continue to find that cooking our own food on a regular basis  helps us stay on a diet that makes us feel great, thus the reliance on back stock of protein in the freezer. This recipe is a result of opening the fridge on a Wednesday evening and having the thawed chicken thighs telling me “I know we are common, but make us special. Very special.” A few things from our well stocked fridge resulted in special yumminess. Saute some greens for a bed, and the special chicken is scrumptious! Wonderful wolfing down of dinner on a Wednesday!

Mustard Baked Chicken

2-3 pounds chicken pieces, skin on
1/2 cup spicy brown or horseradish mustard
1 cup olive oil mayonnaise
1 tsp garlic powder
2 Tbsp fresh lime juice
Salt and Pepper
1 cup grated mozzarella cheese

Preheat oven to 350F. Rinse and pat dry chicken pieces. Season all over with salt and pepper. Place chicken, skin side up, in a large baking dish. In a small bowl stir together mustard, mayonnaise, garlic powder and lime juice. Spread sauce over the top of all the chicken. Bake in preheated oven for about 45 minutes, until juices run clear and edges of chicken begin to brown. Turn off oven, sprinkle cheese over chicken and leave in oven for about 10 minutes, until cheese is melted. Serve immediately.

German Chocolate Cake

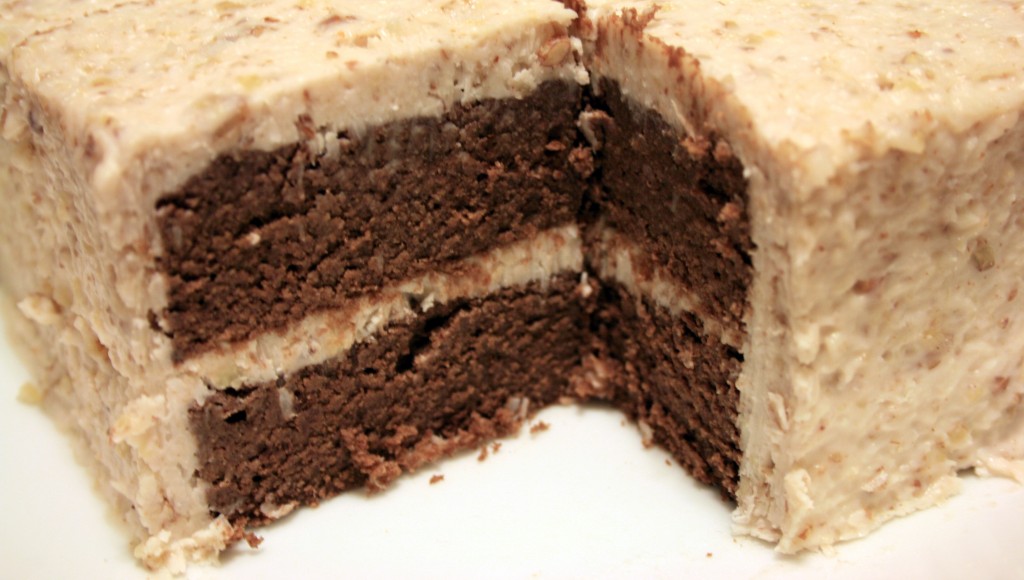
A special treat for a special guy. Big D’s birthday happened a few days ago, and on the short things he actually wanted was a German Chocolate cake – his favorite kind. To keep with our diet of low carbohydrates, no sugar and few grains, I felt a challenge coming on. Is there a way to make a German Chocolate cake following those guidelines? I knew it was out there somewhere. I searched and experimented and finally found one that I thought would work. And it did! He was so happy with the rich, dense cake to top off his birthday. He leaned back from the table after eating it with a big grin across his face, surrounded by his consumable and functional presents (he is not a buy-me-something-to-sit-on-a-shelf-so-I-can-dust-it kind of guy). Good thing that German Chocolate cakes are coconut centric by nature, because the coconut flour worked really well. Of course, being cake, Little B scarfed down a whole piece, clueless about how good for it actually was. For this effort I pretty much followed the instructions closely from Maria’s blog here. She has a bunch of other absolutely delicious recipes, so check them out too! The only variation I did to the noted recipe was use a 9×13 pan instead of two round cake pans. After the cake was frozen it popped right out of the baking dish, I cut it up and trimmed the edges off to make a rectangular two layer cake. The recipe cooking times and frosting quantity were both effective for my approach, so I don’t recommend any changes. This approach also gave Big D another birthday treat. He grew up watching his grandmother trim and decorate special occasion cakes, nibbling on the cake scraps while he watched. When he saw there were cake scraps from this cake his face lit up like he was a little kid. I will definitely be making this cake again, maybe experiment with some other flavors for the holidays. If nothing else, I surely know when I will make it German and Chocolate, in about a year…

German Chocolate Cake

Cake
2/3 cup butter or coconut oil
1 cup unsweetened cocoa powder
8 egg whites
¼ teaspoon cream of tartar
2 whole eggs
8 egg yolks
1 cup coconut milk
1 cup Truvia (or erythritol and 2 tsp stevia glycerite)
1 tsp Celtic sea salt
1 tsp vanilla (or coconut extract)
1 cup coconut flour

In a saucepan, melt the coconut oil (or butter) over medium heat. Add cocoa powder and mix well. Remove from heat and cool. In a separate bowl, beat egg whites and cream of tartar until stiff peaks form; set aside. In another bowl mix together coconut milk, 2 whole eggs, 8 egg yolks, sweetener, salt, and vanilla. Slowly mix in cocoa mixture. Add coconut flour into batter and mix until it is very smooth. Fold egg whites into batter. Pour batter into 2 greased round 8 or 9×1½-inch layer cake pans. Bake at 350 degrees F for 30-35 minutes or until a toothpick inserted into the center comes out clean. Cool (I put mine in the freezer overnight…it frosts really easy then). Fill layers and cover top and sides of cake with Coconut-Pecan Frosting

Coconut-Pecan Frosting
1/4 cup coconut milk
8 ounces cream cheese
1/2 cup Truvia
1/2 cup coconut oil or butter
1 tsp coconut extract
1 cup flaked coconut
1/2 cup pecans, chopped (or more to taste)

Mix coconut milk, cream cheese, sweetener, and butter until well combined and very smooth. Add vanilla, coconut, and pecans. Frost the cake and enjoy! Serves 16.

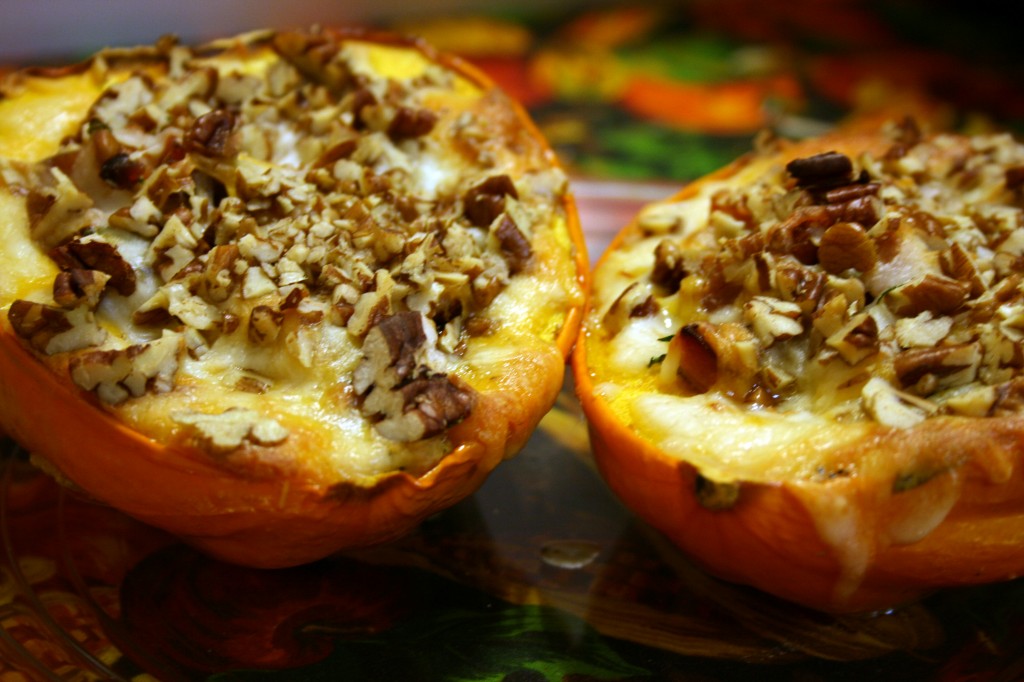
Stuffed Acorn Squash

Fall has officially arrived in Maryland. The leaves are changing, the pumpkin patches are very orange and the mums are blooming everywhere I look. I worried a bit because a storm came through this evening and took away some of my beautiful fall leaves. They don’t last long and the rain likes carpeting the ground with them. Seeing all the shades of green, yellow and orange turn my cooking thoughts towards squash. The colorful vegetable compliment almost any main dish, and they are easy to prepare in many different forms. One of my favorite methods is roasting them in a way that makes them finger food, but I also found that stuffing them is another way to have delicious results. A few weeks ago we bought a variety of small squash to add a fall touch to our home décor. We included with them some Big D bought, which were orange acorn squash. Little B has enjoyed moving them around to decorate different parts of our place each day. When I get home from work I am never sure where they will be – in the bathroom, the patio or right in the middle of the kitchen floor. I wonder if Little B will realized she is eating some of her decorations for dinner…

Stuffed Acorn Squash

2 acorn squash, halved lengthwise and seeded
2 Tbsp butter
1 tsp sea salt
1 tsp ground black pepper
1 tsp garlic powder
1 tsp onion powder
1 cup fresh spinach, chopped
2 cups ham, diced*
1 cup cheddar cheese
1 cup Monterrey jack cheese
¼ cup pecans, chopped

Preheat oven to 400F. Divide the butter among the squash halves and spread it around inside each (using your fingers is the easiest way, of course). Sprinkle each half with salt, pepper, garlic powder and onion powder. In a large glass baking dish place the four squash halves. Bake for about 30 minutes, until soft and beginning to brown. Remove squash from oven and lower oven temperature to 350F.

Fill each squash half with a layer of spinach, followed by ¼ of the ham. Press the ham down firmly to remove any extra bulk from the spinach. Top with a mix of the cheeses and sprinkle with pecans. Bake for about 20 minutes, until heated through and cheese begins to brown. Remove from oven and let cool for about five minutes before serving.

*This recipe is a great way to use leftover meat, so feel free to substitute the ham for diced chicken, ground beef, pork roast or beef roast. If you don’t use ham, which is typically salty, you may want to consider sprinkling some salt on the meat before adding the cheese and pecans.

White Pizza on a Wheatless Crust

Things are pretty exciting around here right now. Not only is Grandma Jo in town for a visit, but Big D’s newly published book is selling like crazy! Every time I read it I have to make sure I allow enough time to sit and keep reading. It is hard to find a place in the story to stop, set the book down and not wonder what is going to happen next, even when I am trying to concentrate on something else. The book is called Shiver on the Sky, and is available as an e-book on Amazon. We are enjoying the good reviews and watching the sales numbers rise. Take a few minutes to check it out – there is a short, discount promotional period right now, so check it out and let us know what you think! To celebrate the successful launch of the book we had a pizza feast the other night. We don’t do delivery – nobody I know of delivers wheat free pizza – we do our own thing. Even before we started avoiding wheat we did not do delivery much, but you can read about one of those adventures here and yet another, gluten free adventure here. The pizza we make is always loaded with a lot of garlic and a whole pile of toppings. The important part is the awesome crust, which I originally found here, from This Chick Cooks, but have since tweaked. It holds the toppings without getting soggy, and there is no doughy crust getting in the way of the garlic. Did I mention we use a lot of garlic? Oh, and we use a bunch of garlic, which is not mandatory, but we like a lot of garlic on our pizza. Garlic in the crust, garlic cooked with the mushrooms and garlic sprinkled between the layers of topping. And a last sprinkle of garlic on the top layer of cheese. Any topping combination you like will work on top of the crust, especially garlic.

White Pizza on a Wheatless Crust

2 cups shredded mozzarella cheese
2 Tbsp coconut flour
2 Tbsp flaxseed meal
¼ tsp baking soda
2 tsp dried parsley
1 tsp dried basil
1 tsp garlic powder
½ tsp onion powder
½ tsp sea salt
2 eggs, beaten

Toppings:
½ cup ranch dressing
1 Tbsp extra virgin olive oil
½ pound ground Italian sausage
1 cup thin sliced pepperoni
1 cup sliced mushrooms
4 cloves garlic, sliced
½ cup chopped black olives
2 cups shredded mozzarella cheese
1 cup shredded sharp cheddar cheese
½ cup grated Parmesan cheese

In a medium saute pan over medium heat add the olive oil. When the oil is hot add the garlic and cook until it softens. Add the sausage, breaking it up into bite sized pieces. When the sausage is half cooked add the mushrooms and toss the whole mess around until the sausage is done and the mushrooms are at least heated through. Preheat oven to 425F, then prepare the crust. In a medium bowl combine the dry ingredients with the cheese. Add the eggs and stir until combined. It will be a bit sticky and not look at all like pizza dough. That is okay. Cover a large cookie sheet with parchment paper. Spread the dough on the paper, making a very thin layer. The best way to spread it is to press down on it with your fingers – it helps to have a little bit of oil on your fingers to reduce the stickiness. It won’t spread out to all the edges, but it will cover most of the pan. The layer should be no more than 1/8 inch thick. Place pan in oven and cook just until it puffs up and the edges and top begin to brown, about seven minutes. Reduce the oven temperature to 400F. Remove the crust from the oven and begin piling on the toppings. We usually start with a thin layer of ranch dressing, followed by some cheddar cheese, sausage/mushroom/garlic, mozzarella cheese, then pepperoni and olives, followed by a mix of cheddar, mozzarella and last but not least Parmesan. If you like your pizza herby, then do what we do and sprinkle some parsley, basil and garlic between the layers of toppings. Bake the pizza for 10-15 minutes, until the cheese is melted and starting to turn brown on the edges. Remove from the oven and let cool for at least five minutes before cutting.
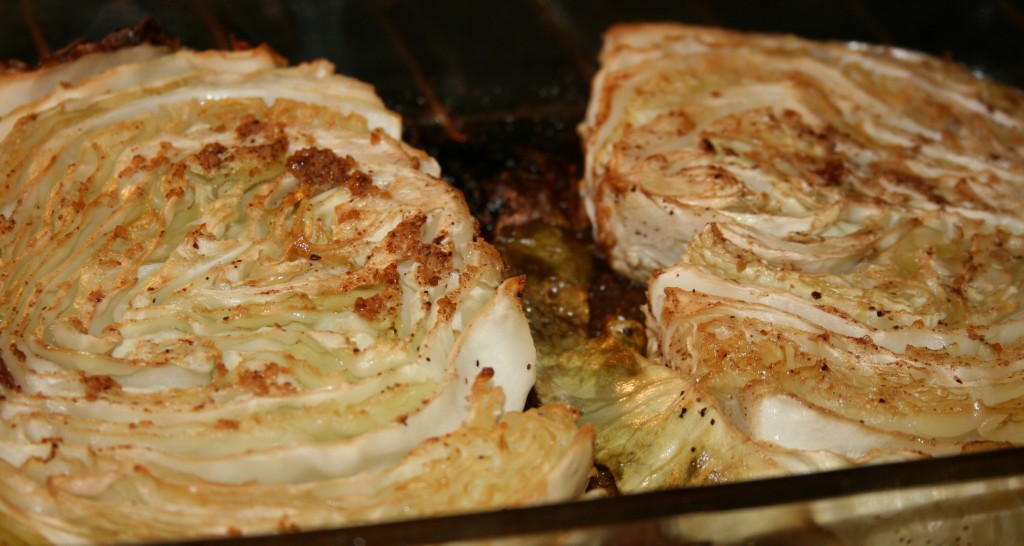
Roasted Cabbage

Now this – this is easy and delish! We love cabbage. And not just because it is low in carbohydrates and high in fiber, but because it tastes good, has great texture and marries up with a variety of flavors. It can double the bulk of a meat dish, or fill up the crevices of a stuffed pepper. It can also make a raw salad extra crunchy. Once when we were living in New Orleans I picked up a big head of green cabbage at a farmers market. All the heads looked pretty much the same, but I grabbed one of the smaller ones. Little B was a baby at the time, hanging around in a sling, nestled against me dozing on and off. I was tired from all the baby maintenance. When I got home and started cleaning and trimming the cabbage, it was filling up my sink. I was pretty impressed at the size. It was huge! Filled the sink. We ate on it for a week. Unlike Charlie of the Chocolate Factory, I never had to rely on cabbage water for dinner. I love the stuff. Roasting it in the oven brings out the flavor without getting watery. It is easy to cook up while something is finishing up on the grill. Enjoy!

Roasted Cabbage

1 head green cabbage
1 tsp chopped fresh garlic
1 tsp chopped fresh ginger
½ tsp ground nutmeg
2 Tbsp olive oil
Salt and Pepper to taste

Preheat oven to 375F. Cut the cabbage head in half, leaving the stem attached. Out of each half cut a 1” slice. Trim some of the stem out of the slices, but leave enough to help hold the slices together. Set aside the outer slices for another use. In medium rectangular baking dish drizzle 1 Tbsp of the oil. Sprinkle the garlic and ginger, as well as some salt and pepper over the oil in a shape approximate to the circumference of the cabbage slices. Place the slices in the pan, gently pressing down so the spices are pushed into the cabbage. Sprinkle the remaining oil on the top of the slices, along with more salt and pepper. Bake for about 30 minutes, then flip the slices. Bake for 30 more minutes, or until cabbage is softened to preferred tenderness. Serve immediately.


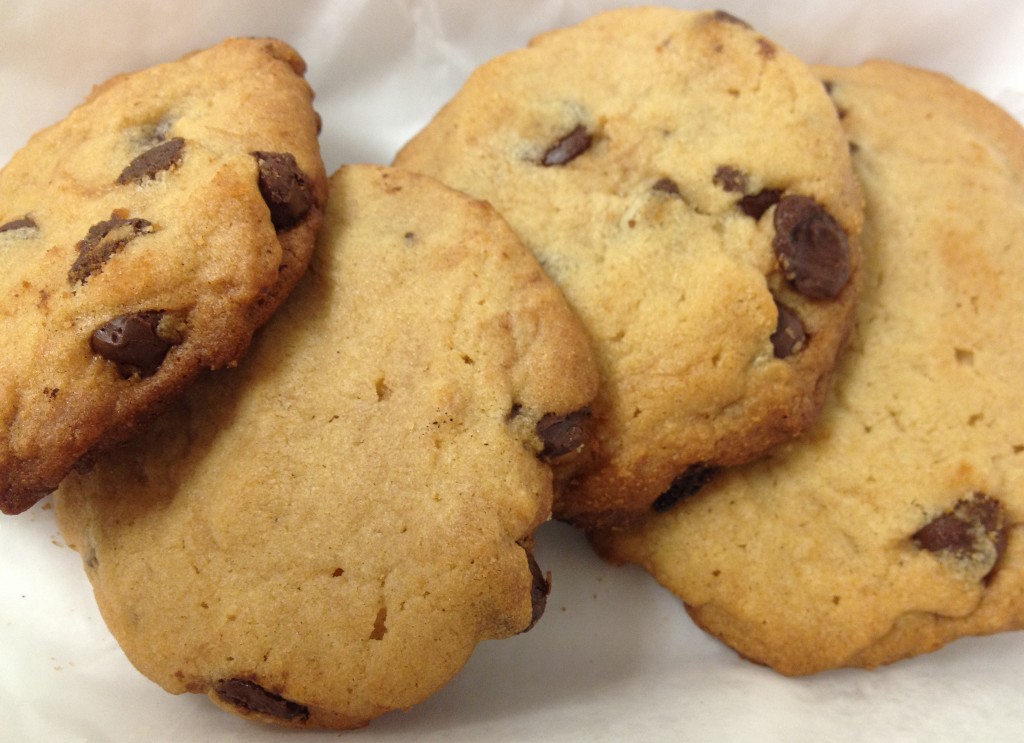
Peanut Butter Chocolate Chip Cookies

As I promised long ago, I am now sharing my old reliable. I came upon it in a cookie cookbook my mom got for me at a school book fair. It was my second cookbook. The first was a cute spiral bound thing with recipes of the world. It was more of an illustrated book, but the recipes were simple and fun for a kid. This cookie cookbook was a whole new world. Real pictures and little squares with facts about ingredients. And the recipes! Oh the recipes! So many to choose from and every one with great results. I always needed cookies for bake sales and parties and such. Bunches of opportunities to cook and learn how ingredients work together. I recently had a need for cookies to take to a party, and made my old faithful. Although I don’t have the cookbook with me right now, I am pretty sure I remember all the ingredients, and they came out great!

Peanut Butter Chocolate Chip Cookies

1 cup peanut butter
1 cup butter, softened
1 cup sugar
1 cup brown sugar
2 large eggs
2 cups flour
1 tsp baking soda
½ tsp salt
8 ounces semi-sweet chocolate chips

Preheat oven to 350F. Cream together peanut butter and butter. Add sugar and combine. Gradually add eggs just until combined. In separate bowl combine flour, baking soda and salt. Add flour mixture in four portions to the wet mixture until blended. Fold in chocolate chips. Drop dough onto non-stick cookie sheets and gently press down into 1 ½ to 2 inch rounds. Bake for 13 – 15 minutes until set and slightly brown on the edges. Store in airtight container.

Stuffed Poblano Peppers

We found a new favorite dinner! Thank goodness I did not have enough peppers to double the recipe, or we would have had to roll ourselves out of the kitchen after eating them all! Did you ever go to a Mexican restaurant, order a chile relleno and end up with a kinda tasteless mound, filled mostly with rice and covered with soggy, sometimes slightly undercooked batter? Here is a way to avoid all that unpleasantness! A little more effort is needed to fill out the other elements of your own combination platter, but here is some help with enchiladas, salsa, guacamole and rice. Since I was not going to dip these peppers in batter I chose not to char and remove the skins – with all the cooking and liquid the peppers were soft and skin inconsequential. This is a a great recipe for using leftover meat and vegetables. It always works great with other pepper types, like cubanelle, etc…

Stuffed Poblano Peppers

4 Poblano peppers
4 ounces cream cheese, room temperature
2 cups shredded pork or cooked seasoned ground beef
1 cup cabbage, cooked and chopped up (or very finely chopped raw cabbage)
1 cup canned diced tomatoes
1 tsp dried oregano
1 tsp ground cumin
1 clove garlic
Salt and pepper to taste
2 cups shredded cheddar and Monterrey Jack cheese
½ cup water
Sour cream and lime wedges for serving

Preheat oven to 400F. Make one slit in each pepper lengthwise. Remove seeds and membrane from inside, careful to leave the stem attached to the pepper. Sprinkle inside of each pepper with salt. In blender or food processor combine tomatoes, oregano, cumin and a dash each of salt and pepper. Puree until you have a smooth tomato sauce. Set aside. Divide cream cheese into four pieces. With the back of your spoon (or your fingers if you don’t mind a little mess) spread the cream cheese around in the cavity off the pepper. In a medium bowl combine the meat and cabbage. Stuff the meat and cabbage mixture in the pepper, making sure the slit does not tear open any more than necessary. Top the meat and cabbage the tomato sauce, making sure it drizzles down within the pepper. Top with the cheese, tucking it in under the edges of the peppers, then gently pushing the pepper edges together as far as you can. In a baking dish just big enough to hold the peppers (9×9 or 8×11) pour in the water, then add the peppers. Cover loosely with foil and bake for 20 minutes. Remove foil and bake for 20-30 more minutes, until cheese begins to brown. Remove from oven and let cool for about five minutes before serving. Top with a dollop of sour cream and a lime wedge for drizzling juice over the stuffed pepper.


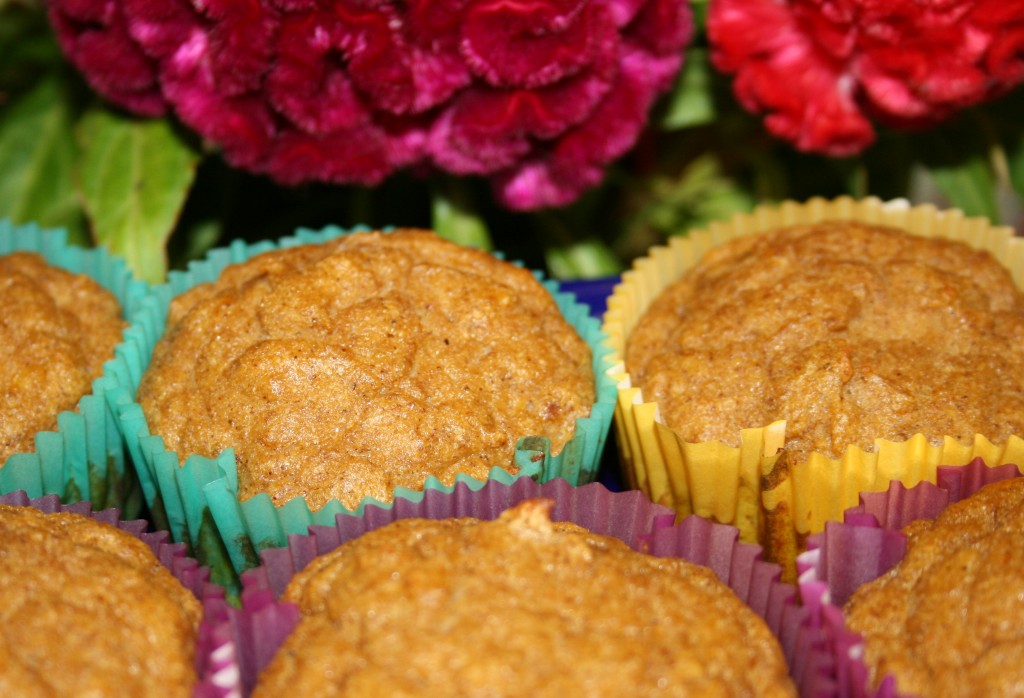
Wheat Free Pumpkin Spice Muffins

Oh the sweet smell of autumn! The smell of wood fires. The way the whole world looks like sunset all day long with the changing leaves. The rush to do things in the daylight of shorter days. It is so close I can feel it – especially with the windows open and tree tops outside my kitchen window. The smell I most often associate with autumn is spiced pumpkin, whether it is coming from a dish for breakfast, dessert or a hot beverage. The smell wafting through the air is heavenly. Every evening this week I have set a pot simmering low on the stove with water, vanilla, cinnamon sticks and ginger. The whole house smells like freshly baked pumpkin pie. Little B is currently ‘helping’ me clean up while the muffins bake. It may sound odd, but Little B has not often been interested in licking the bowl after batter has gone into baking dishes. Unlike what I recall as a little kid, I was always wanting to savor those little bits in the bowl, teasing me about how the final product would taste. As I type she is going on fifteen minutes trying to get every speck of the batter out of the mixing bowl. Regardless of how the muffins turn out, my house smells delicious and the batter is a success!

Wheat Free Pumpkin Spice Muffins

6 eggs
6 Tbsp butter
2 Tbsp unsweetened coconut milk
1 tsp vanilla
10 drops liquid stevia
5 ounces pureed pumpkin
1/2 tsp sea salt
1/2 tsp baking powder
2 tsp cinnamon
½ tsp nutmeg
½ tsp ground ginger
1/2 cup coconut flour
1 cup powdered erythritol

Preheat oven to 400F. Prepare muffin pan with liners. In mixing bowl blend together wet ingredients. In separate bowl combine dry ingredients. Add dry ingredients to wet ingredients and stir just until combined. Divide batter among the 12 muffin cups. Bake for about 15 minutes until tops begin to brown. Let cool for about ten minutes before serving.

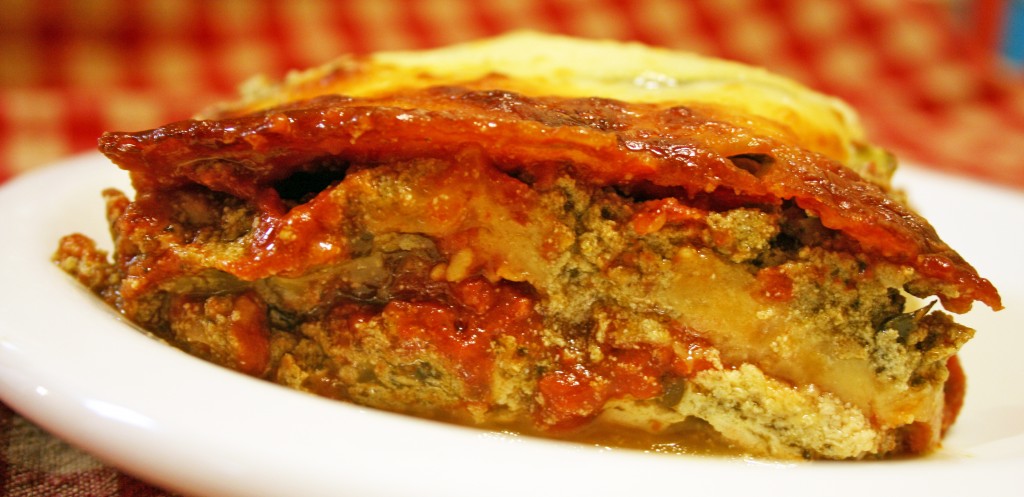
Zucchini Lasagna

Here is another low carb dish! We are really enjoying the increased level of energy we are experiencing with our current diet, which includes avoiding grains, sugars and processed foods. I am not a die hard fan of most pasta dishes, but I am a lasagna lover. When we traveled in Italy eight years ago I was all about the meat, fish and vegetables – the pasta was, surprisingly to me, not my go to dish while there. Probably because I was corrupted by American knock offs, or because I did not go to Northern Italy, where there is supposedly ‘better’ pasta. I do not really feel like I missed out. Especially in Rome there were almost as many places to get a skewer of roasted meat as there were pizza slices. Go figure. The time we spent renting a villa in Tuscany was sprinkled with visits to the local co-op for freshly butchered meat and freshly picked produce. The cheeses and cured meats were quite an experience, too. Of course, the evil alcoholic concoction we came up with while relaxing the nights away made the eating at the villa a pleasant blur. We would take Coca Cola light (the Italian version of diet Coke) and mix it with some quite horrible tasting Grappa. We did find what I consider very good Grappa before we left, but that first bottle was nasty. Not to waste alcohol, we combined it with the soda and boom! We dubbed our creation Crappa. We got schnockered and did some skinny dipping in the pool. To make a long story short, and totally disconnected to our libation, this recipe takes care of my lasagna craving while keeping me away from the processed carbs found in pasta

Zucchini Lasagna

2 large, narrow zucchini
2 14-ounce cans diced tomatoes
1 small can tomato paste
2 tsp dried oregano leaves
2 tsp dried parsley leaves
2 cloves garlic, crushed
1/2 tsp salt
1/2 tsp Splenda or ¼ tsp sugar
12-15 ounces ricotta cheese
2 cups fresh baby spinach leaves, finely chopped
1 tsp ground nutmeg
1 ½ pounds ground Italian sausage, broken up and cooked thoroughly
1 cup sliced mushrooms
4 cups mozzarella cheese

Preheat oven to 350F. In small sauce pan combine the diced tomatoes, paste, oregano, parsley, onion powder, salt and Splenda or sugar. Bring to a boil over medium heat, turn down flame and simmer for about 15 minutes, then remove from flame and let sit. While it is cooking prepare the rest of the dish. In a medium bowl mix the ricotta cheese, spinach and nutmeg and set aside – trust me – it sounds odd, but the nutmeg enhances the ricotta flavor. Slice ends off of zucchini. With a vegetable peeler peel off long strips of zucchini. If you don’t have a peeler, instead make zucchini coins as thin as you can with a knife. To build the lasagna begin with a thin layer of sauce in the bottom of a 9×13 inch baking dish. Add a layer of zucchini strips/coins overlapping generously to make a solid layer, followed by the ricotta mixture, sauce, mushrooms, sausage and 1 cup of mozzarella. Repeat the layers again. Top with a third layer of zucchini and the last of the mozzarella. Bake lasagna until heated through and cheese on top begins to brown, about 45 minutes. Remove from oven and let cool for about ten minutes, allowing the lasagna to set.

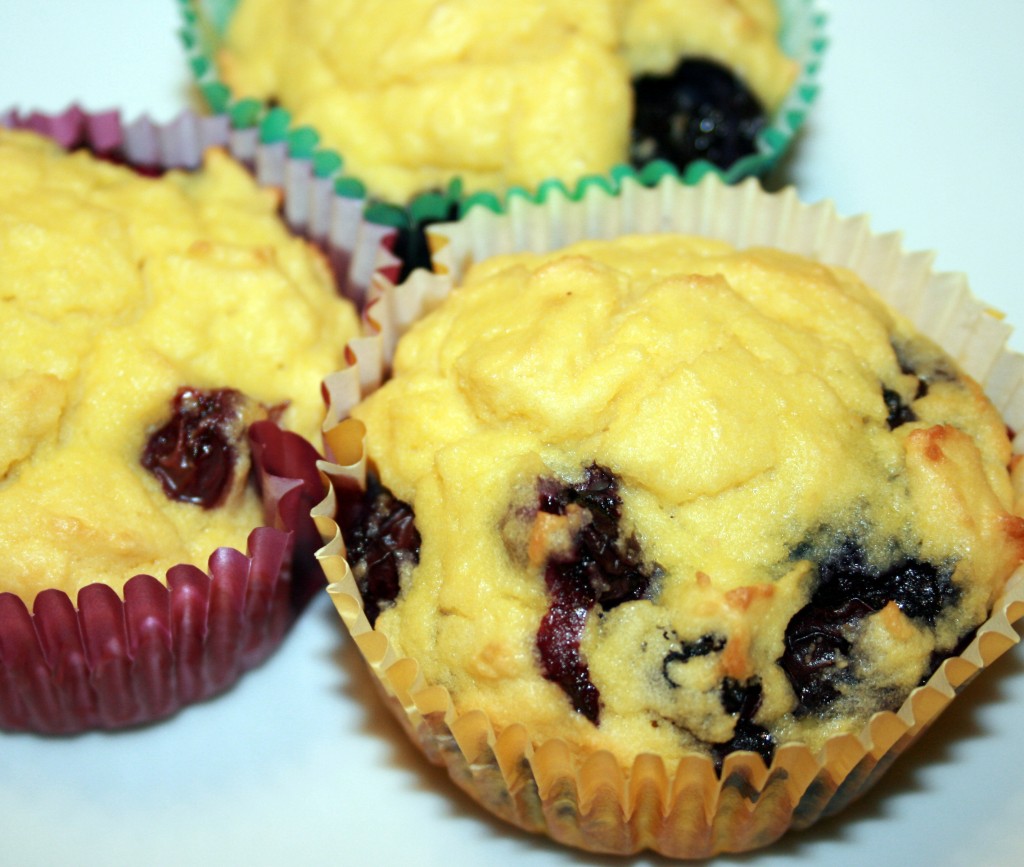
Blueberry Coconut Flour Muffins

Little B used to not like blueberries at all. We stopped even offering them to her, then suddenly, they were the best thing since sliced bread! They still come after blackberries, but they rank pretty high with her these days. When we celebrated Lammas a couple of weeks ago we wanted to honor the day with what is typically use of traditional first harvest items, and the recognition that days are getting shorter and cooler. Well, not cooler yet, but linger in the anticipation. First harvest is usually grains; more specifically, wheat. Since we are avoiding wheat there was a need to focus on a more creative symbolic dish. We mixed up some grain free muffins with a different seasonal harvest item – blueberries! They were wonderful accompaniments to the other harvest items on which we feasted: apples, zucchini, pork and wine. We had a lovely evening releasing regrets and looking towards autumn – what I consider my favorite time of year. I used coconut flour again, which has become a favored ingredient in my baking lately – it does not take much to go a long way and it is good for you! I hope you enjoy the muffins, for we did, in all their bluberry-ness.

Coconut Flour Blueberry Muffins

6 eggs
4 Tbsp plus 2 Tbsp (or 12 1/2 tsp) butter
2 Tbsp heavy cream
1/2 tsp vanilla
3 drops liquid stevia
1/2 tsp sea salt
1/2 cup coconut flour
1/2 cup powdered erythritol
1/2 tsp baking powder
8 ounces blueberries

Preheat oven to 400F. Prepare muffin pan with liners. In mixing bowl blend together wet ingredients. In separate bowl combine dry ingredients. Add dry ingredients to wet ingredients and stir just until combined. Gently fold in blueberries. Divide batter among the 12 muffin cups. Bake for about 15 minutes until tops begin to brown. Let cool for about ten minutes before serving.

Update 11/26/12: Little B and I made a batch of these muffins tonight. A tweak made some doubly delicious muffins! We threw all the wet ingredients, along with the blueberries into a blender and whipped them all up together before combining with wet ingredients. We also added juice from half a very juicy lime – about 1/5 cup (very juicy lime). The tweaks made them more moist and the sweet and tang of the berries and juice worked great together. Everything else remained the same in the recipe.

Post Navigation