Any Kitchen Will Do

Give me a kitchen and I will cook.

Archive for the category “baked”

Portabello Pizza

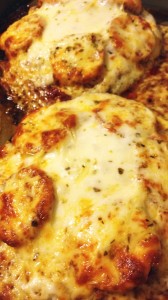
portabello pizzaThe first time I ever cooked with portabello mushrooms was about 15 years ago. At the time I was making a lot of pizzas closely following my discovery of pizza stones. They make the crust crispy all around and are  great for even cooking. I got into the habit of topping each pizza with two to three veggies and a meat. On some occasions my dinner guests were vegetarians, so minus the meat, but what to add to make the pizza hearty? I explored the produce section of the grocery store and came upon the portabellos – huge caps sitting over a sign that described them as meaty. Well, why not? If they don’t eat meat, why not serve them meaty mushrooms? The pizza with portabellos turned out great, and marinating the mushrooms added an extra layer of flavor. Since my last pizza stone broke and I started leaning toward low carb, I never replaced it. One recent tendency has been to make pizzas with low carb crust, and another is to reach back into my pizza past and snatch up the portabellos. This time I used them as the crust. They are quick and of course Little B can help with every step. Using tomato paste adds a spike of tomato flavor without adding much liquid. The one flaw, but not really, in this recipe is the wetness of the mushrooms. I will continue to explore how to dry out the mushrooms, because they soaked up a bit of liquid and the result is not what I would call hand pizza, but it tasted great. Grab a fork and knife for this flavorful rounds and dig in!

Portabello Pizza

4 large Portabello mushrooms, stems removed
1 Tbsp lime juice
1 small can Italian herb tomato paste (or plain past mixed with 1 Tbsp Italian herbs)
2 tsp dried oregano leaves
2 tsp dried parsley leaves
2 tsp dried basil leaves
2 tsp garlic powder
8 ounces pepperoni, sliced thick
2 cups grated mozzarella cheese
½ cup Parmesan cheese
Salt and pepper to taste

Preheat oven to 350F. Place caps stem side up on baking sheet, then sprinkle with lime juice, salt and pepper. Spread tomato paste on mushrooms, followed by a layer of basil, oregano, parsley and basil leaves, along with garlic powder. Place a layer of pepperoni slices and top with mozzarella and Parmesan cheeses. Bake for 20-25 minutes, until mushrooms are tender and cheese is melted and browning.
Strawberry Lemon Cake

strawberry lemon cake

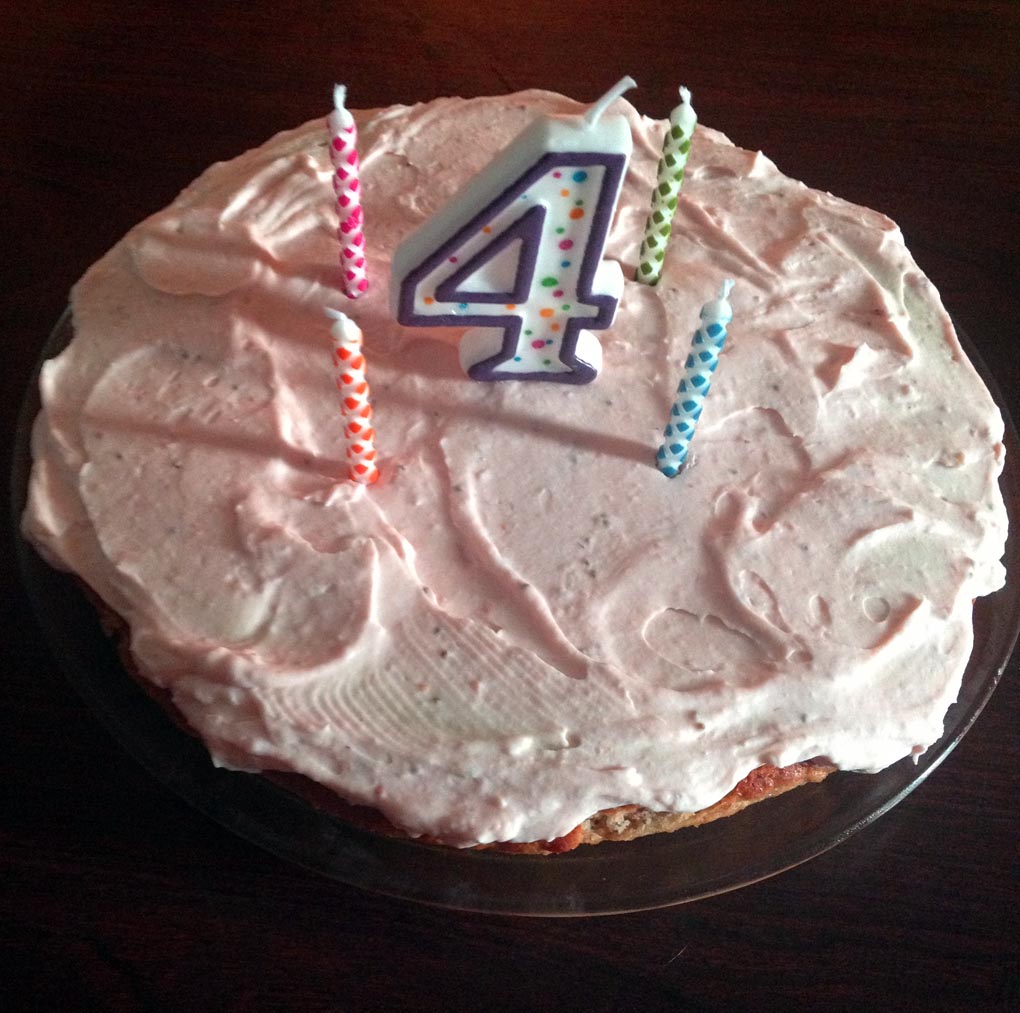
Little B turned four and is taking it very seriously! There are a number of things she won’t do now that she is older than three. It is fun and serious to watch her work it all out. A couple of years ago we started a tradition of doing a family out of town trip to a beach for her birthday. We continued it this past weekend by dipping our toes in the Atlantic Ocean. A challenge for these trips is having a sugar free, wheat free cake ready and waiting for her on THE day. Last year we succumbed to a wheaty, chocolaty concoction from a store near the beach. We got a sugar buzz, while also feeling guilty about not following our diet rules. Rules are made to be broken, yes, but with consequences. She pinged and ponged, then crashed. Not fair to a body, but we did it anyway. I solved it this year by making this strawberry lemon cake and waiting to put it together the day of, thanks to a fridge in the hotel room. It traveled well and thankfully I packed a knife for spreading of the frosting and cutting of the pieces.  Worked like a dream and the whole thing was inhaled by us all. We kept to our food rules, had fun, and no sugar/wheat crash. Besides the princess paraphernalia (ugh) and first bicycle (yay), the cake was a favorite. She wanted a strawberry cake with strawberry frosting. Instead of repeating the cupcakes we made a while back I decided to try a cake with almond meal. I thought the almond and lemon would go wonderfully with the strawberries. The result had a much different texture compared to the coconut flour concoction we came up with before – good, but in a different way. The cake came out dense, very strawberry, very moist and nice and sweet, just like the birthday girl!

Strawberry Lemon Cake

Cake
4 Tbsp butter
3 eggs
4 medium strawberries, cored and chopped
1 tsp vanilla
1 lemon, juiced with meat
1 cup almond flour
½ cup golden flaxseed meal
¼ tsp salt
½ tsp baking soda
2 cups granulated erythritol
1/8 tsp pure stevia powder
½ cup small quartered strawberries

Frosting
1 package cream cheese, room temperature
1/2 cup butter, room temperature
1 cup granulated erythritol
1/2 cup pureed strawberries

In medium pan over medium heat melt the butter. Continue cooking it until the butter is brown and fragrant. Remove from heat and set aside. Preheat oven to 350 degrees. In a blender add eggs, cored and chopped strawberries, vanilla and lemon juice with meat. Blend until combined and strawberries are pureed. Add almond flour, flaxseed meal, salt, baking soda, erythritol, stevia. Blend some more until you have a smooth batter. Stir in butter until well combined. Line the bottom of a 9-inch round baking dish with parchment paper. Pour batter into pan, then drop strawberries into the batter, distributing them evenly. Bake in preheated oven for 25 – 30 minutes. The time may vary based on the juiciness of the strawberries. Remove from oven and let cool in the pan. When cool gently flip cake out of pan and place on serving dish. Frost as desired – I used the strawberry cream cheese version above – combine all ingredients together and whip until smooth. It may need to be chilled for a few minutes to firm up before spreading on the cake. Keep cake refrigerated if room temperature is over 75 degrees. Enjoy!

Adapted from here.

Veggie Meatloaf


veggie meatloaf

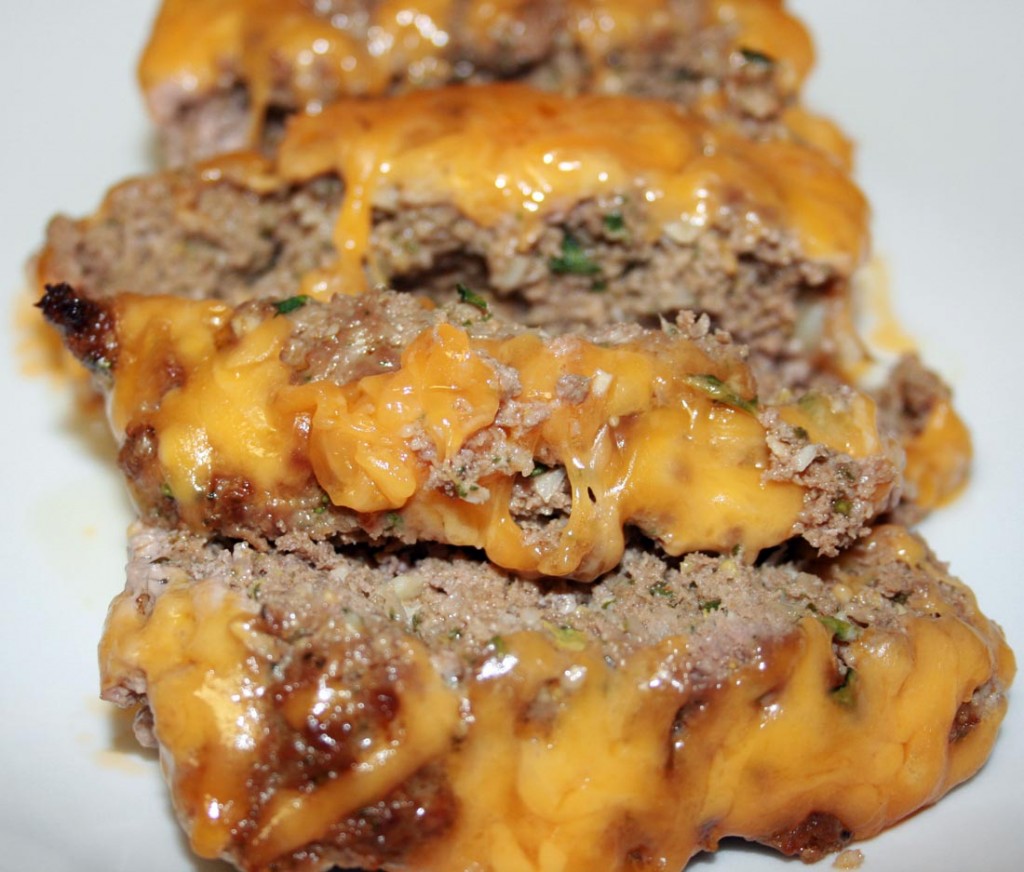
For the most part I don’t have to hide veggies in food to get Little B to eat them. She goes after most of them with a vengeance or by way of an earnest request. Like her all time favorite snack, frozen broccoli “trees”. Yep. Straight out of the freezer. They started out as something to gnaw on when she was teething, but survived as a favorite long after. We try to offer her vegetables every chance we get, even in restaurants, in spite of the restaurants efforts to fill her otherwise. The kid menus at most places include breaded chicken tenders, pasta, sad little mini burgers or a hot dog. Besides being loaded with carbs and often deep fried, such offerings have little nutritional value or variety to expand little palates. More often than not we end up ordering soup or a side of vegetables for her from the non-kid menu. She dives right in. A few times I have tried to order the kid food, but she finds the food as unappealing as I do. It is refreshing to go to a restaurant and actually see smaller versions of the food offered on the rest of the menu, like 1/4 rack of ribs at a barbeque joint, or a kid size version of seafood at a seafood joint. What a concept! I rant because our travels recently have taken us to new restaurants in new places, and I am reminded that sometimes it is not easy to keep Little B eating our version of healthy away from home. This recipe actually stemmed from my desire to use up the vegetable odds and ends in the fridge. It worked very well, held together like meatloaf tends to not want to do. On top of it all Little B ate it up in spite of not being one of her favorite veggies – frozen broccoli, green beans or squash.

Veggie Meatloaf

1 ½ pounds ground beef
2 Tbsp tomato paste
2 stalks celery
1 carrot (or 1 ½ cups mini carrots)
1 small yellow onion
2 cups fresh spinach
4 cloves garlic
3 eggs
½ cup fresh parsley
1 Tbsp dried thyme leaves
1 tsp ground cumin
1 tsp sea salt
½ tsp ground black pepper
1 tsp paprika
1 cup sharp cheddar cheese, grated

In a blender or food processor add tomato paste, celery, carrot, onion, spinach, garlic, eggs, thyme, cumin, salt, pepper and paprika. Pulse until vegetables are very small pieces and herbs are combined. In large bowl combine beef and vegetable mixture. With your bare hands mix meat and vegetables until all the meat is coated and the vegetables are combined with the meat. Press mixture into rectangular bread pan. Bake at 350 for 45 – 55 minutes, until cooked through. Sprinkle top of loaf with cheese and place in hot oven with heat off for five to ten minutes, until cheese is melted. Remove from oven and let rest for about five minutes. Slice in pan, arrange on serving tray and serve.

Double Chocolate Cupcakes

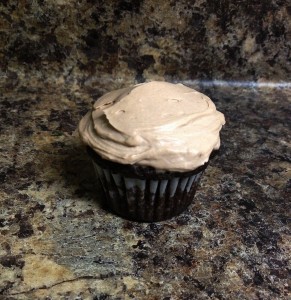
dbl choco cupcakesThese cupcakes came from the mouth of my babe, Little B. As with our strawberry concoction from a while back, she got a baking hankering and we followed it through. Little chocolate cupcakes with chocolate frosting that don’t have any wheat or sugar. She is adamant about those two points, which meant we got to create a new recipe “with only really good tasting ingredients Mommy. Don’t forget they have to be really good” she tells me. Well, they are really good, and buttery and rich. Also a chance to crack eggs and spread frosting, which are always good things. Really good things.

Double Chocolate Cupcakes

Cakes
6 eggs
½ cup butter, room temperature
1 tsp vanilla
¼ cup coconut flour
½ cup golden flaxseed meal
¼ cup cocoa powder
1 tsp pure stevia powder
1 tsp baking soda
½ tsp sea salt
1 tsp ground cinnamon

Frosting
1 8 ounce block cream cheese, room temperature
½ cup butter, room temperature
½ tsp vanilla
¼ cup cocoa powder
½ cup granulated erythritol

Preheat oven to 350 degrees. Combine eggs, butter and vanilla in a medium bowl. Whisk together until combined. In a separate bowl combine flour, meal, cocoa powder, salt, baking soda, cinnamon and stevia. Add dry ingredients to egg mixture and stir until well combined. Divide batter among a lined 12 regular sized or 24 mini muffin pan. Bake for 15 – 18 minutes until tops are firm. Remove from oven and let cool completely. For the frosting add the cheese, vanilla and butter in a medium bowl. Whisk until combined. Add cocoa and erythritol and continue whisking until combined. Chill a few minutes if it comes out thin. Spread frosting over cupcakes. Store cupcakes in the refrigerator until serving – mostly to keep the frosting firm, otherwise they can sit at room temperature.

Stuffed Flank Steak

stuffed flank steak

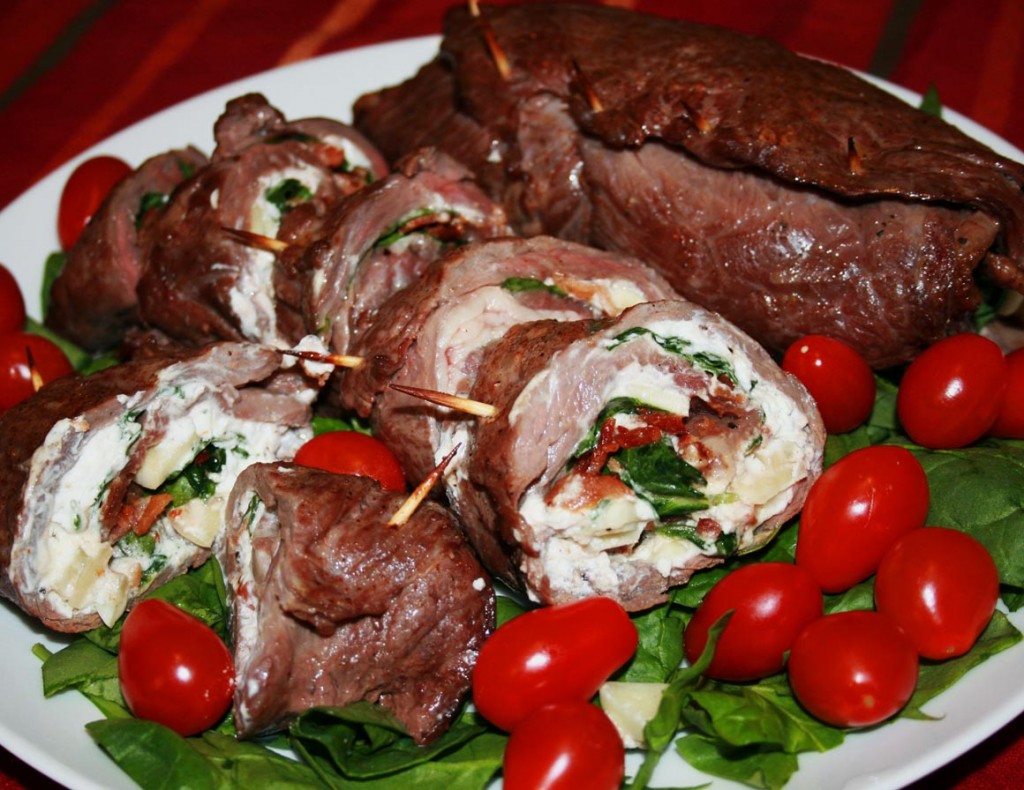
Flank steak, also known as skirt steak, used to be cheap. It was a slightly tougher cut of meat that could be marinated and grilled or broiled, cut up and served south Texas style as fajitas. It still can, but the cheapness is gone. I don’t know what happened. Maybe, like buffalo wings, it got popular and so the price hiked. Did price hike because of demand, or the mere fact the price was higher, and so demand increased? I guess I could go back to my college business textbooks and try to dig deeper, but not gonna do it. The point here is I have turned the once cheap fajita meat into a fancy looking main dish that went POW! Of course, anything with goat cheese tickles my fancy, but the cheese combined with the steak resulted in a tangy, juicy roll. I made a couple and ended up freezing one, and I discovered it froze well, too! Double POW! You can still make old, reliable fajitas with flank steak, but if you want to get a little fancier, you definitely can!

Stuffed Flank Steak

1 – 2 large flank steak (1 ½ – 2 pounds total)
8 ounces bacon
½ cup red onion, finely chopped
4 garlic cloves, sliced
4 – 5 ounces goat cheese
1 Tbsp fresh oregano leaves, coarsely chopped
8 ounces baby spinach leaves
8 – 12 wooden toothpicks

Preheat oven to 400 degrees. Slice bacon into ¼ inch strips. In a medium skillet over medium heat  cook bacon until it begins to release fat. Add onion and garlic and continuing to cook until garlic slices begin to brown. Transfer bacon, onion and garlic to paper towel to soak up extra grease. Lightly salt and pepper the steak. Place steak between two layers of cling wrap. With a tenderizing mallet or side of a regular hammer flatten steak until about ¼ inch thick. Remove the top layer of wrap. Spread the goat cheese on the steak, leaving about ½ inch border around the edges. Make a layer of spinach leaves on top of the cheese. Sprinkle the bacon, garlic and oregano on top of the spinach. Add another layer of spinach. Sprinkle spinach with a little more salt. To roll the steak, begin by lifting the wrap edge on the long side of the steak, pull the steak off the wrap and begin curling it over the spinach. Continue rolling it, squeezing slightly to keep the roll an even size along the length. When completely rolled, place the seam facing up. Impale the roll every inch along the seam with toothpicks. If it is thin enough on the ends, weave a toothpick across them to seal it – like you would a straight pen through cloth. Place the roll in a shallow baking dish or baking sheet covered with foil. Bake for 20 minutes. Turn oven temperature down to 350 degrees and cook for 20 – 30 minutes longer, depending on thickness of steak and desired doneness. I like it more rare, so the shorter cooking time appeals to me.

Baked Spaghetti Squash with Cheese and Herbs

baked spaghetti squash with cheese and herbs

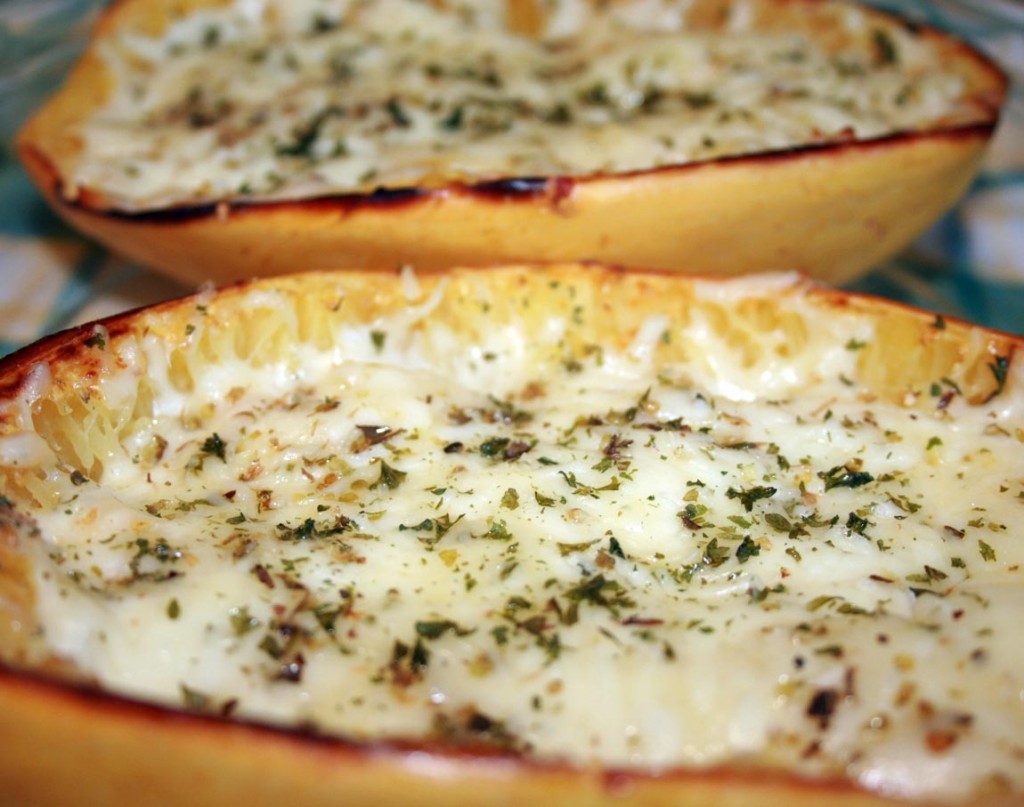
This stuff is just plain cute. Besides being yummy, serving it in the squash skin makes it fun to eat! I remember when I first had spaghetti squash. My mom served it under spaghetti sauce and said it was just like pasta. That caused the problem – unintended, but problematic. I expected some slight mushiness that started to soak up the sauce. What I got was slightly crunchy strings that mixed with the sauce, but did not absorb. I did not find it appealing after the first encounter. Flash forward a few years.  I tried spaghetti squash again, with the expectation of squash, not pasta. It tasted lovely, absorbing the garlic and herbs tossed with it, instead of futilely attempting to soak up marinara. Now that I think back at the two experiences it reminds me to be realistic with Little B when she is trying something new. We often introduce new foods to Little B that may look like other stuff she has had, but will feel and taste different. For example, when you eat regular or instant pudding, then are given chocolate chia pudding, you will have different experiences. They both taste good, but the texture is very different, not to mention the expansive difference in nutritional value. Honestly, I sometimes generalize and refer to most meats as ‘roast’, because she likes roast and it is easier. When it is truly something new I try to describe it for her so she is more willing to not spit it out. When she likes something new she really likes it, but as she gets older she is actually less inclined the try something new. I think it is because of her natural desire right now to display her independence more than not wanting to try something new. I hope it is temporary because she likes spaghetti squash and it is so much better for her than pasta. My ultimate goal is to have new experiences be positive for her. Not always fun or ideal, but result in some learning experience that will move her forward, for the world is full of new experiences. There will be many more new food experiences in her life and I want her to jump into them feet, or mouth first with passion. I know it has made a world of difference for me!

Baked Spaghetti Squash with Cheese and Herbs

1 spaghetti squash
1 Tbsp extra virgin olive oil
Salt to taste
1 tsp garlic powder
½ – 1 cup mozzarella cheese, grated
¼ – ½ cup Parmesan cheese, grated
1 tsp dried oregano
2 tsp dried parsley

Preheat oven to 375 degrees. Cut squash in half lengthwise and remove seeds. Drizzle olive oil on the halves and use your hands to spread it all over the exposed meat of the squash. Place halves face down on baking sheet. Bake for 30 – 45 minutes until inside of squash is soft, but not mushy. Reduce oven temperature to 350 degrees. Flip over squash halves, carefully hold the hot squash with a mitt or towel. Using a fork, scrape the squash meat off the skin, but leave it in the shell. Sprinkle the squash with salt and garlic powder, then gently toss the meat within the skin. Sprinkle with a little more salt. Divide mozzarella on each half, followed by the oregano and parsley. Finish with sprinkling the Parmesan cheese on top. Return squash to oven on baking sheet, cheese side up. Bake for 15 – 20 minutes, until cheese is melted and beginning to brown. Remove from oven and serve immediately – small squash can result in an entire half being a side dish, while larger squash may need to be cut into quarters for serving.

I Love You Cake

flourless chocolate cake with chocolate cream

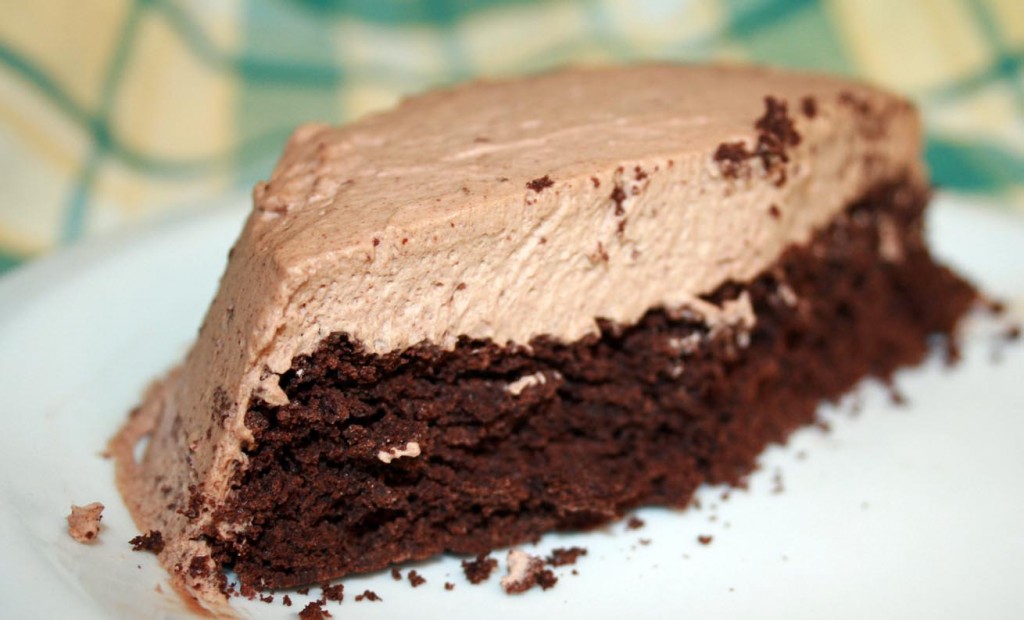
Little B loves parties, especially birthday parties. We never have enough reasons to have a cake or open presents. Pretty much every day one toy or person gets a ‘birthday party’, usually involving an intricately constructed tower out of blocks, wrapped in a bath towel and proudly presented. When an already made muffin or cookie will not suffice as the birthday cake, we will make what Little B calls an I Love You Cake. She calls it that because it is made with love and shared with people we love. If we don’t love someone they cannot have any. Her description. I would not necessarily deprive a person of cake if I felt no love for them, but the size of this cake makes it a non-issue most of the time. There is more to making the cake than just having a good dessert. I have learned over time that Little B often wants to do things over and over to practice new skills, and to do so the process does not have to be big or intricate. This cake is perfect – no wheat, no sugar, just the right size to not have leftovers and it gets cooked in the microwave. For today’s cake Little B enjoyed mixing the ingredients with her whisk ‘until it all looked the same’ and concentrated fully on covering with frosting ‘so the whole cake is a secret underneath’. She has really been on a kick to do more frosting practice, as you may remember from the strawberry cupcakes made a while back. I adapted this recipe from Ally over at This Equals Everything. The cake was a lovely, light dessert after feasting on some white pizza we also made together, and she even let Big D help!

I Love You Cake

Cake
1 large egg
1/2 teaspoon vanilla
1 tablespoon heavy cream
1 tablespoon butter, softened
2 tablespoons cocoa
2 tablespoons granular erythritol (I used Truvia)
10 drops liquid stevia
1 teaspoon baking powder

Chocolate Whipped Frosting
½ cup heavy whipping cream
2 tsp granular erythritol
1 Tbsp cocoa powder

Spray a 2-cup measuring cup or small bowl with cooking spray. Add the egg and beat it with a fork. Add the remaining ingredients and whisk until a smooth batter forms. Microwave on HIGH 45-75  seconds or until it puffs up and no longer looks wet in the center. Let it sit for a few minutes, then pop it into the freezer for about five minutes – when you take it out gently coax the cake from the container, which should come out smoothly. While the cake cools make the frosting. For the frosting put the cream, Truvia and cocoa in a tall sided bowl or container. Whip for about 20 seconds with a hand mixer or stick blender until stiff peaks form. Spread the cake with chocolate whipped frosting to cover the whole thing, or simply a dollop of whipped cream, if desired.

Chocolate Stout Cake with Mint Frosting

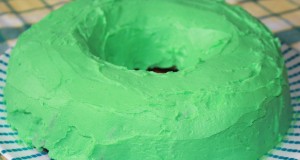
Around here May Day (or Beltane for us) is a wonderful double celebration. On this day nine years ago Big D and I got married at sunset on a beach in Nassau, Bahamas. The golden light in the sky worked its magic to form a beautiful rainbow over the ocean, right in front of storm clouds, which were floating away after a brief afternoon shower. It was an unexpected symbol on the day of our joining I will never forget. Beltane is popular for Handfasting ceremonies, but we were past the year and a day temporary ‘contract’ of a Handfasting, so we dove right into getting fully hitched. We had a small, powerful group of friends and family with us on the beach that day, which makes the memories even more bittersweet as the years pass. The past nine years have been full of travel and adventure and appreciating the awesomeness of our world. Little B joined us about four years ago, which provided me a new perspective on the world as a mother. me and d great bearBeing a wife and mother has forced me to explore who I am and make sure my small corner of the world fits not only the people in my family, but me as well, in my ongoing quest to remain whole and well. I am so blessed and enriched because I joined forces with Big D. It has sometimes been a bumpy ride, but the bumps have made the whole ride a wondrous thing to behold. I wish for everyone such an experience with another person in their lifetime. Our little family has formed traditions that make for some slightly unconventional holidays during the year. We always celebrate Beltane and our Anniversary with food and drink, oftentimes with friends and family (when they are geographically convenient) and forever will include a rather obscure movie – The Wicker Man. Not the silly version with Nicholas Cage, but the original, released in 1973, with the usually cool and smooth Edward Woodward (aka The Equalizer). We don’t go so far in our celebration to (SPOILER) sacrifice a virgin, but we do dress up and decorate and dance, anticipating a late spring and summer full of fresh fruits, vegetables and everything being green. chocolate stout cakeSpeaking of green, maybe I should talk a bit about today’s recipe. We had a full house on St. Patrick’s Day this year. I was so busy posting about the Strawberry Chocolate Bacon Cake right before the Day and Shepherds Pie on the Day that I never got around to posting about the cake I made for dessert on the Day. This cake is not too sweet, which helps bring out the stout flavor, and the frosting gives it a balance for those who like sweeter sweets. It is very rich, which means not much is needed in a serving. The bright shade of frosting reminds me of spring and the nearing summer these days more than St. Patrick’s Day, so I thought it was a fitting post for our pending celebration incorporating stout, IPA, ale and other things decadent. Merry meet and have a blessed May Day! Slainté!

Chocolate Stout Cake with Mint Frosting

Cake
2/3 cup butter
1 cup unsweetened cocoa powder
1 tsp vanilla
8 egg whites
¼ teaspoon cream of tartar
1 cup stout (I suggest Guinness)
2 whole eggs
8 egg yolks
2 cups granulated sweetener or equivalent
1 tsp Celtic sea salt
1 cup coconut flour

Frosting
8 ounces cream cheese, room temperature
½ cup salted butter, softened
1 – 2 tsp mint extract
½ tsp vanilla
Green food coloring
1 cup sweetener or equivalent

Preheat oven to 350 degrees. In a saucepan, melt the butter over medium heat. Add vanilla and cocoa powder, then mix well. Remove from heat and let cool. In a separate bowl, beat egg whites and cream of tartar until stiff peaks form; set aside. In another bowl mix together stout, 2 whole eggs, 8 egg yolks, sweetener and salt. Slowly mix in cocoa mixture. Add coconut flour into batter and mix until it is very smooth. Fold egg whites into batter until combined. Pour batter into greased bundt pan. Bake for 30-35 minutes or until a toothpick inserted into the center comes out clean. Let cool and gently remove from pan. While cake cools make the frosting. Whip together the cream cheese, butter, mint extract and vanilla. When the frosting is smooth gently fold in 3 – 5 drops of food coloring, until it is the desired shade of green. Add the sweetener and continue whipping until it is combined. Chill frosting until cake is cooled and ready. Frost cake with a thin layer all over – it is okay if there are bits of cake sticking out – makes it look even more minty and chocolate. Slice and serve.

Lemon Mustard Chicken

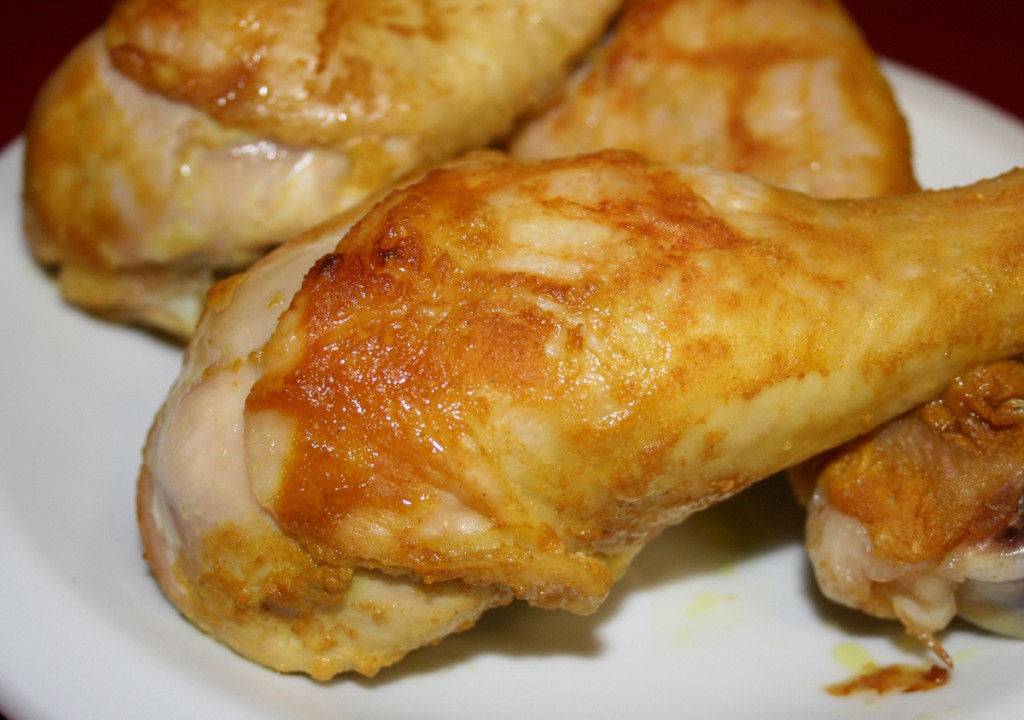
mustard lime chicken_edited-1I know I know. You need another baked chicken recipe like you need a hole in the head. I have been on a tart and tangy kick lately, and was drawn to the mustard in the refrigerator door. I have found that mustard is a great thickener for sauces when flour or cream just don’t fit the bill. That is, if you like mustard, which I do. The flavor of these legs (I used a package of drumsticks for this batch) reminded me of roasted chicken I had many years ago, which was coated with what I decided was a mustard sauce. There was a little restaurant in Denver I liked going to in the late 1990s called Chad’s Grill. Their other food was good, too, but the chicken was addictive as far as I was concerned. I ate my share of salads and burgers and a great variety of daily specials. The atmosphere was very relaxing and open, which made for some long happy hours spent chatting with buddies. I can’t say this recipe has anything to do with that sauce I enjoyed many times in Denver, but as I said before, it sure is a pleasant reminder for me. This time of year in Denver we would be enjoying the warmer weather and trying to avoid afternoon showers that would continue throughout the summer. I would be itching for the weekend to come to explore Dinosaur Ridge or poke around Red Rocks. I will end the reminiscing and lick my lips. The sauce I whipped up worked nicely to flavor the chicken, and the turmeric turned everything it touched yellow. I am still working on getting the stain out of Little B’s white t-shirt.

Lemon Mustard Chicken

8 – 10 chicken legs, skin on
1/2 cup yellow mustard
1/4 cup lemon juice
1 Tbsp Worcestershire sauce
2 tsp garlic powder
1 tsp onion powder
1/2 tsp turmeric
1 tsp salt
Salt and Pepper to taste

Lightly season the chicken with salt and pepper. In a 9×13 baking dish place seasoned chicken. In a medium bowl combine mustard, lemon juice, Worcestershire sauce, garlic, onion and salt. Drizzle sauce over chicken and make sure the top of the chicken is covered. Bake for 45 minutes to one hour, until juices run clear.

Strawberry Cupcakes with Strawberry Frosting

strawberry cupcakes frosted small

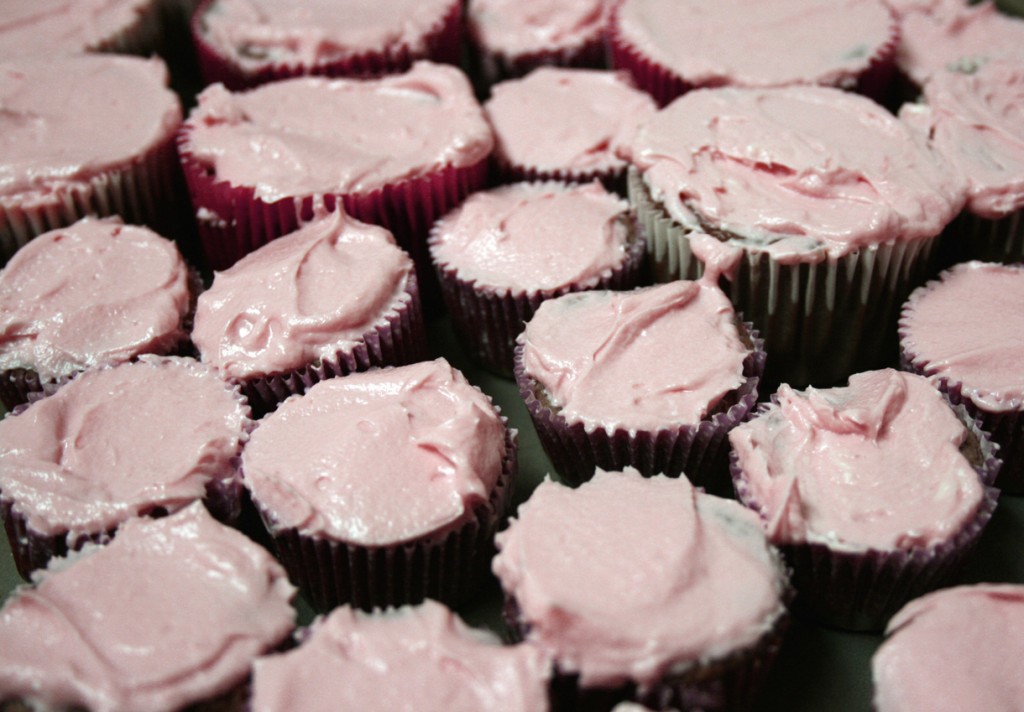
These little cakes came out beautifully imperfect. And Little B frosted every single one of them. We were long overdue making a batch of cupcakes, so I started by asking her what flavor she wanted. Strawberry. Then, I asked her what kind of frosting she wanted. Strawberry. I followed up by asking what she wanted to put on top. Strawberries. I saw a theme. So, guess what we got at the store? You guessed it! Strawberries. She loves pushing buttons on the blender and watching all the ingredients swirl and twirl around. The frosting is very similar to what I put on the birthday cake I made a while back, but without the icky whipped topping. Fortunately, after her taste testing between the frosting of each cupcake, there was still enough to finish the job. We got so involved with making sure there was strawberry in the cupcakes we forgot to keep some for on top! Oh well. And Tall P really liked them too! This is actually a big deal, because he claims to not like sweets. Yep. The guy who drinks sweet tea and eats box after box of fresh strawberries coated in sugar. He does not like sweet stuff. I don’t quite understand where his line between sweet and not are actually drawn. I think he has taste bud issues. Regardless, he ate up these little guys! Score one for me and Little B! They definitely taste like strawberry. Just a little nudge of sweetener made them sweet treats and the berry flavor really shines. They taste like summer.

Strawberry Cupcakes with Strawberry Frosting

Cakes

1 pound strawberries, cored

1 Tbsp lime juice

1 tsp pure stevia powder

6 eggs

1 Tbsp vanilla

¾ cup coconut flour

¼ cup golden flax seed meal

1 Tbsp baking powder

½ tsp sea salt

Strawberry Cream Cheese Frosting

8 ounces cream cheese, room temperature

½ cup salted butter, room temperature

½ cup granulated Splenda

2 Tbsp sugar free strawberry syrup

Preheat oven to 350 degrees. In a blender or food processor add the strawberries and lime juice. Blend until there are no large strawberries remaining. Add the Stevia powder and eggs. Blend again until combined. In a separate bowl combine the coconut flour, meal, baking powder and salt. Add the dry ingredients to the wet ingredients and blend some more until combined. Let the batter sit for a few minutes – you will notice it thicken a bit. Pour batter into 24 lined regular sized muffin tins (or 12 regular muffin tins and 24 mini muffin tins). Bake for 20-25 minutes until set and browning. While the cupcakes are baking prepare the frosting. In a medium bowl combine the the cream cheese, butter and Splenda. In a small bowl combine the arrowroot powder and strawberry syrup. Mix until smooth and thick. Stir the syrup mixture with the cream cheese mixture until the color is evenly distributed. When cupcakes are cooled frost them. Store in the refrigerator.

Post Navigation