Any Kitchen Will Do

Give me a kitchen and I will cook.

Archive for the category “beef”

Beef and Cheese Enchiladas

lc beef enchiladasThis pan of melted cheese may not look like much, but it represents an exciting success for us. It is another one of those comfort foods we abandoned a while back when we focused on low carb eating. Except for those silly little carby tortillas needed to roll up an enchilada, the traditional ingredients are friendly to our diet. Now, I am sure you already think us crazy for following a restrictive diet. Remember when eggs were bad for you, then red wine were good for you, then maybe not, then….you get the idea. The pros and cons of all kinds of diets in American society fluctuates constantly, so I no longer worry too much about what other people think is ‘good’ or ‘bad’ for us. We feel good, are losing excess weight, and trying to be good examples for our daughter, who we hope can avoid the overweight challenges we currently face. To make us even more crazy we added to a new element to our eating habits. Big D addresses it here very well, so I won’t go into details about intermittent fasting. One side effect of the fasting is that we very much appreciate and value what we eat and look forward to our food-making sessions even more. Some of our sessions resulted in Big D figuring out tortillas recently. We almost immediately decided that a good use of them was experimenting with enchiladas, using the thinnest ones he made. This recipe was enough to fill us up and sate our longing for that South Texas comfort food. Served up with some guacamole and some roasted vegetables, they are so very very good, especially right before a fasting period. I still have not figured out a substitute for refried beans, but give me some time.

Beef and Cheese Enchiladas

4 large tortillas
2 cups taco meat or leftover shredded roast
4 cups shredded colby jack cheese
1 14.5 ounce can diced tomatoes and chiles, drained
Salt and pepper to taste

Preheat oven to 350 degrees. Lay out tortillas on a flat surface. Place 1/2 cup of taco meat and 1/2 cup of cheese on each. Sprinkle with salt and pepper. Make ready a deep, rectangular loaf pan. Roll a filled tortilla until the opposite edges overlap. Place it snugly in the pan. Repeat with the remaining tortillas and fit them closely in the pan, ensuring they don’t unravel when the pan is full. Spread tomatoes and chiles over the top of the enchiladas. Top with the remaining cheese. Bake for 35 – 45 minutes, until cheese is melted and edges are browning and crispy. Remove from oven and let sit for five minutes before serving.

Meaty Squash Bake

meaty squash bake

This dish was purely delish and purely a result of leftovers. We had spaghetti squash left over from serving as a side dish with the rolled chicken, and a lovely brisket our friends brought over was still calling to us from the fridge. Knowing we would have leftovers from the leftovers, I wanted to make sure it would be something that would freeze and reheat well. I think we hit the jackpot! I don’t know of many savory leftovers that can’t be combined and topped with cheese, do you? The nice thing about it is you can also cook up some fresh spaghetti squash, and maybe some ground beef for it if you don’t have leftovers to manipulate. It freezes well too! As you see, I made this in my mom’s kitchen, and while I was visiting her I definitely cooked more than we and our visitors could possibly consume, so freezer friendly is a good thing.

Meaty Squash Bake

1 pound chopped meat (leftover brisket, chicken, pork, etc)
2 1/2 cups cooked spaghetti squash
2 tsp garlic powder
1 tsp sea salt
1 cup heavy whipping cream
3 eggs
2 cups Colby jack cheese, shredded

Preheat oven to 350 degrees. In large bowl stir together squash, garlic powder and salt. Add meat and stir again. In small bowl whisk together eggs and cream. Add cream mixture to squash and meat. Fold until everything is coated with cream mixture.  Pour mixture into 9×12 baking dish. Sprinkle top with cheese. Bake for 35 – 45 minutes until outer edge of cheese begins to brown. Remove from oven and let sit for about ten minutes before serving.

Chorizo Burgers

chorizo burgers
We eat a lot of burgers. A lot. They are our go to meal when we can’t think of anything else, or are running late, or are bored, or end up at a quick serve restaurant. The quick serve restaurant is always  a challenge. You cannot imagine the number of blank looks I get when ordering and tell them I don’t want buns. “No, I do not want buns.” “No, no buns.” “You can use salad containers and just put the condiments, meat and cheese in it. It will work fine. I promise you.” “Do I need to go in the back and talk the food prep team on how to do it?” “No, I don’t want the combo/meal. Just the burgers. I know the meal is a better deal compared to buying separately the fries and burger and drink, but I don’t want the fries. And don’t forget, I don’t want the bun either.” What usually happens is Little B and Big D will go find the perfect table and I do the ordering. Not because Big D can’t order. He is extremely articulate. The advantage to to me ordering is my patience – I soooo beat him in that arena when it comes to dealing with ordering food and other people are involved. In contrast, he is most awesome in the patience arena when dealing with me. I tend to be passive aggressive and get stuff pent up until the straw that breaks the camel’s back, and not everyone can deal with it, but he is a magician with me. Okay, on with the dish. Since we avoid traditional buns, and I rarely make low carb buns, the variety in our burger-ness relies on combining meats and the toppings. I was longing for a Tex-Mex feast, but our current situation does not allow for expansive storing of leftovers, which rules out some more bulk preparations of the guacamole, salsa and chile con queso I usually prepare. I did mini versions of the sides, so we ate most of them and storage was not an issue (phew). Also, with my previous exploration into creative meats in burgers, I wanted to do something a little different. Here are my results, which gave me the Tex Mex element, while also giving variety to our burgers with a spicy flair. It may be hard to find good jalapenos in Alaska, but when I do, they are pretty potent. Between the pepper and the ancho chile the burgers definitely left a slow burn in my mouth, and on my lips, and under my fingernails felt the heat to. I was also reminded of those little webbed parts between my fingers that have dry skin but I don’t realize it until I chop up a jalapeno. Ouch but yum!

Chorizo Burgers

Burgers
2 pounds ground beef
1 pound chorizo sausage
2 eggs
½ cup fresh cilantro, chopped
3 garlic cloves, crushed
½ tsp ancho chile powder
½ tsp sea salt
1 tsp ground cumin

Condiments
1 batch chile con queso (melt processed cheese block with a can of tomatoes and chiles, add some chopped fresh tomatoes and jalapenos if you like)
1 batch salsa
1 batch guacamole

Prepare all condiments in advance. I did 1/3 batches and they were enough for these burgers, but do full batches if you have the fridge space – they are great the day after! For the burgers combine the eggs, cilantro, garlic, chile powder, salt and cumin. Whisk together until eggs are scrambled. In a large bowl smush together beef and sausage until there are no recognizable chunks of sausage. Add egg mixture and smush some more until eggs, herbs and spices are well combined. Form meat mixture into six or eight large patties. In a large frying pan over medium high heat sear one side of the burgers, about five minutes. Flip burgers and sear other side. Reduce heat by half, cover burgers and cook until done, about eight minutes. When done cooking immediately place a burger on a serving plate and top with queso and guacamole. Sprinkle with salsa and serve. If you have leftover burgers I recommend storing them separate from the condiments.

Ghoulish Meatballs

ghoulish meatballs

In honor of Halloween I made some quite delicious, ghoulish meatballs! They are massive and arrogant and a little scary. I maxed out my hands trying to form them into balls, but it worked! I have made meatballs before, but they were little and gooey and cheesy. All of those things I consider good, but a huge, ghoulish meatball is awesome! I originally planned on baking the balls, but we are still lacking in the shallow baking pan department as part of our reliance on a hotel room kitchenette. The stove top worked pretty well, allowing for browning on all sides, so all was good good good! The stove top was busy though, with making the sauce and onions and meatballs! It came together in low carb loveliness and is a new comfort food for me. The sweet of the sauteed onions balanced out the bite of the meatballs and tartness of the tomatoes. Today was a crazy busy day with much good news (we officially found a place to live in our new town), much fun, and a humongous amount of candy for Little B. Usually off limits, we let her eat and eat and eat candy with sugar all over and in it. Her glazed eyes and erratic, hyper behavior reminds us why we avoid it the rest of the year. I am writing a last line before bed, and look forward to Samhain tomorrow, the beginning our spiritual new year. Sweet, ghoulish dreams everyone!

Ultimate Meatballs

Balls
1 pound 15 -20 % fat ground beef
3/4 pound ground hot Italian sausage
2 eggs, lightly whisked
1 Tbsp dried oregano leaves
2 tsp dried basil leaves
1 tsp dried parsley leaves
2 tsp garlic powder
1 tsp sea salt
1/2 – 3/4 cup Parmesan cheese, finely grated, plus more for serving

Sauce
1  14.5 ounce can diced Tomatos with sauce
1 tsp dried oregano leaves
1 tsp dried basil leaves
1/2 tsp garlic powder
Salt and pepper to taste

Onions
1 large sweet onion, sliced into thin rings

SAUCE: In a small sauce pan over medium heat combine tomatoes, oregano, basil, garlic, salt and pepper. Stir. When bubbly, turn temperature down to low and simmer, covered, for at least 30 minutes. ONIONS: To prepare the onions, heat a deep pan over medium high heat until hot. It should be dry. Add the onion rings and let sit for a minute without stirring until they begin to brown and sweat. Stir them every minute or two, allowing the onions to brown more. When onions are about half browned add 1/2 cup water and scrape the bottom of the Pan. Stir and continue cooking until the liquid cooks away. Sprinkle with salt to taste. Turn off the heat and cover until time to serve. MEATBALLS: In a small bowl combine the spices – oregano, basil, parsley, garlic, salt and cheese. Set aside. In a large bowl squish together the ground beef and sausage until mixed up well. Add the eggs and make sure all the meat is coated. Pour in spice mixture and knead meat until spices are well distributed. Refrigerate until sauce and onions are ready. When time to cook the meatballs remove meat mixture from refrigerator (can be prepared the day before). Heat large frying pan to medium high heat. Form meat into six huge meatballs, placing them immediately into the hot pan. When forming the balls make sure to press the meat together firmly and roll it around in your hands to make them as round as possible. As one side of each meatball browns, gently turn them to another side. Repeat this a few times so three or four sides are a bit brown. Lower heat, Cover and cook until meatballs are cooked through, about 20 minutes. Depending on your stove you may need to move them around during the cooking time to prevent the outside from overcooking. To serve, arrange a layer of onion on the plate, add a meatball or two, and top with the tomato sauce and more Parmesan cheese. Serve immediately.


Veggie Meatloaf


veggie meatloaf

For the most part I don’t have to hide veggies in food to get Little B to eat them. She goes after most of them with a vengeance or by way of an earnest request. Like her all time favorite snack, frozen broccoli “trees”. Yep. Straight out of the freezer. They started out as something to gnaw on when she was teething, but survived as a favorite long after. We try to offer her vegetables every chance we get, even in restaurants, in spite of the restaurants efforts to fill her otherwise. The kid menus at most places include breaded chicken tenders, pasta, sad little mini burgers or a hot dog. Besides being loaded with carbs and often deep fried, such offerings have little nutritional value or variety to expand little palates. More often than not we end up ordering soup or a side of vegetables for her from the non-kid menu. She dives right in. A few times I have tried to order the kid food, but she finds the food as unappealing as I do. It is refreshing to go to a restaurant and actually see smaller versions of the food offered on the rest of the menu, like 1/4 rack of ribs at a barbeque joint, or a kid size version of seafood at a seafood joint. What a concept! I rant because our travels recently have taken us to new restaurants in new places, and I am reminded that sometimes it is not easy to keep Little B eating our version of healthy away from home. This recipe actually stemmed from my desire to use up the vegetable odds and ends in the fridge. It worked very well, held together like meatloaf tends to not want to do. On top of it all Little B ate it up in spite of not being one of her favorite veggies – frozen broccoli, green beans or squash.

Veggie Meatloaf

1 ½ pounds ground beef
2 Tbsp tomato paste
2 stalks celery
1 carrot (or 1 ½ cups mini carrots)
1 small yellow onion
2 cups fresh spinach
4 cloves garlic
3 eggs
½ cup fresh parsley
1 Tbsp dried thyme leaves
1 tsp ground cumin
1 tsp sea salt
½ tsp ground black pepper
1 tsp paprika
1 cup sharp cheddar cheese, grated

In a blender or food processor add tomato paste, celery, carrot, onion, spinach, garlic, eggs, thyme, cumin, salt, pepper and paprika. Pulse until vegetables are very small pieces and herbs are combined. In large bowl combine beef and vegetable mixture. With your bare hands mix meat and vegetables until all the meat is coated and the vegetables are combined with the meat. Press mixture into rectangular bread pan. Bake at 350 for 45 – 55 minutes, until cooked through. Sprinkle top of loaf with cheese and place in hot oven with heat off for five to ten minutes, until cheese is melted. Remove from oven and let rest for about five minutes. Slice in pan, arrange on serving tray and serve.

Stuffed Flank Steak

stuffed flank steak

Flank steak, also known as skirt steak, used to be cheap. It was a slightly tougher cut of meat that could be marinated and grilled or broiled, cut up and served south Texas style as fajitas. It still can, but the cheapness is gone. I don’t know what happened. Maybe, like buffalo wings, it got popular and so the price hiked. Did price hike because of demand, or the mere fact the price was higher, and so demand increased? I guess I could go back to my college business textbooks and try to dig deeper, but not gonna do it. The point here is I have turned the once cheap fajita meat into a fancy looking main dish that went POW! Of course, anything with goat cheese tickles my fancy, but the cheese combined with the steak resulted in a tangy, juicy roll. I made a couple and ended up freezing one, and I discovered it froze well, too! Double POW! You can still make old, reliable fajitas with flank steak, but if you want to get a little fancier, you definitely can!

Stuffed Flank Steak

1 – 2 large flank steak (1 ½ – 2 pounds total)
8 ounces bacon
½ cup red onion, finely chopped
4 garlic cloves, sliced
4 – 5 ounces goat cheese
1 Tbsp fresh oregano leaves, coarsely chopped
8 ounces baby spinach leaves
8 – 12 wooden toothpicks

Preheat oven to 400 degrees. Slice bacon into ¼ inch strips. In a medium skillet over medium heat  cook bacon until it begins to release fat. Add onion and garlic and continuing to cook until garlic slices begin to brown. Transfer bacon, onion and garlic to paper towel to soak up extra grease. Lightly salt and pepper the steak. Place steak between two layers of cling wrap. With a tenderizing mallet or side of a regular hammer flatten steak until about ¼ inch thick. Remove the top layer of wrap. Spread the goat cheese on the steak, leaving about ½ inch border around the edges. Make a layer of spinach leaves on top of the cheese. Sprinkle the bacon, garlic and oregano on top of the spinach. Add another layer of spinach. Sprinkle spinach with a little more salt. To roll the steak, begin by lifting the wrap edge on the long side of the steak, pull the steak off the wrap and begin curling it over the spinach. Continue rolling it, squeezing slightly to keep the roll an even size along the length. When completely rolled, place the seam facing up. Impale the roll every inch along the seam with toothpicks. If it is thin enough on the ends, weave a toothpick across them to seal it – like you would a straight pen through cloth. Place the roll in a shallow baking dish or baking sheet covered with foil. Bake for 20 minutes. Turn oven temperature down to 350 degrees and cook for 20 – 30 minutes longer, depending on thickness of steak and desired doneness. I like it more rare, so the shorter cooking time appeals to me.

Steak in Tomato Spinach Sauce

sauteed beef with tomato and spinach sauce

We are moving soon. Again. Not a big move for now, just a short term local move before a bigger move. We don’t know when or where the bigger move will occur, but want to be ready, which means not signing a long term lease or making a real estate purchase. A move translates into me trying to clear out the fridge, freezer and pantry. The less I have to move that is perishable or heavy, the better. This recipe used the last big can of tomatoes from the pantry and some stray steak from the freezer. I like never-been-frozen steak straight off the grill, but if it has been frozen I don’t mind baking or broiling or smothering it in sauce. I like how the tomato and spinach made the sauce nice and rich. Serve it next to or on top of some baked spaghetti squash. I ate too much. Roll me on over to the couch!

Sauteed Steak with Tomato and Spinach

1 Tbsp extra virgin olive oil
½ medium yellow onion, roughly chopped
3 cloves garlic, roughly chopped
2 cups fresh spinach
12 – 14 ounces tomato puree
½ cup dry red wine
2 tsp dried oregano
2 tsp dried parsley
1 tsp ground thyme
1 tsp sugar or sweetener equivalent
1 ½ Tbsp butter
1 pounds thin steak
Salt and pepper to taste

Slice steak against the grain into bite-sized pieces, then season generously with salt and pepper. Set aside. Roughly chop spinach into 1-inch pieces. In medium pot over medium-high heat add olive oil. When oil is hot add onion and garlic. Cook until onion and garlic begins to brown, about two minutes. Add spinach and toss with onion and garlic until most of it wilts, about three minutes. Add oregano, parsley, thyme, tomato, sugar/sweetener and wine, then stir. Lower heat to simmer, and cook uncovered for about ten minutes until it begins to thicken. Cover sauce and cook for 20 – 30 more minutes. Set aside. Right before the simmer time is over heat a shallow saute pan over high heat. Add the butter. Just before it begins to brown add the meat and toss until coated with butter. Continue tossing until steak is cooked to desired doneness (for me about 3 minutes for medium rare). Remove from heat. Add the meat to the sauce, stir and continue simmering for about five minute. Salt to taste. Serve immediately over spaghetti squash, pasta or rice.

Real Taco Meat

real taco meat

I give up. My nagging of Big D to write a guest post here in my space and talk about some of the awesome meals he makes our family is over. I would love him to update here after he sees it and make fun of all the ‘mistakes’ I make in the ingredients and process. This is the best way I know of to goad him into talking food here. If he does, you will get a taste of his instinctive method of cooking. If he doesn’t take the bait, you still get a recipe from me that reflects a basic version of what we create, eat a lot of and enjoy. I spicing varies with every batch, but it is so easy to make a big pan of it and have it around for quick meals. You can never go wrong using a package of ground beef with this recipe. It reminds me of Texas and the two week party in San Antonio called Fiesta! It happens every April, and seeing the pictures coming out of San Antone recently, along with the memories of partying it up myself when I lived down there, gave me a serious hankering for some good taco meat. Not what you get out of a prepackaged mix, or find in a school cafeteria, but the real taco meat I grew up with, as did Big D. We like it really spicy around here, and achieve an acceptable level of spice with the wonderful smokiness of chipotle peppers in adobo sauce. They are optional, of course, but add a level of flavor Big D and I  have not found elsewhere. Big D often eats it simply as a pile of meat and cheese, occasionally with some vegetables underneath. You can see from the picture I often surround mine with sauteed veggies underneath (this time with cabbage) and top it with tomatoes, cucumber, olives and sour cream. If you look closely, you will actually see meat! The meat can of course also be served with tortillas, but we don’t keep such things around the house anymore. Take a siesta and enjoy!

Real Taco Meat

3 – 4 Tbsp bacon grease or other high heat fat
3 Tbsp cumin seeds
4 garlic cloves, crushed
1 Tbsp red pepper flakes
1 Tbsp Chili powder
1 tsp red cayenne powder
1 Tbsp cumin powder
2 chipotle peppers with 1 Tbsp adobo sauce (optional)
1 medium onion, chopped
1 ½ – 2 pounds ground beef
6 – 8 ounces amber or dark beer
1 tsp sea salt

In a large skillet over high heat add grease. When it is hot add the cumin seeds, red pepper flakes and optional chipotle peppers. Stir frequently until they begin to darken. After a few minutes add the garlic, chili powder, cayenne pepper, cumin powder and optional adobo sauce. Stir for about a minute until it too darkens. Add the onion and cook until the onions begin to sweat and brown. Add the ground beef, breaking it up into small pieces while also combining it with the onion and spice mixture. Add ½ tsp salt and continue stirring. When about half the liquid has reduced, about five to eight minutes, add the beer. Sip on the rest of the beer in the bottle. Continue cooking over high heat until the liquid reduces again. When most of the liquid is cooked off turn down to medium heat and continue cooking until most of the liquid is gone. The meat should begin searing. Drink some more beer. After searing the meat for about a minute turn down the heat to low and simmer. Taste and add more salt to preferred saltiness. Let sit with the heat off for about ten minutes before serving.

Cornless Corndogs

cornless corndogs

These are sooooo easy! Whip up a batch of coconut flour ‘cornbread’, impale the cornbread muffins with pieces of hotdog and pop them in the oven. Little B really loves corndogs, but I don’t like giving her the funky ones found in the freezer section of the store or deep fried versions at fast food restaurants. I’m not saying that when I am surrounded by a carnival, and there is a severe lack of protein or low sugar options I am going to deprive her of one. I am just saying that when I have an opportunity to give her (and myself) a more nutritious version, I am going to take it. Regardless of how nutritious I try to go, they are still hotdogs. I do try to stick with Hebrew National or uncured versions, but it is still macerated meat. Oh well. Nothing is perfect. Some day I may even figure out how to make these on a stick, but for now, they are delectable muffins. They are baked, portable picnic fare that I personally dip in yellow mustard. Living on the edge. That’s me.

Cornless Cordogs

1 batch cornless cornbread
6 hotdogs

Preheat oven to 400 degrees. Make a batch of cornless cornbread batter. Divide it equally in a 12-count muffin tin. Cut each hot dog into four pieces. Stick two pieces of hotdog in each muffin, trying to keep them away from the edges. Bake for approximately 15 minutes, until the batter is cooked and the hotdog pieces are roasted. Let cool before removing from pan. Serve immediately with mustard.

Dad’s Spaghetti Sauce

dads spaghetti sauce
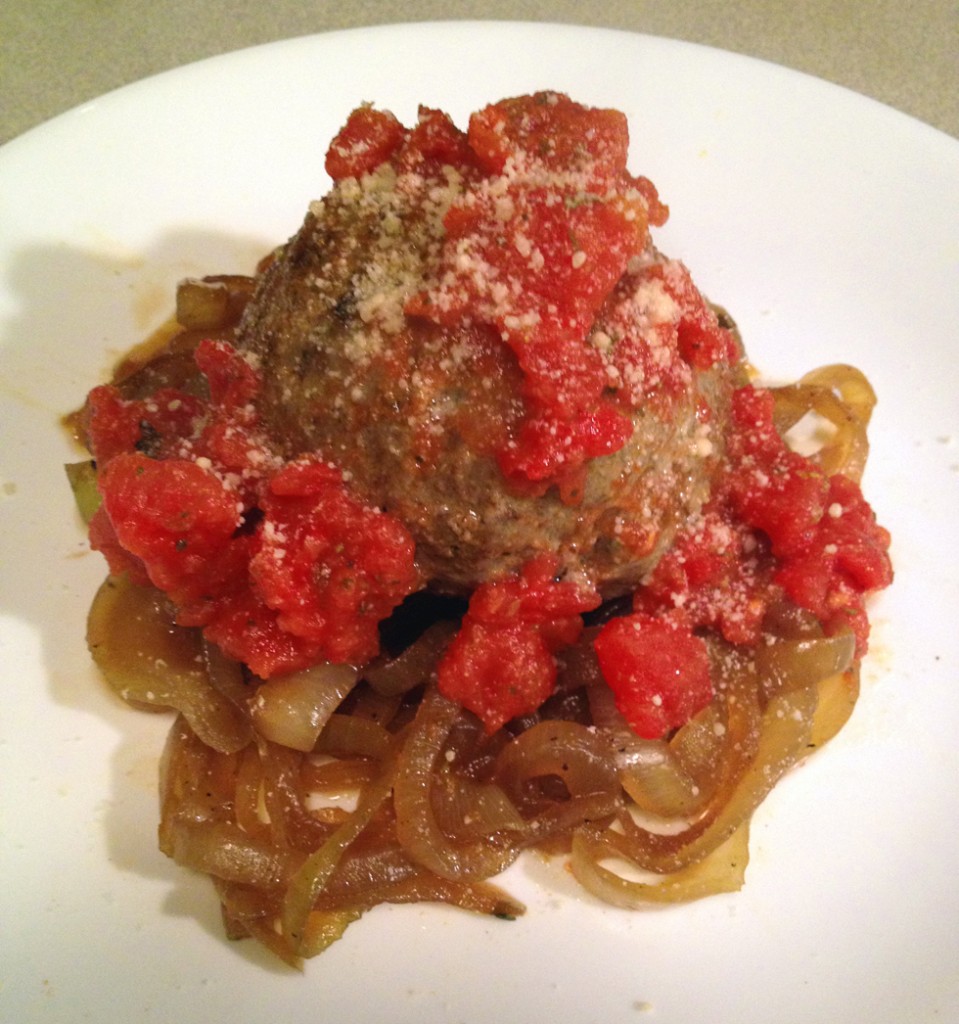
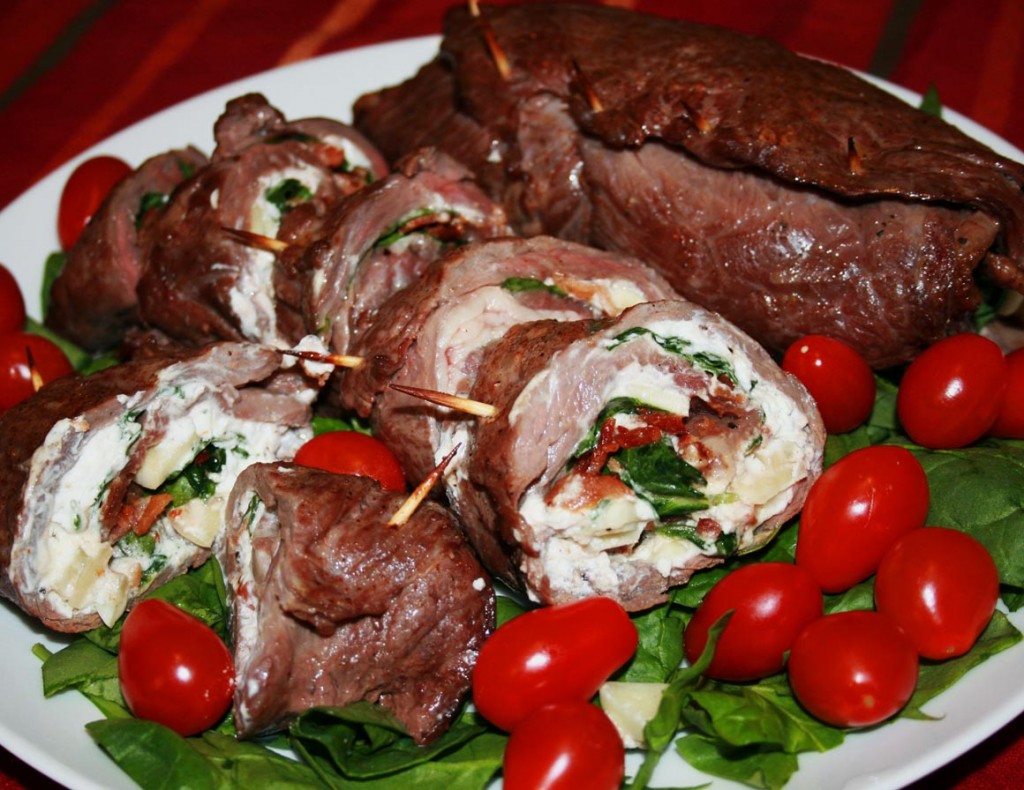
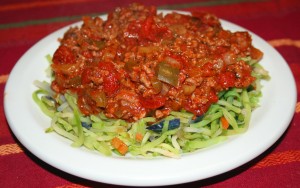
You may not have noticed, but earlier this month I began a greenish/Irish theme, which will lead us up to St Patrick’s Day and beyond. Last year I covered traditional stuff like corned beef and cabbage, colcannon and the less traditional but politically symbolic white chocolate frito popcorn. This year I started with coleslaw, which has green cabbage, followed by some chicken with the green of spinach, then the Dublin Coddle, with a slightly more Irish leaning. I really enjoy St Patrick’s Day. Not only because I am about 87% Irish, or that I have a dual citizenship, or that it is another excuse to drink a little too much, but also because when I was growing up we laughingly called everything my dad made ‘Irish’. Irish popcorn, Irish fajitas, Irish potato salad, Irish steak…you get the idea. The dishes did not necessarily have a historically Irish origin, but because a big Irishman with blue eyes put effort into making it for his loved ones. My dad’s specialties were typically products from the outside charcoal grill. He cooked meat exceptionally well. Whether it was fajitas, steak, chicken or a whole passel of meats in his tower smoker – ribs, ham, turkey, roast – if it used to walk he could cook it, and it tasted great. He was the reason I rarely ever ordered steak in a restaurant until I moved out of the house. Restaurant steak always tasted salty, but not flavorful. I know most of his secrets, and I may share them one day, but today is not the day. Today I share with you his spaghetti sauce. One of his two significant non-grill, non-smoker dishes. In case you were wondering, his other dish was potato salad. Now on with the spaghetti sauce. I have done other tomato-based sauces, but this one is consistent with what he always made. Huge batches filled a big old aluminum pot that simmered on the stove top all day. It smelled heavenly, especially walking into a warm house on a cold, wet Texas day. It smelled like comfort, which is what I often sought on a wet Saturday after playing soccer or doing yard work. When I got older I helped him make it, discovering his penchant for perfectly sized chopped veggies and just the right combination of herbs. Another thing about his sauce – he rarely used fresh ingredients. I don’t consider it a good or bad thing. The sauce was always full of flavor and satisfying. He grew up during the Great Depression, which I think established for him certain habits, including the stockpile of canned and dried goods. You should have seen our pantry when I was growing up – we never failed to have fresh meat, fruit or veggies, but if we didn’t there were always canned. I still love the taste of canned spinach and pineapple – separately, of course. I recognize the canned and dried elements in this recipe. I don’t think you can beat the finished product very easily. I have made a version of this from scratch – fresh tomatoes, fresh herbs…it was good, but you know, after cooking it for so long, I could hardly tell the difference. Maybe it was because I tweaked it until it tasted like Dad’s version, or maybe because after enough cooking the fresh version tastes like the Hunt’s canned version. On top of everything else, I found a great new base to hold the sauce – broccoli slaw. In the past I have used traditional spaghetti pasta, gluten free pasta, spaghetti squash and just chopped sauteed squash. This time I saw some broccoli slaw on sale at the store – it is basically broccoli stems cut julienne and packaged with a bit of carrot and red cabbage. I microwaved it straight from the freezer for five minutes to soften, salted it then set it on a plate and topped it with sauce. The texture worked great – not pasta-y, but definitely a strong texture that worked with the sauce. It is my new favorite to pour things over. I can imagine a decadent cheesiness next time, or maybe some kind of lasagna concoction…

Dad’s Spaghetti Sauce

2 Tbsp extra virgin olive oil
1 small white onion, chopped
6 cloves garlic, crushed
1 pound ground beef, 15% fat or less
1 medium green bell pepper, chopped
3 stalks celery with leaves, chopped
1 tsp sea salt
½ tsp ground black pepper
2 Tbsp dried parsley leaves
1 ½ Tbsp dried oregano leaves
1 Tbsp dried basil leaves
42-56 ounces Hunt’s brand canned diced or plum tomatoes
6 – 8 ounces tomato paste
1 tsp truvia, or one small pinch of pure stevia
More salt to taste

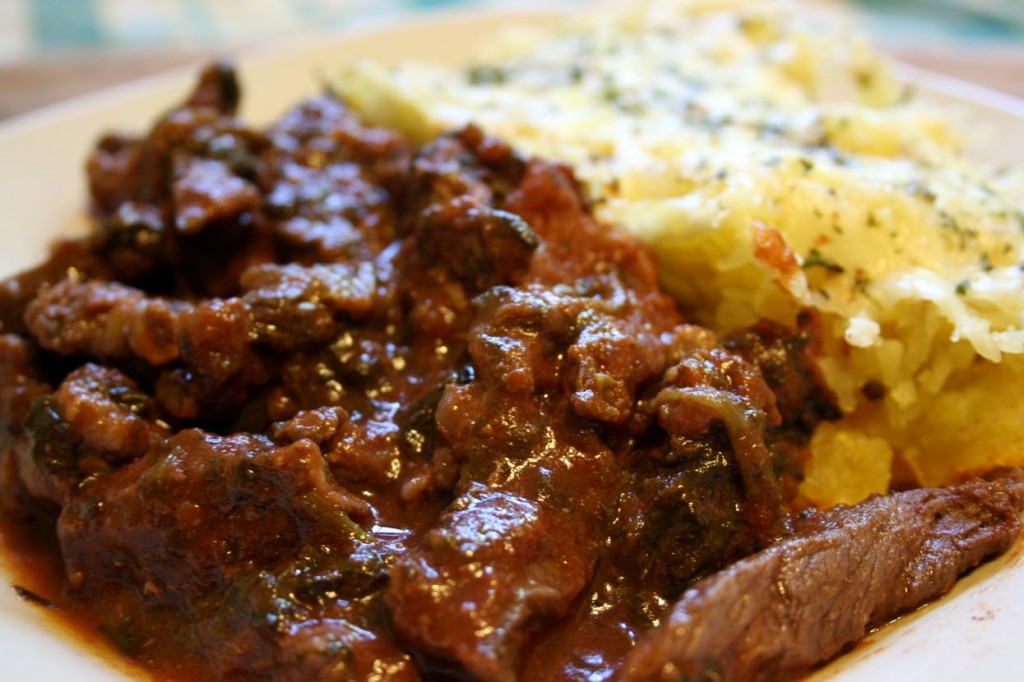
In a deep stock pot heat to medium high and add olive oil. When oil is hot add onions and garlic, saute until the onion sweats (gets shiny and releases liquid). Add ground beef. Break meat up with a wooden spoon and saute until browning begins, but not until it is completely cooked. Add bell pepper, celery, salt, pepper, parsley, oregano and basil. Stir and cook until vegetables begin to soften. Add tomatoes and stir some more. Bring to a boil, cover, reduce heat and simmer for 2 hours (or more). Sprinkle in sweetener, to bring out the tomato flavor, and stir well. For an additional 30 minutes to an hour simmer with the top tipped so steam escapes. The sauce should thicken noticeably. Turn off heat and cover. Let sit until ready to serve, or cool to room temperature and refrigerate overnight. If you double or triple the recipe there will be plenty to freeze in reasonable portions. Reheat slowly on the stove top. Serve over your preferred base – either al dente pasta, spaghetti squash, or my new favorite, cooked broccoli slaw.
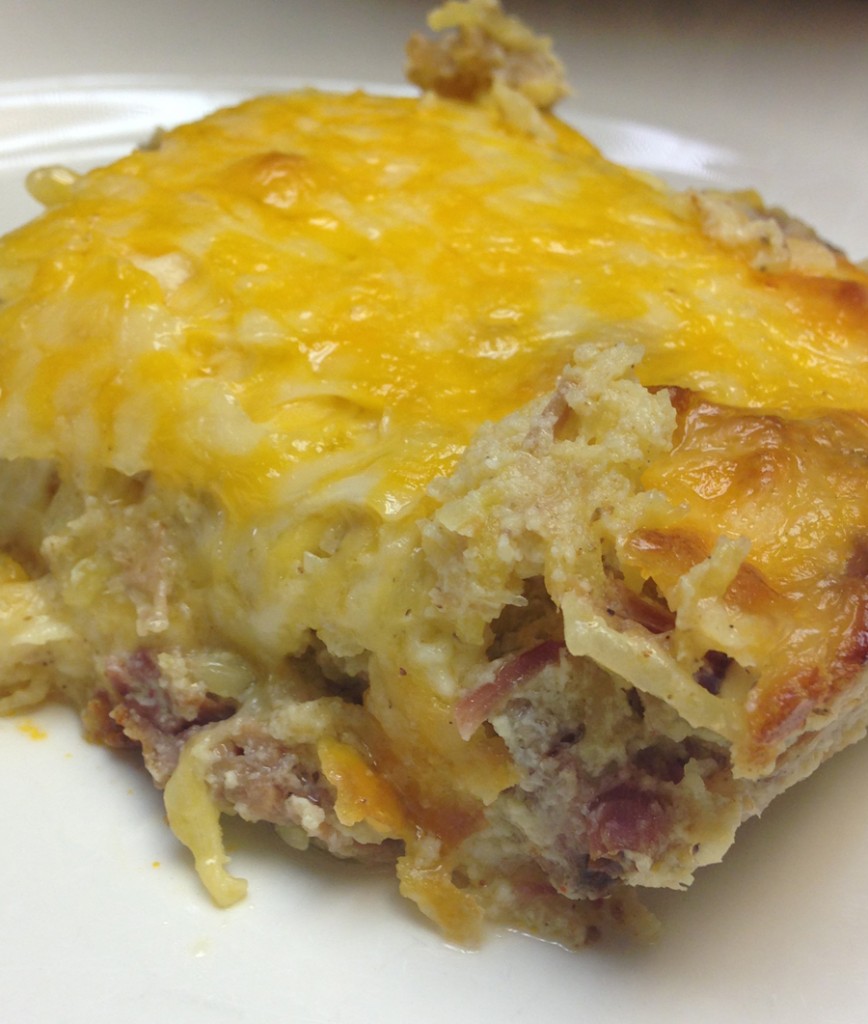
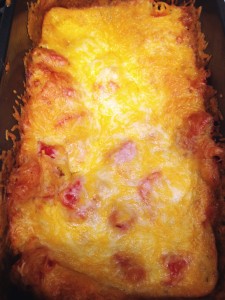
Post Navigation