Any Kitchen Will Do

Give me a kitchen and I will cook.

Archive for the category “nuts”

Limey Cheesecake

limey cheesecake

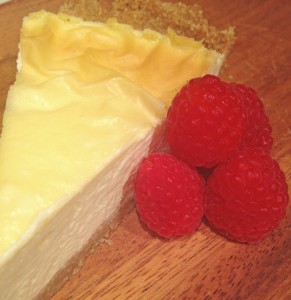
Of all the desserts in all the homes and restaurants and coffee shops I have visited, I am likely to pick cheesecake last. I actually like smooth, flavorful cheesecake, but I have found over time that I am picky and end up finding them icky. I tend not to pick it as my treat of choice because it is easy to make icky cheesecake. For me icky has a specific definition when it comes to cheesecake – that slightly rough, bumpy texture that tastes like something vague, usually plastic or paper, and is far from convincing me to think, ‘hmm, I like this’. Enter Big D. He loooooves cheesecake. I actually have not discussed the ‘icky’ version I tend to experience, but he got a sad little look the other day when we saw some cheesecake in the dessert display of a restaurant. ‘Can you make some?’ he asks hopefully. I say ‘yes, of course’, and his face lights up like a kid with a new bike. Don’t even ask me how many bikes he owns; needless to say, I have seen the look on him plenty of times before. Here is my attempt at cheesecake, with no wheat or sugar. I think it turned out pretty smooth and flavorful. No ‘icky’ factor for me this time! I would really disappoint myself if I contributed an icky cheesecake. There is enough of it in the world. And based on Big D’s reaction to eating it, I scored big on getting a repeat of the new bike face.

Limey Cheesecake

Crust
2 cups finely ground almond flour
2 Tbsp coconut flour
2 Tbsp butter, melted
1 tsp Stevita granulated sweetener
1 tsp ground cinnamon
1/4 tsp ground nutmeg
1/4 ground ginger
1 egg white, whisked (save yolk for filling)

Filling
16 ounces cream cheese, room temperature
1/3 cup sour cream
2 large eggs and 1 egg yolk, room temperature
3 Tbsp butter, room temperature
2 Tbsp heavy whipping cream, room temperature
1/3 cup Stevita, granular sweetener
2 large limes, zested and juice separated from meat (use less for milder lime tang)
1 tsp vanilla extract
Fresh berries (optional)

Preheat oven to 325 degrees. In 9″ pie dish cut a round of parchment paper that fits the bottom of the dish. In medium bowl stir together all dry crust ingredients. Add the butter and stir until the ingredients clump. Add the egg white mix until well combined. Crust will still be crumbly. Press crust into dish until bottom and sides are covered. Filling: in large bowl combine cream cheese and sour cream. Whisk together until completely smooth. Add butter and stir again until smooth. Add eggs and yolk, stir to incorporate and until smooth. Add sweetener, lime zest, lime juice and vanilla. Beat until well combined and smooth (see a pattern?). Pour filling into crust and gently smooth surface. Place in oven. Bake for 30-35 minutes, until filling sets. Turn off heat without opening oven door. Leave cake in oven until oven and cake are completely cooled, about two hours. Remove from oven  and chill for at least an hour. Serve plain or with fresh berries.
 

Peanut Butter Chocolate Chip Protein Cookies

protein pb choco cookies

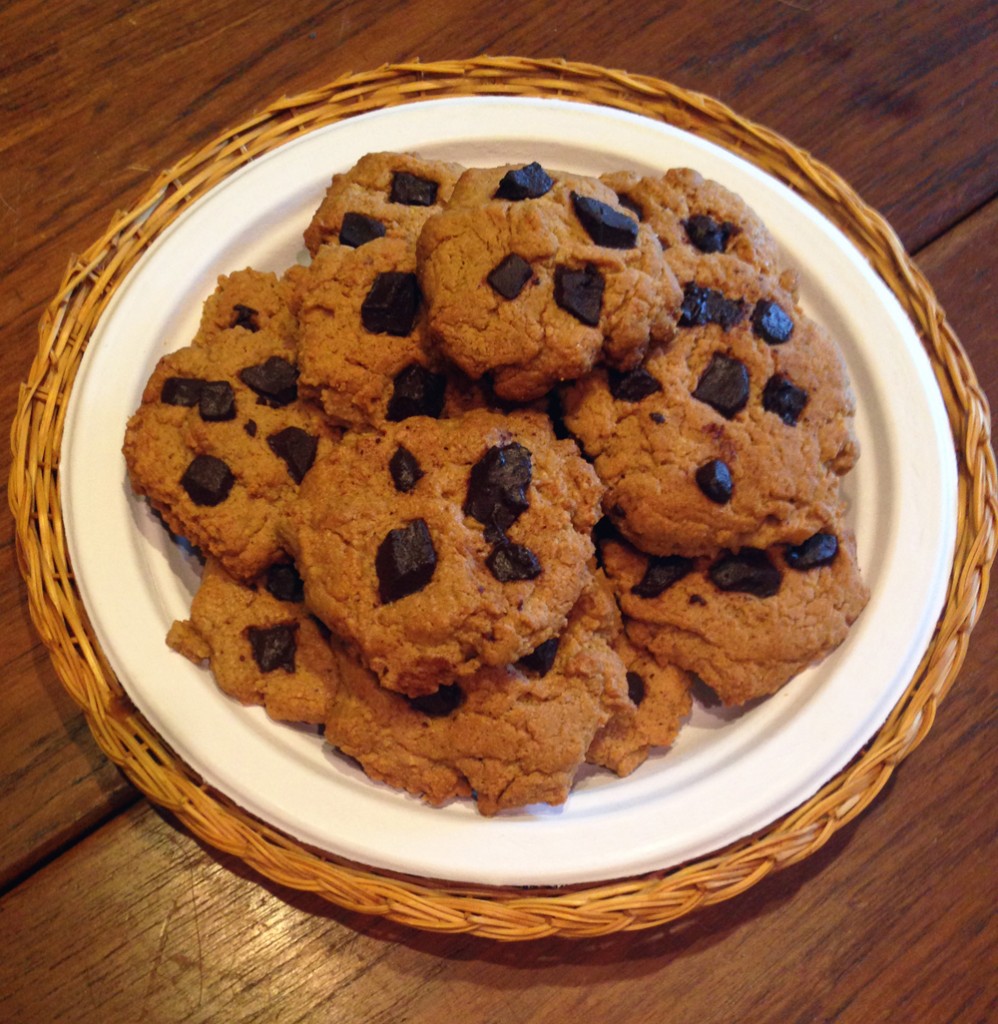
These cookies look ready for a picnic, don’t they?! First impressions may give the appearance of being just a regular cookie, tempting you to abandon your diet or require an additional 20 minutes on the treadmill. Not so! Look closely and you will see they are full of protein, and only have sugar if you choose for them to. We love our sugar free chocolate bars all chopped up and performing the role of topping. Our cookie treats have evolved from the wheaty, to the sugary but not wheaty, to this finale of non-wheaty and non-sugary. We are pretty impressed with ourselves, especially Big D who has become quite the consummate baker! I even changed the name per his request to put the protein after the peanut butter and chocolate chip – I am so proud! Enjoy these cookies on a Sunday picnic, or a Tuesday night – what a treat!

Peanut Butter Chocolate Chip Protein Cookies

1 cup natural peanut butter
1 1/2 Tbsp apple cider vinegar
1 Tbsp butter
3 eggs
1 cup almond flour
2 Tbsp whey or hemp protein powder
1 1/2 tsp baking soda
3 Tbsp Stevita
¼ tsp sea salt
1 cup chocolate chips (or sugar free chocolate bar, chopped)

Preheat oven to 350 degrees. Combine peanut butter, butter, eggs and vinegar in medium bowl. In a separate bowl combine remaining dry ingredients except chips. Add dry mix to wet ingredients and stir until well blended. The dough will be stiff. Cover two baking sheets with parchment paper – paper is optional if sheets are nonstick. For each cookie take 1 – 2 tablespoons in hand and shape a cookie, about  ¼ inch thick and place on cookie sheet. Leave approximately ½ inch between cookies. Gently press three to four chocolate chips into the top of each cookie. Bake for 20-22 minutes, until cookies begin to brown. Remove from oven and cool completely before removing cookies from parchment paper.

Nutty Chocolate Protein Bars

nutty chocolate protein bars

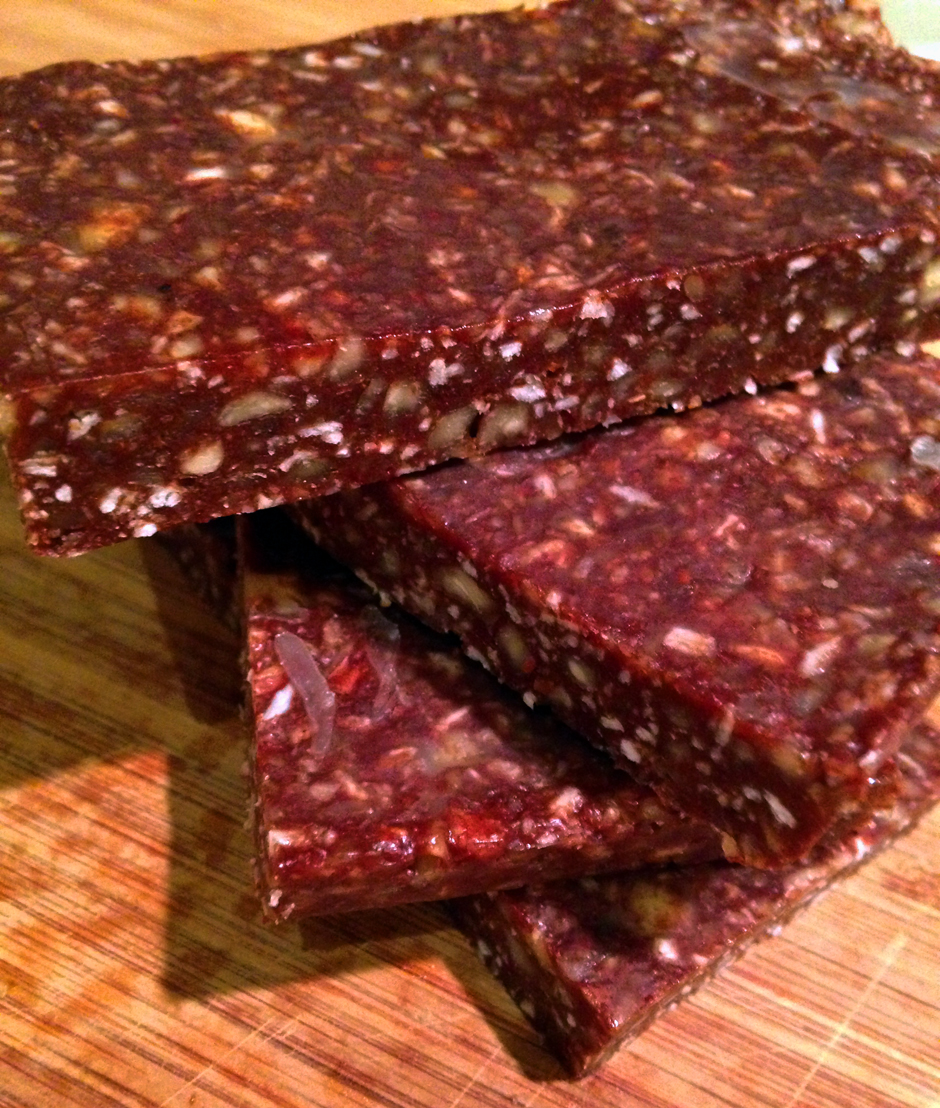
For months Little B took ballet lessons on Saturdays. They are now over, including the flashy, chaotic shows. It was quite an ‘experience’, but is now over. I will reserve my opinion about the experience, but suspect she has more enthusiasm for other activities. I personally am looking forward to getting back to more weekend hikes.  We have standard food we take on hikes and overnight trips – nuts, peanut butter, jerky, cheese, boiled eggs. They are convenient, energy-building and filling, but with all the summer hiking in our future I wanted to add some variety. The idea for these bars sprung from here. The chewiness and nuttiness reminds me of a candy bar you find at the store – rhymes with tickers. After sufficient bar chilling occured Little B tentatively took a small first bite, then proceeded to eat an entire bar and asked for some in her lunch the next day. Score! This is significant, because in her worldly 4 3/4 year old brain anything mommy suggests is immediately suspect. These bars are a tiny bit sticky at room temperature, but what protein bars aren’t? They hold together well when wrapped in foil or plastic wrap, so score again! It is easy to add them to the hiking food mix, and quite a treat when taking a break looking over water and mountains and whales. Yep. The whales are pretty spectacular. And so is everything else. I am going to experiment with less sticky bars, but these easy-to-make snacks are great for dealing with hunger when you want to spend your time focusing on life and love and nature. Even ballet.

Nutty Chocolate Protein Bars

1 ounce bittersweet chocolate
2 tablespoons butter
2 tablespoons heavy cream
2 tablespoons Da Vinci sugar free syrup, any flavor
1 Tbsp Nutiva Stevita
1 cup whey protein powder, vanilla flavor
1 tsp ground cinnamon
1 1/2 cup mixed raw nuts, finely chopped
1/2 cup unsweetened coconut

Line an 8×8″ baking pan with nonstick foil. In a medium microwaveable bowl, melt the chocolate and butter on half power about 1 minute or until melting and softened. Stir until smooth and blended. Add in the cream, syrup, sweetener and protein powder.The mixture will be stiff and sticky when well blended. Stir in the nuts and coconut – you may need to use your hands to get it all mixed in, but then they would already be ready for putting it in the pan. Firmly press the mixture into the bottom of the foil lined pan using the back of a spoon that is lightly coated with oil or butter, or just use your hands. Chill at least two hours or until firm. Cut into eight large bars or 16 snack squares. Store in refrigerator or freeze.

Cheese Ball(s)

cheese ball

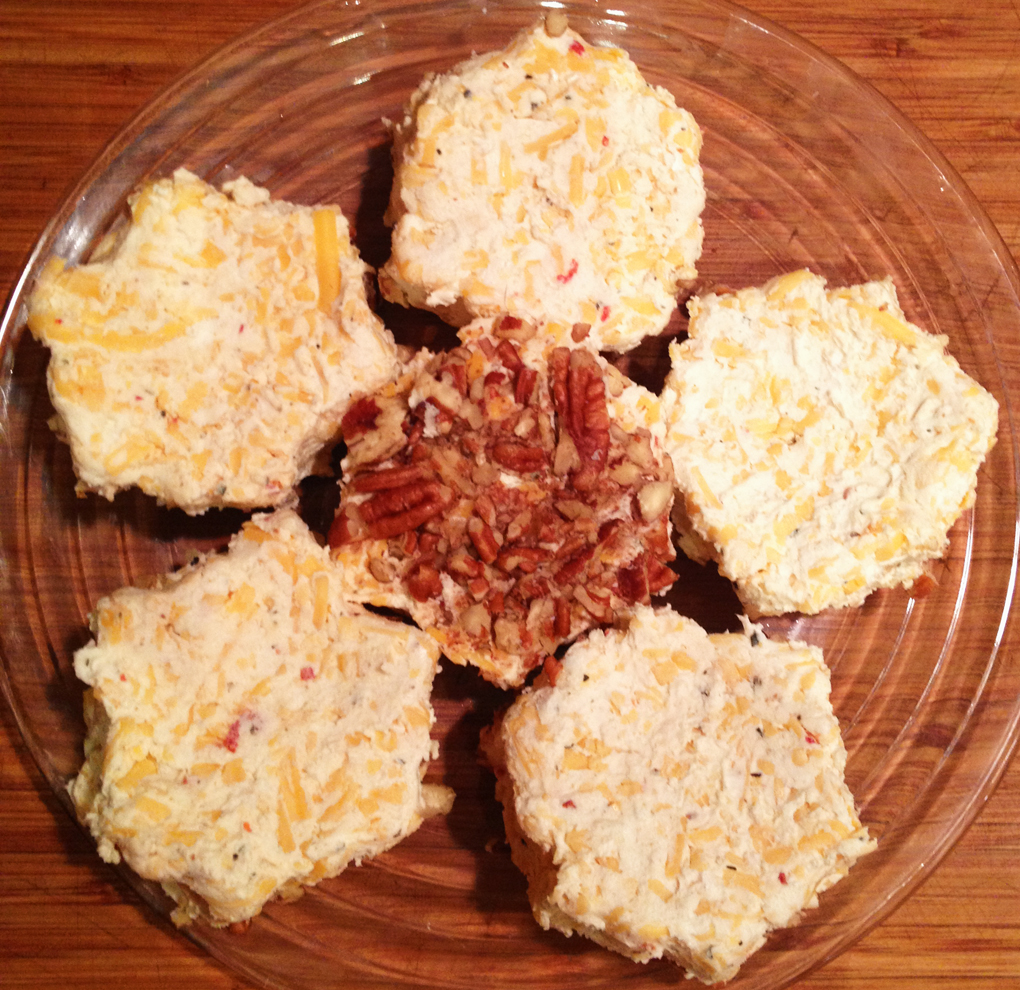
To continue with my appetizer trend, after a longer than expected pause, I offer you a cheese ball! If you look closely at the various balls available at the market, there is a curiously large amount of products that have added sugar and/or wheat. As frequent cheese consumers I found it logical to make our own. This one is simple and can be molded in all kinds of ways. The instructions below tell you how to make an actual ball, but the picture shows the result of using a silicone snowflake mold. I used the mold to make individual servings for a holiday meal, pressing nuts into the bottom, then chilling and turning them out. I served them with nuts face down, along with a smoked beef roast and cabbage saute. We have been eating wonderful meats lately, after our recent acquisition of an electric smoker. Our living situation necessitates the absence of charcoal-related activities on our balcony, so electric it is. The results are stupendous, and our refrigerator is full of delectable, smoked protein. The individual cheese servings were a perfect accompaniment to the meat and vegetables. You can probably tell, but the cheese mixture is extremely versatile and delicious! I recommend it in all forms and fashions to decorate and compliment as an appetizer or side dish. The snowflakes are not necessarily clearly defined, but the plate arrangement certainly gave a hint to the theme. I hope your holiday season is pleasant and not too cold, for the warmth of family and friends always makes the season cozy.

Cheese Ball

2 1/2 cups sharp cheddar cheese, grated and at room temperature
8 ounces cream cheese, room temperature
4 ounces goat cheese, room temperature
1/2 tsp red chili flakes
1 tsp ground cumin
1 cup toasted pecans, chopped (optional)
Whisk together cream cheese, goat cheese, chili flakes and cumin. Add cheddar cheese and stir together. The mixture may be a bit stiff if you don’t have a strong mixer, so mixing it together with your hands (like I often do) works great. Drop cheese mixture onto a piece of cling wrap that is twice the size of the mixture. Using the cling wrap mold the cheese into the desired shape – sphere, log, oval, etc. you can also use a gelatin mold or other shape to form the cheese. If desired, roll shaped cheese in pecans and gently press them into the cheese. Chill at least an hour before serving with vegetables or crackers.

German Chocolate Fusion Cake

german chocolate fusion cakeI woke up this morning with a plan to fulfill a birthday request. It sounded simple – a low carb, wheat free German Chocolate Cake for dessert. Now, I could have gone to a version I made before, but there were a few barriers to doing so: 1) in our little hotel kitchenette with not much room, 2) the absence of measuring cups, a mixer, blender, food processor or more than one mixing bowl (which was actually an ice bucket absconded from the ferry we floated to Juneau on), 3) time was not in abundance. To balance all these challenges I did some digging to come up with a simple recipe that kept the ingredients list of the cake short, allowed for minimal processing, and maximized the small kitchen and involvement of Little B. The results were wonderful, if I may say so myself, and achieved the German Chocolate Cake flavors, if not necessarily in a more traditional presentation. Why do I call it a fusion cake? Because I was inspired by a energy bar recipe. I got some inspiration from the recipe found here, then leaped off into a search for my own results. Big D and I talked recently about coming up with some low carb, portable snack or energy bars. Something we could throw in a backpack to nourish us during long hikes or camping trips, beyond the old reliable of mixed nuts or peanut butter. This cake is a step in that direction – I think with a few tweaks of the cake portion of the recipe we could have some good snack bars, but that is a different story. This cake gave Big D the nutty, coconutty, chocolaty birthday dessert flavors he wanted, which was most important to me. My initial hesitation in even trying to make the cake, what with everything else going on in our lives lately (under-supplied kitchen, new town, looking for permanent housing, furlough, new job, new everything), helped me get everything back into perspective. Cooking always has and still does calm me, and stressing about giving a gift is unnecessary if you create it from the heart. Happy Birthday Big D!

German Chocolate Fusion Cake

Cake
1 cup almond flour
2 scoops vanilla whey protein powder
½ cup cocoa powder
2 cups Stevia in the Raw
1 cup unsweetened coconut
1 cup pecans, finely chopped
4 large eggs
1 cup heavy cream
1 cup water
3 tsp vanilla

Topping
12 ounces cream cheese, room temperature
2 Tbsp coconut oil
2 Tbsp heavy cream
1 1/2 cup Stevia in the Raw
½ cup unsweetened coconut
½ cup pecans, finely ground

Preheat oven to 350 degrees. Place all dry cake ingredients into a large bowl. Stir until well combined. Add the eggs, cream, water, and vanilla. Stir again until batter is well combined. Pour into two greased (or lined with parchment paper) 9-inch baking rounds. Bake until solid firm in the middle. It will not rise very much. Baking time will be 35 – 45 minutes. Remove from oven and let cool completely. Remove rounds from pans and peel off parchment paper. Make the topping while the cake bakes and cools: combine cream cheese, heavy cream, coconut oil and Stevia in the Raw in sauce pan. Heat through and stir until smooth. Set aside and let cool about five minutes. Add coconut and pecans and stir again until well combined. Let topping cool completely. Place one cake round on a serving plate. Top round with half of the topping. Place second round on top of first, then finish the cake with remaining topping, spreading it on the sides if there is enough – the layers will be thin so you may not need to put on the sides at all. Chill to let the topping set. Serve cold or remove from refrigerator about one hour before serving.

Acorn Squash Bread

squash bread

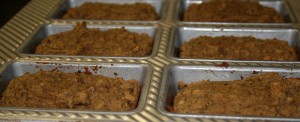
I bought a big, beautiful acorn squash a week or two ago. We have leftovers from the holidays filling the refrigerator and freezer, so in the process of figuring out what to do with the squash, I realized we were running low on goodies for Little B. Additionally, she was to begin a new preschool soon and we needed to stock up on portable wheat free snacks for her. And on top of THAT, I got an awesome new mini loaf plan as a gift and was itching to break it in. To make a bread that has some sweet and savory I included nuts and spices. Of course, relying on coconut flour and eggs to beef up the protein was a must. Little B likes this stuff a lot, and this particular squash was sweet, so the squash/snack/loaf pan goals were met with one recipe. Three birds, one stone. Big D bit into it and groaned – in a good way – it reminded him of his grandmother’s banana bread, and it had no bananas. Now THAT is a compliment!

Acorn Squash Bread

1 cup cooked, mashed acorn squash
½ cup walnuts
6 eggs
½ cup olive oil
1 Tbsp vanilla extract
½ cup coconut flour
¼ cup golden flaxseed meal
1 cup granular erythritol
1 tsp sea salt
1 tsp baking soda
½ tsp baking powder
1 tsp ground cinnamon
¼ tsp nutmeg

Preheat oven to 350 degrees. In blender combine squash, walnuts, eggs, oil and vanilla. Blend until smooth and nuts are broken up to around the size of little peas. In mixing bowl combine flour, meal, erythritol, salt, baking soda, baking powder, cinnamon and nutmeg. Add blended ingredients to dry ingredients and stir until well mixed. Pour batter into greased bread pan or mini loaf pan(s). Bake for 40 – 50 minutes if making one large loaf, or 25 – 30 minutes for mini loaves. The bread is done when the loaves look set (no longer liquid) and the edges begin to brown. Let cool in the pan before removing. Breads made with coconut flour need to cool before they are set enough to remove from pans, but making sure the pans are greased well make the removal process easier.

Cilantro Pesto

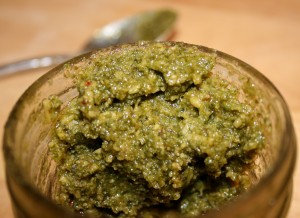
cilantro pesto with spoonWe had a bundle of cilantro sitting in a water jar on the counter. Since I kill it every time I try to grow/regenerate it, I tend to overstock on it when I find it fresh cut in the store. It was starting to look sad, even with its water, which meant it needed to be used pretty soon. The stuff goes from perky to slimy and brown pretty quickly when it starts to go, so I had to act fast. Big D was grilling steaks for dinner, so what could I do with cilantro. Hmmm….cilantro, steaks, cilantro, steaks….I know! I remembered a cilantro sauce from a restaurant I went to years ago in Denver, I think it. Maybe it was Boulder. Instead of basil they used cilantro for pesto. I decided to whip up some cilantro pesto to drizzle on top of the wonderfully seared rare steaks. It helped me use the cilantro instead of leaving it to go bad, and I could not imagine it being uncooperative with the grilled meat. I was right, I must say. The pesto worked great with the steaks, and the leftovers also worked great on pork loin. Another plus was the pesto kept much better in an airtight jar in the fridge compared to un-pesto cilantro would have done sitting on the counter. Double score!

Cilantro Pesto

1 bunch fresh cilantro, most thicker stems removed
1/4 – 1/3 cup extra virgin olive oil
4 cloves garlic
1/4 cup pecan halves
1/4 cup grated Parmesan cheese
1/2 jalapeño, seeds removed
1/2 tsp sea salt
1 Tbsp lime Juice

Add all ingredients except oil to blender or food processor. Purée until blended, then slowly drizzle oil into mixture. Scrape sides and blend more until everything is about the same size. Use immediately or chill until about an hour before serving. Room temperature is the best for serving.

Cranberry Roasted Chestnut Muffins

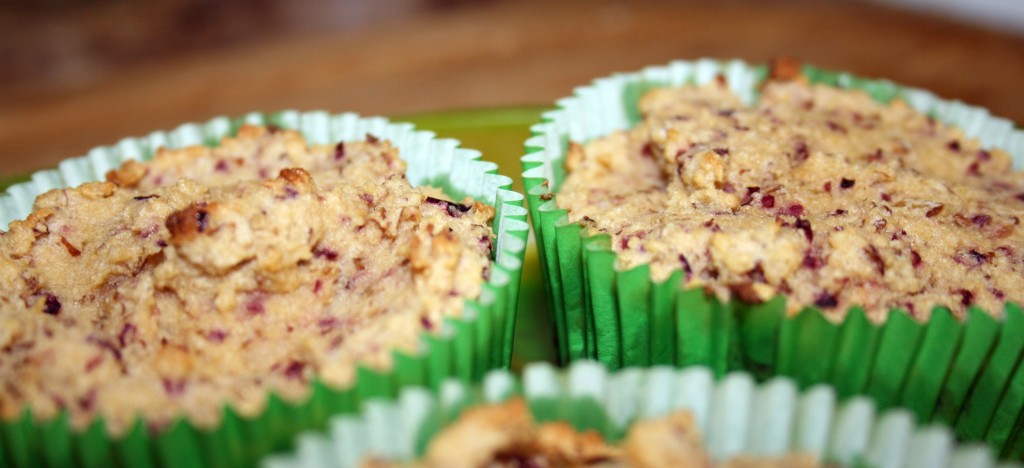
After you do some holiday baking and roast chestnuts on an open fire, you want to do more! We set aside some chestnuts from our recent roasting adventure so I could make these muffins. A recipe for my extra special secret cornbread dressing includes the wonderful inventions of roasted chestnuts and fresh cranberries. I have yet to convince myself to share the recipe, especially since I have not made it in a while, but did recently have a hankering for the flavors that make up the dressing. The evils of corn (it is not the fault of the natural corn, but the sugary nature of the vegetable, which is why I avoid it) have discouraged me from making the dressing in recent years. To recreate the flavor and texture in a corn free way I came up with these muffins. The flax seed gives them the texture that hints at cornbread (and adds extra fiber), while dancing well with the cranberries and chestnuts. Muffins continue to give Little B a sweet treat while keeping her diet high in fiber and low in sugar. She still gets a little confused sometimes when she can have muffins at home and not when we are out, but I have taken to having muffin back ups in my purse for such occasions. She helps make the muffins pretty much every time, which helps keep her interest, and they sate her desire for baked goods. So good so far!!

Cranberry Muffins with Roasted Chestnuts

6 eggs
6 Tbsp butter, melted
4 Tbsp heavy cream or half and half
1 tsp vanilla3 drops liquid stevia
½ tsp sea salt
½ cup coconut flour
¼ cup flaxseed meal
¼ cup powdered erythritol
½ tsp baking powder
8 ounces fresh cranberries
4 roasted chestnuts (can substitute with 10 raw pecan or walnut halves)

Preheat oven to 400 degrees. Prepare muffin pan with liners. In blender add wet ingredients, nuts and cranberries together. Blend on low until cranberries and nuts are broken up in small pieces. In separate bowl combine dry ingredients. Add wet ingredients to dry ingredients and stir just until combined. Divide batter among the 12 muffin cups. Bake for about 15 minutes until tops begin to brown. Let cool for about ten minutes before serving.

Roasted Chestnuts

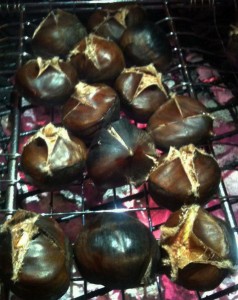
Chestnuts roasting on an open fire….the opening to one of the most wonderful winter songs ever. So many times in recent years I was actually unable to find fresh chestnuts! This year I found some at the store and snagged a bag. While my wonderful MIL Sherry and forever BFF Kelley were here for a visit we were able to fulfill the cliché.

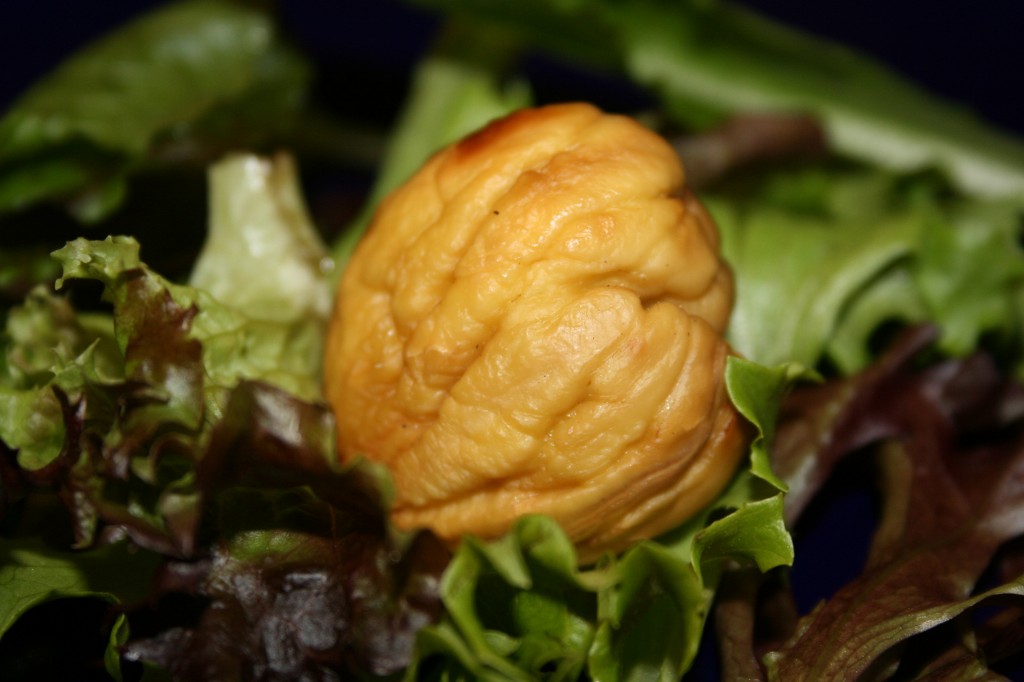
The coals were still glowing red after Big D seared steaks and we had a red meat feast. We had a blast roasting them, and after they cooled just enough we were able to peel them. We could tell they were done when the shell where they were cut started curling up and away from the nut. It was great evening and the chestnuts made for quite a treat. Sherry and Kelley had never roasted chestnuts. We flitted around the kitchen enjoying the process and savoring the flavors of the nuts. Preparation of the nuts is similar to garlic – the outer shell is removed, then the thin membrane right on the nut itself needs to be removed. As my lovely daughter concluded, they look more like brains, which are food for the zombies. Does it help that they are nested in a nice bed of young greens? Maybe not. I don’t want to know how badly we have distorted her mind, but Shaun of the Dead is a most awesome movie. Roast up some chestnuts this winter, or find a street vendor who did the work for you. It is a flavor that will linger and you will never forget.

Roasted Chestnuts

Roasting pan or grilling grid for fish
Open fire or grill with glowing embers
12 – 24 raw chestnuts

With a sharp knife make a criss-cross cut into one side of the nut shell. Roast over an open fire until the cut sections curl away from the nuts and start hissing. The nuts are a bit like popcorn – as you roast them they can go from roasted to burned in about two seconds, so watch carefully, otherwise they might burn. Remove from fire. Let cool just until they can be handled. Peel off outer shell and remove the brown membrane, until the tan colored nut is exposed. The roasted nut should be about the color of a peanut and the texture of a walnut. Eat immediately or freeze/refrigerate for use with chocolate fondue, in recipes and on salads.

Post Navigation