Any Kitchen Will Do

Give me a kitchen and I will cook.

Search Results for: “asparagus

Creamy Baked Asparagus

cremy asparagus

The other day Big D brought home some slim, tender asparagus. They looked wonderful, but were not the best candidates for making our favorite bacon wrapped version. I grabbed some of our pantry staples and created this easy side dish. It ended up very rich, and almost overpowered the smokes salmon we served it with. Not quite, but I will seriously consider serving it with roast pork or beef next time. This would probably work just as well with green beans. Let’s see if Big D comes home with some soon…

Creamy Baked Asparagus

1 bunch slender asparagus
1/2 cup heavy whipping cream
1 egg
1 tsp garlic powder
1/2 tsp onion powder
1 tsp sea salt
1 cup cheddar cheese, grated

Preheat oven to 375 degrees. Chop rough ends off of asparagus spears. Chop the asparagus into 1/2 inch pieces, leaving the tip pieces a little bit longer – makes about three cups of chopped pieces. In a small bowl whisk the egg. Add the cream, garlic powder, onion powder and salt. Whisk until egg is fully incorporated. Place asparagus in 9×11 or 9×9 baking dish. Pour cream mixture over the top and stir slightly to make sure all pieces are coated. Sprinkle cheese on top. Bake uncovered for 30-35 minutes, until cheese is gold and bubbly. Remove from oven and let sit for about ten minutes, until cream mixture is set.


Asparagus Saute

asparagus-saute_edited-1

I just adore brightly colored fruits and vegetables. Such adoration inspired this side dish. Big D cooked an absolutely lovely lamb roast for dinner. I can’t get him to guest post his cooking, so you will have to check out his other types of most awesome writing here. The roast sat and simmered all day, so when I walked through the door I was surrounded by lemony, oregano-y, minty bliss. To balance the strong, Greek flavors of the roast I came up with this bright, sharp side dish. We found a huge collection of asparagus at the store – it was a nice medium size with moist tips that begged to be prepared and enjoyed. We also had a collection of small tomatoes – some red, some orange, some green and some purple. I cut up a few and threw them in. They wilted and balanced the enjoyable bitterness of the asparagus. The meal tasted wonderful on a chilly, wet Juneau evening. We have many more such evenings to come, and I will definitely be making this quick side dish again. It is too early in the season, but I will say it anyway – what a colorful combination of green and red! Looking forward to the fun of the upcoming holiday season!

Asparagus Saute

2 Tbsp extra virgin olive oil
2 bunches asparagus
2 cups small tomatoes
1 tsp garlic powder
Salt and pepper to taste

Arrange the asparagus so the thick ends are lined up together. Slice off the last one to two inches of the the thick ends of the asparagus and discard. Cut the remaining asparagus stalks into bite-sized pieces, about one inch each. Slice tomatoes in half or thirds, making sure they are bite-sized. Heat oil in a large saute pan over medium high heat. Add asparagus and stir until slightly softened, about five minutes. Add tomatoes and stir for one more minute. Sprinkle with garlic, salt and pepper to taste. Stir so as to spread out the spices. Turn down heat, cover and simmer, cooking for about five more minutes, until the asparagus is softened as desired. Turn off heat and leave covered until time to serve. Serve immediately.

Bacon Wrapped Asparagus

bacon asparagus final

These were fun! Not only were they easy to make, mostly by Little B, but no complication, even minor, of adding seasoning or flavors. Yes, I know. That is the magic of bacon! I was tempted to marinate the asparagus first, but decided to try simpler, and it worked wonderfully. We sat on the porch and rolled them while Big D set up the fire in the grill. Is it gas or charcoal, you ask? I won’t tell Big D yo said that. Of course it is charcoal. Although level and length of heat may vary compared to gas, there is no comparison when it comes to the flavors transferred to food from the charcoal fire. For the pictured batch of asparagus we (more precisely he) grilled it. They were a little dark, because of the high fire heat, but it gave the dish a wonderful crispiness and the asparagus was bright green and just tender enough. Although easy to serve as a side dish daintily cut up alongside a steak, we scarfed them down with our fingers, which made them more of an appetizer. In the future I plan on cooking them up in a pan on the stove or in the oven. I will update you on how it goes. For now, we have a quick side dish for an all-grilled meal. The accompanying steaks were to die for, by the way…

Bacon Wrapped Asparagus

1 pound asparagus spears, tough ends removed
1 pound sliced bacon, room temperature

Combine asparagus spears in multiple bundles so each one does not exceed 1/2 inch diameter (could be one to three spears). Wrap a strip of bacon around each bundle at a diagonal, so most of the asparagus is covered. Cooking approaches: 1) grill bundles over medium to high heat until bacon is crisp. Remove and let cool until warm enough to eat, or 2) heat the broiler to medium and place on broiling pan. When top side is crisp (three to five minutes) turn over to crisp on underside. Remove from broiler and let cool, or 3) heat large skillet to medium high heat. Place rolls in the pan and cook until bacon is crisp, like you would for breakfast. Remove from pan and let cool before serving.

Roasted Asparagus

I originally learned this recipe from my old friend Karla. About ten years ago I went over to her house and she made wonderful side dishes while her husband Marcus cooked up some meat. The whole meal was delicious, especially eating under a beautiful summer sky in Denver, but the asparagus was stupendous. It was probably because I had so much trouble cooking it well in the past. I either undercooked it or overcooked it to a green mush. Now it comes out perfectly every time – the thick ends are soft enough to eat and the delicate tips still have substance. The roasting really brings out the flavor of the asparagus while making it tender to eat, hot or cold. I have often taken leftovers on picnics or in cold lunches and it works just as well as if it is right out of the oven. So simple and so scrumptious!

Roasted Asparagus

1 large bunch raw asparagus
2 Tbsp olive oil
2 tsp lime juice
½ cup chopped pecans or almonds
2 cloves garlic, diced
2 Tbsp Parmesan cheese
Salt and Pepper to taste

Heat oven to 350F. Rinse asparagus and remove the thick, tough ends. You can do this in any of three different ways:
1) cut the bottom 1-2 inches off with a knife,
2) bend the asparagus by holding it about half way down with one hand and hold the thick end with the other hand.
Bend the stalk until it naturally breaks where the tough section begins, or
3) with a vegetable peeler gently peel off thick outer skin from the bottom half of the stalk
Line a cookie sheet with aluminum foil. Lay asparagus on foil, alternating thick and thin ends. Make sure the stalks alternate the direction of the tip, so they can cook evenly. Sprinkle asparagus with olive oil and lime juice, followed by garlic, salt, pepper and nuts. Place in oven on the middle rack for 20-30 minutes, until tender. Sprinkle with Parmesan cheese and return to oven, cooking for about five more minutes until cheese is soft. Serve immediately.

Cold Green Bean Salad

coldgreenbeansalad
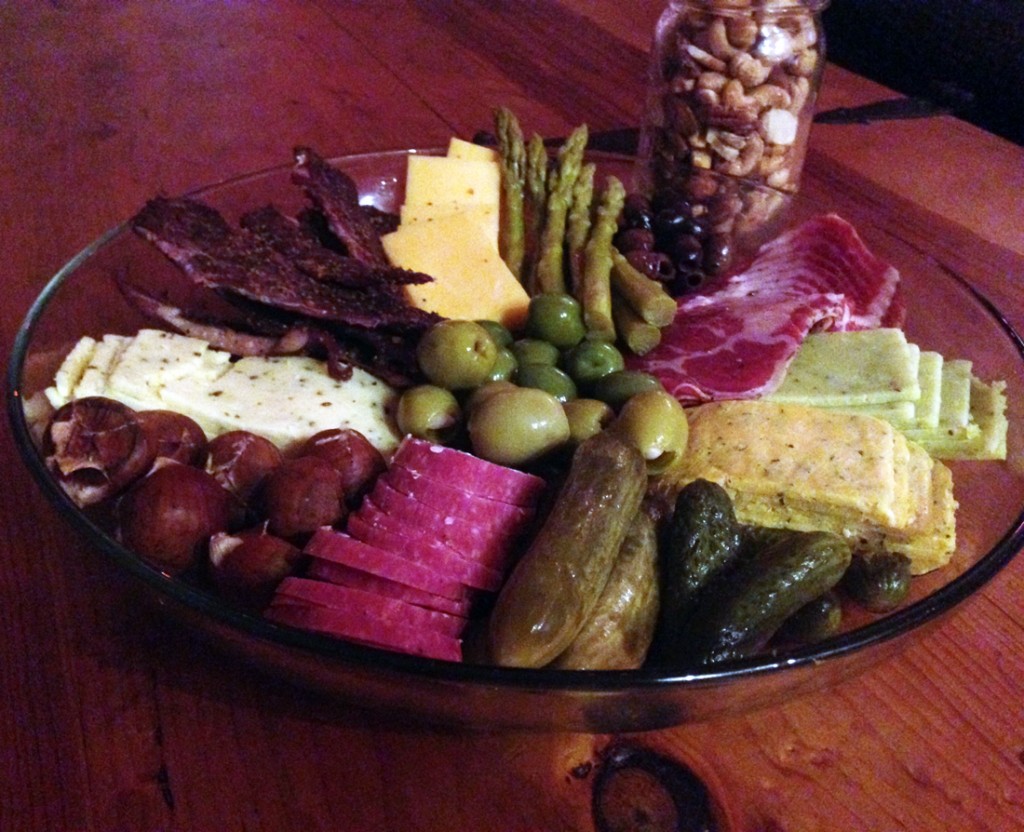
As I have mentioned many times before, we make sure there are prepared foods stocked in our refrigerator, since there are scarce convenience foods that fit our sugar free, grain free eating habits. We prepare boiled eggs, bite-sized raw vegetables, cured meats and salads of all kinds. Making salads out of staples is an easy way to keep the fridge full, like Dilly Egg Salad, Tuna Salad Saute, Don’t Have To Choose Salad, Antipasto Salad or my recently shared Cucumber Salad.

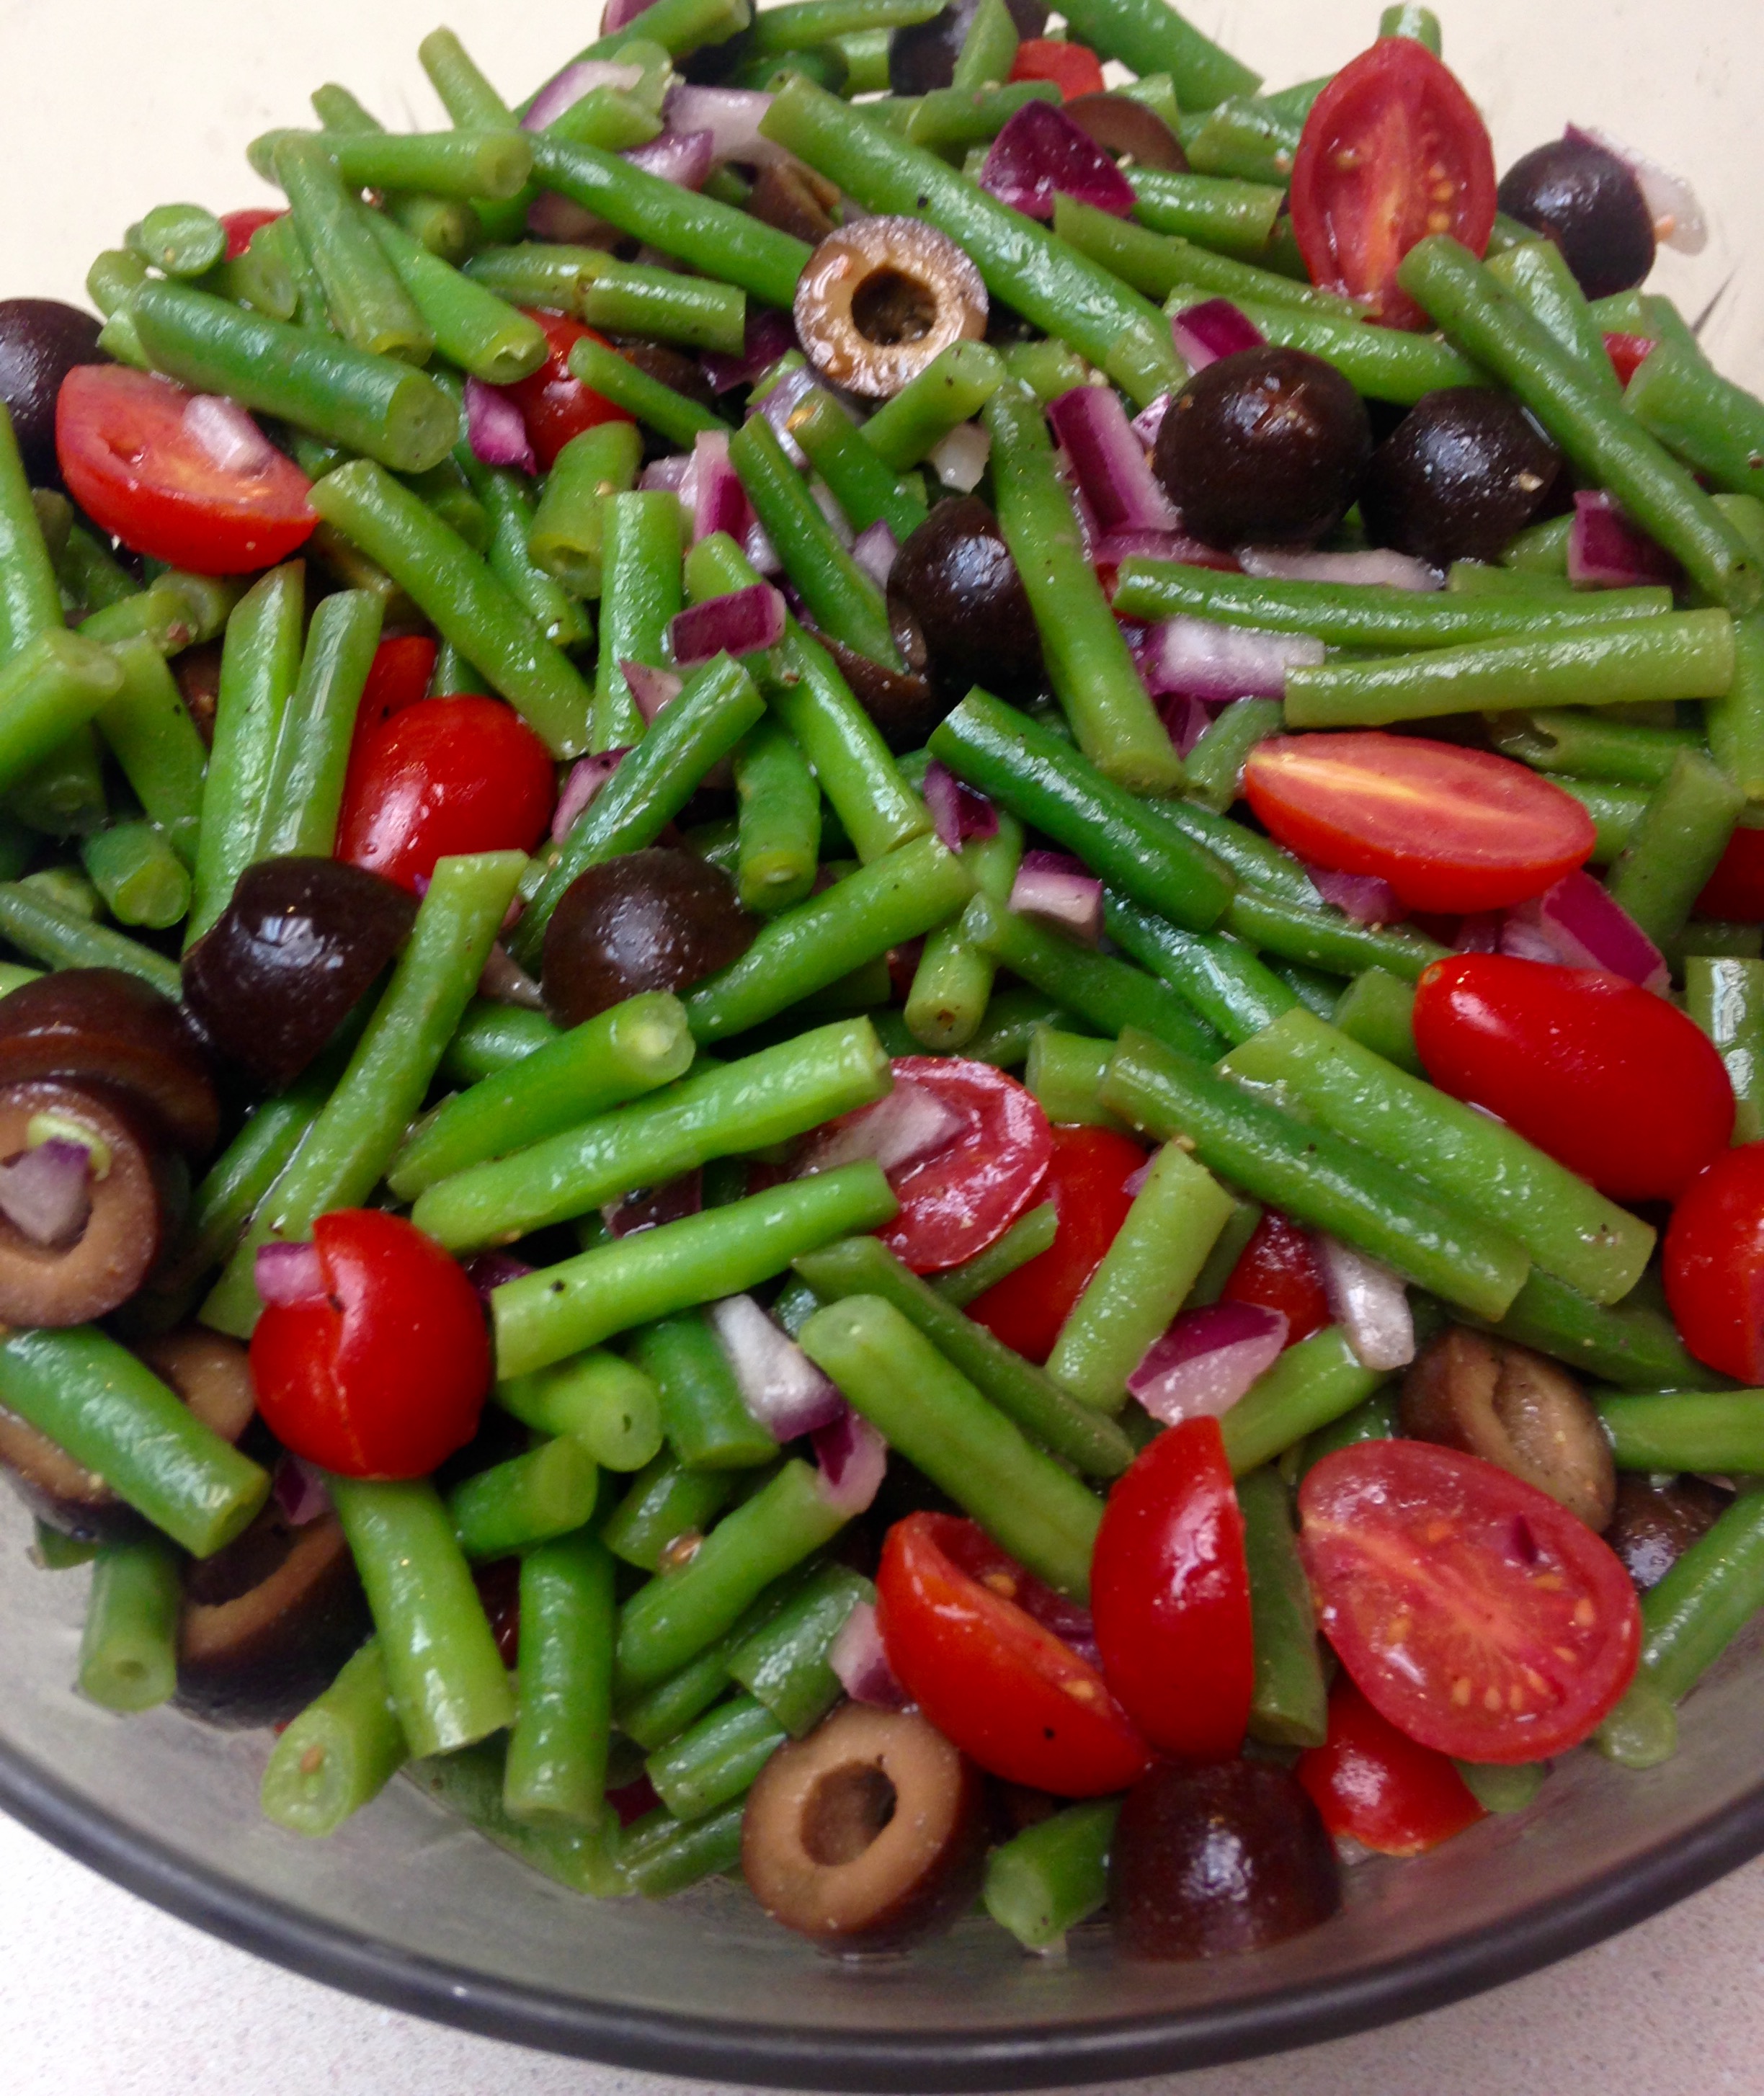
Due to the freakishly mild winter in our current climes there are already fresh green beans available, so I grabbed some and brought them together with some other ingredients for a marinated salad. The thing I like most about marinated salads is that they get better every day they sit. On day four after making this salad the acids in the dressing may have made the green beans a little less bright, but the beans also soaked up all the flavors, including the tang of the red onion, and a serving of it tastes heavenly.

I encourage you to experiment with other salad fixings too! I’ve made similar salads using slender asparagus instead of green beans, Greek olives instead of black, mushrooms along with tomatoes, and even thrown in some chopped up ham or salami. Noticing a variation on a theme? The thing I have learned making cold salads over the years is that two cups of dressing seems to be just right to coat 9-10 cups of salad, which is the case here.

Have fun in your kitchen and enjoy the bright, healthy produce of spring!

Cold Green Bean Salad

2 pounds fresh green beans
2 cups grape or small cherry tomatoes
1/4 large red onion
2 cups large black olives, drained
2 cups vinaigrette dressing (I suggest my Herby Dressing or Greek Dressing)
Sea salt and ground black pepper to taste
2 teaspoons dried red pepper flakes (optional)

Make your vinaigrette dressing of choice, if not already made or using store bought. Set aside.

Remove ends from green beans and slice them into bite sized pieces, about one inch. In a medium pot with steamer insert bring one inch of salty water to a boil. Add beans to steamer and lightly steam about five minutes, with the intention to soften them but retain their bright green color. Remove beans from pot, set them aside to cool and prepare remaining ingredients.

Slice tomatoes in half lengthwise and place in bowl. Finely chop red onion and place in bowl. Slice black olives in half horizontally and place in bowl. Add green beans. If including red pepper flakes add them now.

Pour dressing over salad ingredients. Gently toss salad until well coated. Cover bowl and chill for at least four hours or overnight.

Remove from refrigerator and toss salad again, then taste and add salt and pepper to enhance dressing flavor (need will vary depending on dressing used). Toss one more time to incorporate salt and pepper, then serve.

Hot Bacon Dressing

hot bacon dressing

I am sure I have previously discussed my love for spinach. As a child I was a fan of Popeye and never understood the scrunched up faces of other kids facing the green stuff on their plates. As I got older I craved salads with deep green spinach over the pale, watery nature of iceberg or other lettuces. The term ‘hot’ used for this recipe can mean two things – spicy hot and temperature hot. Other versions of the dressing can be heated up much more so as to clearly wilt the spinach as it is poured. This version, since it relies on egg as a thickener instead of flour or other powders, cannot be made so hot. I rely on the spicy version of the word hot here instead. The tang of the vinegar along with the heat of the horseradish and mustard make it so. It will probably not wilt the spinach, but will still leave a mark on your palate. The picture shows the dressing being used simply on raw baby spinach as a side dish. If I have the salad as a main course I will add onion and soft boiled eggs, and other veggies as I please. Here, it was a way to quickly boost the veggie/protein ratio at dinner one night. The dressing can also go on top of other side dishes, for it has a tang that would compliment broccoli, squash, asparagus, and so forth. If you heat it up leftovers do it gradually in the microwave at half power or low on the stove so as not to create scrambled eggs.

Hot Bacon Dressing

4 slices bacon
1/4 c. water
1/4 c. Apple cider vinegar
1 tsp Stevita granulated sweetener
1 Tbsp horseradish mustard (or 2 tsp yellow mustard and 1 tsp raw grated horseradish)
1 egg
Pinch salt
(Optional) 1/4 red onion, jullienne
(Optional) 4 soft boiled eggs (6 minute eggs)

Cook the bacon over medium high heat in small pan until crisp. Crumble bacon and set aside. Turn temperature to low under bacon grease and let cool to the lower temperature. Add water, vinegar, sweetener and mustard, stirring until combined. Whisk in egg and continue stirring constantly so the egg does not cook firm. When the egg is fully incorporated add crumbled bacon, continuing to cook and stir under heated through. Taste and add salt if needed. Turn heat up to medium, continuing to stir, and heat until steam rises from the dressing, about two minutes. Serve immediately over raw baby spinach, optionally including onion slices and soft boiled eggs sliced in half.

Yule Platter

yule platter_edited-1
Every year on winter solstice we have a family party – Merry Yule! Especially during our winter time in Alaska this day is a big turning point – the shortest day of the year is the beginning of longer days and the approximate midpoint of chilly winter weather. Yes, there are still heavy winter storms in late March sometimes, but there is mostly rain after February here in Southeast. Most of our snow this season so far is melted, with temperatures in the high 30s, and a white Christmas is questionable. Regardless of the weather there is definitely a shortage if light. Sunrise is about 8:45am, if you can see it through the clouds, and then sets about 3pm. One way we celebrate Yule each year is to have a simple meal, made up of preserved foods that require little or no cooking. We don’t do much of the preserving ourselves, but work off the labors of others. Big D smokes some jerky, onion, garlic and cheese, while other items like pickled veggies, cured meats and nuts are added to the platter. We snack from the platter while sipping something bubbly – champagne, beer for me and Big D, and root beer for Little B.  It makes for a winter celebration we appreciate before the hustle and bustle of Christmas Eve and Day, which remind us of our childhood traditions. The simple celebration reminds us that the world is hibernating under the bare branches, blustery winds and wet ground. It reminds us of our New Year resolutions from Samhain and look forward to the Candlemas celebration of light in February. A time to ponder during a more sedate time of year when much of the natural world sleeps. Since there is not much recipe involved, here is a list of suggested items for your platter.
Yule Platter
Dry coppa, pastrami or prosciutto
Dry Salami
Beef Jerky
Roasted Chestnuts
Garlic Stuffed Olives
Jalapeno Stuffed Olives
Dry Roasted Mixed Nuts
Specialty Cheeses, sliced
Pickled Asparagus
Pickles
Roasted Mixed Nuts
Arrange ingredients in a pretty way on large platter. Offer and provide bubbly and/or fermented beverages. Eat, drink, be merry. Don’t feel guilty about the ease of this dinner, for more complicated ones are on the horizon.

Fire Pit Vegetables

fire pit cooking

fire pit carrotsfire pit zucchini

Sometimes when we cook over fire pits we are lazy – impaling sausages and hot dogs on sharpened stick and holding them over the flames until they sizzle. It is pleasant, relaxing, and an easy prep – open sausage package, remove sausages, impale. Other times we get a bit more elaborate. Pretty much any meat can be cooked over a pit fire. Same for vegetables, but some veggies are more cooperative than others. I would not try this with greens or other stuff that shrinks substantially, but most vegetables cook up great, anywhere from root vegetables to asparagus and squash. I have also done corn, tomatoes and cabbage. Little B is usually on the side of sausage impaling, because she can be more involved – we are not yet ready to have her reaching in and fiddling with foil packets an inch from hot coals, or leaning over the fire itself to manipulate stuff on a grill grate. Her turn will come in time, but now is not the time. I typically start baking the vegetables an hour or more in advance of cooking meats, so they are ready to serve on time and out of the way. We are sitting around the fire long before eating anyway, so why not let the fire do some work for us? Also, it does not hurt to let the cooked vegetables rest and allow flavors to settle together. Seasoning is simple, because the wood smoke adds an element that does not need much help.

Fire Pit Vegetables

2 cups mini carrots, 2 – 4 turnips or 3 – 4 zucchini/yellow squash
1/4 cup butter
Fresh yarrow or parsley
Salt to taste
Aluminum foil

Tear aluminum foil into sheets, ensuring they are of a length that will wrap around the vegetables – ideally not to exceed 8×8 inch pouches. Some larger vegetables can be individually or group wrapped, like turnips and corn on the cob. Prepare vegetables in bite-sized pieces, or halved/quartered in equal sized pieces. Place vegetables in the middle of foil sheets in a single layer. Spread butter on vegetables, sprinkle them with salt and place yarrow or parsley on top of the pieces. Wrap foil around vegetables, making sure it wraps around twice and roll the foil at seams to prevent leaking. Follow one of these methods: 1) Place packets around the edges of a pit fire. Rotate pouches every 15-20 minutes, changing the side closest to the heat. After 40 – 60 minutes cooking time remove from pit, open pouches and check for doneness. Return to heat if not done. 2) Place pouches on grill grate suspended above fire, flip packets upside down after about 20 minutes, to help even cooking. Check doneness after about 45 minutes, depending on fire size and heat. When cooked to desired doneness, reseal and set aside until time to serve.


Stuffed Bell Peppers

stuffed pepper plated

We had some lovely visitors from Texas recently. While they were here we had big plans to cook a lot of stuff for them, but we ran out of meals and time. These bell peppers were still hanging out in the refrigerator after they left, so I needed to do somstuffed peppers panething wonderful and amazing with them. It was not their fault they were usurped by a brunch buffet, grilled ribeye, bacon wrapped asparagus and pizza. I used to never like stuffed peppers. They were often overcooked, filled with flavorless rice and left me hungry. When I first made stuffed peppers for myself I decided they needed to eliminate the unsavory elements. Heh. Get it? Unsavory? Okay, I will stop. I first tried stuffing poblano peppers, which turned out great. This time I worked with the previously spurned colorful bell peppers. Bottom line, I added flavor and subtracted rice. The peppers turned out to be a lively, satisfying meal on a rainy day after much errand running. Next time the peppers will not be second or third fiddle, but instead the first choice. Yummy!

Stuffed Bell Peppers

5-6 bell peppers, any color
1/2 large onion, finely chopped
1/2 pound ground beef
1/2 pound ground sausage
1 egg
1 cup Colby/Monterrey Jack cheese, grated
1 tsp ground cumin
5 garlic cloves, chopped
1/2 tsp sea salt
1/2 tsp ground black pepper
1/2 tsp red chile flakes
1 cup beer (recommend an IPA)
5-6 slices Monterrey Jack cheese
Salt to taste
1 batch chimichurri (optional)

Remove top of each pepper, also removing pulp and seeds from inside. Rinse, shake out excess water and place in 8 x 11 inch baking dish. Divide onions equally among the peppers by dropping them into the bottom of each. Sprinkle onions with salt. In a large bowl combine beef, sausage, egg, grated cheese, cumin, garlic, salt, black pepper and chile flakes. Squishing it all together with your hands is the best method. Firmly press the meat mixture into each pepper until it is level with the top. Bake for 45 minutes. Place a slice of cheese on top of each pepper. Return to oven and bake for an additional 20 minutes, until peppers are soft and cheese begins to brown. Remove from oven and let cool for about ten minutes. Suggest serving drizzled with chimichurri.

Brussel Sprouts in Cream

creamy brussel sprouts

Could I ignore it? Just walk by as if it was not there? Pretend it would not be loads of fun to explore? No, I was not strong enough. It drew me towards it like no other stalk. I became a stalker. A stalker of of brussel sprout stalks. I thought maybe I should deny myself yet another green vegetable, but why?! I seem to be on quite the green vegetable streak these days – asparagus then artichokes, and now brussel sprouts! Big D has been doing a lot of meat and soup cooking, so I enjoy the yummy stuff when I get home and fill in the vegetable part of meals where I can. Brussel sprouts are a relative of green cabbage – high in fiber, good for you and the sprouts grow on stalks! I usually see them in the store in bags, but this week they arrived on the stalk. How fun! Little B was so excited about this strange thing when I got home she could not stand to wait until they were cooked. Whenever I can I try to show Little B where food comes from – whether it is pulling wild garlic, to showing her vanilla comes from orchids, her breakfast sausage comes from pigs, or the plants that are the source of her popcorn. I showed her the stalks and explained what the sprouts were. Little B immediately wanted one raw. Um, okay. I gave it to her, she took a big bit and LOVED IT! Chewed it up like Halloween candy!

brussel sprout stalk

brussel sprout tastingI had to promise to cook them up as soon as possible because she would not leave me alone about them. This could get interesting. Sometimes I have to coax Little B into helping with cooking projects and other times I can’t keep her from being overly underfoot (in a good way). This was definitely an underfoot project. She helped me cut them off the stalk and cook them up.  I had a plan and she had a different one, but we figured out how to combine them, and an ordinary weekday evening turned into a stalker party! We came up with two dishes in the end – one that she liked and one that I wanted. The cool thing was the two dishes took the same route to a point, then easily diverged to make everybody happy. Besides raw she tasted them sauteed in the butter, then with her added veggie and cheese, and also after adding the cream to the butter saute. Apparently she prefers them raw, but I think the creamy sauce balanced out the natural bitterness of the sprouts. I am very happy to learn of Little B’s continued interest in green vegetables – from when she started gnawing on frozen broccoli during her teething period as a baby, to snacking on green beans to the brussel sprouts of today. What has your kid eaten and liked that surprised you?

Brussel Sprouts in Cream Sauce

I large stalk brussel sprouts
1/2 cup heavy cream
1/4 cup butter
2 cloves garlic, crushed
1/2 tsp sea salt

Cut sprouts off of the stalk, leaving enough stem on each to hold the sprouts together. Melt butter over medium heat in large saute pan you can cover later. Add garlic and cook until you can smell the garlic aroma. Add sprouts and toss to coat them with butter. Sprinkle with salt. Cover and let cook until sprouts are softened, about ten minutes. Lower the temperature to simmer and add the cream. Gently stir – enough to blend the cream into the sauce, but gently enough to prevent the sprouts from falling apart. Simmer covered for a few more minutes until the sauces is hot, bubbly and begins to brown, about four or five minutes. Serve immediately.

Little B’s version – after sprouts are cooked and softened in the butter, transfer a serving to an oven or microwave-safe bowl. Add some grape tomatoes and black olives cut in half. Sprinkle with grated cheese. Microwave for about one minute, or bake in oven at 300 degrees for about five minutes until cheese is melted.


Post Navigation