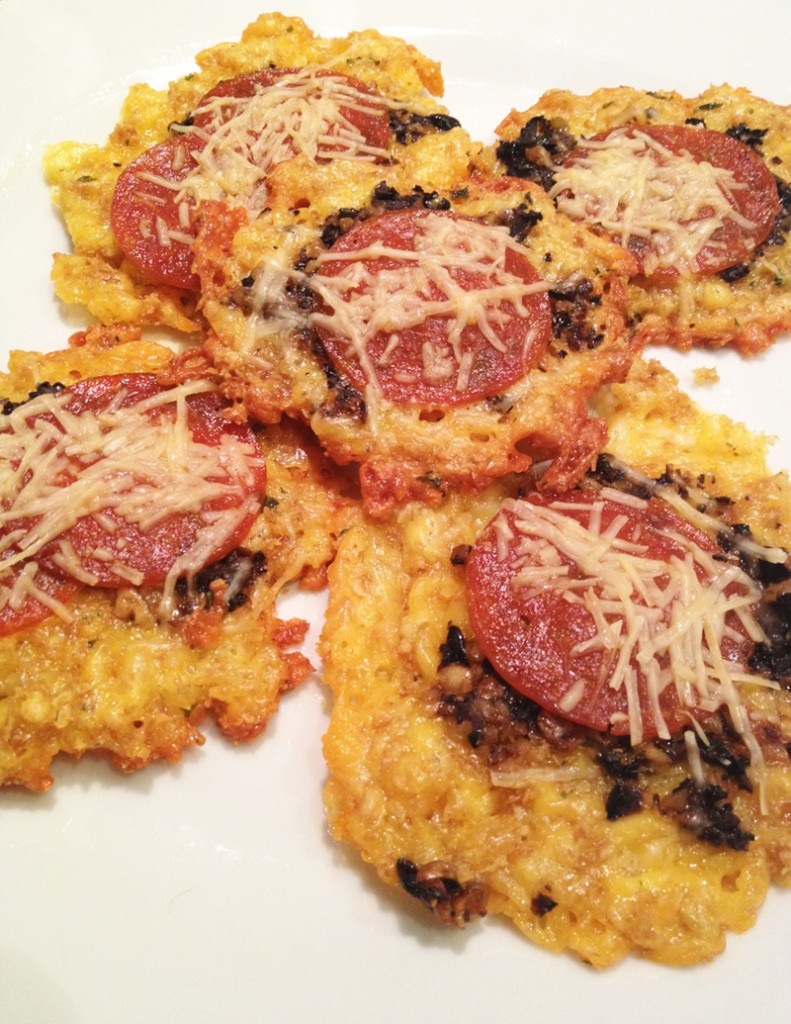
Any Kitchen Will Do

Give me a kitchen and I will cook.

Archive for the category “eggs”

Mini Pizza Pucks

mini pizza pucks_edited-1

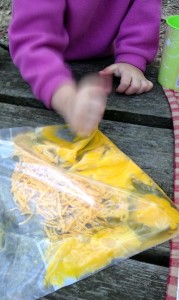
Our whole family loves pizza. Lately I have been trying to find simple dishes for weekday meals, what with Little B getting involved in evening activities and Big D and I with busy work days. In our endeavor to avoid wheat there are few alternatives for quick pizza where we live. The local pizza places just give blank looks when the words ‘wheat free’ or ‘gluten free’ are used, and delivery is a joke when wheat free is concerned. To be fair, there is one place with gluten free pizza, but it is still has nutrition-poor carbohydrates in a rice based crust. Not the end of the world for Little B on the rare occasion, but for me and Big D, who need to avoid the carbs, it is not a solution. These pizza pucks I made are a result of spontaneous experimentation. I tried to combine my cheese crisps and low carb pizza recipes to make this meal and it turned out pretty darned good! They were quick, fun and Little B enjoyed helping making them, of course. I call them pizza pucks, not because they are overly hard or difficult to eat, but because you can pack them up, like pucks, and I am currently living in a place where hockey is popular. I am not yet ensconced in watching or playing the sport, I just went with it. And it is cold. What other time of the year can you call pretty much anything a puck? Besides being a good dinner, the leftovers worked well as a cold snack on the way to Little B’s soccer practice, or ballet, or whatever happens after five but before bedtime that does not involve crashing on the couch at home. What better snack than some protein before running around for an hour or more? Maybe I should come up with some pizza balls to go with the soccer theme, but that is for another day and time…

Mini Pizza Pucks

3 cups shredded mozzarella and cheddar cheese
1/2 cup golden flaxseed meal
1 egg
1 Tbsp dried parsley leaves
1 Tbsp dried basil leaves
1 tsp garlic powder
1 tsp sea salt
1 cup large black olives
6 roasted or pickled garlic cloves (you can use raw, but they may not cook through and cause problems for sensitive stomachs)
20 – 30 slices pepperoni
1/2 cup Parmesan cheese

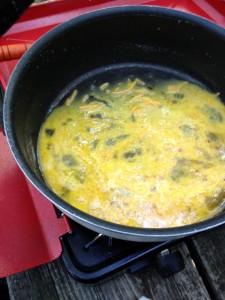
Preheat oven to 350 degrees. In a food processor combine olives and garlic, then pulse until a rough paste forms. Set aside. In a medium bowl combine the mozzarella and cheddar cheeses with flaxseed meal. whisk the egg and add to cheese mixture, folding it in until the cheese is coated. Add the salt, parsley, basil and garlic powder, doing a final few stirs to distribute the spices. On two nonstick cookie sheets make flat piles of cheese, about 2 inches in diameter with about an inch between them. Spoon about 1 tablespoon of olive paste on each pile, spreading it gently with the bottom of the spoon. Place one to two slices of pepperoni on each pile, then sprinkle with Parmesan cheese. Bake in the oven (using two different rack levels) for 12 – 15 minutes, until the edges of cheese begin to brown and the pepperoni glistens. Yes, it must glisten to have the right flavor. Remove from oven and let cool for five minutes before serving.

Yowza Anniversary Cinnamon Rolls

cinnamon rolls

Year three of my blog is starting. Tomorrow. Wow. Yowza. It amazes me that I have been able to continue with it. Not because it is hard, for I love exploring new recipes and sharing old ones, but because making it a priority has given me so many opportunities to focus on myself. This may mean more to people that know me well, but can also make sense to those who don’t. I very often get caught up in helping and supporting people around me – family, friends, co-workers. I discover too late that I do not do ‘me’ stuff frequently enough, so my energy stores and momentum fade away. Knowing that I promised myself to continue the blog has given me a way to keep my personal enthusiasm up. With all the changes and moves and adjustments our family has gone through during the past year I am proud of myself for continuing the blog. Picking up and moving cross country (contiguous) and beyond takes a lot of energy, to embrace the experience and joy of every day. I love we had the experience and expect to do it again and again in our lifetimes. As I look back on the past two years I also see how our eating habits have changed. Moving from eating everything imaginable to excluding wheat to also excluding most starchy carbs and sugar, I see how our journey has evolved. We are not perfect, as with all human being, but we try. Some exclusions have driven us to challenge ourselves to continue our traditions without the ‘evil to us’ ingredients. Things like tamales and king cakes and cookies and muffins are part of the plethora of recipes we rely on to add variety to our diet without deviating. As I work through the various recipes that we love in nostalgia, and discovering new ones, I am so excited to share them with our daughter. It is a constant effort to balance our memories while developing new, healthier versions for her. Miss Marie has recently shared a recipe for cinnamon rolls. I made some changes, of course, and the result made for some amazing treats to celebrate my second anniversary. Between Big D’s love for such rolls and my extensive time spent in airports sniffling the wafting aromas from the cinnamon roll denizens who live there, the treats are cherished and longed for. I am ecstatic about finally making some and feeling indulgent in celebration. What better way to celebrate an anniversary than to make such succulent yummies. Little B loved helping spread the filling and, as always, frosting, just like the cupcakes we made a while back. Thank you to those who have followed my journey the past two year and welcome to those who joined me recently! Slainte!

Yowza Anniversary Cinnamon Rolls

Pastry
3 eggs
1/2 cup butter or coconut oil, softened
3 Tbsp erythritol/stevia blend
1/2 cup coconut flour
1/2 cup blanched almond flour
1/2 tsp aluminum free baking powder
1/2 tsp Celtic sea salt
1 tsp vanilla extract

Filling
3 TBS Coconut oil or Butter, softened
2 TBS Cinnamon
3 TBS erythritol/stevia blend
1/4 tsp stevia glycerite

Frosting
6 TBS cream cheese, softened (or coconut cream if dairy allergy)
3 TBS butter, softened
2 TBS spoonable erythritol/stevia blend
A little heavy cream (to thin it out, if desired)

Pastry: In a medium bowl, cream the butter and the sweetener until very smooth. Add in the eggs. In another bowl mix together the coconut flour, almond four/meal, salt and baking powder. Slowly add in the dry ingredients into the wet, then add in the vanilla. Stir until a thick dough forms. Cover and place in fridge to chill the dough for 1 hour or overnight.

Frosting: Place all ingredients into a medium sized bowl and combine until smooth. Store in fridge overnight. When you start the Pastry Again section below remove Frosting from the fridge.

Filling: Mix all ingredients together.

Pastry Again: Place a sheet of parchment on counter, then spray with coconut oil spray. Place dough on greased parchment, push the dough down a bit, and spray with another layer of coconut oil. Top with another sheet of parchment. Roll the dough out with a rolling pin until a long rectangle shape, about one foot long. Remove the top layer of parchment.

Spread filling evenly over the dough. Roll up dough, with the longer side becoming the roll, using the edge of the plastic to make a tight log. Cut into 1 1/2 inch pieces.

Place the rolls into a greased muffin tin or onto a cookie sheet about 1 inch apart. Bake in a preheated 350 degree oven for 15-20 minutes or until baked through. Insert a toothpick to check doneness…the toothpick should come out clean.

Spread the frosting on the rolls. Serve immediately to family members who were drooling over the smell of the baking rolls. Store extras in airtight container for up to one week at room temperature, or freeze.


Cornless Tamales…What?!

tamales loaded

Growing up in south Texas we adopted a Christmas Eve tradition of a tamale feast. This year was no exception. We made enough for Christmas Eve, Christmas Morning as well as New Years Eve! Our tradition used to include purchasing tamales, then piling them with queso, guacamole, meaty chili and chimichurri. A few years ago, when we no longer spent Christmas in San Antonio, there was difficulty finding good tamales. Tamales were available, but they were just off in size and flavor. We had no choice but to start making our own. At the time we made the masa with corn meal, and perfected the flavor of it to wonderfully compliment the pork filling. Now that we are watching our carbohydrate intake, the reliance on corn products is nil, which we wanted to carry over into our holiday tradition. If you have ever had tamales, you know there is a specific texture to masa in a tamale, and there is supposed to be a hint of smoky spiciness to the middle meat filling. Some people may be on the verge of offended when I talk about masa without corn, for the word typically represents a corn-based dough used for all kinds of dishes, including pupusas, tortillas and of course tamales. For our version we used flaxseed meal and coconut flour to achieve the required texture. We also used what may seem like a lot of salt, but with the flaxseed and coconut products it is needed, to give a little help to the pork for it all to work together and carry the spice flavors through to the final dish. The tamales turned out flavorful and robust, able to compete (in a good way) with the toppings, and with a texture almost exactly like corn masa. Big D appeased me by measuring the ingredients this time around so we could record an actual recipe it for posterity. He is usually an eye it, taste it, add more, dash here, sprinkle there kind of cook, so it was a bit of a stretch, but he survived. With my mom visiting for the holidays we had loads of fun showing her the process and had three generations of family in the tamale-making production line, just like things should be. I hope you enjoyed your holidays and consider our scrumptious medley in your future celebrations. We will never forget it and hope to repeat it in the years to come!

Cornless Tamales….What?!

Masa
2 cups coconut flour
2 cups golden flaxseed meal
¼ pound lard, melted
2 eggs
2 Tbsp ground cumin
1 Tbsp garlic powder
1 Tbsp chili powder
3 Tbsp sea salt
5 – 6 cups liquid retained from meat filling

24 – 36 corn husks, soaked in water for at least one hour

Meat Filling
2 pound pork roast
1 small onion, diced
5 cloves garlic, crushed
1 Tbsp cumin seeds
2 jalapenos, diced
1 cup roasted green chiles (canned or fresh), diced
2 chipotle peppers with adobo sauce from can (use about 1 Tbsp of sauce)
1 cup water
2 Tbsp sea salt

Toppings
1 Batch fresh or canned beef chili
1 Batch Guacamole
1 Batch Chimichurri
Queso (1 pound processed cheese loaf melted with 1 can Rotel tomatoes and chiles)
Sour Cream

Sear sides of the pork roast in a large skillet, then place roast in a crock pot. In the same skillet add bacon grease and melt over medium-high heat. When melted add onion, garlic, cumin seeds, jalapeno and chiles. Cook until seared. Add chipotle peppers and adobo sauce to mixture and continue cooking until combined and heated through. Transfer seared mixture to crock pot over the roast. Add 2 tablespoons of salt and water, then cook roast on low for 8 – 10 hours. Turn crock pot off and let cool for a few hours. Drain liquid and shred meat with a fork, retaining the liquid for masa.

While meat cools make the masa. Combine flaxseed meal, coconut flour, cumin, salt and garlic powder in a bowl. Add lard to mixture and combine into a dough. Add liquid from the meat one cup at a time until it is the consistency of soft peanut butter – you will need anywhere from four to six cups.

To build the tamales pat dry one corn husk, then lay it flat on your work surface. Spread masa evenly in the middle of the husk, leaving 1 – 2 inches clear at the top and bottom, and along one side. Drop a row of pork along the middle of the masa, to the very edges of where it is spread. Gently roll the tamale, making sure the masa completely envelopes the pork in the middle. Overlap the sides of the husk and fold the small end up. A small strip of husk can be used to tie around the tamale to keep it closed, or just lay completed tamales face down so seams to not come apart. Repeat process until you run out of supplies.

In a deep stock pot with pasta/steamer insert, fill bottom of pot with water, but no higher than the bottom of the steamer insert – tamales should not be sitting in water at all. Fill the insert with tamales by lining them up vertically, with folded end down. Place cover on pot and heat to boiling, then turn heat down to simmer, making sure steam continues to rise. Steam tamales for about one hour, until the masa is firm and they are heated through. Remove tamales from pan and lay out in a single or double layer, allowing them to dry out a bit. When ready to eat, unroll the tamales from the husk and eat plain or smother with your toppings of choice.


Wheatless Pecan Pie

low carb pecan pie

Posting about a wheatless, sugar free pecan pie has been a long time coming. We have tried a number of variations, trying to get the texture and flavor of the pie just right. I officially think we have gotten so very very close that we are going to call it good. No, great! Pecan pies have a deep history in both mine and Big D’s histories. It begins with pecans. Harvesting pecans is a popular past time in the South, and in Texas. Yes, Texas and ‘the’ South are different. That is a whole other conversation/discussion/argument. For the here and now we are talking about a traditional holiday dessert. The challenge we faced was getting that smooth, gelatinous, caramel texture of the pie, while still having pecan halves floating atop the pie. You cannot imagine how challenging it is to accomplish without sugar, milk or flour. It is not impossible, which I must say, is proven below, but was definitely not a first-time feat. We very much enjoyed the pie, along with some pumpkin pie, after our feast of prime rib and mashed cauliflower. It was a simple, delicious meal. I hope you kept your holiday meal simple and focused on your people, because I know in my life that my people are most cherished.

Wheatless Pecan Pie

Crust
3/4 cup coconut flour
1/2 cup toasted pecan halves
3 large eggs
8 tablespoons chilled butter or coconut oil
2 tablespoons Stevia in the Raw granular
1/4 teaspoon fine sea salt

Filling
3 eggs, beaten
1 cup Stevia in the Raw granular
1 teaspoon vanilla extract
1/8 tsp salt
2 tablespoons butter, melted
1 cup Walden Farms Pancake Syrup
2Tbsps chia seeds
1 1/2 cups toasted pecans (chopped or halves)

For the crust combine the coconut flour, 1/2 cup pecan halves, fat (either butter or coconut oil), Stevia in the Raw and salt in food processor and pulse until combined and pecans are finely chopped. Add the eggs and pulse until a dough is formed. Spread the dough evenly into the bottom and sides of a 9 1/2 inch tart or pie pan. For the filling beat the eggs with the Stevia in the Raw. Add the vanilla, butter and syrup, then add the pecans. Pour into the crust and bake at 350°F for about 45 minutes, but check after about 30 minutes in case it is cooking quickly. Let pie cool to room temperature before serving, or after it cools to room temperature, chill before serving.

Place the tart onto a sheet pan and bake in the oven at 350 degrees for approximately 45-50 minutes. Check the tart at 30-35 minutes. Cool on a wire rack.


Cookie Cut Ups

cookie cut upsThis is the tale of the cookies that kept cutting up. I found the delicious recipe from Ginny at Ginny’s Low Carb Kitchen. I mostly followed it, but made a tweak or two because of timing – there was nooooo way I was going out in the snow storm to buy xanthan gum, and Little B was gonna die if she could not make cookies soon! I don’t know how different they turned out without it, but we had success! Eventually. Little B and I mixed up the dough, rolled it out and ugh. A bit too soft for manipulating. I suggested to Little B that we form the cookies into shapes with our hands, but she insisted on using the cookie cutters. The cookie cutter use was a disaster. We piled up the dough and stuck it in the refrigerator for an hour. We rolled it out – again – with slightly more success, but still smooshing of the shapes by the spatula, even with a bit of help from arrowroot powder. Ack! Little B still insisted on cookie cutter use, so we again chilled the dough, for about six hours this time, occupying ourselves with movies and art projects and carols. When it was finally time to try again it worked! The cookie cutters did their duty, as long as we made sure to ‘shimmy’ them before pulling them off, separating the shape from the extra dough around it. I then carefully tilted the parchment paper and the shapes, one by one, fell onto my hand. They were delicate, but cooked up nicely and were very buttery and nutty; a wonderful accompaniment to hot chocolate. I will be more adventurous next time figuring out icing, but for now, we were able to experience cut out cookies on a snowy Alaska day, even though they resisted. Kudos to Little B for holding out for use of cookie cutters, and being flexible enough to hand shape those pesky candy canes! Three were set aside especially for Santa. Fingers crossed to have them survive that long!

Cookie Cut Ups

1/2  cup  Stevia in the Raw
1/2  cup  butter
1  large  egg
1  teaspoon  baking powder
1  teaspoon  vanilla
1/2  teaspoon  salt
2 cups  almond flour
In a food processor blend together Stevia, butter, egg and vanilla. In a medium bowl combine the baking powder, salt and flour. Add the butter mixture to the flour mixture and combine into a stiff dough. Refrigerate for 2 – 6 hours. Sprinkle a square piece of parchment paper with arrowroot powder, and have another piece of parchment of the same size nearby. Also prepare a large baking sheet covered with parchment paper and preheat the oven to 350 degrees. Remove dough from refrigerator and work quickly with it. Place dough between parchment paper and roll it out 1/8 to 1/4 inch thick. Carefully peel off top layer of paper and use cookie cutters to make cookies. Two methods can be used to transfer cookies to the baking sheets. Either tilt the paper, letting the cookie fall into your hand, transferring the cookie to the baking sheet, or sprinkle a thin spatula with arrowroot powder and use it to slide under the cookies and remove them from the parchment paper. Bake for 10 – 15 minutes, until the edges start to turn a golden brown. Let cookies cool completely before removing them from the baking sheet. Frost as desired and store in airtight container.
 

Pancakes a la Coconut Flour

coconut flour pancakes

On weekend mornings we sometimes go to a restaurant for brunch. More often then not we end up making complicated orders to cut out starches and wheat, or rely solely on the a la carte menu to fit our diet. Inevitably the ordering process is interrupted while the server makes a trip back to the kitchen to confirm whether or not we can substitute a salad or vegetables for the hash browns and toast. Skimming through the majority of the menu items, most of which involve cakes, toasts, waffles and syrups, reminds me of Sunday mornings growing up. After returning home from church we would all change into our sweats and dad would set up the production line – he would make dozens of waffles, which we would eat on for a month out of the freezer, and enjoy hot, fresh ones immediately. Other days he would make pancakes, with a resulting mound of leftovers reaching a foot high or more. Those extras went into the freezer, too. There was always a bag of one or the other that could be pulled from and popped in the microwave for a quick meal anytime. I have avoided making waffles or pancakes since our shift to wheat free eating because of the obvious barriers of wheat and syrup. After pondering for a while and looking into a bunch of recipes, I think I came up with one that will fill in the sentimental weekend brunch gap. Thank you Carol over at Ditch the Wheat for the trial and error and the resulting great recipe (even though I did tweak it a bit). The cakes turned out great – when Big D and I bit into them we looked at each other, our eyes got wide and we shared our amazement at how similar they were to the pancakes of our childhood! Topped with some Kerry Gold Irish Butter and some Da Vinci sugar free syrup, they were extremely satisfying. Making them also brought back some fond memories of my dad, who passed away about two years ago and always spent happy times in the kitchen. We are definitely making these again, if for no other reason than because I promised Little B we would do so, after seeing her face was so sad when she learned they were all gone. Gotta stock up that freezer! And next weekend I am gonna show her how to eat them with my mom’s wonderful southern contribution slathered on top – peanut butter!

Pancakes a la Coconut Flour

2 tbsp extra virgin coconut oil
Sprinkle of ground cinnamon
3 large eggs
1/4 cup coconut milk
1/2 tsp vanilla extract
1/4 cup coconut flour, sifted
1 tsp powdered stevita (or 1 Tbsp Stevia in the Raw)
1/4 tsp cream of tartar
1/8 tsp baking soda
1/8 tsp sea salt
Additional coconut oil or butter for cooking

Cream together the coconut oil and cinnamon. Add the eggs one at a time. Add coconut milk and vanilla. Mix until smooth. Add coconut flour and stevita. Mix until smooth. Lastly add cream of tartar, baking soda and salt. Do not over mix the batter. Over mixing will result in the baking agents (cream of tartar & baking soda) not working. Use a ladle and pour small amount of batter into a crepe pan or large frying pan with butter or coconut oil on medium heat. Flip once the bottom is light brown and edges are set enough to flip without losing shape. The pancakes will not bubble as much as “regular” pancakes. Serve immediately with a drizzle of syrup. One batch makes about 8 pancakes, so double and triple as needed to feed your clan.

Topped Oatmeal Cookies

oatmeal cookies no wheat

We made these for Santa last year, topped with blueberries. We decided our house was the only one in the whole wide world where he would get blueberry oatmeal cookies. In the morning the cookies and milk were all gone! He must have liked them. I forgot to take pictures then, but recently made a batch with Little B and she wanted to top them with sugar free chocolate chips instead of blueberries. Wheat free and sugar free, these went with Little B to her last day with her daycare group in Maryland before we moved. The group gets so excited just being around each without any stimulation, why the heck would I put wheat or sugar in the treats?! They were soft and chewy and seemed to be a hit. We may make them for Santa again this year, and try again to make them memorable. Involving Little B in deciding the topping and standing back so she can stir stir stir makes for a great opportunity to practice measuring, mixing and creativity. Go crazy with the toppings – she was so proud to share her creations. I got the original idea here, but tweaked to my liking. Thanks Alton!

Toasted Oatmeal Cookies (no wheat)

4 cups old fashioned rolled oats
1 tsp baking powder
½ tsp baking soda
1 tsp cinnamon
½ tsp sea salt
1 tsp unsweetened cocoa powder
1 cup butter, room temperature
1 cup granulated stevia in the raw
3 large eggs
2 tsp vanilla extract
1 cup optional toppers (raisins, blueberries, sugar free chocolate chips, etc)

Heat the oven to 375 degrees F. Spread oats in a single layer on half-sheet pans and bake until lightly toasted, about 20 minutes. Watch carefully to avoid burning. Remove the oats from the oven and let cool for 2 to 3 minutes. Grind half the toasted oats in a food processor until they are the consistency of whole wheat flour. Add the baking powder, baking soda, cinnamon, cocoa, stevia and salt, then pulse to combine. Combine the butter, egg and vanilla in a mixer and mix on medium speed for about a minute. Slowly add the oat mixture and the remaining oats until just combined. Let batter sit and thicken if it is soupy and will not hold shape if scooped. Using a teaspoon, scoop batter and drop onto baking sheets lined with parchment paper. If adding a topping gently push into the middle of each cookie. Bake the cookies for about 12 minutes until they begin to brown around the edges. Remove the pans from the oven and let the cookies cool on the pans for 2 minutes. Transfer the cookies to a cooling rack until cooled completely – they should remain soft and chewy. Store in airtight container.


Camp Scramble

camp scramble 5We went on a final camping trip in Maryland before moving west. This time I actually remembered to take pictures of our typical breakfast – a rare multi-step pictorial is provided for your viewing pleasure. Not because pictures were necessary, but because I just went a little picture crazy and could not decide on a single one. Our egg preparation process, which reduces any extra mess, and gives Little B an opportunity to help without being to near the propane stove that often sits a bit precariously on a tilted picnic table. Although this overnight trip did not require much prep before leaving home (we actually hit the grocery store on the way to the campground), we often take a few extra steps before going camping to make meals delicious, yet simple. For example, mixing ground beef with herbs and spices and dumping it in a resealable bag makes for some flavorful burgers without having to schlepp a bunch of spices separately. For eggs we often break them into resealable bags – enough eggs for using one bag each camp morning – and the transport in the cooler minimizes the space used up by eggs and helps to scramble them en route. Simple salt, pepper and butter completes the dish. This most recent trip included the addition of cheese to officially call the result a scramble instead of just scrambled eggs. And yes, for you egg connoisseurs, I appreciate the difference between the purity of scrambled eggs and the corruption of adding non-egg ingredients. This resealable bag technique also works well at home with little ones who have not yet mastered the use of a whisk and bowl, but want to help.

Camp Scramble

8 – 9 eggs (2-3 eggs per person)
1/2 cup shredded cheddar cheese
Salt and pepper to taste
1 Tbsp butter
Resealable bag – quart or gallon will work

Break eggs into bag.

camp scramble 1


Sprinkle with salt and pepper. Add cheese.

camp scramble 2nd


Smush and mush bag contents until yolks and whites are combined.

camp scramble 3


Heat pan to medium high, add butter. When butter is melted pour egg mixture into heated pan and stir gently until egg is cooked.

camp scramble 4


Coconut Macaroons

coconut macaroons

Big D is all about things coconut. Well, maybe not ALL things, like blue coconut sno cones, but definitely macaroons. I have discovered recently that my longstanding disregard for coconut was primarily based on exposure to sweetened strips of coconut. You know, the stuff in bags from the baking aisle of the store that is oft used for cookies and cakes? It is just too, pitchy and string for my taste. It always made me pucker. Our discovery of coconut flour as a low carb thickener and baking ingredient has changed my mind. Along with coconut oil I have found the coconut flour and unsweetened coconut meat are great conduits for baking – wheat free, high fiber, low carb tasty treats have come out of our kitchens over the past year. I am finally getting around to making this Big D favorite treat. These macaroons are a little too coconut-y for my taste but Big D and Little B scarfed them right down – almost the whole batch before lunch! Big D said that after they sat for a day and were chilled they had the chewy middle he loves about such macaroons, do double yay me. I looked through a bunch of recipes to figure out a good coconut/liquid ratio, but not sure there is a single source to credit, so thanks all you low carb macaroon makers out there! I plan to make a big batch right before our big move so we can nibble on them as we toodle across the country, or at least into the next state. By the way,
I promised credit to Litte B – I had a pile of macaroon for a picture, but Little B insisted on nestling each one carefully in mini muffin papers – after half an hour of manipulation she came up with the wonderful presentation you see above. Beautiful!

Coconut Macaroons

1 1/4 cup unsweetened minced coconut
1/4 cup coconut oil
1 cup granulated erythritol
2 egg whites
2 Tbsp heavy whipping cream
2 Tbsp water

In a medium sauce pan combine coconut, coconut oil, erythritol, cream and water. Stir over medium heat until erythritol is dissolved – if you use finely minced coconut the mixture should be rough and not soupy at all. Remove from heat and let cool for about twenty minutes, so the mixture won’t cook the egg whites. Preheat oven to 350F. Whisk egg whites until they hold shape, but stop before stiff peaks form. Fold egg whites into coconut mixture. With your hands gently form dough into balls no larger than 1″ in diameter. Place on baking sheet lined with parchment paper – one batch should make 16-20 macaroons. Bake for 12-15 minutes, until bottoms begin to brown and tops get brown edges. Let cool before removing from parchment. Store in refrigerator or room temperature in air tight container.

Fickle Coconut Flatbread

coconut flour flatbreadThe flatbread you see here is what I consider part one of an experiment. The goal is to find a quick, easy recipe to make tortilla-type rounds that are low carb and can hold stuff. I mean substantial stuff. Not a dainty piece of fish and a sprinkle of cheese, but a hefty strip or three of fajita meat along with guacamole, chimichurri, queso and sour cream. It is no small feat for a hearty flour tortilla to be able to contain such a pile, but for coconut flour recipe results that tend to be delicate, it is a bigger challenge. After doing a bit of research I came up with the following results. The recipe is a combination of the recipe found here and some of the input in the trailing comments connected to the recipe, so this is my best attempt at giving credit where due. The flatbread is useful for layering, or representing a polenta-type base, but not the ultimate tortilla I was looking for. I will keep this recipe handy, for it tastes really good and was useful and fit the quick and easy requirements I set out. A little fickle (aka delicate), but what is a good cooking experiment without a little fickle? I look forward to part two…

Fickle Coconut Flatbread

4 whole eggs
1/4 c coconut oil
2 pinches salt
1/2 c coconut flour
1/4 tsp baking powder
2/3 to 1/2 c coconut milk or water
1/2 – 3/4 cup butter or coconut oil for cooking

Combine the flour, oil, baking powder, salt and eggs in a food processor. process until a thick batter forms. Let sit until it thickens, about three minutes. Add enough liquid to make a somewhat loose batter. Pour 1/4 c of batter into a  well greased, well oiled frying pan over medium high heat. Cook on one side until the sides begin to brown and the middle starts to set, about three minutes. Gently flip the flatbread and cook for about three more minutes, until it is completely set.

Post Navigation