Any Kitchen Will Do

Give me a kitchen and I will cook.

Archive for the category “flaxseed”

Pizza Reboot

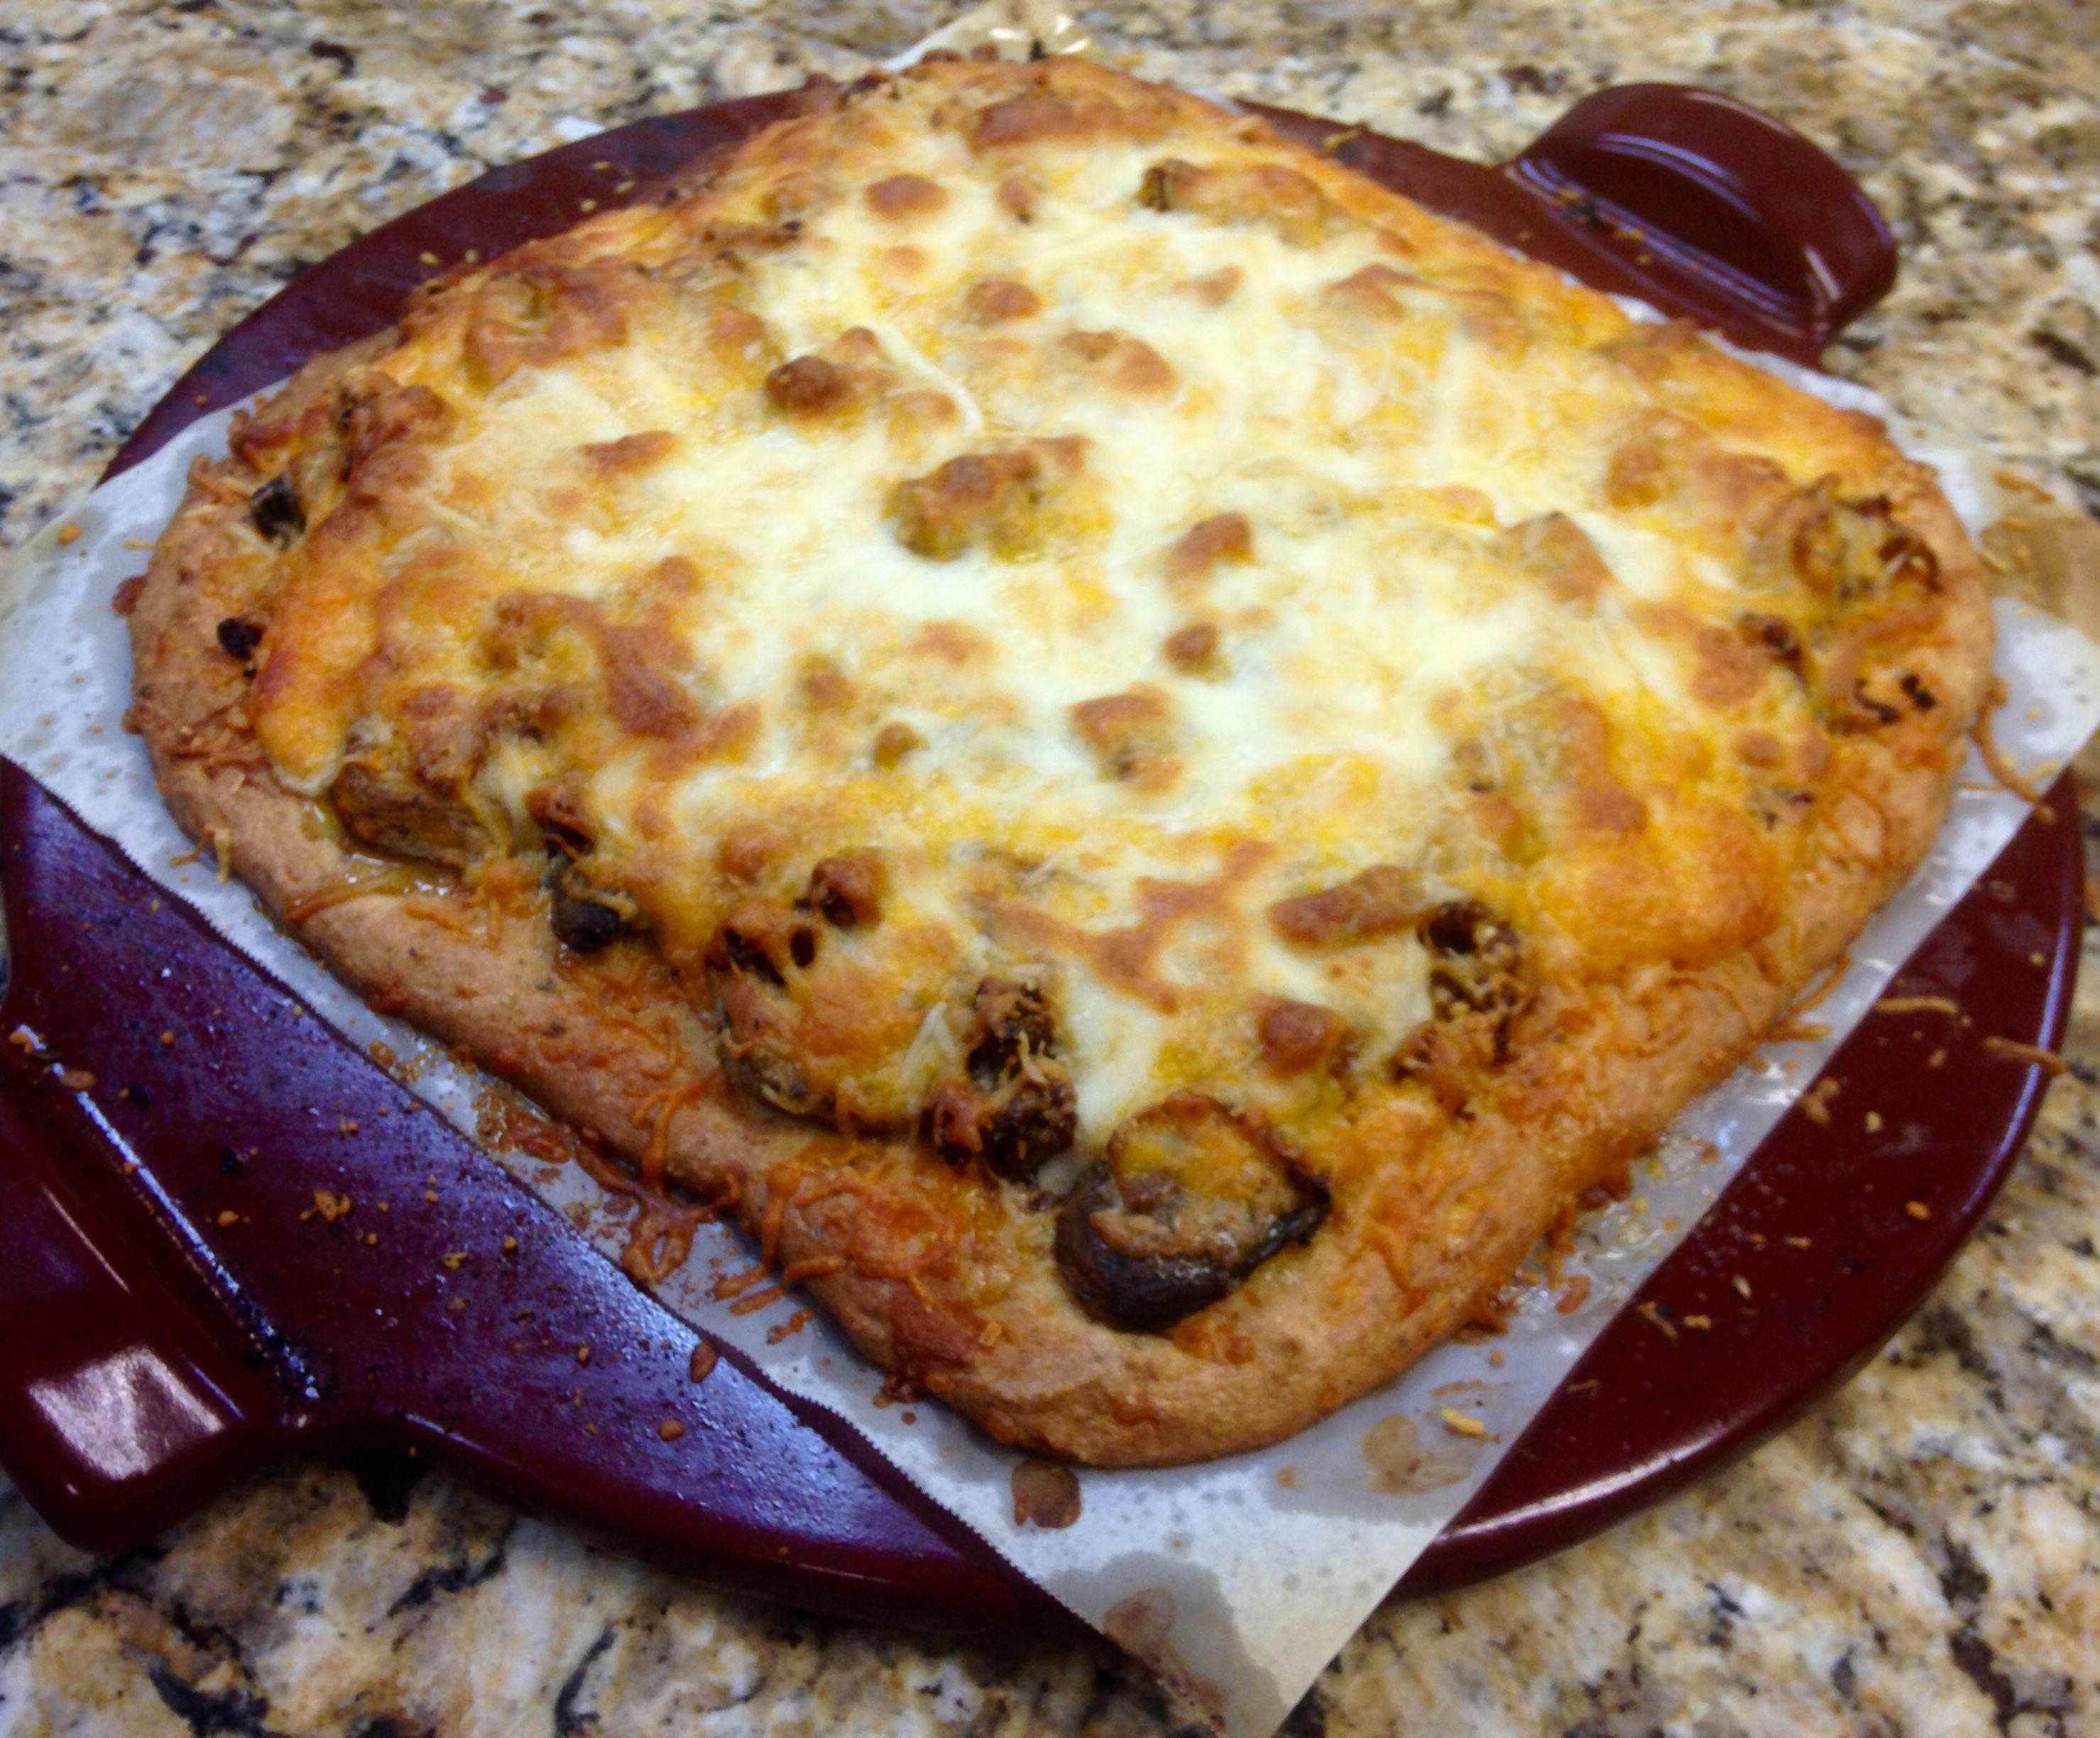
pizzarebootThe other day it was warm and rainy. We were hungry and had previously talked about creating a new to us pizza crust. Since we had time and wanted to stay dry, we made an absolute mess of the kitchen and had wonderfully successful results from our experiment.

It was a great day. Our schedules have been almost opposite lately, with each of us pursuing our multiple streams of income, while juggling the fun and awe we experience watching our Little B grow and explore. It was nice to be at the same place at the same time, in the kitchen, with our daughter supervising from the nearby barstool. Throughout our dozen years of marriage, the kitchen has been a foundation where we reconnect and learn new things together. It was so nice to be back in it after running around with our heads cut off lately!

This pizza crust is the closest to a traditional, grain-based crust we have created, with the ability to pick up a piece and take a bite while still hot. Our other recipes result in slices, but to handle them with other than a fork or knife (blasphemy!!!) they have to cool significantly. With our pizza reboot here, Big D especially enjoyed the ability to almost burn his fingers and run a string of hot cheese connecting slice to mouth.

Although not pictured, we made a second pizza for Little B, testing our crust recipe against one of pizza’s greatest critics – a seven year old. She loved her go-to combination of tomato-based sauce, pepperoni and black olives. I think the fact she ate four pieces between lunch and dinner tells you something!

In the past we have made some good crust with an almond flour base, with a neutral flavor that allows the topping and sauce to shine. Prior to that, we made a hearty cheesy crust that was our staple for years. Other variations on the pizza theme, absent actual crusts, included a squash based pizza casserole, portabello mushroom pizzas and little, two-bite pizza pucks! Whether you have two hours or twenty minutes, grain free pizza can be yours!

As always, there is no limit to the sauce and topping combinations you can use. I list below what we did for a sweet and spicy result. Have fun with it, whether it is raining outside or not!

Pizza Reboot

1 cup extra virgin olive oil
12 large eggs (about 2 1/4 cups), whisked
1/3 cup apple cider vinegar
1/2 cup water
1 cup coconut flour
1/3 cup golden flaxseed meal
1 1/2 teaspoon sea salt
1/2 teaspoon dried basil leaves
1/2 teaspoon dried oregano leaves
1 tablespoon garlic powder (we are garlic fiends, so if you are less so reduce the amount)
1 cup finely grated cheddar and mozzarella cheeses

Suggested Toppings

1/2 cup ranch dressing
1/2 pound ground hot Italian sausage, cooked
3/4 cup caramelized onions or 1/2 cup onion paste *
1 cup sautéed mushroom slices*
Crystal hot sauce
1 cup finely grated cheddar and mozzarella cheeses
1/2 cup grated Parmesan cheese
Additional dried herbs to taste (parsley, basil, oregano, garlic…)

Preheat oven to 400 degrees. Prepare your pizza baking surface – preheat pizza stone as directed for stone, or line two shallow baking sheets with parchment paper.

NOTE: The pizza stone crusts will be smaller and thicker, while the 2 baking sheet version will result in a thinner, crispier crust.

ANOTHER NOTE: As an extra precaution we use parchment paper on our pizza stone (as you can see in the picture), but it may not be necessary. Since we have one pizza stone and make two pizzas, the paper makes it easier to remove the first pizza immediately and move on to the second.

In a mixing bowl combine oil, eggs, apple cider vinegar and water.

In a medium bowl combine the dry ingredients of coconut flour, flaxseed meal, salt, basil, oregano and garlic powder.

With the mixer on low add the dry ingredients to the wet. Increase mixer speed to medium until ingredients are well combined. Add cheese and stir until well distributed. Divide batter in half.

Pour half the batter on the preheated pizza stone or on a prepared baking sheet. Spread batter to desired thickness. Bake for 15-20 minutes, until top sets and edges begin to brown. The browning on top is a signal that the center of the bottom is cooked sufficiently to hold together when the pizza is done.

Remove crust from oven and add desired sauce and toppings. For the toppings I list above we did ranch dressing, Crystal, mushrooms and onions, herbs, Crystal, grated cheese, sausage, herbs, Crystal, cheese. We like Crystal and a little spicy bite to our pizza. Can you tell?

Bake pizza for 15 – 20 minutes, until crust edges brown and cheese in center is melted and starting to brown. After 15 minutes watch pizza closely until it is browned to your preference.

Remove from oven, let cool five minutes, then slice and serve!

*an alternative to separately prepared onions and mushrooms is a quick mushroom onion sauté
Big D’s Breakfast Mix

bigdbreakfastmix

Big D and I have a big love of oatmeal. It started when we were children and carried on into adulthood. It has always been a staple on our camping and kayaking trips – easy to pack and prepare simply with water (ideally hot if we properly manage our alcohol stove fuel). Although our love for the stuff carries on, our desire to avoid high carbohydrate foods is now ever present.

The other morning we decided to try some of our staple pantry ingredients to make a low carbohydrate version of a morning porridge. The chia seeds worked well as a thickener, and gave us all serious boosts of energy that lasted pretty much all day, which is very much needed during a cold winter day.

After making a thinner version for Little B, she came on board with our concoction as well, followed by the demand to recite the old porridge-centric fairy tale, The Three Bears. Quite appropriate, I thought! I am thinking future batches may include a bit of peanut butter, or sprinkling of cocoa powder for fun. Little B will eat pretty much anything with berries on it, so it is almost a sure thing in the future for her too!

The mix recipe can easily be doubled or tripled, as long as it is kept in an air tight container, so go ahead and stock up!

Big D’s Breakfast Mix

1 cup golden flaxseed meal
1 cup shredded unsweetened coconut
2 cups almond meal
2/3 cup chia seeds
1/4 cup ground cinnamon
2 teaspoons sea salt

For Single Serving
1/2 cup breakfast mix
1/2 cup hot water
¼ cup heavy cream or other milk product (soy, almond, cashew, lactose free…)
Dash of preferred sweetener (optional)
Nuts or berries (optional)

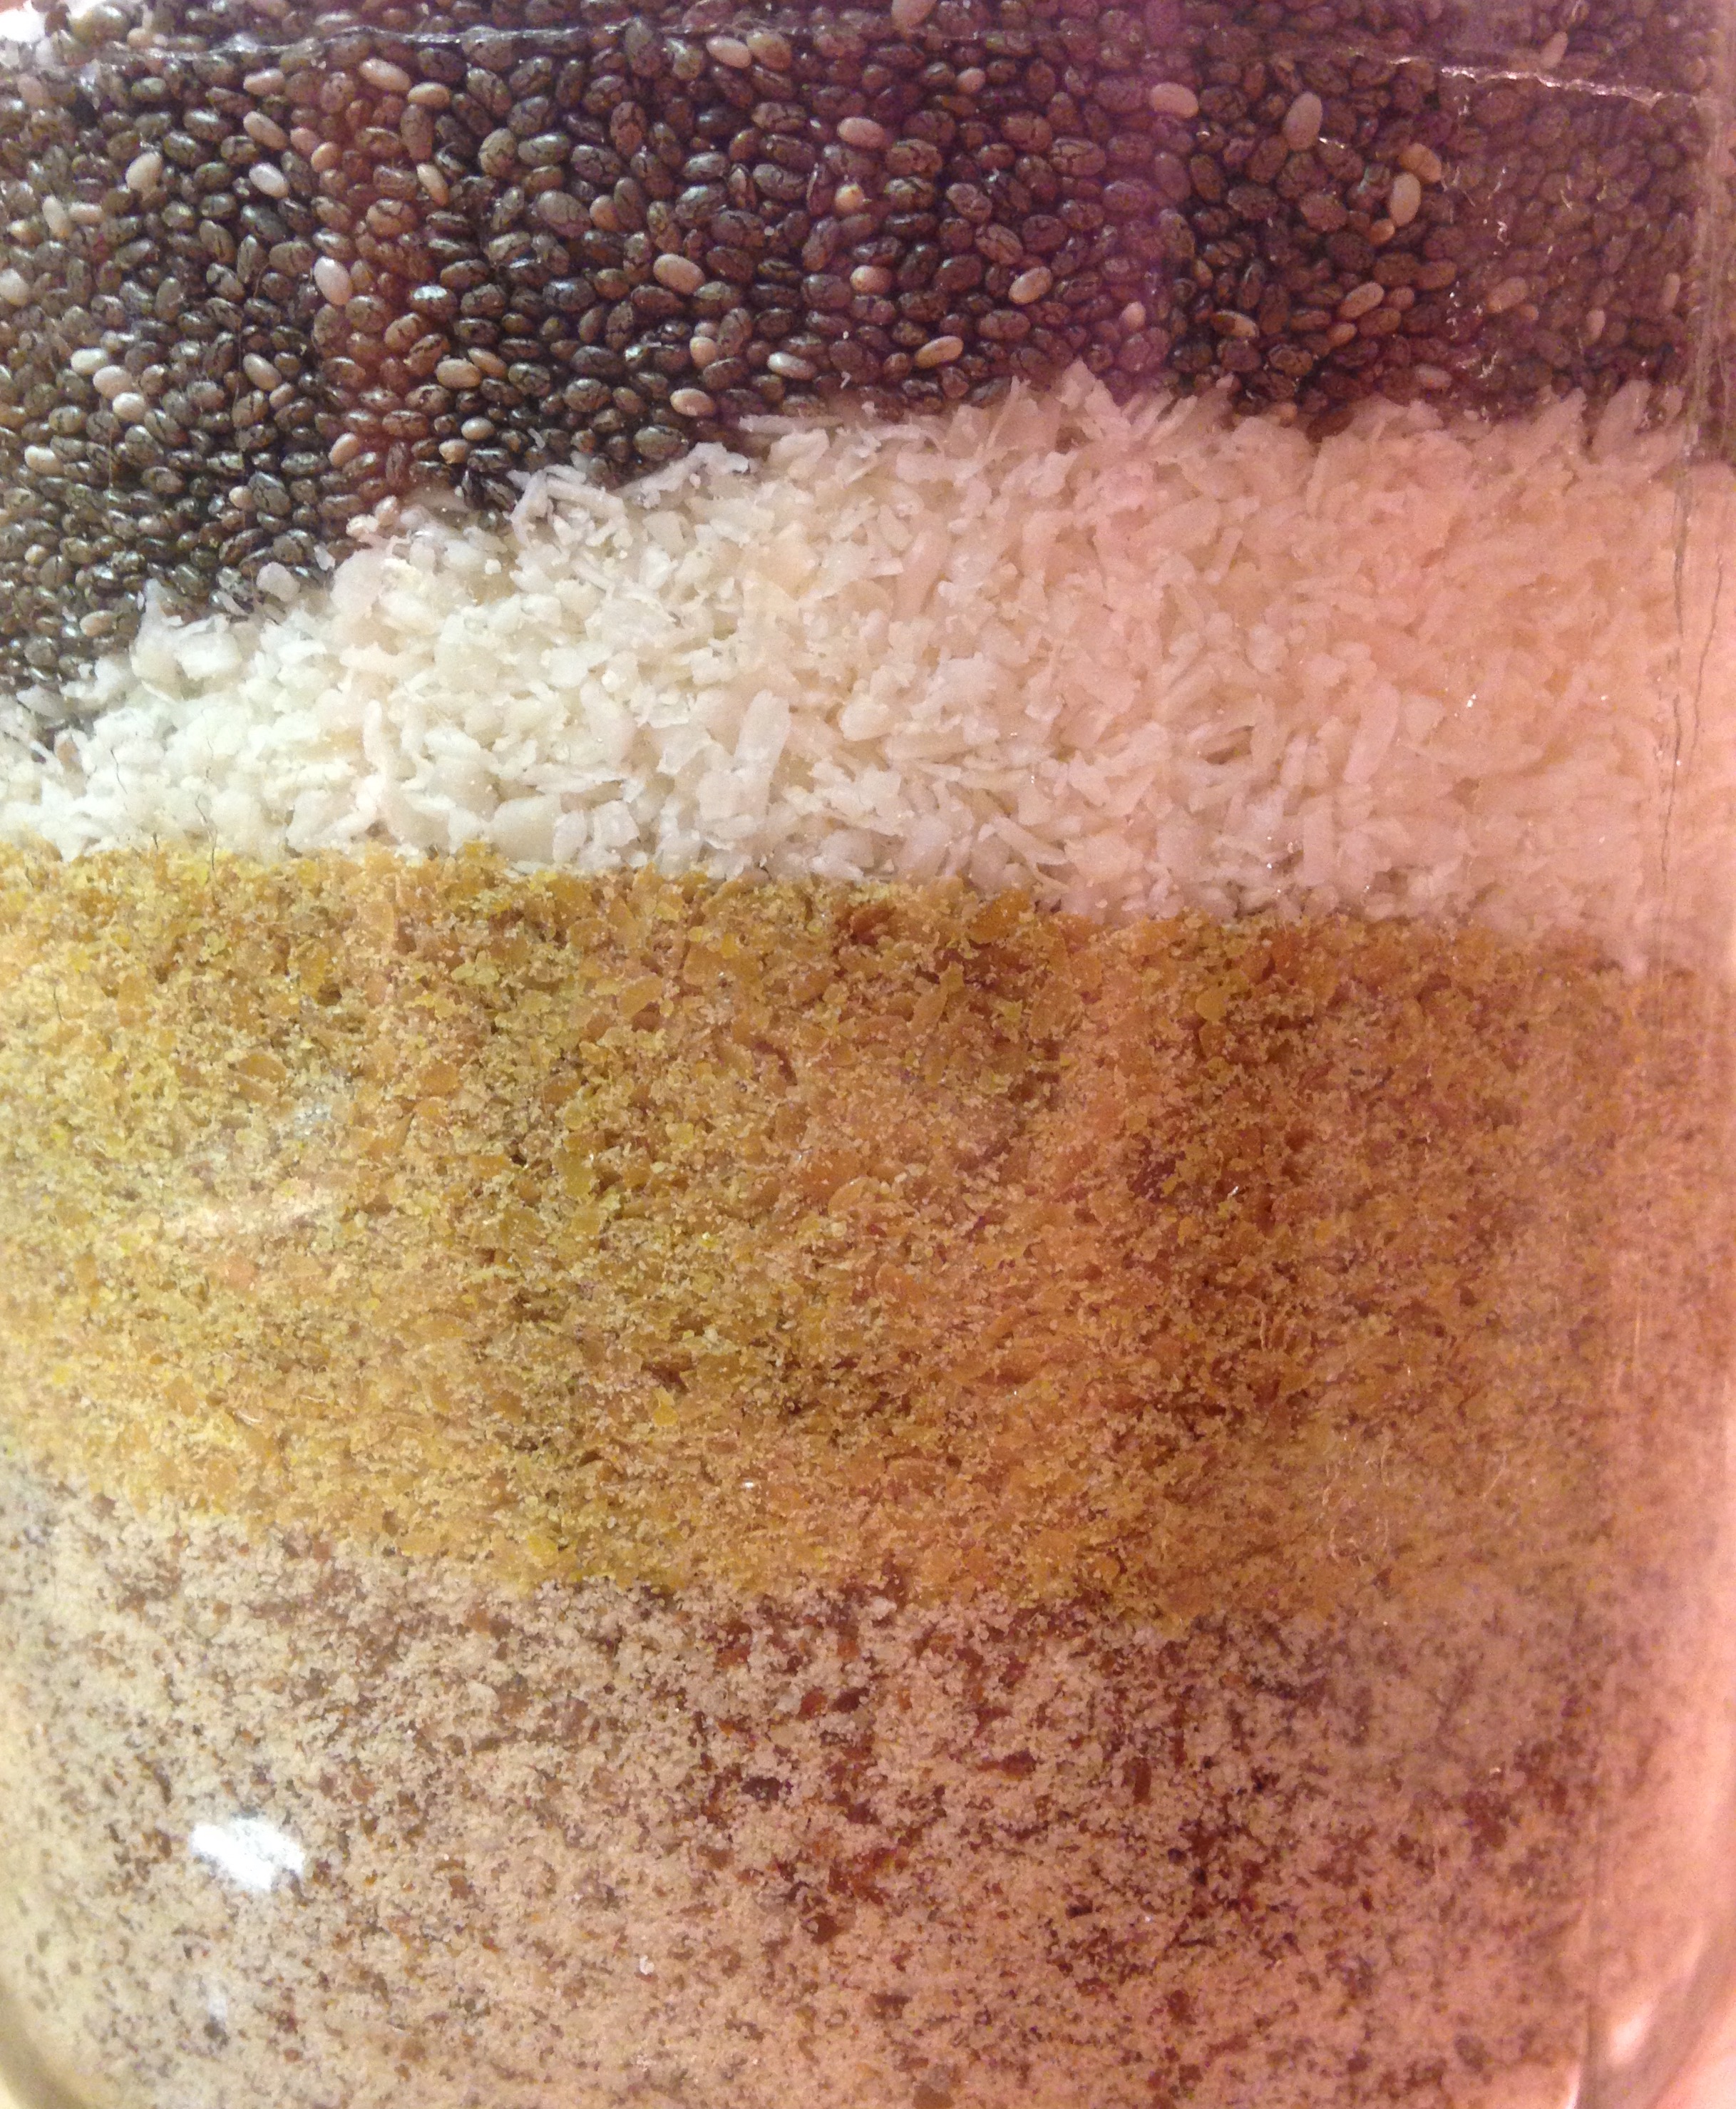
Combine flaxseed meal, coconut, almond meal, chia seeds, cinnamon and salt in an air tight container. Stir or shake until ingredients are well mixed together.

To prepare a bowl of breakfast mix, stir the bulk mix, then scoop ½ cup of the mixture in a bowl. Add hot water and stir, then add sweetener and cream. Stir once more and then let sit for at least one minute to thicken. Add more hot water to adjust thickness as desired. Add nuts or berries if desired and eat immediately.

Foccacia

Foccacia

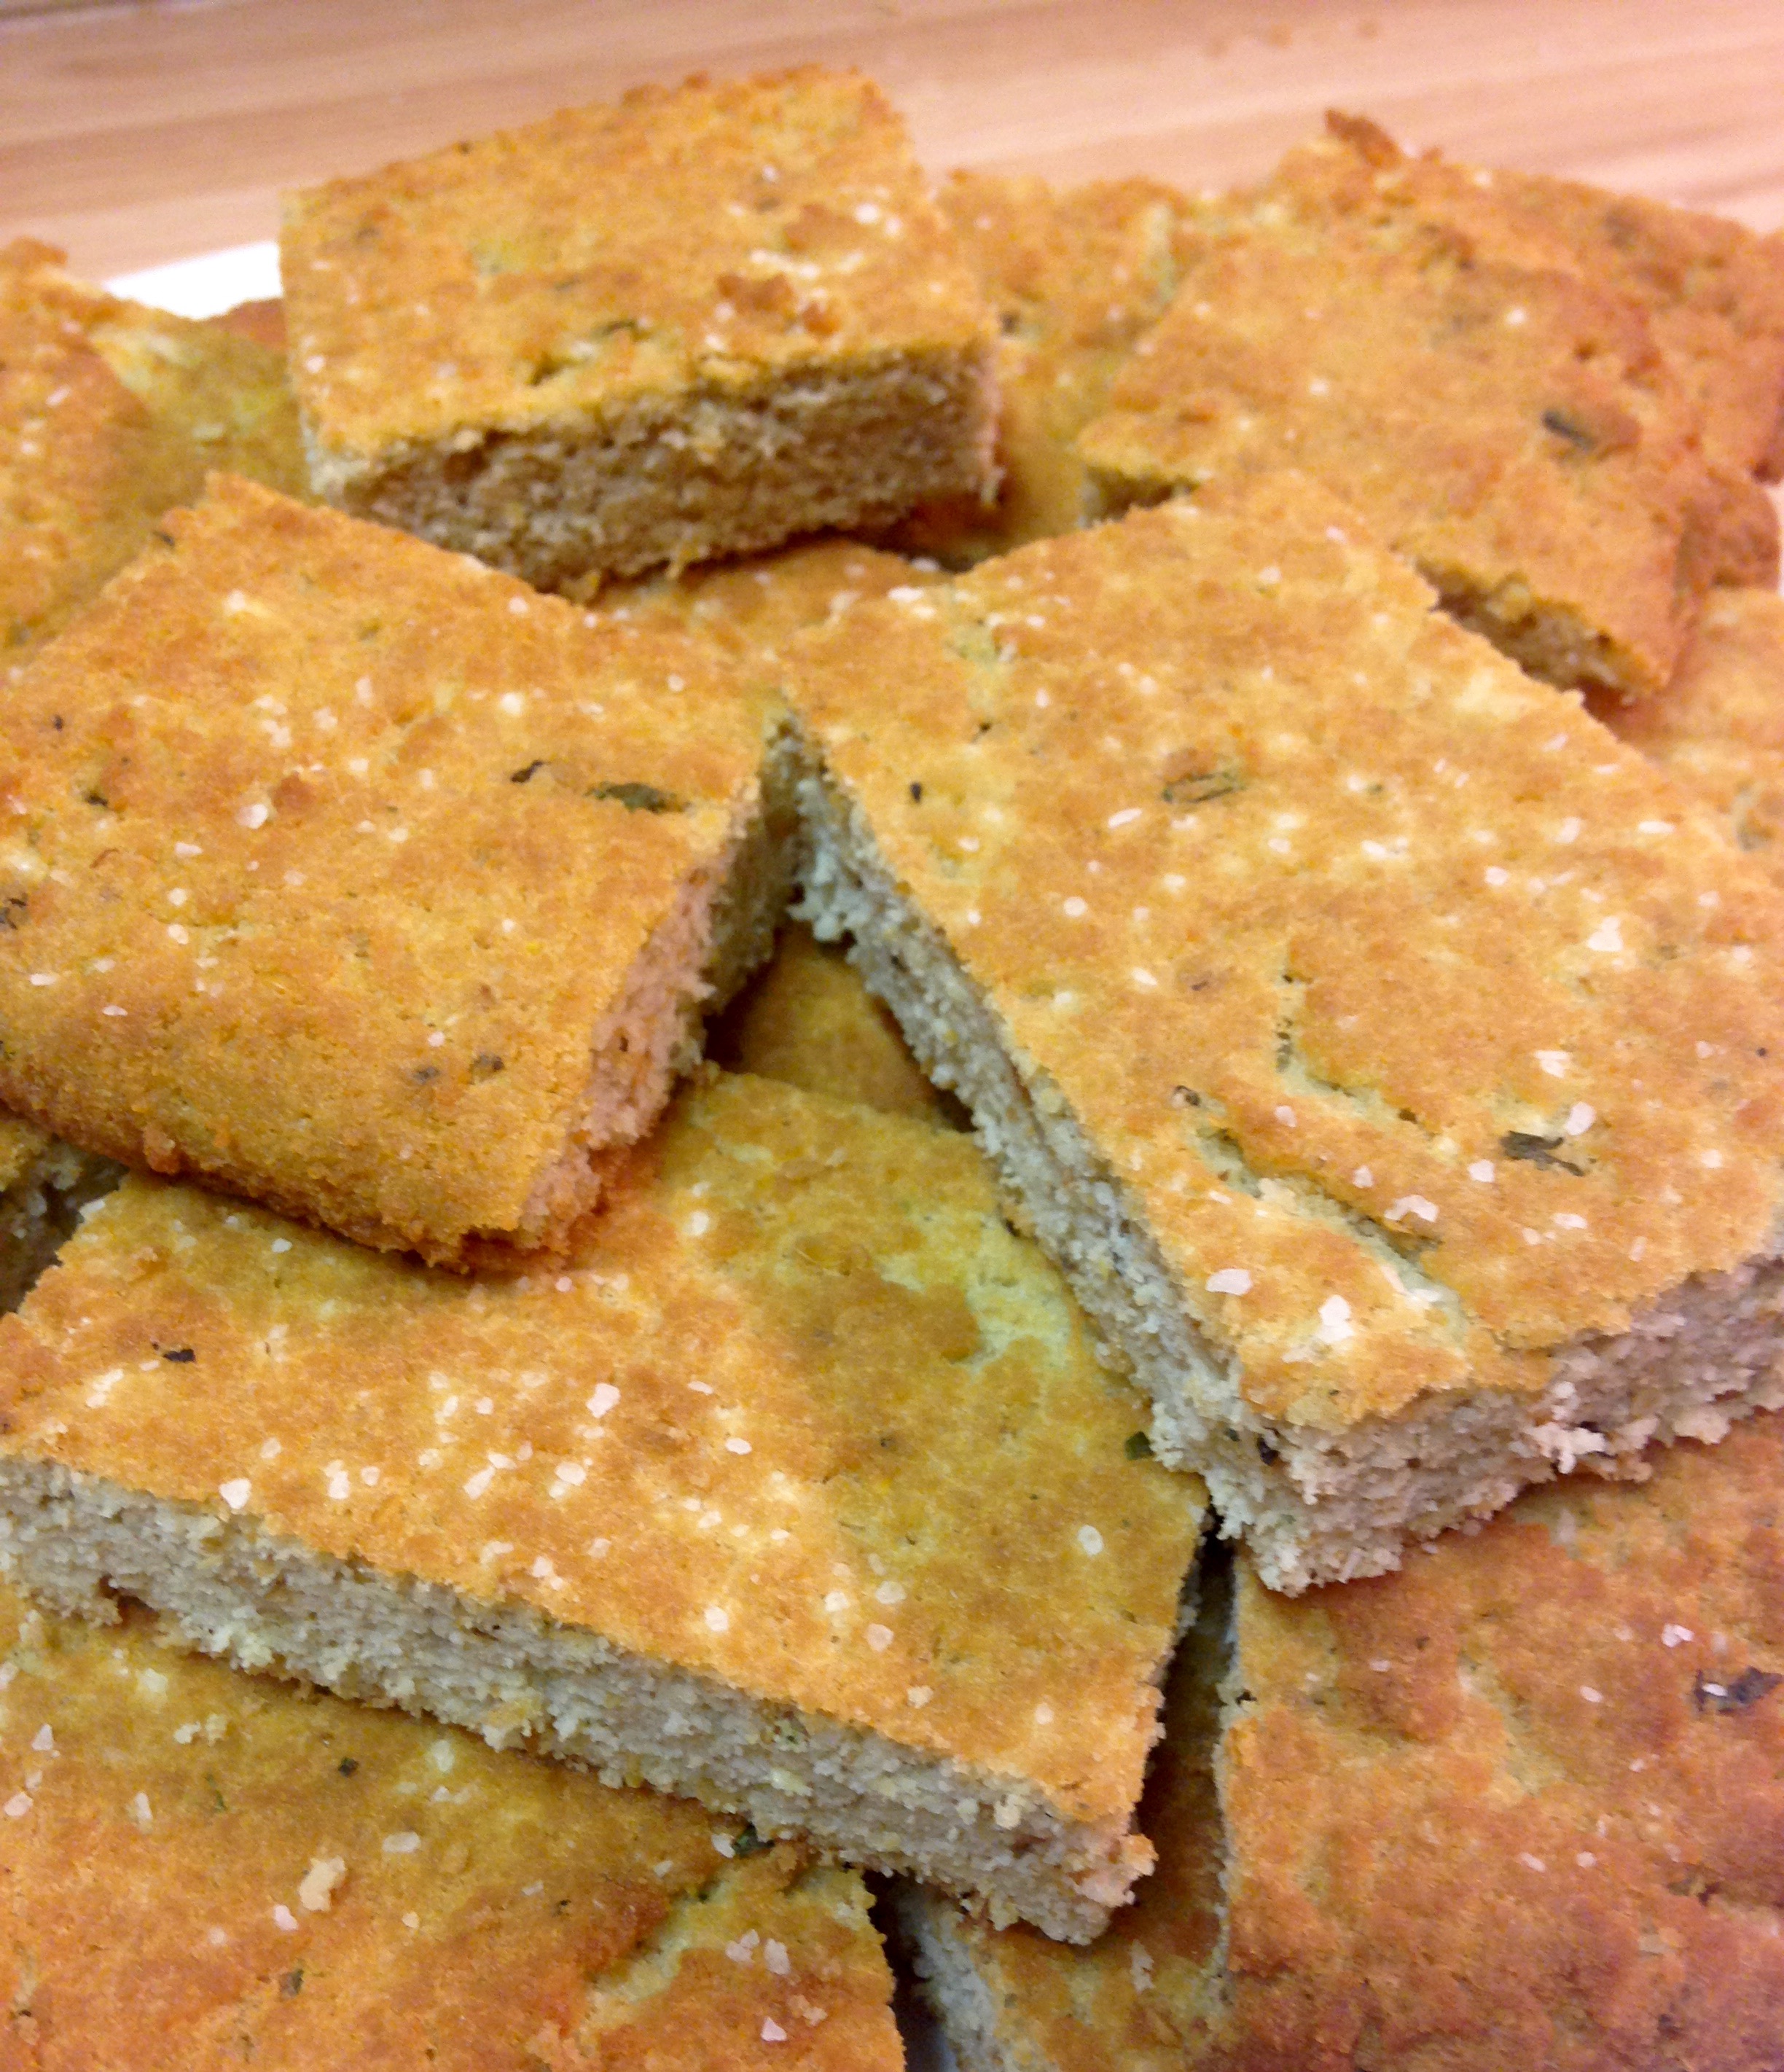
Over the holidays I had a slew of opportunities to feed grain eaters and prove to them that grains are not necessary to enjoy celebratory meals. A couple of guest left after their visit, happy with the discovery that they not only enjoyed their eating experiences, but they in fact lost instead of gained weight during their visit. Win!

One way we were able to accomplish such a feat was adapting some of our recipes to meet celebratory needs. One need was to have a flatbread that easily soaked up sauces and juices, allowing guests to enjoy the tradition of dipping and revelling in soupy leftovers.

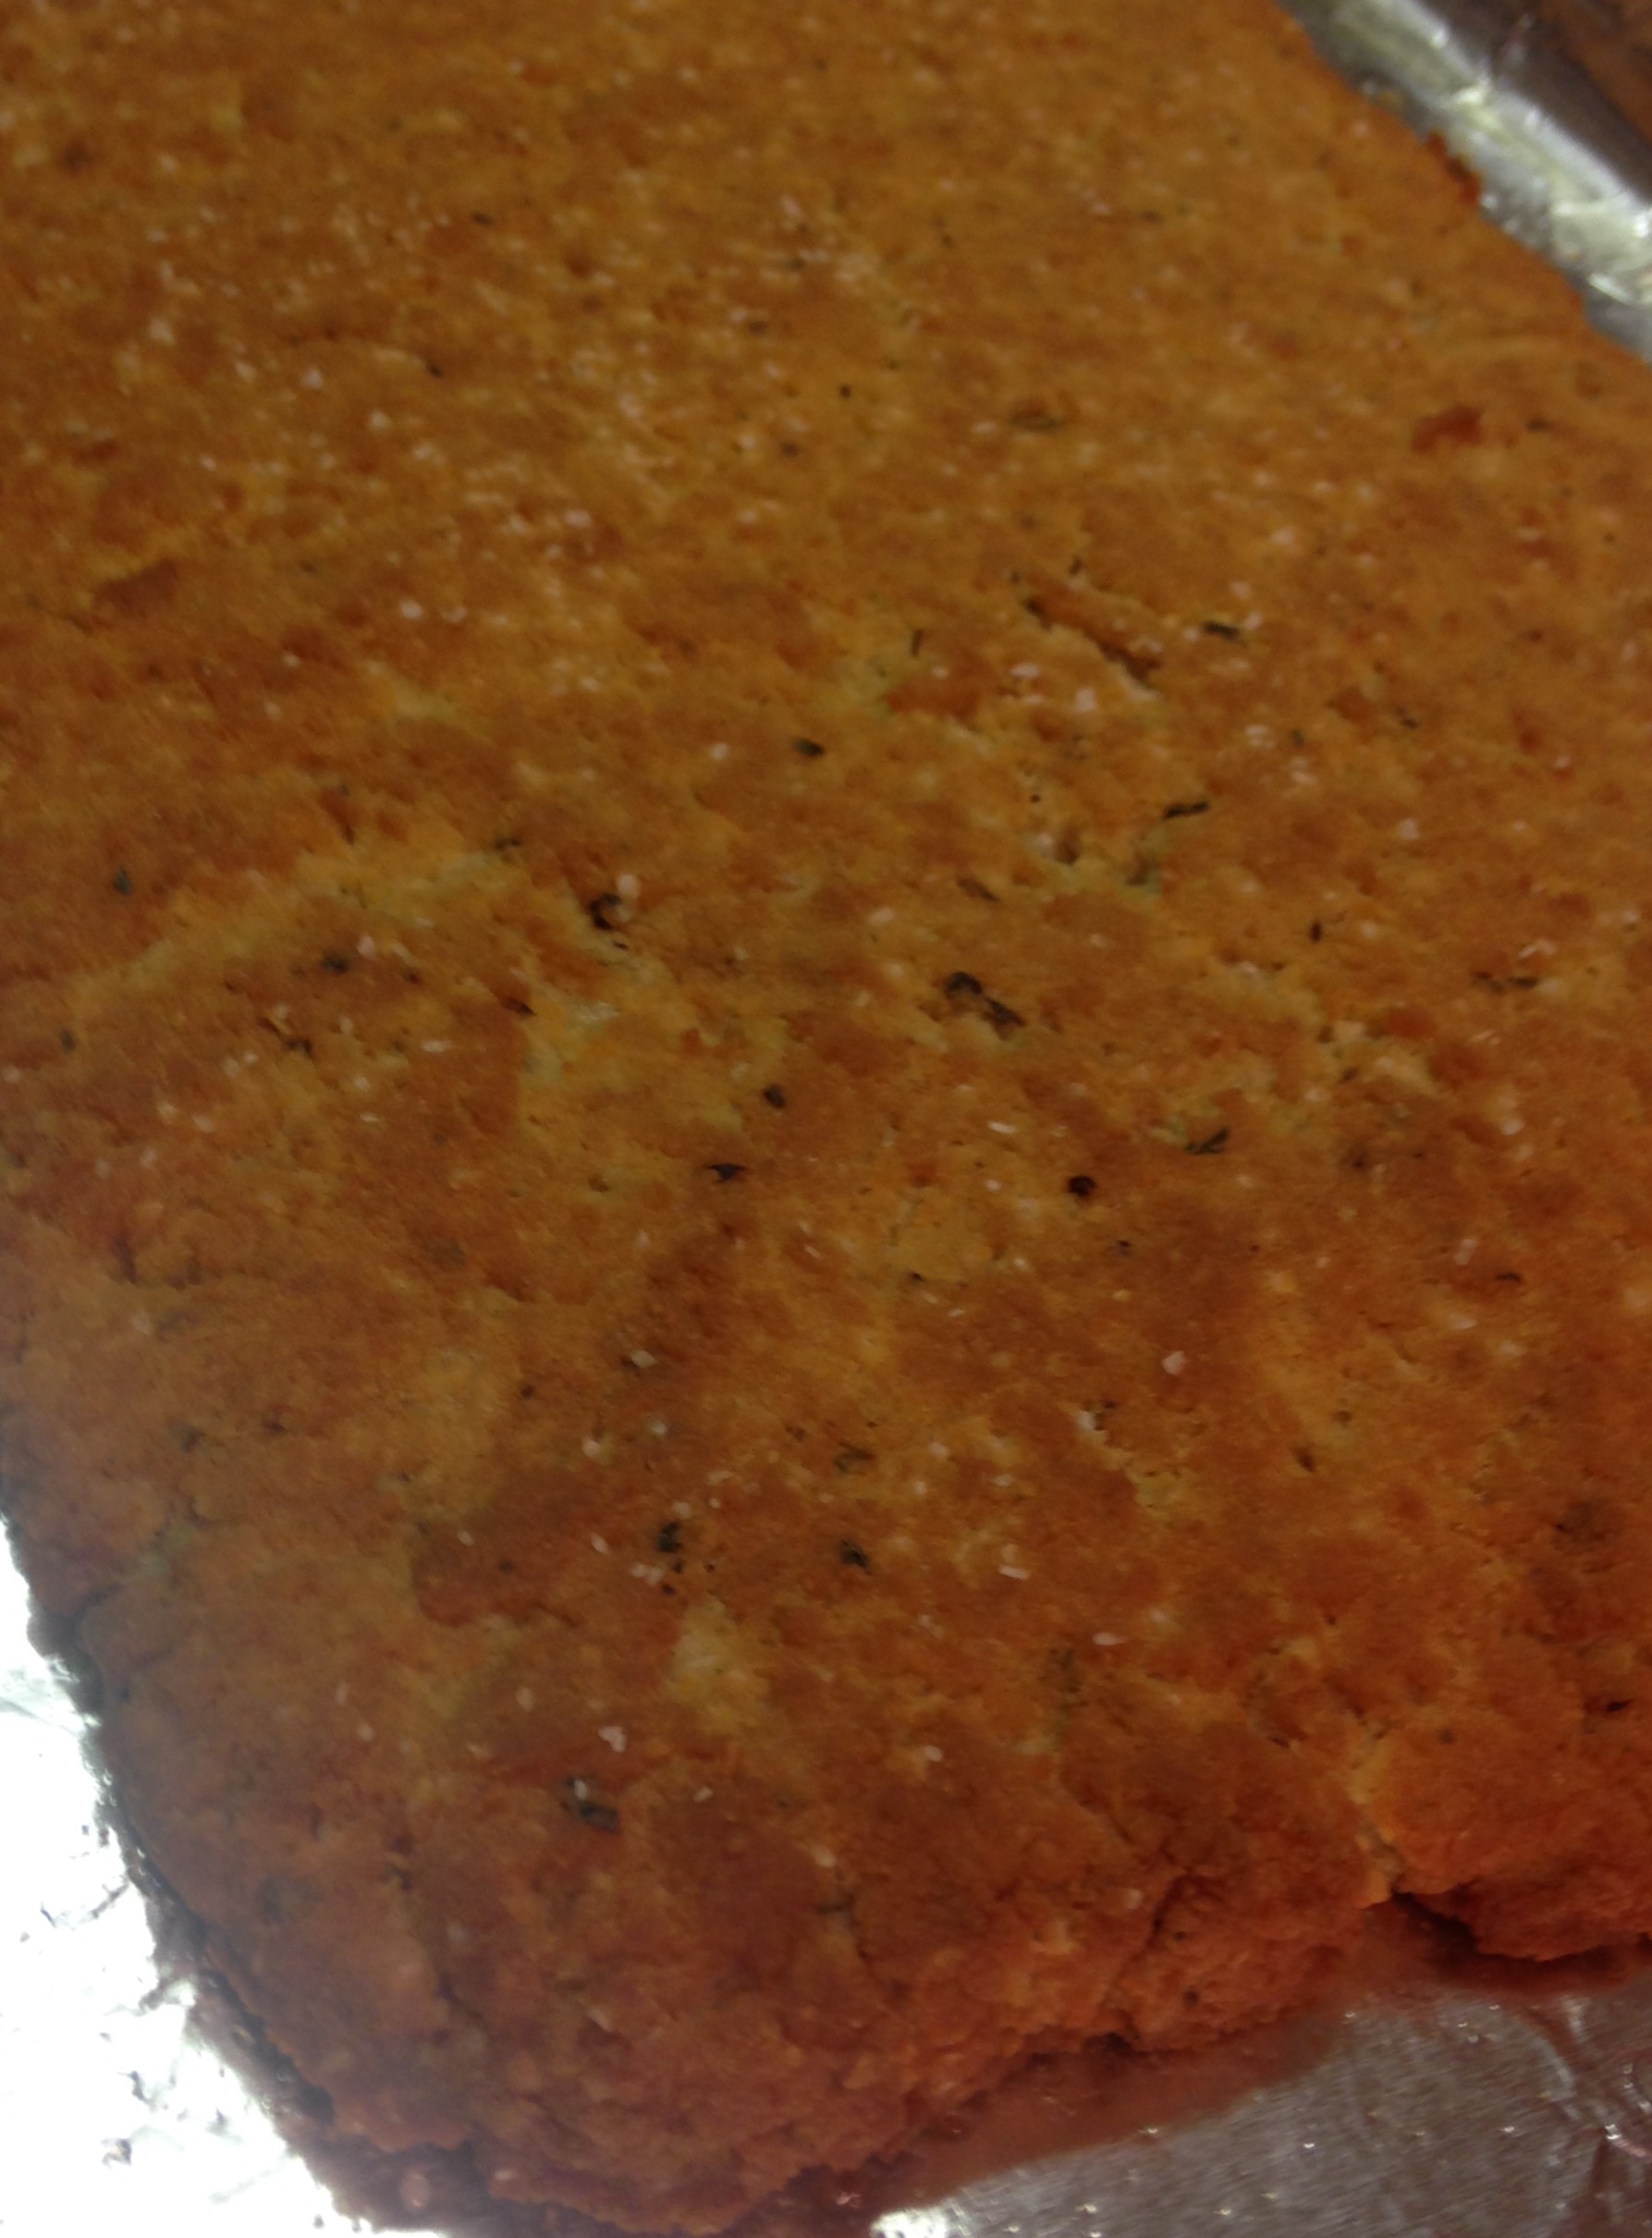
FoccaciawholeThis foccacia was an easy transition from our traditional Power Bread and fun to make! Instead of ensuring the dough was properly packed in a loaf pan I was able to mold it without edges and create exactly what we needed for our celebration. I am still enjoying the new memories made over the holidays and hope you can make some of your own with some of our grain free creations.

Foccacia

1 cup coconut flour
1/4 cup golden flaxseed meal
½ tsp sea salt
1 tsp baking soda
9 eggs, room temperature
¼ cup apple cider vinegar
1 cup melted lard, butter or extra virgin olive oil
2 garlic cloves, crushed
1/4 cup freshly chopped parsley
1/4 cup freshly chopped basil
1/4 cup freshly chopped oregano
1 Tablespoon extra virgin olive oil
Sea salt to taste

Preheat oven to 350 degrees. Prepare shallow baking pan by lining with aluminum foil.

In a large mixing bowl combine coconut flour, golden flaxseed meal, salt, baking soda, garlic, parsley, basil and oregano, then stir until well blended.

In a separate bowl combine eggs and apple cider vinegar. Whisk together until egg whites and yolks are well combined. Add lard/butter to eggs and continue whisking. Add immediately to bowl of dry ingredients.

Place dough in the middle of prepared baking pan. Gently spread dough towards the edges of the pan, making a rectangular shape that is 1/2 inch or less in thickness. Press edges towards the middle, ensuring that they are firmly shaped.

Using your hands gently spread the olive oil over the top and edges of the shaped dough. Sprinkle generously with sea salt. Place in preheated oven on the middle shelf. Bake for approximately 25 minutes, until middle is cooked and top of bread is evenly brown.

Remove from oven and let sit for at least 15 minutes. Slice bread into approximately 12-15 squares. Serve immediately or reheat before serving later. Store chilled in airtight container.

Power Bread

powerbunsFor the past year or so we have experimented with creating a simple, healthy substitute for loaf bread and buns. Some of our experiments were successful, but not quite “it.” We first discovered Bred Bread, which is delicious, but quite pricy considering the four cups of almond needed needed to make it. We also came up with some flatbread, but it is a bit fickle and not the best substitute for a bun. Our quick minute muffins do a good job, but just don’t completely do it for us when we want sliced bread.

This. This is it! We call it power bread because of how much protein and fiber you get from a slice or two. Little B has a slice with peanut butter and forgets about food for hours. This is significant because she is a six year old eating machine these days. The bread works like a sponge, filling up your stomach quickly after eating. It is also convenient to have a loaf ready in the fridge, and much less expensive to make without almond meal.

The loaf and bun versions are very popular with the customers of Grain Free Haven, with people stocking up each week at farmers markets and fairs in the Dallas area. I have been told by customers that Stevia is not the purest of ingredients for people following a Paleo diet, but the ingredient can be excluded without a significant impact. We think it works well balancing the coconut flour and flaxseed meal flavors, but it is a subtle effect and the bread is delicious either way.

I hope you make and enjoy our masterpiece! Be careful though, because one serving will fill you and a second may stuff you!

Power Bread

1 cup coconut flour
1/4 cup golden flaxseed meal
½ tsp sea salt
1 tsp baking soda
½ tsp Stevita (granulated sweetener)
9 eggs, room temperature
¼ cup apple cider vinegar
1 cup melted lard, butter or extra virgin olive oil

Preheat oven to 325 degrees. In a large mixing bowl combine coconut flour, golden flaxseed meal, salt, baking soda and Stevita, then stir until well blended.

In a separate bowl combine eggs and apple cider vinegar. Whisk together until egg whites and yolks are well combined. Add lard/butter/oil to eggs and continue whisking. Add immediately to bowl of dry ingredients.

For one loaf: pour dough into well greased 8 x 4 loaf pan.* This is a smaller loaf, which allows for a square loaf. A larger pan can be used, but you will have more of a rectangular end result. Wet your hands and even out the top of the loaf, making sure it is level and damp. With a dinner fork lightly poke the top of the dough every inch or so. Bake a single loaf, on the center shelf (third shelf from the top) on a shallow baking sheet, for 50-55 minutes.

For 6 buns: well grease six 1-cup ramekins. Place a round of parchment paper on the bottom of each, making sure the paper does not run up the sides. Using a large ice cream scoop place two level scoops into each ramekin. Wet your hands even out the top of each bun, making sure each is level and damp. With a dinner fork lightly poke the top of the dough every inch or so. Place all six ramekins on a shallow baking dish as far apart from each other as possible. Bake buns on the center shelf (third shelf from the top) for 28-32 minutes.

*This is a smaller loaf pan than typically used with wheat-based breads. The size allows for a square loaf. A larger pan can be used, but you will have more of a rectangular end result.

More One Minute Muffins

one minute muffins

We ran out of homemade bread! Big D is out if town! What are we to do?! I can make bread, yes. I can follow recipes and such, but it feels wrong in this instance. Here is why. Big D and I spend a lot of evenings watching each other cook and talking about things. All kinds of things. Not necessarily about what is being cooked, but other stuff. Our kitchen has a bar that opens into it, so one of us can sit out of the way and still have full access to the kitchen goings on. Little B is always nearby, but our talking is usually about something other than dinosaurs and fairies, so is often boring to her. By all means there are plenty of Little B-centric chats, but less likely during these casual cooking tete-a-tetes. Since it felt so wrong bread baking in Big D absentia, I decided to take a stab at one minute muffins again. I did so previously, with results being a little more labor intensive and very specific to accomplishing hamburger buns. Those buns were not going to hit the spot for, say, a breakfast sandwich with sausage, egg and cheese. I wanted something a bit smoother and softer. These are definitely smoother, softer, shorter and sweeter. I also give two different flour/meal choices, but share them together in spite of the very different results. Flaxseed gives a more ‘grainy’ texture, while the almond meal is smooth and spongier. Pick what pleases you. In trying to include the variations that impact results, I hope I do not confuse. Try a muffin and see what you like!
More One Minute Muffins
1-2 Tbsp butter
1/2 to 1/3 cup golden flaxseed meal or almond meal
1 tsp baking powder
1/4 tsp stevita
1 egg
In large microwaveable mug melt butter (less butter makes for a dryer muffin). Add dry ingredients and stir (a larger quantity of meal makes for a shorter, denser muffin). Add egg and mix until fully incorporated. Place mug in microwave. Cook on high one minute – use of almond meal often needs an additional 30 seconds if the middle is still sunken after one minute. When cooked through remove from microwave and immediately flip muffin out of mug. Serve.

Jalapeno Poppers

stuffed jalapenos_edited-1

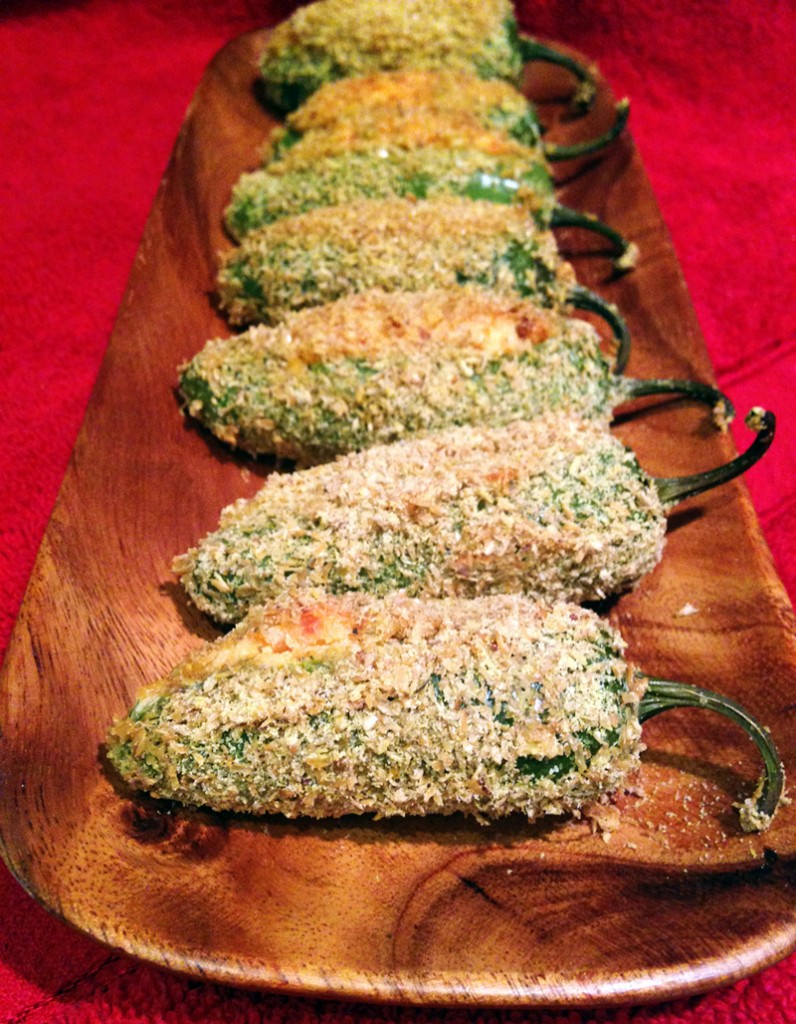
During the first year of my blog I made some addictive jalapeno popper dip. It had the stuffed jalapeno taste and we spread it bumpily on almost everything until the last spoonful was gone. After finding jalapenos on sale at the store the other day I decided it was time to again delve into the jalapeno popper world, with the intent of creating a more original result. We have experimented with finding a coating that bakes up crisp during our foray into making Scotch Eggs. Confident in our knowledge  from many egg batches, we applied the same idea to these poppers. Instead of making it easy on ourselves by cutting the peppers in half and stuffing them, we wanted them whole, but also breaded! Why keep it simple and wrap them in bacon? Hmmm….bacon. Not this time. Much too easy and predictable. We wanted to taste the peppers, which would be harder if the bacon was involved. It is a very domineering ingredient, although it goes with almost anything. Now I want some bacon…..but on to the bacon-less poppers! The filling stayed in the poppers and kept them filled, the breading stayed stuck, and boy did we taste the peppers! We expected a varying level of hot among the peppers, as is typical, but Big D got quite a surprise. He must have bit into a seed cluster juuuuust right, for he went running for a drink, then dove for a piece of bread, where he finally found relief. It is rare when he gets over heated by spice, much less have tears well in his eyes because of them. I had no such biting surprise, but really enjoyed noshing on the poppers and relished their return to our growing list of things-we-gave-up-and-missed-but-now-have-back-again. Yay!

Jalapeno Poppers

8 – 10 medium/large jalapenos (as straight as you can find)
8 ounces cream cheese
1/2 cup cheddar cheese, grated
2 egg whites
1 cup golden flaxseed meal
1 tsp garlic powder
1 tsp ground cumin
1 tsp salt
Ranch Dressing (optional)

Preheat oven to 350 degrees. Lay jalapenos on a flat surface and figure out which side they rest on most stably. On the side opposite of the resting side cut a narrow opening that stops short of both ends lengthwise – narrow enough to keep the stuffing in, but wide enough to clean out the seeds and pulp from inside the pepper. Leave the stem attached. With a small spoon or narrow knife gently scrape out some seeds and pulp, making room for the stuffing. Set aside the jalapenos. In a medium bowl place the cream cheese and cheddar cheese. Heat in microwave on 50% power for one minute, until softened. Add 1/2 tsp garlic powder, 1/2 tsp cumin and 1/2 tsp sea salt and stir until ingredients are combined. Using a small spoon gently push cheese mixture into the jalapenos until they are full, or the filling is used up. Place the egg whites in a medium bowl and whisk until slightly foamy. In another bowl combine the flaxseed meal, 1/2 tsp garlic powder, 1/2 tsp cumin and 1/2 tsp salt. Dip each stuffed jalapeno in egg whites, then roll in flaxseed mixture until well coated, pressing some of the meal against the pepper where it does not instantly cling. Gently place coated jalapenosin a small baking dish, with a little space between. Bake for about 50 minutes, until coating browns and peppers are soft. Remove and let cool for five minutes. Serve with ranch dressing or other dipping sauce.

Bred Bread

bred

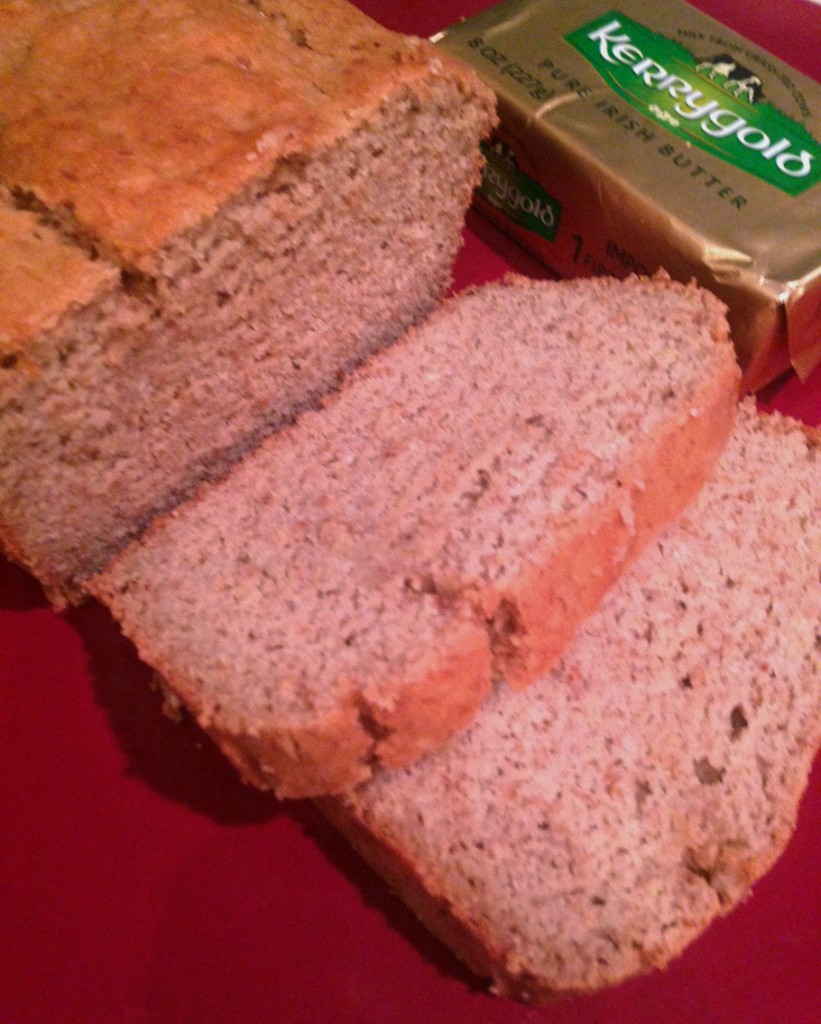
What an adventurous effort this bread recipe has been! It is officially named Bred, just because, and as a homage to Big D’s tendency to play with words. Actually, the recipe has mostly been a result of Big D’s efforts, but Little B and I supervised, mixed, provided input (solicited and not) and were overall cheerleaders. We certainly ate a lot of the results. It all began with cravings. As we continue on our low carb journey we longed more and more for sandwiches and bread. We thought there must be a way to make a nutritious, low carb bread-like thing to sate our desires. Some gluten free breads on the market are okay, but have more carbs that we want to deal with, and include non-wheat grains that we prefer to avoid. They also tend to be a bit rubbery and tasteless, without the help of other flavors slathered all over. After my experimenting with various baked goods, we were already familiar with the impact of flaxseed meals, coconut flour, and almond meal – in muffins, pies, rolls, etc. Not only their impact on the end product, but on our personal weight management, which was not negatively.

Big D searched the interwebs and found this recipe from the wonderful Miss Elana. Our first batch using the recipe was okay, but did not have the texture and flavor we craved. We also did not have the dainty bread pan she recommended, so the first attempt was not as loafy as we wanted. It was a good launching pad for what you find below. This bread is substantial enough for deli sandwiches, garlic bread, and especially grilled cheese sandwiches. After mastering the basic Bred recipe we found that some slight variations make for different, yet still satisfying results. The ‘rye’ version has the tang of traditional rye bread, making for wonderful reuben sandwiches. The version using non-golden flaxseed meal gives the bread a much lighter, almost poppy seed flavor that lends itself to more delicate tea and fish sandwiches. If you miss the very obvious point here, we are so very excited to have bread back in our diet! It adds variety and convenience and helps in stretching out leftovers, which are always hanging out in our fridge.

A related and concurrent discovery was a source of Kerrygold Butter here in town! There is such a superior flavor and texture difference with Kerrygold when compared to other butters – a difference we fell in love with many years ago. We have been searching for it locally for many months now and dreaded the expense of getting it shipped directly. Of course we bought out the supply when we found it, but we don’t feel bad. I am pretty sure others did the same before us. Maybe since it sold out they will restock? We hope so, but that is not always how the bread crumbles…give our Bred recipe a try, and do so with Kerrygold. Yum!

Bred Bread

4 cups almond flour
1/4 cup coconut flour
½ cup golden flaxseed meal
1 ½ tsp sea salt
2 tsp baking soda
½ tsp stevita/erythritol powder
10 eggs
2 Tbsp coconut oil or lard
1/4 cup apple cider vinegar

Rye Version
When combining first six ingredients also add:
1 Tbsp caraway seeds
1 tsp ground turmeric
½ tsp ground mustard
¼ tsp ground black pepper

Lighter Version
Use regular instead of golden flaxseed meal

Place almond four, coconut flour, flaxseed meal, salt, baking soda and erythritol in a bowl and stir until well mixed. Add eggs and oil and stir until well combined, using your hands if necessary as the dough thickens. Add vinegar and stir until well combined. Place dough into a greased 9″x5″ bread pan. Bake at 325 degrees for 50  minutes – knife should come out clean from tallest point of the loaf. Bake for ten more minutes if knife is damp. Remove from pan immediately. Serve.

Multi Minute Burger Buns

burbun1

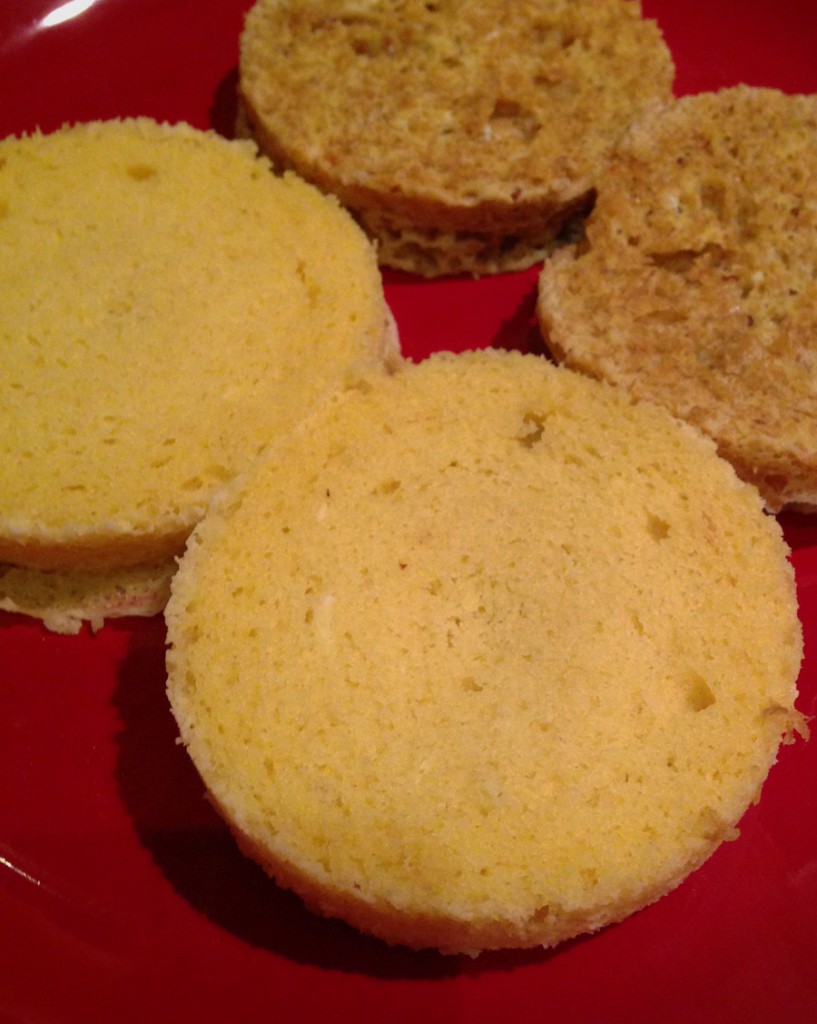
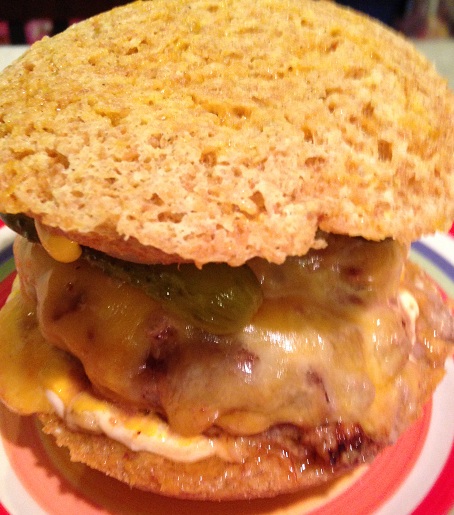
I have seen a bunch of recipes all over the web for one minute muffins, cooked quickly in the microwave. Some are sweet, some are savory. Big D was smoking up some nice, thick burgers for dinner one night and we did not have any of our low carb bread anywhere nearby for them. The delish bread takes hours to make, bake and cool/set, so there was not enough time to make it. One minute is pretty quick, so I decided to try some savory ‘muffins’. I liked the recipe shared by DJFoodie. Not much happens around here in the microwave, sitting quietly above the stove staring at me all the time asking to be used. Here was its big chance for it to actually cook something! I tweaked DJ’s version a little bit to fit the contents of my pantry and our microwave performance (our oven took much longer to do the cooking), and they came out great! The one batch made plenty of bun pairs (four) for our meal, with leftovers. The buns can also be used for non-burger activities, like sandwiches and even eggs benedict, but what I can attest to here is they make for some satisfying, filling burger buns! 

Multi Minute Burger Buns

1 1/2 cups golden flaxseed meal
1 Tbsp baking powder
6 large whole eggs
1 Tbsp plus 1 1/2 tsp extra virgin olive oil
3/4 cup cheddar/colby jack cheese blend, shredded
2 tsp garlic powder
1/2 tsp ground thyme
Salt, fresh cracked pepper and chili flakes, to taste
Butter or other fat to grease dishes

Optional Burger Toppings
Hamburger patties, cooked to desired doneness
Red or white onion, thinly sliced
Dill pickles, thinly sliced
Ripe red tomatoes, thinly sliced
Mustard
Mayonnaise (we used chipotle flavored, but plain works, too)
Cheese, slices or finely grated

Grease eight (or four used twice) individual microwaveable dishes – I used four salad bowls, each about five inches in diameter. Combine all ingredients in a large bowl and whisk together until well combined. Divide the dough into eight equal parts. Place 1/8 of the dough into each bowl, spreading the top evenly, for the shape will not change much during the cooking process. Microwave on high for 90 seconds to three minutes, depending on the microwave – the middle should be spongy like the outer edges, not mushy. Cook in additional 45 second increments if not done. Remove from the oven after letting them sit in the closed oven for about two minutes after the last cooking time. With a knife gently pull the bun away from the bowl edges. Flip out the bread on a grate to cool and dry out. If using four bowls repeat the process. If you want thin buns slice one piece in half. If you want thicker buns (like in the picture) use two of the eight buns for each sandwich. Add your burger with toppings and eat up!

Mini Pizza Pucks

mini pizza pucks_edited-1

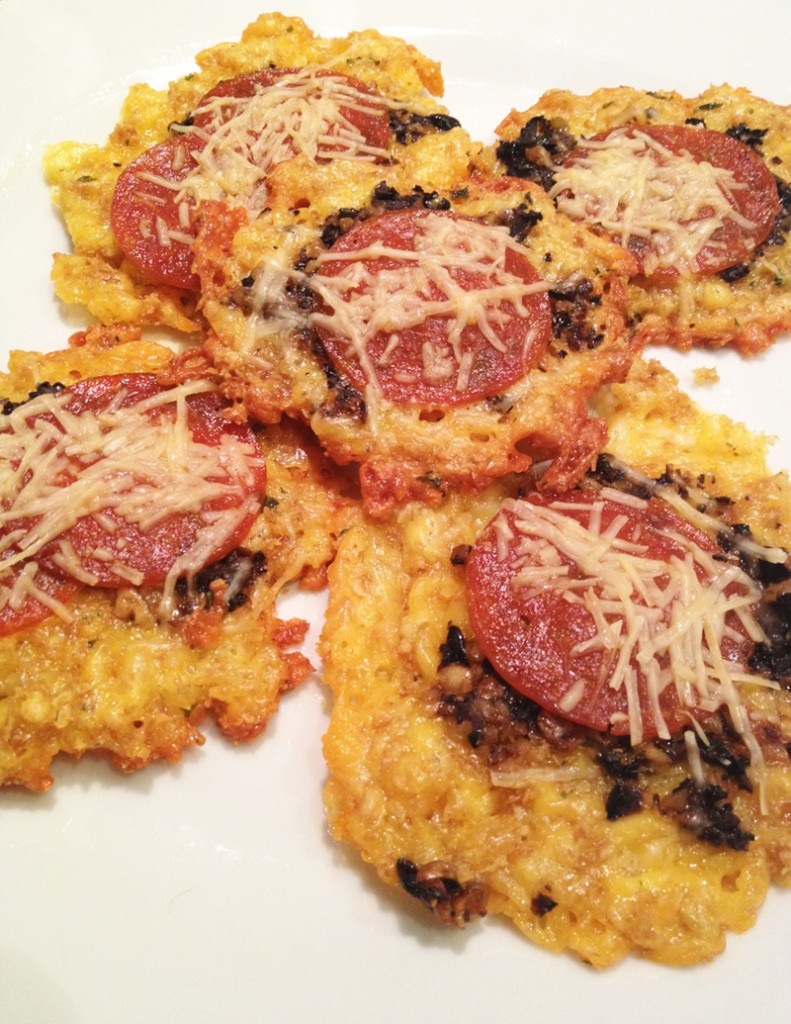
Our whole family loves pizza. Lately I have been trying to find simple dishes for weekday meals, what with Little B getting involved in evening activities and Big D and I with busy work days. In our endeavor to avoid wheat there are few alternatives for quick pizza where we live. The local pizza places just give blank looks when the words ‘wheat free’ or ‘gluten free’ are used, and delivery is a joke when wheat free is concerned. To be fair, there is one place with gluten free pizza, but it is still has nutrition-poor carbohydrates in a rice based crust. Not the end of the world for Little B on the rare occasion, but for me and Big D, who need to avoid the carbs, it is not a solution. These pizza pucks I made are a result of spontaneous experimentation. I tried to combine my cheese crisps and low carb pizza recipes to make this meal and it turned out pretty darned good! They were quick, fun and Little B enjoyed helping making them, of course. I call them pizza pucks, not because they are overly hard or difficult to eat, but because you can pack them up, like pucks, and I am currently living in a place where hockey is popular. I am not yet ensconced in watching or playing the sport, I just went with it. And it is cold. What other time of the year can you call pretty much anything a puck? Besides being a good dinner, the leftovers worked well as a cold snack on the way to Little B’s soccer practice, or ballet, or whatever happens after five but before bedtime that does not involve crashing on the couch at home. What better snack than some protein before running around for an hour or more? Maybe I should come up with some pizza balls to go with the soccer theme, but that is for another day and time…

Mini Pizza Pucks

3 cups shredded mozzarella and cheddar cheese
1/2 cup golden flaxseed meal
1 egg
1 Tbsp dried parsley leaves
1 Tbsp dried basil leaves
1 tsp garlic powder
1 tsp sea salt
1 cup large black olives
6 roasted or pickled garlic cloves (you can use raw, but they may not cook through and cause problems for sensitive stomachs)
20 – 30 slices pepperoni
1/2 cup Parmesan cheese

Preheat oven to 350 degrees. In a food processor combine olives and garlic, then pulse until a rough paste forms. Set aside. In a medium bowl combine the mozzarella and cheddar cheeses with flaxseed meal. whisk the egg and add to cheese mixture, folding it in until the cheese is coated. Add the salt, parsley, basil and garlic powder, doing a final few stirs to distribute the spices. On two nonstick cookie sheets make flat piles of cheese, about 2 inches in diameter with about an inch between them. Spoon about 1 tablespoon of olive paste on each pile, spreading it gently with the bottom of the spoon. Place one to two slices of pepperoni on each pile, then sprinkle with Parmesan cheese. Bake in the oven (using two different rack levels) for 12 – 15 minutes, until the edges of cheese begin to brown and the pepperoni glistens. Yes, it must glisten to have the right flavor. Remove from oven and let cool for five minutes before serving.

Cornless Tamales…What?!

tamales loaded

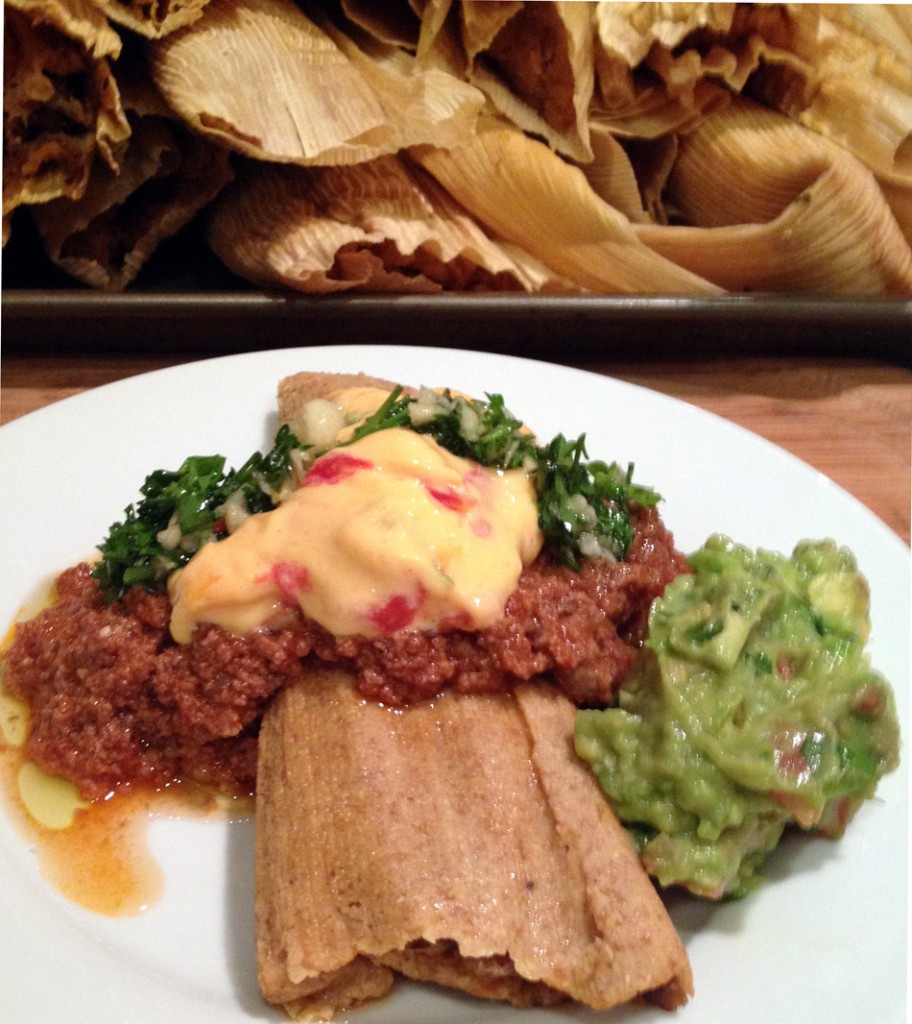
Growing up in south Texas we adopted a Christmas Eve tradition of a tamale feast. This year was no exception. We made enough for Christmas Eve, Christmas Morning as well as New Years Eve! Our tradition used to include purchasing tamales, then piling them with queso, guacamole, meaty chili and chimichurri. A few years ago, when we no longer spent Christmas in San Antonio, there was difficulty finding good tamales. Tamales were available, but they were just off in size and flavor. We had no choice but to start making our own. At the time we made the masa with corn meal, and perfected the flavor of it to wonderfully compliment the pork filling. Now that we are watching our carbohydrate intake, the reliance on corn products is nil, which we wanted to carry over into our holiday tradition. If you have ever had tamales, you know there is a specific texture to masa in a tamale, and there is supposed to be a hint of smoky spiciness to the middle meat filling. Some people may be on the verge of offended when I talk about masa without corn, for the word typically represents a corn-based dough used for all kinds of dishes, including pupusas, tortillas and of course tamales. For our version we used flaxseed meal and coconut flour to achieve the required texture. We also used what may seem like a lot of salt, but with the flaxseed and coconut products it is needed, to give a little help to the pork for it all to work together and carry the spice flavors through to the final dish. The tamales turned out flavorful and robust, able to compete (in a good way) with the toppings, and with a texture almost exactly like corn masa. Big D appeased me by measuring the ingredients this time around so we could record an actual recipe it for posterity. He is usually an eye it, taste it, add more, dash here, sprinkle there kind of cook, so it was a bit of a stretch, but he survived. With my mom visiting for the holidays we had loads of fun showing her the process and had three generations of family in the tamale-making production line, just like things should be. I hope you enjoyed your holidays and consider our scrumptious medley in your future celebrations. We will never forget it and hope to repeat it in the years to come!

Cornless Tamales….What?!

Masa
2 cups coconut flour
2 cups golden flaxseed meal
¼ pound lard, melted
2 eggs
2 Tbsp ground cumin
1 Tbsp garlic powder
1 Tbsp chili powder
3 Tbsp sea salt
5 – 6 cups liquid retained from meat filling

24 – 36 corn husks, soaked in water for at least one hour

Meat Filling
2 pound pork roast
1 small onion, diced
5 cloves garlic, crushed
1 Tbsp cumin seeds
2 jalapenos, diced
1 cup roasted green chiles (canned or fresh), diced
2 chipotle peppers with adobo sauce from can (use about 1 Tbsp of sauce)
1 cup water
2 Tbsp sea salt

Toppings
1 Batch fresh or canned beef chili
1 Batch Guacamole
1 Batch Chimichurri
Queso (1 pound processed cheese loaf melted with 1 can Rotel tomatoes and chiles)
Sour Cream

Sear sides of the pork roast in a large skillet, then place roast in a crock pot. In the same skillet add bacon grease and melt over medium-high heat. When melted add onion, garlic, cumin seeds, jalapeno and chiles. Cook until seared. Add chipotle peppers and adobo sauce to mixture and continue cooking until combined and heated through. Transfer seared mixture to crock pot over the roast. Add 2 tablespoons of salt and water, then cook roast on low for 8 – 10 hours. Turn crock pot off and let cool for a few hours. Drain liquid and shred meat with a fork, retaining the liquid for masa.

While meat cools make the masa. Combine flaxseed meal, coconut flour, cumin, salt and garlic powder in a bowl. Add lard to mixture and combine into a dough. Add liquid from the meat one cup at a time until it is the consistency of soft peanut butter – you will need anywhere from four to six cups.

To build the tamales pat dry one corn husk, then lay it flat on your work surface. Spread masa evenly in the middle of the husk, leaving 1 – 2 inches clear at the top and bottom, and along one side. Drop a row of pork along the middle of the masa, to the very edges of where it is spread. Gently roll the tamale, making sure the masa completely envelopes the pork in the middle. Overlap the sides of the husk and fold the small end up. A small strip of husk can be used to tie around the tamale to keep it closed, or just lay completed tamales face down so seams to not come apart. Repeat process until you run out of supplies.

In a deep stock pot with pasta/steamer insert, fill bottom of pot with water, but no higher than the bottom of the steamer insert – tamales should not be sitting in water at all. Fill the insert with tamales by lining them up vertically, with folded end down. Place cover on pot and heat to boiling, then turn heat down to simmer, making sure steam continues to rise. Steam tamales for about one hour, until the masa is firm and they are heated through. Remove tamales from pan and lay out in a single or double layer, allowing them to dry out a bit. When ready to eat, unroll the tamales from the husk and eat plain or smother with your toppings of choice.


Post Navigation