Any Kitchen Will Do

Give me a kitchen and I will cook.

Archive for the category “garlic”

Cucumber Goat Cheese Bites

cucumber goat cheese bites

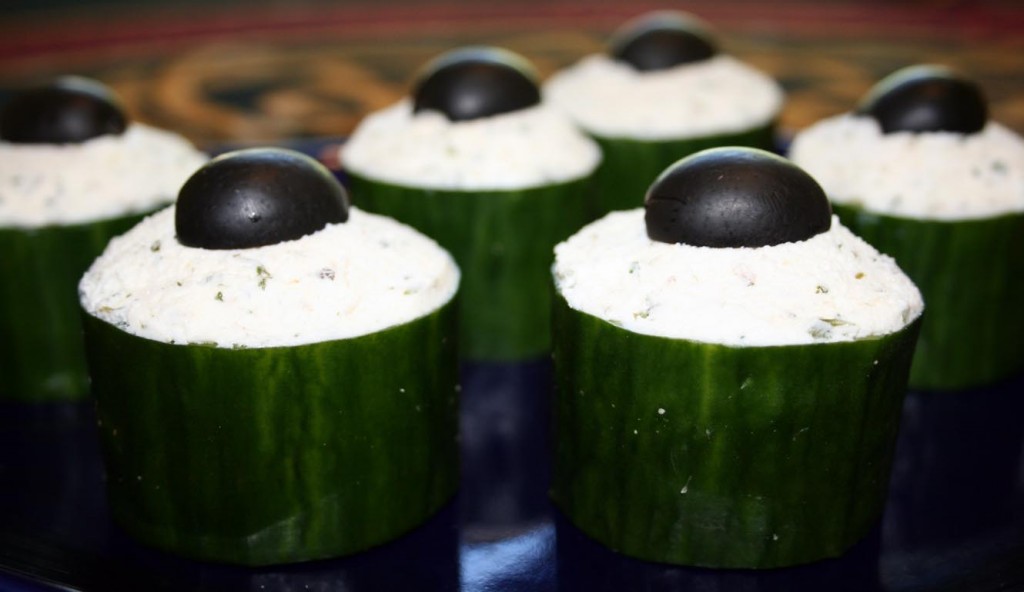
I always love goat cheese, but somehow missed eating it lately. I recently tried to remember the first time I had it – the tart, smooth experience flirting with my tongue. I think it was in Golden, Colorado, while lunching in a little cafe in the historic downtown area. For the life of me I cannot remember the name. I would know it if I saw it again, but since I am Maryland at the moment, such an ability is not very helpful. It was spread on a chicken sandwich, in lieu of mustard or other condiments. I remember leaning on the table with my eyes closed, staring at it, wondering where the cheese had been all my life. Granted, I was only 25 or so, but it seemed such a long time to have been without goat cheese! I may have eaten it before, but passed it off as some other ingredient. Since that chicken sandwich I scour menus for it and grab packages now and then from the store. I get unreasonably excited when a restaurant offers a dollop on top of an otherwise basic green salad, or includes it in a cheesy dippy appetizer. My friend over at What’s For Dinner started on a goat cheese kick recently and, inspired, I now eagerly follow suit. On top of the goat cheesiness hankering, the warmer weather is upon us and I am looking to make some cold dishes. Here is a simple cold appetizer, or green salad substitute, that combines flavors my family and I love. The black olives are especially for Little B, who has adored them ever since Great Aunt Debby stuck them on her chubby little one-year-old fingertips.

Cucumber Goat Cheese Bites

1 English cucumber, washed with peel on
5 ounces goat cheese, room temperature
1 tsp dried parsley leaves
½ tsp dried basil leaves
½ tsp garlic powder
5 – 8 extra large black olives, drained and patted dry
Salt and Pepper to taste

Cut cucumber on the perpendicular, to create 1/3 to ½ inch thick slices. Scoop out an indentation about ¼ inch deep on one side of each slice, allowing for the cheese filling to anchor itself. You can use a small melon baller or 1/2 teaspoon scoop. Stir together cheese, parsley, basil and garlic. Sprinkle indentation and top of cucumber slices with salt and pepper. Using a spoon place some goat cheese mixture on top of each slice, filling the indentation and creating a smooth mound on top. Slice olives in half lengthwise, then place a half on top of each cucumber slice. Chill until served.

Shepherd’s Pie with Cauliflower

shepherds pie whole

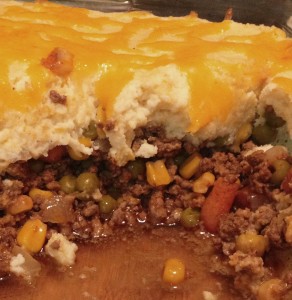
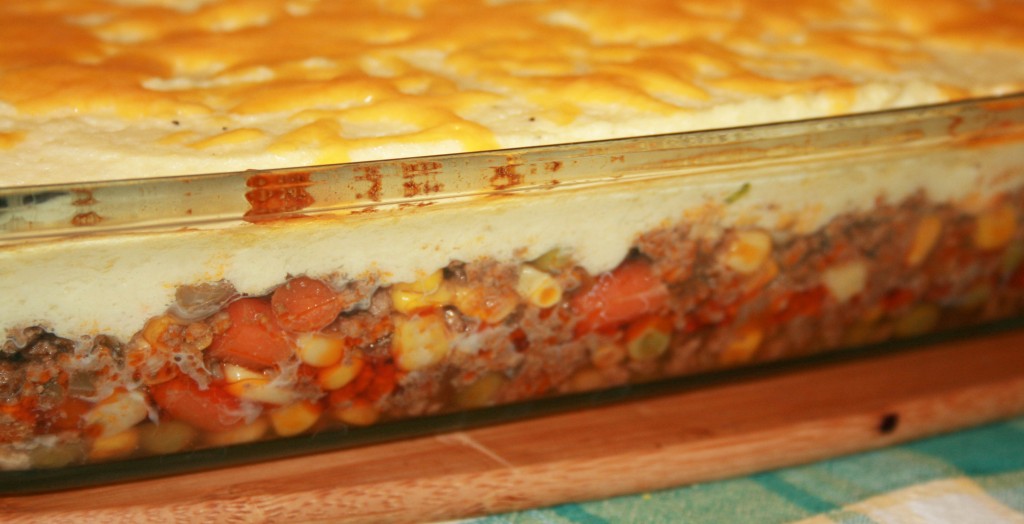
Last year for St. Patrick’s Day I made the traditional American St. Patrick’s Day meal with corned beef. That is all well and good, but not the only Americanized Irish food available. The Shepherd’s Pie is another dish that actually has Irish roots much closer than the corned beef. Here is a version that is very Americanized, or more accurately low carb-ized, for it has not a speck of potato, but as with other manipulations that can be done with cauliflower, you might not miss the ‘taters. This dish is usually called cottage pie when beef is used, and Shepherd’s Pie when lamb is used. I used ground lamb, so I at least kept to some traditional aspects, even if the top is from a cauliflower patch! If I did not tell you, you would never have known. I got the idea for the topping here. I hope for you fun and festivities on this St. Patrick’s Day, and eat cauliflower!shepherds pie piece

Shepherd’s Pie

For the Stew

2 Tbsp butter
1 pound stew beef or lamb, ground or cut into small bite-sized pieces
½ – 1 cup red wine
2 Tbsp tomato paste
2 cloves garlic, crushed
2 Tbsp Worcestershire sauce
1 cup chopped carrots
1 small onion, chopped
1 cup frozen peas
1 cup frozen corn

For the Topping
1 medium head of cauliflower
2 Tbsp heavy cream
2 Tbsp butter
½ cup plus 1 cup shredded sharp cheddar cheese
4 egg whites
Salt & pepper to taste

Clean and trim cauliflower, adding florets to a microwave safe bowl with ¼ cup water. Cover with cling wrap or a vented cover and microwave for 5 – 8 minutes until soft. Drain water. Add the cream and butter to the bowl and toss until butter is melted. Add the cauliflower and ½ cup of cheese to a food processor or use a hand blender to process until the mixture is a smooth consistency. It should look like thick mashed potatoes. Season with salt and pepper. Let cool.

Preheat oven to 375 degrees. In a skillet over medium high heat melt the butter, then add the meat. Saute until browned, about five minutes. If an overwhelming amount of liquid is in the meat, partially drain and continue cooking. Add red wine and cook until sauce bubbles. Add tomato paste, garlic and Worcestershire sauce, stirring until blended. Add onion, corn and peas. Cover and let simmer for 30 minutes over low heat. Turn off heat and set aside while you finish the topping.

Right before putting the cauliflower on top of the meat filling, whip the egg whites to a stiff peak. Fold 1/3 of the egg whites into the cauliflower mixture to lighten it up. Then fold the remaining egg whites into the cauliflower mixture and gently mix until combined. In a 9×13 baking dish add the stew and spread until even. Gently top with cauliflower topping, spreading it evenly and not pressing down too far. Sprinkle the remaining 1 cup of shredded cheese over the top. Bake for 15 – 20 minutes until topping is puffed and cheese is browning slightly. Remove from heat and serve immediately. Sprinkle more Worcestershire Sauce on individual servings if needed.

Dad’s Spaghetti Sauce

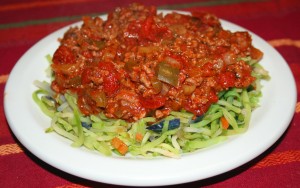
dads spaghetti sauceYou may not have noticed, but earlier this month I began a greenish/Irish theme, which will lead us up to St Patrick’s Day and beyond. Last year I covered traditional stuff like corned beef and cabbage, colcannon and the less traditional but politically symbolic white chocolate frito popcorn. This year I started with coleslaw, which has green cabbage, followed by some chicken with the green of spinach, then the Dublin Coddle, with a slightly more Irish leaning. I really enjoy St Patrick’s Day. Not only because I am about 87% Irish, or that I have a dual citizenship, or that it is another excuse to drink a little too much, but also because when I was growing up we laughingly called everything my dad made ‘Irish’. Irish popcorn, Irish fajitas, Irish potato salad, Irish steak…you get the idea. The dishes did not necessarily have a historically Irish origin, but because a big Irishman with blue eyes put effort into making it for his loved ones. My dad’s specialties were typically products from the outside charcoal grill. He cooked meat exceptionally well. Whether it was fajitas, steak, chicken or a whole passel of meats in his tower smoker – ribs, ham, turkey, roast – if it used to walk he could cook it, and it tasted great. He was the reason I rarely ever ordered steak in a restaurant until I moved out of the house. Restaurant steak always tasted salty, but not flavorful. I know most of his secrets, and I may share them one day, but today is not the day. Today I share with you his spaghetti sauce. One of his two significant non-grill, non-smoker dishes. In case you were wondering, his other dish was potato salad. Now on with the spaghetti sauce. I have done other tomato-based sauces, but this one is consistent with what he always made. Huge batches filled a big old aluminum pot that simmered on the stove top all day. It smelled heavenly, especially walking into a warm house on a cold, wet Texas day. It smelled like comfort, which is what I often sought on a wet Saturday after playing soccer or doing yard work. When I got older I helped him make it, discovering his penchant for perfectly sized chopped veggies and just the right combination of herbs. Another thing about his sauce – he rarely used fresh ingredients. I don’t consider it a good or bad thing. The sauce was always full of flavor and satisfying. He grew up during the Great Depression, which I think established for him certain habits, including the stockpile of canned and dried goods. You should have seen our pantry when I was growing up – we never failed to have fresh meat, fruit or veggies, but if we didn’t there were always canned. I still love the taste of canned spinach and pineapple – separately, of course. I recognize the canned and dried elements in this recipe. I don’t think you can beat the finished product very easily. I have made a version of this from scratch – fresh tomatoes, fresh herbs…it was good, but you know, after cooking it for so long, I could hardly tell the difference. Maybe it was because I tweaked it until it tasted like Dad’s version, or maybe because after enough cooking the fresh version tastes like the Hunt’s canned version. On top of everything else, I found a great new base to hold the sauce – broccoli slaw. In the past I have used traditional spaghetti pasta, gluten free pasta, spaghetti squash and just chopped sauteed squash. This time I saw some broccoli slaw on sale at the store – it is basically broccoli stems cut julienne and packaged with a bit of carrot and red cabbage. I microwaved it straight from the freezer for five minutes to soften, salted it then set it on a plate and topped it with sauce. The texture worked great – not pasta-y, but definitely a strong texture that worked with the sauce. It is my new favorite to pour things over. I can imagine a decadent cheesiness next time, or maybe some kind of lasagna concoction…

Dad’s Spaghetti Sauce

2 Tbsp extra virgin olive oil
1 small white onion, chopped
6 cloves garlic, crushed
1 pound ground beef, 15% fat or less
1 medium green bell pepper, chopped
3 stalks celery with leaves, chopped
1 tsp sea salt
½ tsp ground black pepper
2 Tbsp dried parsley leaves
1 ½ Tbsp dried oregano leaves
1 Tbsp dried basil leaves
42-56 ounces Hunt’s brand canned diced or plum tomatoes
6 – 8 ounces tomato paste
1 tsp truvia, or one small pinch of pure stevia
More salt to taste

In a deep stock pot heat to medium high and add olive oil. When oil is hot add onions and garlic, saute until the onion sweats (gets shiny and releases liquid). Add ground beef. Break meat up with a wooden spoon and saute until browning begins, but not until it is completely cooked. Add bell pepper, celery, salt, pepper, parsley, oregano and basil. Stir and cook until vegetables begin to soften. Add tomatoes and stir some more. Bring to a boil, cover, reduce heat and simmer for 2 hours (or more). Sprinkle in sweetener, to bring out the tomato flavor, and stir well. For an additional 30 minutes to an hour simmer with the top tipped so steam escapes. The sauce should thicken noticeably. Turn off heat and cover. Let sit until ready to serve, or cool to room temperature and refrigerate overnight. If you double or triple the recipe there will be plenty to freeze in reasonable portions. Reheat slowly on the stove top. Serve over your preferred base – either al dente pasta, spaghetti squash, or my new favorite, cooked broccoli slaw.
Dublin Coddle

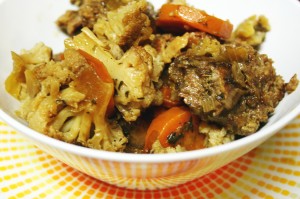
dublin coddleI adore the name of this dish. And oh my flippin’ floopie, it is rich and delish! It reminds me of a chilly, rainy day I spent in Dublin many years ago, popping into a pub to warm up a bit with some food and drink. I did not have a coddle, but the feeling was the same. It totally has a comfort food vibe, and is considered such in Ireland. I thought of it with St. Patrick’s Day coming up and my Irish-ness starting to raise it’s head here in my blog. It is called a coddle because of the slow simmering manner of cooking the dish. Dublin, of course, comes from the popularity of the dish in the Dublin area. I read one place once that the convenience of slow cooking the one-dish meal and the ease of keeping it warm in the oven has a logical basis – it allowed for a warm meal to be ready for the man of the house when he came home late from the pub, after the rest of the family was already in bed. Heh. From my experience there are almost as many variations of this dish as there are mothers and grandmothers. Just like in the US there are delicious recipe variations for meatloaf, chicken soup and apple pie, each cook makes it their own way. I probably committed some form of blasphemy by excluding potatoes from my version of this dish, but we are stubborn about our use of cauliflower as a potato substitute in our diet, so I happily blasphemed. The results were like a beef stew. I know, I know, there is no beef in the recipe. It is just a bunch of pig. That is what I thought! I think the beer mixes with all the other juices and just makes a darned rich broth that is reminiscent of beef broth. Sooooo good! A layer of thinly sliced potatoes as the top layer is the more traditional route, so I included it as an option in the recipe. I thought the quantities would serve four, but we did not have any sides, just a big bowl of coddle. Since there were so many veggies and protein in the coddle it ended up being healthy servings for two very hungry people. If you are not serving sides with the coddle I would recommend doubling the recipe for a party of more than three.

Dublin Coddle

8 slices thick bacon
6 thick pork sausages (mild Italian or ideally some Irish bangers)
1 Tbsp butter
1 large yellow onion, roughly chopped
3 cloves garlic, sliced
1 cup water
1 head cauliflower or 3 medium potatoes
1 large carrot
1 12-ounce beer or hard cider
1 Tbsp dried parsley leaves
2 tsp dried thyme leaves
Salt and Pepper to taste

Cut bacon into 1-inch pieces. In a large frying pan cook the bacon over medium heat until browned. Transfer cooked bacon to Dutch oven. In bacon grease over medium high heat add sausages and cook until browned, but stop before they are completely cooked through. Cut the sausages into one-inch pieces and transfer them to the Dutch oven. In what is left of the bacon grease add the butter. When the butter is melted add the onion and garlic. Saute until onions are softened but not browned. Transfer onion and garlic to Dutch oven. You are now done with the frying pan. Salt and pepper the stuff in the Dutch oven to your liking, then pour in the water. Slice the carrot into coins, no more than ¼ inch thick. Chop cauliflower into bite-sized floret pieces, or peel and slice potatoes, no more than ¼ inch thick. Add to the Dutch oven a layer of carrot, followed by a layer of cauliflower. You may not need the whole head of cauliflower, but there should be an even layer of it over the top of everything else. If using potatoes make an even layer of slices on top, overlapping them so the other ingredients are substantially covered. Sprinkle the parsley and thyme on top of the cauliflower/potatoes, followed by salt and pepper to your liking. Add the beer or cider. The liquid in the Dutch oven should come up to about the middle of the pot and not totally submerge all the ingredients. Cover the Dutch oven with a tight fitting lid or two layers of foil. Place in 400 degree preheated oven and cook for 45 minutes, then turn heat down to 325 degrees and cook for another 1 to 1 ½ hours, until the cauliflower/potato layer is soft and ready to eat. Turn off the oven and leave the coddle inside it until time to serve. It will stay hot for quite a while.


Baked Chicken with Cheese and Spinach

chickenspinachcheese1

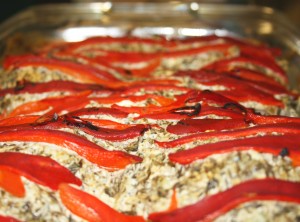
I noticed that it’s been a while since I posted a chicken recipe. I can’t go too long without doing chicken. We eat it often and I try to vary the preparation. It is always easy to roast a bird, but a nice sauce on top of baked pieces is comfort food extraordinaire. I did a slightly similar recipe a while back, but this dish is much more rich and thick, with a completely different result. This stuff is pretty rich, and I spooned up every bit of the sauce when the chicken was long gone. Our young charge Lanky P, who is living with us now, is not a vegetable eater, which makes for a lot of scrambled eggs in his belly. I was nice and did a few thighs without the sauce for him. I think he seriously missed out, but whenever someone dislikes vegetables I respect it, but think it is a little sad. There are so many wonderful flavors you can get from vegetables. Maybe I will do some recipes and sneak in veggies – I did it the other day with spaghetti sauce and he cleaned his plate. I never have to sneak with Little B – she eats frozen broccoli florets straight from the freezer as a snack, for goodness sake – so I can hone my veggie sneaking skills with Lanky P. Heh. Heh. Heh. That is an evil laugh if you don’t recognize it.

Baked Chicken with Cheese and Spinach

6 – 8 chicken thighs, skin on but edges trimmed
3 cups fresh spinach, roughly chopped (or 13.5 ounce can spinach, with liquid squeezed out)
1 Tbsp extra virgin olive oil (if using fresh spinach)
6 cloves garlic, crushed
8 ounces cream cheese
4 ounces goat cheese
6 ounces sour cream
½ tsp sea salt
2 Tbsp lime juice
3 roasted red peppers, jarred or fresh roasted with skin removed
Salt and pepper to taste

Preheat oven to 375 degrees. Lightly salt and pepper chicken thighs after trimming off excess fat and skin – leave enough skin on to cover the top of the chicken thigh meat. Place one layer of chicken in 9×13 baking dish. Slice red peppers into thin strips, no more than ¼ inch width and set aside. In a medium pot over medium high heat add garlic and spinach (if using fresh, add oil first until heated, then garlic and spinach). When spinach is hot add cream cheese, goat cheese, sour cream, salt and juice. Stir until cheeses are melted and combined with spinach and garlic. Spread cheese and spinach mixture over chicken. Lay slices of red pepper over cheese mixture so they are evenly distributed. Cover pan with aluminum foil. Bake for 20 minutes. Remove foil and cook for 20 – 25 more minutes until peppers are dried out a bit, cheese is bubbly and chicken is cooked through. Let sit for about five minutes before serving.


Coleslaw Perfection

coleslaw_edited-2

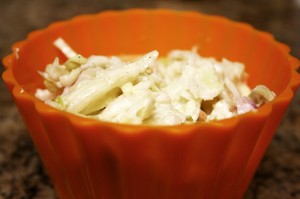
Big D and I have issues. I like tart coleslaw and he likes slightly sweet coleslaw. It makes for a challenge when making, well, coleslaw. I could make two batches, but that seems silly, so I just kept experimenting until I figured out a just right combination of sweet and tart in one bowl of slaw. I previously tried to use sweetener and wine vinegar to get a balance, but then had a revelation and tried – duh – a different kind of vinegar. The apple cider vinegar has just enough sweet and tart to get to the balance we like. Viola! The perfect coleslaw.

Coleslaw

4 cups shredded green cabbage
1 cup shredded purple cabbage
½ cup shredded carrot
½ cup finely chopped red onion
1 clove garlic, crushed
1 cup mayonnaise
¼ cup apple cider vinegar
1 tsp sea salt
½ tsp ground black pepper

In a medium bowl combine garlic, mayonnaise, vinegar, salt and pepper. Whisk until combined. Add green cabbage, purple cabbage, carrot and onion. Toss vegetables until coated with dressing. Chill for at least an hour before serving.

Tzatziki

tzatziki_edited-1

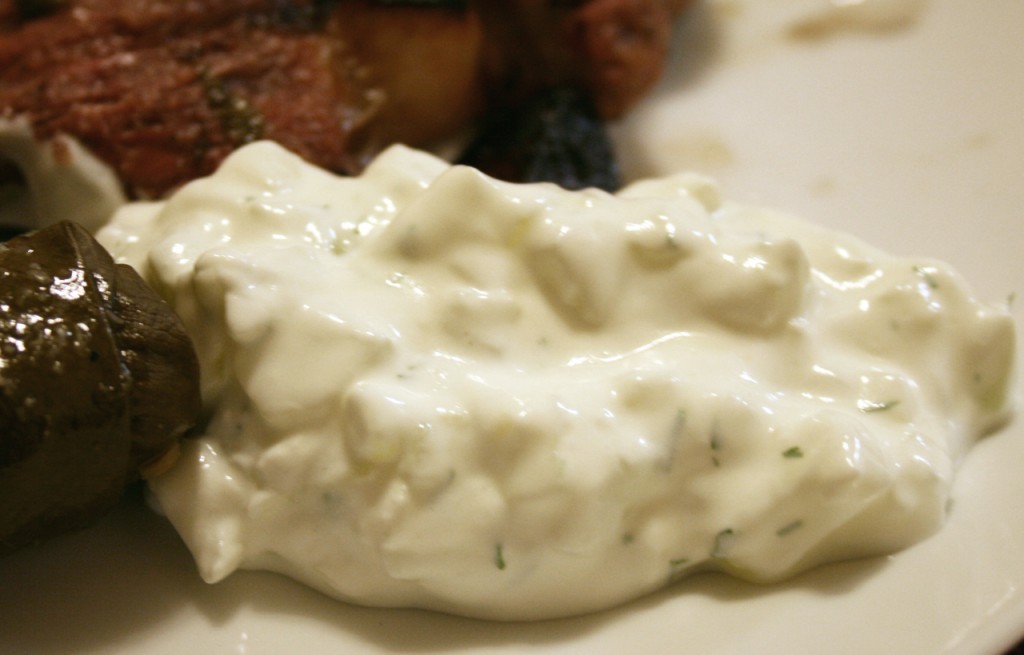
I could just eat this stuff straight from a bowl, with a big spoon, as in “would you like some lamb with your tzatziki”? Forget daintily dipping or drizzling it on food. Sometimes I get a Greek salad just to be able to mix tzatziki in with it. I used to love dipping pita bread into tzatziki and hummus – oh, what a bite exploding with flavor! These days, since I don’t eat pita anymore, I rely on roasted meats and veggies as my tzatziki conduits. Beyond the lovely, tangy creaminess of the sauce, I just like saying the word – tzatziki, tzatziki, tzatziki. I eat salsa with Mexican food, I eat wasabi with sushi, I slather steaks with chimichurri, I put mustard on hotdogs and I top Greek food with tzatziki. So there.

Tzatziki

2 cups plain Greek yogurt, or half sour cream and half yogurt
1 medium cucumber
2 large garlic clove, crushed
1 Tbsp finely chopped fresh mint
2 Tbsp finely chopped fresh dill
1 Tbsp olive oil
2 Tbsp fresh lemon juice
Salt, to taste

Peel, halve and remove seeds from the cucumber, then finely dice. Sprinkle salt on the diced cucumber and let sit for about five minutes. Place diced cucumber it between two towels and press gently to remove any excess water. You may need to repeat with more dry towels to get all the water. In a medium bowl combine yogurt/sour cream, garlic, mint, dill, olive oil and lemon juice. Stir until combined. Fold in cucumber and mix until it is evenly distributed. Add salt to taste. Chill overnight before serving.

Cauliflower Saute

cauliflower sautee_edited-1

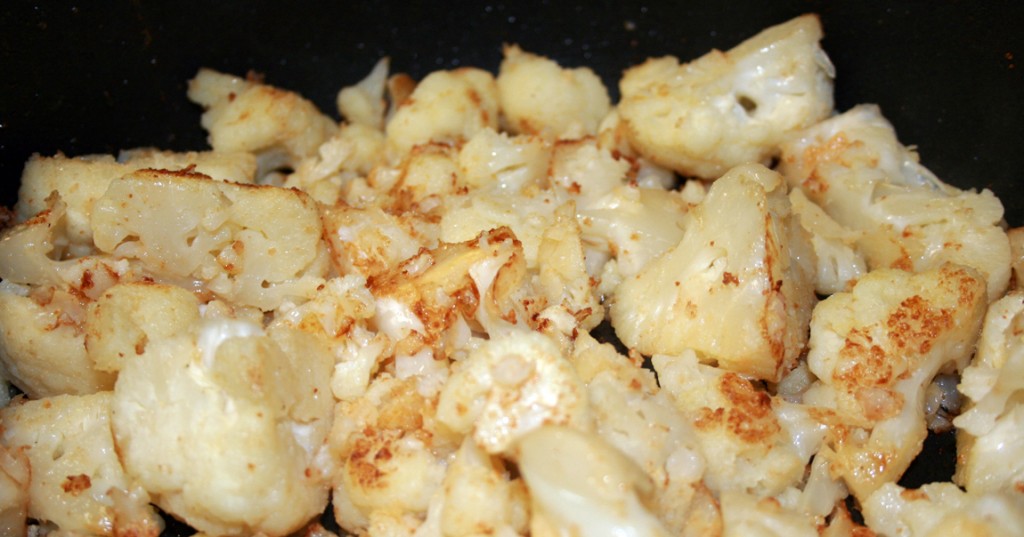
Here is another quick way to prepare cauliflower, in case you did not get enough when I cooked it with curry, or that time when I surrounded it with garlic, and don’t forget the time I made it into fritters, then there was the time I mashed it. We eat a lot of the stuff around here, and I don’t see and end in sight. I swear this time it is different, and enjoy it along a spicy or busy main dish. Nutmeg may sound like an odd spice to use outside of a dessert, but it works amazingly well with cauliflower and helps keep preparation simple and flavorful. It is pretty common in Middle Eastern and European dishes to use nutmeg in savory vegetable and meat dishes. After you use it with cauliflower you will understand why. Yum! I like making cauliflower on the stove top when we are in the RV, or whenever the oven is busy cooking the rest of the meal. It is easy to let it basically prepare itself while I am getting other parts of the meal done, then leaving it covered off the heat keeps it warm and ready to serve when you are.

Cauliflower Saute

1 head cauliflower
3 Tbsp butter
2 garlic cloves, crushed
¼ tsp nutmeg
Salt and pepper to taste

Cut cauliflower into bite-size florets. In large skillet melt butter over medium heat. Add garlic and cook for a few minutes until it softens. Turn up heat to high and add cauliflower. Toss so the butter and garlic coats the florets. Cook until the cauliflower begins to brown. Add nutmeg, salt and pepper and continue to toss every minute or so, allowing more browning. When about half the floret surfaces are browned turn heat to low and cover, cooking the cauliflower until preferred softness, about five to ten more minutes.

Whippersnapper Soup

whippersnapper soup_edited-1

Little B loves vegetable soup. I also consider her a whippersnapper. The traditional definition of the term refers to an insignificant or impertinent young person. Such a definition is not what I think of when I use the word. I think it more describes a precocious, inquisitive little one, which is much more in line with Little B’s personality. Her precociousness carries over to her view of soup. Whether it is actually chicken soup or tortilla soup or beef stew, she considers it vegetable soup. Pretty reasonable, I think, since most soup she has seen is loaded with vegetables. Big D and I like soup, too, especially if it has a bit of a spicy bite. I particularly like the limy chicken soup I make on occasion. Our ‘big people’ soup does not always go over well with Little B because her tongue is not yet attuned to hot spicy. I have never served Little B canned soup. I am sure someone has, but canned soup worries me. With the odd, faded colors of the vegetables and the grainy feel of the meat they are a bit unsettling to me. Don’t get me wrong – I grew up on Campbell’s Chicken Noodle Soup and still sometimes crave the salty soft noodles and bright yellow tinge of the broth. I don’t think they taste bad, except for the saltiness of some types, but I like to know where my food comes from, and I feel the same for what Little B eats. My know-where-it-comes-from parameters are certainly not met by canned soup. This soup recipe is simple to throw together and freezes well. I make it regularly, with a variation on the vegetables I add, depending on what is in the fridge. Little B eats three or four bowls a week, often when Big D and I eat spicy food. She even has it for breakfast sometimes. Frozen in two to three cups per resealable bag or container is perfect – enough to have in the fridge when requested without any going bad. Our whippersnapper loves it and it is so good for her.

Whippersnapper Soup

1 pound package 16 bean soup mix, flavor pack discarded
28 ounce can whole peeled tomatoes
4 celery stalks with leaves
2 cups fresh or frozen green beans, cut to 1 inch lengths
¼ head green cabbage
½ small onion
8 ounces ham, finely chopped (optional)
4 cups filtered water
1 – 2 cups chicken or vegetable broth
2 cloves garlic, crushed
1 Tbsp sea salt
½ tsp black pepper
1 tsp ground cumin
1 tsp fresh oregano, chopped

In stock pot or crock pot combine bean soup mix, tomatoes, celery, green beans, cabbage, onion, ham (optional) and broth. Add garlic, oregano, salt and cumin. Stir until spices are combined. Add water and stir a bit more. On the stove top bring soup to a boil then turn down to simmer. Cover and simmer for about four hours until beans and vegetables are soft. In a crock pot, set to low and cook for eight to twelve hours. Serve immediately or store in the freezer for up to three months.

Blogiversary with Cheese Stuffed Jalapenos

stuffed jalapenosA year ago today I started this blog. Before doing so I thought about it a lot. I wondered how I would feel if it exploded with popularity, or if most interest would be from spammers. Would I want to continue it if either happened? Well, now I know. Spammers love me and I have a rather quiet following. My reaction is that I love doing it. Another thing I discovered over the past year is that I got a lot more out of blogging than I expected. I looked forward to discovering new recipes, documenting old ones and giving Little B experiences in the kitchen, like my parents did for me. The past 12 months were full of changes – I ended one job, started another, moved across the country, lived in four different abodes, said good-bye to family and friends in a number of different ways, then sought out meeting and getting to know new ones. I like my day job, but it lacks the creative outlet I crave, just as my previous full time work did. I don’t have a problem with the absence. My job fills a need for me to be challenged to solve big problems, while protecting separately the things I love. It may be wimpy of me, but I have always hesitated to rely on my passions to support a living. I think I fear it being taken away from me. The last time I tried to do so we got a new addition to our family – Little B – who influenced a change in the direction I was going and who has given me a new passion. My interest in a little, bustling catering business was not a good fit with a newborn. I don’t regret putting it to the side, for Little B is turning into quite the sous chef, the future looks bright for her and with her. Concentrating on my weekday job, knowing that Little B and Big D and cooking comes before and after it is working really well for now. Big D and I go with the flow in life, as always. Cruising the world on a sailboat full time is a ways off, but we are moving in that direction. Until then, I plan to embrace life, watch Little B grow and hold hands with Big D. I could not ask for more right now. When I looked back in the 123 blogs I did over the past year I was surprised to discover I did not start blogging sooner. I am actually an introvert, so doing the blog is stepping outside of my shell and it feels good. A whole year of yumminess. I see how my eating habits have evolved and how much better I feel without the sluggishness I get from high carbohydrate food. I also see how life experience, even over such a short period of time, changed how I approach things and find joy in small routine stuff that is easy to overlook. Oh, wait, this thing is supposed to be about food, too! I pondered for a while about what to make for this blogiversary. I considered doing something fancy and complicated, but that is not where I am right now. What I came up with is quite a gem. Today’s recipe is consistent with our low carbohydrate, wheat free leanings, and made with no concern whatsoever to what Little B likes. This is for me and Big D, who has been so supportive of my creative outlet, especially with tweak suggestions and acting as guinea pig. Spicy and cheesy and addictive these are. Thanks for visiting my blog. I hope you enjoyed your visit as much as I enjoyed preparing it for you, and please return soon!

Blogiversary Cheese Stuffed Jalapenos

6 large jalapenos, halved lengthwise and seeded
8 ounces cream cheese, room temperature
4 ounces ham, finely diced
1 tsp garlic powder
½ cup finely shredded Mexican cheese blend

Preheat oven to 400 degrees. Combine cream cheese, garlic and ham together. Fill the jalapeno halves with the mixture. Sprinkle with the Mexican cheese blend, gently pressing it into the filled halves. In a baking sheet or dish arrange the jalapenos so there is some space between them. Bake for about 20 minutes until cheese is melted and browning, possibly drizzling down the sides of the jalapenos.


Post Navigation