Any Kitchen Will Do

Give me a kitchen and I will cook.

Archive for the category “Mom’s Kitchen”

Spinach Artichoke Dip

spinartdipp
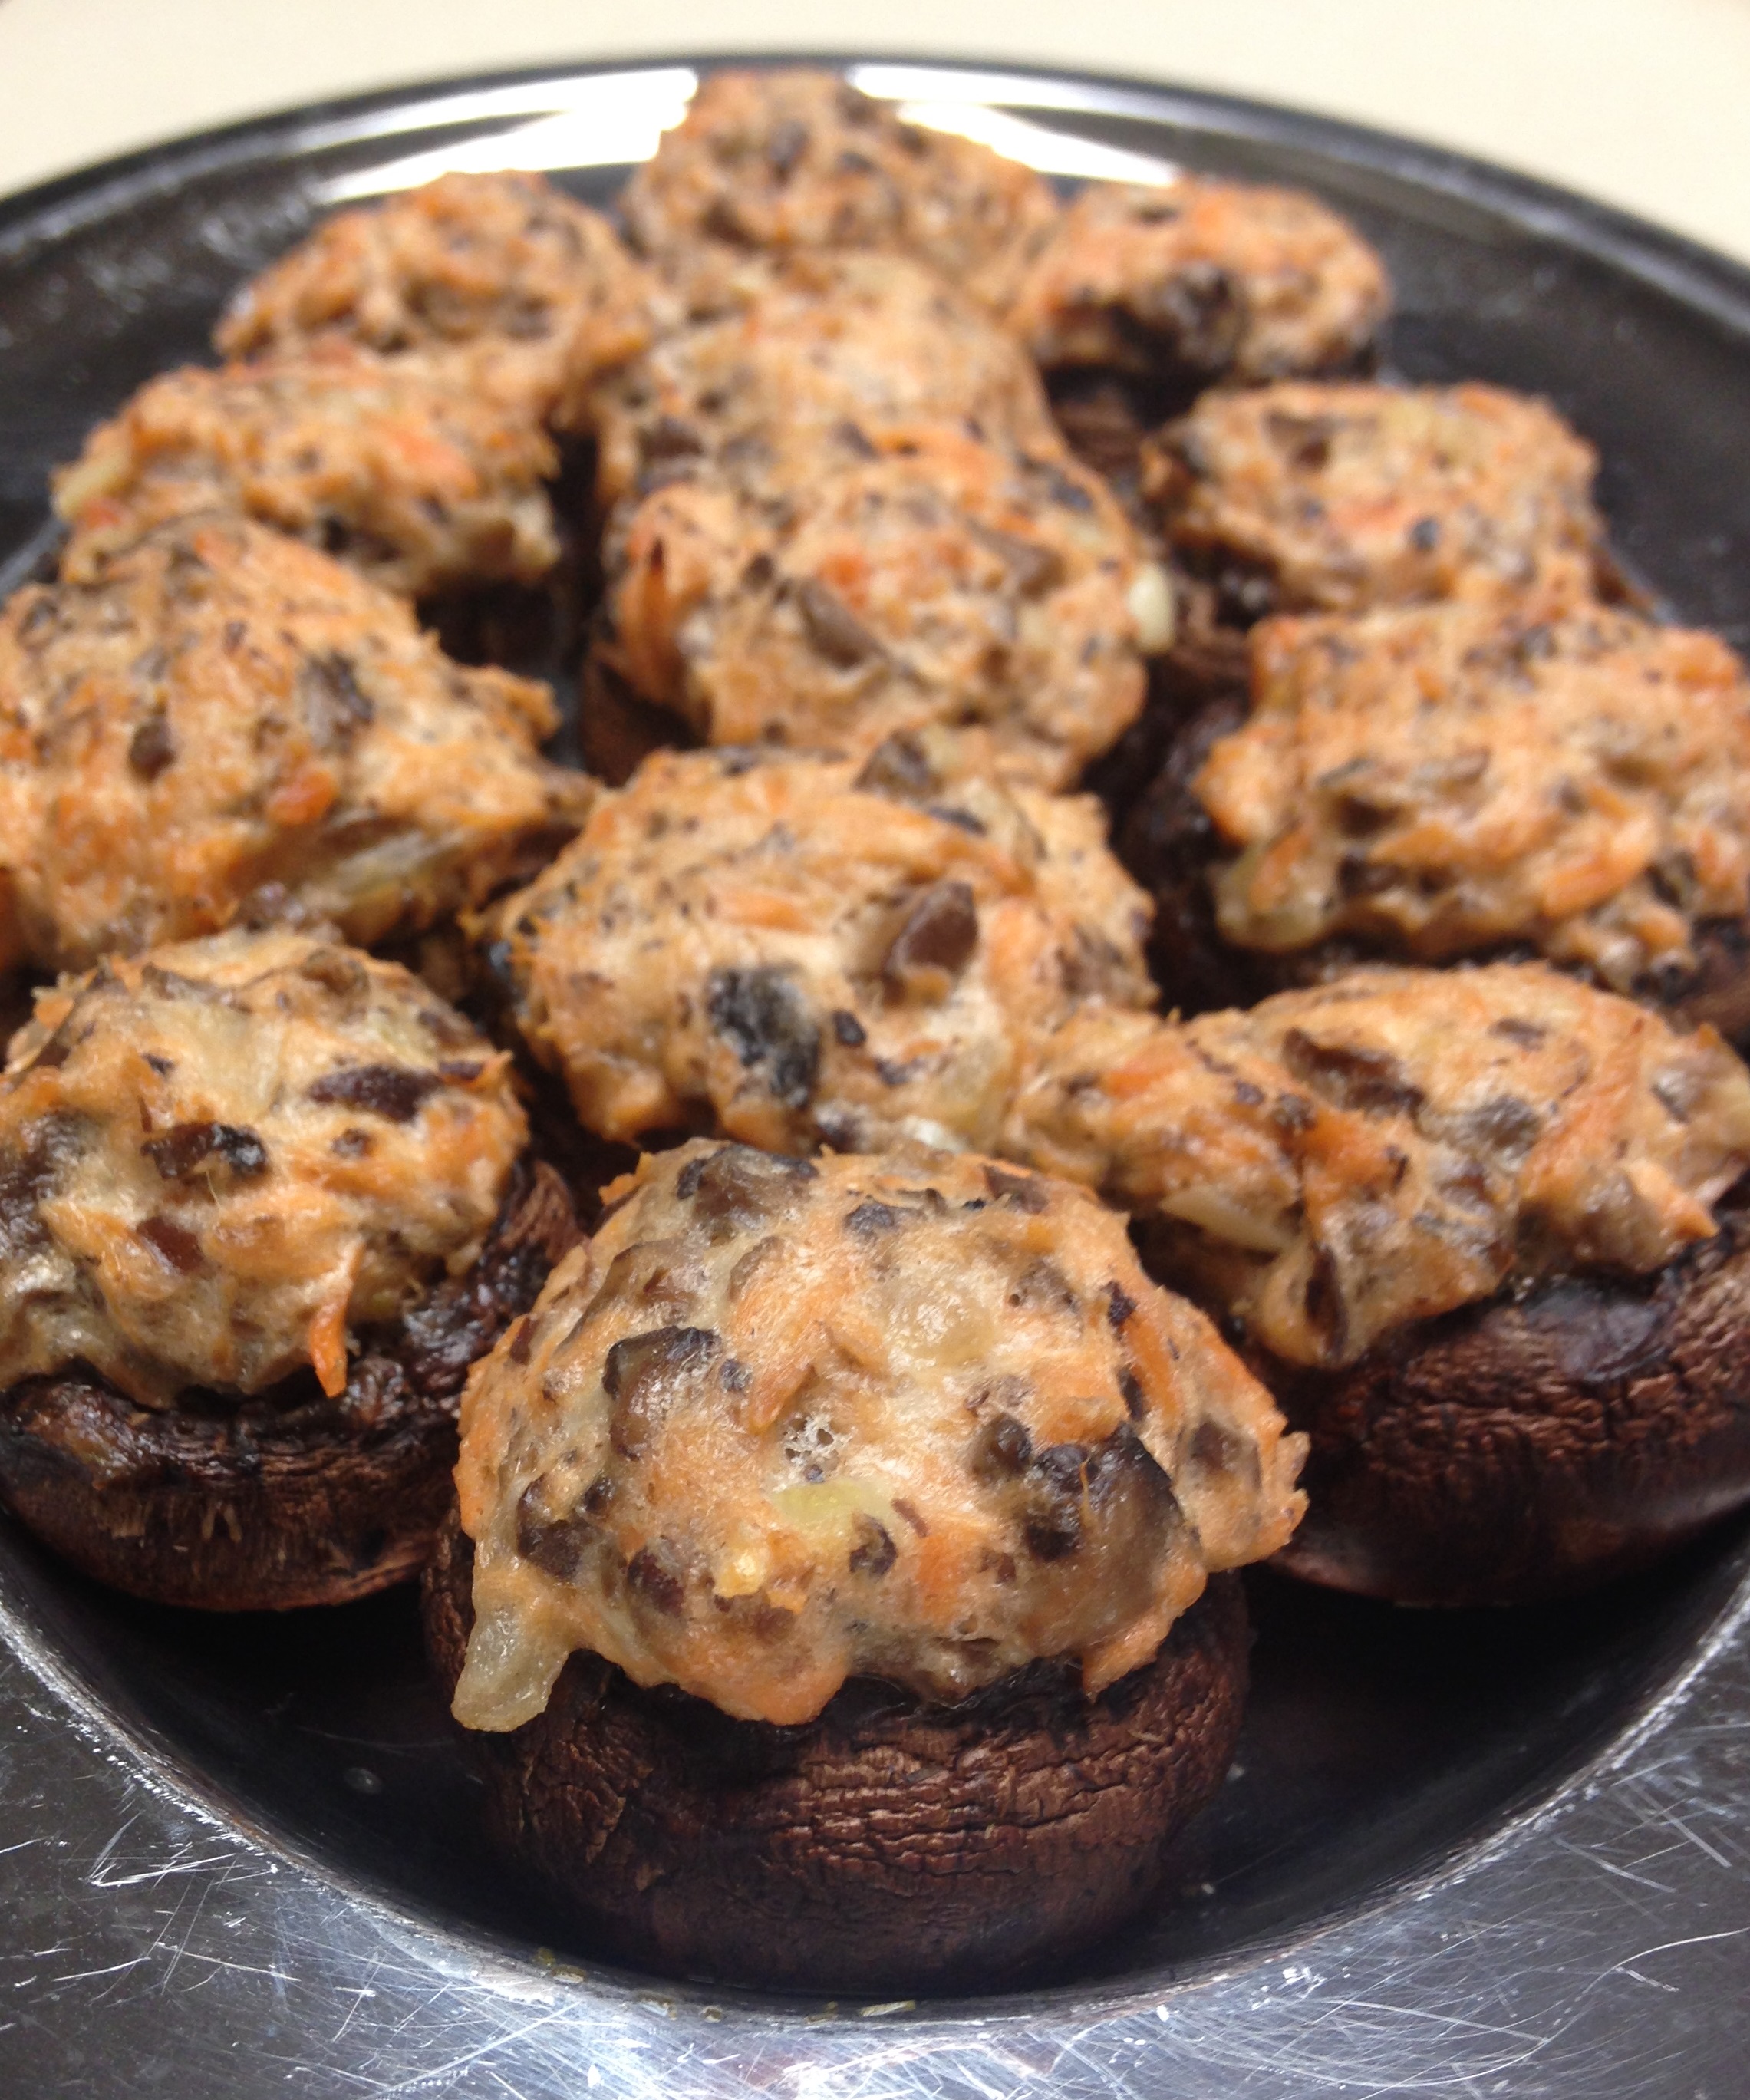
My moms are awesome. One gave birth to me and is crazy supportive. The other I have known since I was seven, fed and housed me numerous times, then eventually became the bestest mother in law ever. They both love cooking and sometimes generously open up their kitchens to me when I visit. Sometimes I come in with a plan and bags full of groceries. Other times I dig around and see what they have for making a meal. In the past I have made pecan crusted chicken and stuffed mushrooms in my mother in law’s kitchen. Today I took over my mom’s kitchen to become dippy. Again.

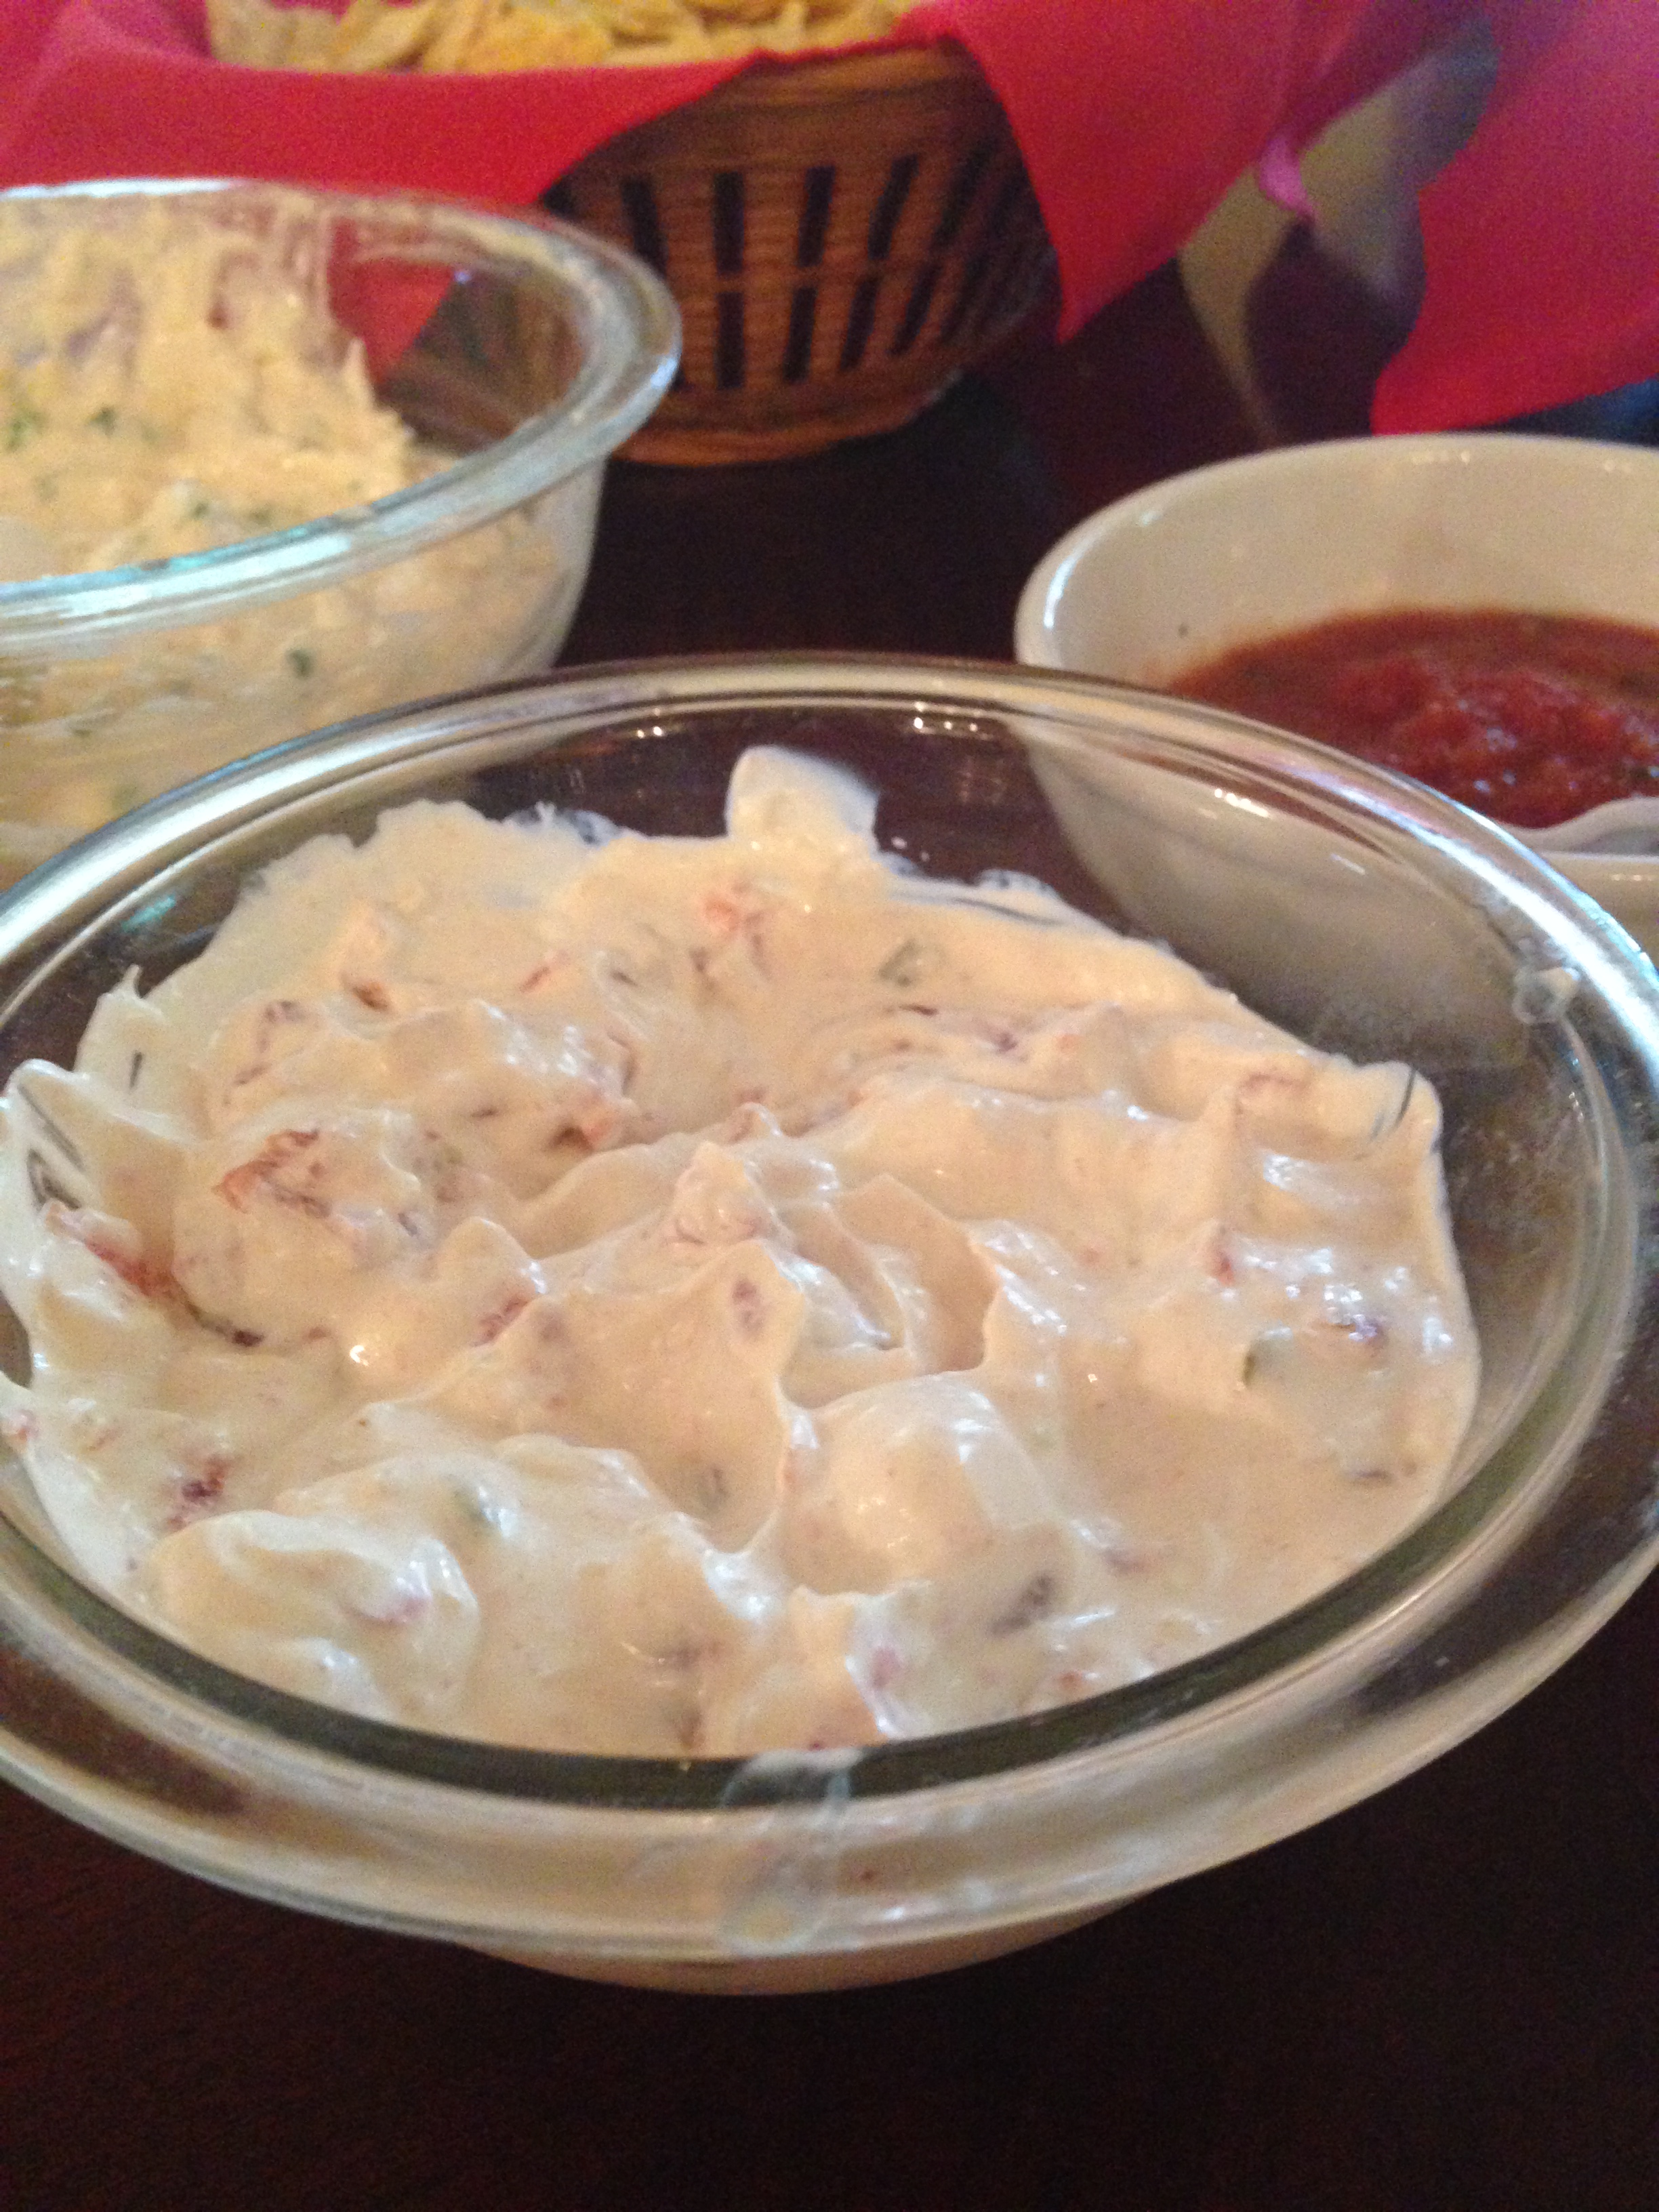
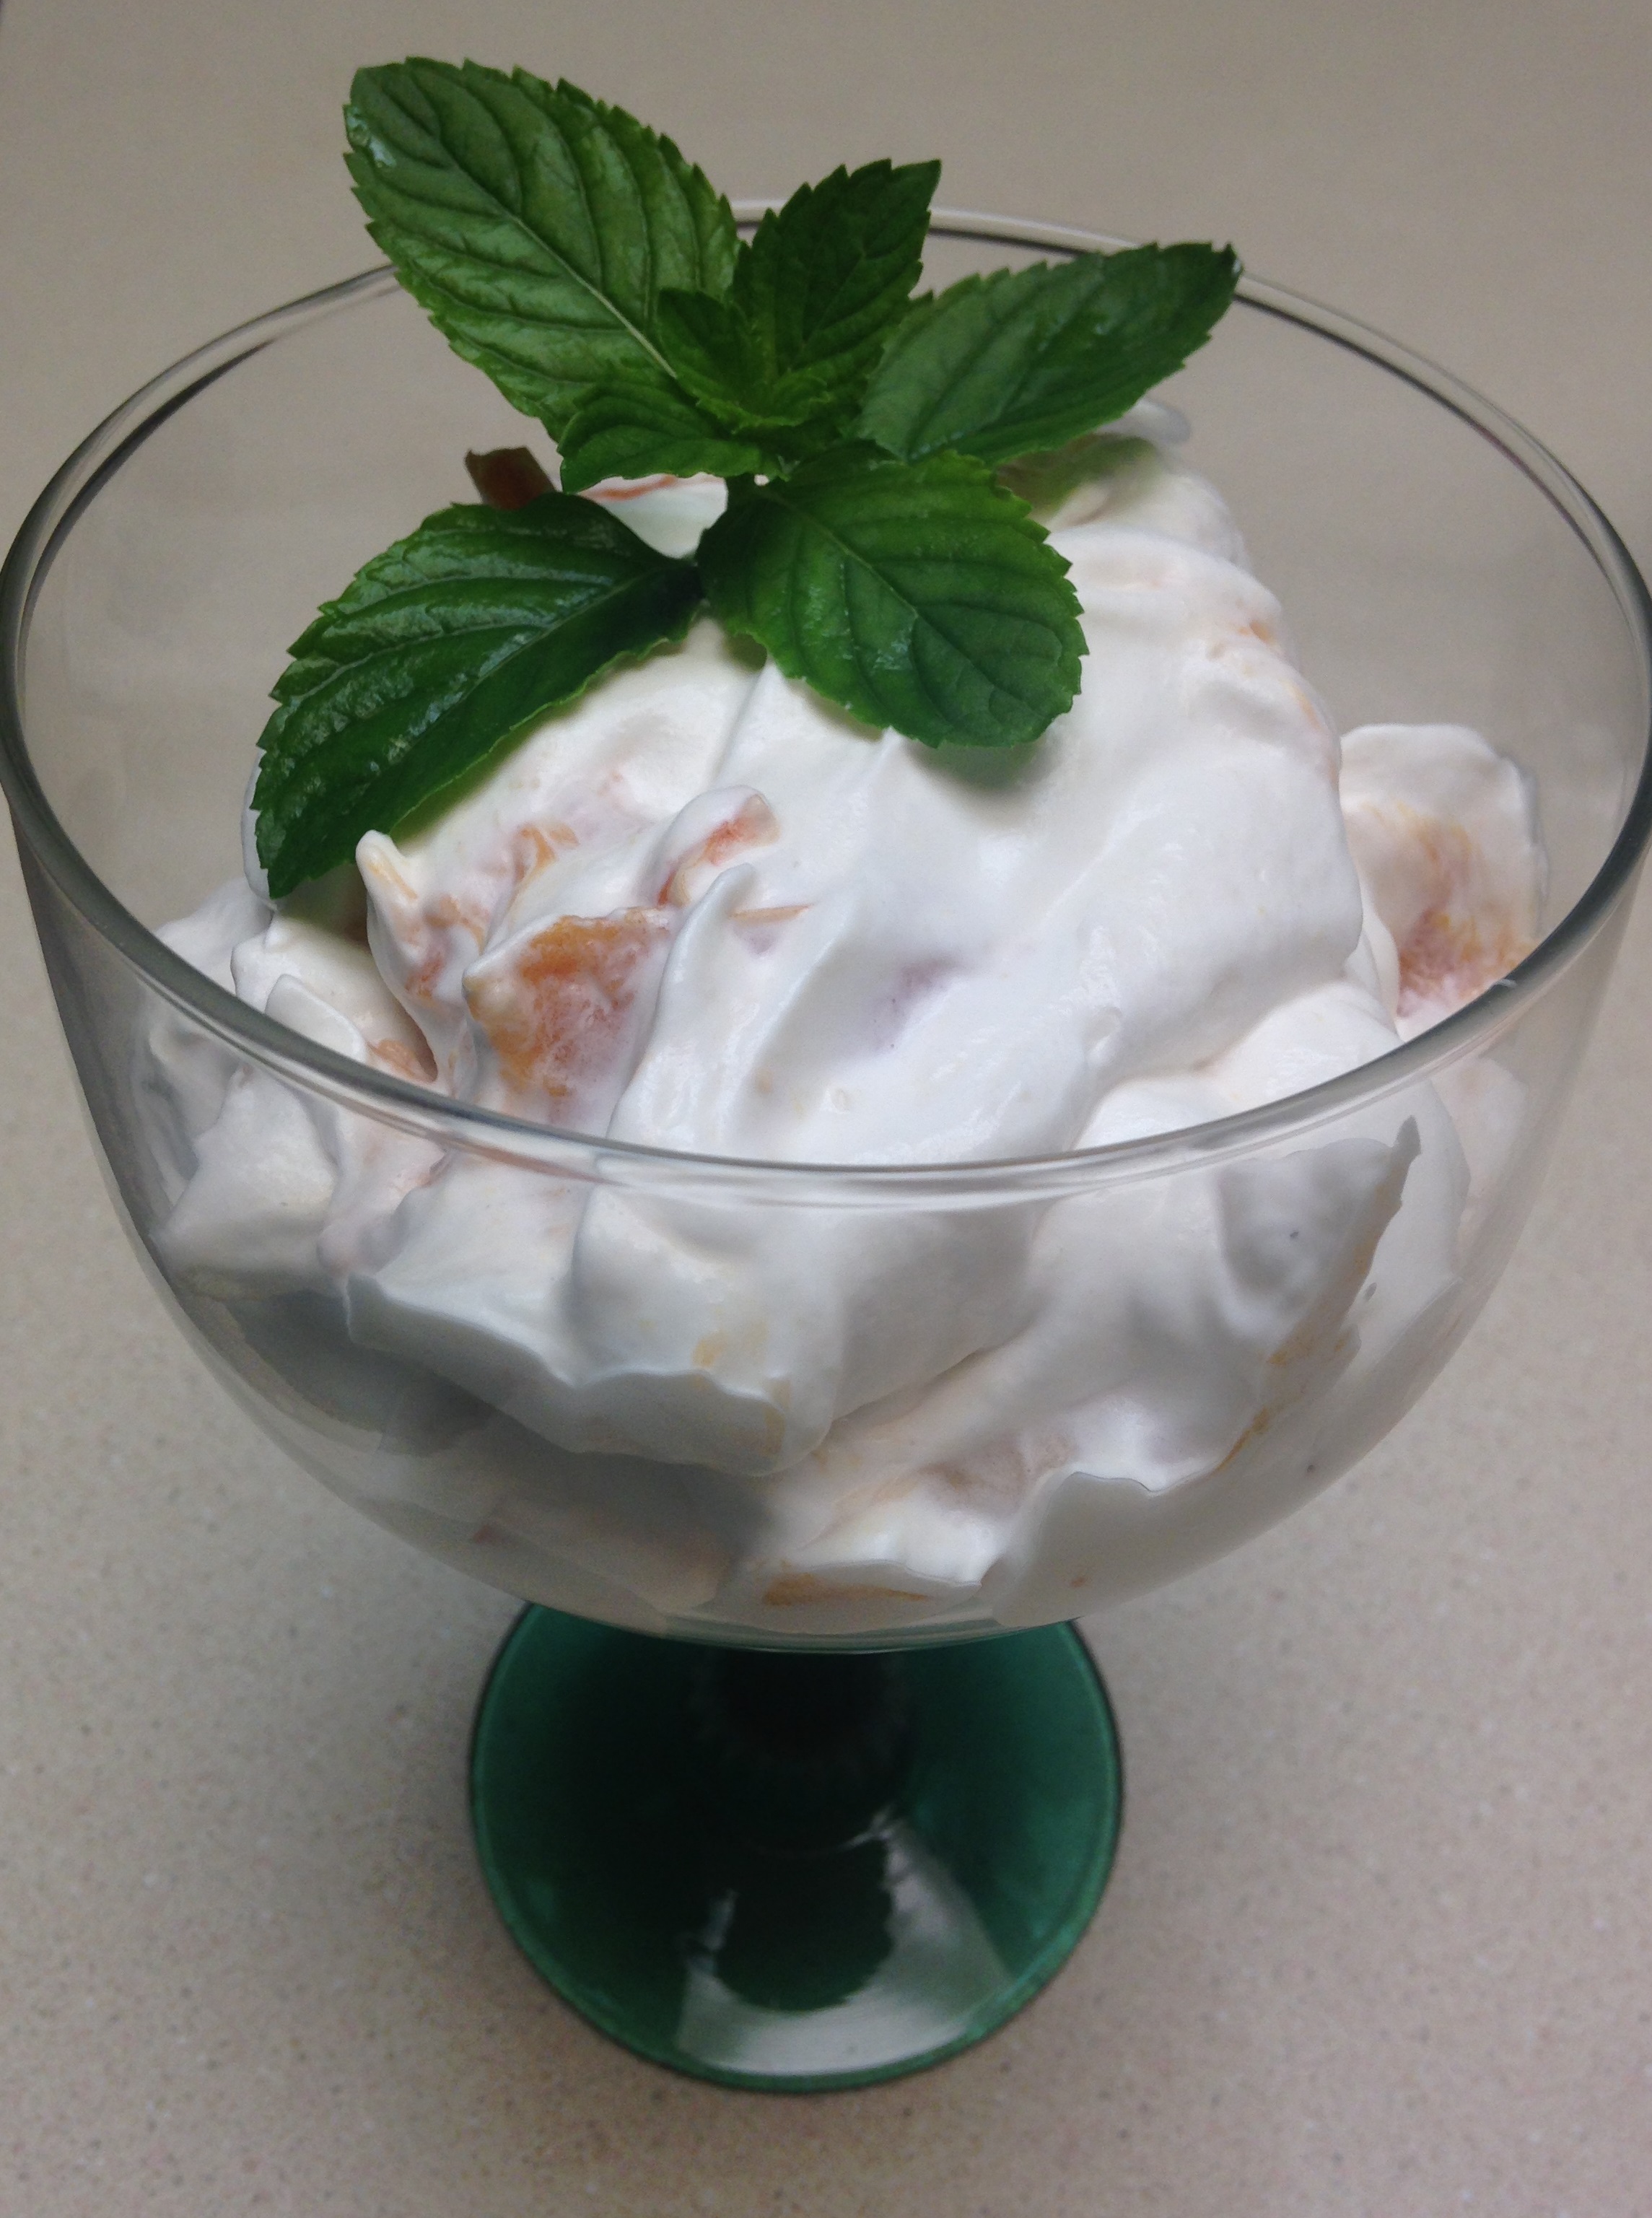
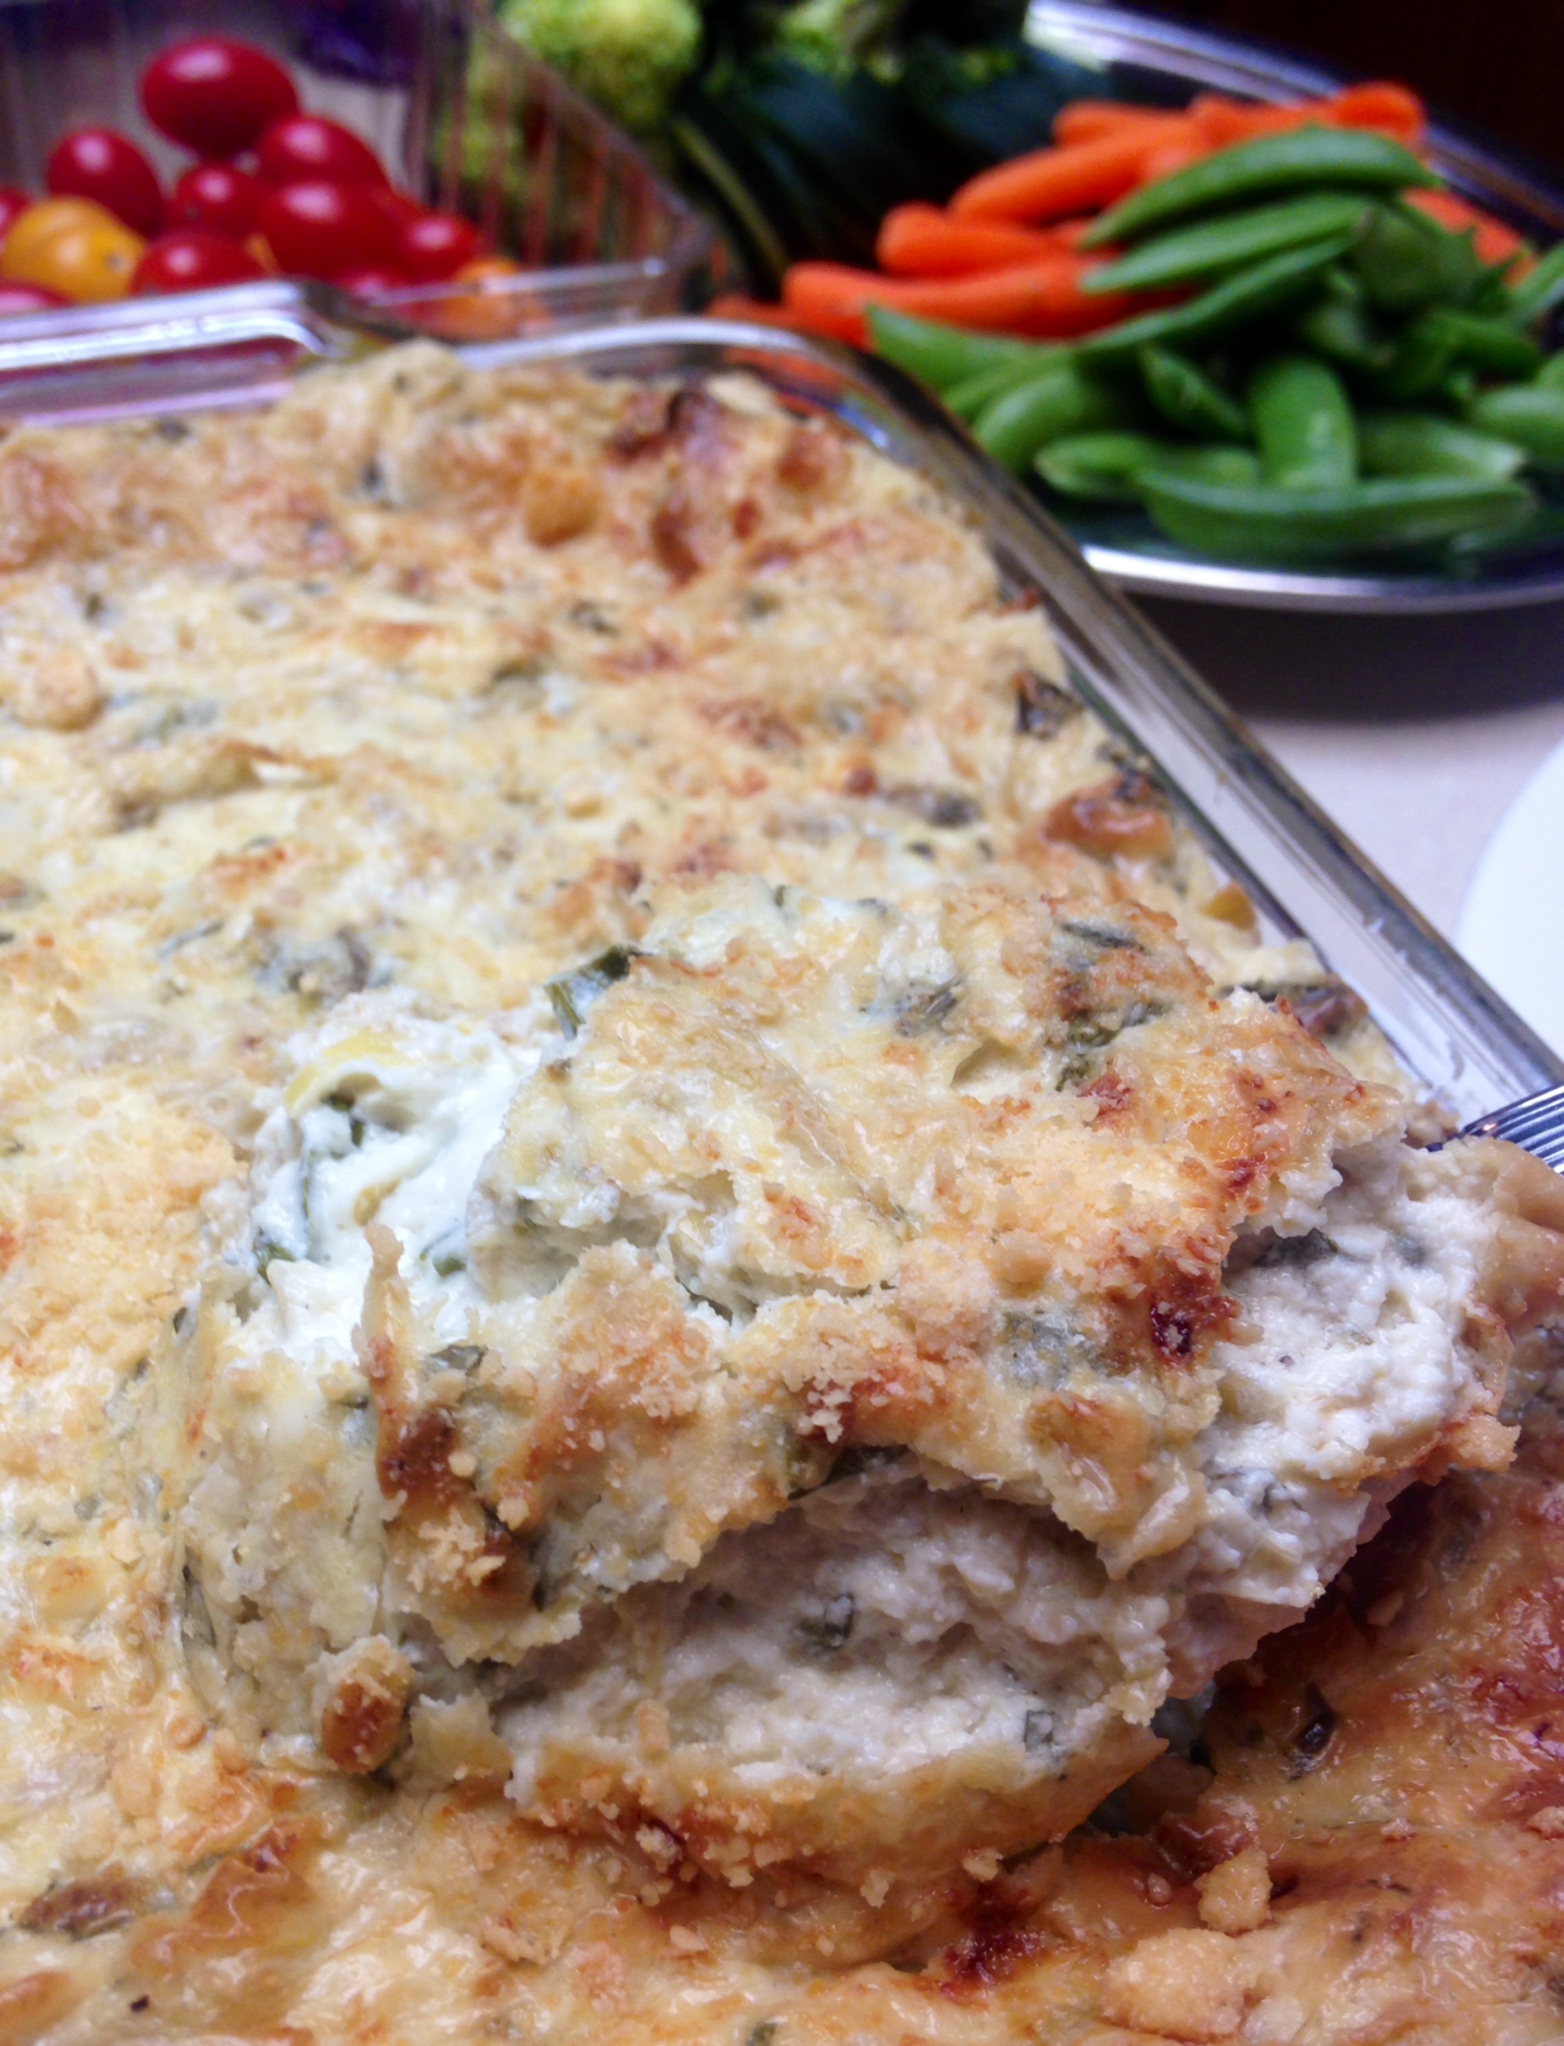
Tonight we had a meatless Monday meal. It was accidental, but yummy. We usually figure out a protein and work vegetables and other stuff around it. This time we went the other direction. I made some guacamole with some gorgeous avocados and also made this lovely, cheesy spinach artichoke dip. As is often the case, I opened mom’s well stocked fridge and checked out what was in there to get inspired for dinner. I have made such a dip before, and it was lovely to see the perfect ingredients just sitting there waiting to be made into a dip – spinach, marinated artichokes, cream cheese, sour cream….It is much more mild than my jalapeño popper dip but still cheesy.

The cool thing about this dip is that it freezes easily, so the huge volume will not go to waste – after we head home my mom can store it in the freezer, then pull out leftovers and bake it up for a quick appetizer when her church or book club group comes over. This is a big recipe! It can easily be halved for a smaller dose, but I like making it for parties and pot lucks, so I share below the big version.

Spinach Artichoke Dip

4 cups fresh spinach, roughly chopped
28 ounces (2 cans) marinated artichoke hearts, chopped
1/2 small yellow onion, finely chopped
32 ounces cream cheese, room temperature
1 cup sour cream
1/2 cup heavy cream
1/4 cup Worcestershire sauce
4 garlic cloves, minced
1/2 bunch fresh parsley, finely chopped
2 Tbsp lemon juice
2 tsp sea salt
1 tsp ground black pepper
3 Tbsp grated Parmesean cheese

Preheat oven to 350 degrees. In a mixer bowl add all ingredients. Mix on medium speed for two minutes until all ingredients are thoroughly combined. Pour mixture into 9×9 or larger baking dish and spread top layer evenly. Sprinkle Parmesean cheese on top. Bake for 45 minutes until hot and bubbly. If top has not browned turn on the broiler and let broil until highest points turn brown. Remove from oven and let rest for about ten minutes. Serve with vegetables or other dippable bits.

Bronze Baked Drumsticks

2015-07-09 10.37.24
You may be about sick of me sharing different ways to cook chicken, but I can’t help it. Trust me, I don’t tell you about all of them. I never really mastered fried chicken on the stove top, like my mom – I know there is a ‘sweet spot’ for temperature and depth of oil that gets the inside cooked and the outside crispy, but I have just not made it enough to get in the sufficient practice. I do a low carb work around that is insane good, so I take comfort in my version.
Otherwise, I bake and bake it, then bake again, using different flavors. Lots of times I do little wings and drumettes, but these pretty, full sized drumsticks were hanging out at the store, so I tried them instead. This recipe, thrown together from stuff in the pantry, was quite good and pretty too! If you don’t have the seasoning mix it can be easily replaced with another, or the suggested mix noted below.
Bronze Baked Drumsticks
8-10 large chicken drumsticks
1/2 cup Worcestershire sauce
1/4 cup extra virgin olive oil
1 lemon juiced with meat retained
1 Tbsp Seasoning Salt (recommend Montreal Steak Seasoning)
In large bowl combine Worcestershire sauce, oil and lemon juice with lemon meat. Add chicken and toss until well coated. Place in refrigerator for one hour, tossing again after 30 minutes. Preheat oven to 375 degrees. Line large shallow baking pan with aluminum foil. Remove drumsticks from marinade and let excess drip off, then place on baking sheet. Place in oven and bake for 45 minutes to one hour, until chicken juices run clear. Remove from oven and let rest for five minutes before serving.
Note: if you don’t have the Montreal Steak Seasoning mix, try the following: 1 tsp sea salt, 1/2 tsp ground black pepper, 1/2 tsp garlic powder, 1/2 tsp onion powder, 1/4 tsp ground cumin, 1/4 tsp ground mustard, dash red chile pepper flakes

Drizzly Fruit Sauce

2015-07-04 21.14.01

There is no denying that fruit is naturally sweet, cuz it is full of sugars. Since the body does not really need much sugar, we have always resisted consuming much ourselves or giving it to Little B, whether natural or processed. She does eats fruit, and so do we sometimes, but it is usually whole, raw versions, not juice from concentrate or colored sugar water with a smidgen of processed juice from concentrate.

When Little B does come across such liquids they are overly sweet for her palate, for she is used to the sweet of real fruit, and in the realm of liquids, she is used to the slightly bitter taste of bubbly water (unflavored carbonated water). It is our fault. I love bubbly water and she liked sharing my beverage when little. Although some consider carbonated beverages (whether plain or flavored) not helpful to the body, I find that there are much more harmful things to drink. Tangent over, back to the drizzly stuff.

fruit sauceI was seeking out yet another light summer dessert for a crowd. We had flash frozen fruit in the freezer and I was reminded of a dessert I made regularly when I first started learning how to cook in earnest after college. It was berries and a splash of juice pureed and let to sit. I chose to be more expansive in this version, mixing the frozen stock and fresh stuff in our crisper. It is definitely a sauce to make the day before. The flavor magnifies when allowed to muddle around. I topped it with some cashew cookies (look for the recipe soon) and some lovely chocolate cashews I made a few months back. With some vanilla ice cream as a base it made for a not so heavy dessert on ANOTHER hot summer night.

Drizzly Fruit Sauce

1 cup chopped pineapple
1 cup chopped canteloupe
1 cup chopped peaches
1 cup raspberries
1 cup blackberries
1 cup blueberries
1 Tbsp vanilla extract

In medium pot over medium heat add and combine the six fruit ingredients. Cover and let heat for about five minutes. When fruit begins to bubble, lower heat by half and continue cooking for 30 minutes, until fruit has released juices. Remove from heat, add vanilla, stir and let sit for one hour. Puree fruit with stick blender or food processor. Transfer puree to container with airtight lid and refrigerate for at least 12 hours. Serve over ice cream and top with crumbled cookies, almond meal and/or dessert cashews.

Tex Mex Dip

2015-07-03 18.34.43Dip is a sure fire thing to always have around. Having last minute dinner guests? Pull out the dip with crudite. Feeling nibbly? Pull out the dip with some chips. Faced with raw chicken that needs to be dinner? Pull out the dip and slather the fowl with it before tossing it in the oven. Headed over to someone’s place for drinks? Pull out the dip. It can come in all shapes and sizes and colors and quantities. It can be hot, or cold or both. People can eat it, or not. Dips can be made to taste like just about any dish.

We like queso. When we don’t want to break out the crock pot, processed cheese and can of tomatoes we don’t have to miss out on the flavors. We just pull out the can of tomatoes and veer in another direction. Here is a dip I came up with that gives us the flavor and tang of Tex Mex without the logistics. When I say queso I don’t mean the Spanish word for cheese. I mean chile con queso, the warm cheese dip with tomatoes, onions and chiles often served with a Tex Mex meal. I like queso, but it needs melting and oversight so it does not burn and reheating when it cools off, then if the crock pot cord does not reach to the nearest plug there is need for an extension and the possibility of tripping on it…not that I ever trip on anything. 🙂 None of these logistical elements are insurmountable barriers, but are way beyond what is needed for this dip. Nothing can replace chile con queso in my book, or plate, but this is a nice, cool variation.

Tex Mex Dip

2 cups sour cream
1 Tbsp lime juice
1 Tbsp ground cumin
1 tsp garlic powder
1 tsp sea salt
1/2 tsp ground black pepper
1 can tomato and chiles, well drained
1/4 cup finely chopped onion

In a medium bowl combine sour cream, lime juice, cumin, garlic powder, sea salt and pepper. Whisk until combined. Add onion, tomatoes and chiles. Stir until well combined. Chill at least two hours or overnight before serving.

Minty Melon Salad

2015-07-03 16.17.07When I was young and helping my parents in the kitchen I steadily graduated from simple tasks to more complicated,  (and for clumsy me) dangerous ones. I started with setting the table, then got to put condiments straight from the fridge to the table, eventually graduating to placing crystal and working in the oven and on the stove top. One very typical, simple task I did was melon balling. We often made weekend brunches at home, which included melons when in season. Since we had a cool little melon baller it made sense to us it instead of making boring, square pieces of melon.

2015-07-03 21.01.32When I made this salad about ten years ago I did not write it down – I don’t remember if someone told me how to make it or I read it, but I loved balling the melons.  I made it again recently as a dessert to a burgers and dogs meal while staying at my mom’s house – I even used the old melon baller that was still hanging around! I guessed pretty close on ingredients because tasted just like I remember. It did a great job topping off a hearty meal as we sat around the pit fire on a warm summer night. The mint soothed the full stomachs and the melon refreshed. I strongly recommend it!

Minty Melon Salad

3-4 cups balled or cubed watermelon
3-4 cups balled or cubed cantaloupe
1/2 cup water
1 cup Stevia In The Raw (or other preferred 1:1 sugar substitute)
3/4 cup mint leaves, loosely packed
1 lemon, juiced
1 Tbsp amaretto liquor
Place melon balls in large serving bowl. In blender place remaining five ingredients. Blend on medium for 15-20 seconds, until mint is finely chopped.  Let sauce rest until foam subsides. Pour sauce over melon and gently stir to coat. Chill at least an hour or overnight. Toss to again coat, then serve.
Note: The mint won’t be bright green after sitting overnight, but the flavors will settle better in the melon balls.

Sauteed Squash Strips

2015-06-28 13.53.16

With all our moving around and packing and unpacking and living in compact spaces, I have lost the desire to accumulate kitchen gadgets. If something cannot be used for three or more different purposes I am hard pressed to acquire or keep it. If I do succumb, such things often don’t make ‘the cut’ when we are packing and downsizing. Things like avocado slicers, cherry pitters, cheese slicers and the like are not found in our kitchen drawers. On the other hand, our eleven year old Wusthof knife set goes with us everywhere. One thing I have not been able to  do consistently without a gadget is vegetable ‘noodles’. I can use a vegetable peeler to make strips of veggies (yes, the peeler always makes the cut), but not so much the rounder noodles I want as a base.

I caved and finally bought one of those twisty vegetable noodle makers. It works well and is compact (I bought the smaller, non-deluxe version). I have used the noodles under sauces in place of pasta, used them as a side dish, and even as part of tacos and enchiladas, which I must say went especially well. Using the gadget reminds me of peeling oranges as a child – I always tried to peel them in one long strip. This gadget can literally make one long noodle out of a zucchini. The problem with a three foot long noodle is dividing it among diners, so ponder some trimming either before or after cooking.

The nice thing about all these uses (and trimming opportunities) is the preparation is the same, and simple. I use them as a conduit to compliment other foods, like many use rice or pasta, so keeping the preparation simple makes so much sense. One way to use them that I have not yet tried is in soup – imagine pho or udon with veggie noodles. Sounds good, but for me, July is not the time for hot soup, so that experimentation will have to wait for fall.

Sauteed Squash Strips

1 Tbsp extra virgin olive oil
1/2 yellow onion, julienned
2 garlic cloves, chopped
1 yellow squash
1 zucchini
Sea salt and ground black pepper to taste

Twist zucchini and yellow squash through thick setting of a vegetable noodle gadget, placing ‘noodles’ into a bowl. With a sharp knife cut an X through the noodles, allowing for randomly shorter, bite-sized strips. In a medium skillet over medium high heat add oil. When oil is hot add garlic and onion. Cook until onion begins to brown on edges. Lower heat to medium. Add squash strips to pan and season with salt and pepper. Toss squash with onion and garlic until heated through, but stop before squash begins to go limp and release liquid, about two minutes. Remove from pan and serve immediately, either as a side dish, taco filler or ‘pasta’ under sauce.

Gin and Tonic Shots

2015-06-27 11.11.06

I wanted to have fun with gelatin. I remember summer gelatin fun as a kid – mixing it with whipped cream, making jiggly things that can be picked up, bowls of shiny, wiggly stuff that falls off a spoon. Little B likes fruity gelatin, so a while back I went in search of what was available at the grocery. If you look at the flavored gelatin packages you will find either sugar or aspartame in them. Really? Aspartame in a product you are expected to mix with boiling liquid? Have they read any of the information about the stuff and the dangers of heating it?? I will get off podium/verge of preaching and move on…

Making some flavored gelatin for Little B from the simple, unsweetened gelatin packets I also found at the grocery, I was reminded of the gelatin shots often consumed at parties in college. The spiked shots in little paper cups were potent and moved fast through the system. The challenge was always getting plenty of liquor in them while making sure they could still firm up. As I am older and tell myself I am more mature, so I wanted to try a slightly more refined version of the shots. Is there such a thing as mature gelatin shots?!

2015-06-27 13.40.00My favorite cocktail of all time is a gin and tonic. It took a couple of tries to get the liquor/non liquor liquid ratio right, but I figured it out. I highly recommend keeping close to the ratios I present, even if you vary the liquor or flavoring. For example, rum and coke or screwdriver or margarita or…oh boy do I have more experimenting in my near future! My mother in law, who is also a gin and tonic lover, liked them. Sis in law did too! She is usually a sangria kind of gal, leaving gin to the rest of us, but she downed a few. I do agree that they are not a substitute for slowly sipping a tall gin and tonic on the rocks during a hot summer evening, but they were a fun variation to liven up a dinner party.

I remember first seeing the lime presentation in a magazine a billion years ago (well, maybe ten), unfortunately I do not remember where, so crediting it must remain a mystery. Happy summer to you!

Gin and Tonic Shots

3 cups diet tonic water
2 tsp stevita (or other granular erythritol/stevia sweetener)
6 tsp unflavored gelatin (Knox brand usually has 2 tsp per envelope)
1 cup gin
6-8 limes, sliced into 6 rounds each

Heat 2 cups of tonic water and sweetener until boiling. While liquid boils add final cup of tonic water into a medium bowl. Sprinkle the gelatin over it, letting it sit for one minute. Add hot liquid to bowl and stir until gelatin is completely dissolved. Add gin and stir. Pour mixture into a 9×9 baking dish, or pour into approximately 50 mini paper cups/mini cupcake papers, or split between both methods. If using mini cupcake papers it is suggested they be arranged in mini cupcake pans, for the liquid will seep through. Refrigerate at least overnight.

To serve from the dish, cut shots into 1 to 1 1/2 inch cubes with a sharp knife, removing from the dish with a thin, flexible spatula. Place squares on lime rounds to serve. If using paper or cupcake cups, gently peel away paper and invert them on lime rounds. To eat, tip shot into mouth, then with your teeth fold the lime round in half and bite down, releasing juices to mix with shot. Juice may dribble down chins, but you won’t care.

Tangy Feta Pork Chops

tangy feta pork chops

Just like chicken, pork is quick and easy to make, so the challenge is adding variety to the flavors surrounding them. A lot of my chicken and pork recipes are interchangeable, like this one, because both proteins represent mild flavored bases. They can be smothered easily enough, or done in a skillet with a light sauce like these mustard cider chops.

Another easy way for me to make pork chops is to sear, make sauce, pour it on chops and bake for a bit. I call it SSPB – Sear Sauce Pour Bake. The prep is quick, and if forces beyond my control delay dinner, then letting them sit in a turned off oven after they are done cooking does no damage. I know such things NEVER happen to anybody else, but if it ever may happen to me, this is the type of dish I make. Things like traffic delaying dinenr participants, discovery of a new spider, a Minecraft world I just HAVE to see, or the wonders of a summer thunderstorm that must be observed from outside. Here is a recent SSPB using citrus to go along with the tang of the feta. Dinner indeed got delayed about twenty minutes because of an art project, so the delay factor was indeed tested on this one!

Tangy Feta Pork Chops

2 Tbsp extra virgin olive oil
6 thin cut pork chops (with or without bone)
1 lemon, juiced with meat retained
1 lime, juiced with meat retained
1 clove garlic, minced
Salt and pepper to taste
1 cup crumbled feta cheese
½ cup heavy whipping cream

Preheat oven to 350 degrees. With kitchen scissors or a knife make a ½ inch slit in the curved edge of each pork chop, towards the center. Generously season pork chops with salt and pepper. Place three chops in a large pan over high heat, cooking until downward facing side is seared, about two minutes. Flip chops and repeat searing. Remove chops to 9×13 baking dish. Repeat searing with remaining three chops. Remove to baking dish. Turn heat to medium low. Add lemon and lime juice to pan, scraping brown bits from bottom. Add feta and cream. Stir until sauce is bubbly, about 3-4 minutes. Pour sauce over pork chops. Cover baking dish with foil and bake for 20 minutes, until pork is cooked through and juices run clear. Chops can be served immediately, or left in oven with heat turned off for about an hour to keep warm.

Salmon Stuffed Mushrooms

salmon stuffed mushrooms

I came up with these when thinking about my in-laws. They are very special people I have known since I was about eight years old. One loves salmon, one not so much. She can usually find shrimp acceptable, but not at all with the salmon. When the salmon eater comes to dinner without the other we often do salmon. The situation came up at dinner a few days ago, and there was some poached salmon left over. There is always the opportunity to use salmon leftovers at a brunch or in a frittata, but I wanted something for dinner. Not breakfast-for-dinner, but dinner-for-dinner.

I didn’t want to overwhelm the salmon with other flavors, so I stuck with ingredients used when poaching the salmon. Being surrounded by mushroom, cream cheese and egg whites the salmon did not get dried out or overcooked. Funny the way things worked out – the salmon loving in-law was also at dinner to enjoy these mushrooms! Go figure!

Salmon Stuffed Mushrooms

15-20 miniature Portabello mushrooms
3 garlic cloves, minced
1 Tbsp extra virgin olive oil
2 egg white
6 ounces poached salmon
1/2 + 1/4 tsp fresh dill
1/2  cup cream cheese, softened
1/2 cup water
Salt and pepper to taste

Scoop out stem and meat from caps of mushrooms. Chop the stems finely. In a small skillet over medium heat add the oil. When oil is hot add the mushroom stems and garlic. Stir occasionally until mushrooms have released moisture and liquid is reduced. Remove from heat. In medium bowl whisk egg white until foamy, about 15 seconds. Add to the whites cheese, salmon, 1/2 tsp dill and stir until combined. Add the stem mixture. Add salt and pepper to taste. Preheat oven to 350 degrees. Fill mushroom caps with cheese mixture. Place filled caps evenly distributed in a 9×13 baking dish. In a measuring cup mix the water with 1/4 tsp salt and 1/4 tsp dill. Stir until salt is dissolved. Pour water into bottom of baking dish. Bake in oven for 30 minutes, until mushrooms shrink and filling puffs up. Remove from oven. Place mushrooms onto platter and serve immediately.

Peach Fool

peach fool

I adore the name of this dessert! Fool! I don’t know much about it’s history, short of it being English and traditionally made with gooseberries. I do know it is not heavy and is easy to make ahead when you have dinner to get ready. I was reminded of the dessert during a recent weekend road trip. If you have ever been to Texas you may have discovered that the Hill Country is prime for grape growing and wine making, and the people there know it. There are more than forty wineries west of the Fort Worth/Austin/San Antonio corridor. The area is also prime for growing other fruits, like peaches. There is an abundance of the sweet stone fruit during the summer, sold at produce stands and grocery stores all over the state and beyond.

During a recent overnight adventure to sample wines between Johnson City and Fredericksburg we discovered it was a prime peach picking period. It was a beautiful trip, full of wonderful company, wines and food, as well as beautiful arts and crafts we discovered along the way. If you want to create your own adventure in the area this website was extremely helpful to us: www.texaswinetrail.com. On the way home we sought out some fresh produce, including the lovely and talented Fredericksburg peaches. The ripe mound we claimed for ourselves were freestone, so they did not stick to the pit.

They are much more sweet that what I usually eat, but here is the thing: enjoying such things in moderation really makes a difference to me when experiencing the seasons, especially summer. I am not a summer fan. Correction – I am not a hot summer fan. Anything above 75 degrees has the potential to make me grumpy. I am currently hanging out in a place that is lucky to have that temperature as the LOW each day. If I can find a bit of summer joy by eating a few peaches with whatever iced beverage I choose to have with me every minute of my waking hours, then I will eat them. To balance out their natural sugariness I took a stab at this fool. I have attempted to make a good tasting fool that is sugar free (except for those wondrous juices in the peaches) and abundant in protein. Hope you like it!

Peach Fool

3 cups sliced, pitted peaches, skin on
2 tsp lemon juice
1 Tbsp + 2 tsp granulated sweetener (recommend erythritol/stevia mix)
1 1/2 cups heavy whipping cream
1/2 cup plain Greek yogurt (or sour cream)
1 tsp vanilla extract
Mint leaves and thin peach slices (optional, for garnish)

In a medium skillet over medium heat add the peaches, drizzle lemon juice and 1 Tbsp sweetener and gently toss. Cook for about five minutes until peaches soften and begin to break apart. Gently toss again and remove from heat, allowing to cool completely at room temperature or in the refrigerator. When peaches are cool prepare the cream. In a mixing bowl add the whipping cream, yogurt, 2 tsp sweetener and vanilla. Whisk or beat on high until stiff peaks form. Fold in peaches and their juices just until combined, creating a swirled effect – over stirring can cause the cream to collapse and loss of the swirl. It is recommended that the folding step occur in the serving bowl, to avoid over stirring. Serve ‘family style’ from the larger serving bowl, or carefully transfer to individual dessert dishes. Garnish with mint and thin peach slices (optional), then serve with crisp cookies or squares of shortcake.

Note: this dessert can be made with berries as well, with a much more dramatic swirl effect. The cooking time for the berries will probably need to be doubled to make sure the juices are released enough to make the fool swirly.

Post Navigation