Any Kitchen Will Do

Give me a kitchen and I will cook.

Archive for the category “side dish”

Bacon Wrapped Asparagus

bacon asparagus final

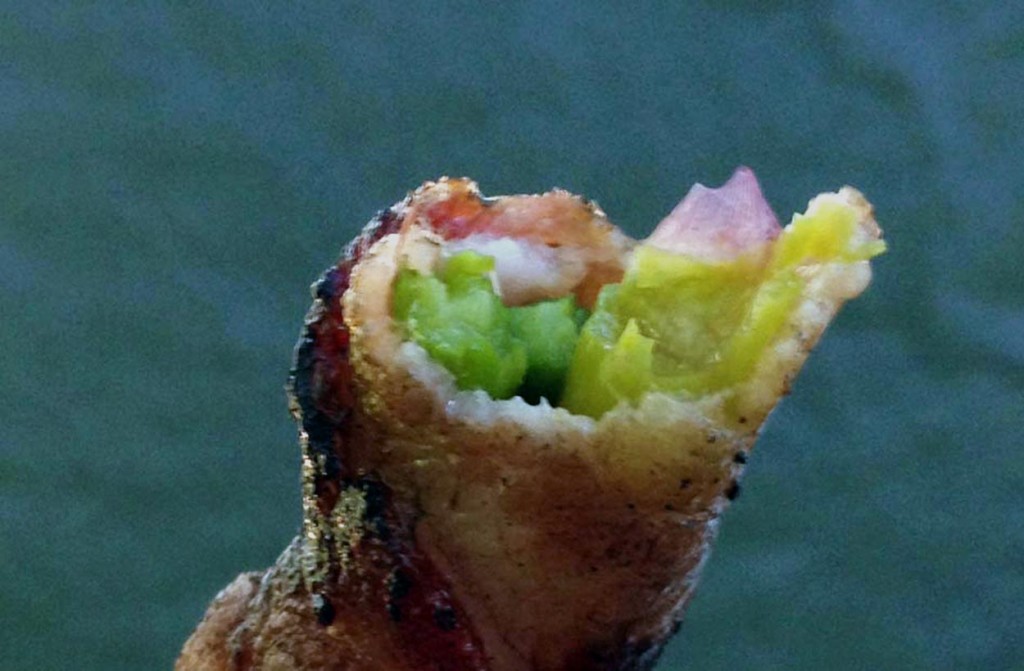
These were fun! Not only were they easy to make, mostly by Little B, but no complication, even minor, of adding seasoning or flavors. Yes, I know. That is the magic of bacon! I was tempted to marinate the asparagus first, but decided to try simpler, and it worked wonderfully. We sat on the porch and rolled them while Big D set up the fire in the grill. Is it gas or charcoal, you ask? I won’t tell Big D yo said that. Of course it is charcoal. Although level and length of heat may vary compared to gas, there is no comparison when it comes to the flavors transferred to food from the charcoal fire. For the pictured batch of asparagus we (more precisely he) grilled it. They were a little dark, because of the high fire heat, but it gave the dish a wonderful crispiness and the asparagus was bright green and just tender enough. Although easy to serve as a side dish daintily cut up alongside a steak, we scarfed them down with our fingers, which made them more of an appetizer. In the future I plan on cooking them up in a pan on the stove or in the oven. I will update you on how it goes. For now, we have a quick side dish for an all-grilled meal. The accompanying steaks were to die for, by the way…

Bacon Wrapped Asparagus

1 pound asparagus spears, tough ends removed
1 pound sliced bacon, room temperature

Combine asparagus spears in multiple bundles so each one does not exceed 1/2 inch diameter (could be one to three spears). Wrap a strip of bacon around each bundle at a diagonal, so most of the asparagus is covered. Cooking approaches: 1) grill bundles over medium to high heat until bacon is crisp. Remove and let cool until warm enough to eat, or 2) heat the broiler to medium and place on broiling pan. When top side is crisp (three to five minutes) turn over to crisp on underside. Remove from broiler and let cool, or 3) heat large skillet to medium high heat. Place rolls in the pan and cook until bacon is crisp, like you would for breakfast. Remove from pan and let cool before serving.

Cabbage Saute

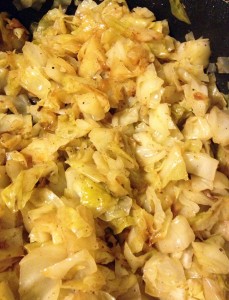
sauteed cabbageI noticed that my entries are absent of side dishes. Lately I have been cooking some staples for meals, because it is a hectic time of year for us. Stuff that I posted already, likebaked spaghetti squash, taco meat or a fritatta. I have cooking and baking ideas, but a lack of time to implement. I am sure I am not the only one out there that has more project ideas than time to do them. You should see my Pinterest boards! So many things to do, so little time. This is a simple side dish that is easy, high in fiber, filling and my family loves it. Great as a base for many a dish as a substitute for rice, pasta or other grains. Don’t forget the nutmeg – it sounds odd, but works so very well with the cabbage.

Cabbage Saute

3 Tbsp olive oil, butter or bacon grease
1 small head green cabbage
1 tsp ground nutmeg
Salt and pepper

In large saute pan heat olive oil over medium high heat. Chop cabbage in 1/2-inch to 1-inch pieces. Toss cabbage in pan and stir to coat in oil. Sprinkle with salt, pepper and nutmeg. Continue cooking and stirring until about half of the cabbage begins to brown. Turn down heat by half and cover. Cook for another ten minutes or so, until all the larger chunks are softened. Keep covered until ready to serve, then do so immediately while it is hot. If preparing it in advance and chilled, it is easy to toss it in a hot saute pan and serve hot.

Caprese Salad

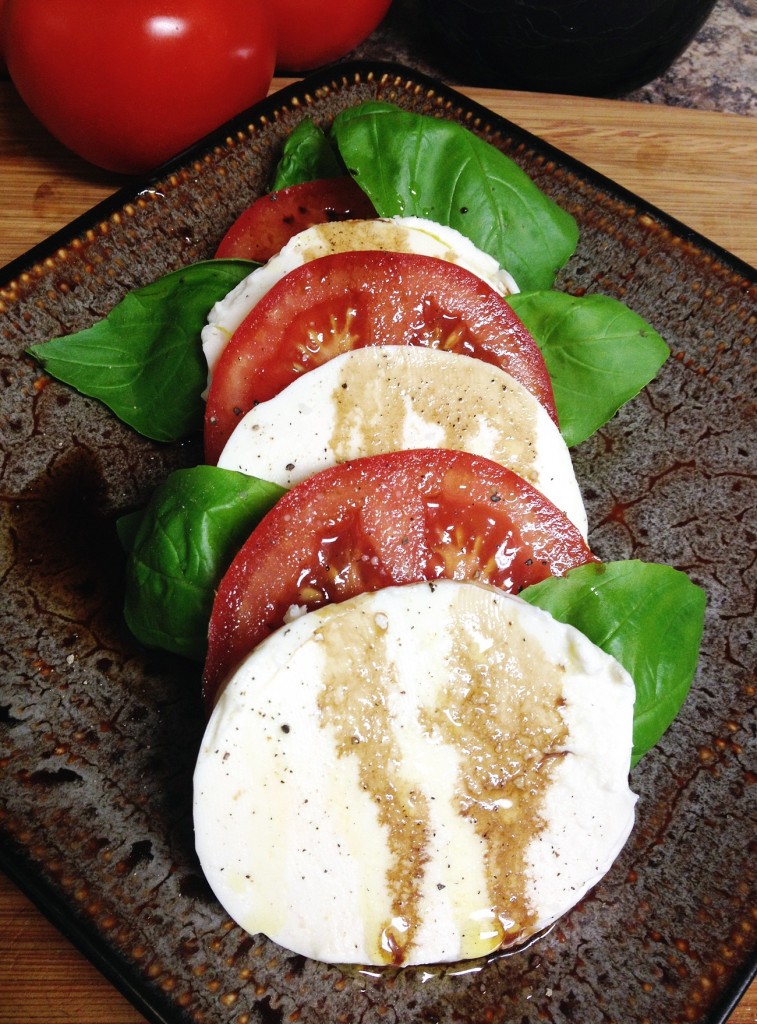
caprese

Basil always reminds me of Italy. In 2004 Big D and I explored Rome and Tuscany with another couple. There were, as always, some ups and downs during the trip. Big D’s luggage was not found until halfway through the trip, the pool at our villa was too darned cold for midnight skinny dipping, and cheap grappa is nasty when imbibed warm and straight. The luggage was finally found and took forever because the villa was not easy to find and the local washer/dryer machine was not really a dryer. No solution about the pool, except for some teeth chattering. The grappa was resolved with ice and mixing it with Coke Light (Italy’s version of Diet Coke). Very potent. The reminder basil gives me relates to the week we spent at the little villa. It had three bedrooms upstairs, a dining area and living area downstairs. There was also a lovely, large kitchen. Right outside the kitchen was an herb garden. Even being early summer, it overflowed with rosemary, oregano, thyme, parsley and of course basil. Most nights Big D and I would walk to the co-op in the nearby village, pick out fresh beef and vegetables, walk home, pick a collection of herbs and cook cook cook! The couple we traveled with often went out to eat at one restaurant or another, so we had the place to ourselves for the night. It was a wonderful, quiet time of day after exploring Siena, Pisa, Florence, Rome…. When I smell basil I think of the quiet evenings, fresh steaks and veal, and another, funny and memorable element – frogs croaking in the pond below our bedroom window all night. Believe it or not it was like an elixer, lulling us to sleep. On to the salad. I almost called it insalata caprese, but decided not to because of the – dum dum dum – basalmic vinegar. I loved salad when made with fresh ingredients and high quality olive oil, but never recall seeing the basalmic vinegar offered in Italy, only in the US. My research was consistent. Insalata caprese is typically seasoned with salt, pepper and olive oil.

Caprese Salad

1 large red tomato
1 ball fresh mozzarella
1 large stem fresh basil
Extra Virgin Olive Oil
Aged Basalmic Vinegar
Salt and Pepper to taste

Slice tomato and mozzarella into slices of equal thickness. Sprinkle slices with salt and pepper. Layer slices with leaves of basil. Sprinkle salad with olive oil and basalmic vinegar. Serve immediately.


Baked Spaghetti Squash with Cheese and Herbs

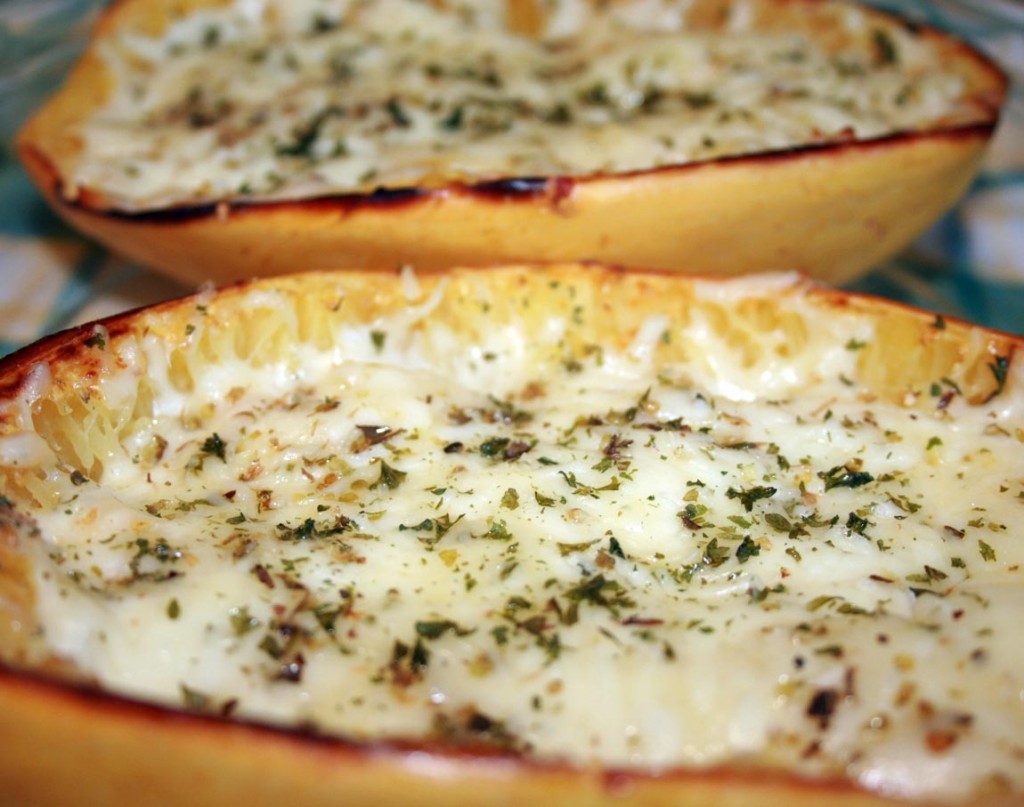
baked spaghetti squash with cheese and herbs

This stuff is just plain cute. Besides being yummy, serving it in the squash skin makes it fun to eat! I remember when I first had spaghetti squash. My mom served it under spaghetti sauce and said it was just like pasta. That caused the problem – unintended, but problematic. I expected some slight mushiness that started to soak up the sauce. What I got was slightly crunchy strings that mixed with the sauce, but did not absorb. I did not find it appealing after the first encounter. Flash forward a few years.  I tried spaghetti squash again, with the expectation of squash, not pasta. It tasted lovely, absorbing the garlic and herbs tossed with it, instead of futilely attempting to soak up marinara. Now that I think back at the two experiences it reminds me to be realistic with Little B when she is trying something new. We often introduce new foods to Little B that may look like other stuff she has had, but will feel and taste different. For example, when you eat regular or instant pudding, then are given chocolate chia pudding, you will have different experiences. They both taste good, but the texture is very different, not to mention the expansive difference in nutritional value. Honestly, I sometimes generalize and refer to most meats as ‘roast’, because she likes roast and it is easier. When it is truly something new I try to describe it for her so she is more willing to not spit it out. When she likes something new she really likes it, but as she gets older she is actually less inclined the try something new. I think it is because of her natural desire right now to display her independence more than not wanting to try something new. I hope it is temporary because she likes spaghetti squash and it is so much better for her than pasta. My ultimate goal is to have new experiences be positive for her. Not always fun or ideal, but result in some learning experience that will move her forward, for the world is full of new experiences. There will be many more new food experiences in her life and I want her to jump into them feet, or mouth first with passion. I know it has made a world of difference for me!

Baked Spaghetti Squash with Cheese and Herbs

1 spaghetti squash
1 Tbsp extra virgin olive oil
Salt to taste
1 tsp garlic powder
½ – 1 cup mozzarella cheese, grated
¼ – ½ cup Parmesan cheese, grated
1 tsp dried oregano
2 tsp dried parsley

Preheat oven to 375 degrees. Cut squash in half lengthwise and remove seeds. Drizzle olive oil on the halves and use your hands to spread it all over the exposed meat of the squash. Place halves face down on baking sheet. Bake for 30 – 45 minutes until inside of squash is soft, but not mushy. Reduce oven temperature to 350 degrees. Flip over squash halves, carefully hold the hot squash with a mitt or towel. Using a fork, scrape the squash meat off the skin, but leave it in the shell. Sprinkle the squash with salt and garlic powder, then gently toss the meat within the skin. Sprinkle with a little more salt. Divide mozzarella on each half, followed by the oregano and parsley. Finish with sprinkling the Parmesan cheese on top. Return squash to oven on baking sheet, cheese side up. Bake for 15 – 20 minutes, until cheese is melted and beginning to brown. Remove from oven and serve immediately – small squash can result in an entire half being a side dish, while larger squash may need to be cut into quarters for serving.

Corn on the Cob


corn on the cobMy beautiful Aunt Pilar taught me how to cook corn like this. It always turned out slightly crunchy and tender, just the way I like it. I don’t eat it much anymore, since it is not one of the lower carbohydrate vegetables in in the world. Little B and Tall P like it a lot, so I do cook up a batch for them every now and then. The peak of the corn growing season is still a few months off, but warmer weather reminds me of piles of corn on the cob at group picnics and barbeques. I remember growing up my parents had a set of narrow, teak corn on the cob bowls with matching handles for the cobs. You stuck the handles on the ends, which made for dainty corn eating. The bowls allowed the melted butter that dripped off to be caught, instead of spreading all over your plate,because there was always a part of the cob that needed more butter. If you have a big crowd to feed there is a mass production version of this technique that works great. See below for the details. You may not have enough corn bowls for them, but the corn will be good and warm all the same.

Corn on the Cob

3 – 4 quarts water

5 – 8 cobs of corn

1 Tbsp sea salt

Remove the husks and corn silk from all the ears of corn. Cut short any stems that are more than ½ inch long. Pour water and salt into a deep stock pot. Cover. Turn heat to high and bring to a boil. Uncover and add corn. Cover. Cook for 8 – 10 minutes. Remove corn from water and let sit so water can evaporate and drain off, then serve immediately. Season with salt, pepper, butter or other seasonings of your choice.

If you are serving a big group outside and have to spare a large cooler with a draining spout, here is a simple approach. Put the shucked cobs in the cooler. Get all your large pots on the stove and fill them with salted water. Boil the water. Pour the boiling water over the corn, enough to cover all the ears, and close the lid. Let sit for about 15 – 20 minutes to allow all the corn to cook, then drain the water from the cooler spout. Leave the top closed so as to keep the corn warm until time to serve. Everyone will have warm corn on the cob to go with whatever is being grilled.


Coleslaw Perfection

coleslaw_edited-2

Big D and I have issues. I like tart coleslaw and he likes slightly sweet coleslaw. It makes for a challenge when making, well, coleslaw. I could make two batches, but that seems silly, so I just kept experimenting until I figured out a just right combination of sweet and tart in one bowl of slaw. I previously tried to use sweetener and wine vinegar to get a balance, but then had a revelation and tried – duh – a different kind of vinegar. The apple cider vinegar has just enough sweet and tart to get to the balance we like. Viola! The perfect coleslaw.

Coleslaw

4 cups shredded green cabbage
1 cup shredded purple cabbage
½ cup shredded carrot
½ cup finely chopped red onion
1 clove garlic, crushed
1 cup mayonnaise
¼ cup apple cider vinegar
1 tsp sea salt
½ tsp ground black pepper

In a medium bowl combine garlic, mayonnaise, vinegar, salt and pepper. Whisk until combined. Add green cabbage, purple cabbage, carrot and onion. Toss vegetables until coated with dressing. Chill for at least an hour before serving.

Dolmas

dolmas_edited-1To conclude coverage of our Greek feast I share with you dolmas. Dolma generally means ‘stuffed thing’, and depending on where you are, the stuffed thing is some sort of vegetable – potatoes, squash, peppers, or tomatoes. After room is made in said vegetable they are filled with stuffing made of grains, vegetables and seafood or meat, which is then cooked. In this case we are leaning towards a Greek variation that involves stuffing grape leaves. The grape leaf version of dolmas can be eaten with fork and knife, or picked up as finger food. Personally, my method depends on how long it has been since I last had dolmas. I am more likely to use utensils if my last encounter with dolmas occurred recently; otherwise, fingers it is. To make them healthier and lower the carb count we used cauliflower instead of rice. I always like having dolmas  as part of a Greek meal – they are great hot or cold, can be made in advance (ideally at least the day before), and a plate of them can be easily shared if eaters are willing and generous. I hardly noticed the absence of rice in this version, since the cauliflower gave them a very similar texture to grain or rice. The lemon and egg coating gives them a nice tang, but it does not hurt to serve them up with a dollop of tzatziki as well. If you know me at all you would not be surprised that my dollops are more like glops, but to each her own. Big D helped with the logistics of making the dolmas, especially with separating the grape leaves, which he referred to as “a real pain in the a**”, and with filling them. I was not ignorant to the fact he got such an annoying, leafy task – the poor, innocent guy. Only through this post will he realize my true evil intentions when I sweetly said “can you help for a sec?” We are excited about using the steaming water as a base for soup. Maybe he will forgive me. Yay and Yum! I got some good suggestions for making the dolmas with cauliflower here.

Dolmas

1 8-ounce jar grape leaves (you will probably have extras)
½ head raw cauliflower
½ cup pine nuts (optional)
½ cup raisins (optional)
1 pound ground lamb (or chicken – I know, blasphemy, but can’t find lamb sometimes)
½ medium raw onion
1 Tbsp dried mint
½ cup fresh parsley leaves
2 garlic cloves, crushed
1 ½ tsp sea salt
½ tsp ground black pepper
2 fresh lemons
1 large egg

Carefully remove the leaves from the jar and place in the sink or a large bowl. They are usually tightly rolled together in the jar and can easily be torn. Cover the leaves with hot water and allow to soak at least 15 minutes. Meanwhile, break the cauliflower into florets, removing the stems. Place the florets in the food processor bowl and pulse until the cauliflower looks like rice. This takes about 10 to 15 one-second pulses. Place “rice” in a large mixing bowl and put the bowl back on the food processor; no need to clean it yet.

(Optional) Heat a dry skillet over medium high heat, then add pine nuts and raisins, stirring often and cooking until the pine nuts are lightly toasted, about 3-5 minutes. Set aside to cool, then coarsely chop. Add the nuts and raisins to the rice in the bowl.

Place the lamb, onion, mint, parsley, garlic, salt, and pepper in the bowl of a food processor and steadily pulse the mixture until the ingredients form a paté and everything is combined. I have also used a pastry cutter when a processor is not available – it takes a little longer, but results work. Add the lamb paté to the “rice” and mix well. The easiest way to do this is with your hands: run them under a little cold water and dig in.

In a steamer basket place a few leaves — the ones that are torn or small — to mostly cover the bottom of the pan. There can be some gaps. Put enough water in the steamer base so it does not rise above the bottom of the basket. Cut half of one lemon in half and drop the quarters in the water. Bring the water to a boil while you prepare the dolmas. Drain the water from the rest of the leaves. Place a leaf on a flat surface with the shiny side facing down, veins facing up. Snip off the stem, and place about one mounded tablespoon of filling on the end of the leaf closest to you, where the stem attached before you whacked it. The filling amount can vary, depending on the size of the leaf you are using. Roll from the bottom until the filling is covered by one layer of leaf. Fold in the side flaps and keep rolling until you have a cigar shape. You want to roll them pretty tightly so they don’t come apart during the cooking process. This is different than traditional dolmas where you want to leave a little wiggle room for the rice to expand during cooking. The cauliflower actually shrinks as it cooks, so roll them up tight, but be gentle not to tear the leaves! Place the rolls in the pan and nestle them up against each other. There can be multiple layers if needed, but place the layers crosswise so air can circulate. They will all get cooked.

Cut half of one lemon into thin slices circles and arrange the slices on top of the dolmas in the steamer. Place the filled basket over the boiling water. Cover with a lid, turn the heat way down to a gentle simmer and cook 25-30 minutes, until the leaves are tender but not falling apart. Remove the steamer and pour out the water from the base pot. Replace the steamer into the base.

In a small bowl, whisk the juice from the remaining lemon with the egg until frothy. Remove lemon slices from the top of the dolmas. Pour the frothy mixture over the dolmas, then put the lid back on and let the sauce set. The hot dolmas gently cook the egg/lemon sauce to create a tangy coating.

When the sauce sets, about ten minutes, remove the dolmas from the pan, place covered in the fridge, and wait until they’re chilled. They taste great cold, room temp, or hot — but are best if reheated the day after preparation, rather than eaten immediately when they come out of the pan.
Cauliflower Saute

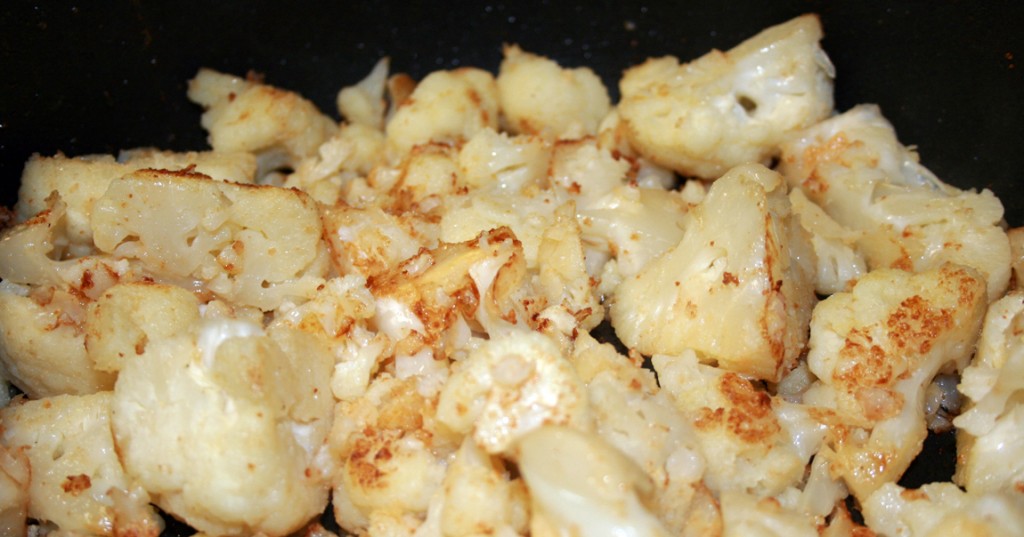
cauliflower sautee_edited-1

Here is another quick way to prepare cauliflower, in case you did not get enough when I cooked it with curry, or that time when I surrounded it with garlic, and don’t forget the time I made it into fritters, then there was the time I mashed it. We eat a lot of the stuff around here, and I don’t see and end in sight. I swear this time it is different, and enjoy it along a spicy or busy main dish. Nutmeg may sound like an odd spice to use outside of a dessert, but it works amazingly well with cauliflower and helps keep preparation simple and flavorful. It is pretty common in Middle Eastern and European dishes to use nutmeg in savory vegetable and meat dishes. After you use it with cauliflower you will understand why. Yum! I like making cauliflower on the stove top when we are in the RV, or whenever the oven is busy cooking the rest of the meal. It is easy to let it basically prepare itself while I am getting other parts of the meal done, then leaving it covered off the heat keeps it warm and ready to serve when you are.

Cauliflower Saute

1 head cauliflower
3 Tbsp butter
2 garlic cloves, crushed
¼ tsp nutmeg
Salt and pepper to taste

Cut cauliflower into bite-size florets. In large skillet melt butter over medium heat. Add garlic and cook for a few minutes until it softens. Turn up heat to high and add cauliflower. Toss so the butter and garlic coats the florets. Cook until the cauliflower begins to brown. Add nutmeg, salt and pepper and continue to toss every minute or so, allowing more browning. When about half the floret surfaces are browned turn heat to low and cover, cooking the cauliflower until preferred softness, about five to ten more minutes.

Creamy Vegetable Bake

creamy veggie bake

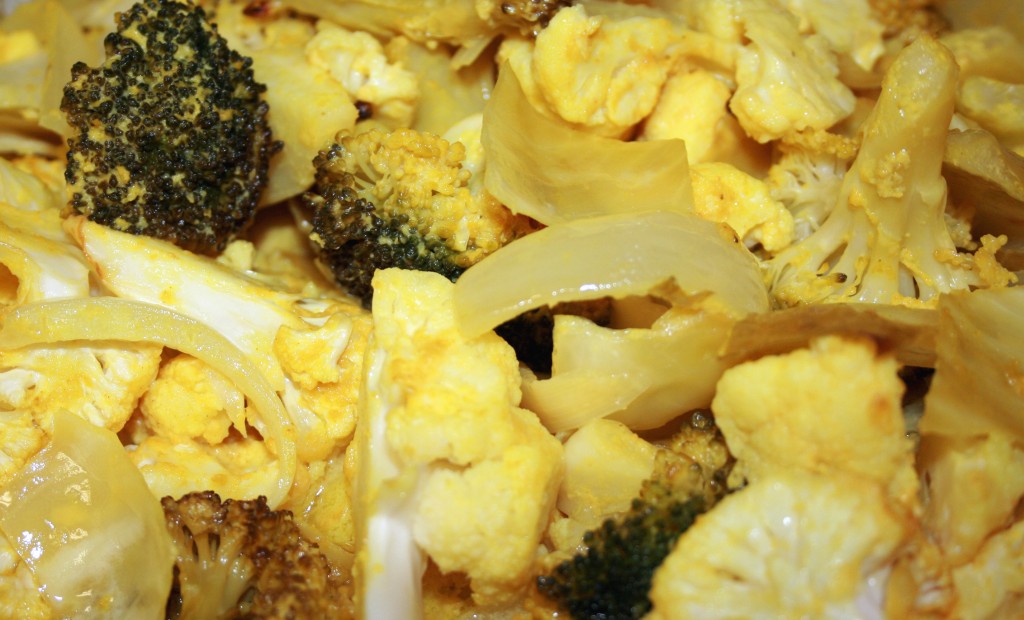
I am constantly trying to find new ways to prepare high fiber vegetables. There is only so many times a week I can chew on raw broccoli and cauliflower, no matter how good they are for me. Big D made a big, chipotle spiced pork roast in the crock pot the other day. I wanted some baked veggies to go along with it to balance the spicy. Of course I turn to a creamy, buttery sauce. I threw in a little turmeric for flavor and color. The vegetables did a good job of not taking away from the smokey chiles while also keeping my tongue from burning too much. Little B still prefers her broccoli ‘trees’ straight out of the freezer. Although I hoped she would like this baked version, which she did not find appealing, I am not going to complain. Someday she may not like broccoli. For now I will just smile and keep buying the bags of frozen green trees she can reach on her own with the help of the little red kitchen stool.

Creamy Vegetable Bake

1 crown broccoli
½ head cauliflower
½ head cabbage
1 small onion
½ cup butter, melted
½ cup heavy cream or half and half
¼ cup yellow mustard
1 tsp garlic powder
½ tsp turmeric
1 tsp sea salt
Salt to taste

Preheat oven to 350 degrees. Chop vegetables into bite size pieces. Mix vegetables together in a 9×13 baking dish. In a medium bowl combine butter, cream, mustard, garlic, salt and turmeric. Whisk until well combined. Pour sauce over vegetables and toss until coated. Cover with aluminum foil and bake for 45 minutes. Uncover and bake for an additional 15 – 30 minutes until vegetables are of preferred softness. We like them slightly crunchy. Serve immediately and make sure the sauce is drizzled over the top.

Soupless Green Bean Casserole

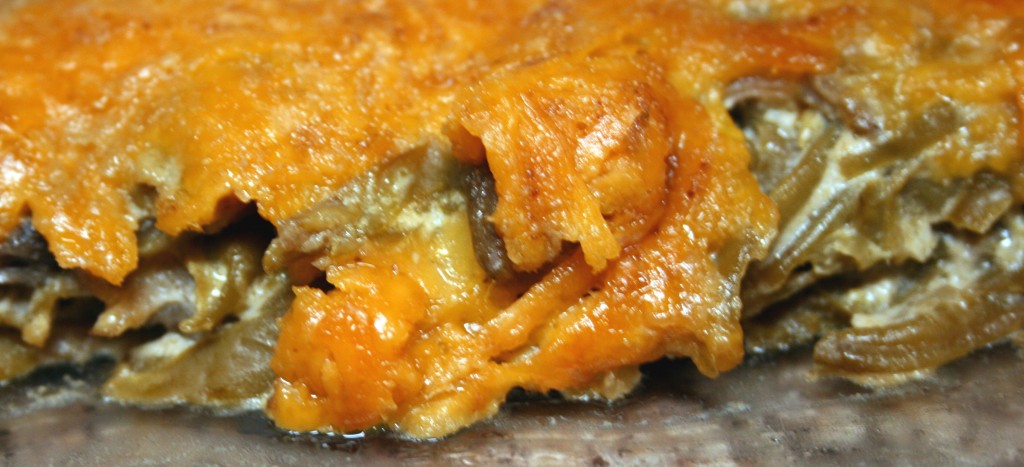
I like holiday meals. Partly because of all the lovely foods we don’t make during other times of the year, but also because the meals often require cooking all day. Darn. Heh. We like spending time in the kitchen. Besides keeping us close to the alcoholic beverage supplies, it is a place where we have great conversation and create or try new things. This is a good thing, in my opinion. Besides a huge bird, or a massive ham, I always look forward to green bean casserole. There is something about the beans and the creamy sauce and the occasional mushroom bits all swirled together in a single bite. This version of the casserole does not include the crunchy fried onions, because of the wheaty carbiness of them, but it still turned out to appease my comfort food craving for the soupy, crunch version. I don’t know how well this would work with whole fresh beans, but with the canned french style the sauce coated every bit very well and the richness I love so much was able to shine through. I am not partial to all the extra stuff they put in canned soups, as I have ranted about before, so I am always glad to figure out versions of comfort foods I enjoy with out the canned stuff. Big D got a little perturbed at how much I liked the green bean casserole over the flaxseed dressing, which was pretty good. His holiday comfort food goes back to his grandmother’s dressing, filled with biscuits, cornbread, apples and sage. I don’t know that he ever gave green bean casserole a second thought before we got together. What can I say, I am a green bean casserole girl. Have I mentioned I like green bean casserole? That last one was for Big D.

Soupless Green Bean Casserole

2 Tbsp butter
1 Tbsp coconut flour
1 tsp salt
1 tsp erythritol
1/4 cup onion, diced
2 cups mushrooms, diced
1 cup sour cream
1 Tbsp Worchestershire sauce
3 cans green beans, drained
2 cups shredded Cheddar cheese

Preheat oven to 350F. Melt 2 tablespoons butter in a large skillet over medium heat. Stir in flour until smooth, and cook for one minute. Stir in the salt, erythritol, onion, Worcestershire sauce and sour cream. Add mushrooms. Cook mixture until mushrooms sweat and liquid reduces by about 50%. Add green beans, and stir to coat and heat. Transfer the mixture to a 9×9 casserole dish. Spread shredded cheese over the top. Bake for 30 minutes, or until the top is golden and cheese is bubbly.

Post Navigation