Any Kitchen Will Do

Give me a kitchen and I will cook.

Archive for the category “side dish”

Mushroom Onion Saute

mushroom onion sautee

I have spoken before about the delicate balance of having side dishes hot and ready when gorgeous meats are pulled off the grill. The grilled meat is best served warm, so everything needs to be ready and waiting! Here is a quick side dish that works with grilled stuff, and frankly, anything that is baking in the oven and needs something on the side. I sometimes forget that sharing main dishes can overshadow the often quick and easy sides, which are not to be discounted or forgotten. I remember when I first began to cook on my own I always though complicated was better tasting, and I was sooooo wrong! Simple is better, but complicated is fun! Try this. Can’t go wrong.

Mushroom Onion Saute

2 Tbsp butter
4 cups mini portobello
1 medium white onion
4 garlic cloves
1/4 cup fresh parsley, finely chopped
Sea salt taste

In medium frying pan over medium high heat add butter. When butter is melted add onion and garlic. Toss until coated with butter and let cook until they release water (sweat). Add mushrooms and parsley. Toss until well mixed and coated. Continue cooking until mushrooms soften and onions begin to brown. Season with salt and cook three more minutes until salt is able to saturate vegetables. Remove from heat and cover until ready to serve. When served with or on top of grilled meats these vegetables soak up meat juices and complement them well.

Creamed Cabbage Collard Mix

creamy collard cabbageLots of nights I open the fridge to figure out what needs to be cooked sooner rather than later, then I have a guide for our evening meal. Other times I go out on our balcony to see what needs to be harvested from our little container garden to use as a guide. This dish was a result of both guides. There was a partial head of cabbage in the fridge, and the collard greens on the balcony needed to be thinned so the smaller, younger leaves could thrive. The savory combination was a wonderful complement to a spicy meat dish and added the requisite fiber to the meal. I encourage you to grow your own garden, keep your fridge stocked with fresh vegetables and let them inspire what lands on your dinner plate. Cook well, eat well!

Creamed Cabbage Collard Mix

1/2 medium head cabbage, roughly chopped
2 – 3 cups collard greens, stems removed
1/2 cup mayonnaise or 1/4 cup heavy whipping cream
1/2 tsp chili powder
Salt and pepper to taste

Heat a large frying pan to medium-high heat. Add mayonnaise or cream and chili powder. Heat until mayonnaise is melted or cream is bubbly. Add cabbage and greens. Sprinkle generously with salt and pepper. Stir until vegetables are coated. Let cook for about ten minutes, stirring every few minutes until cabbage and greens are wilted, but still slightly crispy. Remove from heat and cover until time to serve.

Funky Fries

jicama friesI don’t use jicama in my recipes very much. Most often I include it on crudites platters to add variety from the typical celery and carrot sticks. Just last week at a potluck there was a delicious, crunchy salad made with jicama. It was very good, and took me to researching a bit more about using it for other things. You may be sick of hearing about this by now, but we continue to seek out low starch, healthy replacements for otherwise unhealthy comfort foods. When we recently succeeded in making burger buns there was a logical inquisitiveness about the traditional side dish – french fries. I really like the baked fries I made a few years ago, but they rely on potatoes, which are not a routine part of our diet anymore. I know from experience that jicama is crispy and a bit sweet, and in my opinion more flavorful than the traditional potato used for fries. I was skeptical about my hunt for the jicama at the local stores. Everything we buy arrives here on barges or planes (nope, no driving to Juneau!). Although local stores place orders for goods, there is always a mystery about what will actually arrive when, so it is hard to predict much of anything. I was overjoyed when I walked in and there they were, in their muted brown glory – a big pile of jicama! I even found a rather symmetrical one, for they can come in rather lumpy shapes and sizes sometimes. The peeling of it was easy, as usual, and the chopping duties were shared with Little B. I figured these fries could handle some stronger, savory flavors like garlic, onion and parmesean. I was right! The big pile was eaten up by the three of us and our visiting family, so I cannot speak to how robust (or not) leftovers would be. If I ever find out in the future I will let you know. Serve them along with some ketchup (or plain, or with mayo or whatever you like) and you have fries!

Funky Fries

1 jicama
1 Tbsp avocado oil
¼ cup parmesean cheese, finely grated
¼ tsp garlic powder
¼ tsp onion powder
¼ tsp sea salt

Preheat oven to 350 degrees. Peel and slice jicama into strips no thicker than ¼ inch. Slice strips in half. In a large bowl toss fries with the avocado oil. In a plastic bag combine cheese, garlic, onion and salt. Add fries and shake until coated. Place fries evenly spaced on a baking sheet, for too little space in between can prevent crisping. Depending on the size of the pan and the jicama, you may need two or more pans. Bake for 15 minutes. Remove from oven and flip the fries. If you are baking with two pans make sure you switch their position in the oven – my oven bakes faster on the bottom rack if there are two in at the same time, so switching after tossing helps them all cook evenly. Return to oven and bake for 10 – 15 minutes more, until edges are crispy and brown. Serve immediately. Recipe varied from the one found here.

Simple Chopped Cabbage Bake

baked cauliflourThe other day we had a busy stove top. Three of the four burners had things simmering or sauteing or boiling. I wanted to make cabbage, but the last, small burner was hidden among the pots and pans, willing to do the job, but just not roomy enough. I still wanted cabbage, so I looked around and spotted the oven. Of course! Usually I cook up cabbage on the stove top because the oven is busy, so I got a little chuckle about the reverse happening. Okay, so it is not funny, like a gag in a movie or a stand up comedian, but when I think of, say, Thanksgiving when four things need to be baked at once, including the turkey, there is always a wish to have a dish that can be done on the stove top. Okay, not actually chuckle worthy. It was so good I was surprised I had not thought of doing it sooner. Silly. Maybe it is silly. I will stop, because it actually does not matter. This dish is so simple I am not even doing an ingredients list.

Just take half a head of cabbage and chop it into one inch pieces. On a large cookie sheet toss the cabbage with 2 Tbsp of bacon grease or extra virgin olive oil (add some salt of you use olive oil). Tossing it is most effective with your hands. Place pan in unheated oven. Turn oven to 350 degrees. After about ten minutes toss the cabbage and bake for ten more. Some cabbage will be darker, beginning to caramelize, and the rest should be soft enough to eat. Serve immediately.

Cauliflower Mac Bake

cauli mac bake

Our foster son Tall P makes really good cheesy scrambled eggs. Somehow he cooks the eggs just right and puts in just enough cheese right at the end to make it taste like baked macaroni and cheese. I won’t try to duplicate it, for it is something he does for us, so why try? He is the master! I had a hankering for them the other day when he was busy at school, so I decided to try a baked cauliflower version of mac n cheese. I think I found a great way to do a veggie version, although I bet he would not agree. I have to reveal here that Tall P is not a vegetable lover. He likes corn on the cob and vegetables in soup, and only if they are an unrecognizable puree added as a thickener and he does not know they were added. Yes, Paul, you now know the veggie soup secret! This dish was inspired by the cheesy eggs, created with cheesy veggies.  Go figure. It definitely appeased my craving for baked mac and cheese (not so much the Kraft version I grew up eating, but the baked stuff I discovered later in life). The dish was easy to prepare and bake, allowing me to time it perfectly with the smoked pork Big D made. Add some chimichurri to the pork and what a meal!

Cauliflower Mac Bake

1 large head cauliflower
1/2 cup heavy cream
2 eggs
1 Tbsp parsley, finely chopped
1/2 tsp garlic powder
1/2 tsp sea salt
1 tsp ground mustard
1/2 tsp red chile flakes
2 cups cheddar cheese, grated
1/4 pound sharp white cheddar cheese, sliced into thin pieces
3 Tbsp butter

Preheat oven to 350 degrees. Chop cauliflower head into bite-sized pieces, making sure stem pieces are a little smaller. Place white cheddar cheeses slices in the bottom of a 9×9 or 9-11 baking dish. Spread cauliflower evenly over cheese. In a medium bowl combine cream, eggs, garlic, salt, mustard and chile flakes. Whisk until well combined. Add cheese and stir until well coated. Pour cheese mixture over cauliflower, spreading it evenly. Make thin slices over butter and place them on top of cheese mixture. Place in preheated oven for 60 – 75 minutes. The thicker the cauliflower the longer the baking time to make sure the middle is baked soft. Remove from oven and let sit for five minutes before serving. Slice into six or nine pieces for side dishes – it should come out intact, but if it doesn’t, it will still taste awesome.

Quick Savory Green Beans

quick green beans

Every once in a while I get a craving for green bean casserole. You know, the kind you usually only have as part of holiday meals? Since we are not a few days past a holiday there is missing from the fridge a casserole dish waiting for me to empty it. In the spirit of immediate gratification I had to act fast. A few years ago I came up with a low carbohydrate version that is really good and satisfying, but the multiple steps don’t always work for a fast weekday evening meal. We had some leftover prime rib roast that would take about twenty minutes to heat up, so I had time to make a vegetable side, but not an hour for a multiple step dish that needed to finish in the oven. These beans cook up quickly on the stove top and are ready by the time the leftover meats was heated up in the oven, and wow did they hit the spot flavor wise. Viola! The flavor of green bean casserole without the carbohydrates and without the baking. Definitely something I was able to easily make up with our pantry staples. Add some leftover mashed cauliflower along with the beans and you have a delicious meal for an ordinary Monday night.

Quick Savory Green Beans

2 cans green beans
1/4 tsp ground black pepper
1/2 tsp sea salt
1 tsp garlic powder
1/2 tsp onion powder
2 Tbsp butter
1/5 cup heavy whipping cream
3 Tbsp Worcestershire sauce
1/2 cup parmesean cheese

In a dry skillet over medium high heat add the beans. Saute until they begin to dry a bit and sear. Add the pepper, salt, garlic powder and onion powder. Toss and cook for another minute. Clear  a spot in the middle of the pan and add the butter, parmesean cheese and Worcestershire sauce. Stir into the beans as the butter melts. Cook for another five minutes. Add the cream and simmer for five minutes, allowing the cream to heat up and sauce to thicken. Serve immediately.

Brussel Sprouts in Cream

creamy brussel sprouts

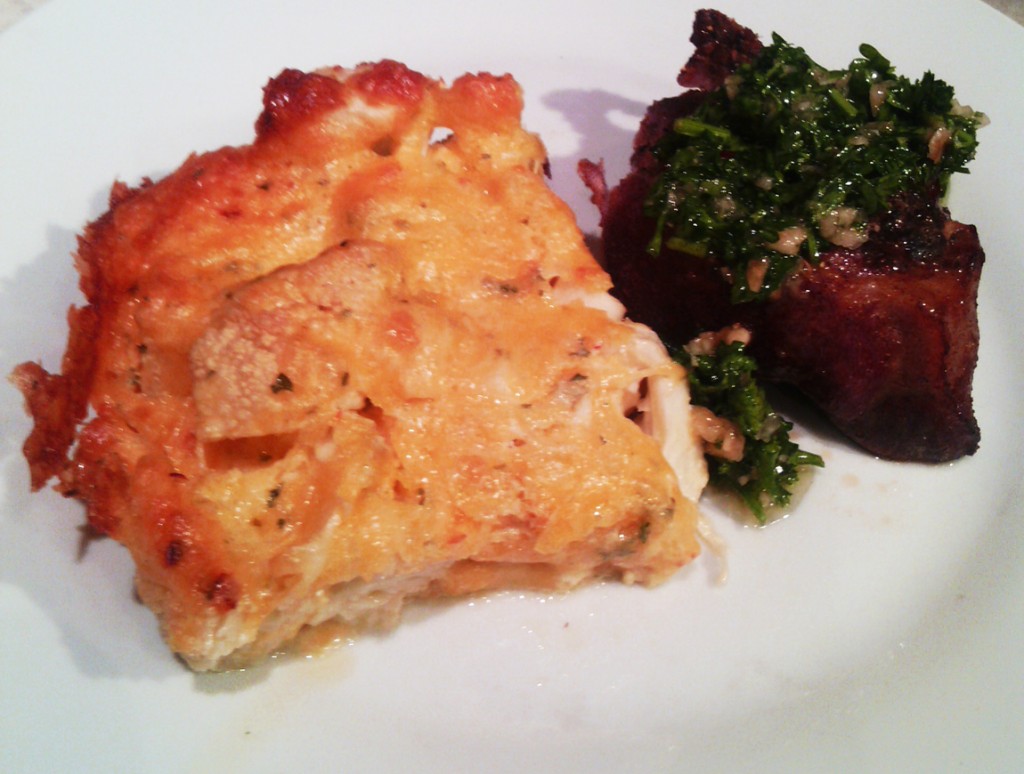
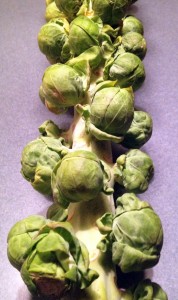
Could I ignore it? Just walk by as if it was not there? Pretend it would not be loads of fun to explore? No, I was not strong enough. It drew me towards it like no other stalk. I became a stalker. A stalker of of brussel sprout stalks. I thought maybe I should deny myself yet another green vegetable, but why?! I seem to be on quite the green vegetable streak these days – asparagus then artichokes, and now brussel sprouts! Big D has been doing a lot of meat and soup cooking, so I enjoy the yummy stuff when I get home and fill in the vegetable part of meals where I can. Brussel sprouts are a relative of green cabbage – high in fiber, good for you and the sprouts grow on stalks! I usually see them in the store in bags, but this week they arrived on the stalk. How fun! Little B was so excited about this strange thing when I got home she could not stand to wait until they were cooked. Whenever I can I try to show Little B where food comes from – whether it is pulling wild garlic, to showing her vanilla comes from orchids, her breakfast sausage comes from pigs, or the plants that are the source of her popcorn. I showed her the stalks and explained what the sprouts were. Little B immediately wanted one raw. Um, okay. I gave it to her, she took a big bit and LOVED IT! Chewed it up like Halloween candy!

brussel sprout stalk

brussel sprout tasting
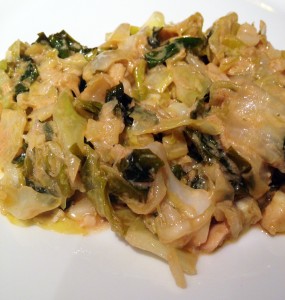
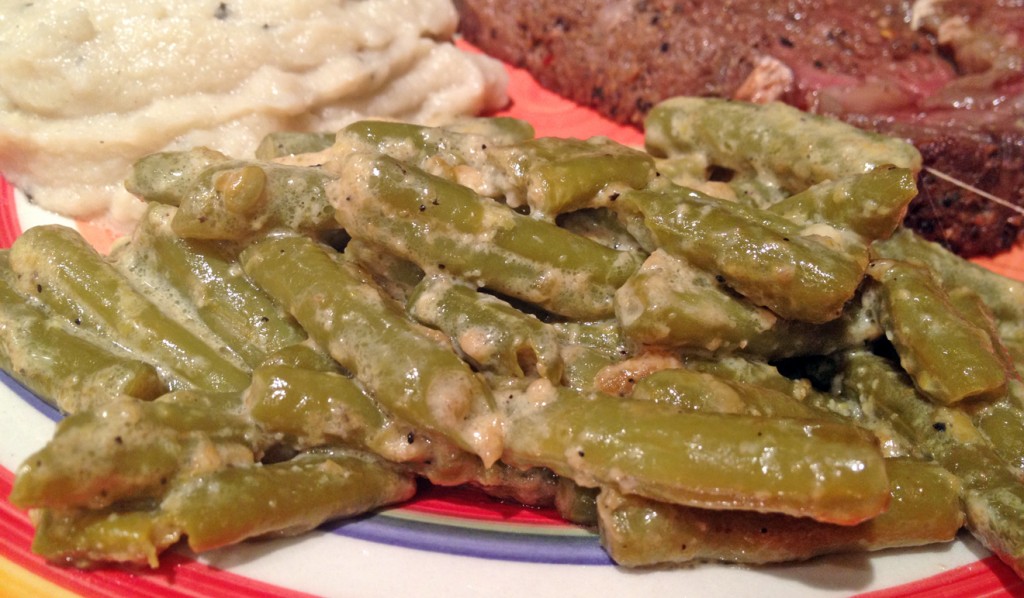
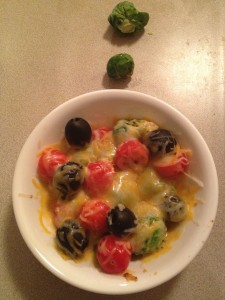
I had to promise to cook them up as soon as possible because she would not leave me alone about them. This could get interesting. Sometimes I have to coax Little B into helping with cooking projects and other times I can’t keep her from being overly underfoot (in a good way). This was definitely an underfoot project. She helped me cut them off the stalk and cook them up.  I had a plan and she had a different one, but we figured out how to combine them, and an ordinary weekday evening turned into a stalker party! We came up with two dishes in the end – one that she liked and one that I wanted. The cool thing was the two dishes took the same route to a point, then easily diverged to make everybody happy. Besides raw she tasted them sauteed in the butter, then with her added veggie and cheese, and also after adding the cream to the butter saute. Apparently she prefers them raw, but I think the creamy sauce balanced out the natural bitterness of the sprouts. I am very happy to learn of Little B’s continued interest in green vegetables – from when she started gnawing on frozen broccoli during her teething period as a baby, to snacking on green beans to the brussel sprouts of today. What has your kid eaten and liked that surprised you?

Brussel Sprouts in Cream Sauce

I large stalk brussel sprouts
1/2 cup heavy cream
1/4 cup butter
2 cloves garlic, crushed
1/2 tsp sea salt

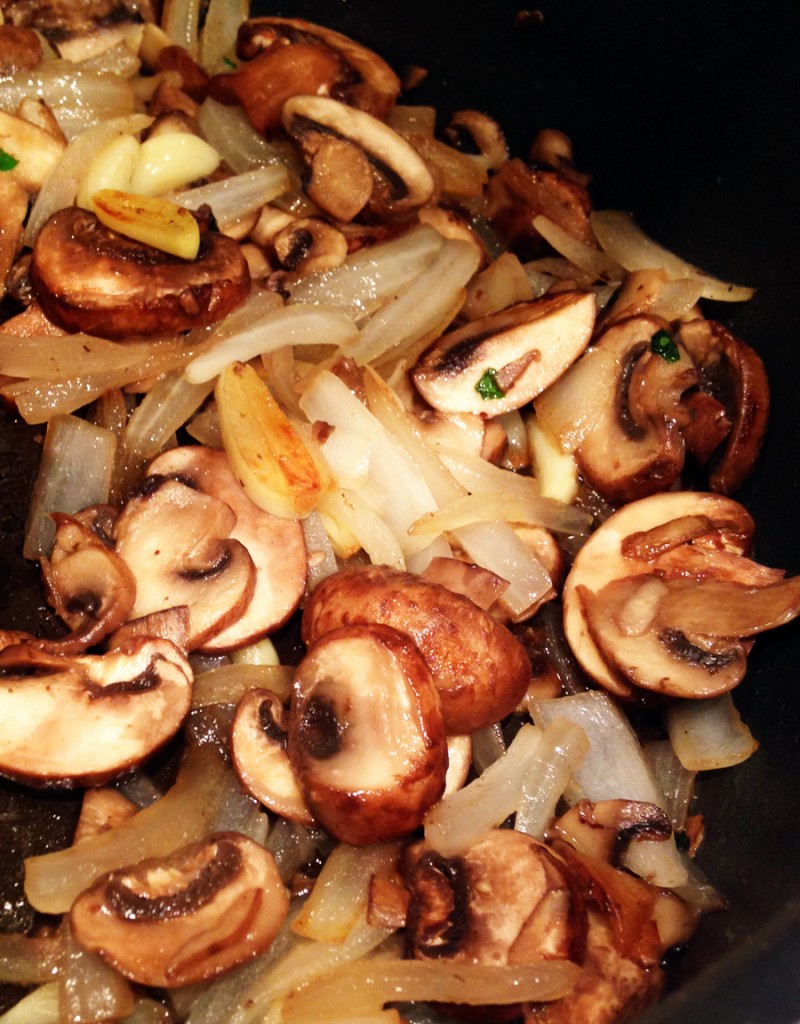
Cut sprouts off of the stalk, leaving enough stem on each to hold the sprouts together. Melt butter over medium heat in large saute pan you can cover later. Add garlic and cook until you can smell the garlic aroma. Add sprouts and toss to coat them with butter. Sprinkle with salt. Cover and let cook until sprouts are softened, about ten minutes. Lower the temperature to simmer and add the cream. Gently stir – enough to blend the cream into the sauce, but gently enough to prevent the sprouts from falling apart. Simmer covered for a few more minutes until the sauces is hot, bubbly and begins to brown, about four or five minutes. Serve immediately.

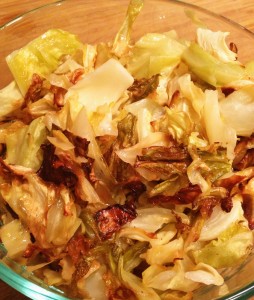
Little B’s version – after sprouts are cooked and softened in the butter, transfer a serving to an oven or microwave-safe bowl. Add some grape tomatoes and black olives cut in half. Sprinkle with grated cheese. Microwave for about one minute, or bake in oven at 300 degrees for about five minutes until cheese is melted.


Lemon Infused Artichokes

lemon infused artichokes

I found some beautiful artichokes at the store and whisked them home. Instead of preparing them in the more nostalgic way I have in the past, I wanted to try something a little different. To get more of the lemon and garlic flavor deeper into the artichoke I thought cutting them in half and baking would be useful, so chop chop! I did not want them to dry out, so I surrounded them with moisture and covered it all up. Since they are already divided into individual servings it is easy to rely on them for an appetizer course of a dinner party, or have them cooked and ready for whenever you can get the family sat down at the dinner table. The fun thing about making these for a dinner party is watching the guests try to be dainty and tidy while eating them. Although some (like fancy schmancy restaurants) discard every bit of the artichoke except the heart (which can be cut into about four dainty bites) many like pulling off meat from the leaves of the vegetable with their teeth. We fall in the category of pulling off meat from leaves, so it can get a bit messy. That’s okay – either way, conversations can get started over the nuances of artichoke consumption. Have fun with them and don’t forget the dipping sauce!

Lemon Infused Artichokes

4 medium artichokes
1 cup water
1/4 cup extra virgin olive oil
1/3 cup lemon juice
1 Tbsp garlic powder
1 tsp sea salt

Butter
1/2 cup salted butter
1 tsp garlic powder
1 Tbsp lemon juice
Salt to taste

Preheat oven to 300 degrees. In a five quart pot add the water and about 1 Tbsp of lemon juice. Cut the stems off the artichokes then cut them in half. Drizzle the halves with oil and lemon juice, then sprinkle with garlic powder and salt. Arrange halves loosely in the pot. Cover and place in oven. Cook for about 45 minutes until tender. If the heart, above the stem, is not tender, then cook them for 10 – 15 minutes longer. While the artichokes bake prepare the butter – in a small sauce pan over low heat add the butter, garlic powder and lemon juice. When butter melts stir, cover and let simmer for about one minute, then turn off heat. Add salt as desired and stir. Serve as a dipping sauce with the artichokes. When you serve the artichokes make sure to remove the hairy choke portions of the vegetable, right above the heart, and discard. Spooning it out should be easy, since it is exposed when the artichokes are cut in half. In the picture above you can see the dark line where the choke ends and the heart begins, right above the stem. If you want more about the basics of eating artichokes check out the step by step guide here.

Asparagus Saute

asparagus-saute_edited-1

I just adore brightly colored fruits and vegetables. Such adoration inspired this side dish. Big D cooked an absolutely lovely lamb roast for dinner. I can’t get him to guest post his cooking, so you will have to check out his other types of most awesome writing here. The roast sat and simmered all day, so when I walked through the door I was surrounded by lemony, oregano-y, minty bliss. To balance the strong, Greek flavors of the roast I came up with this bright, sharp side dish. We found a huge collection of asparagus at the store – it was a nice medium size with moist tips that begged to be prepared and enjoyed. We also had a collection of small tomatoes – some red, some orange, some green and some purple. I cut up a few and threw them in. They wilted and balanced the enjoyable bitterness of the asparagus. The meal tasted wonderful on a chilly, wet Juneau evening. We have many more such evenings to come, and I will definitely be making this quick side dish again. It is too early in the season, but I will say it anyway – what a colorful combination of green and red! Looking forward to the fun of the upcoming holiday season!

Asparagus Saute

2 Tbsp extra virgin olive oil
2 bunches asparagus
2 cups small tomatoes
1 tsp garlic powder
Salt and pepper to taste

Arrange the asparagus so the thick ends are lined up together. Slice off the last one to two inches of the the thick ends of the asparagus and discard. Cut the remaining asparagus stalks into bite-sized pieces, about one inch each. Slice tomatoes in half or thirds, making sure they are bite-sized. Heat oil in a large saute pan over medium high heat. Add asparagus and stir until slightly softened, about five minutes. Add tomatoes and stir for one more minute. Sprinkle with garlic, salt and pepper to taste. Stir so as to spread out the spices. Turn down heat, cover and simmer, cooking for about five more minutes, until the asparagus is softened as desired. Turn off heat and leave covered until time to serve. Serve immediately.

Peanut Butter Yogurt Dip

peanut butter yogurt dip

Double duty yogurt stuff! This works as an awesome dip for fruit as well as a spoonable non-dip snack for Little B. Talk about protein and protein and some subtle sweetness from the apple sauce. The recipe is quick and dirty (but clean) so I will leave the intro the same. Make it and enjoy, even adding some extra cinnamon to make it spicier, if the apple sauce is not already enough. Yum yum! You can see Little B’s hand dipping a blurry strawberry in her eagerness – could not wait until the pics were taken….

Peanut Butter Yogurt Dip

1 cup creamy peanut butter
2 cups whole milk Greek yogurt
1/2 cup apple sauce

In medium bowl combine peanut butter, yogurt and apple sauce. Stir until completely combined. Store in covered dish and chill overnight. Serve with celery, apple slices, mango slices or other fruit. Also works plain as a snack for peanut butter lovers.

Post Navigation