Any Kitchen Will Do

Give me a kitchen and I will cook.

Archive for the category “avocado”

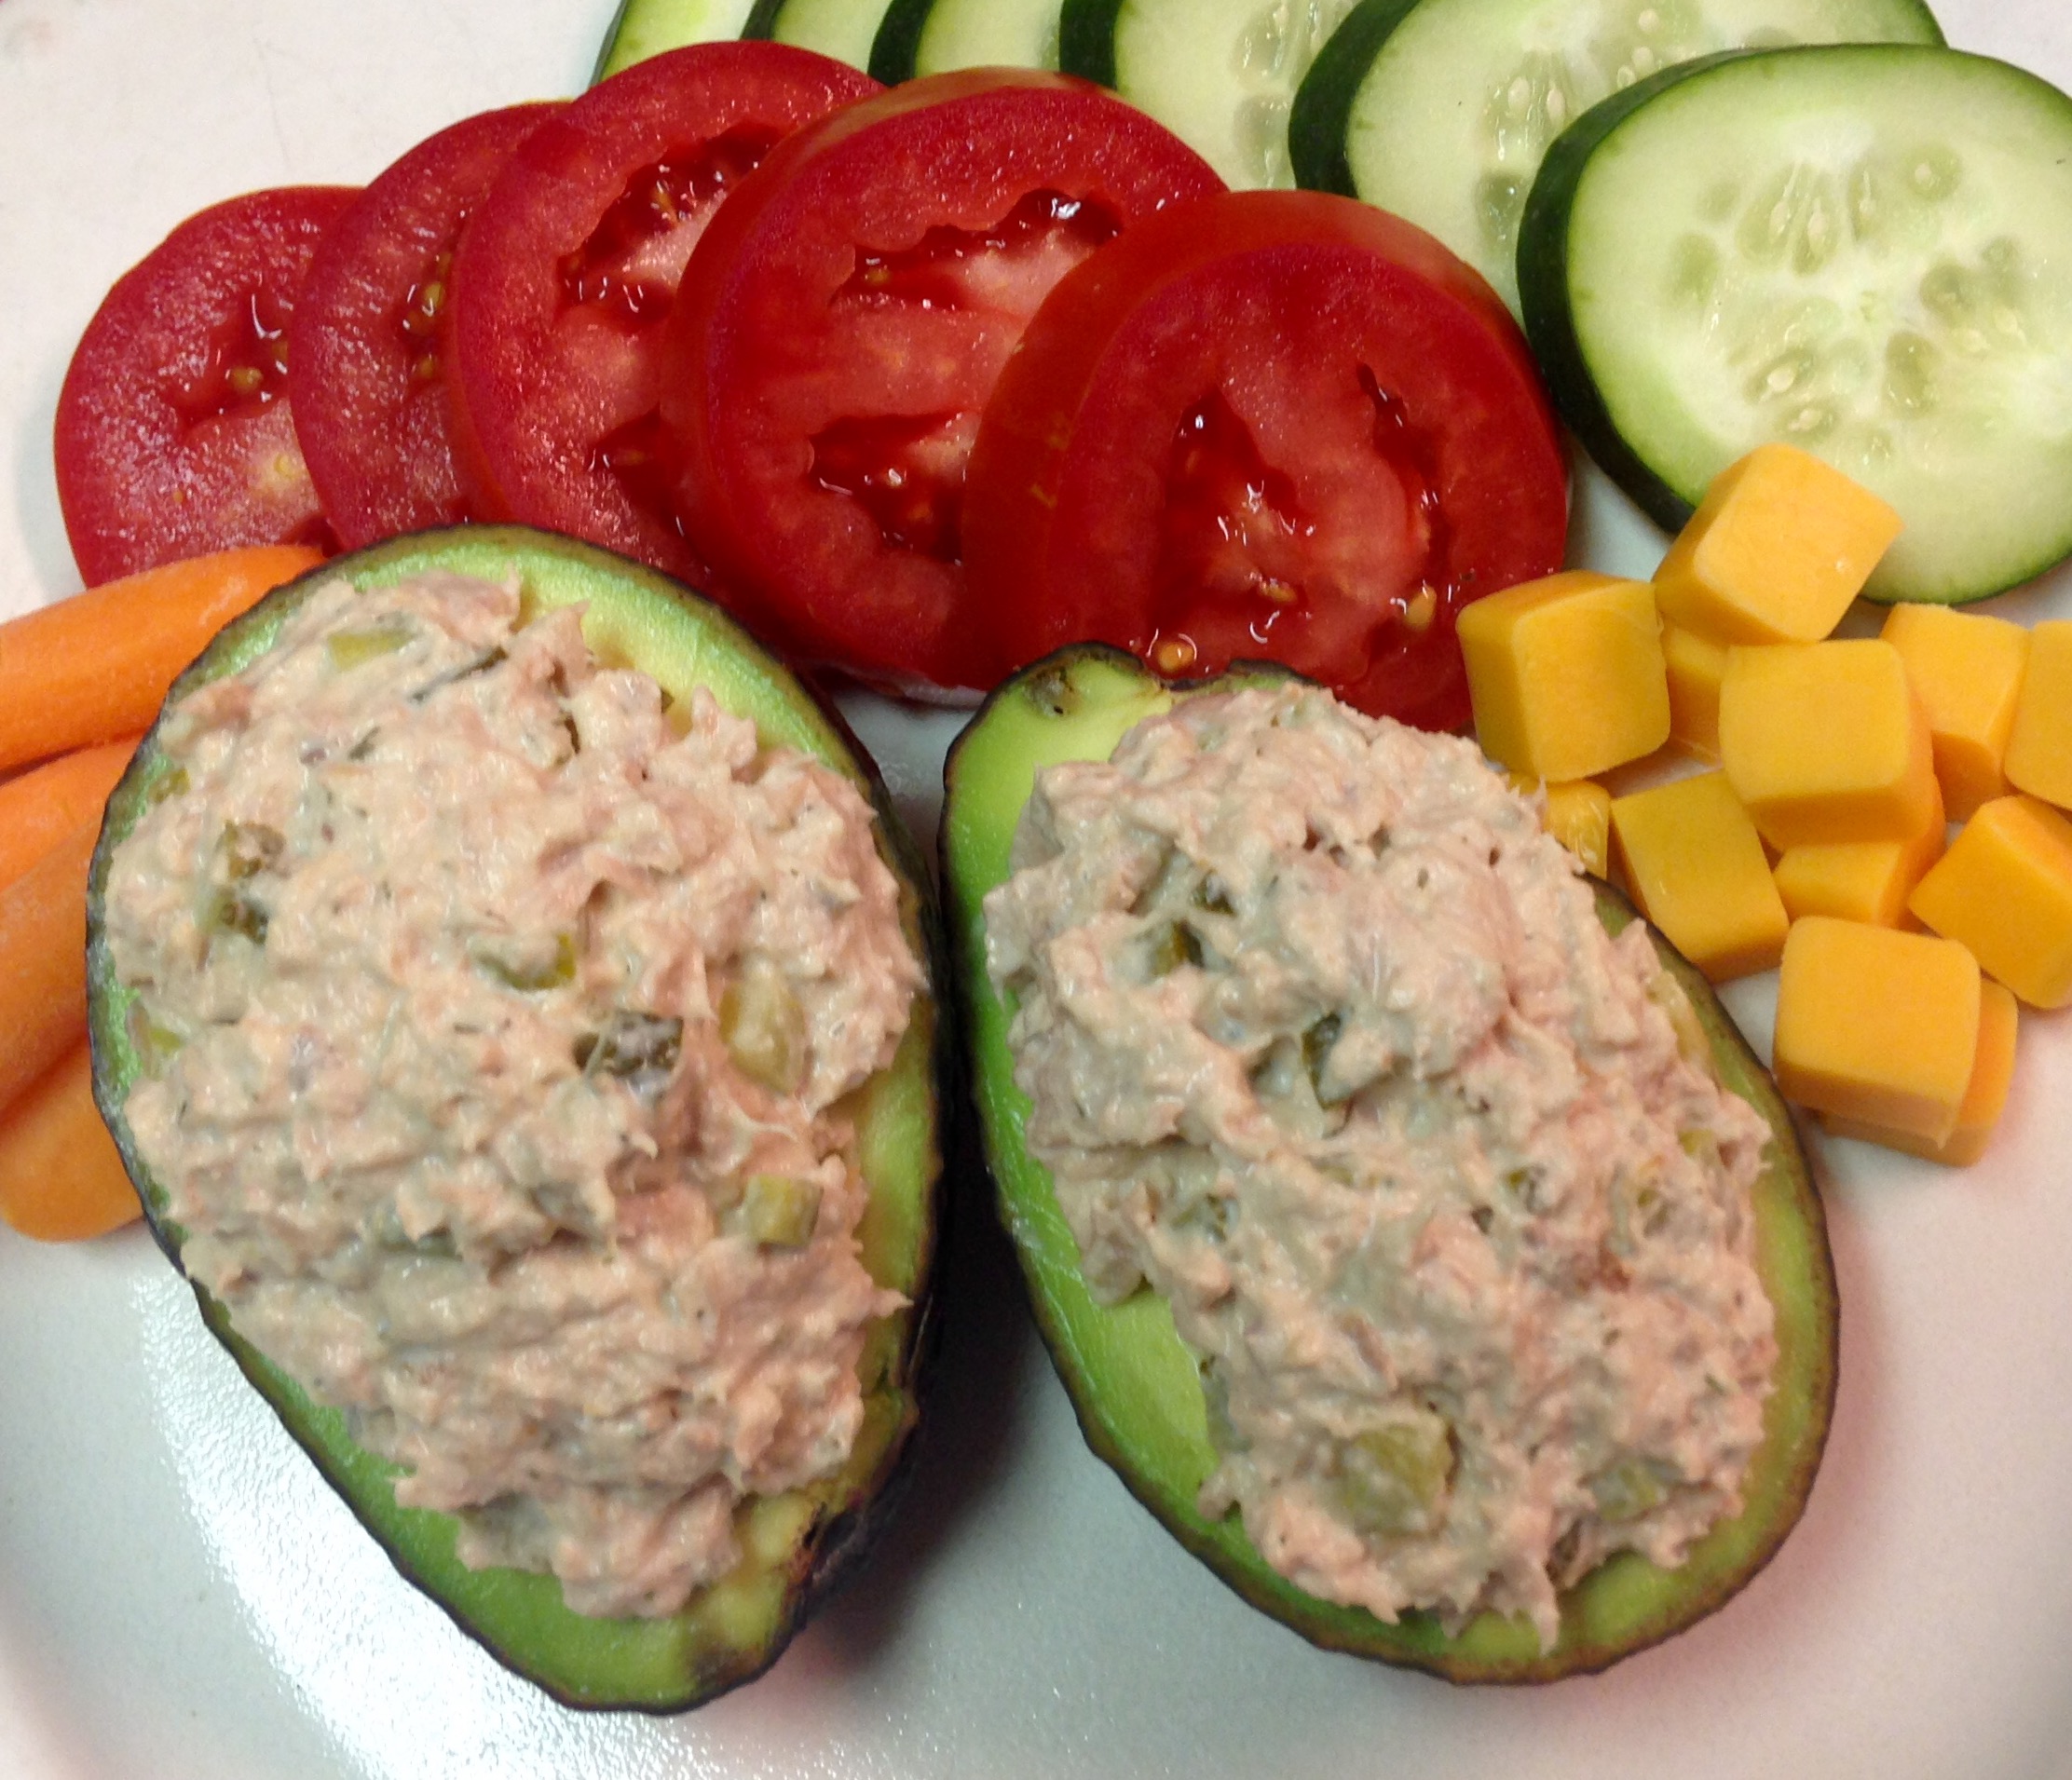
Tuna Avocado Cups

tunaavocadocups

We will be moving (again) soon. Not far and not dramatically, just to a different town. As always, there is a process prior to our moves that involve a cleansing. Cleansing of stuff of all kinds, including the contents of the pantry, freezer and fridge. This cleansing project has resulted in eating leftovers and staples with which I have not been very creative. The process is neither bad nor good, but the lack of creativity resulted in a lack of posts lately.

In my attempt to reconcile the posting situation I realized I was hungry for lunch and had two hankerings – tuna and avocado. I stocked up on some avocados a few days ago and they were finally, wonderfully ripe. Here is what I did with my hankerings and had a filling, satisfying lunch that did not take long at all to make.

Of course you can use any of many cold salads to fill avocado halves, like my Mustard Chicken Salad, Don’t Have To Choose Salad, Walnut Chicken Salad, Dilly Egg Salad, or even the exotic and vegetarian Japanese Eggplant Tomato Salad.  I used my old, reliable tuna salad this time, which I just realized I never posted about. Well, then, I am multitasking and did not know it!

Tuna Avocado Cups

2 ripe avocados
10-12 ounces wild caught tuna in water
1 medium dill pickle, finely chopped
1/2 cup mayonnaise
2 teaspoons lemon juice
1 Tablespoon finely chopped onion or 1/8 teaspoon onion powder
1 clove garlic, finely minced or 1/8 teaspoon garlic powder
1 teaspoon dried dill leaves
1/2 teaspoon sea salt
Dash ground black pepper

In a medium bowl whisk together mayonnaise, lemon juice, onion, garlic, salt and pepper. Add tuna and stir with a fork until tuna is broken up and coated with mayonnaise mixture.

Slice avocados in half lengthwise and remove seeds. Lightly sprinkle halves with salt. Spoon tuna salad into halves, molding it into a pretty mound. Serve immediately with some cheese and raw vegetables.

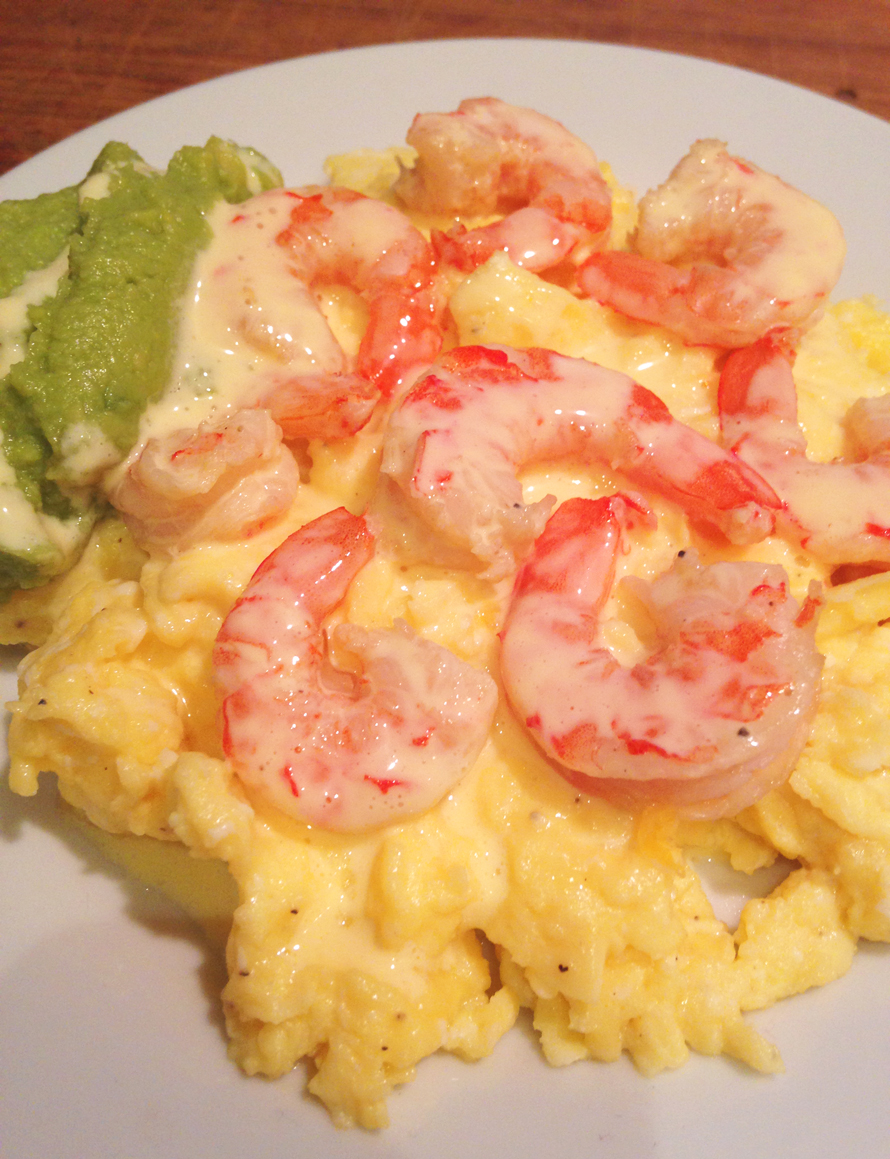
Shrimp Hollandaise on Scrambled Eggs

shrimp hollandaise with eggs

We eat a lot of eggs. Not only are they good sources of protein, they are extremely versatile. Do you want to bake some cookies? Add an egg. Do you want a casserole type macaroni and cheese? Add an egg to thicken it. Do you want a shiny finish on your pie crust? Brush it with an egg wash. Do you want a fun appetizer or side dish? Devil some. Need to feed a crowd of overnight guests? Make a frittata. Do you want a breakfast that sticks to your ribs? Scramble some. You can always throw some meat and cheese into your scrambled egg, but there is always that occasional morning when you want something different. Here is a dish for one of those different days. My original craving was for Eggs Benedict, but I have not yet mastered the low carb English muffin, so I deviated. I figured out that what I was craving was the Hollandaise Sauce. Although not a traditional, more complicated version of the sauce, it was quick to make and ready in advance of the short cooking time needed for the shrimp and eggs. Little B was not very excited about the sauce – she is still young and naive, but she inhaled the eggs, shrimp and guacamole.

Shrimp Hollandaise on Scrambled Eggs

6 eggs
1/4 tsp sea salt
Dash of ground black pepper
1 Tbsp butter
1/2 pound medium shrimp, deveined, shells and tails removed
1/2 lemon
1 tsp sea salt
1 cup prepared guacamole

Hollandaise Sauce
4 oz Butter
2 Egg Yolks
1 Tbsp Lemon Juice
1 Tbsp Water
1/4 tsp salt

For the shrimp fill a medium pot half with water. Add salt, squeeze lemon juice into water and drop the lemon half into the water. Set pot over high heat. While waiting for water to boil for the shrimp, make Hollandaise Sauce. Melt 4 ounces of butter and let cool briefly. While butter is cooling add the rest of ingredients in a blender but do not blend them yet. When butter has cooled a bit spoon out the foamy, bubbly top from butter, leaving the clear, yellow clarified portion. Use only the clarified portion for the sauce. Begin blending the mixed ingredients on low and gradually and steadily add the butter. Let blend for about a minute. Stop the blender. Leave sauce at room temperature until served. If water is boiling add shrimp and cover. Let boil for three to five minutes, just until they turn pink all over. Remove from water and place on towel to drain. In a bowl crack the eggs and add salt and pepper. Whisk until combined. In a frying pan melt butter over medium high heat. Add eggs and stir in the pan until cooked to desired doneness (Big D likes soft so I take his out of the pan first – Little B and I like ours a little more firm). Divide eggs among individual serving plates. Top with shrimp, then drizzle them with Hollandaise sauce. Add a side scoop of guacamole and serve.

Peruvian-ish Posole

posole

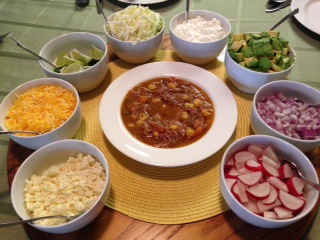
Posole. A basic, comforting soup I have enjoyed at restaurants across America that touted Central and South American cuisine. Not having made it before, I dug around to try and identify the when and where of it’s origin. To no avail, I might add. I have most often found it in Mexican and Peruvian restaurants, so then my goal was to figure out the differences between the two versions. I also recently watched a documentary about it being a dish prepared and served in New Mexico hundreds of years ago. Was there a difference? Not much. Peruvian leans more towards tomatillos and green or serrano chiles to give it depth and spice, while the Mexican versions rely on the red chile. New Mexico, of course, relied on their extra special (read Hatch) chiles and local meats. Other variations I discovered switched between the use of pork and chicken. Finally, I decided to come up with my own, since everyone else seems to be doing the very same thing. My goal was to make it similar to the bowl of posole I had in a little, Peruvian restaurant we stumbled upon in a Las Vegas strip mall. No, not on The Strip, but in a mall that is strip like where multiple business share a parking lot. The place was decorated very basically, with varnished plywood walls, folding tables and beat up stackable banquet chairs. The decor accommodated large crowds to watch soccer games or have big parties. We were surrounded by bright posters advertising Peruvian beer, and inundated with loud, quick-paced dance music. The food was amazing and I could only imagine a pre-Colombian Incan family cooking something similar over a fire, in the shadow of Machu Picchu. They may have used alpaca instead of pig, but I am not going there, except in the wearing of a sweater. One thing I love about all my posole experiences is the fresh, raw toppings traditionally served on the side. They give a spark to the otherwise flavorful, yet basic soup. Since I was making the soup for a dinner party I wanted to make sure it was good (duh), and that the topping variety accommodated all the eating habits of guests. I love my friends dearly, but if their diet evolution is anything similar to mine, there is a need for variety in meal preparation. Here is what I came up with, and I must say it was delicious. My dear friends enjoyed it, including Little B. As you can see from the picture, the toppings were many and everyone got to make their own special soup. As usual, the leftovers got better and better a few days later. And as usual, the fun and memories of the people involved in the evening will last even longer.
Peruvian Posole
1 1/2 – 2 pounds pork shoulder
2 Tbsp high heat fat (lard or coconut oil recommended)
2 cups roughly chopped white onion
1 cup roughly chopped carrot
1 Tbsp paprika
1 tsp ground cumin
1/2 tsp ground coriander
2 tsp dried oregano leaves
4 garlic cloves, minced
8 cups pork broth (if there is not enough from cooking the pork, add water)
1 cup dark beer (suggest Negro Modelo or a porter)
4 – 6 cups hominy, canned or prepared fresh (simmered in water for two hours, drained)
1 pound tomatillos, shucked, rinsed and roughly chopped
4 large green chiles, roughly chopped
2 limes, juiced with meat included
Salt to taste
Toppings

1 small red onion, chopped
2 avocados, chopped
2 limes, cut into 1/8 wedges
1 bunch radish, halved and thinly sliced
1/2 head cabbage, shredded
1 cup sour cream
1 cup cheddar cheese, grated
1 cup cotija cheese, crumbled
1/2 cup pico de gallo or salsa

In 8 – 10 quart stock pot place pork shoulder over high heat. Turn shoulder as each side browns, until all sides have color. Add water and scrape bottom of pan to release browning tidbits.  Cook pork over medium heat until pork easily shreds, about two hours. Remove pork and liquid from pot and set aside, retaining the liquid separately. When meat is cool enough to handle, shred it into bite-sized pieces. Set heat under the now empty stock pot to medium high and add lard or coconut oil. When it is melted add the onions and garlic. When they start to sweat add the carrots. Add paprika, coriander, oregano and cumin. Stir and cook longer until you can smell the spices. Add broth and beer. Cook until it begins to boil softly. Add pork, hominy, tomatillos and chiles. Stir and cook until a soft boil begins. Taste test to see if you can taste the flavors. If not, sprinkle liberally with salt and stir, then taste again. There should be a difference. if not, add more salt. Turn heat down to simmer, making sure there is still a very soft boil. Cook for an additional two hours. Place toppings in separate bowls with spoons right before serving. Serve spoon in large soup bowls and pass around the toppings!


Chorizo Burgers

chorizo burgers
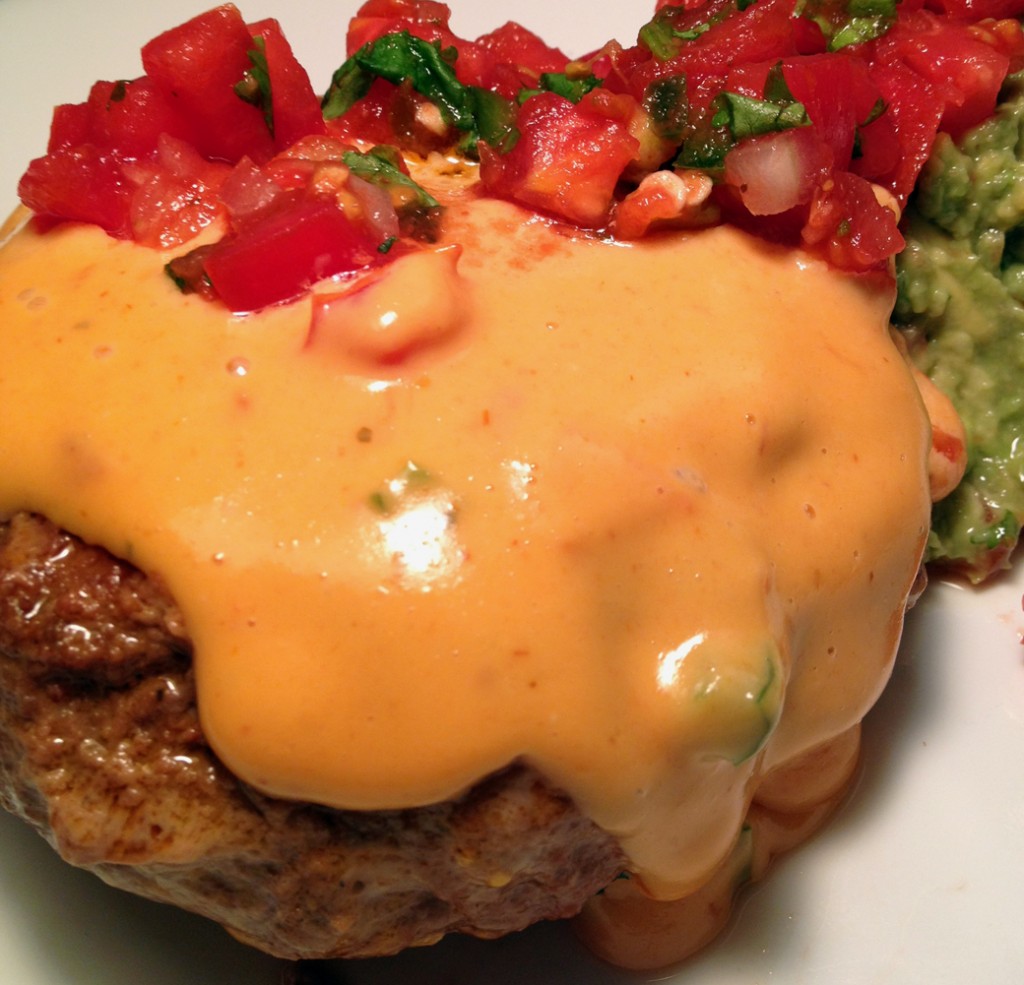
We eat a lot of burgers. A lot. They are our go to meal when we can’t think of anything else, or are running late, or are bored, or end up at a quick serve restaurant. The quick serve restaurant is always  a challenge. You cannot imagine the number of blank looks I get when ordering and tell them I don’t want buns. “No, I do not want buns.” “No, no buns.” “You can use salad containers and just put the condiments, meat and cheese in it. It will work fine. I promise you.” “Do I need to go in the back and talk the food prep team on how to do it?” “No, I don’t want the combo/meal. Just the burgers. I know the meal is a better deal compared to buying separately the fries and burger and drink, but I don’t want the fries. And don’t forget, I don’t want the bun either.” What usually happens is Little B and Big D will go find the perfect table and I do the ordering. Not because Big D can’t order. He is extremely articulate. The advantage to to me ordering is my patience – I soooo beat him in that arena when it comes to dealing with ordering food and other people are involved. In contrast, he is most awesome in the patience arena when dealing with me. I tend to be passive aggressive and get stuff pent up until the straw that breaks the camel’s back, and not everyone can deal with it, but he is a magician with me. Okay, on with the dish. Since we avoid traditional buns, and I rarely make low carb buns, the variety in our burger-ness relies on combining meats and the toppings. I was longing for a Tex-Mex feast, but our current situation does not allow for expansive storing of leftovers, which rules out some more bulk preparations of the guacamole, salsa and chile con queso I usually prepare. I did mini versions of the sides, so we ate most of them and storage was not an issue (phew). Also, with my previous exploration into creative meats in burgers, I wanted to do something a little different. Here are my results, which gave me the Tex Mex element, while also giving variety to our burgers with a spicy flair. It may be hard to find good jalapenos in Alaska, but when I do, they are pretty potent. Between the pepper and the ancho chile the burgers definitely left a slow burn in my mouth, and on my lips, and under my fingernails felt the heat to. I was also reminded of those little webbed parts between my fingers that have dry skin but I don’t realize it until I chop up a jalapeno. Ouch but yum!

Chorizo Burgers

Burgers
2 pounds ground beef
1 pound chorizo sausage
2 eggs
½ cup fresh cilantro, chopped
3 garlic cloves, crushed
½ tsp ancho chile powder
½ tsp sea salt
1 tsp ground cumin

Condiments
1 batch chile con queso (melt processed cheese block with a can of tomatoes and chiles, add some chopped fresh tomatoes and jalapenos if you like)
1 batch salsa
1 batch guacamole

Prepare all condiments in advance. I did 1/3 batches and they were enough for these burgers, but do full batches if you have the fridge space – they are great the day after! For the burgers combine the eggs, cilantro, garlic, chile powder, salt and cumin. Whisk together until eggs are scrambled. In a large bowl smush together beef and sausage until there are no recognizable chunks of sausage. Add egg mixture and smush some more until eggs, herbs and spices are well combined. Form meat mixture into six or eight large patties. In a large frying pan over medium high heat sear one side of the burgers, about five minutes. Flip burgers and sear other side. Reduce heat by half, cover burgers and cook until done, about eight minutes. When done cooking immediately place a burger on a serving plate and top with queso and guacamole. Sprinkle with salsa and serve. If you have leftover burgers I recommend storing them separate from the condiments.

Don’t Have To Choose Salad

donthavetochoosesalad

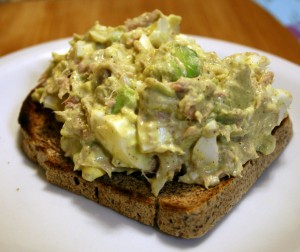
My food hankering today was conflicting. Do I want egg salad, tuna salad or guacamole? To take full advantage of my indecisiveness I decided to combine them all. I have never combined the three dishes before, so why not now? I wanted the flavor of all three to be present and also work together. I think I did a pretty good job, and it was a great way to use up the last avocado sitting on the counter – not enough for guacamole, or for topping a batch of chicken, but such a delicious thing shouldn’t go to waste. Tuna is a great way to add protein to a dish, even if there is already protein eking out of the avocado and egg. This salad was delicious sitting atop toasted Julian’s paleo bread. Reminded me of egg salad sandwiches on Lenten Fridays when I was a kid. We would have macaroni and cheese, salmon patties, tuna or egg salad. I understand the symbolism of no meat on Fridays, but feeling less lust or anger in the absence of meat on my part was not actually achieved. Feeling an excess of either was not an issue when I was a child, but one day a week is not what I consider an actual test. To get away from the nostalgic and dogmatic reasons for making the salad, it met my hankering and indecisive needs.

Don’t Have To Choose Salad

1 large ripe avocado
8 – 10 hard boiled eggs
1 5-ounce can tuna packed in water, drained
½ cup Greek yogurt or sour cream
2 Tbsp lime juice
1 tsp stone ground mustard
½ tsp sea salt
½ tsp ground cumin
¼ tsp chili powder
Sprinkle of ground black pepper

In a large bowl mix yogurt, juice, mustard, salt, cumin, chili powder and pepper. Roughly chop eggs and avocado into pieces about the same size. Gently mix the tuna, avocado and eggs with the dressing, trying not to smash much of it. Chill for about an hour before serving.


End of Summer Salad

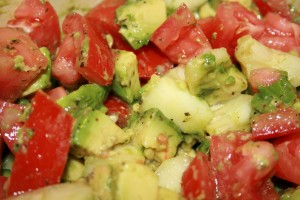
As the temperatures gently creep lower I tend to linger over the fresh, seasonal summer produce at the markets. I know some of it, although sadder looking, will be around pretty much year round. Some will have faded colors or less flavor. Others will just get more expensive. I look forward to the squash and root vegetables that are already becoming more prevalent, but I currently plan on cherishing the last of the bright tomatoes, abundant cucumber and perfect avocados that have become a habit over the past few months. Here is a wonderful, simple, soft salad that fully appreciates some of the summer fruits that we often call vegetables. Enjoy!

End of Summer Salad

4 Tbsp extra virgin olive oil
2 Tbsp apple cider vinegar
1 small bunch basil leaves, finely chopped
1 tsp sea salt
1 tsp ground black pepper
½ lime, juiced with pulp
2 ripe Hass avocados, peeled and coarsely chopped
3 roma tomatoes, cut into about 20 pieces each
½ large cucumber, peeled and coarsely chopped

In a small bowl combine the first six ingredients. Set aside. In a large bowl combine the avocado, tomato and cucumber. Add dressing and stir gently, trying not to smash tomatoes or avocado too much. Chill covered for about an hour before serving.

Stuffed Burgers


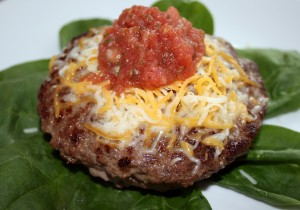
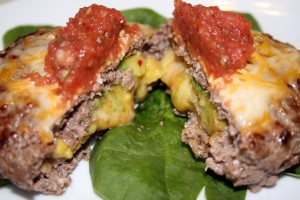
If it can all go on top, why can’t some go in the middle, too? In the world of hamburgers there is a limitless number of topping combinations and I have tried a lot of them. My go to combinations are usually the traditional bacon and cheddar, or bleu cheese with mushrooms. I am not a fan of Hawaiian themed burgers – it is my opinion that pineapple is for dessert, not for pizza or burgers. The more exotic burgers with truffles and seafood are okay, but such toppings seem to pair better with pasta. Sometimes I go for a couple of onion rings with barbeque sauce, but the sauce has to be just right. Although messy, cover my burger anytime with spicy queso dip and guacamole. I will be on it like a bee on honey. As often wont to do, I lean towards a more Tex-Mex theme for this latest dish. I have not made these in a while, so I figured it was time to do so again. These can be pretty messy if eaten on a bun, but that is okay. A good burger is always messy.

Stuffed Burgers

2 pounds ground beef
½ tsp sea salt
¼ tsp ground black pepper
½ tsp cumin
Dash dried red pepper flakes
1 Hass avocado
8 – 12 ounces shredded co-jack cheese
Salsa for serving
Fresh spinach and/or buns for serving

Combine beef, salt, pepper, cumin and pepper flakes together. Remove avocado meat from skin and roughly chop into small pieces. Divide beef into eight portions, then form portions into thin, equal sized patties. On four of the patties add 1/3 of the cheese, avocado and then 1/3 more of the cheese, leaving about ½ inch of meat around the edges. Place the other four patties over the loaded ones, then press together the edges so there is no seam. In a frying pan over medium heat add the olive oil. When oil is hot add the burgers. Cook for 5 – 7 minutes on each side, until cooked to desired doneness. The burgers will not take as long as regular burgers to cook because the cheese and avocado will heat up quickly in the middle. At the last minute add a bit more cheese to the top and cover until melted. Top with salsa on a bed of spinach (or buns) and serve immediately.


Chicken Tomatillo

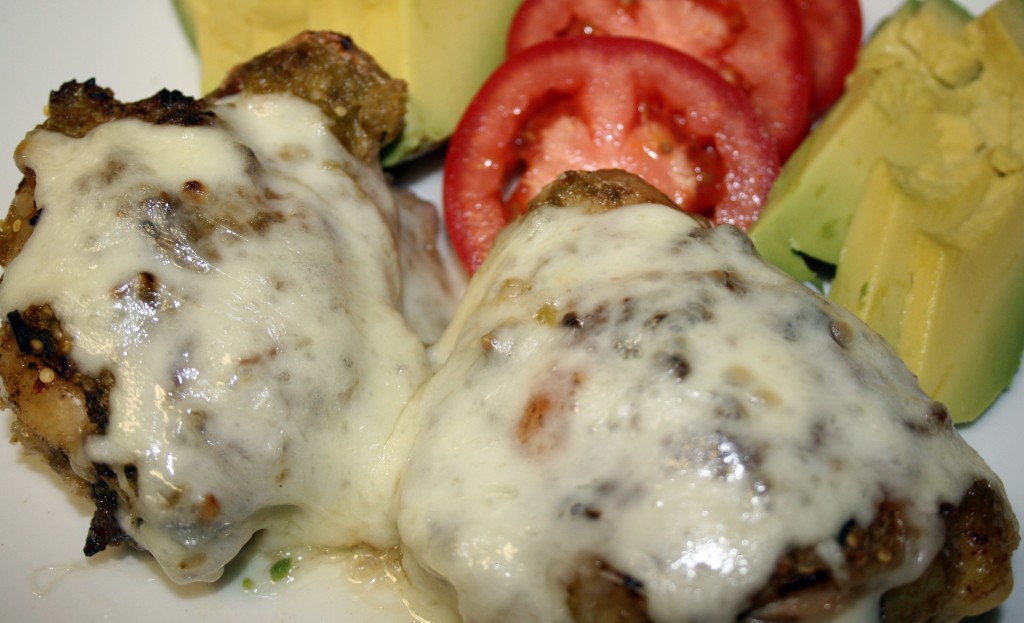
What the heck do you do when you have chicken and some leftovers in the fridge? Come up with something for dinner using them! Duh! After a long day at work I really needed to cook something so I could relax and totally enjoy my family. Cooking, Little B and Big D are what I rely on to balance out the chaos at work. It is a necessity for me to focus on those three things when I get home. It definitely works. I don’t think about work again until the next morning when they are sleeping and I am on the way out the door on the way to the office. I love that it works so well for me. There is nothing better than being able to escape at home. One of my constant challenges is to do something creative and simple with chicken. We are dark meat people, which means packages of legs and/or thighs cooked up for dinner. Recently we had a package of thighs, so I poked around in the fridge and came up with something luscious and amazing for dinner and a couple of lunches at work, which, of course, reminded me of home and let me escape for a bit in the middle of the work day. Yay!

Tomatillo Chicken

3 – 4 pound package chicken thighs, with bone and skin

1 tsp chili powder

1 tsp ground cumin

1 tsp sea salt

½ tsp ground black pepper

2 cups salsa verde with tomatillos sauce

2 cups mozzarella cheese

Preheat oven to 350F. Combine chili powder, cumin, salt and pepper. Get your hands dirty and cover chicken with combined spices. Place chicken in 9×13 glass baking dish. Pour tomatillo sauce over chicken, then top with cheese. Bake uncovered for 45 minutes to 1 hour, until chicken is cooked through and juices run clear. Let sit for about ten minutes before serving.

Fondue Feast

Is it French or Swiss in origin? I don’t know. The evolution in America of fondue is such a different animal compared to the simple cheese fondue I found to be served in Europe. Way back in the ’80s my family would join forces with other families and have fondue parties. At the time it was a throwback to the 1960s, when my parents stocked up on fondue sets. Regardless of when it peaked in popularity or where it first happened, it is still a fun time with abundant and delicious food.

I learned a number of things from those fondue parties when I was growing up. The first was you must commit to any dip you take with your loaded fondue forks, for double dipping in a pot of cheese or chocolate is frowned on in the fondue world. If you do such a thing there may be nothing said, but the vibes of the fondue tribe may change toward you. Those fondue forks can be lethal when stabbed into a hand guilty of double dipping! The second thing I learned was there is never enough room on the little divided plates for all the sauces. With divided fondue plates you need to commit to, like, four of the ten or so available sauces. Another option is to do a lot of dollop dropping on individual pieces you cook. The third thing was that it took a while to get full from fondue, and since the process took a while to cook and eat and reload and cook and eat…there was plenty of time to talk and sip wine and laugh and, especially, try and sneak other people’s forks when they are not looking so you get to double up on your pile of cooked bites. The trick to sneaking forks is to not have any of your own on your plate. Have your own forks cooking away before stealthily stealing your neighbor’s fork while they are gesturing dramatically during the telling of a story. Don’t forget to reload their fork with the same stuff. A bonus is their quizzical look when they check their fork and wonder why the chicken is still raw after their story about Uncle Festus at the family reunion.

Although it may take a while to fill up on fondue that full stomach will sneak up on you. Before the chocolate fondue is served you wonder if you have any room left in your belly. But it is just fruit, right? There is always room for fruit! Maybe not fruit covered with chocolate, but it is very much worth trying. And it will fit!

For our fondue feast we did a sample of four different fondues – cheese, oil, broth and chocolate. In the future I will probably limit myself to one fondue for a meal, surrounding it with non-fondue dishes. This particular meal was a chaotic mess of food and fun, and a great way to sample the different fondue types. Everyone had a blast.

The following recipes account for feeding seven people, since our fondue party included as many guests. After digging through the closets mom found four – count ’em – four fondue pots. We chose not to use the small one from France meant for chocolate fondue, but only because the sheer number of people, all that dipping would have overwhelmed the little thing. The meal called for a lot of preparation, but it can be spaced out in small chunks, mostly as early as the day before, and makes for quick set up when it is actually time to eat. I pulled everything out of the refrigerator (yes, even the meats) about 45 minutes to an hour before serving so things were cool but not chilly.

Everyone should scour their parents’ pantry, estate sales and thrift stores for fondue sets and be ready to pull them out for some fun eats. If you are short of cash the fondue feast can be turned into a pot luck where everyone brings a little bit but eats a lot. Have fun with it and be sure to make a mess!

I served the cheese fondue when people were first arriving and standing around in the kitchen, then served the oil and broth fondues at the table with all the sauces. In addition to the sauces I made, shown in the recipes below, I provided tartar sauce, BBQ sauce and creamy horseradish, all served simply in their pre-made states in bottles from the grocery. I did not even start preparing and melting the chocolate fondue until the table was cleared of the oil and broth. It was quick to do and a fun dessert. I remembered a lot of the recipes from when I was younger, but found a lot of helpful reminders here.

FONDUES
Cheese Fondue

2 garlic cloves, cut in half

1 cup dry white wine
8 ounces Gruyere cheese, shredded
8 ounces Havarti cheese, shredded
2 ounces Dubliner cheese, shredded
1 Tbsp lemon juice
1 Tbsp cornstarch
1 Tbsp Kirsch or brandy
½ tsp nutmeg
½ tsp paprika
Black Pepper (optional)

Handful of Cubed bread per person
Vegetables also used with Broth Fondue

The measurements for wine and cheese should be enough, but you may want to have a little more on hand to adjust the consistency if needed. Add more cheese if it’s too liquid, add more wine if it’s too thick. I have found that if you mix the cheese fondue on the stove top or electric fondue pot about an hour before serving, then turn it off, but then start to reheat about ½ hour before serving it makes for quick set up when guests first arrive. To begin preparation, rub the garlic inside the fondue pot then discard. Pour the white wine and lemon juice into the pot and turn on the burner. Let the wine and lemon juice warm up without boiling. Reduce heat and add the shredded cheese. With a wooden spoon, mix well and stir regularly. Dilute the cornstarch in the Kirsch or brandy, and add remaining ingredients to the pot. Add pepper to taste. Adjust consistency with additional wine or cheese. Dip bite size pieces of bread or vegetables. Let the freshly dipped pieces cool off for a few seconds before enjoying. You may have to twirl the cheesy bits on your fondue fork until it cools and stops drizzling long strings of cheese before you eat them. Also, extra liquid may be needed after the fondue is half gone because it thickens as time passes.

Hot Oil Fondue

2 – 4 cups peanut or canola oil
4 ounces beef per person, cut in bite-sized cubes
2 – 4 ounces chicken breast per person, cut into thin strips
2 ounces per person medium size shrimp (cooked or uncooked), tails intact

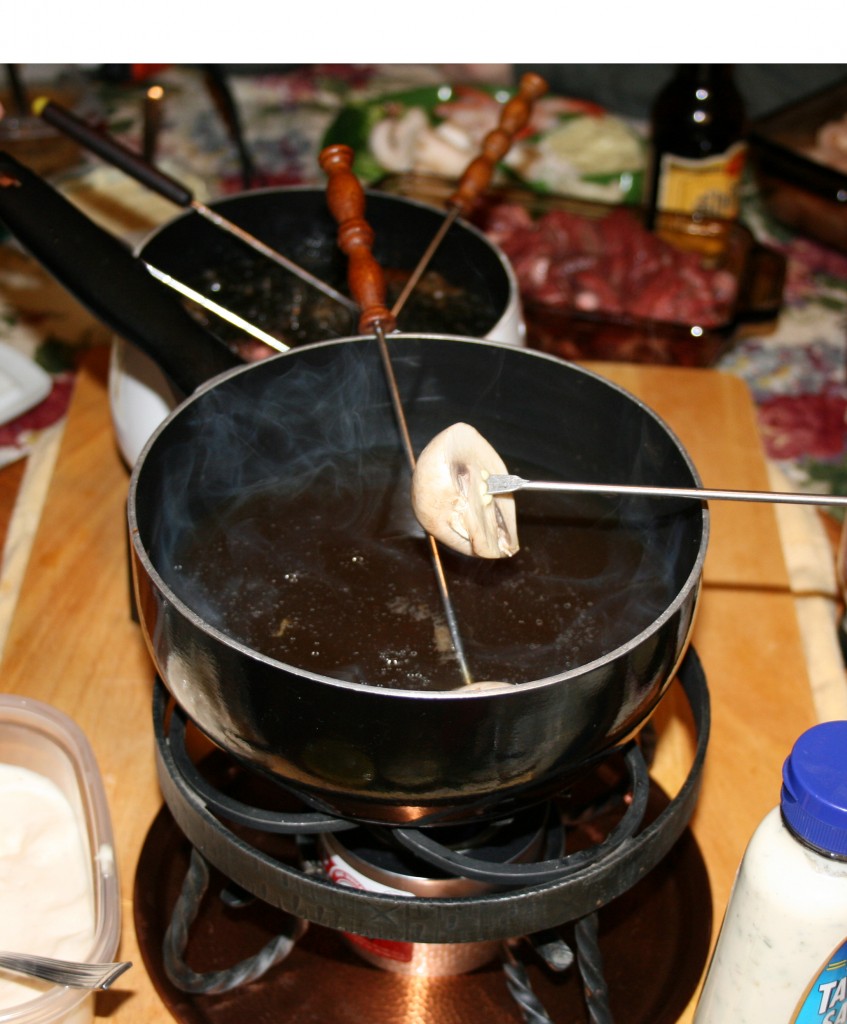
Heat oil to 325 – 350F, either in the fondue pot if electric, which is best for oil, or on the stove top for flame pots. If using a flame pot carefully transfer the hot oil to the fondue pot. Do not fill the pot more than 2/3 full, to reduce splashing over the rim of the pot while cooking. Pierce the raw meat or seafood with fondue forks and submerge in hot oil for about a minute. Remove and let cool briefly before dipping.

Broth Fondue

4 – 6 cups chicken stock
2 Tbsp dry white wine
1 garlic clove, thinly sliced
1 Tbsp fresh ginger, grated
3 Tbsp Worcestershire or soy sauce
Salt and Pepper to taste

2 – 4 mushrooms per person, whole or halved, depending on size
4 – 6 broccoli crowns per person, blanched
2 – 4 cauliflower crowns per person, blanched
4 – 6 snow peas per person, blanched
2 – 3 mini carrots per person, blanched

Combine all ingredients (salt and pepper optional) into electric fondue pot or on a stove top pot if using flame pot. Bring liquid to a simmer (liquid is moving and steam coming off surface) and begin dipping. For flame pots bring liquid to a boil on the stove then carefully transfer to the flame fondue pot. Dip vegetables into broth until cooked to your liking, warm but still crisp, or soft and mushy. If you really want the vegetables cooked quickly, I recommend blanching all the vegetables (drop them for 2 – 5 minutes in boiling water, then stop the cooking process by dropping them in cold water, then drain) before cooking them in the broth. The blanching can be done in advance and then refrigerated until serving time.
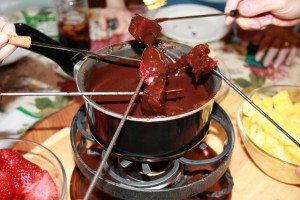
Chocolate Fondue

½ pound semi-sweet chocolate
1/2 cup Light Cream
1/8 cup brown Sugar
2 Tbsp Butter
2 tsp Vanilla Extract

Combine all ingredients in pot on stove top or in a microwave-proof glass bowl. Melt on low heat until liquid and well combined. If using the microwave heat for 30 seconds and stir until mostly melted, then stir until all lumps are gone. Whether prepared on the stove top or in the microwave, transfer to fondue pot for serving and dip dip dip (but don’t double dip!).

SAUCES

Lemon Teriyaki Sauce

1/2 cup Soy Sauce
1/2 tsp Ground Ginger
1/4 cup Sugar
2 tbs Lemon Juice

Add all ingredients to a pot on the stove top. Heat until ingredients come to a boil. Let cool.

Hollandaise Sauce

4 oz Butter
2 Egg Yolks
1 tbs Lemon Juice
1 tbs Water
1/4 tsp salt

Melt butter and let cool briefly. While butter is cooling mix the rest of ingredients in a blender but do not blend them yet. When butter has cooled a bit spoon out the foamy, bubbly top from butter, leaving the clear, yellow clarified portion. Begin blending the mixed ingredients and gradually and steadily add the butter. Let blend for about a minute. Leave at room temperature until served.

Spicy Oriental Sauce

2 Tbsp soy sauce
1 ½ Tbsp lemon juice
1 4.5 ounce can mild green chiles
1 clove garlic, crushed
2 tsp Sesame Oil

Combine all ingredients in tall bowl. With hand blender combine ingredients to a uniform, slightly thick texture. Serve chilled or at room temperature.

Garlic Lemon Dip

1 ½ cups mayonnaise
1 ½ Tbsp lemon juice
1 Tbsp garlic, crushed
½ tsp hot sauce
Salt and Pepper to taste

Mix all the ingredients until well blended. Keep refrigerated until served.

Curry Sauce

1 cup plain yogurt
2 tsp ground curry
1 ½ tsp lime juice
Salt and Pepper to taste

Mix all ingredients until well combined. Refrigerate until served.

Dill Dip

1 ½ cup low fat sour cream
½ shallot, finely chopped
2 Tbsp dill, finely chopped
1 Tbsp lemon juice
Salt and Pepper to taste

Combine all ingredients well. Refrigerate until served.

Guacamole Dip

1 rip avocado, mashed
1 Tbsp lemon juice
½ cup plain low fat yogurt
½ cup low fat sour cream
¼ cup finely chopped pine nuts, walnuts or pecans
1 leek, white and light green part finely chopped
½ tsp hot sauce
Salt and Pepper to taste

Mix the avocado flesh with the lemon juice. Mix avocado mixture with the rest of the ingredients. Add salt and pepper to taste. If prepared ahead of time of serving, keep refrigerated.

Tilapia Tacos

One of my favorite past times is kayaking. Big D and I have sit-on-top kayaks we use in warmer climates, while our sit-inside kayaks and spray skirts are reserved for colder places. Besides allowing us to paddle to shallow nooks and crannies boats often cannot go, the kayaks keep me on top of the water. I never really like that vulnerable feeling when I have my feet dangling down where they cannot touch the bottom, wondering if my wiggling toes are calling large sea mammals to come feast. It is irrational and I do not get to the point where I freeze with fear, but my imagination sure runs wild. Yes, I may be able to blame images from Jaws or Deep Blue Sea for giving me trepidations, and (mom, don’t read this) I have in fact landed in the ocean with feet dangling over the abyss, hanging on the edge of my kayak while waves roll me around. Good thing I can swim and can heave ho myself back into my kayak. I can stand here today and say with confidence that I have not yet been eaten by any sea creatures, though I am pretty sure a few have come close and considered a snack. All of this kayak talk is leading me to my solution for using up some beautifully ripe tomatoes and avocados.

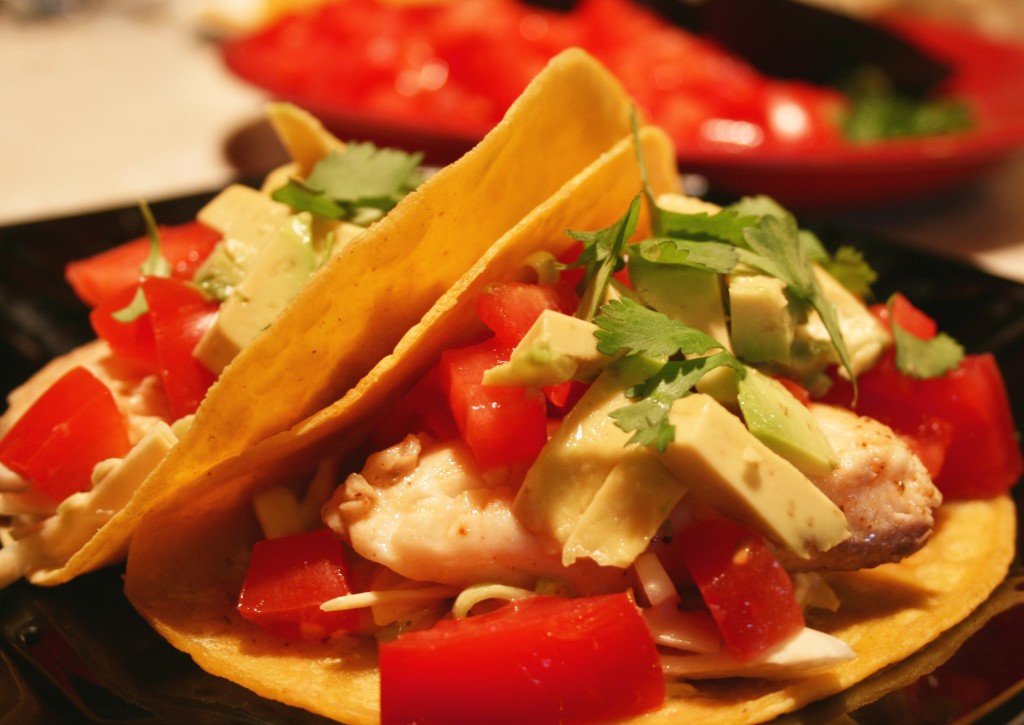
I appreciate the taste of fresh fish on fresh corn tortillas, topped with things like the previously mentioned beautifully ripe tomatoes and avocados. Such concoctions are called fish tacos in my world. When I am done kayaking for the day, and famished, I am rarely interested in cooking. I want food. Immediately. Made by someone else. Since it is a must to be near water when kayaking, it is pretty much guaranteed there is someone cooking up seafood at nearby restaurants. I will trudge over to the nearest joint, regardless of my sandy and salty and bedraggled state, drink a ton of water and chow down. When I am not eating shrimp or oysters at said restaurants I like fish tacos – a mix of fresh vegetables and fresh fish all swaddled in corn tortillas. After watching fish swim by and under me all day I can’t help but think about eating them. I have discovered in my travels the preparation of fish tacos varies in the U.S. from coast to coast to coast (yes, there are at least three in the contiguous U.S.). Here is the way I like them.

Tilapia Tacos

2 tilapia fillets
3-4 Tbsp olive oil
1 lime, juiced with meat included
1 tsp chili powder
½ tsp salt
¼ head green or red cabbage
1 Tbsp red wine vinegar
3 Tbsp sour cream
1 tsp Crystal® hot sauce
1 tsp cumin
Salt and pepper to taste
1 large ripe tomato, chopped
1 avocado, diced
¼ cup cilantro leaves
6 corn tortillas

Combine 2 tablespoons olive oil, lime juice, chili powder and salt in a bag that can be sealed. Add fillets and toss gently until the fish is covered by the marinade. Push air out of the bag and seal, marinating for at least an hour, flipping it over about half way through. For the coleslaw chop the cabbage thinly and then across, making short, bite-size pieces. Combine vinegar, sour cream, hot sauce, salt, pepper and cumin. Toss with cabbage. Refrigerate until tacos are served. Preheat oven to 300F. Brush the remaining olive oil on both sides of the corn tortillas, placing them on a large cookie sheet. While cooking the fish pop the tortillas in the oven. They should be ready about the same time as the fish – they just need to be heated up, not browned or crisped. Heat a pan on the stove top to medium high. Cut each fillet into three or four pieces, depending on the size of the fillets. Add the fish to the dry heated pan and cook about three minutes on each side, until cooked through. There should be enough oil on the fish to cook them without adding more oil, but if not, you may need to add a splash more while cooking. Remember: dry fish is gross fish! Before serving break up the fish into even smaller pieces, allowing them to better mix with the other ingredients when added to the tacos. Fill tortillas with fish, coleslaw, tomato, avocado and cilantro. Eat up! I tend to put the slaw on top so the dressing can drip down onto the rest of the taco contents. After a few bites sprinkle on some hot sauce if the tacos are not spicy enough.

Post Navigation