Any Kitchen Will Do

Give me a kitchen and I will cook.

Archive for the category “Uncategorized”

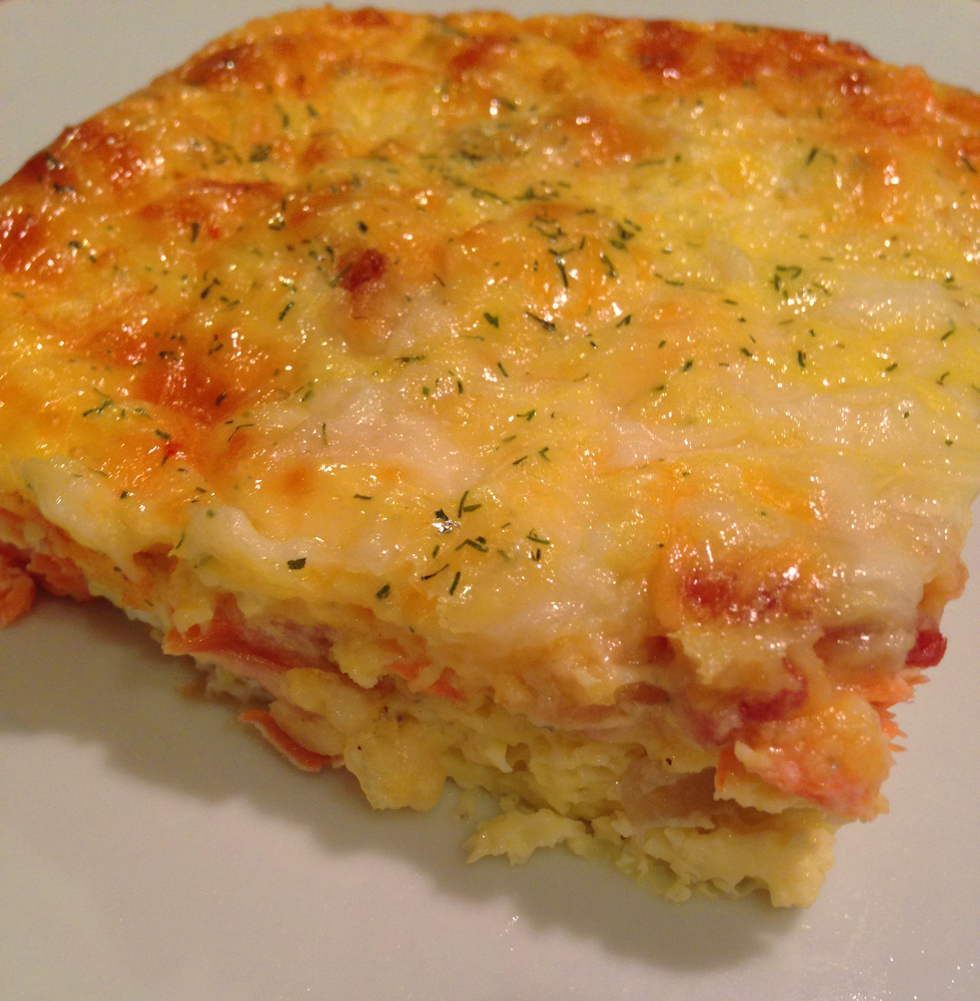
Simple Salmon Frittata

salmon frittata

I have shared a frittata recipe with you before, but the ingredients this time combined so nicely, and made such a great weekend breakfast that I decided to share another. Living in Southeast Alaska there is a year round craving for seafood, but it gets magnified as the spring days get longer, and the call to play outside with fewer layers on gets stronger. Our smoker has been busy flavoring meats, vegetables and cheeses for us all winter, but now we ask it to prepare our salmon. A local fish shop – and I mean a fish shop that sells catches from local fisherpeople – Pinkies, had some beautiful, fresh King Salmon. The smoker used alder wonderfully to compliment it, so we feasted on some wonderful marine life. The King Salmon is a big fish, so the leftovers were waiting on us the next morning. I get very used to tossing onion and garlic into many morning egg dishes, but I also leave them out sometimes, depending on the ingredients. This time I chose to let the salmon sing, and it did! I used smoked salmon, but any leftover cooked salmon would work.

Salmon Frittata

8 eggs
1/2 cup heavy cream
1 1/2 tsp dill weed
1/2 tsp sea salt
1/4 tsp ground black pepper
Dash dried red chili flakes
4 ounces smoked salmon, roughly chopped
3 slices cooked bacon, crumbled
1 cup Colby jack cheese, grated
1/2 cup mozzarella cheese, grated

Preheat oven to 350 degrees. Crack eggs into a medium bowl and whisk until slightly frothy. Whisk in cream salt, pepper, chili flakes and 1 tsp of dill. Grease a 9×9 baking or pie dish. Pour in egg mixture. Sprinkle salmon and bacon evenly into the egg mixture. It should sink down into the egg. Follow the fish and bacon with the Colby Jack cheese and then mozzarella cheese. Spread the last of the dill weed and a bit more salt on top. Bake for 30-40 minutes, until edges are browning, middle egg is set and middle cheese is slightly bubbly. Remove from oven and let sit for about ten minutes. Slice and serve.

Peruvian-ish Posole

posole

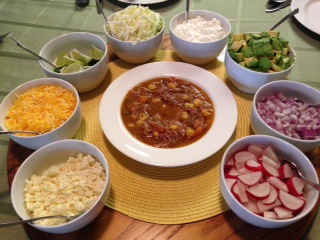
Posole. A basic, comforting soup I have enjoyed at restaurants across America that touted Central and South American cuisine. Not having made it before, I dug around to try and identify the when and where of it’s origin. To no avail, I might add. I have most often found it in Mexican and Peruvian restaurants, so then my goal was to figure out the differences between the two versions. I also recently watched a documentary about it being a dish prepared and served in New Mexico hundreds of years ago. Was there a difference? Not much. Peruvian leans more towards tomatillos and green or serrano chiles to give it depth and spice, while the Mexican versions rely on the red chile. New Mexico, of course, relied on their extra special (read Hatch) chiles and local meats. Other variations I discovered switched between the use of pork and chicken. Finally, I decided to come up with my own, since everyone else seems to be doing the very same thing. My goal was to make it similar to the bowl of posole I had in a little, Peruvian restaurant we stumbled upon in a Las Vegas strip mall. No, not on The Strip, but in a mall that is strip like where multiple business share a parking lot. The place was decorated very basically, with varnished plywood walls, folding tables and beat up stackable banquet chairs. The decor accommodated large crowds to watch soccer games or have big parties. We were surrounded by bright posters advertising Peruvian beer, and inundated with loud, quick-paced dance music. The food was amazing and I could only imagine a pre-Colombian Incan family cooking something similar over a fire, in the shadow of Machu Picchu. They may have used alpaca instead of pig, but I am not going there, except in the wearing of a sweater. One thing I love about all my posole experiences is the fresh, raw toppings traditionally served on the side. They give a spark to the otherwise flavorful, yet basic soup. Since I was making the soup for a dinner party I wanted to make sure it was good (duh), and that the topping variety accommodated all the eating habits of guests. I love my friends dearly, but if their diet evolution is anything similar to mine, there is a need for variety in meal preparation. Here is what I came up with, and I must say it was delicious. My dear friends enjoyed it, including Little B. As you can see from the picture, the toppings were many and everyone got to make their own special soup. As usual, the leftovers got better and better a few days later. And as usual, the fun and memories of the people involved in the evening will last even longer.
Peruvian Posole
1 1/2 – 2 pounds pork shoulder
2 Tbsp high heat fat (lard or coconut oil recommended)
2 cups roughly chopped white onion
1 cup roughly chopped carrot
1 Tbsp paprika
1 tsp ground cumin
1/2 tsp ground coriander
2 tsp dried oregano leaves
4 garlic cloves, minced
8 cups pork broth (if there is not enough from cooking the pork, add water)
1 cup dark beer (suggest Negro Modelo or a porter)
4 – 6 cups hominy, canned or prepared fresh (simmered in water for two hours, drained)
1 pound tomatillos, shucked, rinsed and roughly chopped
4 large green chiles, roughly chopped
2 limes, juiced with meat included
Salt to taste
Toppings

1 small red onion, chopped
2 avocados, chopped
2 limes, cut into 1/8 wedges
1 bunch radish, halved and thinly sliced
1/2 head cabbage, shredded
1 cup sour cream
1 cup cheddar cheese, grated
1 cup cotija cheese, crumbled
1/2 cup pico de gallo or salsa

In 8 – 10 quart stock pot place pork shoulder over high heat. Turn shoulder as each side browns, until all sides have color. Add water and scrape bottom of pan to release browning tidbits.  Cook pork over medium heat until pork easily shreds, about two hours. Remove pork and liquid from pot and set aside, retaining the liquid separately. When meat is cool enough to handle, shred it into bite-sized pieces. Set heat under the now empty stock pot to medium high and add lard or coconut oil. When it is melted add the onions and garlic. When they start to sweat add the carrots. Add paprika, coriander, oregano and cumin. Stir and cook longer until you can smell the spices. Add broth and beer. Cook until it begins to boil softly. Add pork, hominy, tomatillos and chiles. Stir and cook until a soft boil begins. Taste test to see if you can taste the flavors. If not, sprinkle liberally with salt and stir, then taste again. There should be a difference. if not, add more salt. Turn heat down to simmer, making sure there is still a very soft boil. Cook for an additional two hours. Place toppings in separate bowls with spoons right before serving. Serve spoon in large soup bowls and pass around the toppings!


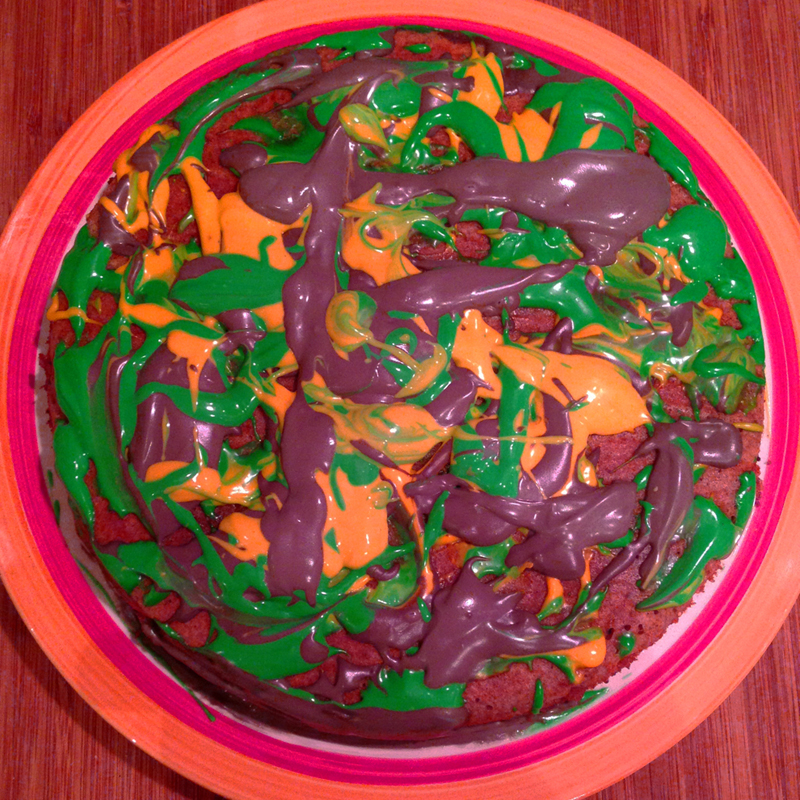
Unholy King Cake

unholy king cake_edited-1

For the past few years, since moving away from N’Awlins, we’ve made our own King Cakes as part of our Mardi Gras and Fat Tuesday celebration. We party on Fat Tuesday wherever we are, regardless of the location. This year I was hard pressed to find acceptable decorations in our Alaska town, having to resort to mail order for beads and masks and shiny purple/gold/green curtains for out doorways. Our little place looks cheery and ready for fun. Again this year I made a King Cake, and again it is a version different from previous years. I seem to experiment with a new recipe each year instead of just going with what I did the previous year. One reason for the annual variation is because I like trying new things, and another is because of our evolving diet – from sugar and wheat and carbs to less or none of all three. The first cake was traditional, made with wheat flour, another was gluten free version but with sugar and not much nutritional value. A third version was a concoction of low carb sugar free cinnamony cakelettes, with a very sticky icing. This year it is an unholy cake, absent the traditional hole in the middle, as well as absent of sugar and wheat. I guess I could have made it holy, but then where would all the frosting go?!  I guess if you want to cut a hole in the middle you could, but I am not as holy as I used to be, so don’t miss the ring-ness of this cake. It looks very different from a traditional rolled cake, but I think it definitely carries the spirit of the original, and we can eat it without worry of allergic reactions or sugar buzzes. It was fun to make and everybody helped splatter the frosting, although the first batch of purple turned too gray to use. Try, try again I say. Now I wonder who will find the baby this year? Laissez les bons temps rouler!

Cake
1 cup finely chopped coconut
1 cup almond meal
6 eggs
1 tsp ground nutmeg
1 Tbsp ground cinnamon
1 Tbsp Stevita
½ tsp sea salt
1 tsp baking powder
2 Tbsp heavy whipping cream
1 Tbsp lime juice
2 tsp vanilla extract

Topping
1 cup raw pecans
1 cup raw walnuts
2 Tbsp ground cinnamon
1 Tbsp Stevita
½ cup butter, melted
¼ tsp sea salt

Frosting
4 ounces cream cheese
3 ounces butter
1 Tbsp Stevita
Food coloring (green, yellow, purple – made with one part blue and three parts red)

Preheat oven to 350 degrees. In a food processor grind the coconut into very small pieces, about the same size as the almond meal. In a medium bowl combine coconut, almond meal, nutmeg, cinnamon, Stevita, salt and baking powder. Add eggs, whipping cream, vanilla and lime juice. When well combined, pour mixture into 9” round cake pan lined with parchment paper. In a food processor combine pecans, walnuts, cinnamon, Stevita, butter and salt. Pulse until combined and nuts are a uniform size. Drop the nut mixture by spoonfuls until mixture is covering most of cake batter in pan. If you want to give the impression of a hole in the middle, drop the spoonfuls so batter in the middle of the cake is not covered with nut mixture. Place in preheated oven and bake for 30 – 40 minutes, until middle is firm and edges are pulling away from pan. When cake is cooled, flip out of baking dish onto cooling rack, removing parchment paper. Flip over again so cinnamon/nut filling is face up. In microwave safe dish warm the cream cheese and butter until softened, but not completely melted. Add sweetener and whisk together until smooth. Divide frosting into three separate bowls. Add yellow food coloring to one, green coloring to another, then 3 parts red and 1 part blue to the third to make purple. Add more coloring as desired so they are bright and a similar tone. With small spoons drop the frosting with a slashing motion until the top of the cake is covered with spatters. Store in the fridge until about an hour before serving, allowing it to soften and come to room temperature.


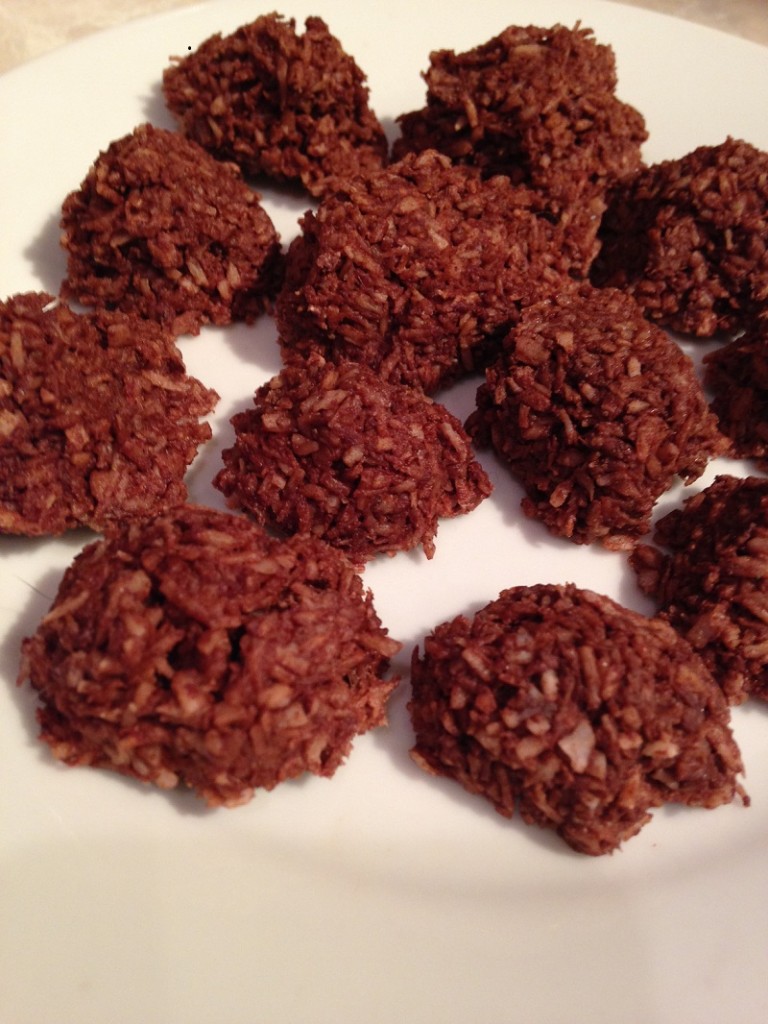
Chocolate Coconut No Bake Goodies

coconut treats 

When I was growing up my mom made what she called tangos – heat up sugar, chocolate, oatmeal and peanut butter in a pan, drop the hot stuff on wax paper, let it cool and you have instant treats. I have made them a lot myself – the chocolate and peanut butter with the chewiness of the oatmeal made for a great snack and had a richness that appeased the nibbling and snacking craving I get of an afternoon. I have been craving them lately and sought out a version that does not have sugar or oatmeal. I found what looked like a really close version with coconut. I relied on the traditional peanut butter instead of almond, and a few other tweaks, but the recipe made a great healthy snack for my family. Tall P really liked them to appease his sweet tooth cravings, too, but the guy that dips his strawberries in sugar said they were too sweet. Silly boy. Little B liked them so much she took them to her Valentine’s Day party to share with friends. Score!

Chocolate Coconut No Bake Goodies

3.5 oz bittersweet chocolate
1/3 cup coconut oil
2 Tbsp smooth peanut butter
1/2 cup coconut milk
1 tsp vanilla extract
Pinch of sea salt
2 Tbsp Stevita spoonable stevia
4 cups finely shredded coconut

In a medium sauce pan over medium heat combine the dark chocolate, butter and peanut butter. Cook until melted and thoroughly combine. Add the coconut milk, vanilla, salt, and sweetener and stir to combine. The heated mixture will thicken quickly, then needs to be taken off the heat. If it begins to separate it is okay, just keep stirring when off the heat. In a large bowl pour the chocolate mixture over the coconut. Stir to incorporate. Using a cookie scoop, scoop out the mixture onto a piece of parchment paper. Refrigerate until hardened.

Simple Chopped Cabbage Bake

baked cauliflourThe other day we had a busy stove top. Three of the four burners had things simmering or sauteing or boiling. I wanted to make cabbage, but the last, small burner was hidden among the pots and pans, willing to do the job, but just not roomy enough. I still wanted cabbage, so I looked around and spotted the oven. Of course! Usually I cook up cabbage on the stove top because the oven is busy, so I got a little chuckle about the reverse happening. Okay, so it is not funny, like a gag in a movie or a stand up comedian, but when I think of, say, Thanksgiving when four things need to be baked at once, including the turkey, there is always a wish to have a dish that can be done on the stove top. Okay, not actually chuckle worthy. It was so good I was surprised I had not thought of doing it sooner. Silly. Maybe it is silly. I will stop, because it actually does not matter. This dish is so simple I am not even doing an ingredients list.

Just take half a head of cabbage and chop it into one inch pieces. On a large cookie sheet toss the cabbage with 2 Tbsp of bacon grease or extra virgin olive oil (add some salt of you use olive oil). Tossing it is most effective with your hands. Place pan in unheated oven. Turn oven to 350 degrees. After about ten minutes toss the cabbage and bake for ten more. Some cabbage will be darker, beginning to caramelize, and the rest should be soft enough to eat. Serve immediately.

Cauliflower Mac Bake

cauli mac bake

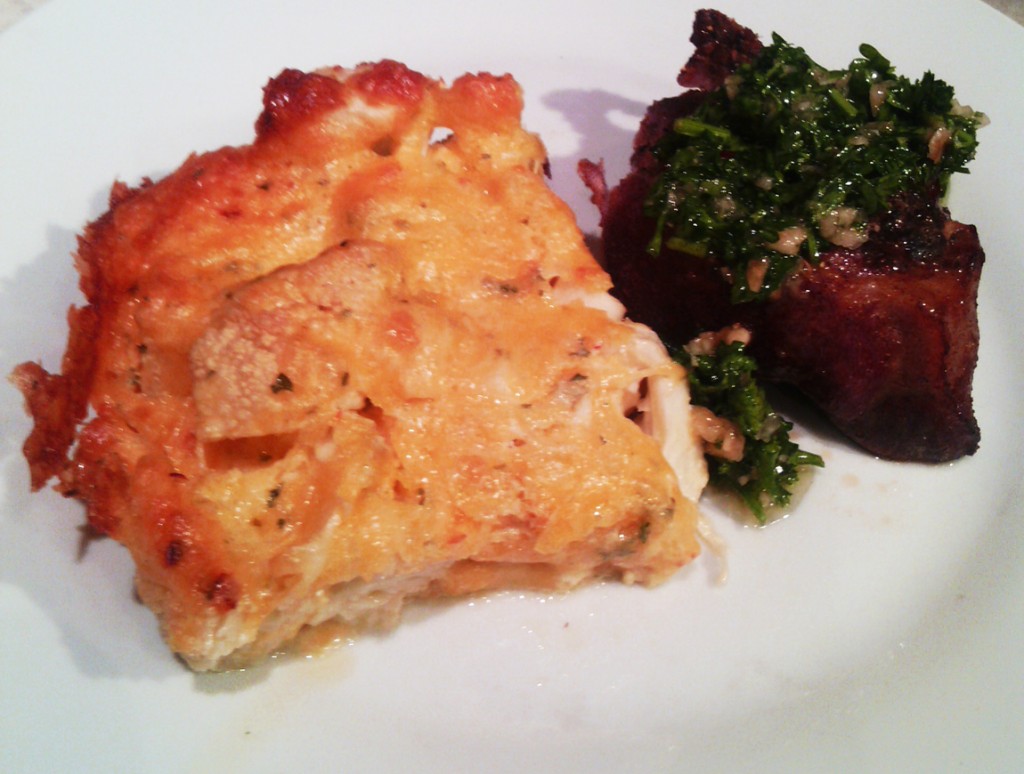
Our foster son Tall P makes really good cheesy scrambled eggs. Somehow he cooks the eggs just right and puts in just enough cheese right at the end to make it taste like baked macaroni and cheese. I won’t try to duplicate it, for it is something he does for us, so why try? He is the master! I had a hankering for them the other day when he was busy at school, so I decided to try a baked cauliflower version of mac n cheese. I think I found a great way to do a veggie version, although I bet he would not agree. I have to reveal here that Tall P is not a vegetable lover. He likes corn on the cob and vegetables in soup, and only if they are an unrecognizable puree added as a thickener and he does not know they were added. Yes, Paul, you now know the veggie soup secret! This dish was inspired by the cheesy eggs, created with cheesy veggies.  Go figure. It definitely appeased my craving for baked mac and cheese (not so much the Kraft version I grew up eating, but the baked stuff I discovered later in life). The dish was easy to prepare and bake, allowing me to time it perfectly with the smoked pork Big D made. Add some chimichurri to the pork and what a meal!

Cauliflower Mac Bake

1 large head cauliflower
1/2 cup heavy cream
2 eggs
1 Tbsp parsley, finely chopped
1/2 tsp garlic powder
1/2 tsp sea salt
1 tsp ground mustard
1/2 tsp red chile flakes
2 cups cheddar cheese, grated
1/4 pound sharp white cheddar cheese, sliced into thin pieces
3 Tbsp butter

Preheat oven to 350 degrees. Chop cauliflower head into bite-sized pieces, making sure stem pieces are a little smaller. Place white cheddar cheeses slices in the bottom of a 9×9 or 9-11 baking dish. Spread cauliflower evenly over cheese. In a medium bowl combine cream, eggs, garlic, salt, mustard and chile flakes. Whisk until well combined. Add cheese and stir until well coated. Pour cheese mixture over cauliflower, spreading it evenly. Make thin slices over butter and place them on top of cheese mixture. Place in preheated oven for 60 – 75 minutes. The thicker the cauliflower the longer the baking time to make sure the middle is baked soft. Remove from oven and let sit for five minutes before serving. Slice into six or nine pieces for side dishes – it should come out intact, but if it doesn’t, it will still taste awesome.

Creamy Shrimp Alfredo

creamy shrimp alfredo

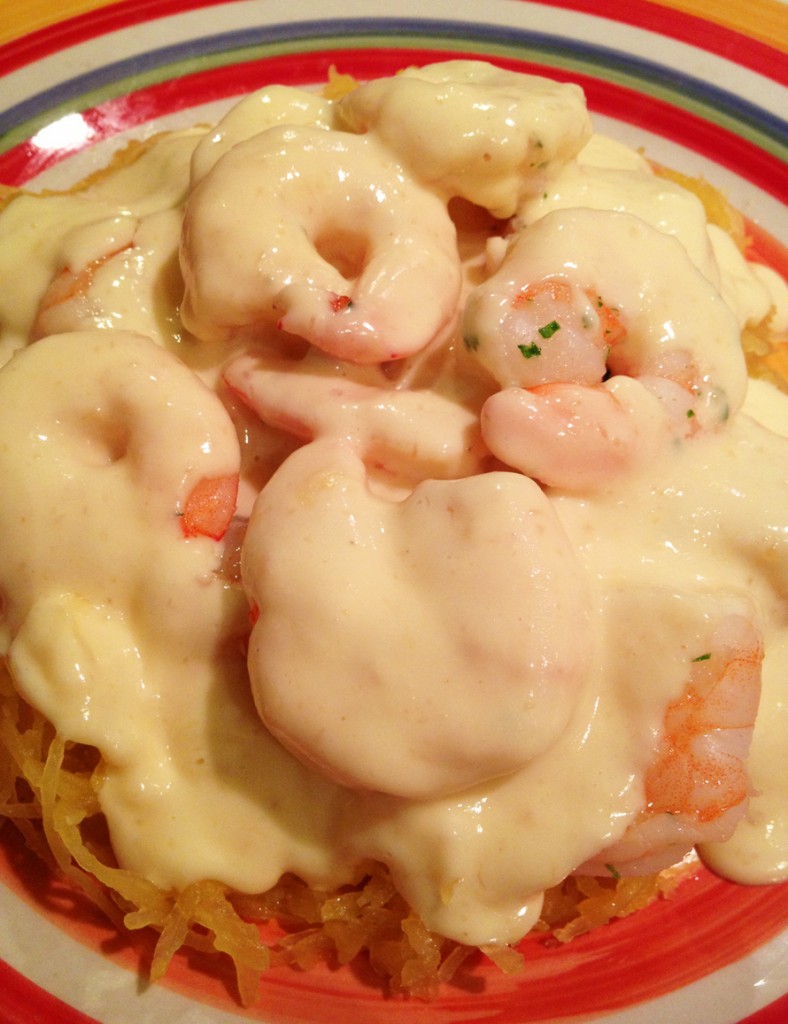
If you had not noticed from the divorce shrimp I made recently, I really like creamy sauces. I love alfredo sauce, although not necessarily on fettuccine, and my favorite pasta dish of all time is spaghetti carbonara. Since I was craving the carbonara and Big D was craving the alfredo, and we were being stared down by the spaghetti squash and shrimp in the fridge, I combined all the pieces into a quiet, Saturday night dinner. Depending on the history you believe, the original alfredo sauce did not actually have any cream, and the original carbonara sauce did not have it either, but I think it all came together in a rich, satisfying dish. I even added a nod to the carbonara’s pancetta with the bacon grease used for the squash and shrimp. Other fats like butter or olive oil or coconut oil could be used, too, but when there is bacon grease available, why? It turned out great and made me want to watch the Godfather or the Untouchables. Salute!

Creamy Shrimp Alfredo

1 1/2 cups heavy cream
1/2 cup butter
2 egg yolks
1 clove garlic, crushed
1 cup freshly grated parmesean cheese
3 Tbsp bacon grease
3 cloves garlic, finely chopped
3 Tbsp fresh parsley, finely chopped
2 pounds large shrimp, shelled and deveined
1 large spaghetti squash
Salt to taste

Preheat oven to 350 degrees. Slice squash lengthwise and scrape out seeds and stringy membrane. Place squash halves face down and place in the oven. Bake for 45 minutes to an hour, until center is soft and edges begin to brown. Remove from oven and let cool enough to handle. With a fork scrape out squash ‘spaghetti’ and place in a bowl. Toss with a sprinkling of salt and 1 Tbsp bacon grease. Set aside until time to serve. While the squash bakes prepare the sauce. In a cold medium sauce pan add the cream and egg yolk. Whisk together until well combined. Add 1/2 cup butter and turn on heat to medium, stirring occasionally. When the butter is melted and sauce begins to steam, but not boil, add the garlic. Continue to stir and avoid boiling. Begin to add the cheese, stirring constantly, about 1/4 cup at a time, making sure it is completely melted before adding more. When all the cheese is incorporated add some salt to taste, if needed. Turn heat down to low simmer and let sauce simmer and thicken, but not boil!!! In a large skillet melt 2 Tbsp bacon grease over medium heat. Add garlic and stir until garlic begins to sweat. Increase heat under burner to medium high. Add shrimp, sprinkle lightly with salt and toss regularly until shrimp begins to turn pink. Sprinkle with parsley and continue tossing until shrimp is cooked through, about three to five minutes. To serve, place a bed of spaghetti squash on a plate, top with shrimp and drizzle with sauce. Serve immediately with parmesean cheese on the side.


Mini Pizza Pucks

mini pizza pucks_edited-1

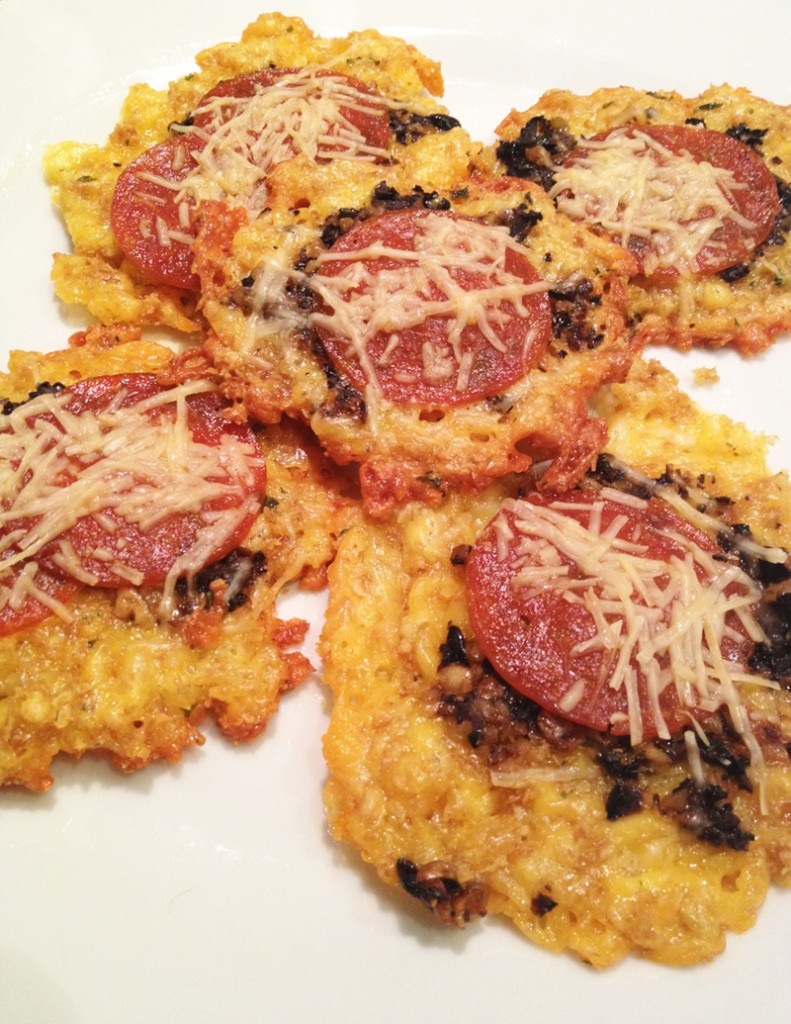
Our whole family loves pizza. Lately I have been trying to find simple dishes for weekday meals, what with Little B getting involved in evening activities and Big D and I with busy work days. In our endeavor to avoid wheat there are few alternatives for quick pizza where we live. The local pizza places just give blank looks when the words ‘wheat free’ or ‘gluten free’ are used, and delivery is a joke when wheat free is concerned. To be fair, there is one place with gluten free pizza, but it is still has nutrition-poor carbohydrates in a rice based crust. Not the end of the world for Little B on the rare occasion, but for me and Big D, who need to avoid the carbs, it is not a solution. These pizza pucks I made are a result of spontaneous experimentation. I tried to combine my cheese crisps and low carb pizza recipes to make this meal and it turned out pretty darned good! They were quick, fun and Little B enjoyed helping making them, of course. I call them pizza pucks, not because they are overly hard or difficult to eat, but because you can pack them up, like pucks, and I am currently living in a place where hockey is popular. I am not yet ensconced in watching or playing the sport, I just went with it. And it is cold. What other time of the year can you call pretty much anything a puck? Besides being a good dinner, the leftovers worked well as a cold snack on the way to Little B’s soccer practice, or ballet, or whatever happens after five but before bedtime that does not involve crashing on the couch at home. What better snack than some protein before running around for an hour or more? Maybe I should come up with some pizza balls to go with the soccer theme, but that is for another day and time…

Mini Pizza Pucks

3 cups shredded mozzarella and cheddar cheese
1/2 cup golden flaxseed meal
1 egg
1 Tbsp dried parsley leaves
1 Tbsp dried basil leaves
1 tsp garlic powder
1 tsp sea salt
1 cup large black olives
6 roasted or pickled garlic cloves (you can use raw, but they may not cook through and cause problems for sensitive stomachs)
20 – 30 slices pepperoni
1/2 cup Parmesan cheese

Preheat oven to 350 degrees. In a food processor combine olives and garlic, then pulse until a rough paste forms. Set aside. In a medium bowl combine the mozzarella and cheddar cheeses with flaxseed meal. whisk the egg and add to cheese mixture, folding it in until the cheese is coated. Add the salt, parsley, basil and garlic powder, doing a final few stirs to distribute the spices. On two nonstick cookie sheets make flat piles of cheese, about 2 inches in diameter with about an inch between them. Spoon about 1 tablespoon of olive paste on each pile, spreading it gently with the bottom of the spoon. Place one to two slices of pepperoni on each pile, then sprinkle with Parmesan cheese. Bake in the oven (using two different rack levels) for 12 – 15 minutes, until the edges of cheese begin to brown and the pepperoni glistens. Yes, it must glisten to have the right flavor. Remove from oven and let cool for five minutes before serving.

Brussel Sprouts in Cream

creamy brussel sprouts

Could I ignore it? Just walk by as if it was not there? Pretend it would not be loads of fun to explore? No, I was not strong enough. It drew me towards it like no other stalk. I became a stalker. A stalker of of brussel sprout stalks. I thought maybe I should deny myself yet another green vegetable, but why?! I seem to be on quite the green vegetable streak these days – asparagus then artichokes, and now brussel sprouts! Big D has been doing a lot of meat and soup cooking, so I enjoy the yummy stuff when I get home and fill in the vegetable part of meals where I can. Brussel sprouts are a relative of green cabbage – high in fiber, good for you and the sprouts grow on stalks! I usually see them in the store in bags, but this week they arrived on the stalk. How fun! Little B was so excited about this strange thing when I got home she could not stand to wait until they were cooked. Whenever I can I try to show Little B where food comes from – whether it is pulling wild garlic, to showing her vanilla comes from orchids, her breakfast sausage comes from pigs, or the plants that are the source of her popcorn. I showed her the stalks and explained what the sprouts were. Little B immediately wanted one raw. Um, okay. I gave it to her, she took a big bit and LOVED IT! Chewed it up like Halloween candy!

brussel sprout stalk

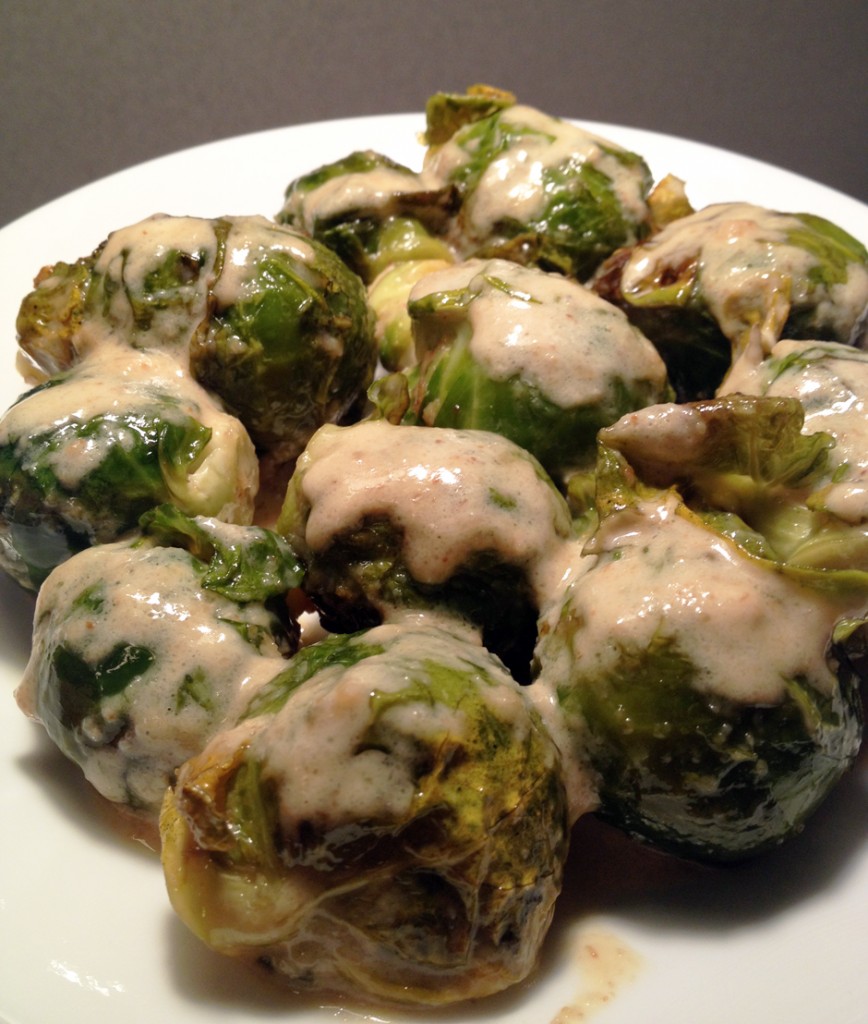
brussel sprout tastingI had to promise to cook them up as soon as possible because she would not leave me alone about them. This could get interesting. Sometimes I have to coax Little B into helping with cooking projects and other times I can’t keep her from being overly underfoot (in a good way). This was definitely an underfoot project. She helped me cut them off the stalk and cook them up.  I had a plan and she had a different one, but we figured out how to combine them, and an ordinary weekday evening turned into a stalker party! We came up with two dishes in the end – one that she liked and one that I wanted. The cool thing was the two dishes took the same route to a point, then easily diverged to make everybody happy. Besides raw she tasted them sauteed in the butter, then with her added veggie and cheese, and also after adding the cream to the butter saute. Apparently she prefers them raw, but I think the creamy sauce balanced out the natural bitterness of the sprouts. I am very happy to learn of Little B’s continued interest in green vegetables – from when she started gnawing on frozen broccoli during her teething period as a baby, to snacking on green beans to the brussel sprouts of today. What has your kid eaten and liked that surprised you?

Brussel Sprouts in Cream Sauce

I large stalk brussel sprouts
1/2 cup heavy cream
1/4 cup butter
2 cloves garlic, crushed
1/2 tsp sea salt

Cut sprouts off of the stalk, leaving enough stem on each to hold the sprouts together. Melt butter over medium heat in large saute pan you can cover later. Add garlic and cook until you can smell the garlic aroma. Add sprouts and toss to coat them with butter. Sprinkle with salt. Cover and let cook until sprouts are softened, about ten minutes. Lower the temperature to simmer and add the cream. Gently stir – enough to blend the cream into the sauce, but gently enough to prevent the sprouts from falling apart. Simmer covered for a few more minutes until the sauces is hot, bubbly and begins to brown, about four or five minutes. Serve immediately.

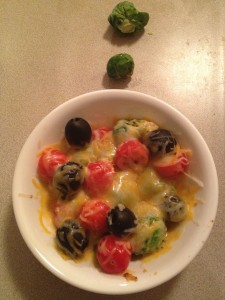
Little B’s version – after sprouts are cooked and softened in the butter, transfer a serving to an oven or microwave-safe bowl. Add some grape tomatoes and black olives cut in half. Sprinkle with grated cheese. Microwave for about one minute, or bake in oven at 300 degrees for about five minutes until cheese is melted.


Ghoulish Meatballs

ghoulish meatballs

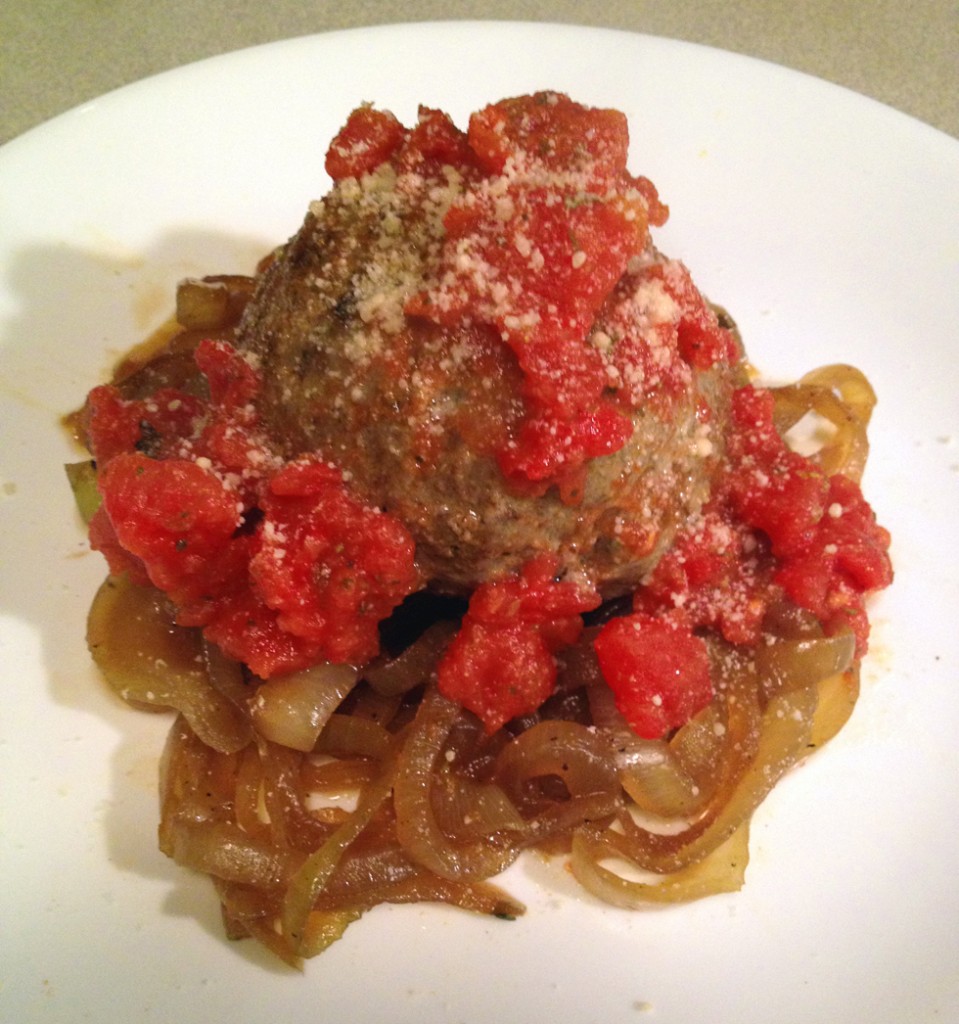
In honor of Halloween I made some quite delicious, ghoulish meatballs! They are massive and arrogant and a little scary. I maxed out my hands trying to form them into balls, but it worked! I have made meatballs before, but they were little and gooey and cheesy. All of those things I consider good, but a huge, ghoulish meatball is awesome! I originally planned on baking the balls, but we are still lacking in the shallow baking pan department as part of our reliance on a hotel room kitchenette. The stove top worked pretty well, allowing for browning on all sides, so all was good good good! The stove top was busy though, with making the sauce and onions and meatballs! It came together in low carb loveliness and is a new comfort food for me. The sweet of the sauteed onions balanced out the bite of the meatballs and tartness of the tomatoes. Today was a crazy busy day with much good news (we officially found a place to live in our new town), much fun, and a humongous amount of candy for Little B. Usually off limits, we let her eat and eat and eat candy with sugar all over and in it. Her glazed eyes and erratic, hyper behavior reminds us why we avoid it the rest of the year. I am writing a last line before bed, and look forward to Samhain tomorrow, the beginning our spiritual new year. Sweet, ghoulish dreams everyone!

Ultimate Meatballs

Balls
1 pound 15 -20 % fat ground beef
3/4 pound ground hot Italian sausage
2 eggs, lightly whisked
1 Tbsp dried oregano leaves
2 tsp dried basil leaves
1 tsp dried parsley leaves
2 tsp garlic powder
1 tsp sea salt
1/2 – 3/4 cup Parmesan cheese, finely grated, plus more for serving

Sauce
1  14.5 ounce can diced Tomatos with sauce
1 tsp dried oregano leaves
1 tsp dried basil leaves
1/2 tsp garlic powder
Salt and pepper to taste

Onions
1 large sweet onion, sliced into thin rings

SAUCE: In a small sauce pan over medium heat combine tomatoes, oregano, basil, garlic, salt and pepper. Stir. When bubbly, turn temperature down to low and simmer, covered, for at least 30 minutes. ONIONS: To prepare the onions, heat a deep pan over medium high heat until hot. It should be dry. Add the onion rings and let sit for a minute without stirring until they begin to brown and sweat. Stir them every minute or two, allowing the onions to brown more. When onions are about half browned add 1/2 cup water and scrape the bottom of the Pan. Stir and continue cooking until the liquid cooks away. Sprinkle with salt to taste. Turn off the heat and cover until time to serve. MEATBALLS: In a small bowl combine the spices – oregano, basil, parsley, garlic, salt and cheese. Set aside. In a large bowl squish together the ground beef and sausage until mixed up well. Add the eggs and make sure all the meat is coated. Pour in spice mixture and knead meat until spices are well distributed. Refrigerate until sauce and onions are ready. When time to cook the meatballs remove meat mixture from refrigerator (can be prepared the day before). Heat large frying pan to medium high heat. Form meat into six huge meatballs, placing them immediately into the hot pan. When forming the balls make sure to press the meat together firmly and roll it around in your hands to make them as round as possible. As one side of each meatball browns, gently turn them to another side. Repeat this a few times so three or four sides are a bit brown. Lower heat, Cover and cook until meatballs are cooked through, about 20 minutes. Depending on your stove you may need to move them around during the cooking time to prevent the outside from overcooking. To serve, arrange a layer of onion on the plate, add a meatball or two, and top with the tomato sauce and more Parmesan cheese. Serve immediately.


Post Navigation