Any Kitchen Will Do

Give me a kitchen and I will cook.

Archive for the category “cinnamon”

Banana Bread

banana bread_edited-1

Little B has been requesting banana bread for over a month. We don’t usually buy bananas because Little B is the only one who eats them, and often loses interest before the bunch is gone. The same was true this week. Two bananas were left to get dark brown and look pathetic. I remembered all the breads we have made over the past year and did a crap shoot. The ratio between almond and coconut flour definitely needs to be considered to ensure a moist result, but not overly so. The bananas would provide a natural sweetness, but no need to do much sweetening otherwise. Cinnamon always tastes yummy when sprinkled on a banana, so why not drop in a bit? The bread did not rise very much, but it was still light and fluffy. Little Be loved it, but picked out the walnuts, so the next batch we will do without. A lot of buts that turned into a lovely bread. And the darned bananas are finally gone.

Banana Bread

1 cup almond flour
1/2 cup coconut flour
1 tsp baking soda
1/2 tsp sea salt
1 Tbsp Stevita (can be excluded, if you find the mild sweetness of banana sufficient)
1 tsp ground cinnamon
2 ripe bananas
4 Tbsp butter, melted
3 eggs
1 cup finely chopped raw walnuts (optional)

Preheat oven to 350 degrees. Line rectangular bread pan with parchment paper or grease muffin pan. In a large bowl combine the almond and coconut flours, baking soda, sea salt, sweetener and cinnamon. In a separate bowl place the bananas. Puree the bananas with a stick blender (or mush with hands like Little B prefers) until smooth. Add butter and eggs, whisking together until smooth. Pour liquid mixture, and nuts (optional) to dry mixture. Whisk together until combined. Batter will be thick. Pour batter in bread pan, or divide batter equally among muffin pan divets. Bake in oven for 20 – 30 minutes. Muffins take about 20 minutes, loaf about 30. Remove from oven and let cool in pan for about ten minutes. Serve or store in refrigerator.


Chocolate Cheesecake

chocolate cheesecakeSo the cheesecake saga continues. Our young friend Skinny D has been visiting with us on his first trip to Alaska. When I was making the limey cheesecake for Big D he got a similar ‘happy face like a kid with a new bike’ look as he requested a chocolate cheesecake. Of course I could not say no, and was curious how it would turn out, considering the smooth success from the first cheesecake attempt. I do wish to provide full disclosure here – I have made cheesecake before – it was a pumpkin cheesecake with a gingersnap crust. It was lovely and carby and wheaty. A healthier version may be in my future this fall, for I really liked the pumkiny goodness. Back to the here and now. This cheesecake was smooth like the last one, and Skinny D was very happy. So was Big D and Little B (although for some reason Little B did not like the crust). One piece of advice on cheesecake making – this cheesecake was smooth, but as you can see in the picture, there are little speckles. It is my fault. I did not ensure that the cream cheese was soft enough, nor did I take the time to do extra mixing, so little bitty pieces of cream cheese did not get thoroughly combined. Did not seem to have a negative impact on texture or flavor though. I bet I will take the time to do it right next time!

Crust
2 cups finely ground almond flour
2 Tbsp coconut flour
1 Tbsp butter, melted
1 Tbsp Stevita granulated sweetener
1 tsp unsweetened cocoa powder
1 egg white, lightly whisked

Filling
16 ounces cream cheese, room temperature
1/3 cup sour cream, room temperature
2 eggs, room temperature
1 egg yolk (retained from crust ingredients)
4 ounces unsweetened chocolate
1/3 cup Stevita, granular sweetener
1/2 tsp ground cinnamon
1 tsp vanilla extract

Preheat oven to 325 degrees. In 9″ pie dish cut a round of parchment paper that fits the bottom of the dish. In medium bowl stir together all dry crust ingredients. Add the butter and stir until the ingredients clump. Add the egg white, mix until well combined. Crust will still be crumbly. Press crust into dish until bottom and sides are covered. Filling: in large bowl combine cream cheese and sour cream. Melt chocolate in the microwave proof bowl – heat and stir in 10 second increments until chocolate is melted and smooth. Add chocolate to cream cheese and sour cream mixture. Whisk together until completely smooth. Add butter and stir again until smooth. Add eggs and yolk, stir to incorporate and until smooth. Add sweetener and vanilla. Beat until well combined and smooth. Pour filling into crust and gently smooth surface. Place in oven. Bake for 30-35 minutes, until filling sets. Turn off heat without opening oven door. Leave cake in oven until oven and cake are completely cooled, about two hours. Remove from oven  and chill for at least an hour. Serve plain or with fresh berries.

Nutty Chocolate Protein Bars

nutty chocolate protein bars

For months Little B took ballet lessons on Saturdays. They are now over, including the flashy, chaotic shows. It was quite an ‘experience’, but is now over. I will reserve my opinion about the experience, but suspect she has more enthusiasm for other activities. I personally am looking forward to getting back to more weekend hikes.  We have standard food we take on hikes and overnight trips – nuts, peanut butter, jerky, cheese, boiled eggs. They are convenient, energy-building and filling, but with all the summer hiking in our future I wanted to add some variety. The idea for these bars sprung from here. The chewiness and nuttiness reminds me of a candy bar you find at the store – rhymes with tickers. After sufficient bar chilling occured Little B tentatively took a small first bite, then proceeded to eat an entire bar and asked for some in her lunch the next day. Score! This is significant, because in her worldly 4 3/4 year old brain anything mommy suggests is immediately suspect. These bars are a tiny bit sticky at room temperature, but what protein bars aren’t? They hold together well when wrapped in foil or plastic wrap, so score again! It is easy to add them to the hiking food mix, and quite a treat when taking a break looking over water and mountains and whales. Yep. The whales are pretty spectacular. And so is everything else. I am going to experiment with less sticky bars, but these easy-to-make snacks are great for dealing with hunger when you want to spend your time focusing on life and love and nature. Even ballet.

Nutty Chocolate Protein Bars

1 ounce bittersweet chocolate
2 tablespoons butter
2 tablespoons heavy cream
2 tablespoons Da Vinci sugar free syrup, any flavor
1 Tbsp Nutiva Stevita
1 cup whey protein powder, vanilla flavor
1 tsp ground cinnamon
1 1/2 cup mixed raw nuts, finely chopped
1/2 cup unsweetened coconut

Line an 8×8″ baking pan with nonstick foil. In a medium microwaveable bowl, melt the chocolate and butter on half power about 1 minute or until melting and softened. Stir until smooth and blended. Add in the cream, syrup, sweetener and protein powder.The mixture will be stiff and sticky when well blended. Stir in the nuts and coconut – you may need to use your hands to get it all mixed in, but then they would already be ready for putting it in the pan. Firmly press the mixture into the bottom of the foil lined pan using the back of a spoon that is lightly coated with oil or butter, or just use your hands. Chill at least two hours or until firm. Cut into eight large bars or 16 snack squares. Store in refrigerator or freeze.

Unholy King Cake

unholy king cake_edited-1

For the past few years, since moving away from N’Awlins, we’ve made our own King Cakes as part of our Mardi Gras and Fat Tuesday celebration. We party on Fat Tuesday wherever we are, regardless of the location. This year I was hard pressed to find acceptable decorations in our Alaska town, having to resort to mail order for beads and masks and shiny purple/gold/green curtains for out doorways. Our little place looks cheery and ready for fun. Again this year I made a King Cake, and again it is a version different from previous years. I seem to experiment with a new recipe each year instead of just going with what I did the previous year. One reason for the annual variation is because I like trying new things, and another is because of our evolving diet – from sugar and wheat and carbs to less or none of all three. The first cake was traditional, made with wheat flour, another was gluten free version but with sugar and not much nutritional value. A third version was a concoction of low carb sugar free cinnamony cakelettes, with a very sticky icing. This year it is an unholy cake, absent the traditional hole in the middle, as well as absent of sugar and wheat. I guess I could have made it holy, but then where would all the frosting go?!  I guess if you want to cut a hole in the middle you could, but I am not as holy as I used to be, so don’t miss the ring-ness of this cake. It looks very different from a traditional rolled cake, but I think it definitely carries the spirit of the original, and we can eat it without worry of allergic reactions or sugar buzzes. It was fun to make and everybody helped splatter the frosting, although the first batch of purple turned too gray to use. Try, try again I say. Now I wonder who will find the baby this year? Laissez les bons temps rouler!

Cake
1 cup finely chopped coconut
1 cup almond meal
6 eggs
1 tsp ground nutmeg
1 Tbsp ground cinnamon
1 Tbsp Stevita
½ tsp sea salt
1 tsp baking powder
2 Tbsp heavy whipping cream
1 Tbsp lime juice
2 tsp vanilla extract

Topping
1 cup raw pecans
1 cup raw walnuts
2 Tbsp ground cinnamon
1 Tbsp Stevita
½ cup butter, melted
¼ tsp sea salt

Frosting
4 ounces cream cheese
3 ounces butter
1 Tbsp Stevita
Food coloring (green, yellow, purple – made with one part blue and three parts red)

Preheat oven to 350 degrees. In a food processor grind the coconut into very small pieces, about the same size as the almond meal. In a medium bowl combine coconut, almond meal, nutmeg, cinnamon, Stevita, salt and baking powder. Add eggs, whipping cream, vanilla and lime juice. When well combined, pour mixture into 9” round cake pan lined with parchment paper. In a food processor combine pecans, walnuts, cinnamon, Stevita, butter and salt. Pulse until combined and nuts are a uniform size. Drop the nut mixture by spoonfuls until mixture is covering most of cake batter in pan. If you want to give the impression of a hole in the middle, drop the spoonfuls so batter in the middle of the cake is not covered with nut mixture. Place in preheated oven and bake for 30 – 40 minutes, until middle is firm and edges are pulling away from pan. When cake is cooled, flip out of baking dish onto cooling rack, removing parchment paper. Flip over again so cinnamon/nut filling is face up. In microwave safe dish warm the cream cheese and butter until softened, but not completely melted. Add sweetener and whisk together until smooth. Divide frosting into three separate bowls. Add yellow food coloring to one, green coloring to another, then 3 parts red and 1 part blue to the third to make purple. Add more coloring as desired so they are bright and a similar tone. With small spoons drop the frosting with a slashing motion until the top of the cake is covered with spatters. Store in the fridge until about an hour before serving, allowing it to soften and come to room temperature.


Yowza Anniversary Cinnamon Rolls

cinnamon rolls

Year three of my blog is starting. Tomorrow. Wow. Yowza. It amazes me that I have been able to continue with it. Not because it is hard, for I love exploring new recipes and sharing old ones, but because making it a priority has given me so many opportunities to focus on myself. This may mean more to people that know me well, but can also make sense to those who don’t. I very often get caught up in helping and supporting people around me – family, friends, co-workers. I discover too late that I do not do ‘me’ stuff frequently enough, so my energy stores and momentum fade away. Knowing that I promised myself to continue the blog has given me a way to keep my personal enthusiasm up. With all the changes and moves and adjustments our family has gone through during the past year I am proud of myself for continuing the blog. Picking up and moving cross country (contiguous) and beyond takes a lot of energy, to embrace the experience and joy of every day. I love we had the experience and expect to do it again and again in our lifetimes. As I look back on the past two years I also see how our eating habits have changed. Moving from eating everything imaginable to excluding wheat to also excluding most starchy carbs and sugar, I see how our journey has evolved. We are not perfect, as with all human being, but we try. Some exclusions have driven us to challenge ourselves to continue our traditions without the ‘evil to us’ ingredients. Things like tamales and king cakes and cookies and muffins are part of the plethora of recipes we rely on to add variety to our diet without deviating. As I work through the various recipes that we love in nostalgia, and discovering new ones, I am so excited to share them with our daughter. It is a constant effort to balance our memories while developing new, healthier versions for her. Miss Marie has recently shared a recipe for cinnamon rolls. I made some changes, of course, and the result made for some amazing treats to celebrate my second anniversary. Between Big D’s love for such rolls and my extensive time spent in airports sniffling the wafting aromas from the cinnamon roll denizens who live there, the treats are cherished and longed for. I am ecstatic about finally making some and feeling indulgent in celebration. What better way to celebrate an anniversary than to make such succulent yummies. Little B loved helping spread the filling and, as always, frosting, just like the cupcakes we made a while back. Thank you to those who have followed my journey the past two year and welcome to those who joined me recently! Slainte!

Yowza Anniversary Cinnamon Rolls

Pastry
3 eggs
1/2 cup butter or coconut oil, softened
3 Tbsp erythritol/stevia blend
1/2 cup coconut flour
1/2 cup blanched almond flour
1/2 tsp aluminum free baking powder
1/2 tsp Celtic sea salt
1 tsp vanilla extract

Filling
3 TBS Coconut oil or Butter, softened
2 TBS Cinnamon
3 TBS erythritol/stevia blend
1/4 tsp stevia glycerite

Frosting
6 TBS cream cheese, softened (or coconut cream if dairy allergy)
3 TBS butter, softened
2 TBS spoonable erythritol/stevia blend
A little heavy cream (to thin it out, if desired)

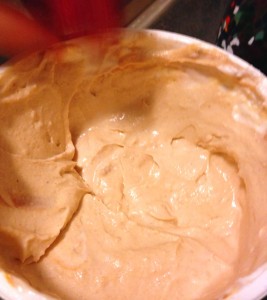
Pastry: In a medium bowl, cream the butter and the sweetener until very smooth. Add in the eggs. In another bowl mix together the coconut flour, almond four/meal, salt and baking powder. Slowly add in the dry ingredients into the wet, then add in the vanilla. Stir until a thick dough forms. Cover and place in fridge to chill the dough for 1 hour or overnight.

Frosting: Place all ingredients into a medium sized bowl and combine until smooth. Store in fridge overnight. When you start the Pastry Again section below remove Frosting from the fridge.

Filling: Mix all ingredients together.

Pastry Again: Place a sheet of parchment on counter, then spray with coconut oil spray. Place dough on greased parchment, push the dough down a bit, and spray with another layer of coconut oil. Top with another sheet of parchment. Roll the dough out with a rolling pin until a long rectangle shape, about one foot long. Remove the top layer of parchment.

Spread filling evenly over the dough. Roll up dough, with the longer side becoming the roll, using the edge of the plastic to make a tight log. Cut into 1 1/2 inch pieces.

Place the rolls into a greased muffin tin or onto a cookie sheet about 1 inch apart. Bake in a preheated 350 degree oven for 15-20 minutes or until baked through. Insert a toothpick to check doneness…the toothpick should come out clean.

Spread the frosting on the rolls. Serve immediately to family members who were drooling over the smell of the baking rolls. Store extras in airtight container for up to one week at room temperature, or freeze.
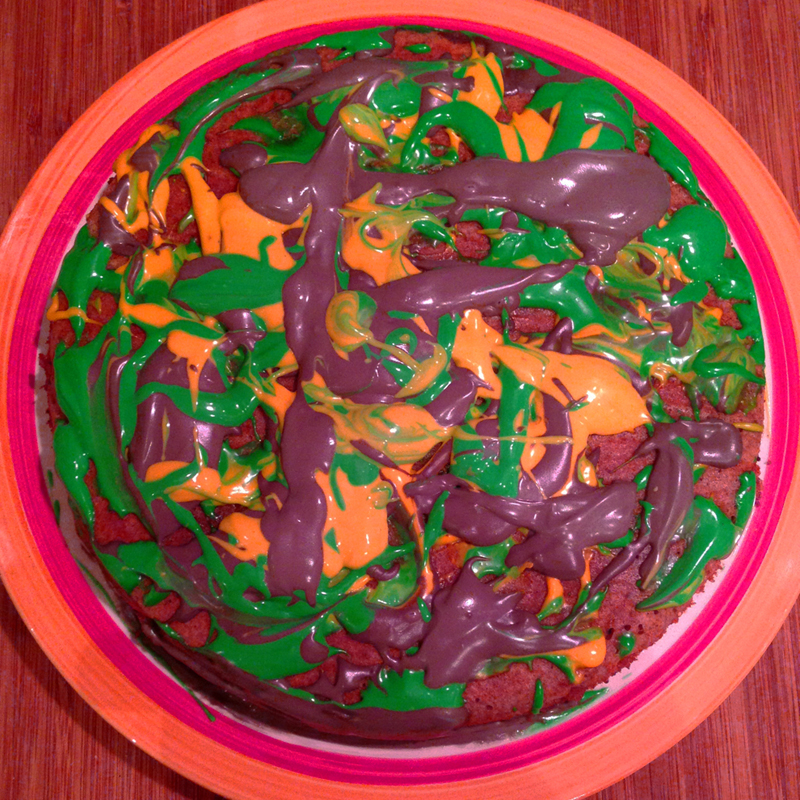
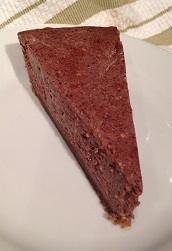
 

Pancakes a la Coconut Flour

coconut flour pancakes

On weekend mornings we sometimes go to a restaurant for brunch. More often then not we end up making complicated orders to cut out starches and wheat, or rely solely on the a la carte menu to fit our diet. Inevitably the ordering process is interrupted while the server makes a trip back to the kitchen to confirm whether or not we can substitute a salad or vegetables for the hash browns and toast. Skimming through the majority of the menu items, most of which involve cakes, toasts, waffles and syrups, reminds me of Sunday mornings growing up. After returning home from church we would all change into our sweats and dad would set up the production line – he would make dozens of waffles, which we would eat on for a month out of the freezer, and enjoy hot, fresh ones immediately. Other days he would make pancakes, with a resulting mound of leftovers reaching a foot high or more. Those extras went into the freezer, too. There was always a bag of one or the other that could be pulled from and popped in the microwave for a quick meal anytime. I have avoided making waffles or pancakes since our shift to wheat free eating because of the obvious barriers of wheat and syrup. After pondering for a while and looking into a bunch of recipes, I think I came up with one that will fill in the sentimental weekend brunch gap. Thank you Carol over at Ditch the Wheat for the trial and error and the resulting great recipe (even though I did tweak it a bit). The cakes turned out great – when Big D and I bit into them we looked at each other, our eyes got wide and we shared our amazement at how similar they were to the pancakes of our childhood! Topped with some Kerry Gold Irish Butter and some Da Vinci sugar free syrup, they were extremely satisfying. Making them also brought back some fond memories of my dad, who passed away about two years ago and always spent happy times in the kitchen. We are definitely making these again, if for no other reason than because I promised Little B we would do so, after seeing her face was so sad when she learned they were all gone. Gotta stock up that freezer! And next weekend I am gonna show her how to eat them with my mom’s wonderful southern contribution slathered on top – peanut butter!

Pancakes a la Coconut Flour

2 tbsp extra virgin coconut oil
Sprinkle of ground cinnamon
3 large eggs
1/4 cup coconut milk
1/2 tsp vanilla extract
1/4 cup coconut flour, sifted
1 tsp powdered stevita (or 1 Tbsp Stevia in the Raw)
1/4 tsp cream of tartar
1/8 tsp baking soda
1/8 tsp sea salt
Additional coconut oil or butter for cooking

Cream together the coconut oil and cinnamon. Add the eggs one at a time. Add coconut milk and vanilla. Mix until smooth. Add coconut flour and stevita. Mix until smooth. Lastly add cream of tartar, baking soda and salt. Do not over mix the batter. Over mixing will result in the baking agents (cream of tartar & baking soda) not working. Use a ladle and pour small amount of batter into a crepe pan or large frying pan with butter or coconut oil on medium heat. Flip once the bottom is light brown and edges are set enough to flip without losing shape. The pancakes will not bubble as much as “regular” pancakes. Serve immediately with a drizzle of syrup. One batch makes about 8 pancakes, so double and triple as needed to feed your clan.

Topped Oatmeal Cookies

oatmeal cookies no wheat

We made these for Santa last year, topped with blueberries. We decided our house was the only one in the whole wide world where he would get blueberry oatmeal cookies. In the morning the cookies and milk were all gone! He must have liked them. I forgot to take pictures then, but recently made a batch with Little B and she wanted to top them with sugar free chocolate chips instead of blueberries. Wheat free and sugar free, these went with Little B to her last day with her daycare group in Maryland before we moved. The group gets so excited just being around each without any stimulation, why the heck would I put wheat or sugar in the treats?! They were soft and chewy and seemed to be a hit. We may make them for Santa again this year, and try again to make them memorable. Involving Little B in deciding the topping and standing back so she can stir stir stir makes for a great opportunity to practice measuring, mixing and creativity. Go crazy with the toppings – she was so proud to share her creations. I got the original idea here, but tweaked to my liking. Thanks Alton!

Toasted Oatmeal Cookies (no wheat)

4 cups old fashioned rolled oats
1 tsp baking powder
½ tsp baking soda
1 tsp cinnamon
½ tsp sea salt
1 tsp unsweetened cocoa powder
1 cup butter, room temperature
1 cup granulated stevia in the raw
3 large eggs
2 tsp vanilla extract
1 cup optional toppers (raisins, blueberries, sugar free chocolate chips, etc)

Heat the oven to 375 degrees F. Spread oats in a single layer on half-sheet pans and bake until lightly toasted, about 20 minutes. Watch carefully to avoid burning. Remove the oats from the oven and let cool for 2 to 3 minutes. Grind half the toasted oats in a food processor until they are the consistency of whole wheat flour. Add the baking powder, baking soda, cinnamon, cocoa, stevia and salt, then pulse to combine. Combine the butter, egg and vanilla in a mixer and mix on medium speed for about a minute. Slowly add the oat mixture and the remaining oats until just combined. Let batter sit and thicken if it is soupy and will not hold shape if scooped. Using a teaspoon, scoop batter and drop onto baking sheets lined with parchment paper. If adding a topping gently push into the middle of each cookie. Bake the cookies for about 12 minutes until they begin to brown around the edges. Remove the pans from the oven and let the cookies cool on the pans for 2 minutes. Transfer the cookies to a cooling rack until cooled completely – they should remain soft and chewy. Store in airtight container.


Peanut Butter Yogurt Dip

peanut butter yogurt dip

Double duty yogurt stuff! This works as an awesome dip for fruit as well as a spoonable non-dip snack for Little B. Talk about protein and protein and some subtle sweetness from the apple sauce. The recipe is quick and dirty (but clean) so I will leave the intro the same. Make it and enjoy, even adding some extra cinnamon to make it spicier, if the apple sauce is not already enough. Yum yum! You can see Little B’s hand dipping a blurry strawberry in her eagerness – could not wait until the pics were taken….

Peanut Butter Yogurt Dip

1 cup creamy peanut butter
2 cups whole milk Greek yogurt
1/2 cup apple sauce

In medium bowl combine peanut butter, yogurt and apple sauce. Stir until completely combined. Store in covered dish and chill overnight. Serve with celery, apple slices, mango slices or other fruit. Also works plain as a snack for peanut butter lovers.

Tart Apple Sauce

tart apple sauce

If your local grocer is anything like mine, they have a corner of the produce section where you can occasionally find deeply discounted fruits and vegetables that are gently bruised or pretty ripe. Recently there was a bunch of Granny Smith apples marked down to 50 cents a pound. What a steal! I had to grab some. They are my favorite apples ever – green and crisp and tart. Making apple sauce with them results in a nice tart sauce as well. I think it tastes much better than the sweeter stuff from the store. I don’t add any sweetener or sugar – I don’t think the sauce, or Little B, needs it, but could easily be added if you prefer. I threw it all in the crock pot at bedtime and the house slowly started smelling like apples and cinnamon during the night, making me seriously crave an apple fritter for breakfast. A spoonful or two of the apple sauce took care of that, thank goodness. I have made this stuff for Little B ever since she started eating solids. She still likes it and happily inhaled a bowl full as soon as the stick blender was pulled out.

Tart Apple Sauce

6 – 8 large Granny Smith apples
1 Tbsp ground cinnamon
1 cup water

Core and slice apples, leaving the skin on. The skin will soften and cook down, so you won’t notice it in the final product. The sauce will be darker than what you typically buy at the store, but the texture is the same. Place apples in a crock pot. Add cinnamon and toss to coat apple slices. Pour water over apples, cover and set temperature to low. Cook for 6 – 8 hours. Let cool and puree with a hand mixer until smooth. Store in the refrigerator or freezer.

Crunchy Cinnamon Chickpeas

crunchy chickpeas

Spring is coming and the increase of daylight highlights in our home the pack rat tendencies we had over the winter. This time of year, especially when it begins to get warmer, I want to throw open the windows and refresh my surroundings. The refresh includes finding new ways to feed Little B. She is often open to trying new things, except when she isn’t. I thought some crunchy chickpeas would be right up her alley, and since I found a can of them in the pantry during spring cleaning, I decided to try and copy some chickpeas I found in a convenience store a while back. They were bought during a road trip when I was desperately trying to avoid potato chips – a traditional road trip food that is also traditionally not very good for a body. The chickpeas were crunchy and spicy, I suspect from cayenne or chili powder, and very satisfying. There was probably also mono sodium glutamate and other chemicals, but I don’t recall. I make a simple, less spicy version here for Little B, but the crunchy is definitely the same.

Crunchy Cinnamon Chickpeas

1 can chickpeas
1 Tbsp extra virgin olive oil
½ tsp sea salt
¼ tsp cinnamon
Tiny pinch of pure stevia

Preheat oven to 425 degrees. Rinse and drain chickpeas. In a medium bowl add chickpeas and drizzle with oil. Sprinkle in the salt, stevia and cinnamon. Toss until chickpeas are coated. Line a cookie sheet with aluminum foil, then spread out the chickpeas in one layer. Bake in preheated oven for 15 – 20 minutes until they begin to brown, then shake them around so they change positions, but are still spread out in one layer. Bake for 15 more minutes – if there is extra coating dropped on the foil it may make it smell like it is burning, but the chickpeas themselves should be fine. Remove from oven and let cool to room temperature. If there is any left after snacking on them, store at room temperature in an air tight container.

Post Navigation